
The article describes installation and configuration of Devart ODBC Driver for QuickBooks on Windows, as well as authorization and connection to a QuickBooks account, and provides a demo sample of retrieving QuickBooks account data using Microsoft SQL Server Management Studio.
Requirements
Before installing the ODBC driver, make sure that another version of Devart ODBC Driver for QuickBooks is not installed on the PC, since more than one version cannot be installed simultaneously on one PC.
Also make sure there is .NET Framework 4.5 installed on your system.
Devart ODBC Driver for QuickBooks currently supports Windows 32-bit and 64-bit.
Installing on Windows
1. Run the .msi executive file.

2. Follow the instructions in the wizard.
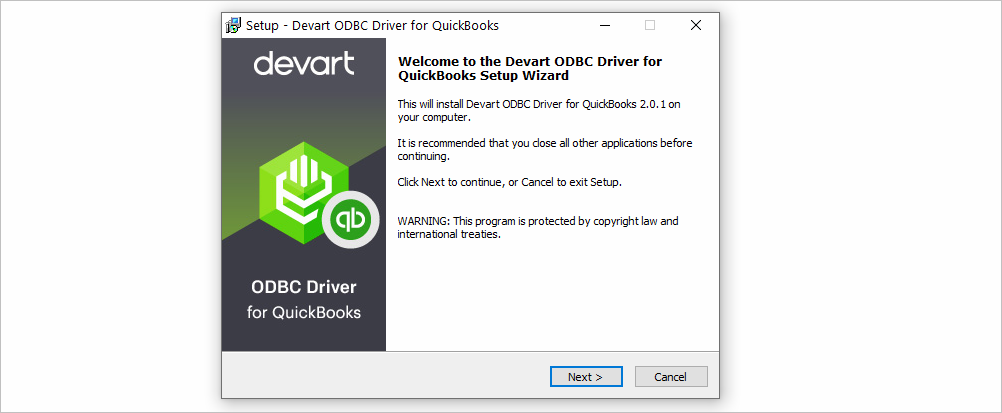
3. In case if you already have the specified installation folder on the PC or another Driver version is installed, you will get a warning. Click Yes to overwrite the old files with the current installation, but it is recommended to completely uninstall the previous driver version first, and then install the new one.
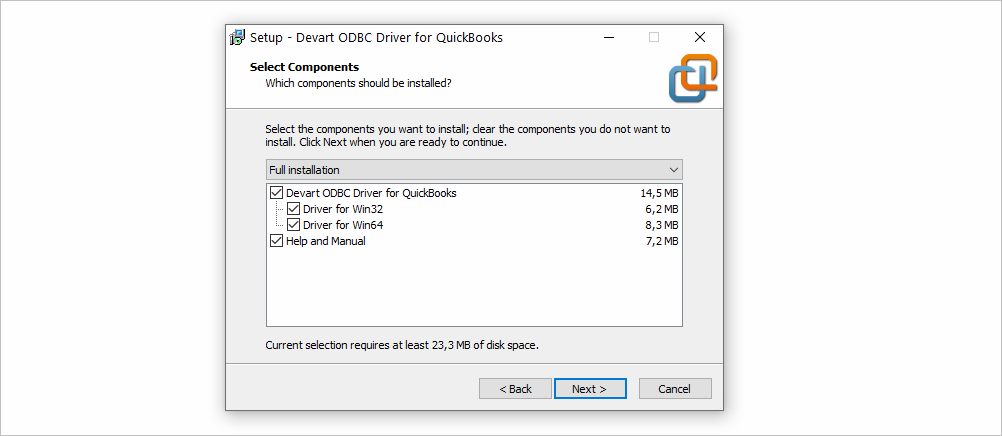
4. In the Select Components page you can select whether to install the 64-bit version of the driver or not. Clear the check box if you need no 64-bit installation. There is also a check box on this page, that allows you to select whether to install Help and Manual.
5. On the License Information page, you should select the license type and activate the product.
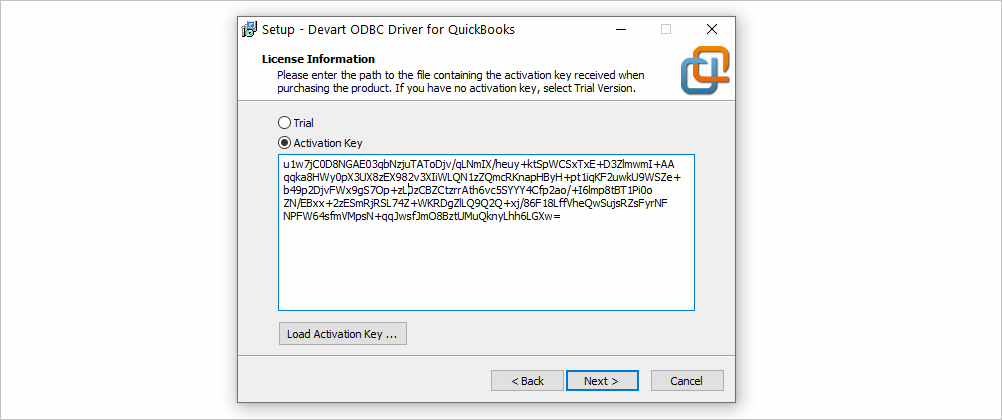
Read the Driver Activation During Installation article for more details about this step. If you have no License Key, you can select Trial and use the driver for evaluation purposes. Click Next.
6. Click Install. Click Finish. Then you need to configure the driver.
Configuring ODBC Driver for QuickBooks
After the driver is installed, it should be configured.
1. Open Administrative Tools in the Control Panel and find the ODBC Data Sources tool:

2. Add the Devart ODBC Driver for QuickBooks to the list of System Data Sources or User Data Sources or File Data Sources using the ODBC Data Source Administrator dialog.
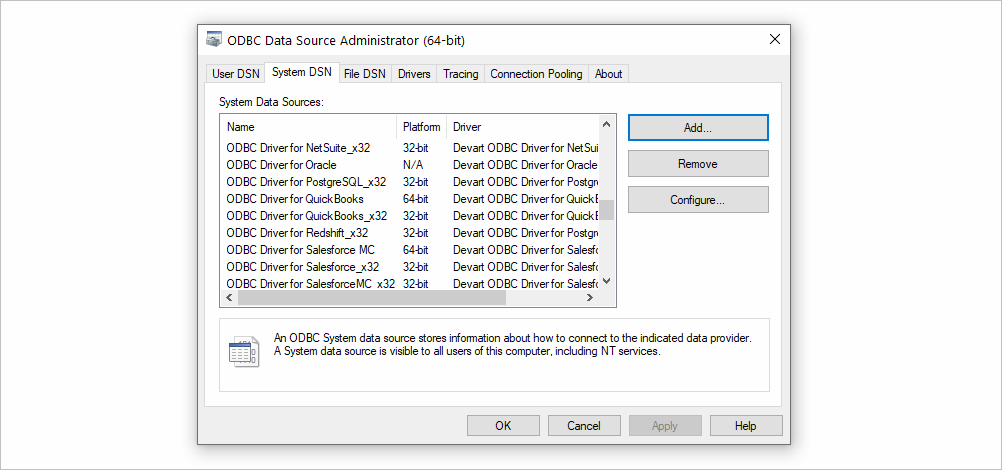
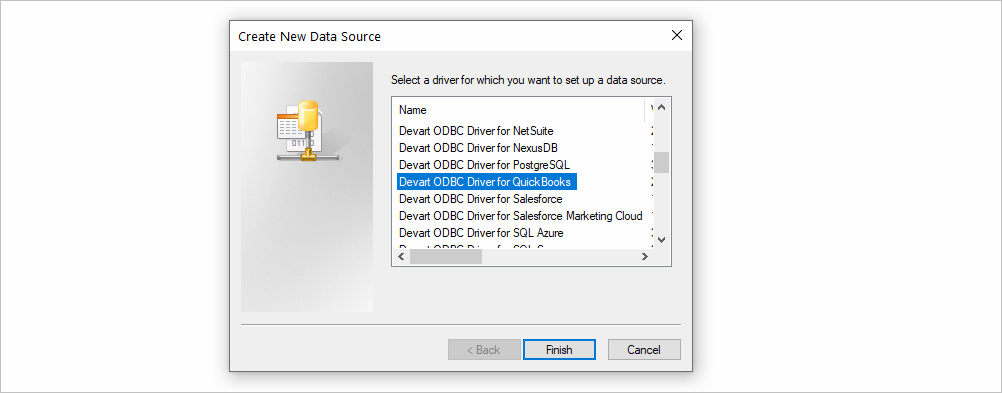
3. For this, click the Add button – the Create New Data Source dialog will appear with a list of available drivers. Select Devart ODBC Driver for QuickBooks and click Finish.
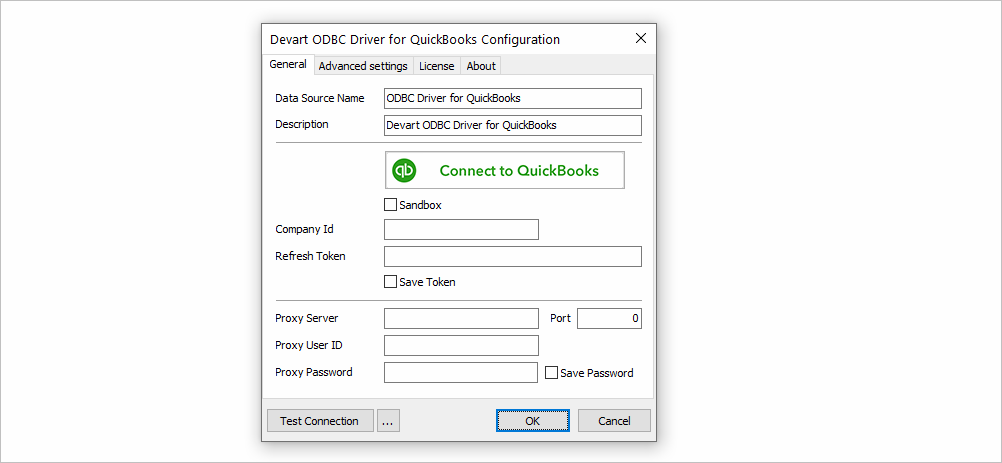
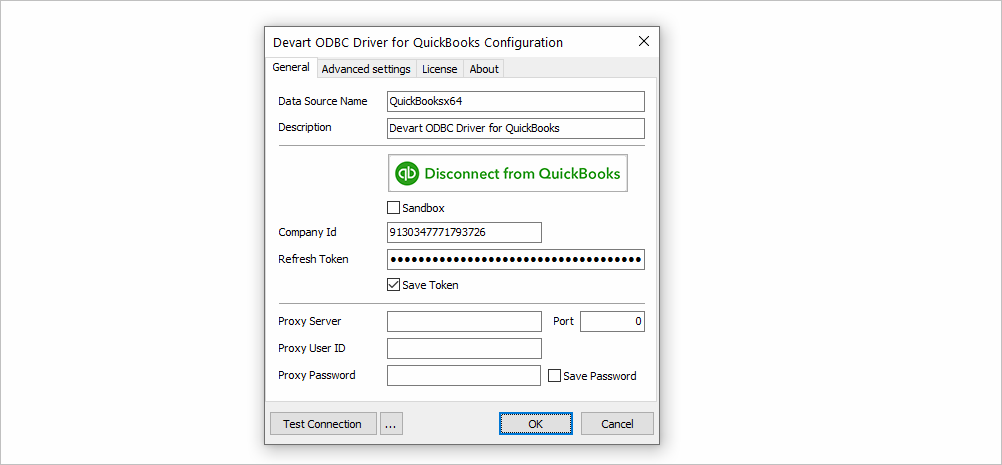
4. Then you will be suggested to configure the driver. In the appeared connection dialog, specify Data Source Name and its Description and click Connect to QuickBooks button.
5. In the appeared Web Login dialog enter your QuickBooks account credentials and click Sign in.

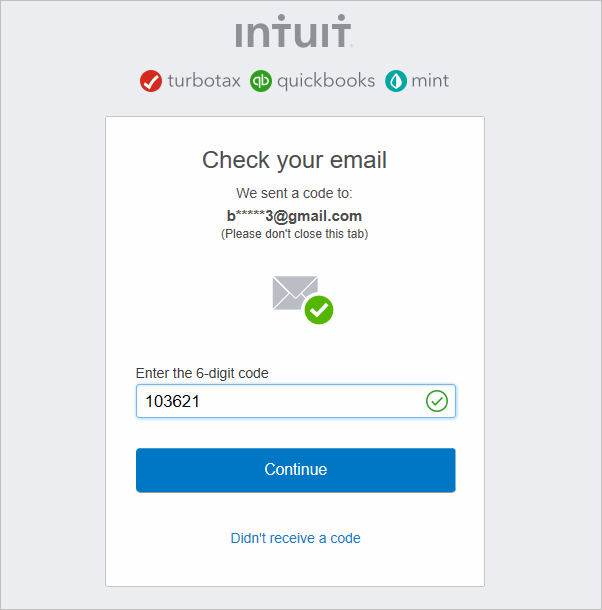
7. At the “Check your email step” enter the 6-digits code you received on email and click Continue.
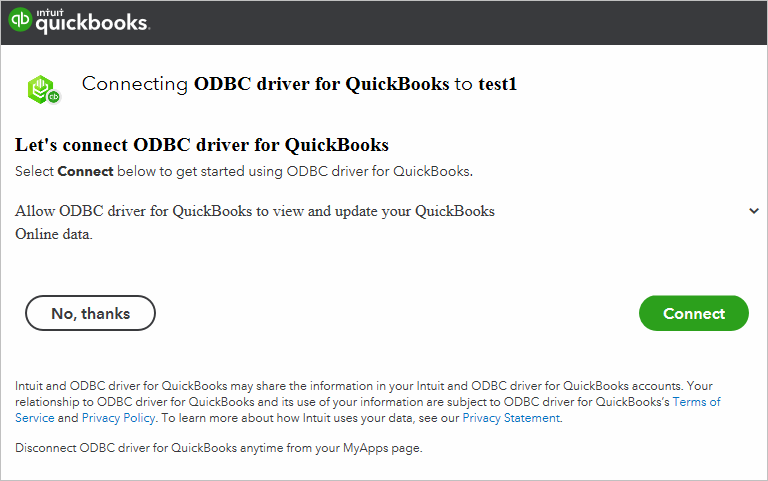
8. On the next step click Authorize.
9. Now Devart ODBC Driver for QuickBooks is authorized to QuickBooks, and all the required connection options are filled in automatically.

If you want to save the refresh token in order to be used for new connections, select the Save Tokens checkbox.
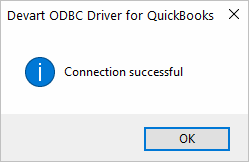
10. In order to check connection to QuickBooks data source, click on the Test Connection button. A successful connection message must appear.
Then you can click OK and finish configuration or switch to the Advanced settings tab to specify more detailed Connection String. See the full list of supported connection options in the Connection Options article.
To activate the driver via ODBC Administrator, refer to the Driver Activation After Installation article for more details.
Retrieving Data From QuickBooks
Now, when the driver is connected to QuickBooks, we can retrieve QuickBooks company data. To demonstrate it, we used Microsoft SQL Server Management Studio (SSMS). You can repeat the following steps, that we performed.
Requirements
- The data source must be a configured system DSN.
- The driver, studio, and SQL Server must be of the same bitness. For example, if you are using 64-bit SQL Server Management Studio on 64-bit Windows platform, then configure the 64-bit version of the driver using ODBC Administrator launched from %windir%\system32\odbcad32.exe. Otherwise, configure the driver using the 32-bit version of ODBC Administrator – launch it from %windir%\SysWOW64\odbcad32.exe.
- ODBC Driver for QuickBooks and SQL Server must be installed on the same computer.
- .NET Framework 4.5 must be installed on the computer.
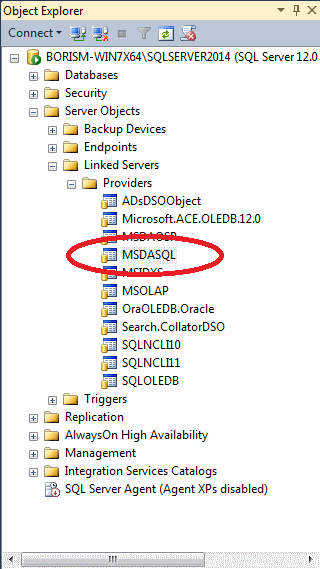
Disable the “Allow inprocess” option of “MSDASQL” OLE DB Provider for ODBC Drivers. For this, find the “MSDASQL” provider in the list of Linked Servers and double-click on it
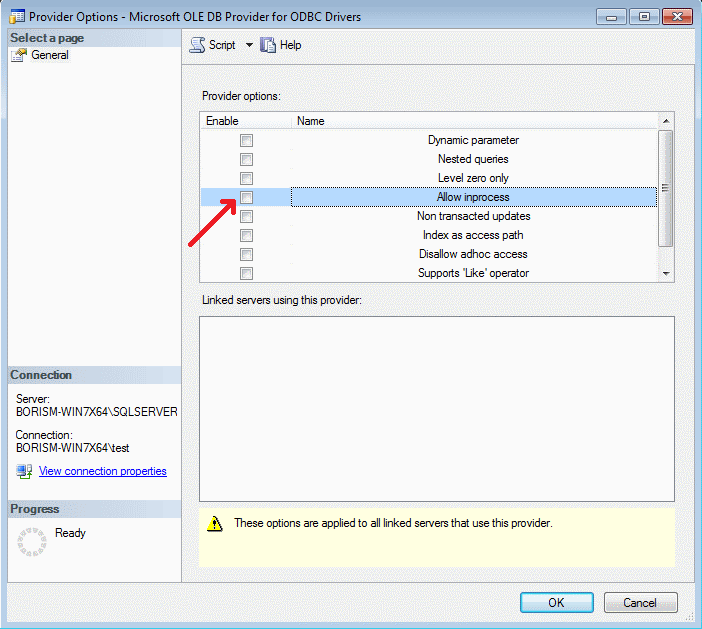
In the appeared Provider Options window, clear the “Allow inprocess” checkbox
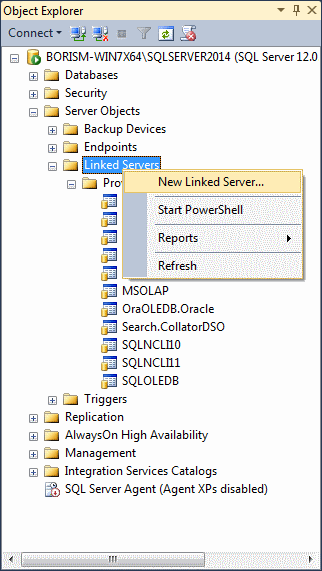
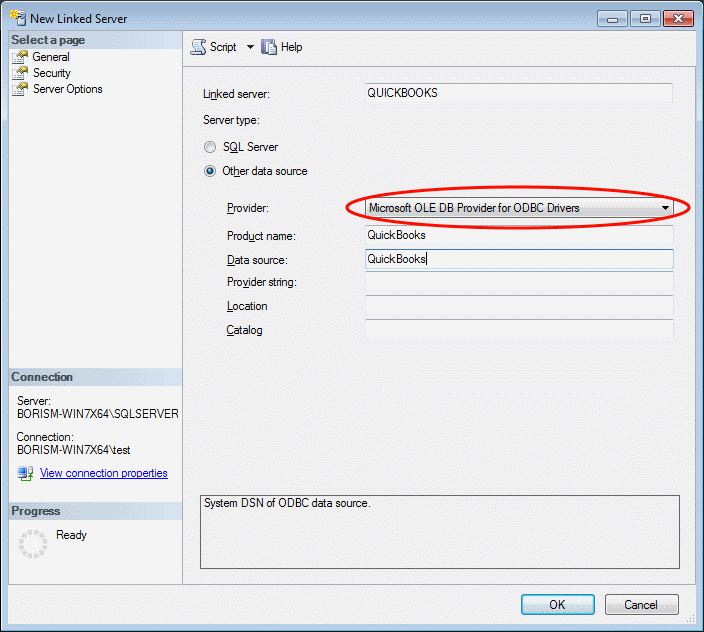
Create a new Linked Server
Make sure to select Microsoft OLE DB Provider for ODBC Drivers and specify the following parameters
The QuickBooks tables are already available to be fetched. To get the Account table data, click on the New Query button at the pivot

and enter the following SQL query, that returns the Account table
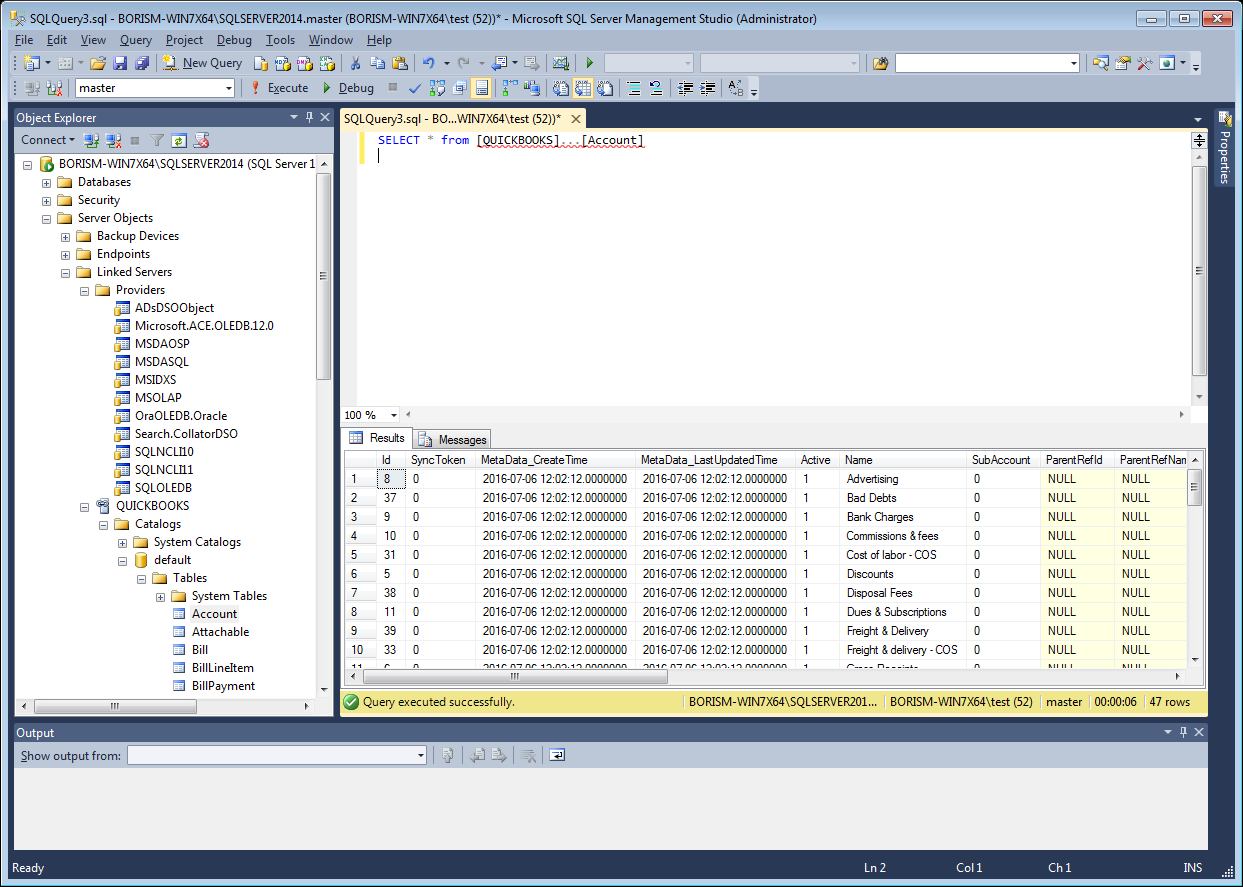
As a result, you can see the contents of the Account table retrieved directly from the QuickBooks account you are connected to.
Disconnecting from QuickBooks
You can disconnect from your QuickBooks Online company by clicking the Disconnect from QuickBooks button in the Devart ODBC Driver for QucikBooks Configuration dialog:
Then all the connection parameters will be emptied and connection closed:
very useful information provided in this blog. concepts were explained in a detailed manner. Keep giving these types of informations