
Zoho Books is an online accounting software that helps you manage finance, automate business workflows, and streamline collaboration across departments.
Integration of Zoho Books data into a .NET application can be extremely beneficial when handling large amounts of data. This approach provides a simplified reporting method, saving your team’s time
Fetching data from Zoho Books to an external application can enhance data analysis, reporting, and integration with other business processes. It allows users to leverage Zoho Books data in custom applications for tailored workflows and improved decision-making.
It features integration with .NET applications, high performance, and comprehensive security. With dotConnect, users can execute SQL queries directly against Zoho Books data, eliminating the need to learn complex APIs.
This tutorial will show you how to connect Zoho Books to your .NET application to Fetch Data (Invoices).
Table of Contents
- Setting Up Your .NET Environment
- How to Get Zoho Books Refresh Token
- How to Connect to Zoho Books API From .NET Application
- How to Fetch Invoices From Zoho Books
- Create a UI and Manage Zoho Books Invoices in Your App
- Conclusion
Setting Up Your .NET Environment
Before we start, let’s briefly overview the prerequisites you should have in order to succeed in setting up the connectivity. If you don’t have access to some of the tools and accounts listed below, take your time to get ones before you proceed.
- Visual Studio 2022. If you don’t have Visual Studio on your machine, our IDE of choice will be Visual Studio 2022. We will be using the community version, which you can download and install.
- dotConnect for Zoho Books is a feature-rich tool for incorporating Zoho Books data into our .NET applications.
- Zoho Books account with some invoices that have been created. In case to avoid any issues on the way, please note that one should have a specific role.
- Zoho Developer console configurations for Client ID, Client Secret, and Redirect URL.
Now, let’s move on to preparational steps. Follow the guide below to set up a new .NET Application project.
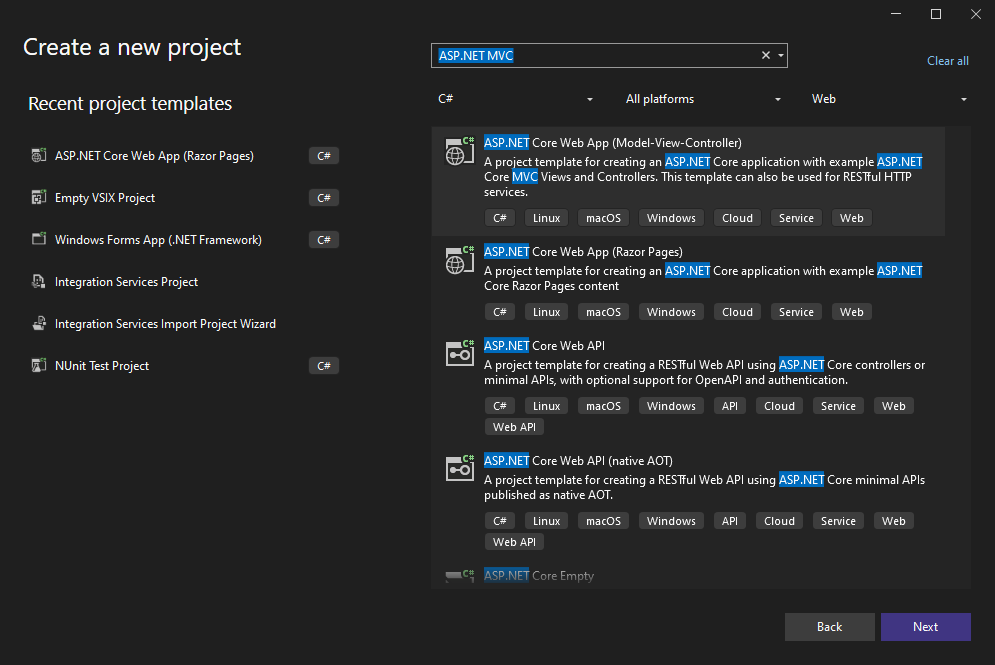
- Open the Visual Studio that you have installed and click Create a new project option.
In the Search Template field, search for ASP.NET MVC and select it.
- Give your project and name. For example, I have called mine Zoho_Books_.NET. Then, select .NET 8 as the target framework and click Create.
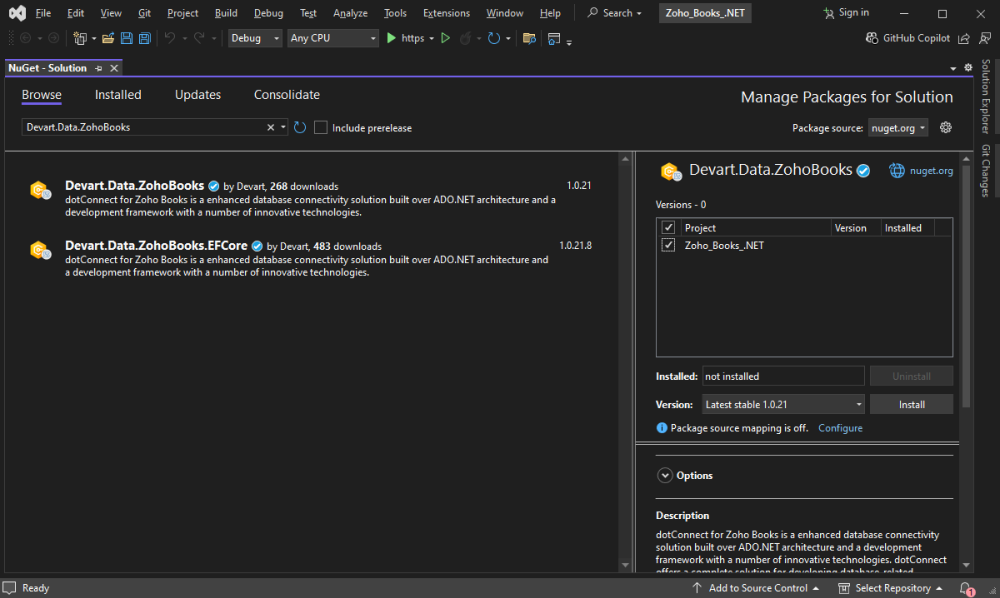
- Next, we are going to install dotConnect for Zoho Books in our project via the NuGet Package Manager in Visual Studio. In the taskbar, click Tools, navigate to NuGet package manager, and then proceed to Manage NuGet packages for the console.

- The NuGet Package Manager page will open up. On this page, click Browse and search for Devart.Data.ZohoBooks, click Devart.Data.ZohoBooks. Then select your project, and click Install.
- After installing the NuGet package, activate the trial version or enter your license key by navigating to the official website and downloading the dczohobooks Installer. Execute the downloaded file and follow the instructions to install dotConnect for Zoho Books on your machine.
- When you run the application by clicking F5 the scaffolded web page has to appear.
This page serves as a starting point for your application, allowing you to build further functionalities that can interact with Zoho Books data, such as displaying, updating, or managing financial records directly from your web application.
How to Get Zoho Books Refresh Token
Before we can interact with the Zoho API, we need to obtain a token that grants access to the Client service specified in the Zoho Developer Console. To get the Client ID and Client Secret, follow the steps described in this tutorial.
To get the refresh token, we’ll have to get a code first.
public class AccessCodeResponse
{
    public string access_token { get; set; }
    public string refresh_token { get; set; }
    public string scope { get; set; }
    public string api_domain { get; set; }
    public string token_type { get; set; }
    public int expires_in { get; set; }
}- To do this, let’s create a class called AccessCodeResponse, and copy the code provided above into it.
- Next, create a class called AuthorizationClass in your solution and paste the code you see below into it.
        private const string AuthorizationEndpoint = "https://accounts.zoho.com/oauth/v2/auth";
        private const string ClientId = "1000.LR49IV7TR1EM9PJX3H05YY7CAO4QCY";
        private const string ClientSecret = "2fdc969392bc3b60c34855fa5a3aab217e7cb696f2";
        private const string RedirectUri = "https://localhost:3000/oauth/callback/";
        private const string Scope = "ZohoBooks.fullaccess.all";        private const string License = "********";

        public async Task<string> GetAuthorizationCodeAsync()
        {
            string accessToken = "";
            string AccessCodeEndpoint;
            string authorizationUrl = $"{AuthorizationEndpoint}?scope={Scope}&client_id={ClientId}&redirect_uri={Uri.EscapeDataString(RedirectUri)}&response_type=code&access_type=Offline&prompt=consent&licensekey={License}";

            // Open the default browser with the authorization URL
            Process browser = Process.Start(new ProcessStartInfo(authorizationUrl) { UseShellExecute = true });

            Console.WriteLine("Please log in and authorize the application.");
            Console.WriteLine("After authorization, you will be redirected to a page that may show an error.");
            Console.WriteLine("Copy the entire URL from your browser's address bar and paste it here:");

            string redirectedUrl = Console.ReadLine();

            // Close the browser
            browser?.Close();

            // Parse the authorization code from the URL
            Uri uri = new Uri(redirectedUrl);
            string authCode = System.Web.HttpUtility.ParseQueryString(uri.Query).Get("code");
            AccessCodeEndpoint = System.Web.HttpUtility.ParseQueryString(uri.Query).Get("accounts-server");

            if (string.IsNullOrEmpty(authCode))
            {
                throw new Exception("Authorization code not found in the redirected URL.");
            }

            var parameters = new Dictionary<string, string>
        {
            { "client_id", ClientId },
            { "grant_type", "authorization_code" },
            { "client_secret", ClientSecret },
            { "redirect_uri", RedirectUri },
            { "code", authCode }
        };

            using (var client = new HttpClient())
            {
                var content = new FormUrlEncodedContent(parameters);
                var response = await client.PostAsync($"{AccessCodeEndpoint}/oauth/v2/token", content);

                if (response.IsSuccessStatusCode)
                {
                    var responseContent = await response.Content.ReadAsStringAsync();
                    var root = JsonConvert.DeserializeObject<AccessCodeResponse>(responseContent);
                    accessToken = root.refresh_token;
                }
                else
                {
                    Console.WriteLine($"Error: {response.StatusCode}");
                }
            }
            return accessToken;
        }
    }
That’s a lot of code, so let’s briefly go through it.
In this example, we have created a method called GetAuthorizationCodeAsync. This method starts out when calling the authorizationUrl.
Next, we have created a browser process to listen for the response. After the response appears as a URL in the browser’s address bar, we have to copy that URL and paste it into the console that will open when the application runs. The authentication code and account server properties from the pasted URL can be used then in another API call to obtain access and refresh tokens.
Remember to replace your ClientId, ClientSecret, and RedirectUri with the correct values configured in your Zoho API Console.
We will explain all these steps later.
Now, let’s create a new class called ConnectionClass to simulate a connection to the Zoho Books database instance. Go ahead and add the piece of code showcased below.
public class ConnectionClass
{
    private const string ClientId = "1000.LR49IV7TR1EM9PJX3H05YY7CAO4QCY";
    private const string ClientSecret = "2fdc969392bc3b60c34855fa5a3aab217e7cb696f2";    private const string License = "********";
    public void CreateZohoBooksConnection(string token)
    {
        Devart.Data.ZohoBooks.ZohoBooksConnection myConn = new Devart.Data.ZohoBooks.ZohoBooksConnection();
        myConn.ConnectionString = $"ClientId={ClientId};ClientSecret={ClientSecret};RefreshToken={token};LicenseKey={License}";
        myConn.Open();
        string connMessage = "Connection is " + myConn.State.ToString();
        Console.WriteLine(connMessage);
        myConn.Close();
    }
}
This class uses the Refresh token gotten from GetAuthorizationCodeAsync along with our ClientId and ClientSecret to open a connection to the Zoho Books API.
Next, under the controllers folder, navigate to HomeController and replace it with the following code.
public IActionResult Index()
{
    AuthorizationClass authorizationClass = new AuthorizationClass();
    string code = authorizationClass.GetAuthorizationCodeAsync().Result;
    Console.WriteLine($"Authorization code: {code}");
    ConnectionClass connectionClass = new ConnectionClass();
    connectionClass.CreateZohoBooksConnection(code);
    return View();
}
This piece of code will open a connection to the Zoho Books Database when the application starts up.
How to Connect to Zoho Books API From .NET Application
Now that we have completed all the preparations let’s finally connect to the Zoho Books API. To showcase the process, we’ll simulate the application to which we’ll pull the data.
When you run the application, an authorization page comes up asking if the application should grant access to the Zoho client. You should click Accept.
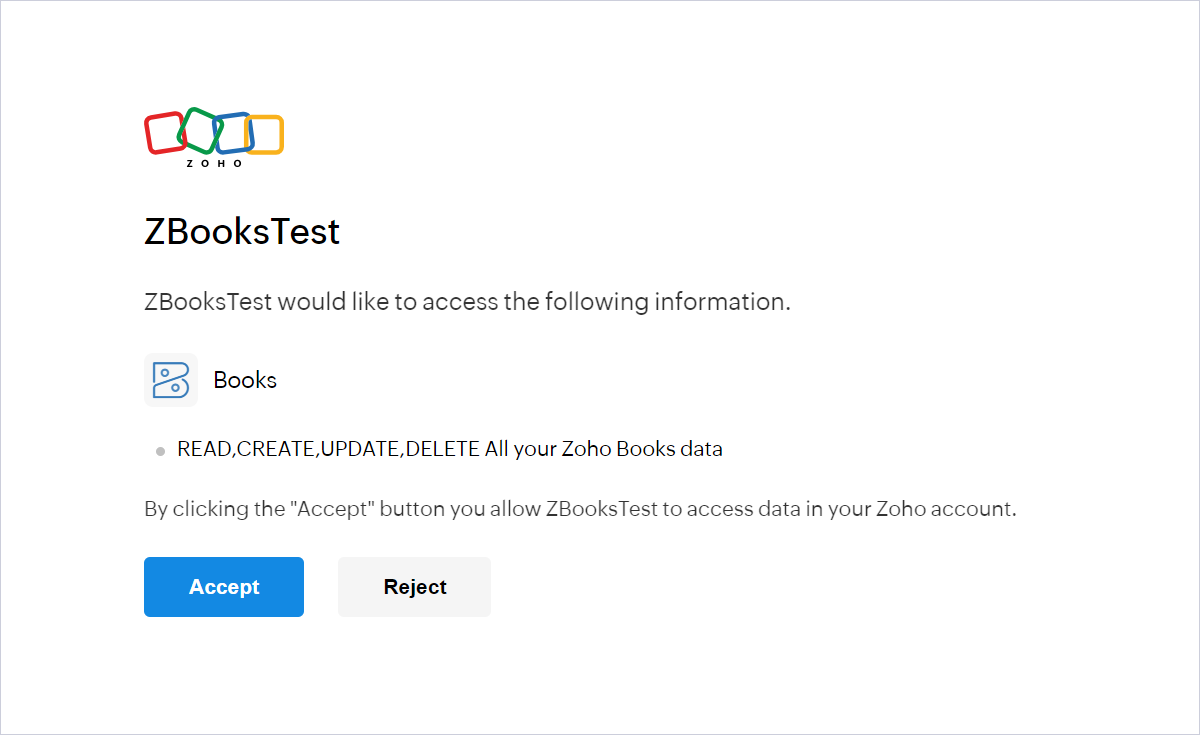
After that, you’ll be redirected to the Zoho page with the access code embedded in the URL.
Simultaneously, a console will open up. Go ahead, copy that URL into the console, and press Enter. If all goes well, you will get a message in the console that the connection has been opened.
Please note that the code generated from the URL is time-bound, so you will need to copy and paste it into the console quickly so that it does not expire.
How to Fetch Invoices From Zoho Books
Okay, so we have been able to open a connection to our Zoho Books Database. Let’s try to retrieve some data, specifically we’ll be pulling the invoices from our Zoho Books database.
Modify your ConnectionClass so it looks like this:
public class ConnectionClass
{
    private const string ClientId = "1000.LR49IV7TR1EM9PJX3H05YY7CAO4QCY";
    private const string ClientSecret = "2fdc969392bc3b60c34855fa5a3aab217e7cb696f2";     private const string License = "2fdc969392bc3b60c34855fa5a3aab217e7cb696f2";
    public DataTable GetInvoices(string token)
    {
        Devart.Data.ZohoBooks.ZohoBooksConnection myConn = new Devart.Data.ZohoBooks.ZohoBooksConnection();
        myConn.ConnectionString = $"ClientId={ClientId};ClientSecret={ClientSecret};RefreshToken={token};LicenseKey={License}";
        DataTable dt;
        using (ZohoBooksConnection connection = new ZohoBooksConnection(myConn.ConnectionString))
        {
            connection.Open();
            string query = "SELECT InvoiceNumber,ReferenceNumber,CustomerName,CompanyName,Date,DueDate,CurrencyCode,Total FROM Invoices";
            Devart.Data.ZohoBooks.ZohoBooksDataAdapter dataAdpater = new Devart.Data.ZohoBooks.ZohoBooksDataAdapter(query, connection);
            DataSet data = new DataSet();
            dataAdpater.Fill(data, "Invoices");
            dt = data.Tables["Invoices"];
        }
        myConn.Close();
        return dt;
    }
}
Note, that we are retrieving only a few columns for the sake of brevity.
Create a UI and Manage Zoho Books Invoices in Your App
Let’s create a simple UI to view the data we have just retrieved.
Add this method in HomeController class.
static string GenerateHtmlTable(DataTable dataTable)
{
    StringBuilder htmlBuilder = new StringBuilder();

    // Add border and spacing to the table
    htmlBuilder.Append("<table style='border-collapse: collapse; border: 1px solid black; padding: 8px;'>");

    // Add table header
    htmlBuilder.Append("<tr>");
    htmlBuilder.Append("<th style='border: 1px solid black; padding: 8px;'>InvoiceNumber</th>");
    htmlBuilder.Append("<th style='border: 1px solid black; padding: 8px;'>ReferenceNumber</th>");
    htmlBuilder.Append("<th style='border: 1px solid black; padding: 8px;'>CustomerName</th>");
    htmlBuilder.Append("<th style='border: 1px solid black; padding: 8px;'>CompanyName</th>");
    htmlBuilder.Append("<th style='border: 1px solid black; padding: 8px;'>Date</th>");
    htmlBuilder.Append("<th style='border: 1px solid black; padding: 8px;'>DueDate</th>");
    htmlBuilder.Append("<th style='border: 1px solid black; padding: 8px;'>CurrencyCode</th>");
    htmlBuilder.Append("<th style='border: 1px solid black; padding: 8px;'>Total</th>");
    htmlBuilder.Append("</tr>");

    // Add table rows
    foreach (DataRow row in dataTable.Rows)
    {
        htmlBuilder.Append("<tr>");
        htmlBuilder.Append($"<td style='border: 1px solid black; padding: 8px;'>{row["InvoiceNumber"]}</td>");
        htmlBuilder.Append($"<td style='border: 1px solid black; padding: 8px;'>{row["ReferenceNumber"]}</td>");
        htmlBuilder.Append($"<td style='border: 1px solid black; padding: 8px;'>{row["CustomerName"]}</td>");
        htmlBuilder.Append($"<td style='border: 1px solid black; padding: 8px;'>{row["CompanyName"]}</td>");
        htmlBuilder.Append($"<td style='border: 1px solid black; padding: 8px;'>{row["Date"]}</td>");
        htmlBuilder.Append($"<td style='border: 1px solid black; padding: 8px;'>{row["DueDate"]}</td>");
        htmlBuilder.Append($"<td style='border: 1px solid black; padding: 8px;'>{row["CurrencyCode"]}</td>");
        htmlBuilder.Append($"<td style='border: 1px solid black; padding: 8px;'>{row["Total"]}</td>");
        htmlBuilder.Append("</tr>");
    }

    htmlBuilder.Append("</table>");

    return htmlBuilder.ToString();
}
Then modify the Index method so it looks like this.
public IActionResult Index()
{
    AuthorizationClass authorizationClass = new AuthorizationClass();
    string code = authorizationClass.GetAuthorizationCodeAsync().Result;
    Console.WriteLine($"Authorization code: {code}");
    ConnectionClass connectionClass = new ConnectionClass();
    DataTable dataTable = connectionClass.GetInvoices(code);
    string htmlTable = GenerateHtmlTable(dataTable);
    ViewBag.HtmlTable = htmlTable;
    return View();
}
Now, locate the index.cshtml view.
Then replace the code there with this version.
@{
ViewData["Title"] = "Home Page";
}
<div class="text-center">
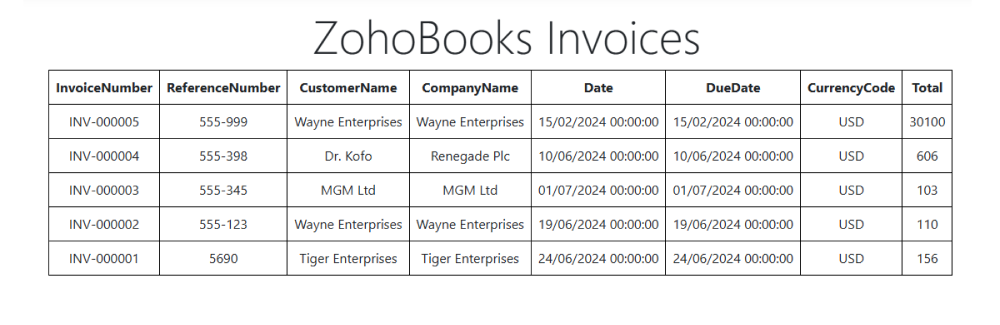
<h1 class="display-4">ZohoBooks Invoices</h1>
<div>
@Html.Raw(ViewBag.HtmlTable)
</div>
</div>Now you can run the application and check the result.
Conclusion
In this article, we have explored the seamless integration of Zoho Books data into a .NET application. We have successfully retrieved an authorization code from the ZohoBooks API using dotConnect for Zoho Books. With this auth code, we have obtained both the access token and refresh token necessary for connecting to Zoho Books. We also demonstrated how effortlessly data can be retrieved from the Invoices table using the ZohoBooksDataAdapter from dotConnect for Zoho Books. Try it yourself by downloading a free trial and experience the seamless integration and efficient data handling of Zoho Books data in your .NET applications.
