When raising issues related to increasing performance and improving Oracle database reliability and integrity while developing and deploying databases, the real value lies in automating the process and managing changes securely.
Very often, DBAs perform, for example, database administration tasks that include the creation of Oracle database automation scripts or procedures. This will allow them to stop wasting their time on repetitive tasks and increase efficiency and boost productivity.
In the article, we are going to describe a simple alternative about how to easily automate the database development process using the template files created with the tools of dbForge Studio for Oracle.
First, let’s cover the main definitions to be used in the article.
What is DevOps for Oracle Databases?
When it comes to database deployment and change management in Oracle, automating the workflow is a good idea to implement. This can be achieved with DevOps that can not only facilitate the Oracle database deployment automation and reduce release cycles of database deployment to production but also ensure higher database performance and reliability.
DevOps is a set of practices and tools designed to coordinate and collaborate with developers and operations teams and to automate the software development life cycle in order to deliver better and more reliable products faster and to enhance performance.
How to Use dbForge Studio for Oracle in the DevOps Workflow
The command-line script includes the following steps:
- create a table
- populate the table with some test realistic data to be generated through Data Import and Data Generator
- synchronize schemas on different servers using Schema Compare
- add data to the table using Data Compare
- generate documentation in a .pdf file format
To begin with, make sure that dbForge Studio for Oracle is installed on your machine. To download the tool, visit Download dbForge Studio for Oracle.
Prior to executing the script, create the template files (.scomp, .dcomp, .dit, and/or .dgen, which will be used in the commands) with the help of dbForge Studio for Oracle. In our case, we will use DBFORCL as a test server.
Step 1. Create a user
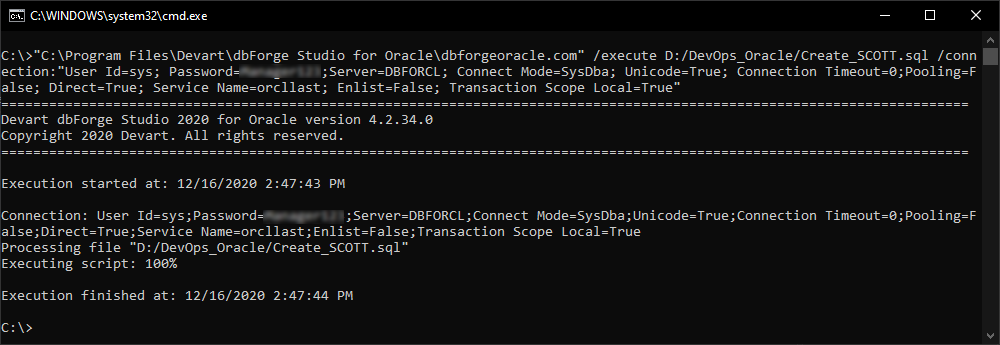
To create a new user SCOTT, execute the following command:
"C:\Program Files\Devart\dbForge Studio for Oracle\dbforgeoracle.com" /execute D:/DevOps_Oracle/Create_SCOTT.sql /connection:"User Id=sys; Password=[password];Server=DBFORCL; Connect Mode=SysDba; Unicode=True; Connection Timeout=0;Pooling=False; Direct=True; Service Name=orcllast; Enlist=False; Transaction Scope Local=True"where Create_SCOTT.sql is a template file we previously created with dbForge Studio for Oracle.
Step 2. Create a table
Next, to create an empty table, execute the following command-line script as a SCOTT user:
"C:\Program Files\Devart\dbForge Studio for Oracle\dbforgeoracle.com" /execute D:/DevOps_Oracle/Create_tables_in_SCOTT.sql /connection:"User Id=SCOTT;Password=[password];Server=DBFORCL;Unicode=True;Connection Timeout=0;Pooling=False;Direct=True;Service Name=orcllast;Enlist=False;Transaction Scope Local=True"where Create_tables_in_SCOTT.sql is a template file we previously created with dbForge Studio for Oracle.

Step 3. Populate the table with data
To generate random data for the table, we will use the Data Generator and Data Import/Export functionalities provided by dbForge Studio for Oracle.
Using the Data Generator functionality
Data Generator is the simplest way to generate large sets of realistic test data. It supports a wide range of Oracle data types and includes over 200 data generators to populate tables with different types of values. For more information about the Data Generator functionality, see Oracle Data Generator.
Using the previously configured data generator template file (SCOTT_Data_Generation.dgen), execute the following command-line script:
"C:\Program Files\Devart\dbForge Studio for Oracle\dbforgeoracle.com" /generatedata /projectfile:"D:\DevOps_Oracle\SCOTT_Data_Generation.dgen" /connection:"User Id=SCOTT; Password=[password]; Server=DBFORCL; Unicode=True; Connection Timeout=0; Pooling=False; Direct=True; Service Name=orcllast; Enlist=False; Transaction Scope Local=True"
Using the Data Import/Export functionality
dbForge Studio for Oracle allows you to easily import data and/or export data from separate files. The tool supports different data file formats and allows you to customize the import and export options the way you need. For more information about the Data Import/Export functionality, see Data Import and Export Tools for Oracle.
To insert data into the tables, we’ll run the command-line script with the data import templates we previously configured and saved in dbForge Studio for Oracle:
"C:\Program Files\Devart\dbForge Studio for Oracle\dbforgeoracle.com" /dataimport /connection:"User Id=SCOTT;Password=[password];Server=DBFORCL;Unicode=True;Connection Timeout=0;Pooling=False;Direct=True;Service Name=orcllast;Enlist=False;Transaction Scope Local=True" /templatefile:D:/DevOps_Oracle/BONUS_template.dit

"C:\Program Files\Devart\dbForge Studio for Oracle\dbforgeoracle.com" /dataimport /connection:"User Id=SCOTT;Password=[password];Server=DBFORCL;Unicode=True;Connection Timeout=0;Pooling=False;Direct=True;Service Name=orcllast;Enlist=False;Transaction Scope Local=True" /templatefile:D:/DevOps_Oracle/DEPT_template.dit

"C:\Program Files\Devart\dbForge Studio for Oracle\dbforgeoracle.com" /dataimport /connection:"User Id=SCOTT;Password=[password];Server=DBFORCL;Unicode=True;Connection Timeout=0;Pooling=False;Direct=True;Service Name=orcllast;Enlist=False;Transaction Scope Local=True" /templatefile:D:/DevOps_Oracle/EMP_template.dit

"C:\Program Files\Devart\dbForge Studio for Oracle\dbforgeoracle.com" /dataimport /connection:"User Id=SCOTT;Password=[password];Server=DBFORCL;Unicode=True;Connection Timeout=0;Pooling=False;Direct=True;Service Name=orcllast;Enlist=False;Transaction Scope Local=True" /templatefile:D:/DevOps_Oracle/SALGRADE_template.dit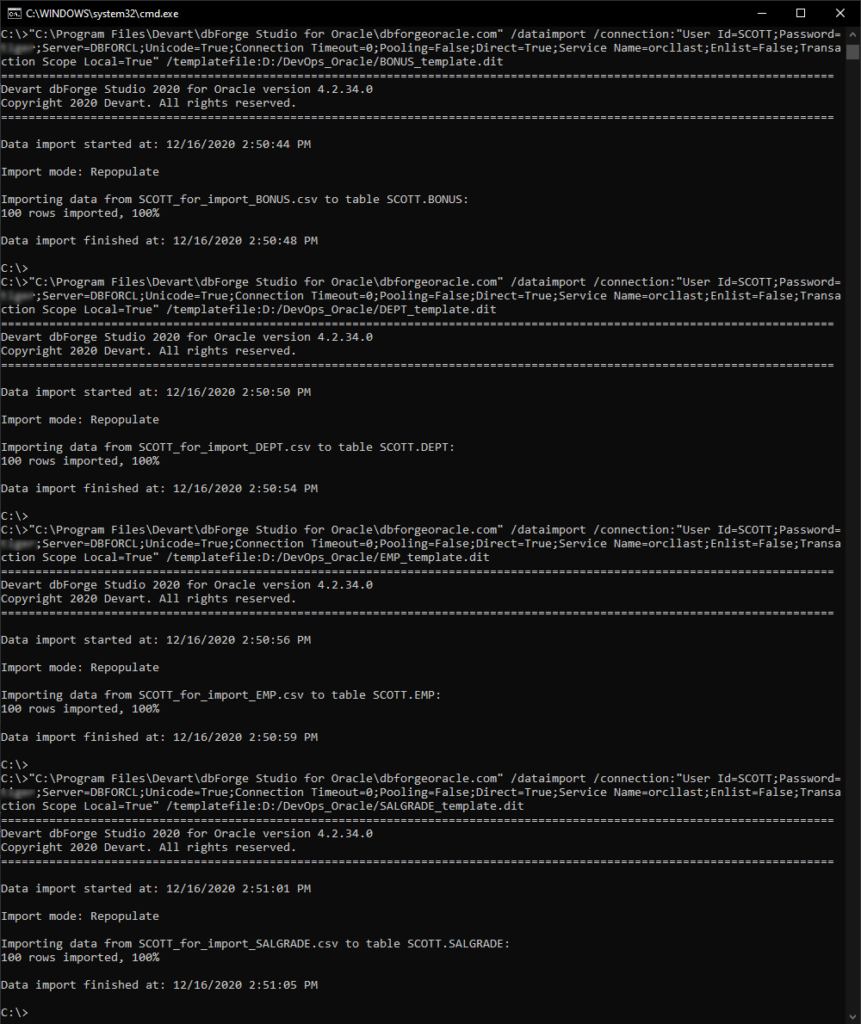
Step 4. Synchronize schemas on different servers
In cases, when we need to duplicate a database on the same or another server, the Schema Compare functionality is a useful solution that allows comparing and synchronizing schemas quickly and accurately.
To create a new schema structure on another server, run the following command-line script:
"C:\Program Files\Devart\dbForge Studio for Oracle\dbforgeoracle.com" /schemacompare /compfile:"D:\DevOps_Oracle\SCOTT_Schema_Compare.scomp" /source connection:"User Id=SCOTT;Password=[passowrd];Server=DBFORCL;Unicode=True;Connection Timeout=0;Pooling=False;Direct=True;Service Name=orcllast;Enlist=False;Transaction Scope Local=True" /target connection:"User Id=SCOTT;Password=[password];Server=dbforacle18;Unicode=True;Pooling=False;Direct=True;Service Name=oracle18;Enlist=False;Transaction Scope Local=True" /schemas:SCOTT,SCOTT /sync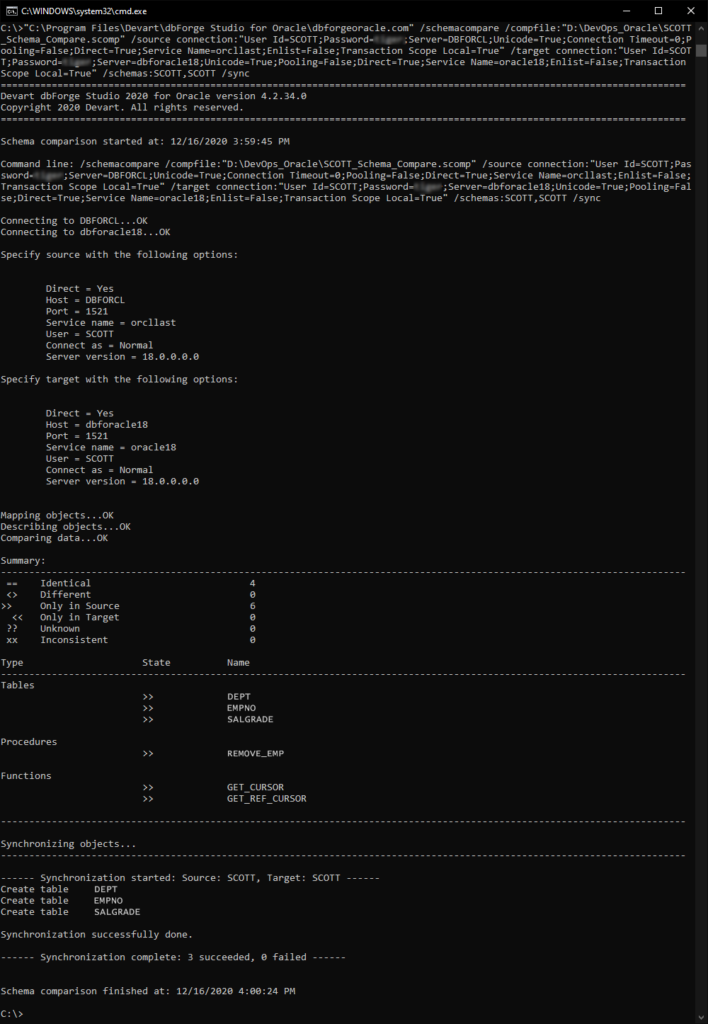
This will add tables, views, procedures, functions, and triggers that we have selected when creating the SCOTT_Schema_Compare.scomp template with the Schema Comparison tool in dbForge Studio for Oracle.
Step 5. Populate the database with test data
To insert data into the database, we will use the Data Compare tool that allows easily migrating test data from one database or script folder to another.
To populate the database, run the following script:
"C:\Program Files\Devart\dbForge Studio for Oracle\dbforgeoracle.com" /datacompare /compfile:"D:\DevOps_Oracle\SCOTT_Data_Compare.dcomp" /source connection:"User Id=SCOTT;Password=[password];Server=DBFORCL;Unicode=True;Connection Timeout=0;Pooling=False;Direct=True;Service Name=orcllast;Enlist=False;Transaction Scope Local=True" /target connection:"User Id=SCOTT;Password=[password];Server=dbforacle18;Unicode=True;Pooling=False;Direct=True;Service Name=oracle18;Enlist=False;Transaction Scope Local=True" /schemas:SCOTT,SCOTT /sync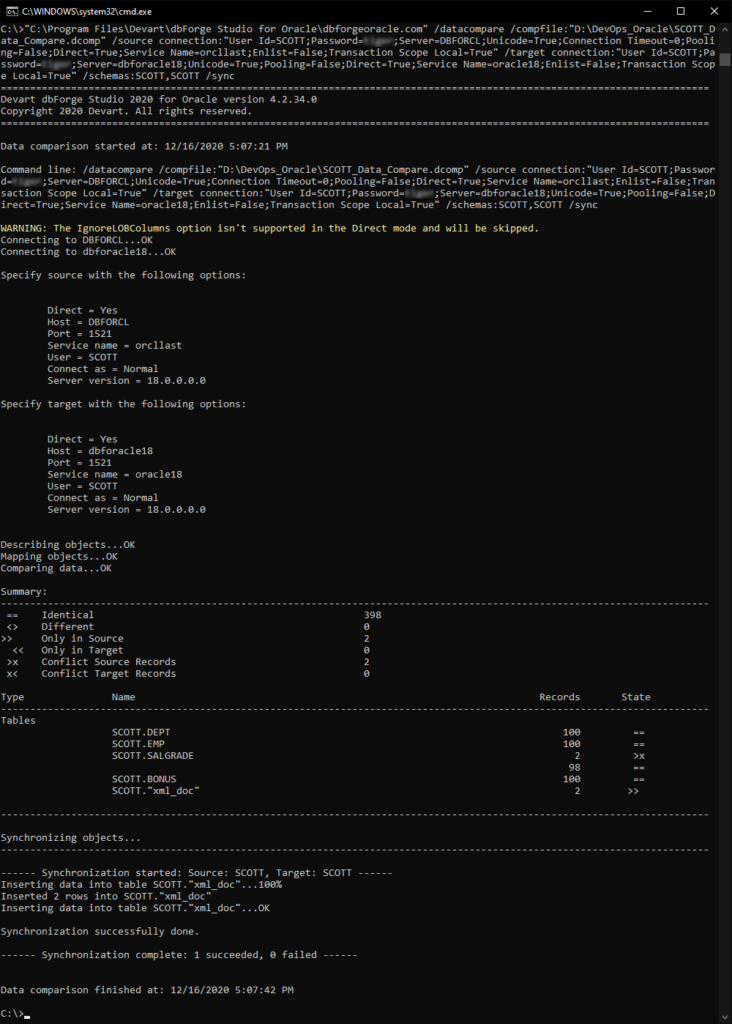
where SCOTT_Data_Compare.dcomp is a template file previously configured with the Data Comparison tool built into dbForge Studio for Oracle.
Step 6: Generate the documentation
After we have compared and synchronized Oracle schemes and inserted data into the databases, we will generate documentation of the whole schema. The tool helps create documentation in HTML, PDF, or Markdown file formats. In our example, we will use a .pdf file format.
To generate documentation, execute the following script:
"C:\Program Files\Devart\dbForge Studio for Oracle\dbforgeoracle.com" /document /projfile:"D:\DevOps_Oracle\SCOTT_dbforacle18.ddoc" /connection:"User Id=SCOTT;Password=[password];Server=dbforacle18;Unicode=True;Pooling=False;Direct=True;Service Name=oracle18;Enlist=False;Transaction Scope Local=True" /password /documentformat:Pdf /outputfile:"D:\DevOps_Oracle\SCOTT_dbforacle18.pdf" /breadcrumbs:Ywhere SCOTT_dbforacle18.ddoc is the template file configured previously with the Documenter tool built into dbForge Studio for Oracle.
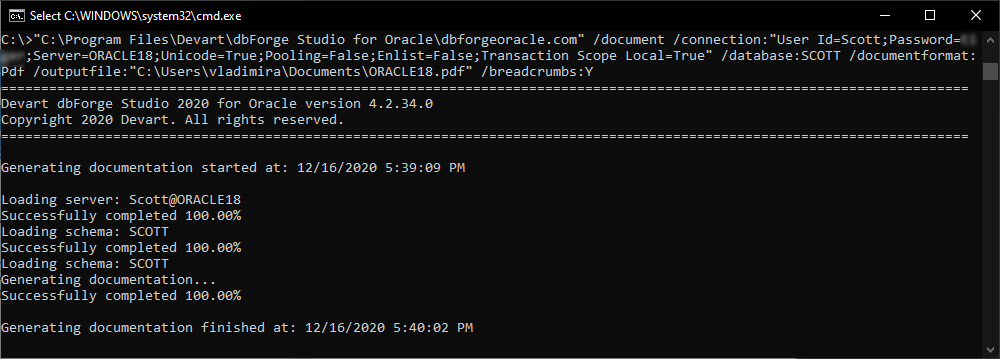
As a result, you receive a deployment script that will allow you to automate schema and database creation, test data population, comparison and synchronization of schema structure and data, as well as generation of documentation in the convenient file format.
Conclusion
dbForge Studio for Oracle is a robust tool that can be easily integrated into DevOps database automation tools. You can use the tool to easily apply DevOps concepts to database deployment and improve change management in Oracle. Using the DevOps for Oracle database will help you save your time and increase efficiency when deploying routine and repetitive scripts in Oracle schemas.
For more information about the tool and the features it provides, see dbForge Studio for Oracle.

