
Stripe is one of the world’s leading payment gateways. It allows its users to manage their payments worldwide, ensuring security and offering seamless payment methods for all businesses, regardless of size. With the rise of no-code platforms, integrating this payment system into most projects becomes a no-brainer. No-code platforms help users connect Stripe with various business tools, eventually reducing the need for complex coding.
In this article, we’ll discuss the advantages, tools, and various techniques for creating no-code Stripe integrations that are capable of enhancing business efficiency and improving payment processes.
- Why choose no-code solutions for Stripe integration?
- Top no-code platforms to integrate Stripe with other services
- Devart ODBC driver for Stripe
- Setup of the ODBC Driver for Stripe
- Conclusion
Why choose no-code solutions for Stripe integration?
No-code solutions have become a significant technological advancement, allowing non-developers to create better workflows and payment processes. With the drag-and-drop interfaces, it has become much easier to integrate third-party platforms with Stripe without writing a single line of code.
Let’s explore the benefits of these platforms and their typical use cases in detail.
Benefits of no-code Stripe integration for business
No-code platforms bring significant change to businesses by reducing development workloads. Also, side by side, these platforms make technical integration accessible to everyone. You should pay attention to no-code integration methods if you are interested in the following advantages.
- Ease of use. There is no need for complex logic. Even non-developers who have basic knowledge of programming can use these platforms.
- Rapid development. No-code integration platforms have GUI, which makes it easier for everyone to install them and set up connectivity even without any prior experience.
- Cost and time efficiency. Traditional development requires investing time and money into it, as well as a team to manage tasks. On the other hand, the no-code tools reduce the burden by enhancing the development process with the help of a simple drag-and-drop interface.
Common use cases
No-code platforms are chosen both by small and medium businesses as well as enterprises. Naturally, the use cases depend on business specifics and size. However, there are still the most common ones that we can cover.
- Automatic payment notifications. Integrating data from Stripe to other platforms lets companies get real-time updates related to payment statuses through alerts or emails.
- Syncing Stripe data with CRMs. No-code integration can provide your business with real-time purchase history updates by syncing Stripe transactions with popular CRM platforms like Salesforce or Zoho. To make this connection more efficient, no-code platforms often include Salesforce integration tools that simplify field mapping, improve data accuracy, and automate the sync process—no manual setup required.
- Generating automated invoices. It becomes much easier to create and send invoices that are based on Stripe’s transactions without any manual input.
- E-commerce optimization. Integration of Stripe with no-code tools like Shopify can boost the checkout user experience.
- Workflow automation. Combining Stripe with a no-code tool like Zapier or ODBC drivers can help automate tasks like refund processes and client follow-ups and even let you export data to spreadsheets.
These are only some of the advantages of Stripe integration to your business. Now, let’s check which solutions and platforms you can use to integrate Stripe with CRMs and databases.
Top no-code platforms to integrate Stripe with other services
No-code platforms make the process of Stripe integration easy and straightforward, empowering startups to manage workflows without having to hire tech talent. There are many popular tools, such as Make, Zapier, and ODBC drivers, through which businesses can set up this integration, avoiding overly complex architecture.
Let’s overview some of these solutions to understand which of them will fit your project’s use case.
Zapier
Zapier is an automation platform that provides many connectivity and integration options for its users. It connects Stripe with various apps and makes it easy for its users to handle payment processes efficiently. Zapier provides a drag-and-drop interface from which you can create “zaps” to manage your tasks, including handling payment transactions and sending payment requests or alerts to team members on the arrival of new orders. With Zapier, you can also sync customer data with CRM systems.
Practical use case: sending new invoices
This guide will teach you basic steps on how to connect Stripe with Zapier and how to generate new invoices or any other event you want. Keep reading to explore Zapier’s functionality further.
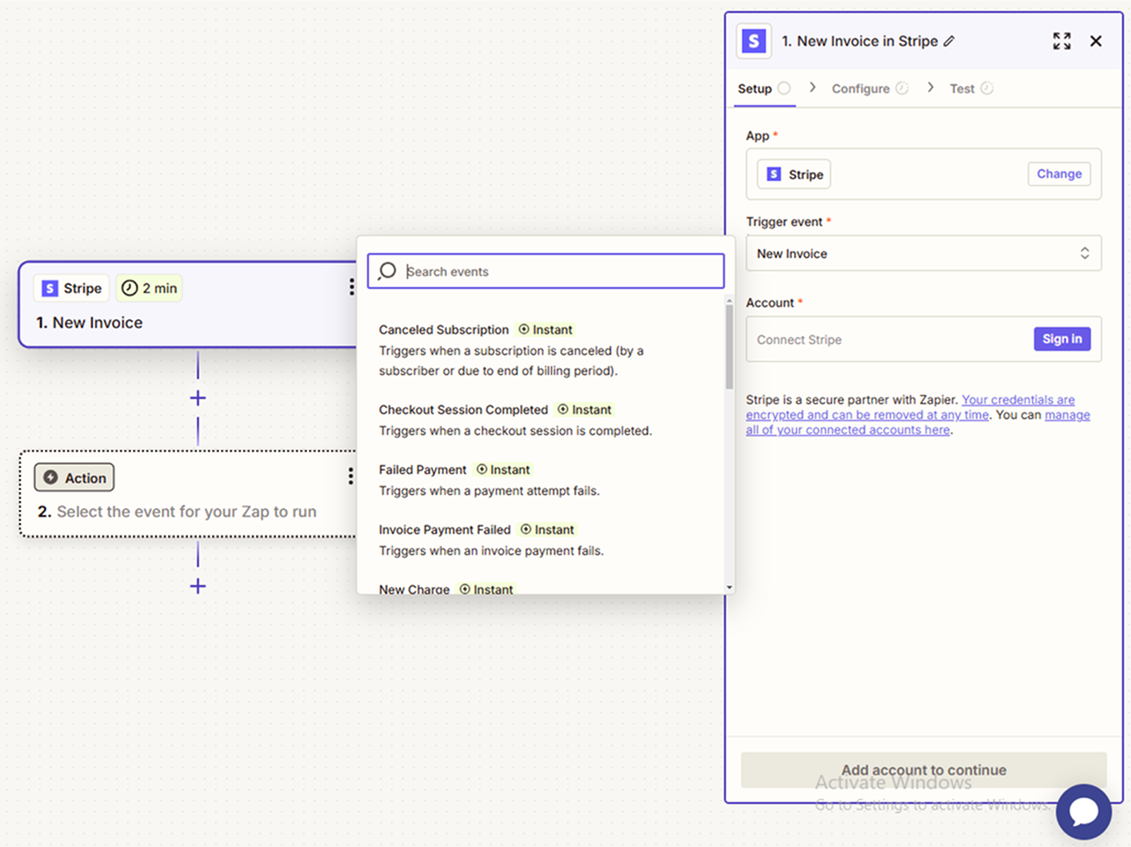
Step 1. Sign into Zapier and create a zap.

Step 2. Click on the trigger to open a new dialogue box.

Step 3. This dialogue will show you thousands of apps. Search for Stripe. You’ll see various options such as invoice payment, canceled subscription, new customer, new charge, etc.
Shopify
When there is a need to use no-code platforms to drive e-commerce business, the first option that comes to mind is Shopify. Its easy integration with Stripe provides online businesses with smooth payment processing. By merging Stripe with Shopify, you can enhance the store’s productivity and operational efficiency, as well as automate tasks.
Connecting Shopify with Stripe
Step 1. Register or log in to Shopify and click Settings.
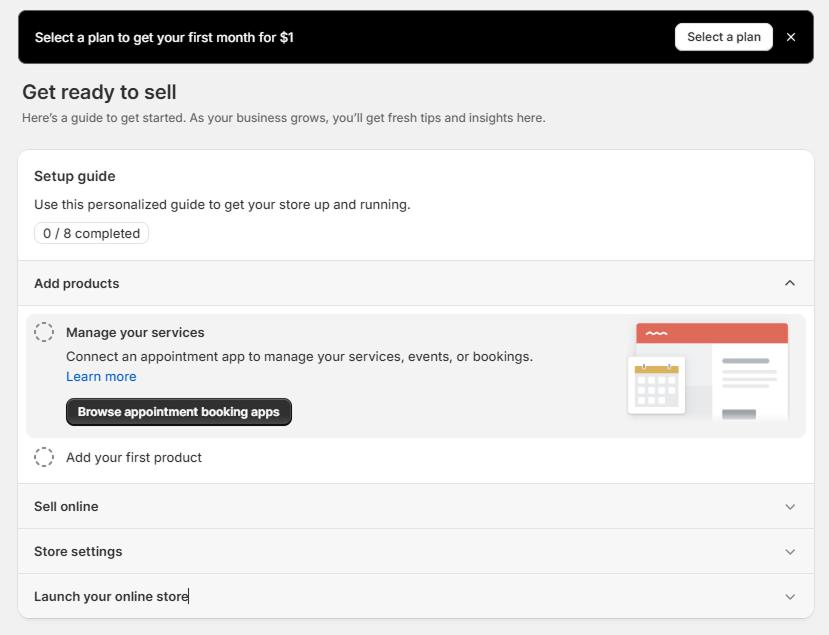
Step 2. In the sidebar on the left, locate Payments option. Click it.
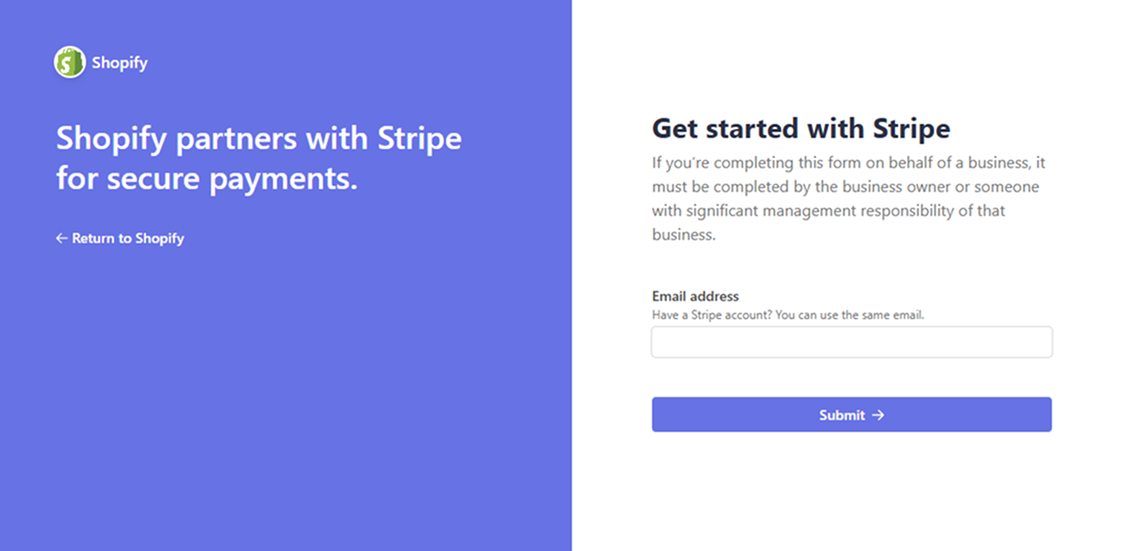
Step 3. Type in “Stripe” in the search bar to choose this third-party payment provider.

Step 4. Submit your personal information and connect your store to the Stripe payment system.
Airtable
Airtable is a cloud-based platform that combines the simplicity of spreadsheets with the power of relational databases. It’s widely used to manage structured data, build lightweight apps, and automate workflows. For businesses managing payment data, Airtable integrations offer a flexible way to organize Stripe transactions, customer records, and operational metrics in a single, collaborative environment. Let’s check how you can do it.
Step 1. Register your Airtable account or log in to Airtable if you already have one, and then create a project.
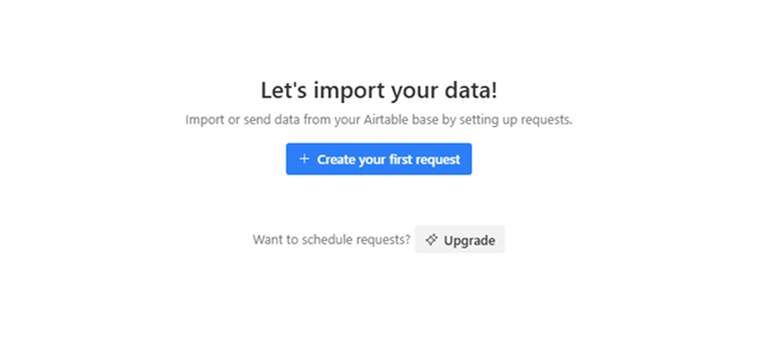
Step 2. Go for the “Import your Stripe data” option (you can do it using a third-party extension to fetch data).
Step 3. Choose the Stripe payment system.
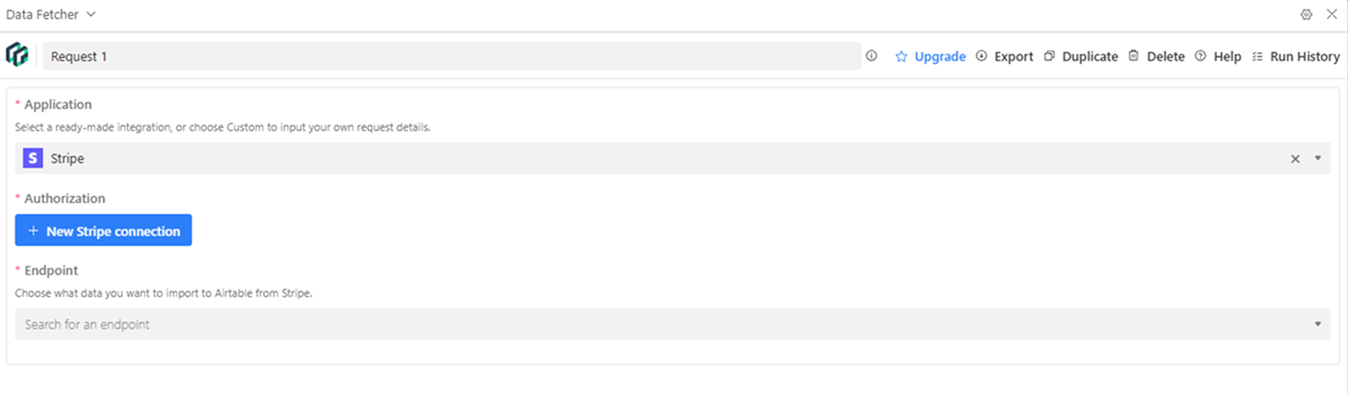
Step 4. Make a connection with the Stripe.
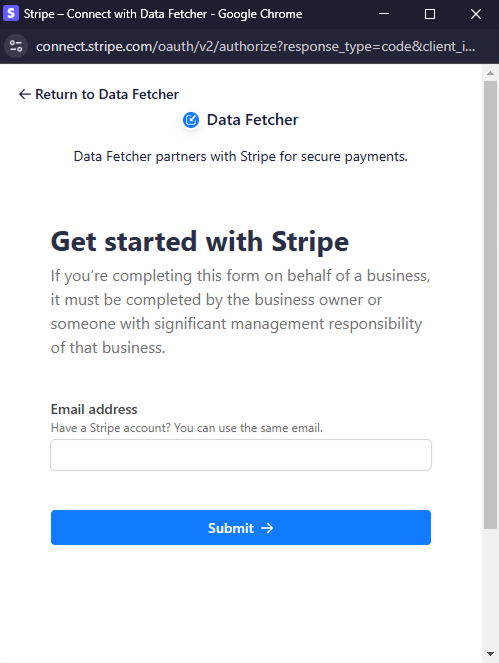
Step 5. Now, you have to add your personal information to the corresponding fields.
Now that we have seen some of the basic integration cases for Stripe with several popular no-code platforms let’s dive a bit deeper and explore what we can do if we want to integrate Stripe with a platform that doesn’t have a ready solution for such connectivity.
To cope with this task, we’ll need the Devart ODBC drivers.
Devart ODBC driver for Stripe
Devart ODBC driver for Stripe is a powerful tool that provides seamless access to Stripe data with the help of standard SQL queries. Using the Devart ODBC driver, you can connect this data to any ODBC-compliant database or platform to analyze payment trends, track transactions of the customers. Also, you can integrate Stripe with the business intelligence tools.
Overview of the ODBC Driver for Stripe from Devart
The Devart ODBC driver is a high-performance solution that fully follows the standard of ODBC. Also, it allows integration with multiple popular apps, including Microsoft Excel, Power BI, and more.
Its core advantages are real-time data access, proxy support, and cross-platform compatibility.
Key features and benefits
ODBC driver for Stripe comes with a lot of features that make it an essential tool for using and assessing Stripe data efficiently.
Real-time access to Stripe Data
This driver provides its user with the ability to enable direct, live access to the Stripe data. It is not like batch imports or late updates. This driver provides quick updates to the dashboard, letting you get financial and customer insights based on the current situation.
Support For ANSI SQL-92
The driver also provides support for ANSI SQL-92, which allows users to implement advanced queries to fetch Stripe data. Users can use JOINS to work with multiple data, WHERE for advanced filtering, GROUP BY for aggregated reporting, and ORDER BY custom supporting.
Seamless Integration with data tools
This driver also integrates with analytical tools and ODBC-complaint reporting such as:
- Microsoft Excel. In Excel, you can import Stripe data for quick calculations.
- Power BI. In Power BI, you can develop an interactive dashboard to manage performance metric events, including revenue, loss, etc.
- Tableau. From Tableau, you can get dynamic visualization insights to understand payment behavior.
Setup of the ODBC Driver for Stripe
First, you need to install the Devart ODBC driver for Stripe to connect Stripe with external applications, such as Microsoft Excel.
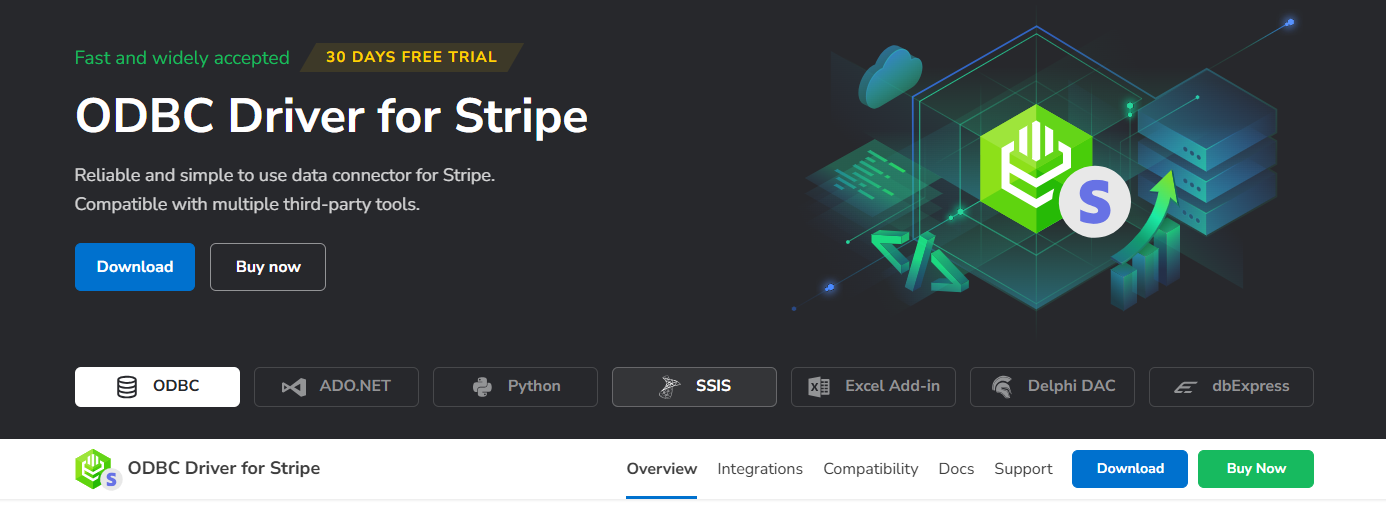
Step 1. Download and install the driver
- First, visit the Devart ODBC driver for Stripe page and download the driver. Make sure to choose the correct version based on your system’s requirements.
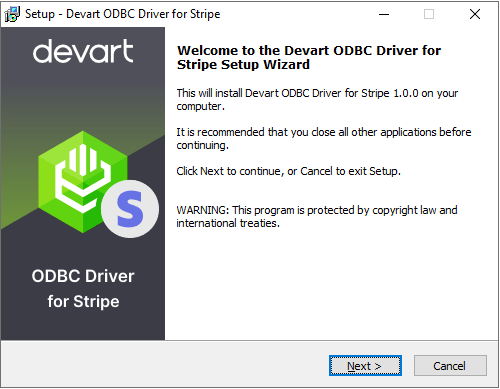
- After downloading, let’s install our Devart ODBC drive. Follow the on-screen instructions and completely install the drivers on your system.
- Next, set Search ODBC Data sources on the start menu and choose the very first option that will appear.
- Then click on the Add button to set your driver.
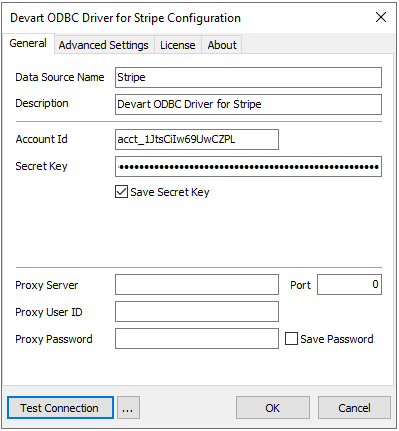
- After this, choose the Devert ODBC driver for Stripe.
- Click Finish and add your information in the corresponding fields.
- After filling in the information, test the connection.
Step 2. Connecting Excel to Stripe with Power Query
You can use Power Query in Excel to connect to Stripe via ODBC, provided you have an ODBC driver for Stripe installed. Follow the steps described below to proceed.
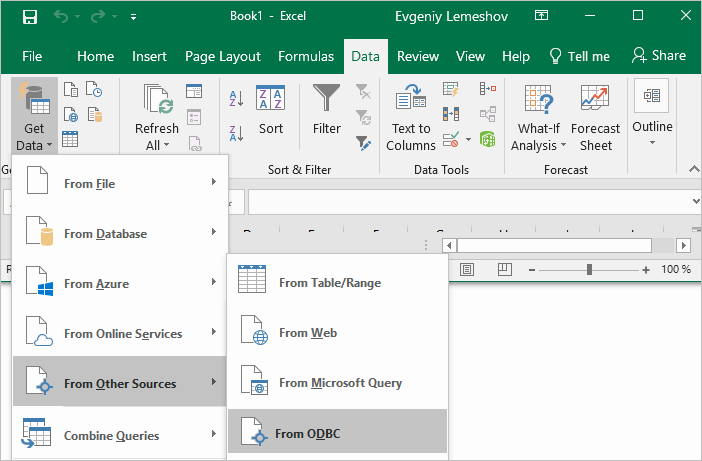
- Open Excel and go to the Data tab. Click Get Data, then choose From Other Sources, and pick From ODBC.
2. In the From ODBC dialog, select your Data Source Name (DSN):
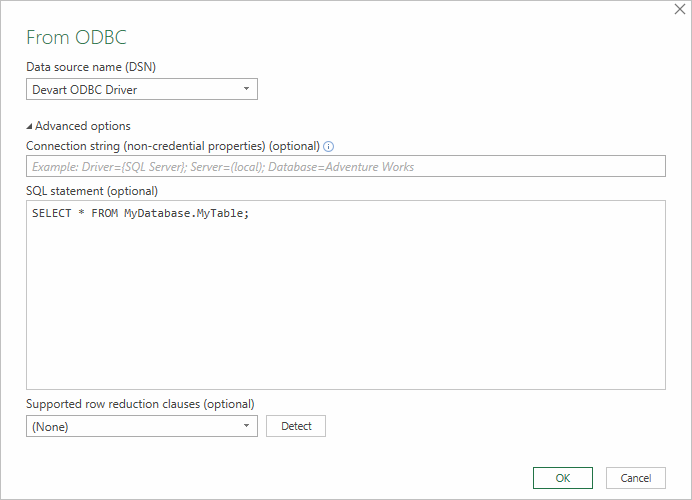
- If your ODBC driver isn’t configured yet, expand Advanced Options and enter the connection string (excluding credentials, which will be entered in the next step).
- You can also input an SQL query to execute immediately after the connection is established.
- Click OK.
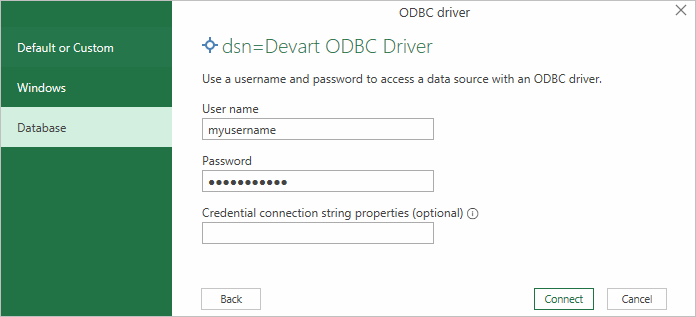
- If authentication is required:
- Select Database, enter your username and password, then click Connect.
- If credentials are already stored in your ODBC settings or authentication isn’t needed, choose Default or Custom and proceed.
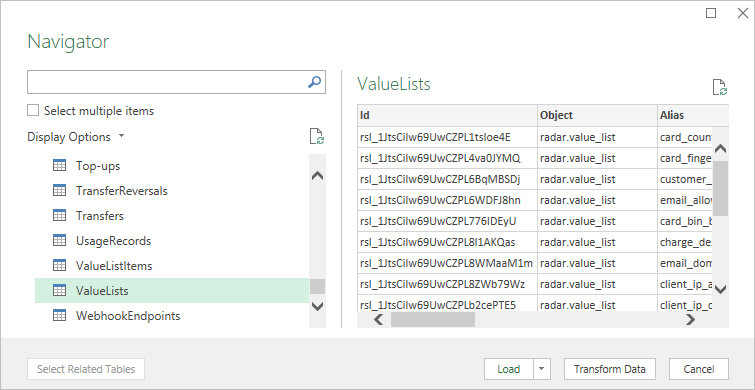
- In the resulting window, select the table you need and click Load. Your selected data will now be imported into an Excel spreadsheet. It’s ready for analysis.
How Devart ODBC driver simplifies data analysis for non-technical users
For those startups or businesses that are completely relying on Stripe, the ability to analyze the data is crucial. The Devart ODBC driver is a game changer, as it eliminates complex manual exporting and helps transform Stripe data with dynamic reporting, custom dashboards, and extensive scalability.
Conclusion
The Devart ODBC driver stands out as an essential tool for businesses that are looking to harness the full potential of their Stripe data. By providing functionalities such as SQL compatibility, real-time data access, and smooth integration with popular analytical tools, it helps teams make data-driven decisions.
Whether you have a technical background or not, the Devart ODBC driver will help you integrate Stripe to any ODBC-compliant platform you want in a matter of minutes.
