
Integrating Dynamics 365 with Visual Studio should be simple. Yet, developers and solution architects often run into challenges when trying to establish a direct, standards-compliant connection. From dealing with fragmented integrations to handling complex data security requirements, these obstacles slow down development, increase maintenance costs, and hinder the full strategic use of CRM data.
Devart ODBC drivers help overcome these pitfalls by providing a unified, simplified approach to connecting Dynamics 365 with Visual Studio. Unlike generic, one-size-fits-all solutions, Devart’s drivers are engineered to handle the specific technical challenges that come with CRM data integration.
In the following sections, we’ll look at ways to simplify connecting Dynamics 365 with Visual Studio. We will also show how tools like Devart ODBC drivers can help, making it easier to work with Dynamics 365 data in dashboards, apps, or smaller projects.
Table of contents
- Why Use Devart ODBC for Dynamics 365?
- Setting Up Devart ODBC Drivers in Visual Studio
- Integrating with Visual Studio
Why use Devart ODBC for Dynamics 365?
When you want to establish a Dynamics 365 and Visual Studio connection, Devart ODBC drivers can be a great choice because they:
- Ensure smooth, reliable performance even with heavy datasets or complex tasks.
- Have built-in security with TLS/SSL encryption and compliance-ready features.
- Simplify setup with clear documentation and easy troubleshooting.
- Work well across Windows, macOS, and Linux.
- Scale affordably with flexible pricing and low maintenance costs.
- Address real needs, from Power BI integration to compliance requirements.
For more details about the Devart ODBC driver for Dynamics 365, check out its features and benefits on our product page.
Setting up Devart ODBC Drivers in Visual Studio
Establishing a connection between Visual Studio and Dynamics 365 using Devart ODBC drivers is straightforward. Below, we’ll walk you through the steps. Let’s dive in.
Prerequisites
Before starting, ensure you’ve got the essentials in place. You’ll need the following prerequisites:
- Devart ODBC Driver installer – Download it from Devart’s official page.
- Administrator rights – Required if installing the driver system-wide or modifying system-level ODBC settings. If installing for a single user, admin rights may not be necessary.
- Valid credentials for Dynamics 365 – These can be either test credentials for a sandbox environment or production credentials for a live connection, depending on your use case.
Step-by-step installation
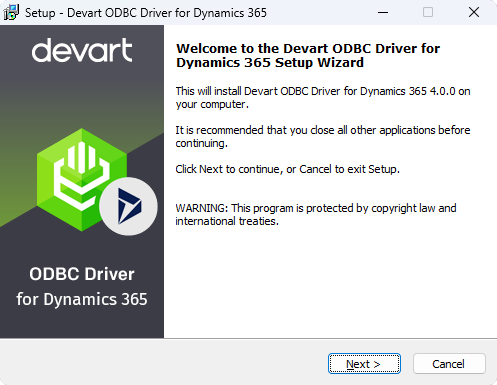
Step 1: Run the Devart installer
Double-click the downloaded installer (e.g., devart_odbc_dynamics365.exe) and follow the on-screen instructions:
- Accept the license agreement.
- Choose an installation directory.
- Confirm that the setup completed without errors.
Step 2: Verify the Driver in ODBC Data Source Administrator
Open the ODBC Data Source Administrator:
- On Windows, type “ODBC” into the Start menu to find it.
- Go to the Drivers tab and confirm the presence of “Devart ODBC Driver for Dynamics 365.”

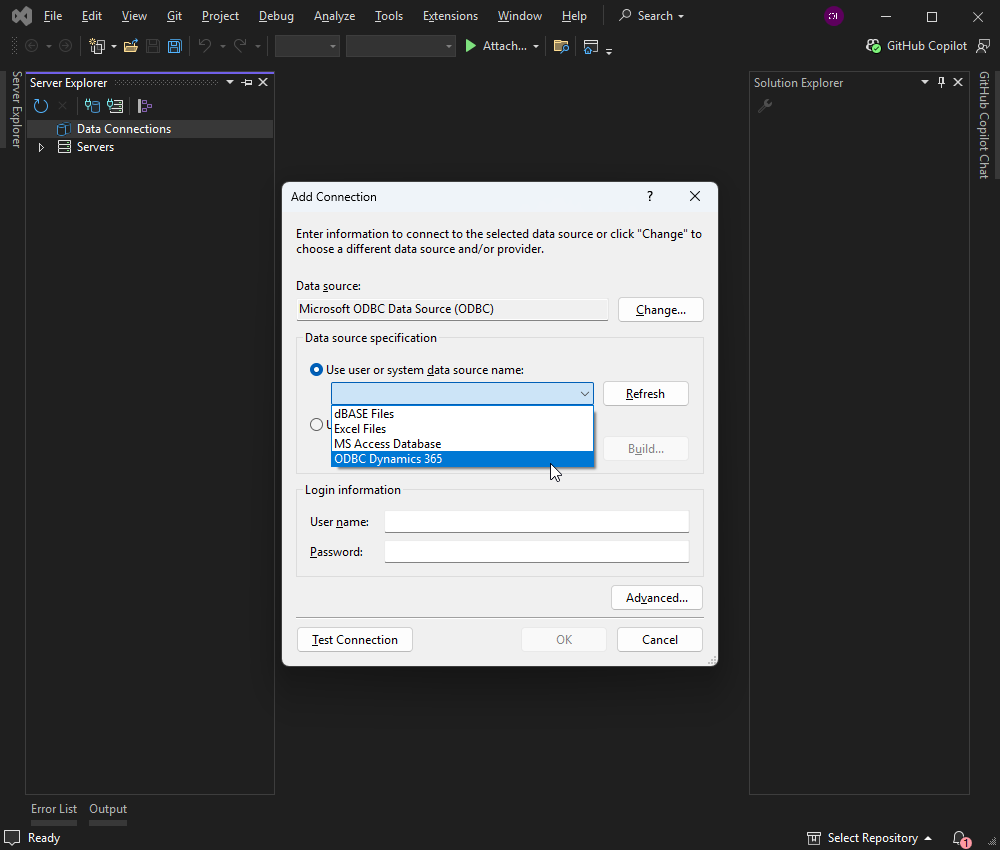
Step 3: Create a Data Source (DSN)
In the ODBC Data Source Administrator:
- Select User DSN or System DSN, depending on who needs access to the data source.
- Click Add and pick “Devart ODBC Driver for Dynamics 365” from the list.
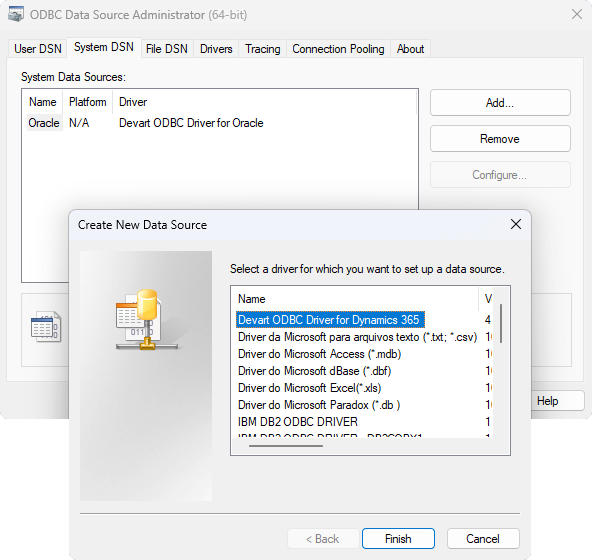
- Provide the following details, Data Source Name, Description, and Server URL (your Dynamics 365 endpoint).
- Input authentication parameters such as username/password, or OAuth tokens based on your security setup.
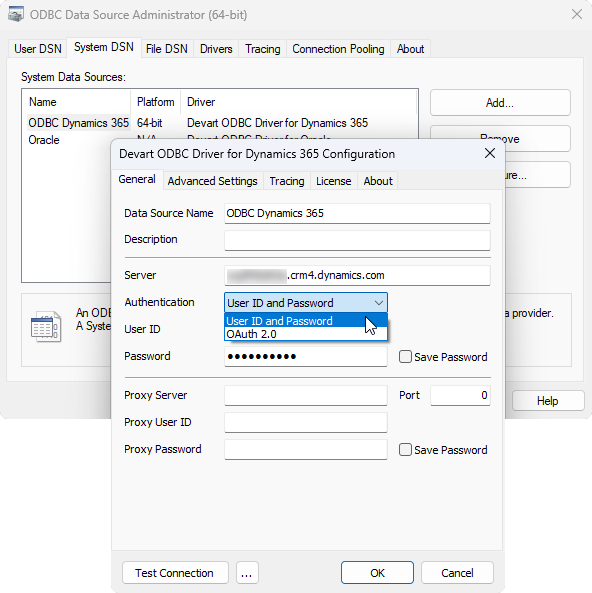
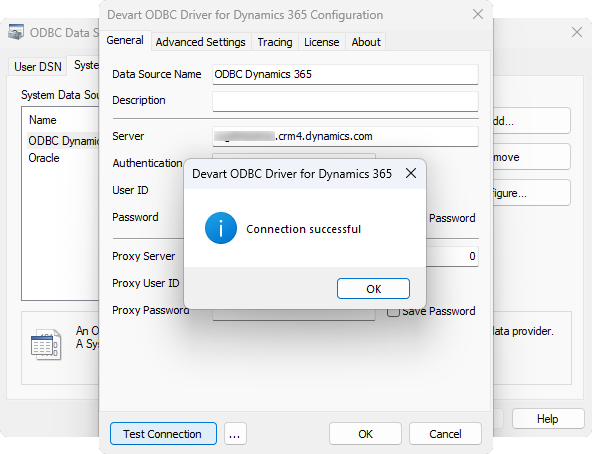
- Test the connection to ensure it succeeds before hitting OK.
Integrating with Visual Studio
Step 1: Open Visual Studio’s Server Explorer
- In Visual Studio, go to View > Server Explorer (or SQL Server Object Explorer in newer versions).
Step 2: Add a new data connection
- Right-click Data Connections in Server Explorer and select Add Connection.

- In the dialog, choose ODBC Data Source as the data source type. Select the DSN you created previously.
Step 3: Verify and test the connection
- Click the Test Connection button to ensure Visual Studio can query Dynamics 365 via the ODBC driver.
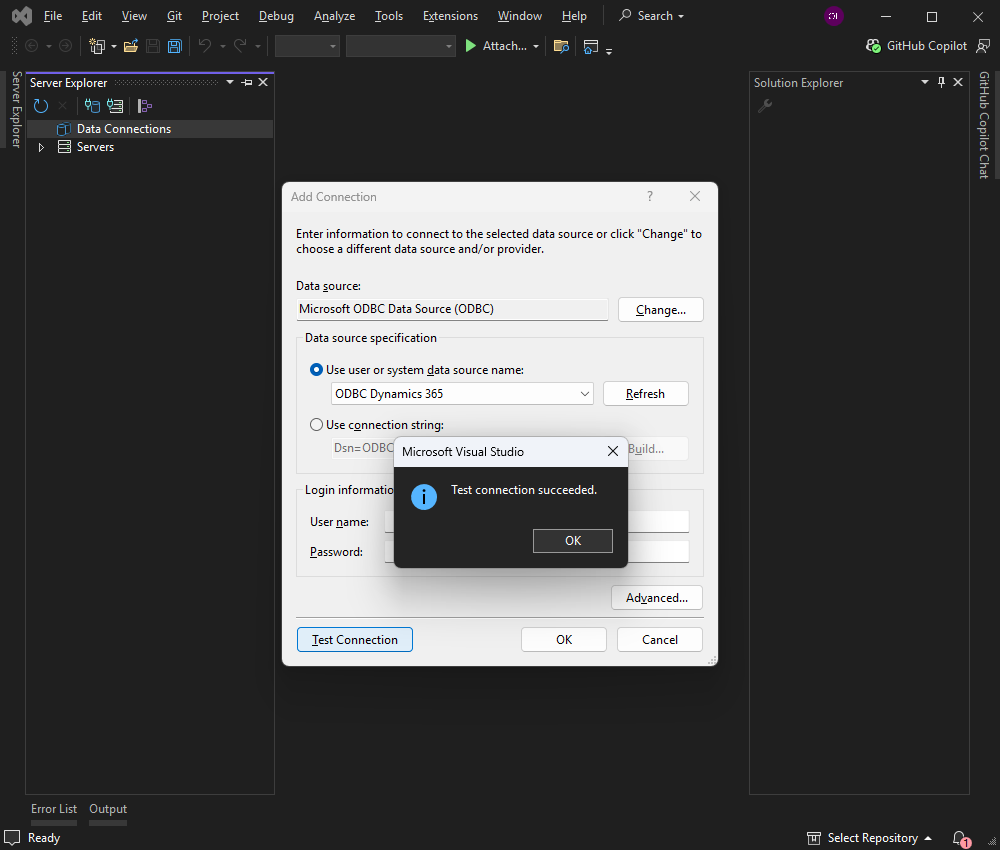
- Once the test is successful, press OK to finalize the connection.
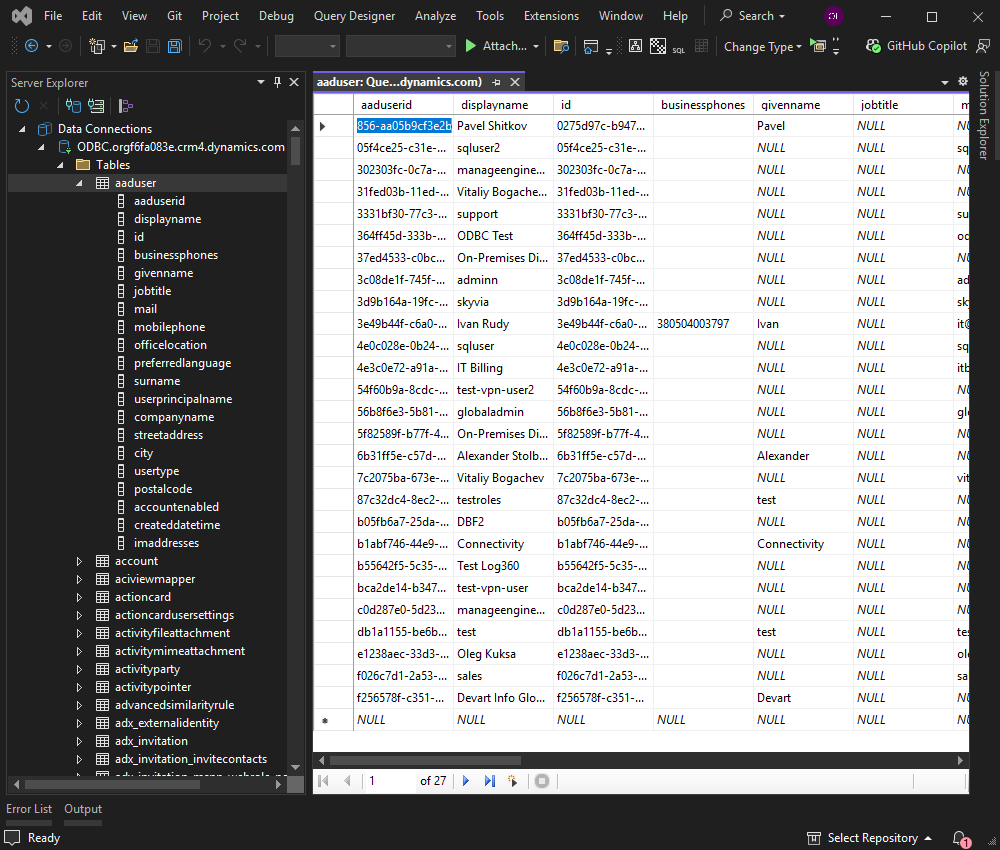
Step 4: Access Dynamics 365 Data
- In Server Explorer, you will now see Dynamics 365 tables/entities listed under the new Data Connection.
Common troubleshooting tips
Encountering issues? Here are quick fixes for the common problems:
- Authentication failures: If you receive “authentication failed” or “invalid credentials” errors, double-check your user credentials or OAuth settings. Some Dynamics 365 instances require token-based authentication.
Tip: Consult Devart’s documentation for supported authentication types (e.g., OAuth2) and confirm that you’re using the correct client IDs, secrets, or tokens. - Timeouts and slow connections: In case queries take too long or time out, increase the Connection Timeout in the DSN or within Visual Studio’s connection properties. Network latency or large datasets may require adjusting these values.
- Bitness mismatch (32-bit vs. 64-bit): Always ensure the driver architecture matches your Visual Studio environment or install both 32-bit and 64-bit drivers.
- Logging and diagnostic tools: In case of persistent issues arise, enable driver-level logging. Logs can reveal critical insights, such as incorrect SQL queries, unreachable endpoints, or unsupported features.
- Certificate and SSL issues: For secure TLS/SSL connections, verify that your host environment trusts the relevant certificate authority. If you encounter certificate validation errors, add the server’s certificate to a trusted store.
Post-setup validation
After establishing a connection, consider running a few test queries or exploring tables to ensure everything is functioning as expected. Validate that you can read data and perhaps update or insert records if your workflow requires it.
The takeaway
Connecting Dynamics 365 to Visual Studio doesn’t have to be complicated. Devart’s ODBC drivers give you a reliable, standards-based way to connect the dots—so you don’t have to waste time on awkward manual fixes, flaky custom scripts, or last-minute hacks to get your CRM data flowing.
If you want a connection that works—and keeps working as your projects scale and evolve—Devart ODBC drivers for Dynamics 365 are the practical choice.
Download Devart ODBC drivers for Dynamics 365 today to enhance your workflow and enable a smooth CRM integration.
Need something different? Explore our complete range of ODBC drivers for various databases and platforms here.
