
We won’t break any new ground by saying that data import and export rank among the most essential operations related to database management—and it’s the latter that we’ll talk about today.
Moreover, we’ll talk about it in the context of Azure SQL Database, Microsoft’s fully managed relational database service. It is flexible, secure, and easily scalable on demand, and it’s continuously kept up-to-date by Microsoft.
Still, if you are a user of Azure SQL Database, you don’t have all that many ways of exporting your data—and not all of them are as easy and flexible as you’d like them to be. But here, we’ll show you the most convenient ones and save the best for last.
Contents
- Export from the Azure portal
- Export using the bulk copy program utility
- Export via SQL Server Management Studio
- Export via SSMS + dbForge Data Pump
- Methods comparison
Export from the Azure portal
The first way to be discussed today is export to a BACPAC file from the Azure portal. A BACPAC file is basically a ZIP file that contains the metadata and data from your database. It can be stored in Azure Blob or in local storage and later imported back into Azure SQL Database, Azure SQL Managed Instance, or a SQL Server instance—whichever you may require.
This method is quite suitable if you need to export a database for archiving or for moving to another platform since the database schema gets exported alongside the data.
However, be aware that the current maximum size of a BACPAC file is 200 GB for Azure Blob. Larger BACPAC files can be exported to local storage via SqlPackage. Microsoft also warns that, for larger databases, BACPAC export and import may take lots of time, and may fail midway for various reasons.
Also note that BACPAC files are not intended for backup-and-recovery operations, since Azure offers auto-backups for every database.
Now let’s see how to export your database via the Azure portal.
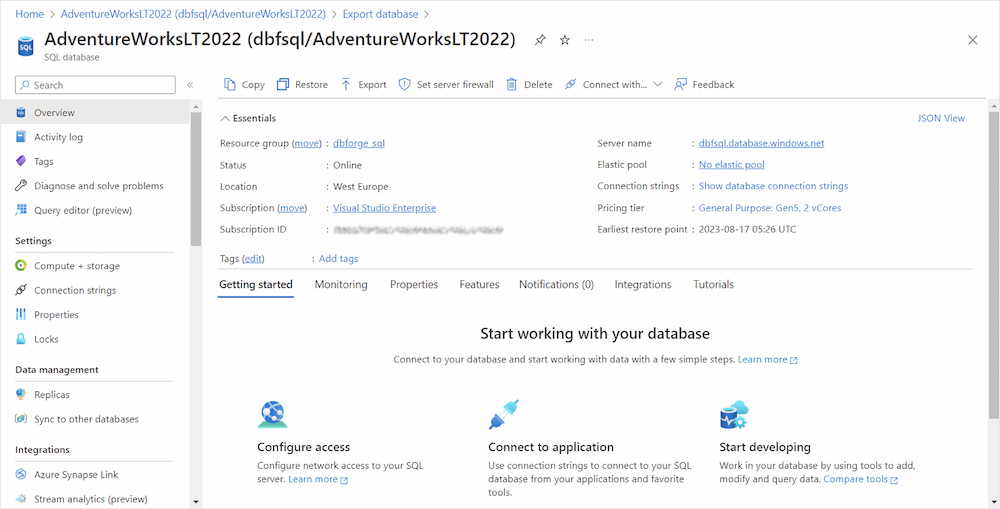
1. Go to the Azure portal (surely, you must be logged in to proceed) and find the required database.
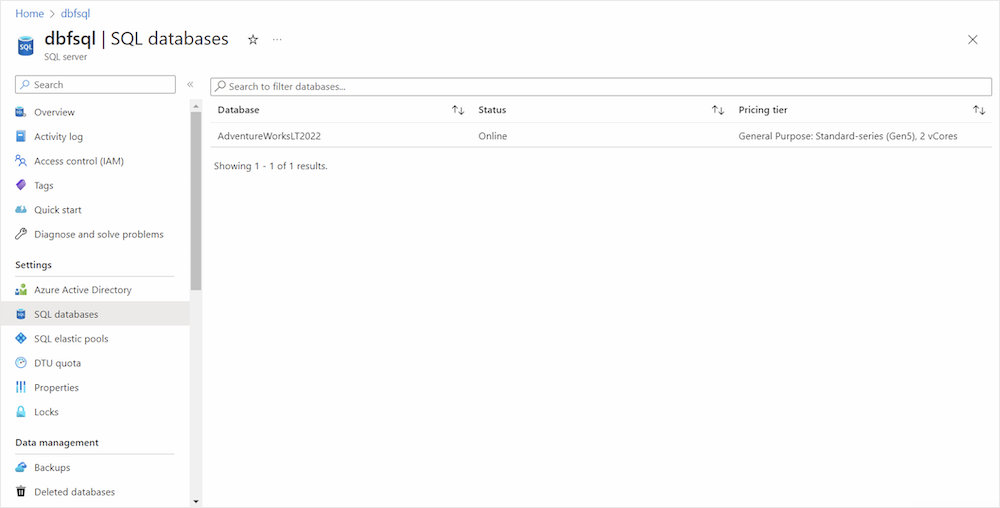
2. Click it to open the database page and select Export on the toolbar.
3. Enter the BACPAC file name, select your Azure storage account and container for the export, and specify the credentials to access your database.
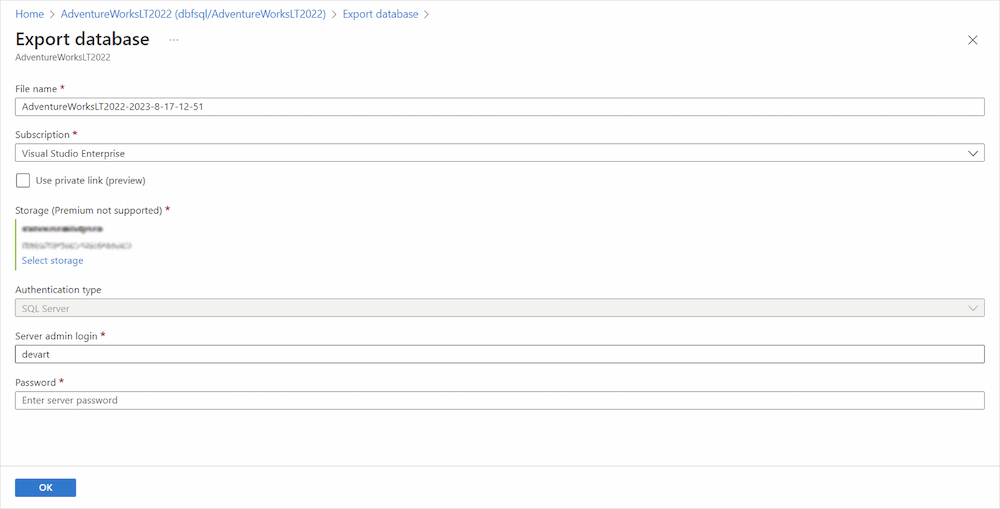
4. Select OK, and the export operation will commence. If you would like to keep an eye on its progress, you may open the page for the server that contains the database that’s being exported, and under Data management, select Import/Export history.
That’s it! It’s very easy, but you need to make sure that the abovementioned considerations are not a problem in your particular case.
Export using the bulk copy program utility
The second way is to use the bulk copy program utility (a.k.a. BCP), which leads us straight to the command line.
1. First, make sure that the BCP utility is installed on your machine. To do so, open the Command Prompt and run the following:
C:\WINDOWS\system32> bcp /vThe output will be similar to this:
C:\WINDOWS\system32> bcp /v
BCP - Bulk Copy Program for Microsoft SQL Server.
Copyright (C) Microsoft Corporation. All Rights Reserved.
Version: 15.0.2000.5
If you don’t have the BCP utility installed on your machine, you can download the latest versions for x64 and for x86.
2. Now, once you’re ready, run the following command after setting up valid parameters:
bcp database.dbo.table out C:\Path\datafile.dat -c -U username -S Azure.database.windows.netThis command will export table data from database.dbo.table to a file named datafile.dat under the specified path. -c refers to character data, -U refers to your relevant username, and -S refers to the name of the Azure server that you want to connect to.
3. Hit Enter, and you’ll be prompted to enter the password. After that, you will be informed about the success of your export, which will look similar to this:
C:\WINDOWS\system32> bcp database.dbo.table out C:\path\datafile.dat -c -U username -S Azure.database.windows.net
Password:

Starting copy…

27 rows copied
Network packet size (bytes): 4096
Click Time (ms.) Total     : 1797 Average : (15.59 rows per sec.)
4. Once it’s done, check the specified file that will contain the exported rows.
Export via SQL Server Management Studio
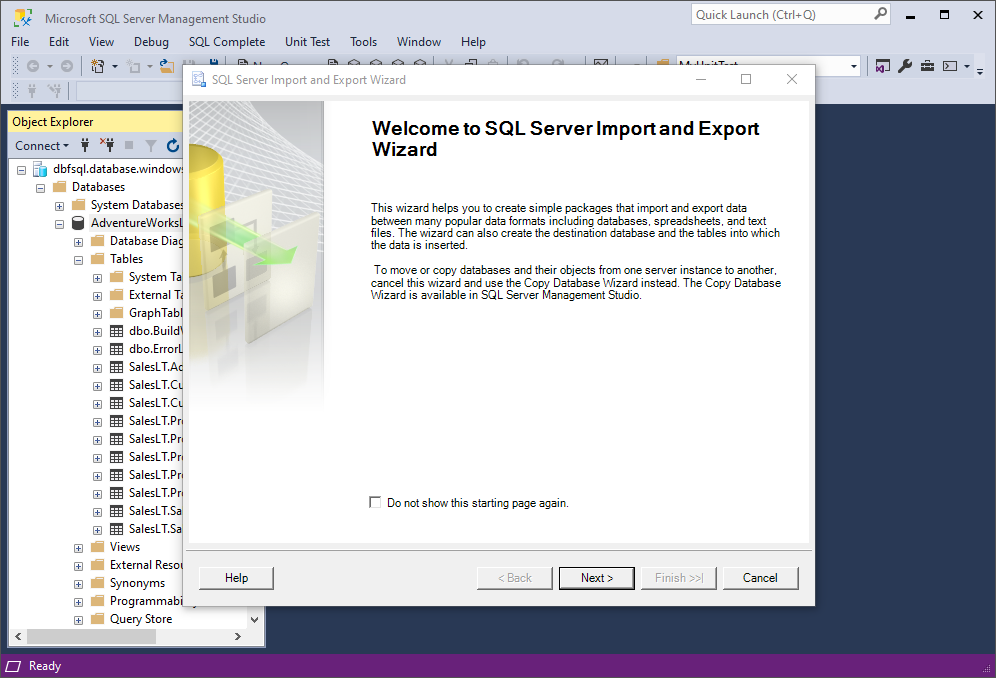
The next way that will be scrutinized involves Microsoft’s SQL Server Management Studio, the golden standard for SQL Server databases that is just as nicely compatible with Azure SQL Database.
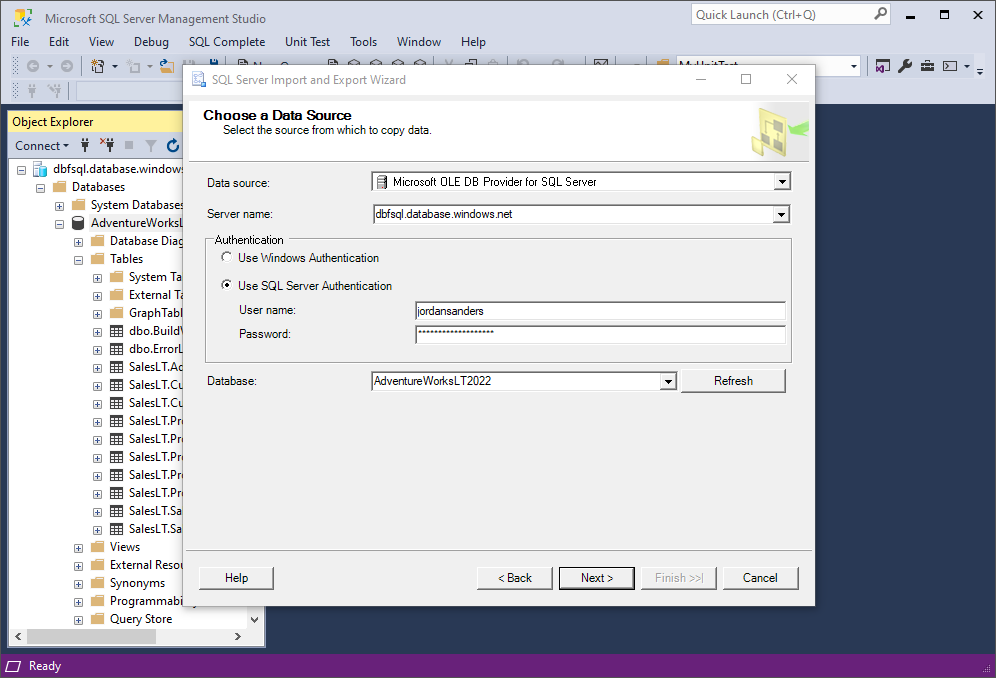
1. Open SSMS and establish your Azure SQL connection. Then right-click the required database and go to Tasks > Export Data. In the wizard that opens, click Next.
2. On the Choose a Data Source page, specify the required data source, server name, authentication details, and, of course, the database. After that, click Next.
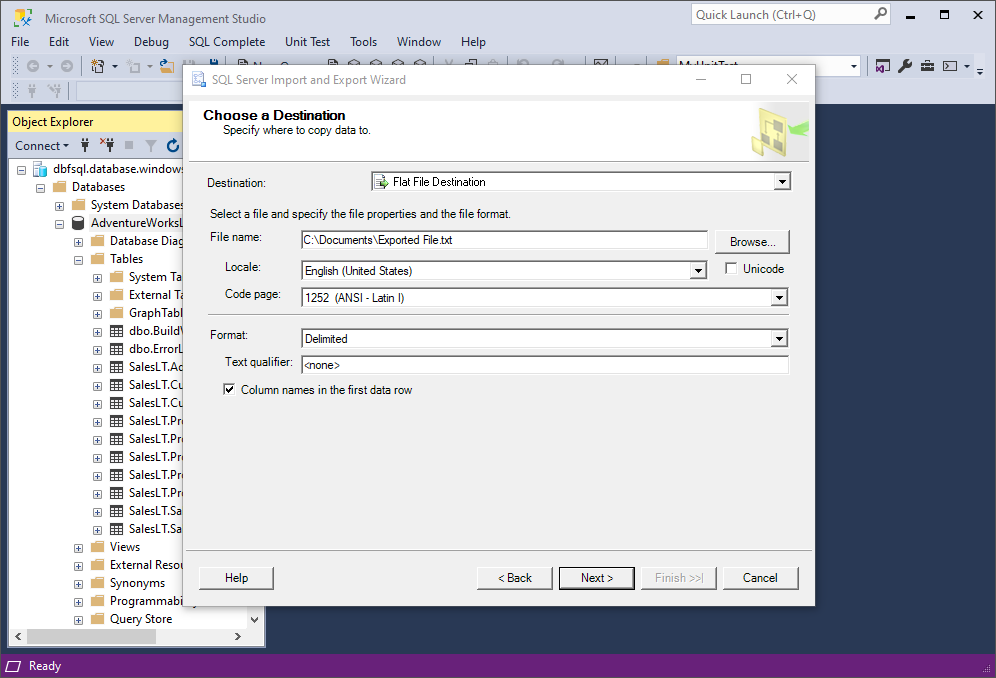
3. Next comes the Choose a Destination page, where you need to select Flat File Destination, enter a name for your file with the path to the folder where it will be saved, and specify the format alongside a couple of additional settings. Once you make sure it’s all correct, click Next.
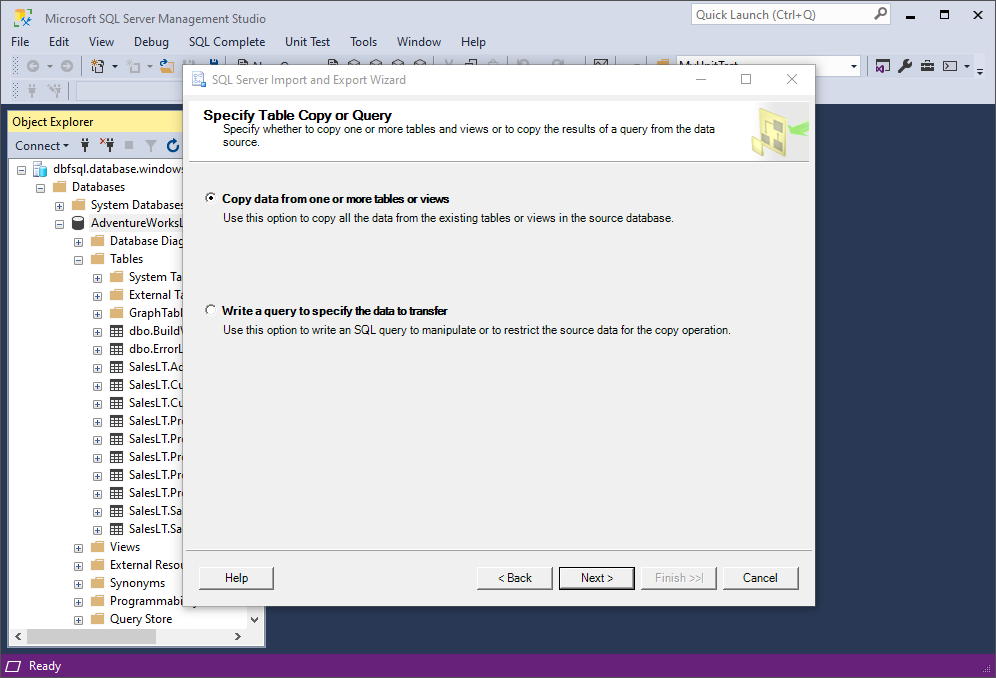
4. Select whether you want to export data based on a query—or simply leave it as it is to copy data from one or more tables or views. Click Next.
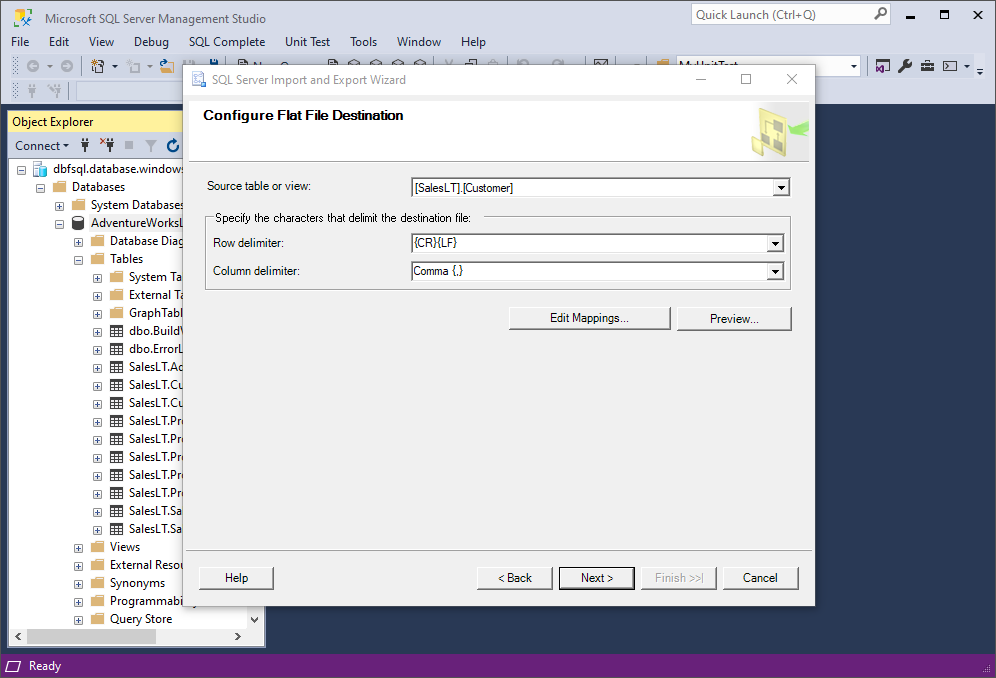
5. Here, specify the source table/view and delimiters and click Next.
6. Next comes the Save and Run Package page, where you indicate whether to save the SSIS package or run it immediately. You can leave the Run immediately option as it is and click Next.
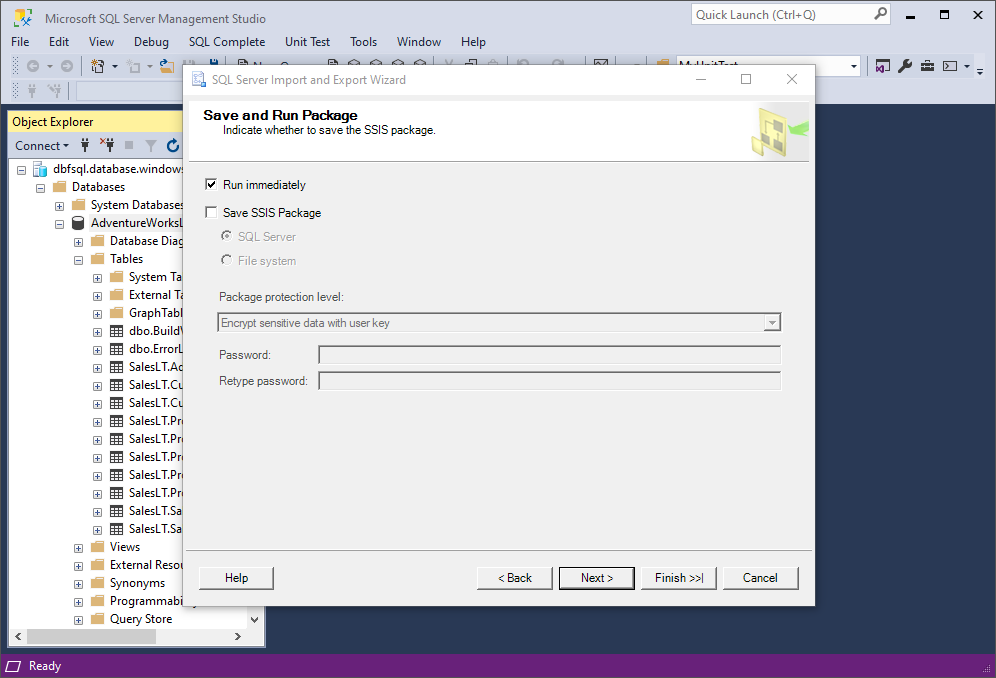
7. Finally, review the package details. Once you make sure everything is correct, click Finish.
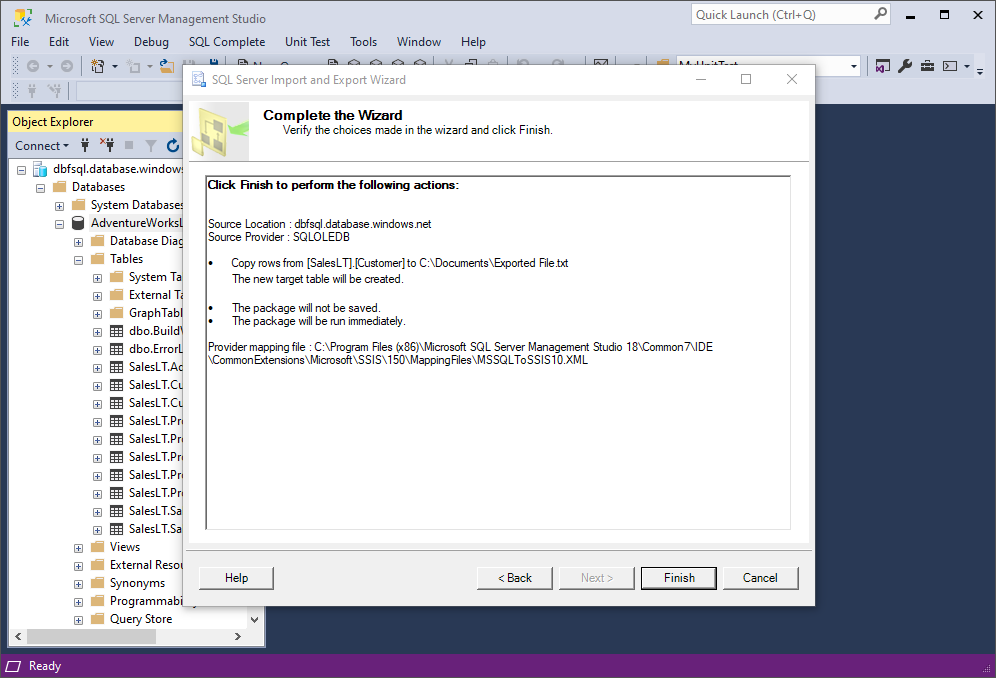
8. Wait until the execution is completed and click Close.
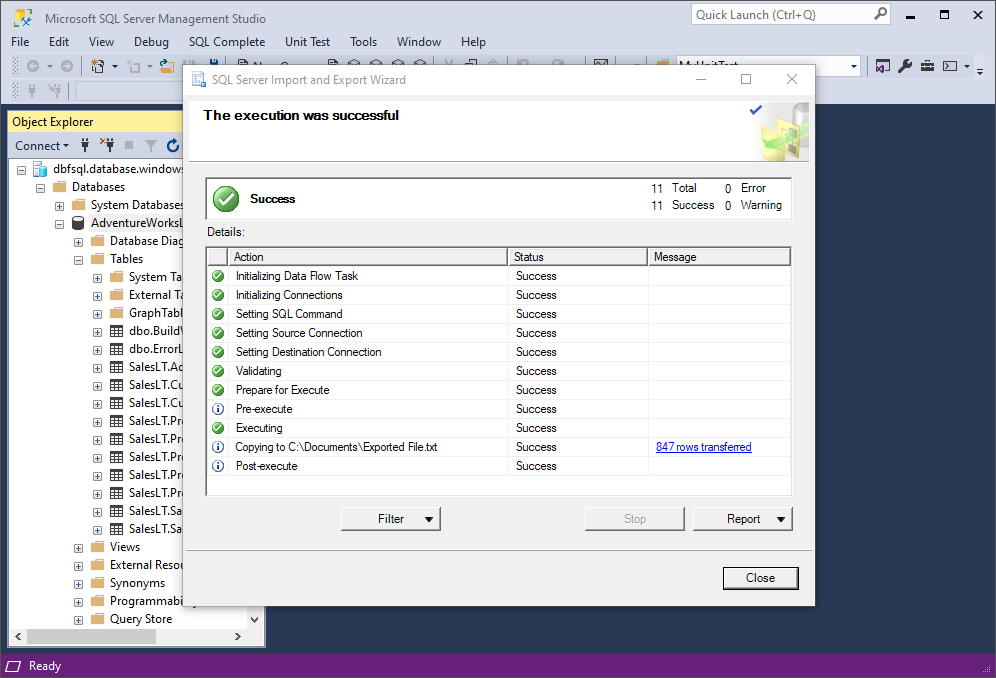
That’s it! Now you can go to your exported file and check its contents.
Well, that was a long ride, wasn’t it? Now let us suggest an alternative that’s far more convenient and far more flexible, with quite a few available data formats and settings at your service.
Export via SSMS + dbForge Data Pump
We said we’d save the best for last—and we’ll keep our word. Now what if we take the same SQL Server Management Studio, yet enhance it with dbForge Data Pump for SQL Server, an add-in focused on filling SQL databases with external source data and migrating data between systems? We’ll get ourselves data export to 14 most popular data formats with the richest customization options you can possibly find.
The 14 formats in question are as follows:
- HTML
- TXT
- XLS
- XLSX
- MDB
- RTF
- JSON
- XML
- CSV
- ODBC
- DBF
- SQL
- Google Sheets
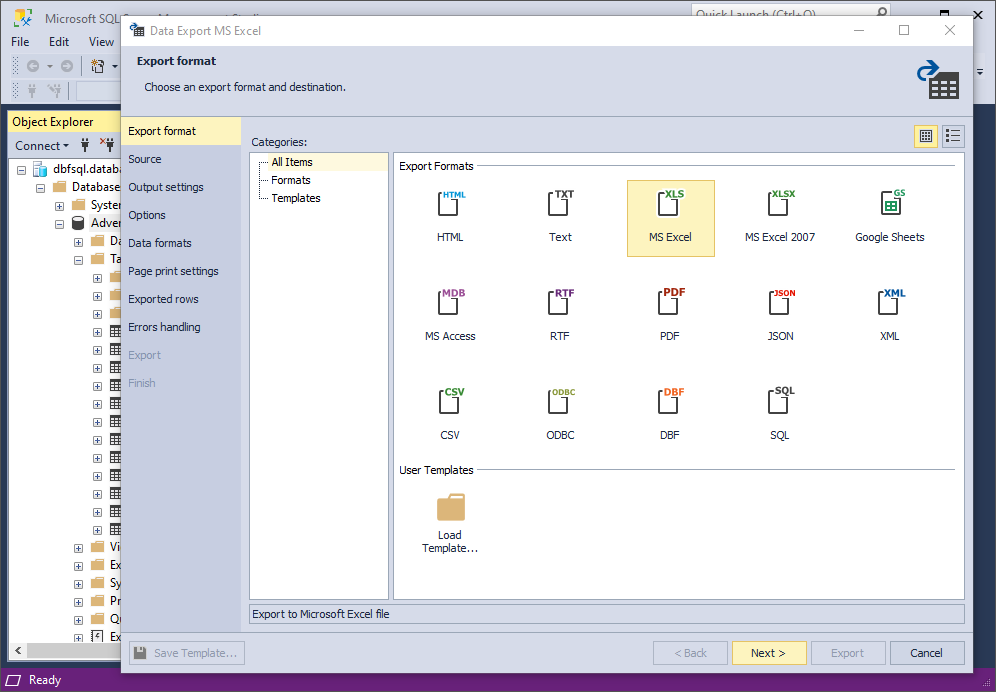
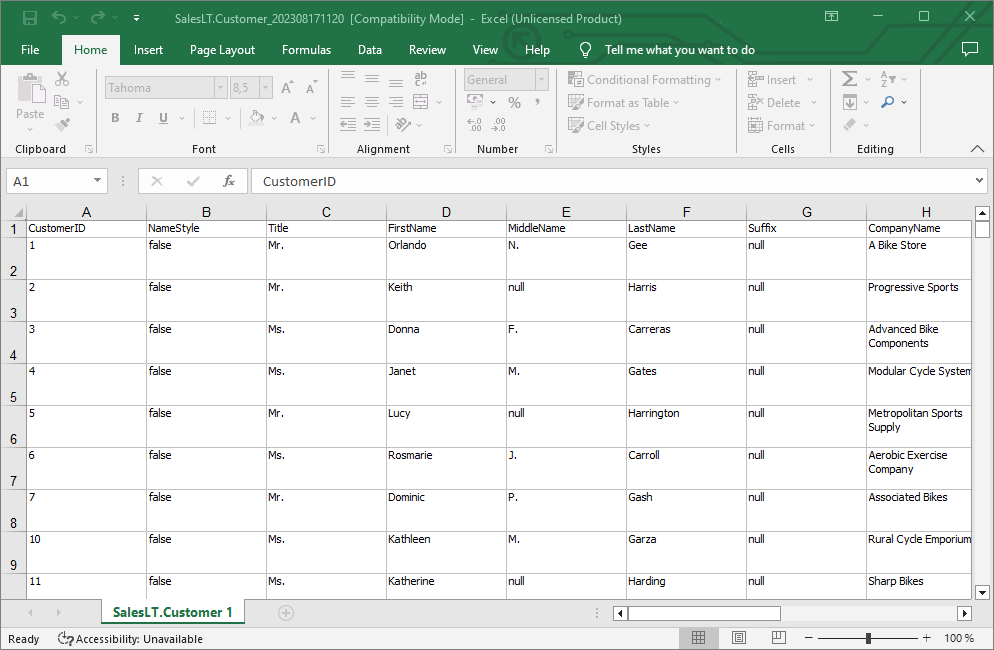
Let’s take the XLS format to illustrate export with Data Pump.
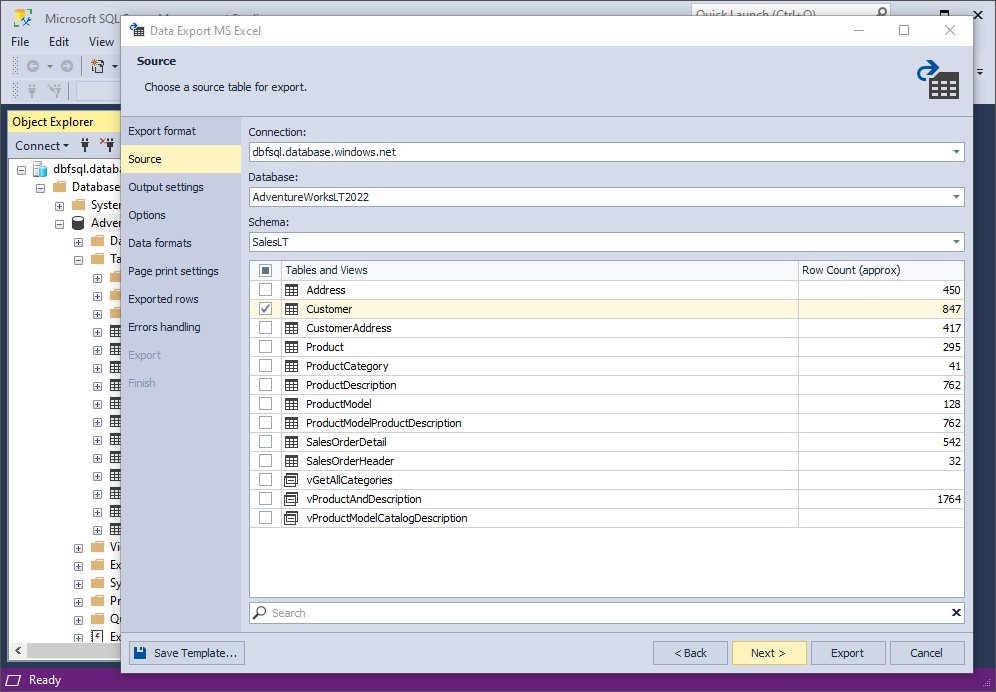
1. Open SSMS. In Object Explorer, right-click a database, point to Data Pump, and then click Export Data to open the wizard. You will be greeted by the Export format page. Select the MS Excel format and click Next.
2. On the Source page, select a server connection, a database and its schema, table(s) and/or view(s) that you want to export, and click Next.
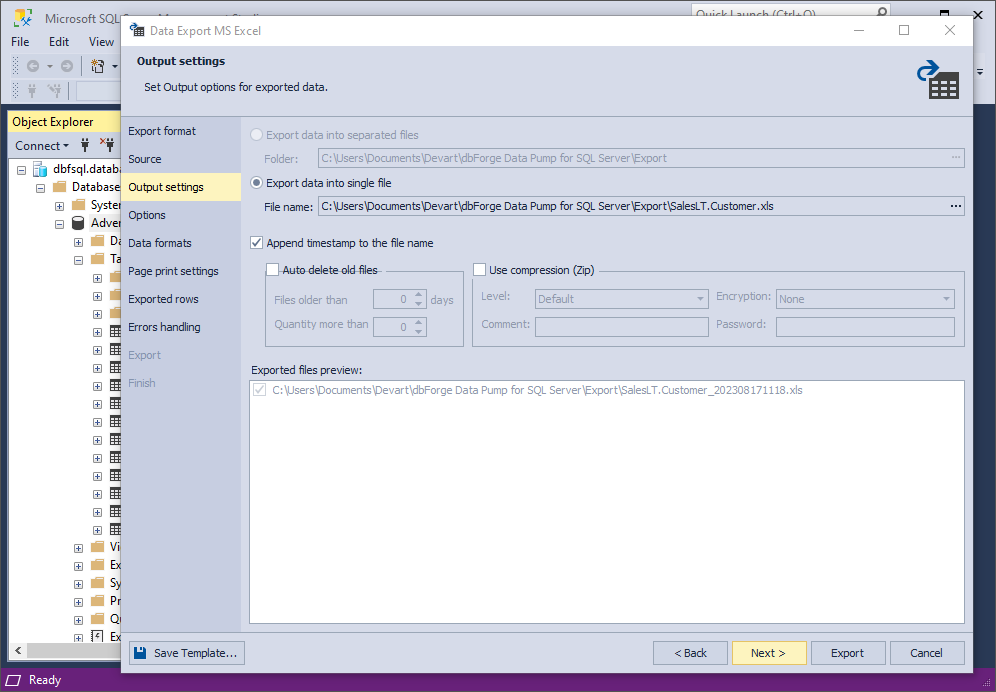
3. On the Output settings page, you have two main options:
- Export data into separate files, where you specify the path to the folder that they will be saved to
- Export data into a single file, where you specify the path and the file name
You will find the list of files to be exported in the Exported files preview box. Additionally, you can enable a few options: append timestamp to the file name, auto-delete old files, and create an archive file with your exported files.
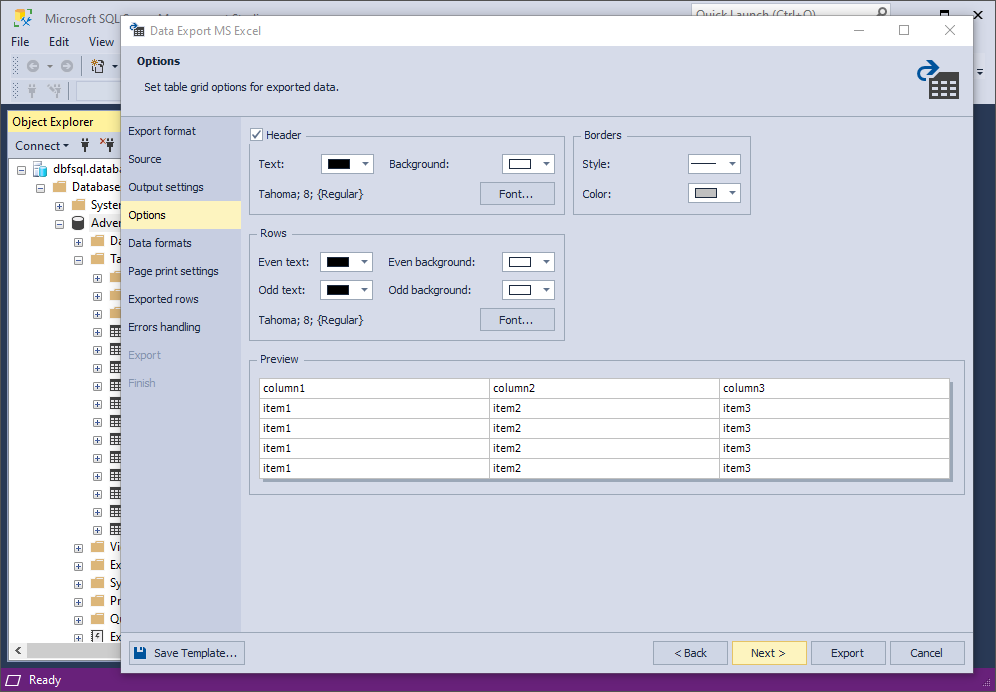
4. On the Options page, you can set the table grid options for exported data: text and background colors and fonts in Header and Rows, as well as width and color of Borders. The results of your configuration are shown in Preview.
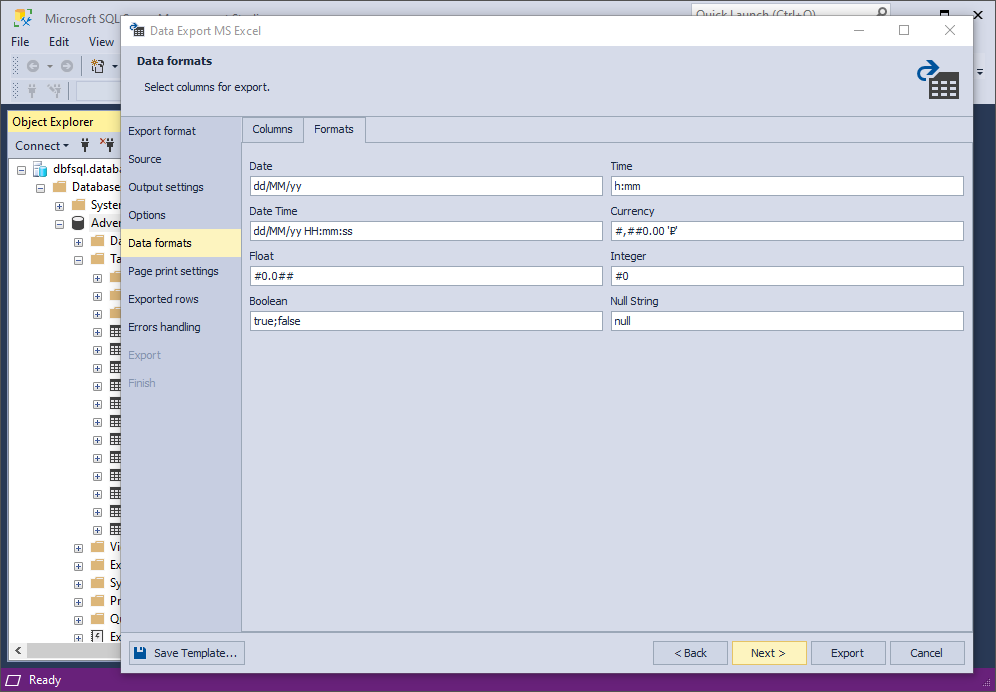
5. On the Data formats page, you have two auxiliary tabs. The first one is Columns, where you can select columns for export and check their aliases and data types.
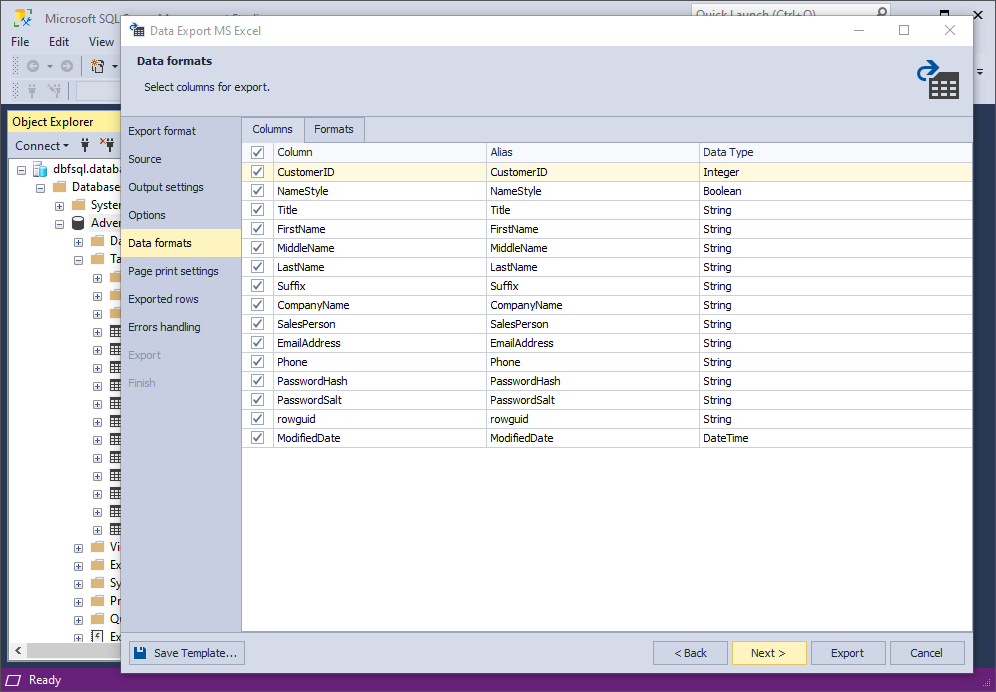
The second one is Formats, where you can change the default settings for various formats, as well as select the required binary encoding from the drop-down list.
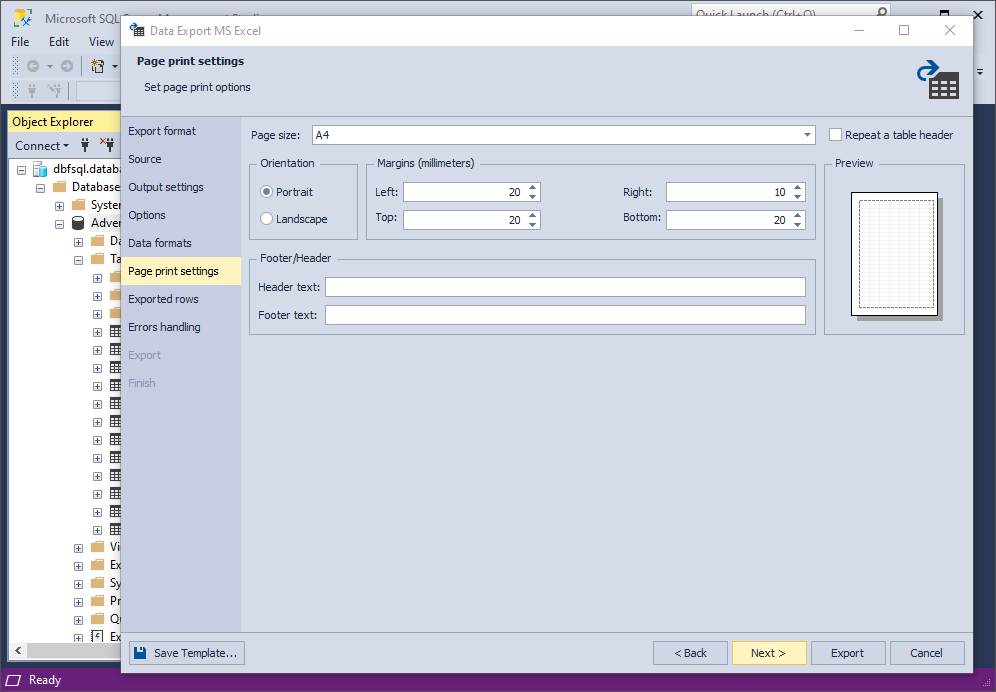
6. On the Page print settings page, you can configure the page size, orientation, margins, header and footer text (including the option to repeat the table header). You also get a preview of your configurations.
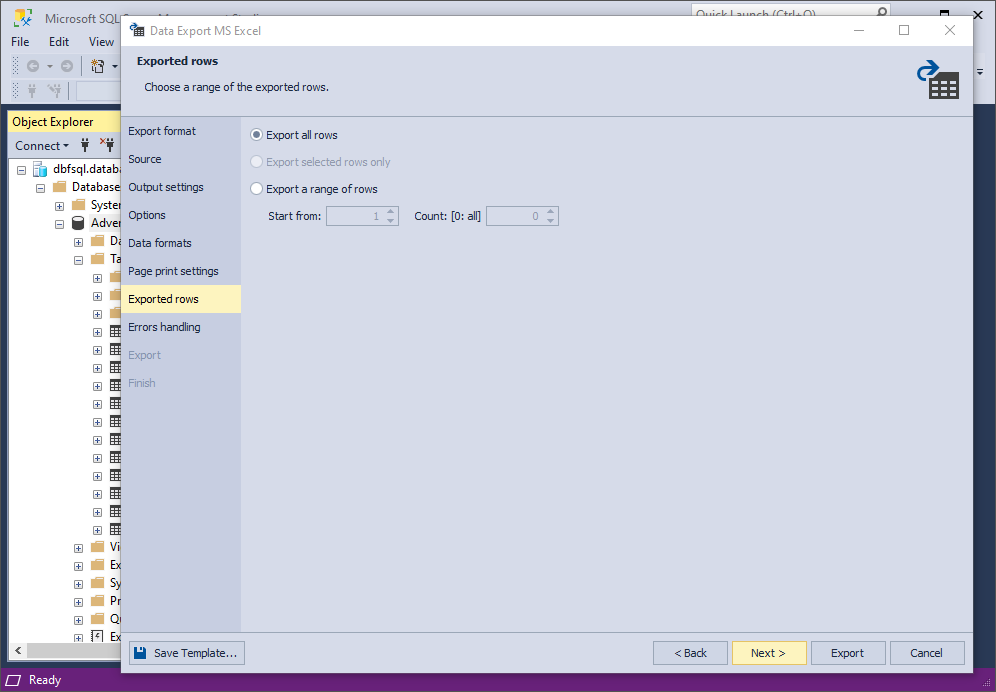
7. On the Exported rows page, you can select to export all rows, export the rows selected on the Data formats page, or export a specified range of rows.
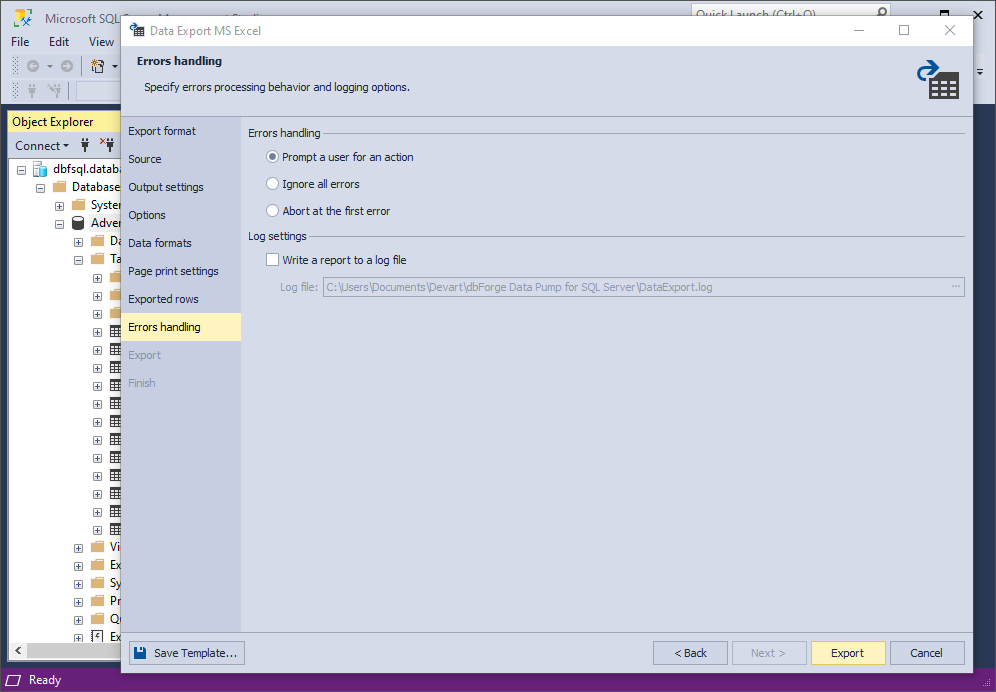
8. On the Errors handling page, you can specify the error processing behavior using one of the three available options, as well as opt to write reports to a log file with a specified path.
9. Lastly, click Export. When your data export is completed, you have several options: you can open the exported file or folder, perform another export operation, view the log file, or simply click Finish.
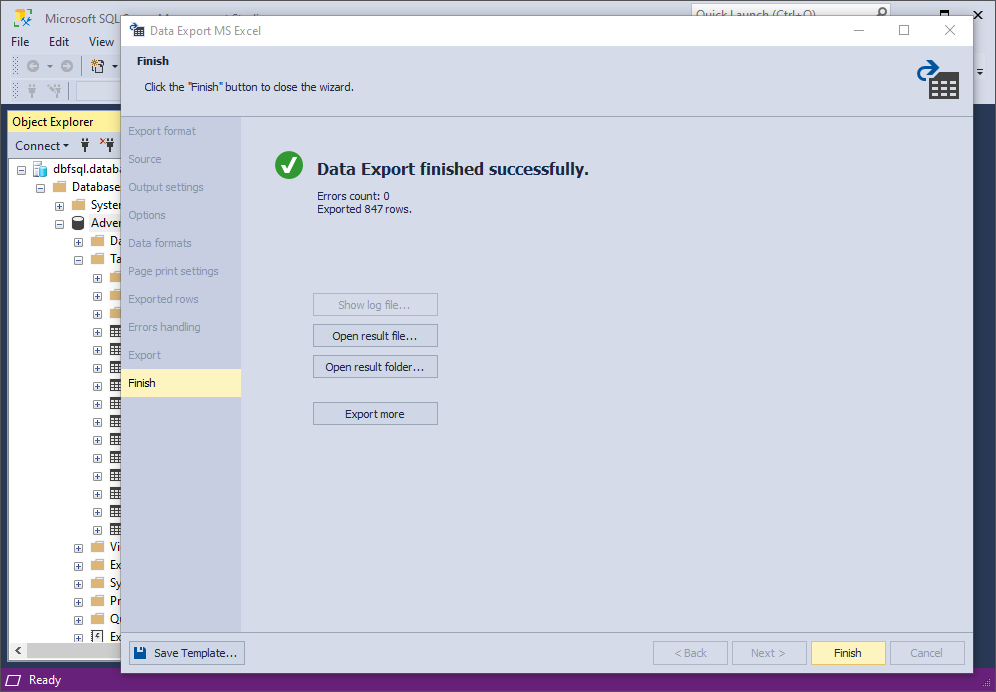
Let’s take a look at the exported document.
That’s it! Note that you can click Export at any given moment—you don’t necessarily have to go through all the pages. They only serve to make your export settings more flexible. You should also note that the set of pages and settings in the wizard may differ depending on the selected format.
Finally, let’s say that you can effortlessly automate recurring export operations from the command line.
Methods comparison
| Method | Key Features | Ease of Use | Limitations |
|---|---|---|---|
| Export via Azure Portal | – Exports schema & data to a BACPAC file- Stores in Azure Blob or local storage- Imports into Azure SQL, Managed Instance, or SQL Server | Easy (UI-based) | – Max file size: 200GB for Azure Blob- Slow for large databases- Not suitable for backup & recovery |
| Bulk Copy Program (BCP) | – Command-line utility for bulk data export- Fast for large datasets- Supports various file formats | Moderate (CLI-based) | – Requires command-line knowledge- Schema not included- Manual authentication required |
| SQL Server Management Studio (SSMS) | – UI-based export tool- Supports multiple formats (CSV, Excel, etc.)- Allows selective export of tables & views | Moderate (UI-based) | – Limited format options- Requires SSMS installation |
| SSMS + dbForge Data Pump | – Exports to 14 formats (CSV, JSON, Excel, etc.)- Advanced customization options- Automatable via command line | Easy (UI-based) | – Requires dbForge Data Pump add-in- Some advanced features require a paid license |
Download dbForge Data Pump for a free 30-day trial today!
How about giving the last one a go yourself? That will be rather easy. Just download Data Pump for a free 30-day trial and install it in a matter of minutes.
Note that Data Pump comes as part of dbForge SQL Tools, an extensive bundle of 15 standalone apps and add-ins for SSMS and Visual Studio. And since data export comprises, like, about 1% of its functionality, let us give you a list of key database-related tasks that it helps you cover:
- Context-aware SQL code completion, formatting, and refactoring
- Debugging of T-SQL scripts, stored procedures, triggers, and functions
- Visual query building on diagrams that eliminates the need for coding
- Query performance optimization
- Version control of database schemas and static table data
- Comparison and synchronization of databases
- Simplified data analysis and reporting
- Easy data migration
- Generation of database documentation
- Generation of column-intelligent, compliant, and realistic test data
- Creation and management of database unit tests
- Real-time server and database performance monitoring
- Index defragmentation
- Automation of recurring operations from the command line
- Integration of all tools into a single DevOps cycle
Well, that was long. Yet, there’s even more going on, but that would make the list even longer. That said, you may want to take a closer look at other tools included in the bundle—perhaps you will find something you’ve been looking for.
FAQ
How to export database from Azure SQL Server?
There are several methods you can use to export database from Azure SQL Server: you can use Azure Portal (BACPAC File) for database migration and archiving, choose Bulk Copy Program (BCP) to quickly export table data via the command line, or perform export in SSMS if you want to get flat files. Depending on your project’s needs, pick any of these methods.
How do I export an entire SQL database?
To export a full SQL database, use the export method featuring the BACPAC File, which includes schema and data. This method is considered best for migration. To perform this export, go to the Azure Portal, select your database, click “Export,” and specify the BACPAC file name, storage account, and credentials. After that, click “Ok” to confirm you are all set, and the export will start.
Alternatively, you can use dbForge Data Pump for SQL Server to export data. To do it via this tool, open SSMS, right-click the database, and select “Data Pump” > “Export Data.” Choose a format, configure export settings, and run the export.
Also, you can use the dbForge Compare Bundle for SQL Server, which provides tools to compare both schema and data and extensive customization options (such as custom comparison configurations, data sources selection to compare, and automation). As you perform export, using these utilities in SSMS will let you compare whole databases, backups, and script folders to ensure you haven’t missed anything.
How to export Azure SQL database data to CSV?
You can export Azure SQL data to CSV using SSMS and Data Pump, especially when configuring delimiter, encoding, and structure. To handle CSV export in SSMS, go to “Data Pump” > “Export Data.” Here, select CSV format, set up the configurations for date, time, and currency formats, and define what you should do with null values and how you want the boolean values to appear. Next, run the export with advanced settings like automation and filtering.