
Git is one of the most popular version control systems, ideal for handling both small and large projects. A standout feature of Git is its branching model that allows the users to create multiple independent branches and manage various aspects of a project without jeopardizing the work of others.
A crucial ability to switch between these branches effortlessly is ensured by the git checkout command. In this article, we will delve into this command.

Contents
- Understanding Git checkout
- Detached HEAD in Git
- Overview of dbForge Source Control
- Linking SQL database to a Git repository with dbForge Source Control
- Switching between branches in dbForge Source Control
- Conclusion
Understanding Git Checkout
The most frequent scenario involves using git checkout to transition between branches, but it also applies to switching between separate commits. The command for switching to another branch is:
git checkout <branch>Shifting to a specific commit is accomplished with the git checkout <sha> command.
Let’s delve deeper into this command and explore its various use cases.
Switching to a different existing branch
When your work repository contains several existing branches, you can seamlessly transition between them using the git checkout command.
For instance, begin by checking the available branches and their names:
git branch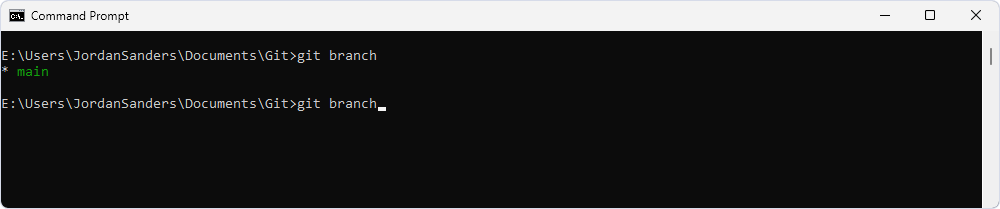
Now, you can switch to the main branch using the git checkout command:
git checkout mainAll the subsequent commits will be recorded within the context of the main branch, where you can create new branches to perform specific tasks.
Switching to a new branch
The git checkout command often collaborates with the git branch command, especially when you start working on a new branch. You first employ the git branch command to create a new branch, followed by git checkout to transition into this newly created branch.
However, instead of using two distinct commands, you can enhance the git checkout command by incorporating the -b flag:
git checkout -b <new-branch>With this option, Git will automatically execute the git branch command to create the new branch and immediately transfer you to it using git checkout:
git checkout -b hotfixThe above command generates a new branch called hotfix and transitions the user to it.
Switching to a remote branch
Teams commonly use remote repositories to store their sets of branches. When you need to transition to a branch from such a remote repository, the process is the same as when switching to a different local branch.
To begin, retrieve the contents of the remote branch using the command:
git fetch --allThen, execute the git checkout command to transition to the desired remote branch:
git checkout <remotebranch>Note: This method is supported by the current versions of Git. If you’re working with older Git versions, you’ll need to first establish a local branch based on the corresponding remote branch.
All checkout operations are recorded in the reference log (reflog), along with details about each commit. To inspect the reflog and gain insights into branch switching history, use the following command:
git reflogKeep in mind that the reference log maintains information for a limited period. You can check and modify this retention period within the Git settings.
Detached HEAD in Git
Now that we’ve examined the typical use cases of the git checkout command for working with branches, let’s delve into the issue of detached HEAD.
A detached HEAD occurs when the HEAD pointer is not attached to any specific branch in the repository – it points to a specific commit instead. Consequently, your current work becomes isolated from the rest of your project and its history. No branch will reference it, and Git won’t include it in the commit history.
In other words, you’ll be able to access the work committed from this detached state only if you know its exact hash value.
How to Resolve the Detached HEAD Issue
The detached HEAD state isn’t an error – it is a part of the standard process, like when you need to go back several commits to test a certain functionality. Intentionally entering the detached HEAD state becomes problematic if you begin committing changes without first creating a branch.
If you find yourself in a detached HEAD state, you can address it in two ways:
Create a new branch from the current commit
This is the ideal solution if you plan to continue work from a specific commit. Even if you begin committing immediately, you can always create a new branch. Commits maintain their hierarchical relationship — each commit connects to the previous one, allowing you to restore the correct sequence.
Use the standard command:
git checkout -b <branch_name>Thus, make sure to create the new branch before switching to another commit/branch.
Return to the previous (or another) branch in Git
If you entered the detached HEAD state merely to view some specific commit, you might want to return to the previous branch. The following commands can accomplish this:
git checkout -Git will switch you to the branch that you were on before the current one, extracting you from the detached HEAD state.
Alternatively, specify the desired branch with:
git checkout <branch_name>This command allows you to quickly switch from the detached HEAD state to any branch and continue working as usual.
In Git, branches can be created and managed using the command-line utility or other dedicated tools. However, if you’re working with SQL Server databases, it’s beneficial to employ the familiar environment of SQL Server Management Studio (SSMS). This is made possible by dbForge Source Control.
Overview of dbForge Source Control
dbForge Source Control is an add-in for SSMS that is available as a part of the dbForge SQL Tools package or as a feature of dbForge Studio for SQL Server. Source Control serves as a client for your chosen version control system that can be naturally integrated into your DevOps processes.
This solution allows you to do the following:
- Connect the databases to the version control system and manipulate both the database schemas and table data
- Perform the essential tasks visually: get the latest changes, commit and roll back changes, and handle conflicts
- Access the full history of revisions related to the entire database or particular objects
dbForge Source control supports both shared and dedicated work modes, and, besides Git (with GitHub, GitLab, and Bitbucket), is compatible with all major version control systems, such as Azure DevOps Server, Apache Subversion (SVN), Mercurial (Hg), Perforce (P4), TFVC, and SourceGear Vault.
Linking SQL Server database to a Git repository with dbForge Source Control
When you have the Git for Windows client on your machine and the local Git repository created or cloned from the remote repository, you can link your database to the repository using dbForge Source Control:
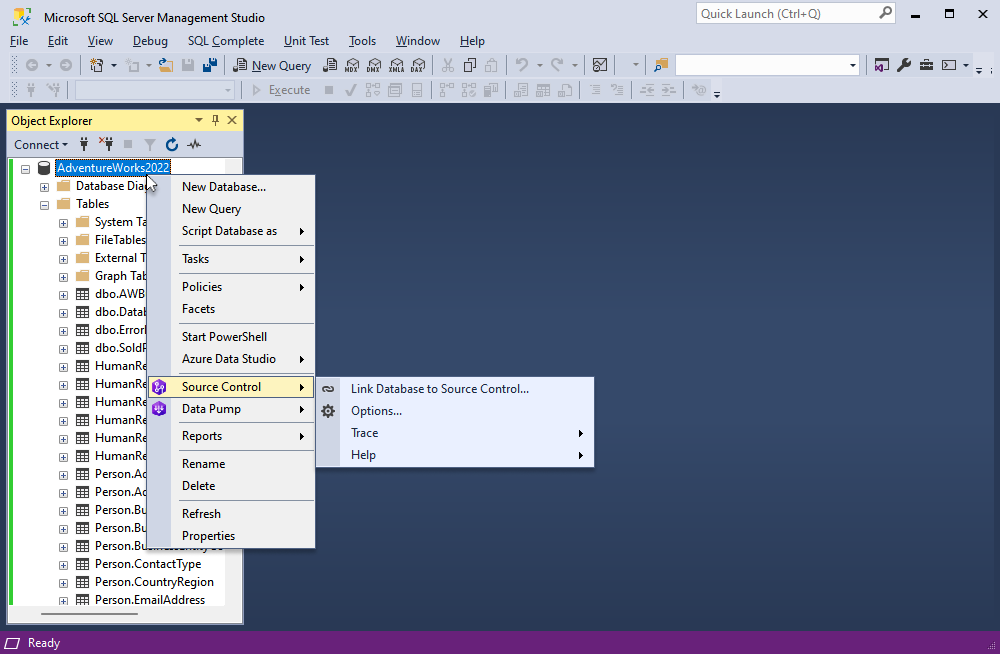
- In SSMS, select the necessary database in Object Explorer, and right-click on it.
- Choose Source Control > Link database to Source Control.
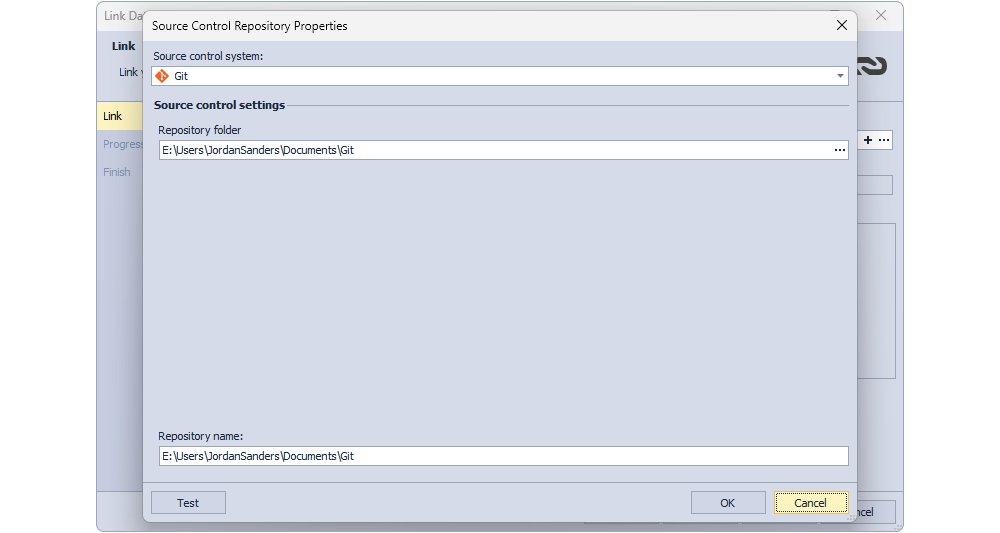
- In the Wizard, click the + icon next to the Source control repository.

- Select Git and specify the path to the local Git repository (you need to clone it). Click Test to make sure your settings are correct, and click OK to finish the configuration.
- Click Link. After that, the database in Object Explorer will be marked as linked.

Now you can work on your database, perform all the necessary tasks, and commit/revert changes directly from the SQL Server Management Studio.
Switching between branches in dbForge Source Control
After linking your database to the version control system, you can access it from within SSMS. By default, you work with the current branch of the repository.
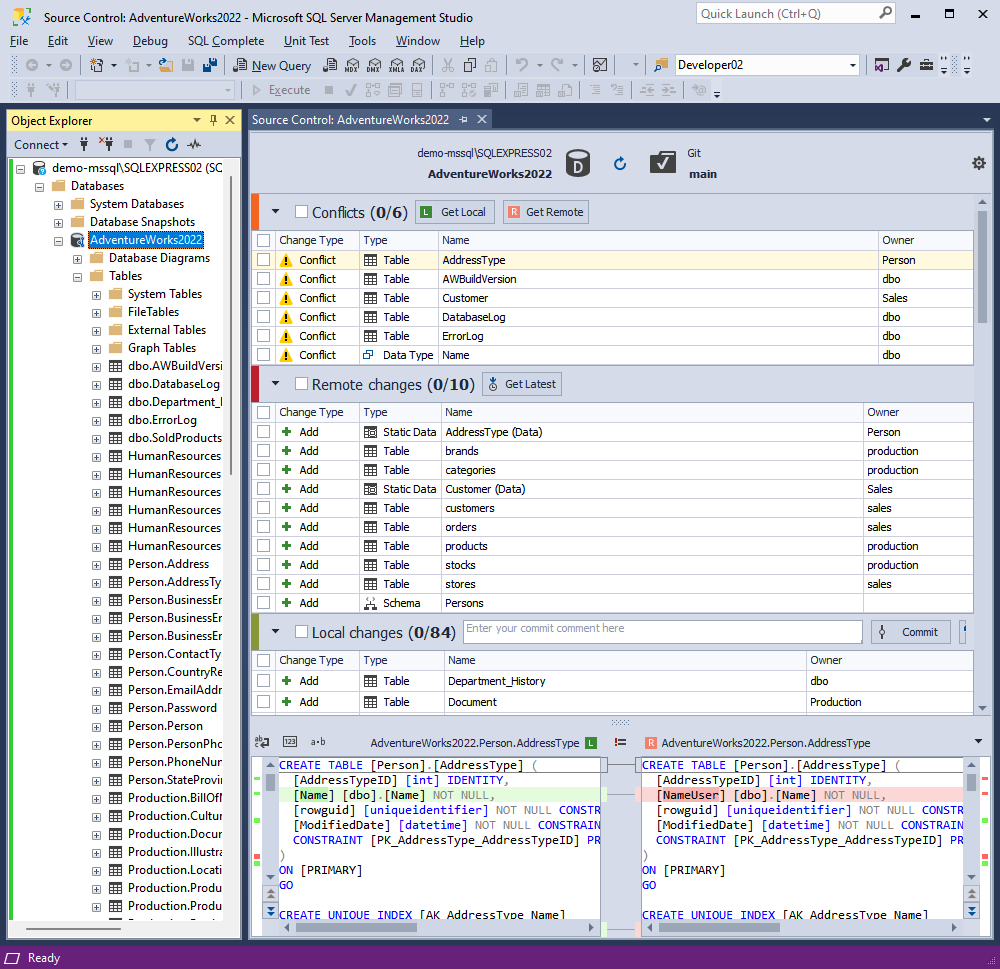
Note the available options:
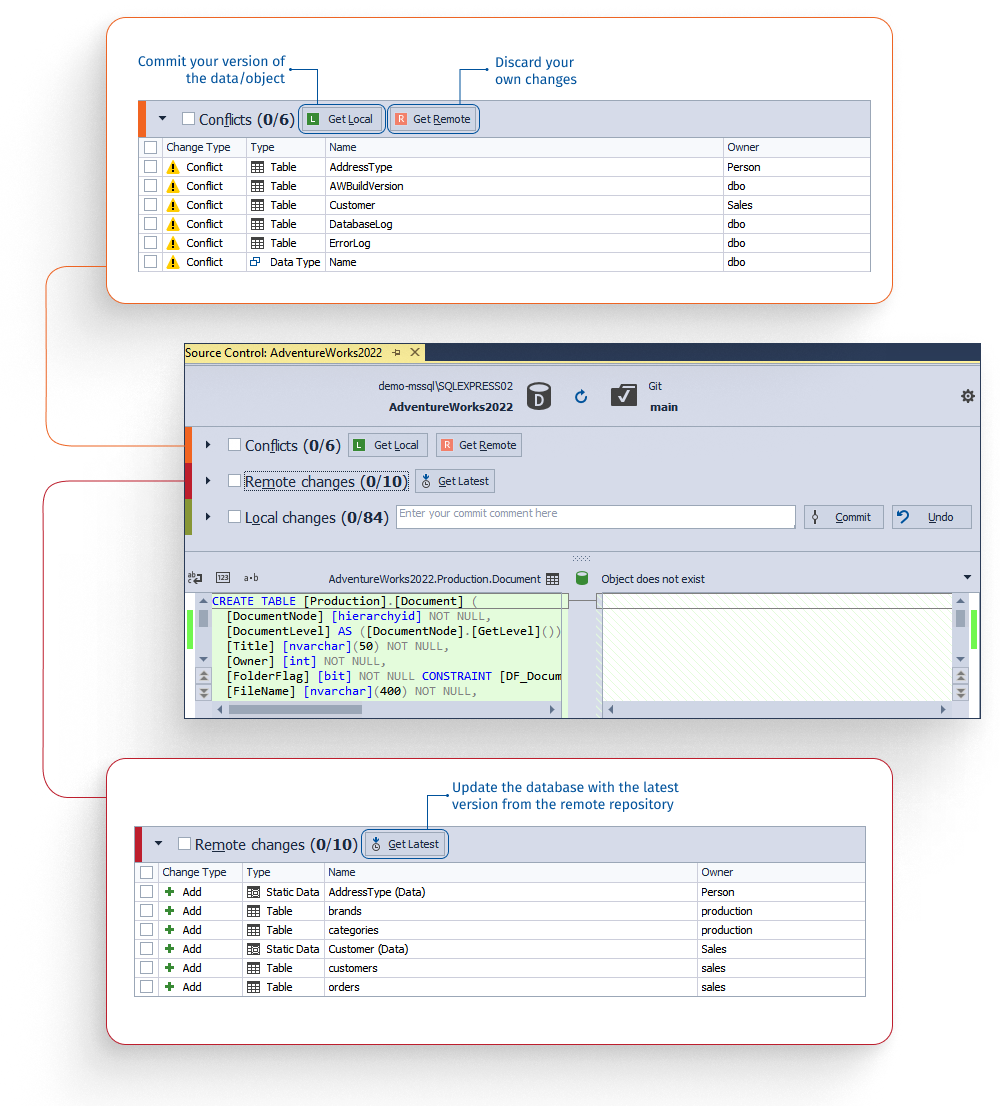
However, the git checkout command is not supported by the Source Control functionality directly. To switch between branches and create new branches, you need to use the command-line capacities or other tools created for Git.
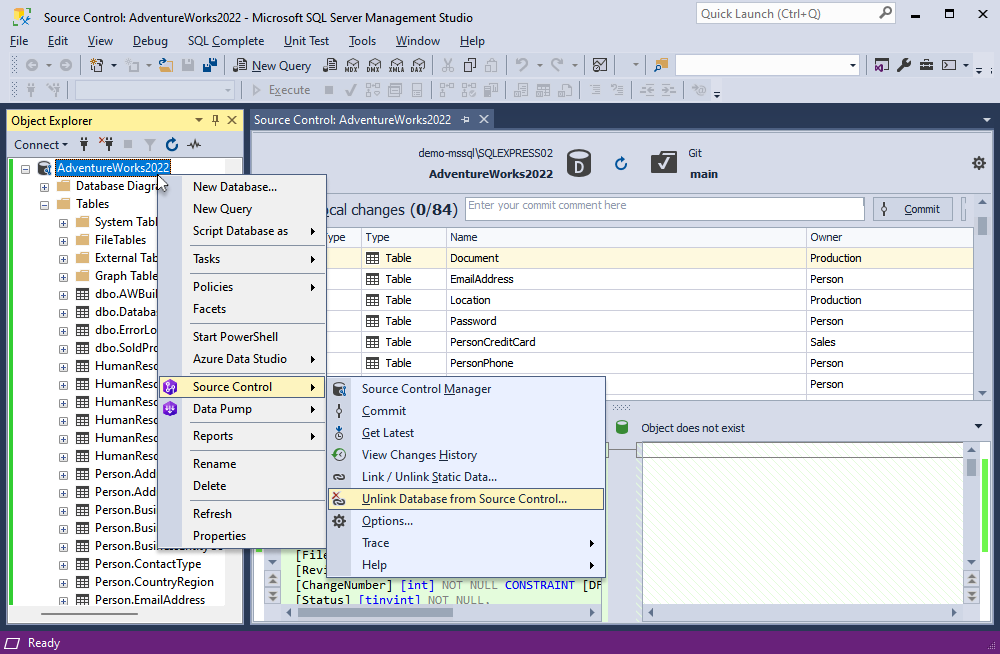
If you need to switch to another branch in Git, perform the git checkout command in a standard manner, as you prefer in your workflow. After that, to synchronize that switch with your SSMS interface, unlink and relink the database:
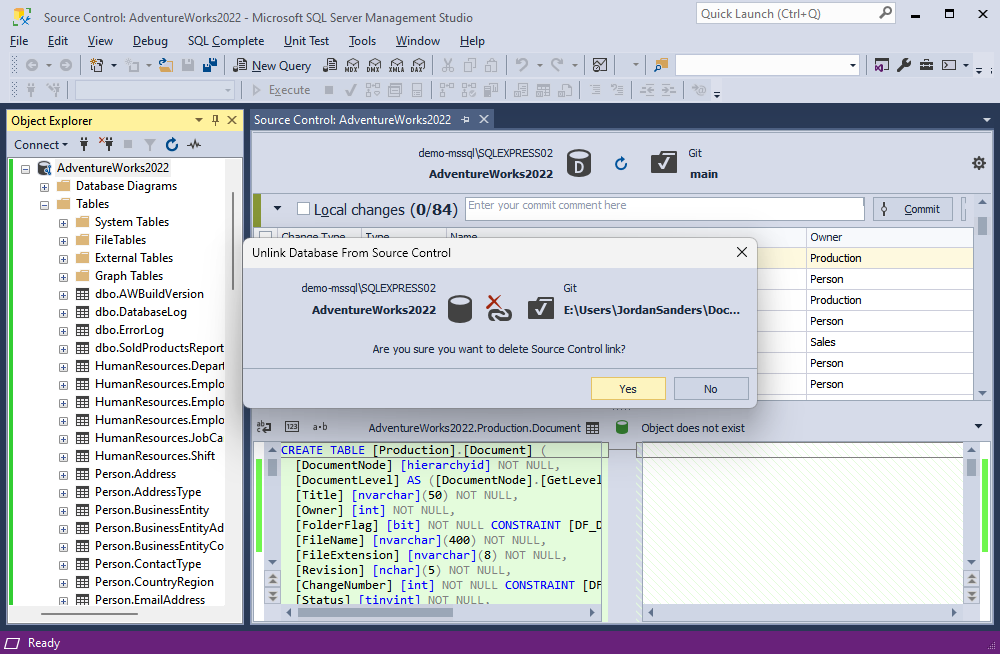
- Go to Object Explorer, right-click the necessary database, select Source Control, and proceed to Unlink Database from Source Control.
Then click Yes.
2. Right-click the database again and repeat the same steps to get to the Source Control menu. Choose Link database to Source Control as before, and relink the database.
Now you can define the location of your new branch and work on it effectively from within the SSMS interface.
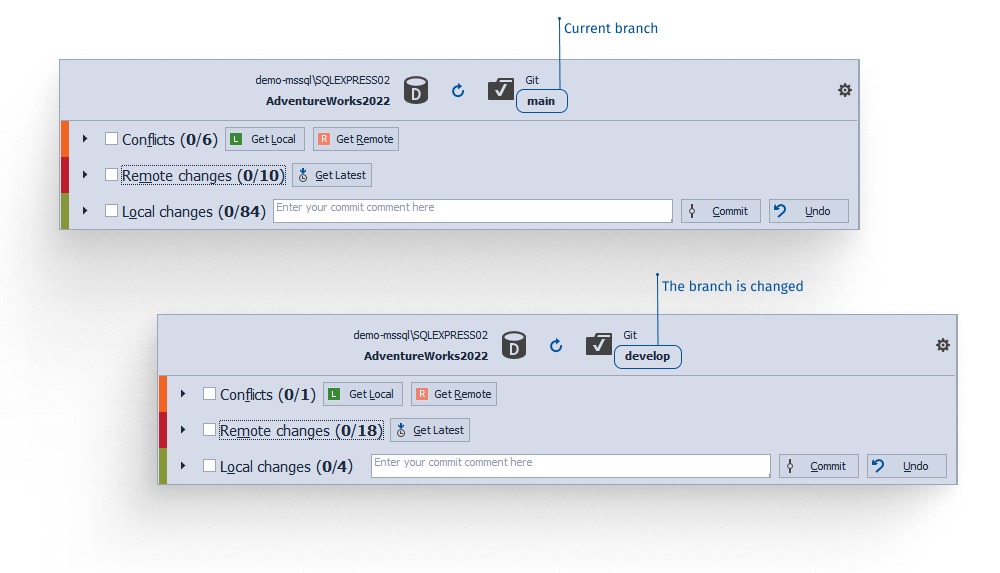
As you can see, the current branch has changed.
Conclusion
Thanks to Git’s support for branching, developers can work more safely and conveniently, focusing on tasks without the danger of impacting work in different branches. In this context, git checkout lets developers switch to the desired branch swiftly and omit the potentially hazardous detached HEAD state.
For developers favoring SQL Server Management Studio, dbForge Source Control provides direct access within the SSMS interface to options like committing changes to version control systems (Git and others), reverting changes, and resolving conflicts. This eliminates the need for external tools. Once you’ve switched to the desired branch, you can focus on your tasks and manage changes efficiently.
You can test the Source Control capabilities under a full workload, and decide whether to install only the Source Control or include other SQL Tools to transform your SSMS into a much more robust and adaptable system. A 30-day fully functional trial allows you to assess the SQL Tool’s powers across all areas, including DevOps. dbForge Source Control and its complementary tools can streamline and safeguard your development and deployment processes.