Properly configured and easily locatable SQL Server backups are critical to maintaining data integrity and business continuity. However, missing or mislabeled backup files can complicate recovery processes, potentially resulting in data loss or extended downtime during restoration efforts. In this article, we’ll review why the backup process may fail, provide options for locating missing backups, and suggest several ways to address backup history challenges proactively.
Contents
- Common issues with SQL Server backups
- Identifying and locating missing backups
- Best practices for SQL Server backups
- Conclusion
Common issues with SQL Server backups
Data recovery and business continuity can be at risk due to data loss or corruption caused by issues that may arise during the backup process. Common issues with database backup history include the following:
- Backups don’t end up in the expected location. This often happens due to incorrect configurations or permissions. For example, a backup script or job may specify an incorrect or outdated directory path or the DBA may have customized the default backup directory location and forgotten to update scripts or configurations. Also, the same issue may arise if the SQL Server service account has insufficient permissions to write to the desired folder.
- Files have incorrect names or labels. This issue can result from incorrect backup script configuration (for example, improperly formatted dynamic variables in scripts may cause files to be named differently), inconsistent naming conventions, backup software conflicts if third-party backup tools are used (especially if default or template names are left unchanged), or manual intervention (the person running the backup may use different naming schemes).
- Other processes or security applications interfere. For example, real-time scanning by antivirus software can lock files temporarily or block SQL Server from writing to specific directories. Also, multiple simultaneously running backup processes can cause interference or lead to partial backups. Processes such as defragmentation or disk cleanup may temporarily interfere with file system performance, leading to slower or failed backups. In addition, heavy disk or CPU usage by other applications can slow down the backup process or lead to timeouts, especially in environments with limited system resources.
- Insufficient Disk Space. One of the most common issues is running out of disk space where backups are stored, which results in the SQL Server failing to create backups there.
- Backup File Corruption. Backup files can become corrupted for various reasons, including hardware failures, power outages, or improper shutdowns.
- Backup Device Errors. If backups are being written to the backup devices, hardware malfunctions can lead to backup failures.
Regularly reviewing the backup history can help you catch issues like failed backups. In the next section, we’ll explore how to check SQL Server backup history.
To learn more about the basic notions of SQL Server backup and get a detailed overview of the main SQL Server backup types, refer to another post: SQL Server Backup Types and Key Concepts.
Identifying and locating missing backups
SQL Server keeps detailed information about each backup operation performed on a database and the physical media (devices) where the backup data is stored. This information is kept in two tables—backupset and backupmediafamily.
You can get a full list of backups and their storage media from the mentioned tables by executing the below SELECT query. This method may return vast amounts of data, so it can be challenging to process the retrieved information. If you wish to explore information retrieved this way, you can find the description of each column in the official Microsoft SQL Server article: backupset (Transact-SQL).
-- Retrieve a full list of backups and their storage devices or files
SELECT *
FROM msdb.dbo.backupset bs
LEFT JOIN msdb.dbo.backupmediafamily bf
    ON bs.[media_set_id] = bf.[media_set_id]
To simplify the database history analysis, let’s refine the results to get a clear view of the backup history. We’ll be using dbForge Studio for SQL Server.
Get specific backup details in dbForge Studio for SQL Server
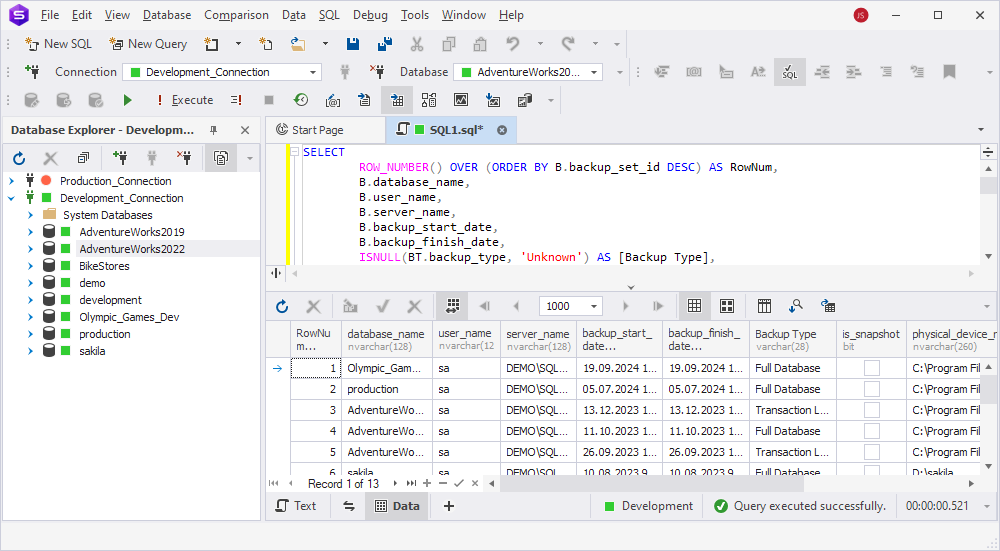
First, execute the following query to get a table listing all backups with an indication of the backup type, size, the device where the backup is stored, and when it occurred:
-- Retrieve a full list of backups with the indication of the backup type and device type
SELECT
        ROW_NUMBER() OVER (ORDER BY B.backup_set_id DESC) AS RowNum,
        B.database_name,
        B.user_name,
        B.server_name,
        B.backup_start_date,
        B.backup_finish_date,
        ISNULL(BT.backup_type, 'Unknown') AS [Backup Type],
        B.is_snapshot,
        BMF.physical_device_name,
        ISNULL(DT.device_type, 'Other Device') AS [Device Type],
        CONVERT(DECIMAL(10, 2), backup_size / 1024. / 1024.) AS BackupSizeMB
    FROM msdb.dbo.backupmediafamily AS BMF
    INNER JOIN msdb.dbo.backupset AS B
    ON BMF.media_set_id = B.media_set_id
    LEFT JOIN
    (
        VALUES
            ('D', 'Full Database'),
            ('I', 'Differential database backup'),
            ('L', 'Transaction Log'),
            ('F', 'File or filegroup'),
            ('G', 'Differential file'),
            ('P', 'Partial'),
            ('Q', 'Differential partial')
    ) AS BT(backup_type_code, backup_type)
    ON B.type = BT.backup_type_code
    LEFT JOIN
    (
        VALUES
            (2, 'Disk'),
            (5, 'Tape'),
            (7, 'Virtual Device'),
            (9, 'Azure Storage'),
          (105, 'A permanent backup device')
    ) AS DT(device_type_code, device_type)
    ON BMF.device_type = DT.device_type_code
dbForge Studio displays the requested data:
Then, with the code provided below, create a function (GetBackupHistory) which you’ll use to filter the backups by two parameters:
@LastDays—Filters the backups based on how many days in the past to include. If NULL, all backups are included.@DatabaseName—Filters the results by a specific database name. If NULL, backups for all databases are included.
-- Create a function to filter the backups by creation date and database name
CREATE FUNCTION dbo.GetBackupHistory
(
    @LastDays INT = NULL,
    @DatabaseName NVARCHAR(128) = NULL
)
RETURNS TABLE
AS
RETURN
(
    SELECT
        ROW_NUMBER() OVER (ORDER BY B.backup_set_id DESC) AS RowNum,
        B.database_name,
        B.user_name,
        B.server_name,
        B.backup_start_date,
        B.backup_finish_date,
        ISNULL(BT.backup_type, 'Unknown') AS [Backup Type],
        B.is_snapshot,
        BMF.physical_device_name,
        ISNULL(DT.device_type, 'Other Device') AS [Device Type],
        CONVERT(DECIMAL(10, 2), backup_size / 1024. / 1024.) AS BackupSizeMB
    FROM msdb.dbo.backupmediafamily AS BMF
    INNER JOIN msdb.dbo.backupset AS B
    ON BMF.media_set_id = B.media_set_id
    LEFT JOIN
    (
        VALUES
            ('D', 'Full Database'),
            ('I', 'Differential database backup'),
            ('L', 'Transaction Log'),
            ('F', 'File or filegroup'),
            ('G', 'Differential file'),
            ('P', 'Partial'),
            ('Q', 'Differential partial')
    ) AS BT(backup_type_code, backup_type)
    ON B.type = BT.backup_type_code
    LEFT JOIN
    (
        VALUES
            (2, 'Disk'),
            (5, 'Tape'),
            (7, 'Virtual Device'),
            (9, 'Azure Storage'),
          (105, 'A permanent backup device')
    ) AS DT(device_type_code, device_type)
    ON BMF.device_type = DT.device_type_code
    WHERE (@LastDays IS NULL OR CONVERT(datetime, B.backup_start_date, 102) >= GETDATE() - @LastDays)
    AND (@DatabaseName IS NULL OR B.database_name = @DatabaseName)
);
GO
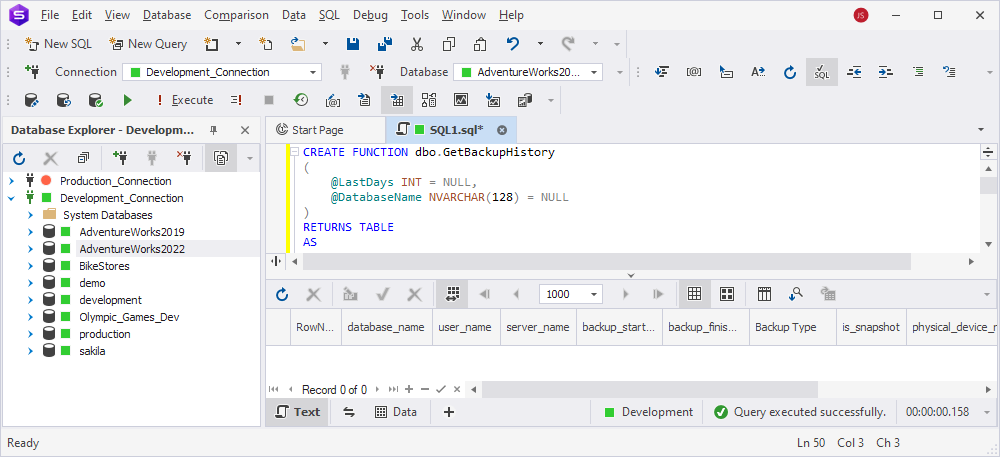
This query gets successfully executed in dbForge Studio:
Now, use the GetBackupHistory function in your queries. Here are a few examples:
-- Show all backups that are available on the server
SELECT * FROM dbo.GetBackupHistory(NULL,NULL);

-- Show only those backups that were created during the last 30 days
SELECT * FROM dbo.GetBackupHistory(30,NULL);

-- Show only backups created for a specific database (for example, the Olympic_Games_Dev database) during the last 30 days
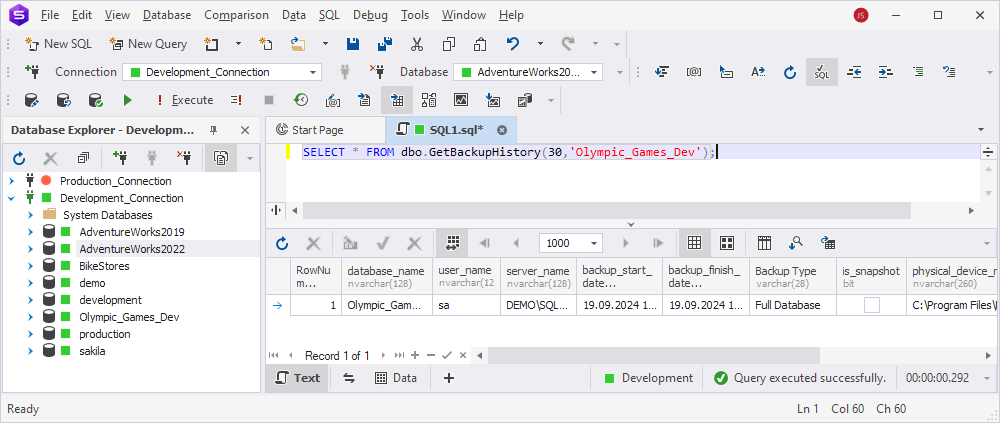
SELECT * FROM dbo.GetBackupHistory(30,'Olympic_Games_Dev');
We’ll try out the last of the above examples. The function does its job perfectly, and dbForge Studio displays data according to the specified parameters:
Alternative: View the backup history using SQL Server Management Objects
You can also check the entire SQL Server backup history with the help of SQL Server Management Objects (SMO).
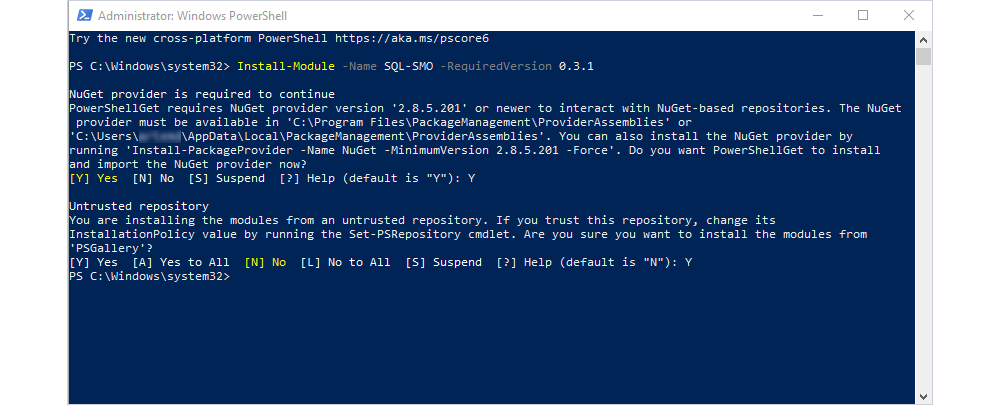
First, install SQL Server Management Objects (SMO) by running the following command in PowerShell:
Install-Module -Name SQL-SMO -RequiredVersion 0.3.1If the NuGet provider is required to continue or the Untrusted repository message appears, choose Yes to install the NuGet Provider or install the modules.
You now have the necessary libraries to interact with SQL Server through PowerShell scripts.
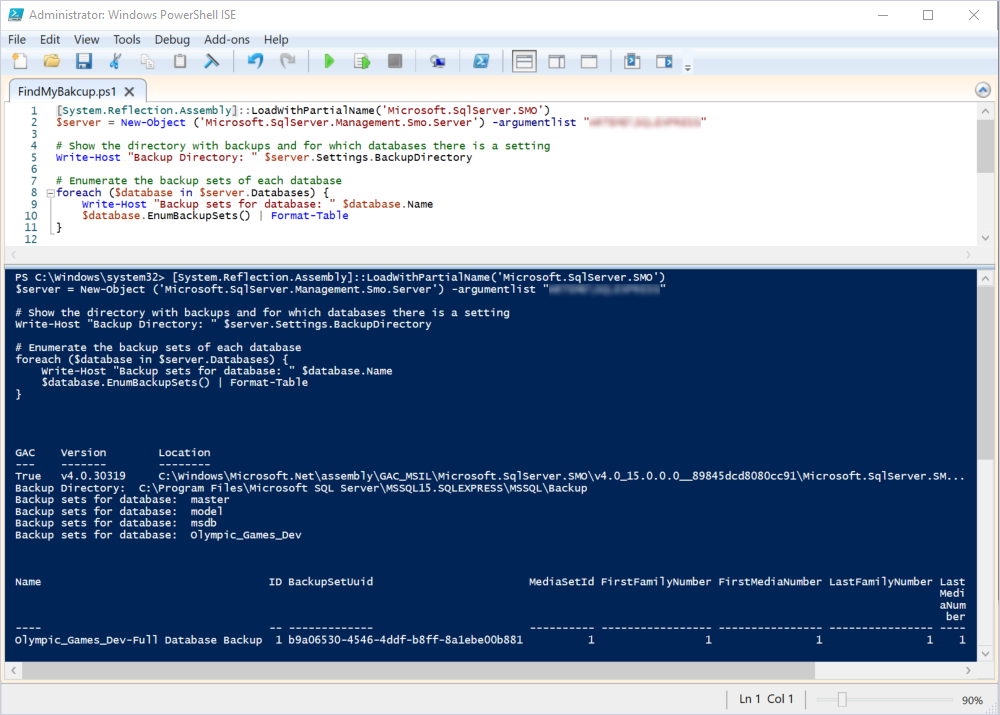
Next, create and run a script file (.ps1) in PowerShell ISE with the script below. Replace SERVER_NAME with the name of your local server.
# Load the SMO assembly and connect to the SQL Server instance
[System.Reflection.Assembly]::LoadWithPartialName('Microsoft.SqlServer.SMO')
$server = New-Object ('Microsoft.SqlServer.Management.Smo.Server') -argumentlist "SERVER_NAME"

# Show the directory with backups and for which databases there is a setting
Write-Host "Backup Directory: " $server.Settings.BackupDirectory

# Enumerate the backup sets of each database
foreach ($database in $server.Databases) {
    Write-Host "Backup sets for database: " $database.Name
    $database.EnumBackupSets() | Format-Table
}
The console displays the backup history for all databases on your SQL Server instance:
These are the possible ways to check SQL Server backup history.
If you’d like to brush up on creating and restoring backups, this article can help you: Best Way to Back Up an SQL Server Database.
Best practices for SQL Server backups
Here are some guidelines for maintaining an accurate SQL Server backup history:
- Use clear and consistent naming for backups. This ensures easy identification and differentiation between databases, environments, backup types, and backup dates. Also, this facilitates automation and recovery. For details on automating the backup process, refer to this post: How to Set Up Every Day Database Auto Backup in SQL Server.
- Set up alerts for failures. This ensures backups are performed correctly and stored in the right location. If an expected backup is missing from the history, you are alerted early and have time to resolve the issue before it affects recovery operations.
- Check backup job logs regularly. Doing so lets you know whether all scheduled backups were completed successfully and have no unexpected gaps due to failed or incomplete backups.
- Audit storage locations. Periodically verify that backups are being stored in the intended directory or external storage location (e.g., cloud, network share) and that there is sufficient disk space. And follow the 3-2-1 rule:
- Keep 3 copies of your data—the primary copy and two backups.
- Use 2 different storage media types to mitigate the risk of failure (e.g., hard drive and cloud storage).
- Store 1 copy offsite in a remote location (e.g., cloud storage or a different office) to safeguard against disasters like fires or floods.
- Ensure that third-party tools or other processes do not interfere. Verify that any third-party backup solutions are integrated correctly with SQL Server’s native backup process so that they don’t attempt to perform backups or manage logs simultaneously. Configure antivirus or security software to exclude the backup directory so that real-time scanning doesn’t lock or slow access to backup files. Schedule your backups in such a way that they do not compete for resources with other processes.
Conclusion
We’ve looked at methods to find missing backups, but depending on them during crucial recovery moments can be unreliable. It’s far better to avoid these problems by adhering to best practices and using reliable SQL server backup solutions. Using clear naming schemes, configuring failure alerts, routinely checking storage paths, and preventing conflicts with third-party tools are essential steps to keep backups reliable and easy to retrieve. By proactively resolving these common issues, you can reduce downtime and ensure that recovery processes are efficient and successful when needed. dbForge Studio for SQL Server can help you with almost any task related to databases in SQL Server.

