
The article presents a step-by-step guide to SQL INSERT INTO statement. You will learn the basic principles underlying this command and see how to implement this statement visually using dbForge Query Builder.
The Basics of the SQL INSERT INTO Statement
INSERT is one of the basic Structured Query Language (SQL) commands for Oracle and SQL Server databases. It is the first command that we execute after creating a new table. Then, you insert rows with the necessary values into it, and this query allows you to insert both single and multiple rows.
The syntax of the command is quite straightforward:
INSERT INTO table_name (column1, column2, column3, ...)
VALUES (value1, value2, value3, ...);
Let’s explain the above syntax:
- In table_name, we specify the table in which we want to insert columns and rows.
- The list of columns determines which of them are the destinations for the INSERT operation. In the query, we must separate them by commas and include the entire list of columns into parentheses.
- A particular value must be specified for every NOT NULL column. In the syntax, all values must be separated with commas, and the full list must be included in parentheses.
You should also consider the following factors:
- The number of columns must be the same as the number of values. Otherwise, an error will take place.
- The order of values you insert must be the same as the order of table columns.
- Not all columns require inserting values. Some of them can be left empty or have default values.
- The INSERT statement may not include the list of columns. In that case, the specified values will be inserted into all table columns. Here, the order of values is critical, as the INSERT command will match it to the order of columns from the CREATE TABLE statement.
Insert Multiple Rows Into a Table
What’s important to know is that you can insert multiple rows into a table (up to 1,000) using a single INSERT statement. To do this, you need to list the values for each row enclosed in parentheses and separate them with commas as follows:
INSERT INTO table_name (column1, column2, column3)
VALUES
(row1_value1, row1_value2, row1_value3),
(row2_value1, row2_value2, row2_value3),
(row3_value1, row3_value2, row3_value3);
SQL INSERT INTO SELECT Statement
Another useful option that is available within the SQL INSERT statement is the possibility to copy data from one table and insert it into another table. To do this, you can execute the INSERT INTO SELECT statement, but an important condition here is that the data types in source and target tables must match. If you want to copy the entire data and insert it into another table, use the following syntax:
INSERT INTO target_table
SELECT * FROM source_table
WHERE condition;
In case you need to copy data contained in specific columns, change the syntax as follows:
INSERT INTO target_table (column1, column2, column3, ...)
SELECT column1, column2, column3, ...
FROM source_table
WHERE condition;
The WHERE clause is optional, and you can use it to specify the condition and extract only those records that fulfill this condition.
Being one of the basic and most widely-used SQL commands, INSERT is a must-know statement for every specialist whose work is related to databases. And even though every specialist can write the necessary command manually, no one would argue that manual routine work consumes a lot of time.
The modern work approaches target eliminating routine as much as possible so as to free people and let them focus on more sophisticated and creative tasks. Plenty of software solutions allow this. We are going to consider writing and executing the SQL INSERT statement with the help of dbForge Query Builder for SQL Server.
How to create INSERT using dbForge Query Builder for SQL Server
The SQL Query Builder for SQL Server is a specialized solution developed by the Devart company. It comes as stand-alone software or as a part of the dbForge SQL Tools bunch. Also, it is one of the dbForge Studio for SQL Server features. Depending on your purposes, you may choose any of the above options.
The essence of this tool is to build any SQL queries without coding. A graphical interface enables you to do all the tasks quickly using the mouse only. It also has many other features designed to make the query building process faster, simpler, and more accurate. It is possible to create the most complex queries within a couple of seconds and edit them on the fly.
Such foundational SQL commands as DELETE, UPDATE, and INSERT are, of course, covered by the visual query building functionality. Let’s examine the way of building the INSERT command with this tool.
Working with a single table
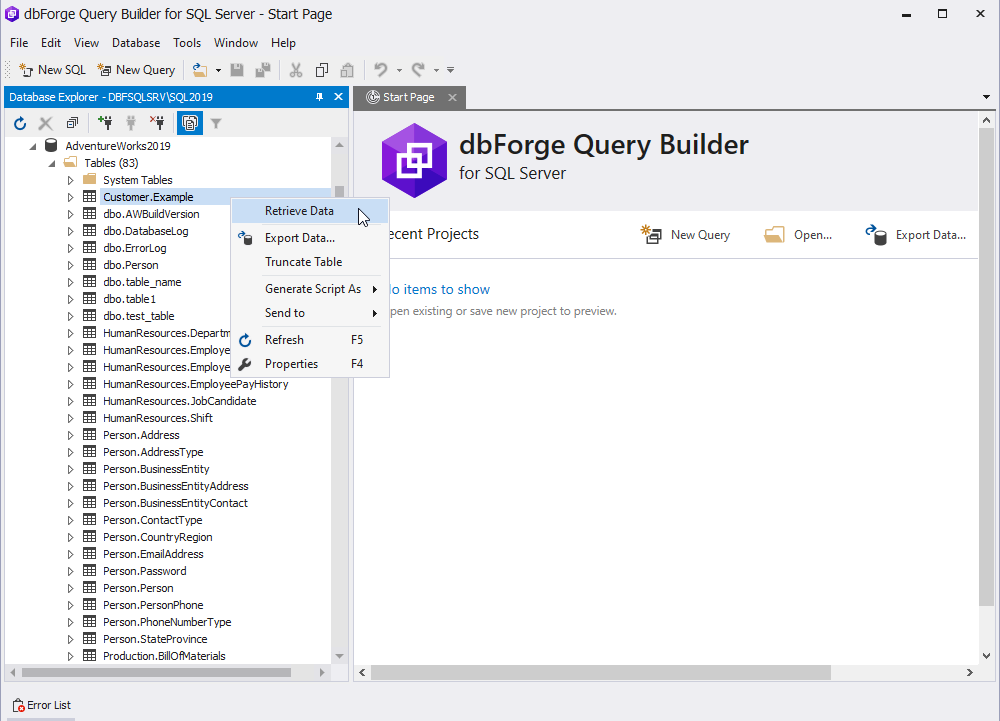
Launch Query Builder and navigate to the database you want to work with. In our example, we have created a separate empty table within the database and named it Example.Customer. We are going to show you how to insert the data into this table.
Right-click the table and click Retrieve Data in the context menu. There aren’t any records in the table, and this is precisely what we need in our case.
We can work with this table and insert records into it. The excellent thing is that we don’t need to type any code manually. The mouse clicks are sufficient for all the required operations. We don’t even need flawless SQL coding knowledge, doing all operations in a graphical interface and following simple hints.
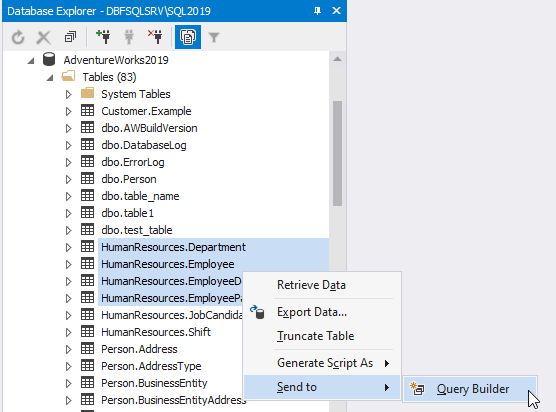
Return to the context menu by right-clicking the necessary table again. Select Send to, then Query Builder. Or drag-and-drop the table into the query diagram area.
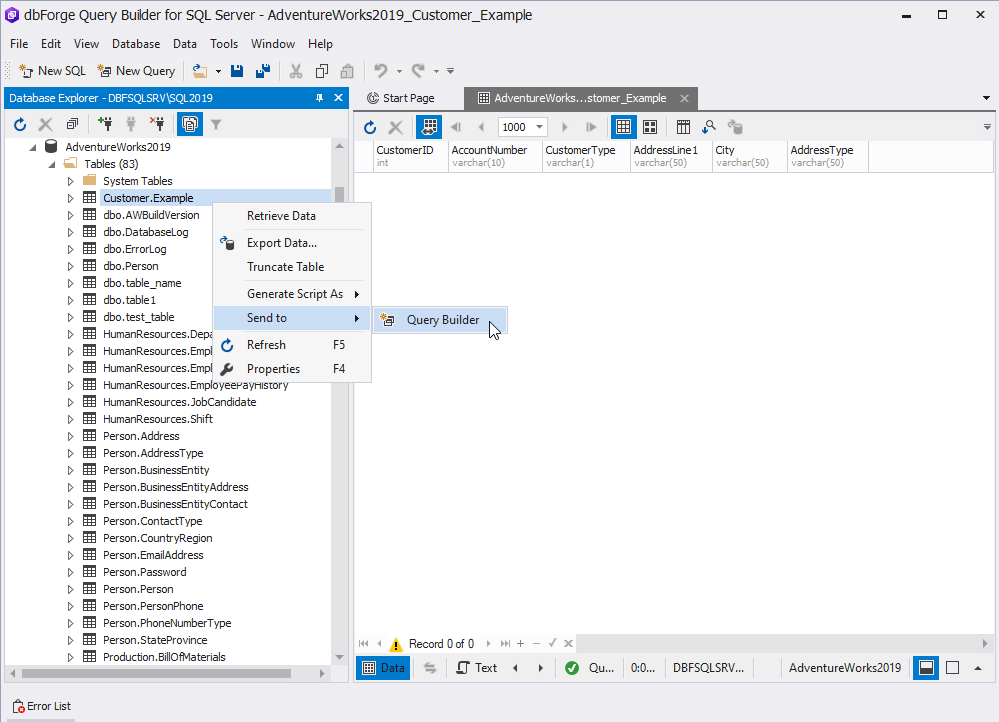
The diagram area is where we build our queries.
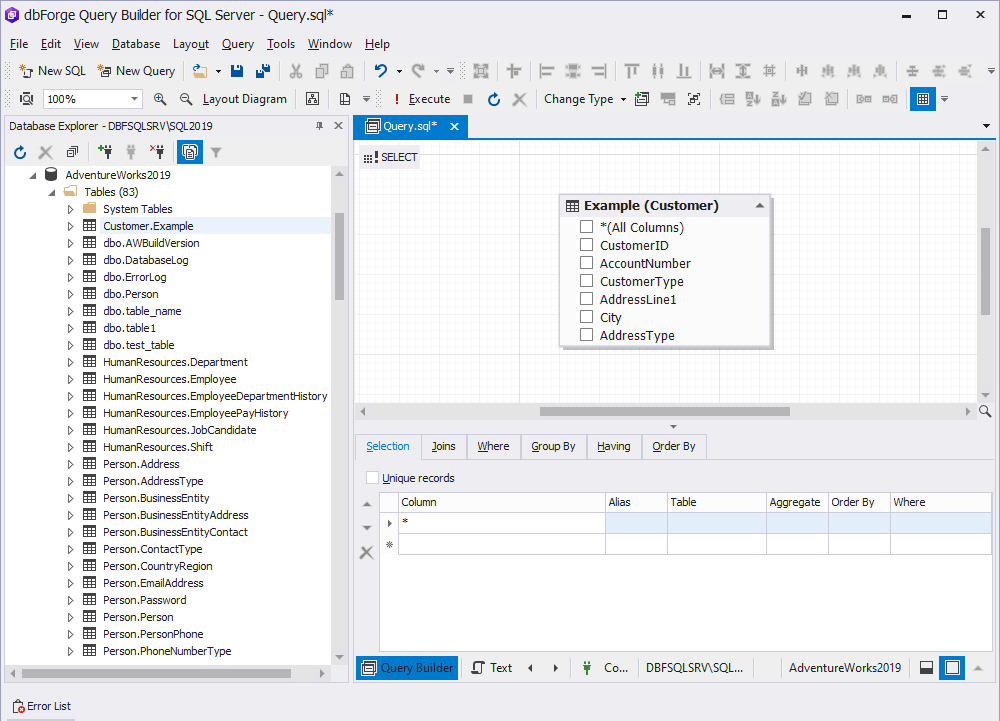
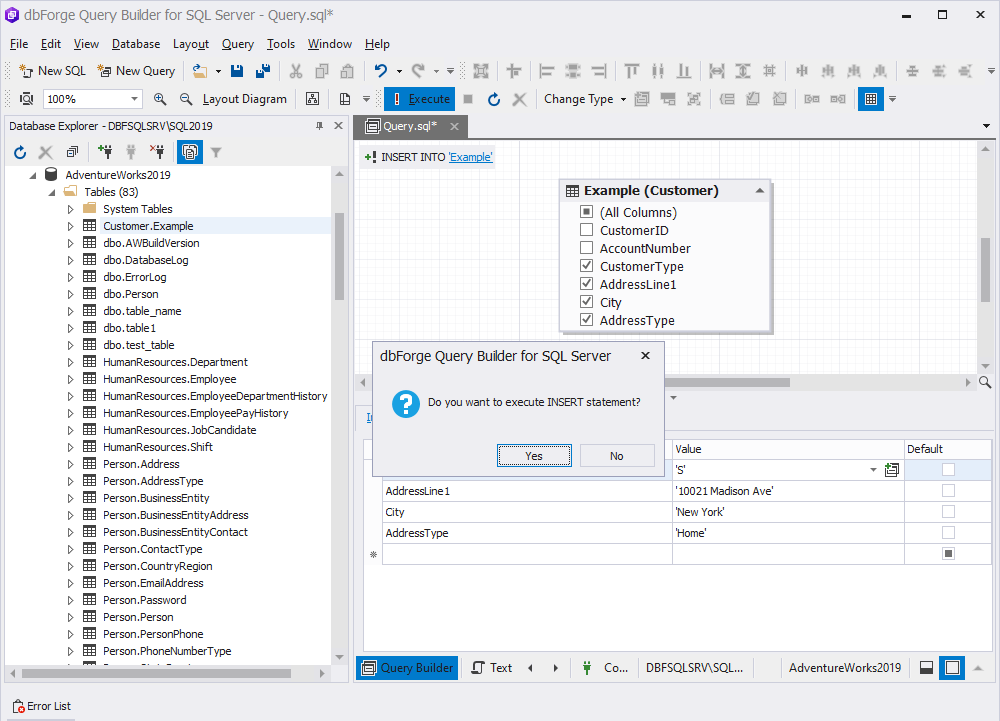
Pay attention to the upper area of our query document. We see the current query type on the left. To change this type, we either select the Change type list on the toolbar or launch the context menu and select the Change type item in it. In both cases, this action requires a split second. Change the query type from Select to Insert Values.
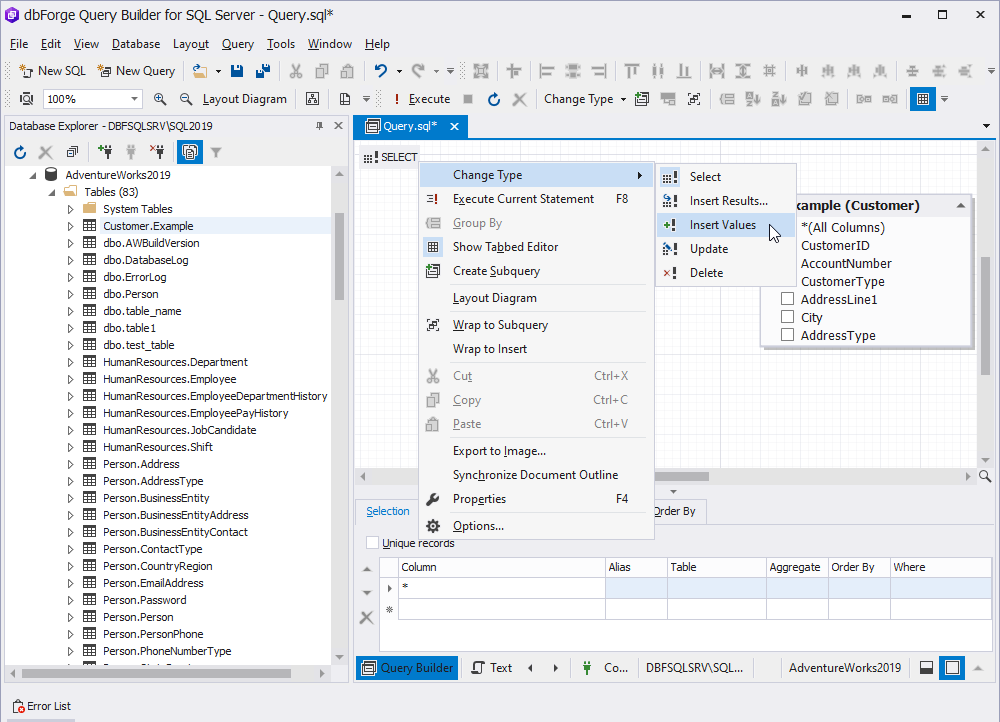
Select the required columns and assign values to them. Execute the query by clicking Execute on the toolbar.
Our next step is to verify if we have performed the insertion of values into the table successfully. Click the standard refresh icon, and let’s take a look at the data.
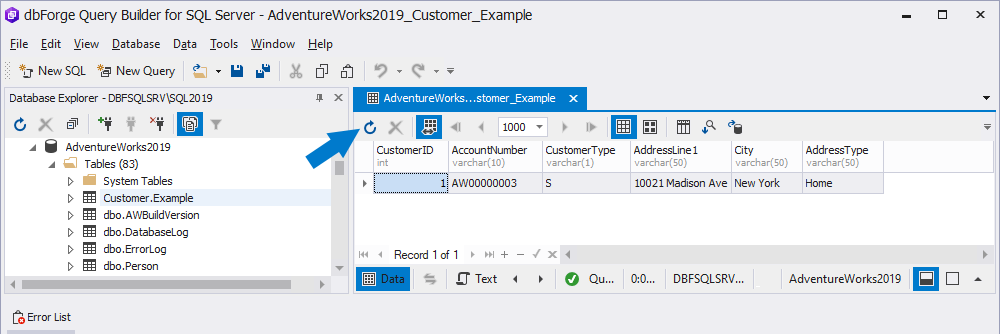
We have inserted the data correctly. The graphical interface allowed us to complete the job in a flash.
However, this task was elementary. We only needed one empty table and inserted our column values into it. What if we have to perform a more complicated job, like inserting multiple data? dbForge Query Builder for SQL Server is 100% efficient here.
Working with multiple tables
Therefore, our next task is to insert values from several source tables into a single target table. For this example, we are going to use a HumanResources.Example table as our target table.
First of all, we have to select the necessary tables from the list and send them all to Query Builder.
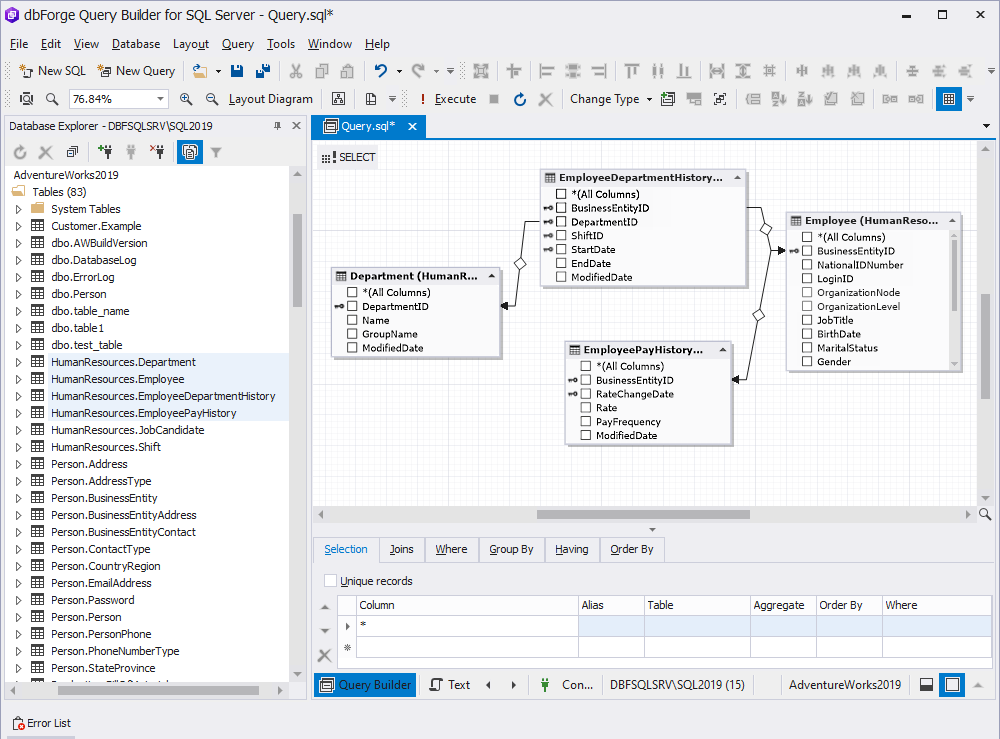
The system converts the data into a visual query diagram. This way, we can define all the essential features of our query at once and save time significantly. The visual mode here is much more convenient than working with SQL code.
In the graphical interface of the program, the three basic elements become the focus: tables and views, subqueries, and links connecting the tables and subqueries. The picture is scalable, and we can adjust it for more convenient viewing.
In this work area, we add the selection conditions for our query. In our example, we’ll select the records from the Employee table and filter them by the JobTitle column with the condition Values are equal to “Sales Representative”.
We also need to select the columns we want to insert into the table by selecting the appropriate checkboxes in the diagram.
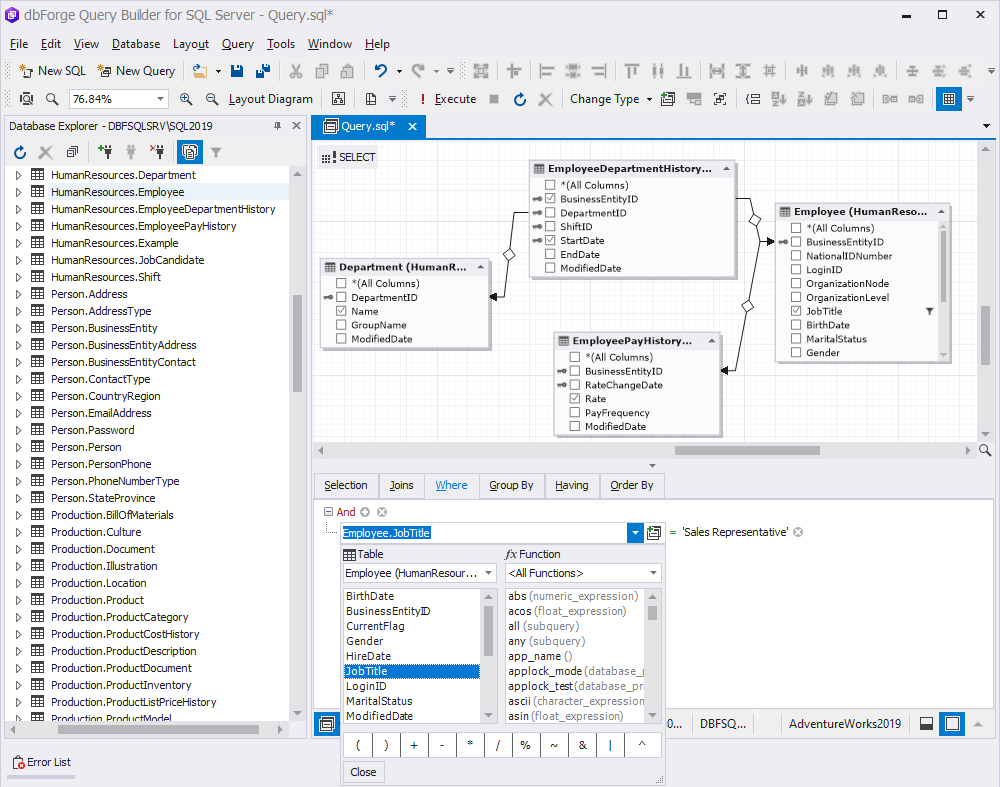
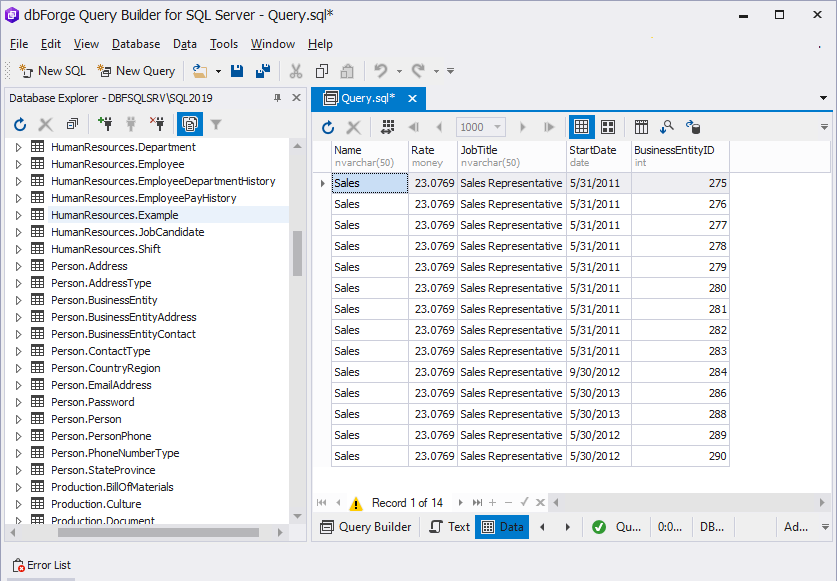
Let’s preview the data that will be inserted. As you see, 14 records match the condition.
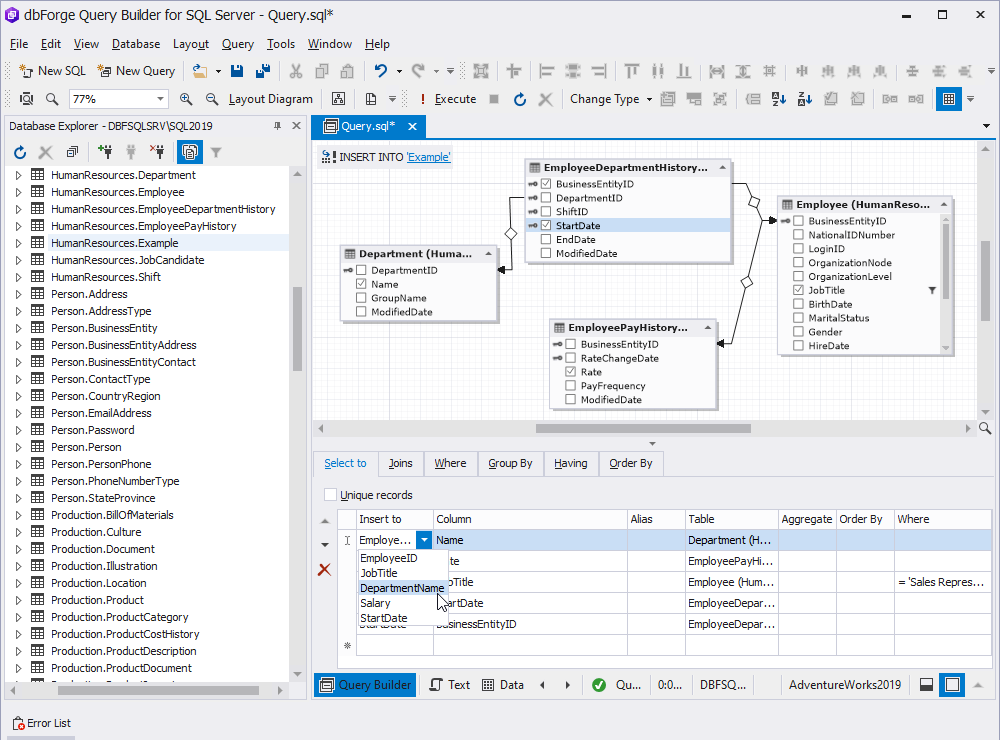
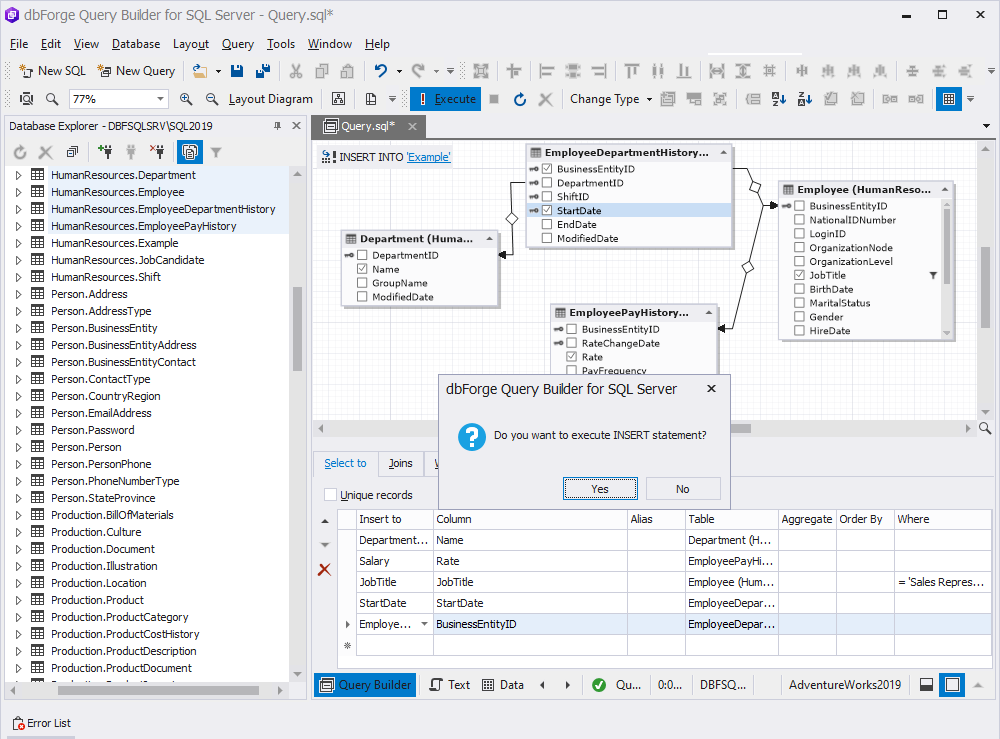
Change the query type from Select to Insert Results. Next, select the table to insert data into, and ensure that the table and query fields match.
However, we have an issue – the order of fields in the table differs from the order of fields in the query. As we defined earlier, this mismatch causes errors. Thus, we have to fix the issue before we can complete the task. Note that the column types must match as well, but the column names don’t need to match.
Let’s take a look at the query text first.
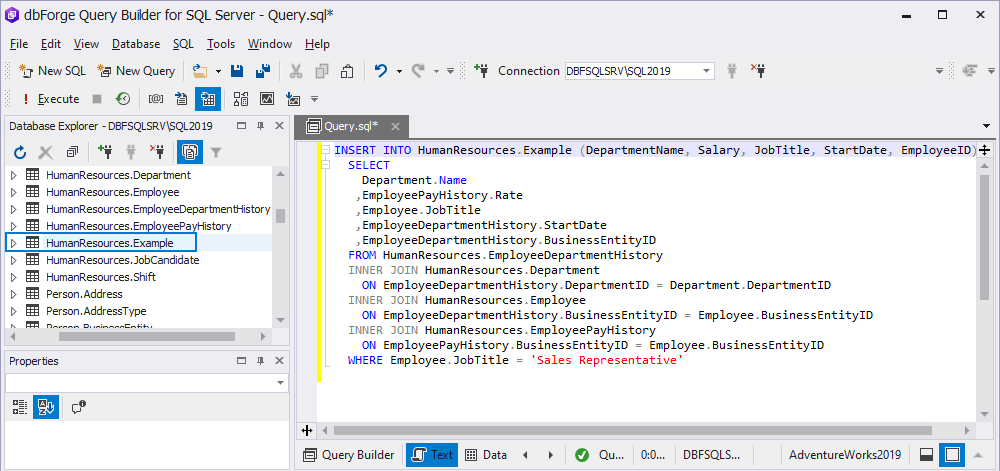
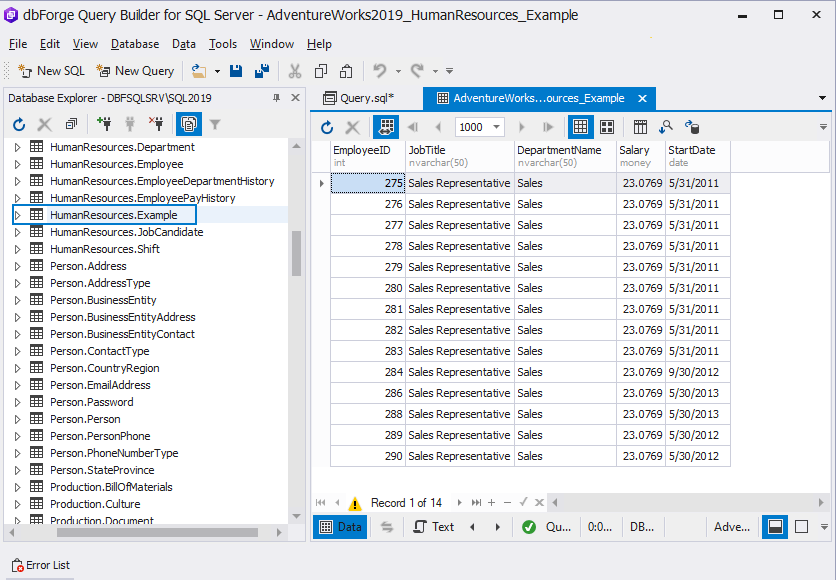
Everything is fine. We can execute the query.
The result is correct. Everything is as we planned, and the query making and execution took several seconds when we used dbForge Query Builder for SQL Server.
Using dbForge solutions for SQL Server allows us to save time and improve the results when managing databases. We can easily add new column in SQL Server database tables, create new tables and databases, edit them, and perform all kinds of database tasks.
Conclusion
As you see, this tool is a great aid for all tasks related to writing and executing SQL queries. The fully functional 30-days free trial is available for download. This way, you can test all options available in the software to their full capacity.
