
Privileged Access Management (PAM) solutions have become increasingly popular due to their ability to address data security concerns with flexible access control. One essential area for employing PAM solutions is using them alongside database clients (from the simplest ones to full-fledged IDEs) to ensure safe access to databases.
StrongDM is a leading PAM solution that supports modern software development infrastructures both on-premises and in the cloud. This article explores the workflow and benefits of using StrongDM together with dbForge Studio for PostgreSQL.
What is StrongDM?
StrongDM is an infrastructure access platform designed to simplify and secure access to various environments, such as databases, servers, cloud environments, and Kubernetes clusters. It serves as a central hub for managing and monitoring access, ensuring that only authorized users can reach the necessary resources. Moreover, it limits access to the duration of a specific work session, meaning that even if an account is compromised, it won’t have prolonged access to critical areas.
In simpler terms, StrongDM functions as a proxy server between data sources (like PostgreSQL, MySQL, SQL Server, Oracle, etc.) and client applications/IDEs such as SSMS, MySQL Workbench, or dbForge Studio. It offers a wide range of features to manage user access and log their activities, making it a popular tool for data security management.
Key advantages of StrongDM:
- Unified access management: StrongDM centralizes access to all resources, whether on-premises or in the cloud. With this single platform, you can manage all access-related tasks, such as granting or revoking permissions, without switching between different solutions.
- Access control: Access policies can be configured based on roles, groups, or specific resources. Management options include just-in-time access (no permanent access), role-based access, attribute-based access, and direct access. Access revocation is instant, which delivers real-time security.
- Audit and monitoring: The system automatically logs all access attempts and activities, providing detailed audit reports for every session, query, and command performed within integrated tools. This data helps reduce Mean Time to Investigate (MTTI) and Mean Time to Respond (MTTR), helping users quickly identify and address issues, and minimizing potential damage.
- Secure access: With StrongDM, there’s no need for VPNs, SSH keys, or shared credentials. It provides encrypted, secure connections to resources, ensuring unauthorized access is prevented, even without credentials — users only need to log into StrongDM.
- Seamless integration: StrongDM can be integrated with a variety of solutions, allowing organizations to maintain high-security standards within their existing workflows. It supports all native protocols, so developers can continue using their preferred tools without interruption.
In our guideline, we focus on integrating StrongDM with dbForge Studio for PostgreSQL – a powerful, multi-featured IDE for PostgreSQL and Amazon Redshift databases.
Overview of dbForge Studio for PostgreSQL
dbForge Studio for PostgreSQL is a leading tool for comprehensive database development, management, and administration. With its robust toolkit and intuitive graphical user interface (GUI), the Studio simplifies all database-related tasks with variegated visual tools and automation options.
Key features of dbForge Studio for PostgreSQL:
- Coding assistance: The Studio provides an array of SQL coding tools, including context-aware auto-completion, syntax validation, code formatting, and a library of code snippets, enhancing coding efficiency and accuracy.
- Database comparison and synchronization: There are specialized tools that help compare database schemas and table data, identify discrepancies, conduct in-depth analysis, and synchronize changes with autogenerated scripts.
- Visual query profiling: This feature helps users pinpoint and resolve performance bottlenecks in queries.
- Data import and export: The Studio supports direct data import and export in over ten popular formats, facilitating easy data migration.
- Test data generation: This tool allows users to generate high-quality, realistic test data in required volumes, with customizable data types and characteristics to align with specific test scenarios.
- Data analysis and reporting: Features such as Pivot Tables, Chart Designer, and Master-Detail Browser enable users to analyze large data sets and generate detailed, visually engaging reports.
- CLI-powered task automation: dbForge Studio automates routine tasks through the command-line interface, converting configured settings into executable .bat files for recurring operations, thus freeing up time for more critical tasks.
PostgreSQL is renowned for its robust security features, making it a top choice for developers around the world.
Integrating StrongDM with PostgreSQL
StrongDM is a proxy platform that manages and audits access to databases, servers, clusters, and web applications, helping create a secure network. The architecture of StrongDM includes a local desktop client, a gateway intermediary, and a configuration layer.
- The local desktop client, which includes both graphical and command-line interfaces, tunnels users’ requests from their workstations to the gateway via a single TLS 1.2-secured TCP connection. This setup is compatible with Windows, macOS, and Linux. Users must log in to the local client for authentication.
- The gateway serves as the entry point to the network. It can be deployed with a DNS entry, operate privately within the corporate network, or be placed behind a VPN. All data is routed through this network. The gateway decrypts credentials on behalf of end users and breaks down requests for auditing purposes.
- Admin UI is the configuration layer. Administrators assign roles and set access permissions for users. Any configuration changes are pushed to the local clients and are updated in real time.
All of these components work in the following way: users log in through the StrongDM desktop client before establishing a connection with an IDE like dbForge Studio for PostgreSQL. StrongDM monitors all the commands and queries executed by the user in real time and records the entire session, capturing every action the user takes within the Studio, including query execution, data modification, and administration tasks. This recording can be stored for auditing purposes and reviewed if any suspicious activity is detected.
Also, StrongDM manages and stores the credentials required to access databases securely. Users do not directly use their own credentials; instead, they check out credentials from this PAM system, which adds an additional layer of security and ensures that password policies are enforced. Besides, users’ actions within dbForge Studio for PostgreSQL will be restricted based on their role set and configured in StrongDM.
Now, let us review the process of configuring StrongDM.
Step 1. Sign up for a StrongDM account
Your first step is to create a StrongDM account. On the registration page, provide the necessary details and click Submit. After that, you need to verify your email address by clicking on the confirmation link sent to your inbox.
Note: If you sign up directly, you’ll create an Administrator account for your organization. This involves providing your work email and setting a password.
Step 2. Install the StrongDM desktop client
Once your account is set up, download the StrongDM client to the devices accessing your infrastructure. Install the client on your machine and log in using your admin credentials. You can apply filters to the client to manage the existing data sources more conveniently.
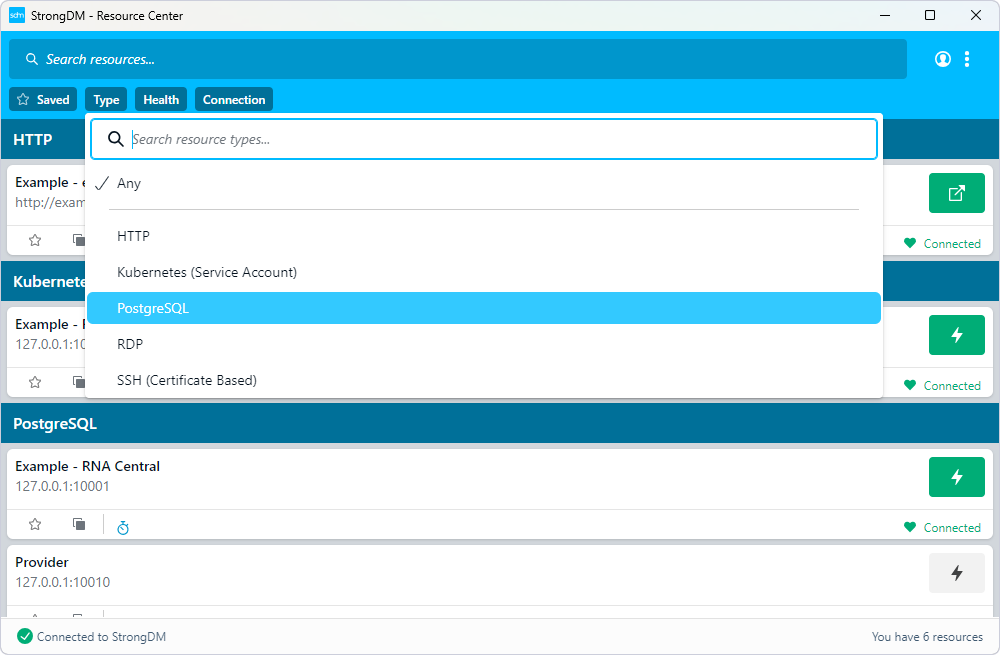
Initially, the desktop client contains only test resources; further, it will also include all those added by the Administrator.
Step 3. Add a connection host to StrongDM and dbForge Studio for PostgreSQL
To integrate dbForge Studio with the secure network managed by StrongDM, you must add the data sources used in the Studio to the StrongDM Infrastructure section. This integration enables StrongDM to monitor user activities on these databases and manage access permissions accordingly.
That said, let’s add a data source to StrongDM.
Proceed to Infrastructure > Datasources. In this section, you will see the list of existing data sources. To add a new source (a new database in our case), click Add datasource.
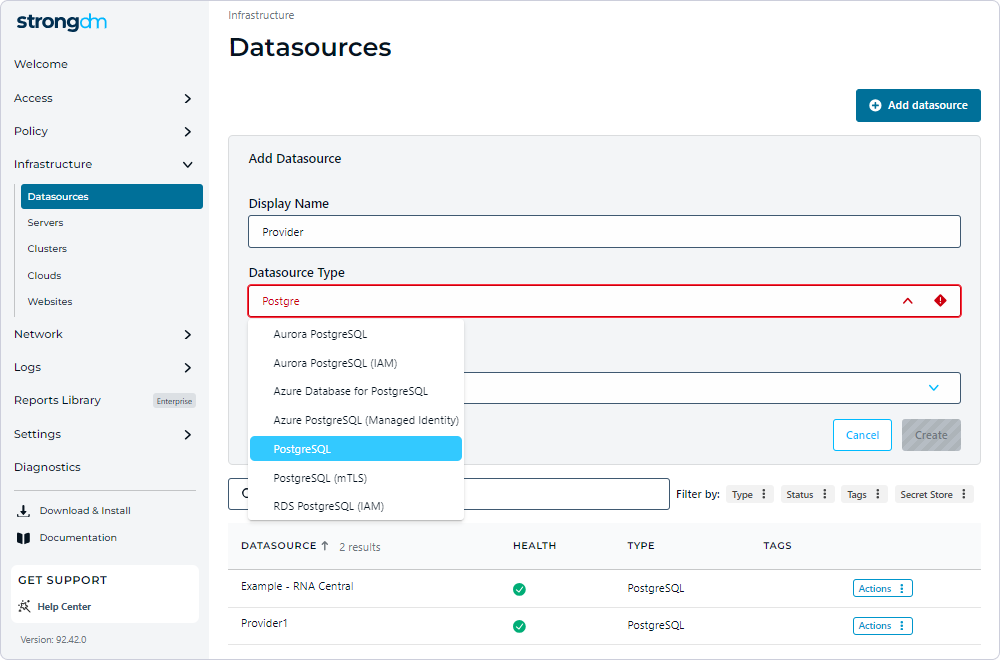
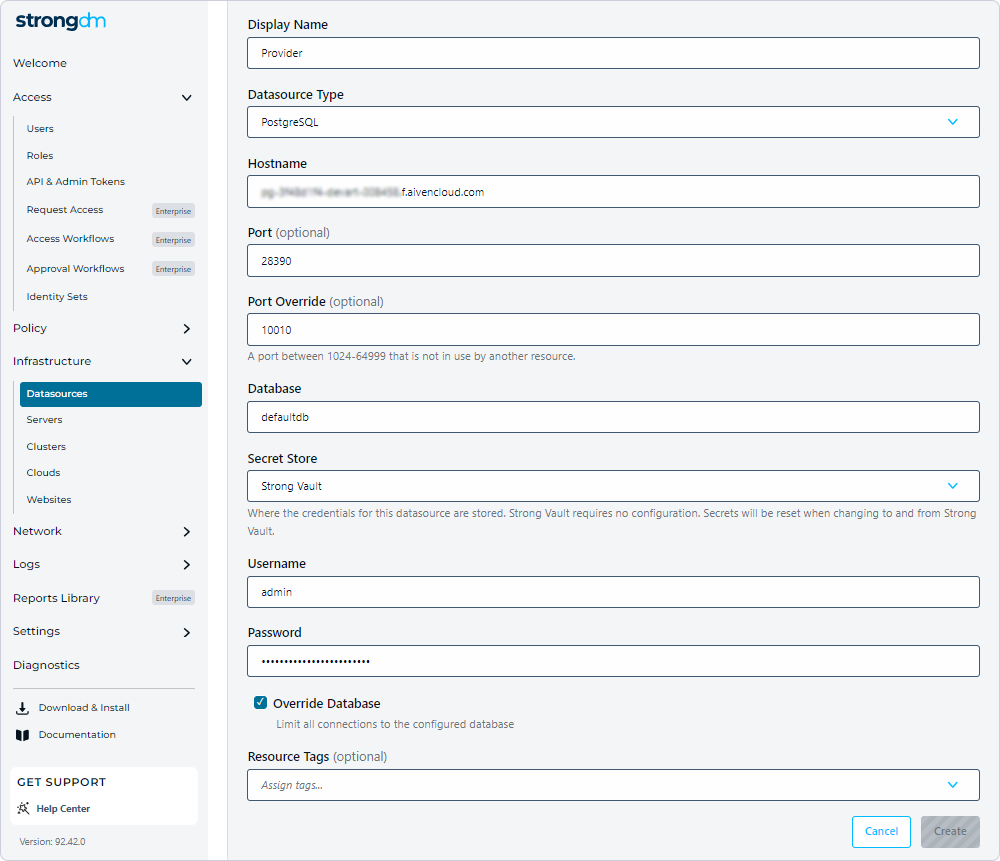
Provide the necessary details and click Create to complete the process.
Note that it might take some time for the new data source to be verified. After that, you can connect to it using the local desktop client.
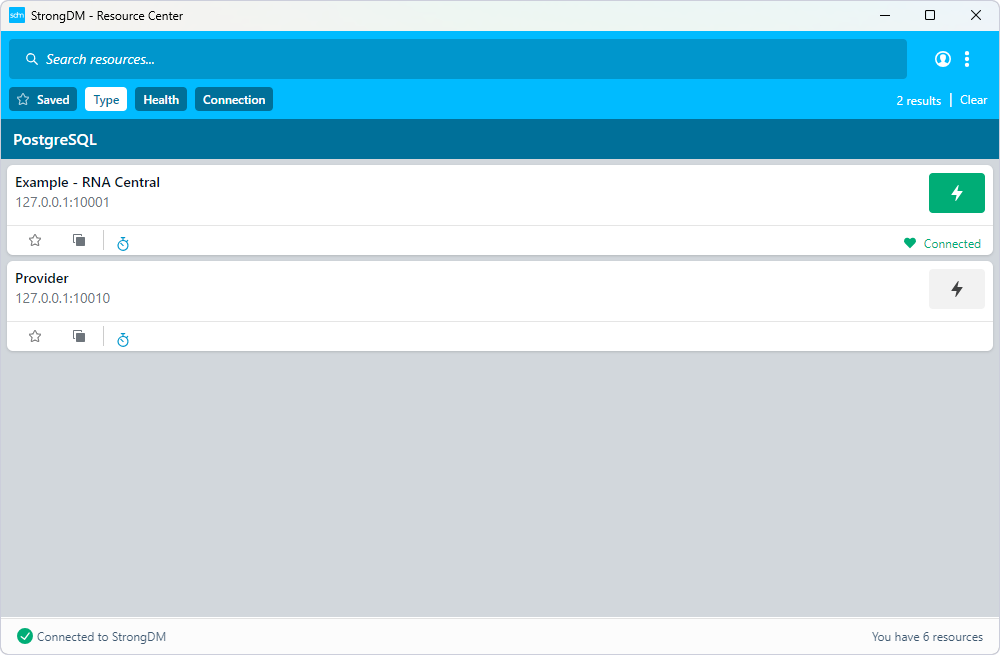
To connect to the added database with dbForge Studio for PostgreSQL, do the following:
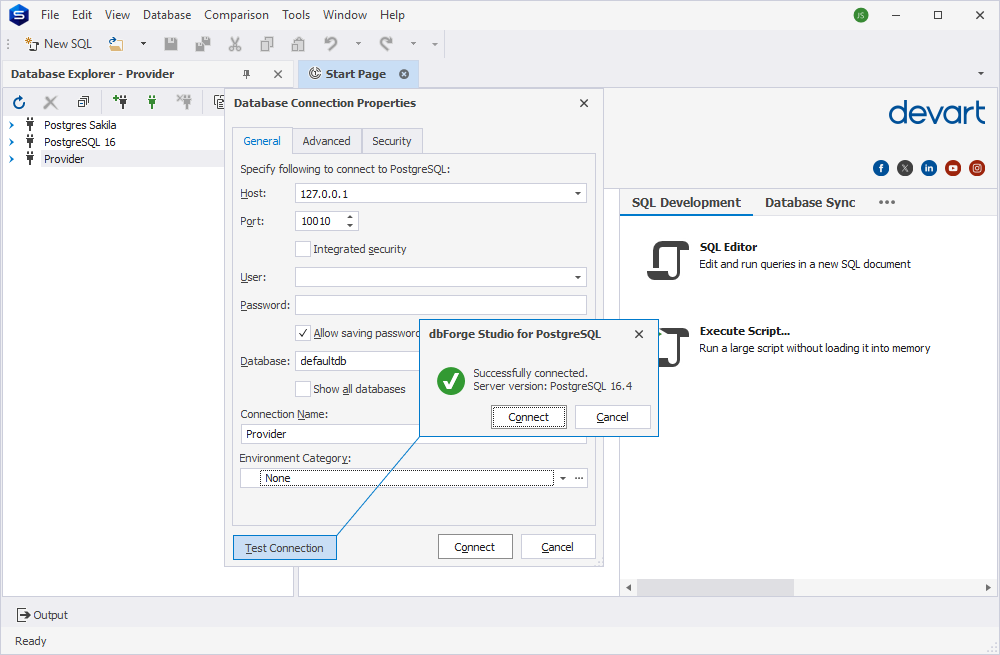
Launch the Studio, click the New Connection icon in Database Explorer, and configure the connection properties for the database.
The host and port should match those specified in the StrongDM client. The username and the password aren’t necessary as the required credentials are stored in and managed by StrongDM.
After that, click Test Connection, and the Studio will verify the connection details and connect to the specified database.
Step 4. Configure user roles
User roles are the method of providing and restricting user access to resources, a collection of permissions granted to the user.
In the online console of StrongDM, navigate to the Access section > Roles. This area contains the list of the existing roles and allows the Administrator to create new roles. To create a new role, click Add role.
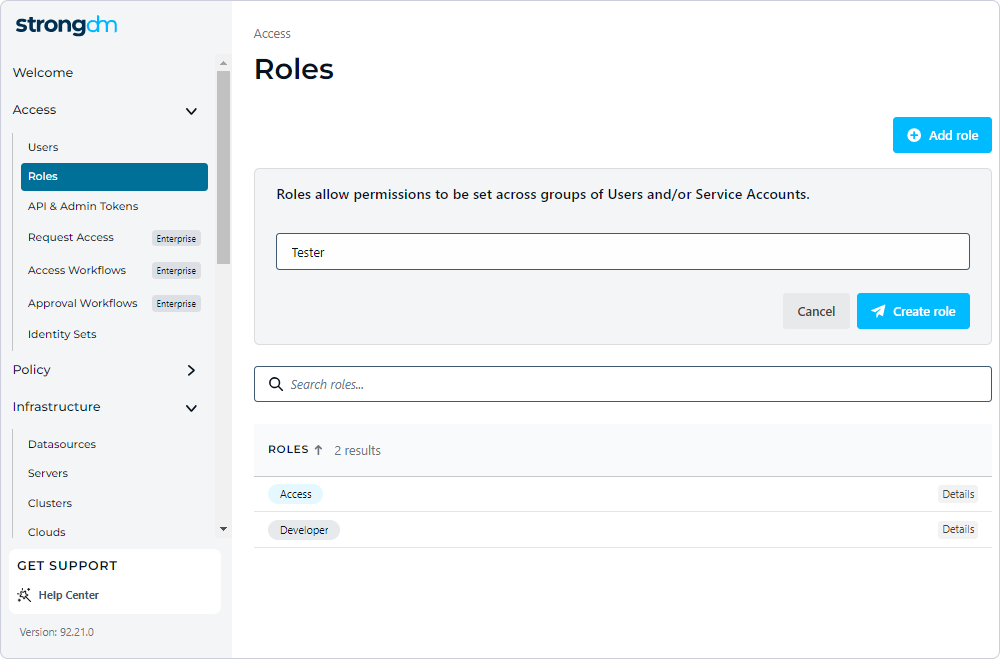
Name the role and click Create role to proceed to the configuration on the Access Rules page. Two methods are available for assigning permissions to a role.
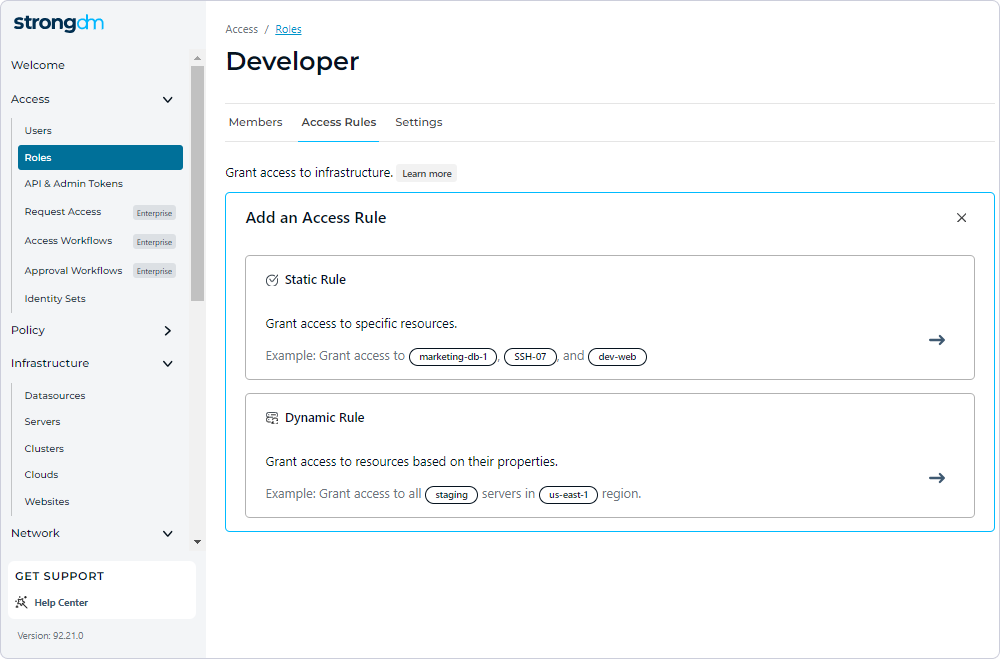
Static rules are assigned manually.

Dynamic rules are set according to tags and resource types.

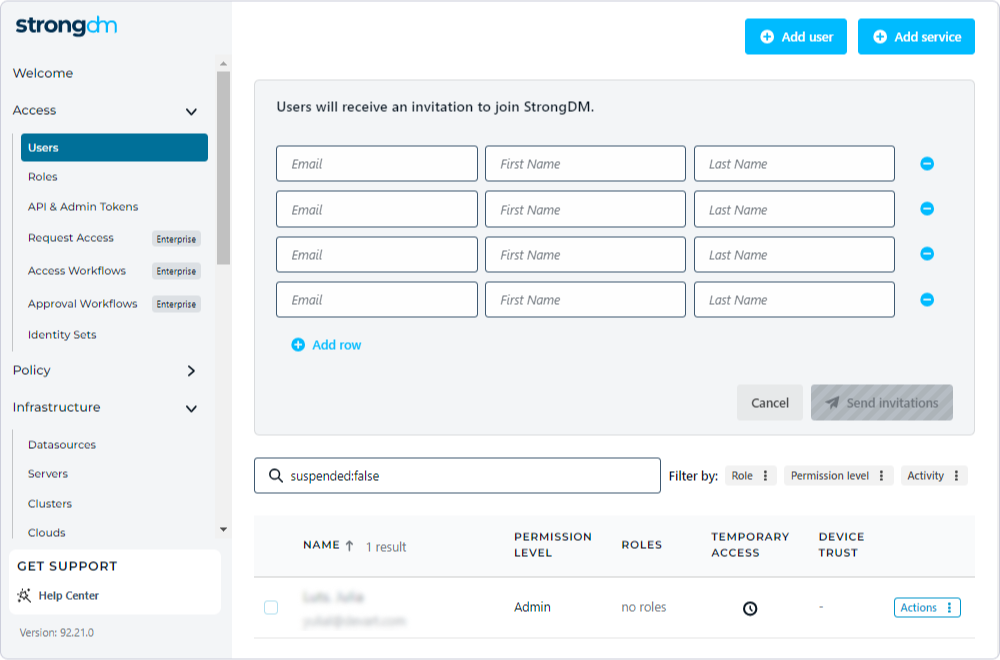
After defining the role, you can assign users to it. This can be done in the Users section where you only need to select a user or a group of users and set roles for them.
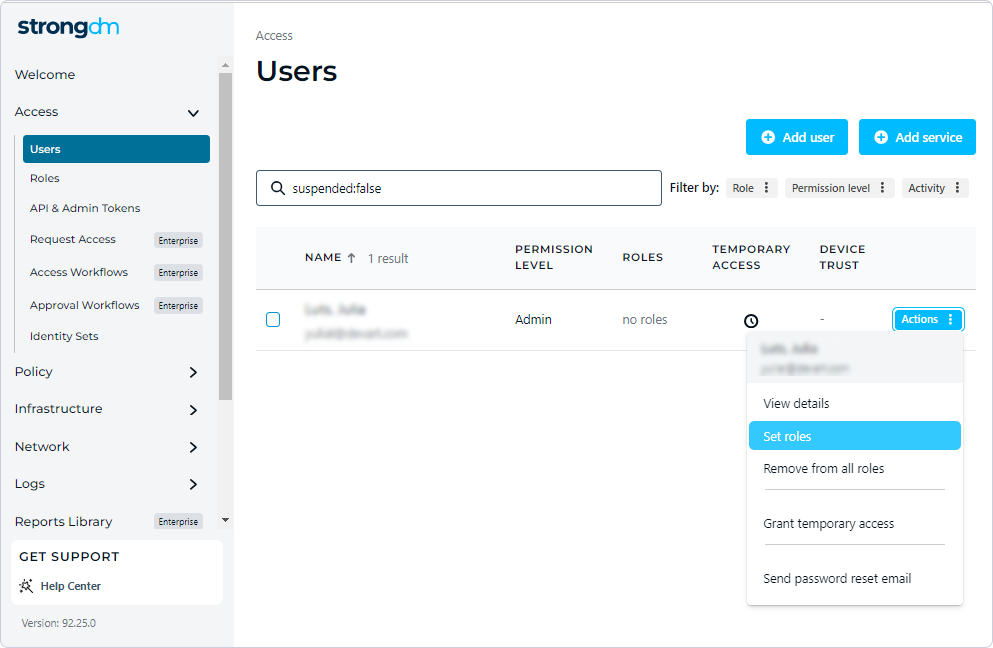
To invite users, click Add user in the Users section and enter their email addresses.
Step 5. Monitor activities
Once everything is set up, you can start using the StrongDM client to access resources securely. When users log in via the StrongDM local client, the roles are applied to them, they can query and access the data sources and servers to which they have been granted access, and their activities are monitored and audited.
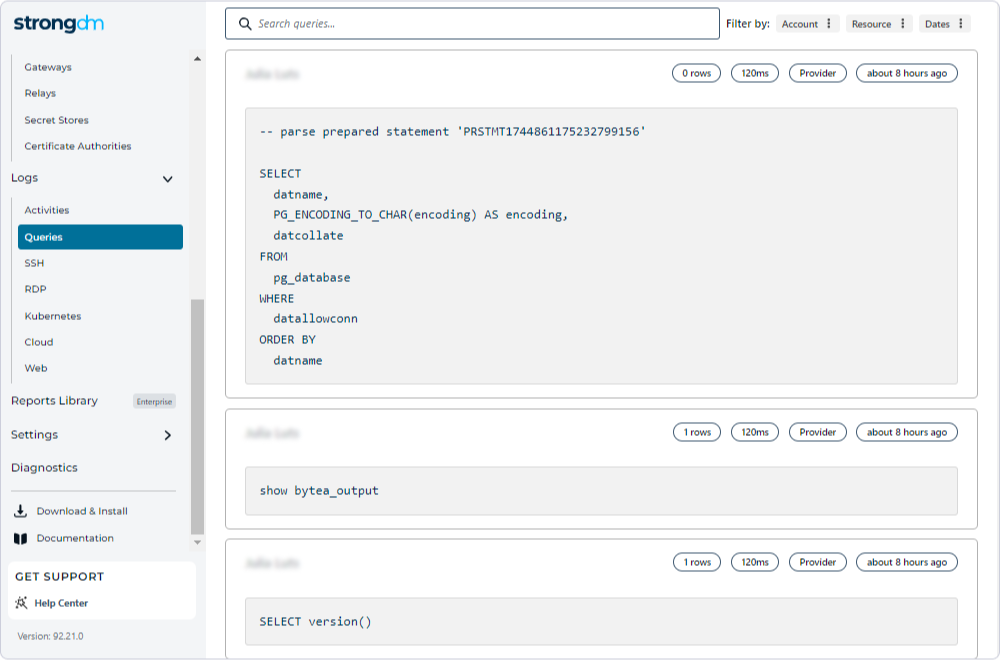
The full history of all queries executed by the user in dbForge Studio for PostgreSQL is recorded on the Queries page under Logs.
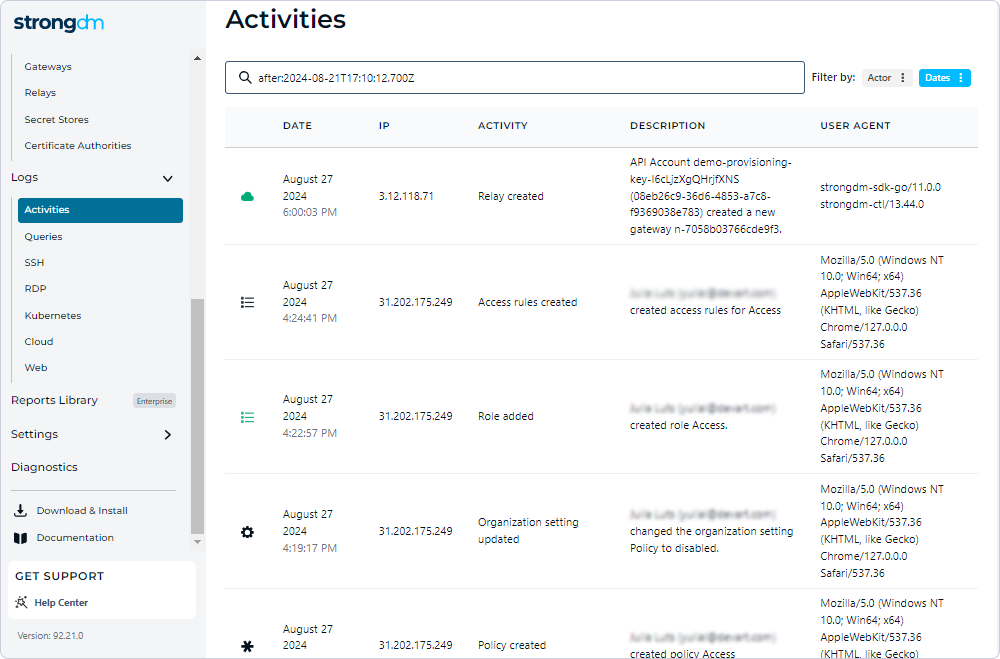
In the same section, you can view detailed information about any specific user’s actions on the Activities page.
As always, you should periodically review data sources and user permissions to ensure compliance with your security policies. It is done conveniently in the admin console online.
Conclusion
StrongDM is a viable solution that enhances security, simplifies access management, and secures operations with databases through IDEs such as dbForge Studio for PostgreSQL. It enables real-time logging and monitoring of all database queries and tasks performed through the Studio, providing administrators with critical information that is particularly useful in responding to failures and security threats.
dbForge Studio for PostgreSQL also does its part, being specifically designed as a single solution that provides comprehensive functionality for developing, managing, and administering PostgreSQL and Amazon Redshift. You can test both solutions in your actual work environment to assess their effectiveness. dbForge Studio for PostgreSQL offers a fully functional 30-day trial with personalized tech support.