
In this article, we will talk about how to create a user in Oracle. You will learn how to add new database users, figure out which supplemental aspects this job involves: from the initial user creation to dropping it. Moreover, you will find some useful tips on working with IDENTIFY and TABLESPACE clauses, as well as learn how to GRANT roles and permissions in Oracle.

Contents
- How to Create a New User in Oracle
- Oracle CREATE USER Syntax Examples
- How to Create Default Users with Default Settings
- Create User Identified by Clauses
- CREATE USER with Tablespace Clause
- Create User Attributes
- Grant Role to User
- Granting Permission in Oracle
- GRANT Command Syntax
- Oracle User Privileges
- How to Create and Grant All Privileges to Oracle User
- How to Grant Table Privilege to User in Oracle
- Create Oracle Users and Grant Permissions Easily with dbForge Studio for Oracle
- How to Delete (Drop) User in Oracle
- Conclusion
How to Create a New User in Oracle
Before we start, you need to check if you have the necessary system privilege to create users. If not, make sure to get them assigned to your account. After that, you can proceed to the practical tasks. The examples in this article relate to the create user Oracle 19c version, but the methods are the same for all Oracle versions in use (including Oracle 10g, 11g, 12c, etc.).
Oracle CREATE USER Syntax Examples
For starters, we will be looking into Oracle CREATE USER syntax. First, we will discuss how to create one with default settings. After that, we will move on to the different variations of the IDENTIFIED clause, tablespace clause, and other peculiarities of the CREATE USER syntax in Oracle.
How to Create Default Users with Default Settings
It is always best to start with the basics. Thus, let us focus on the CREATE USER command by itself. As is, it will create a user with default attributes. Further in this article, we will look at how to configure users more finely and how it boosts the safety of the database in general.
Create User Identified by Clauses
The IDENTIFIED clause lets you indicate how the Oracle database authenticates a user. Let us take a closer look at different examples of the IDENTIFIED syntax in Oracle.
Create User Identified by Password Clause
In the most straightforward case, we are creating a new local user under the username. The user will be required to enter the password to log into the system:
CREATE USER <username> IDENTIFIED BY <password>;The username can be anything. However, the password must consist of single-byte characters from the database character set. If the character set also has multibyte characters, it does not change the password requirement – use only single-byte characters.
CREATE USER visitor
  IDENTIFIED BY psw4visits;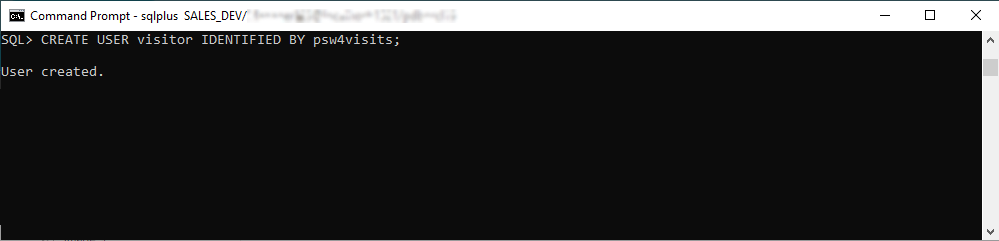
Externally and Globally Clauses
Besides identifying by password, you may use one of the two other means of user authentication. It will be configuring an external user or a global user. To do it, you need to include the EXTERNALLY or GLOBALLY clause in the CREATE USER Oracle command.
EXTERNALLY allows for creating an external user. In this case, the user is authenticated by an external system, such as the operating system. For instance, an Oracle database user is a Windows user. Thus, they can access the database after getting authenticated by Windows without entering other passwords. Working under the external user is a standard option for regular database users. But such users only have standard roles (CONNECT and RESOURCE), without administrator or database operator privileges.
To create an external user, we execute the below statement:
CREATE USER external_user1
  IDENTIFIED EXTERNALLY
  DEFAULT TABLESPACE tbs_new_10
  QUOTA 10M ON tbs_new_10
  PROFILE external_user_profile1;
This way, we have made a new external user for our database. The name is external_user1. No additional password is needed. We assigned this user the default tablespace tbs_new_10 with a quota of 10 Mb. Other limitations are defined by the external_user_profile1 applied to this user.
As we mentioned earlier, different external systems can maintain and manage external users in the Oracle database. Using the capabilities of the operating system is the most common option. Thus, if we want to create an external database user accessible by the system account in the operating system, we only need to modify our statement slightly. We’ll add the ops$ prefix to the username:
CREATE USER ops$external_user1
  IDENTIFIED EXTERNALLY
  DEFAULT TABLESPACE tbs_new_10
  QUOTA 10M ON tbs_new_10
  PROFILE external_user_profile1;
GLOBALLY allows for creating global users. It means that their logins and passwords are stored on the Central Oracle Security Server instead of the specific database. Besides, roles assigned to global users on that central Server apply to this user in any database. It won’t be necessary to configure the user role in a separate database. Note that you need to enable the single sign-on option for global users.
To create a global database user, we use the following statement:
CREATE USER global_user1
  IDENTIFIED GLOBALLY AS 'CN=manager, OU=division, O=oracle, C=US'
  DEFAULT TABLESPACE USERS
  QUOTA 10M on USERS;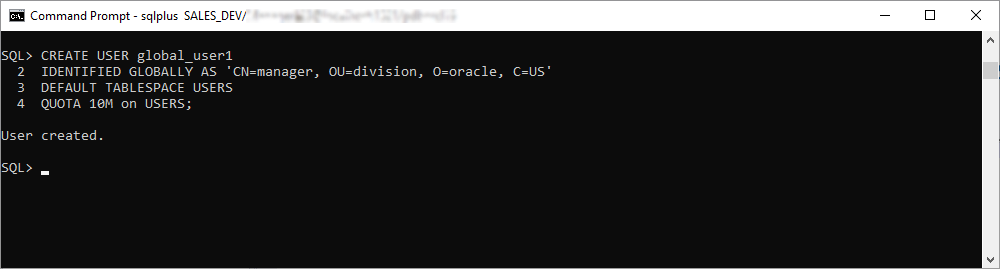
Now we have a new global database user under the name of global_user1. We assigned USERS default tablespace to that user with a quote of 10M.
CREATE USER with Tablespace Clause
Now, let us review the basic Oracle create new user script. It is below:
CREATE USER username
    IDENTIFIED BY password
    DEFAULT TABLESPACE tablespace
    TEMPORARY TABLESPACE tbs_temp_01
    QUOTA {size | UNLIMITED} ON tablespace;
As you see, the script includes several clauses that we should take into consideration:
Default Tablespace
This clause specifies the default tablespace for objects created by the user. Otherwise, such objects are stored in the default tablespace of the database. If there are not any default tablespaces specified for this particular database, the objects will get into the system tablespace.
Restriction: don’t specify the locally managed temporary tablespace (such as undo tablespace or dictionary-managed temporary tablespace) to be the Oracle create user default tablespace.
Temporary Tablespace
This clause specifies the tablespace/tablespace group meant to contain the temporary segments of the user. Without it, those users’ temporary segments are stored in the default temporary tablespace of the database of the system tablespace. When you specify the tablespace group including the tablespace_group_name value in the script, users’ temporary segments can be saved in any tablespace of that group.
Note:
Make sure to specify the temporary tablespace with standard block size. It cannot be the undo tablespace or the tablespace with automatic segment-space management.
Quota
This clause specifies how much space this user can allocate in the tablespace. Multiple QUOTA clauses in one Oracle CREATE USER command can be present if you need to specify several tablespaces.
The clause can include the UNLIMITED definition to allow this definite user to allocate the tablespace as much as needed, without bounds.
Restriction: the QUOTA clause does not apply to temporary tablespaces.
Create User Attributes
There are additional, optional Oracle CREATE USER attributes you can include in the syntax. Have a look at the following example:
CREATE USER username
    IDENTIFIED BY password
    [DEFAULT TABLESPACE tablespace]
    [QUOTA {size | UNLIMITED} ON tablespace]
    [PROFILE profile]
    [PASSWORD EXPIRE]
    [ACCOUNT {LOCK | UNLOCK}];
Let us review these optional clauses.
Profile
This optional clause lets you limit the database resources for this specific user at once when the limitations are defined in the particular profile. Without this clause, a new user automatically comes under the default profile.
Password Expire
The clause is optional, but many database administrators set it for more effective security. If included, this clause will determine the forced change of the password on the user’s side. Usually, it happens when the user tries to log into the database for the first time.
Account Lock/Account Unlock
You may use one of these clauses. With LOCK applied, Oracle creates the user account, but that account won’t have access to the database. If you apply the UNLOCK clause or don’t specify any of these two clauses, the account will be usable at once. The unlocked status is the default.
The CREATE USER statement with these additional parameters would be as follows:
CREATE USER visitor
    IDENTIFIED BY migzw23ter
    DEFAULT TABLESPACE tbs_new_10
    QUOTA 50M ON tbs_new_10
    TEMPORARY TABLESPACE tbs_temp_10
    QUOTA 5M ON system
    PROFILE qualified_user
    PASSWORD EXPIRE;
ACCOUNT UNLOCK
Here, the statement creates a new Oracle database user named visitor, with the password migzw23ter. This user is assigned the default tablespace tbs_new_10 with a quota of 50Mb. This user is also allowed to use the temporary tablespace tbs_temp_10.
Grant Role to User
The first step is the creation of a user. The next one is to set the user’s rights. A newly created user is not allowed to do anything, even to connect to the database.
Working with Oracle databases inevitably includes the task of creating database users. There are the system user accounts that Oracle creates itself – hr, OE, sys, etc. These accounts have predefined configurations with rights and limitations. However, daily work will always require other users.
One of the DBA’s duties is to create additional database users. The job includes configuring the user accounts, setting privileges, and managing users according to the business goals.
Granting Permission in Oracle
By using the GRANT command, you can provide the users with certain privileges and configure their roles according to your needs. In Oracle, you can grant your permission to others so that they can manipulate and manage the data in your database. GRANT is a very powerful statement with many possible options, but the core functionality is to manage the privileges of both users and roles throughout the database.
GRANT Command Syntax
The basic syntax of the query to grant certain privileges to the user is the following:
GRANT <permission> to <user>;Oracle User Privileges
The GRANT command can give the users privileges to create, alter, drop and manage database objects. For instance, the privileges to create tablespaces and to delete the rows of any table in a database are system privileges.
Oracle has more than 100 system privileges that can be found in the SYSTEM_PRIVILEGE_MAP table.
| CLUSTER | CREATE/CREATE ANY/ALTER ANY/DROP ANY CLUSTER |
| DATABASE | ALTER DATABASE, ALTER SYSTEM, AUDIT SYSTEM |
| INDEX | CREATE ANY/ALTER ANY/DROP ANY INDEX |
| PROFILE | CREATE/ALTER/DROP PROFILE |
| ROLE | CREATE/ALTER ANY/DROP ANY /GRANT ANY (allows REVOKE) |
| Rollback Segment | CREATE/ALTER/DROP ROLLBACK SEGMENT |
| USER | CREATE/ALTER/BECOME/DROP USER |
| VIEW | CREATE/CREATE ANY/DROP ANY VIEW |
| SYNONYM | CREATE/CREATE ANY/CREATE PUBLIC/DROP ANY/DROP PUBLIC SYNONYM |
| SESSION | CREATE/ALTER/RESTRICTED SESSION, ALTER RESOURCE COST |
| TABLE | CREATE/CREATE ANY/ALTER ANY/DROP ANY/SELECT ANY/INSERT ANY/UPDATE ANY/DELETE ANY/LOCK ANY TABLE |
| TABLESPACE | CREATE/ALTER/DROP/MANAGE TABLESPACE |
Usually, the administrator of a database grants the privileges to the users. However, there are cases when the administrator needs to transfer their Oracle user privileges. This is when DBA privileges come in. If a DBA needs to provide system privilege to another person, it has to be done with the admin option:
GRANT create session TO user;
GRANT create session TO user with admin option;
Revoke create session from user;
Besides the Oracle tool privileges, object privileges are granted upon database objects: tables, views, procedures, and so on.
How to Create and Grant All Privileges to Oracle User
First, we need to grant our users the system privilege to log into the database. We use the following statement for that:
GRANT CREATE SESSION to visitor;There are many permissions the database administrator can provide to the user. But it is essential to stick to the primary concept of security, which is to give users the minimum of privileges necessary to do the job efficiently. That’s why it is not recommended to provide all privileges to the user.
You can apply other privileges one by one, each by a separate statement. Or, it is possible to combine these permissions into one, as shown below:
GRANT CREATE VIEW, CREATE PROCEDURE, CREATE SEQUENCE, CREATE TRIGGER to visitor;If this definite user is allowed to change tables, procedures, triggers, etc., the syntax to set the necessary privilege for each case is below. Again, be very careful when allowing the user to change any elements, as this permission is global.
GRANT ALTER ANY TABLE to visitor;
GRANT ALTER ANY PROCEDURE to visitor;
GRANT ALTER ANY TRIGGER to visitor;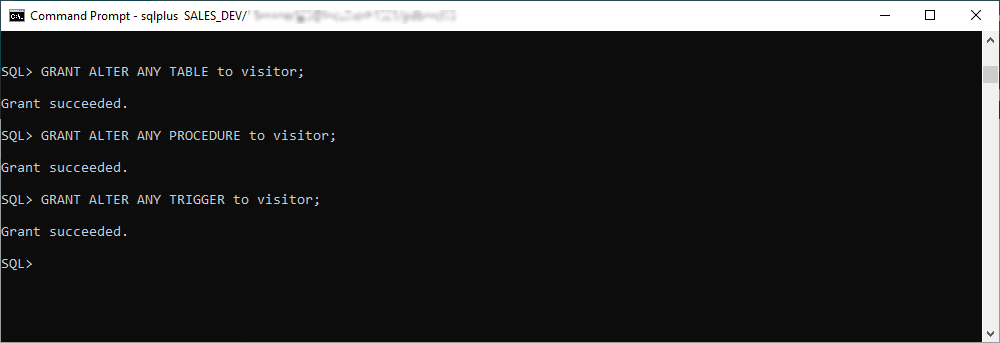
To allow the user to delete elements, we use the below statements:
GRANT DELETE ANY TABLE to visitor;
GRANT DROP ANY PROCEDURE to visitor;
GRANT DROP ANY TRIGGER to visitor;
GRANT DROP ANY VIEW to visitor;
How to Grant Table Privilege to User in Oracle
Before you set the privileges to the particular user, you should consider which tasks that person must perform in the database. The most common scenarios include creating tables, views, procedures, triggers. Some cases require the possibility to change or delete those elements. Depending on the situation, the administrator defines which system privileges to provide.
Let us take a closer look at how to grant CREATE TABLE privilege to a user in Oracle. If we are willing to allow our user – visitor – to create tables in the database, we will use the following query:
GRANT CREATE TABLE to visitor;Create Oracle Users and Grant Permissions Easily with dbForge Studio for Oracle
If you are working with Oracle databases on a daily basis and looking for a convenient all-in-one powerful IDE, your search ends here. dbForge Studio for Oracle helps developers to speed up PL/SQL coding, provides versatile data editing tools for managing in-database and external data.
In this article, we will be creating an Oracle user and granting DBA privileges using this multi-purpose script:
DECLARE
 schema_name VARCHAR2(255):='username1'; -- Insert your username instead of 'username1'
 row_count NUMBER;
BEGIN
 FOR r IN (SELECT sid,serial# FROM v$session WHERE username = schema_name)
 LOOP
   EXECUTE IMMEDIATE 'ALTER SYSTEM DISCONNECT SESSION ''' || r.sid || ',' || r.serial# || ''''||' IMMEDIATE';
   EXECUTE IMMEDIATE 'ALTER SYSTEM KILL SESSION ''' || r.sid || ',' || r.serial# || '''';
 END LOOP;

 SELECT count(*) INTO row_count FROM dba_users WHERE username = schema_name;
 IF row_count > 0 THEN
   EXECUTE IMMEDIATE 'DROP USER '||schema_name||' CASCADE';
 END IF;
 EXECUTE IMMEDIATE 'CREATE USER '||schema_name||' IDENTIFIED BY ' || schema_name;
 EXECUTE IMMEDIATE 'GRANT dba TO '|| schema_name;
 EXECUTE IMMEDIATE 'ALTER SESSION SET CURRENT_SCHEMA = '||schema_name;
END;
/ 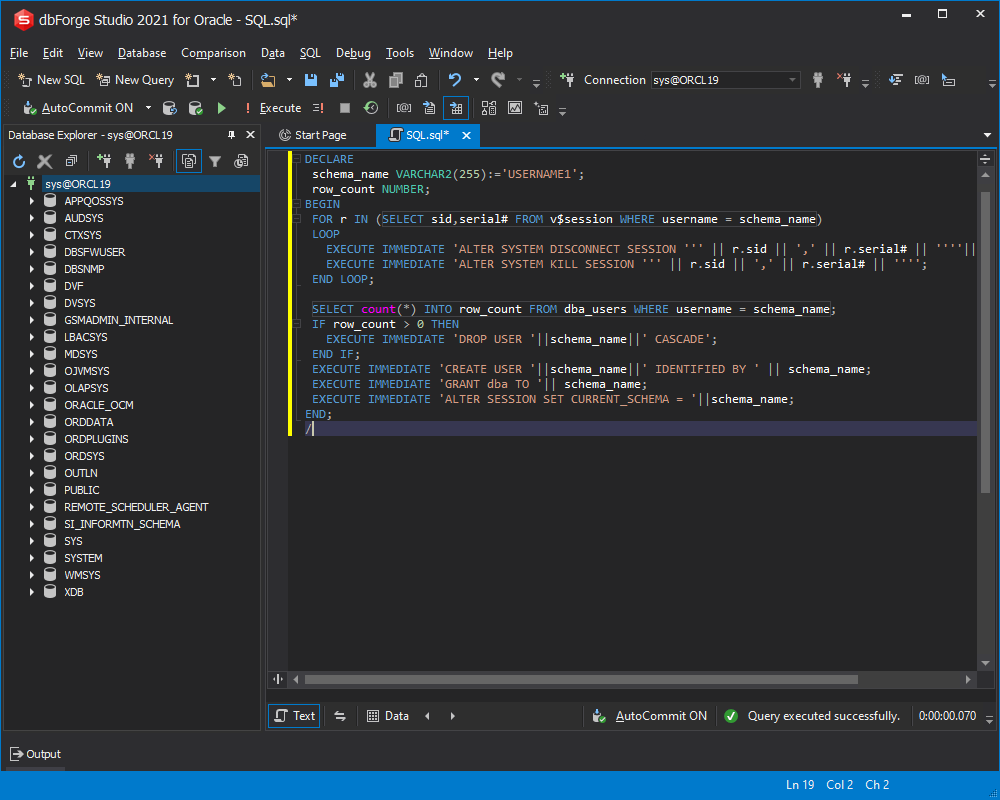
What we are doing in the provided script, is:
- creating a new user
- granting DBA privileges to the newly created user
- setting the newly created user as a default one for the current session
In Oracle, users and schemas are essentially the same thing. You can consider that a user is an account to connect to a database, and a schema is the set of objects that belong to that account. The newly created schema is empty and, therefore, will not be displayed in Database Explorer.
Let us create a departments table to make the new user appear in the list. To do that, feel free to use the following script:
CREATE TABLE departments (
  department_id NUMBER CONSTRAINT PK_DepID PRIMARY KEY,
  department_name varchar2(255) NOT NULL,
  location_id NUMBER  NOT NULL);
Keep in mind that you do not have to open a different SQL document for this operation. dbForge Studio for Oracle allows you to execute the code only partially. Simply select the CREATE TABLE clause, make a right-click, and choose Execute Selection.
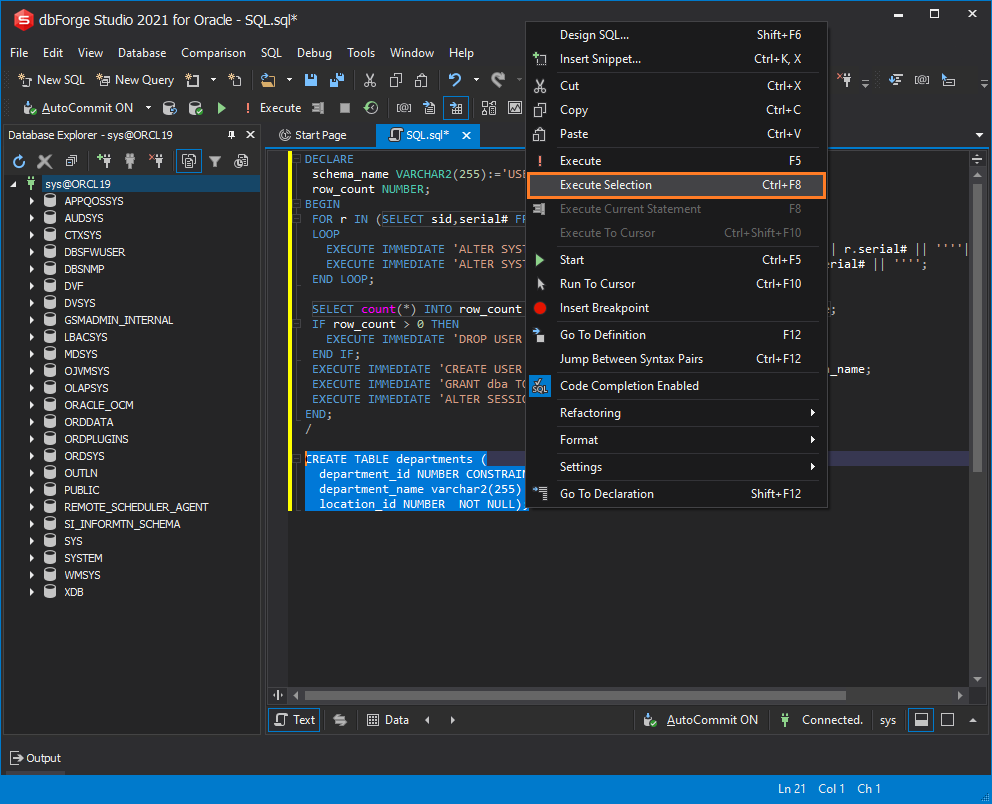
If you have the AutoComit feature ON, the previous step will be the last one. However, if it is off, you will need to commit the changes. Then, on refreshing Database Explorer, you will see username1 in the list.
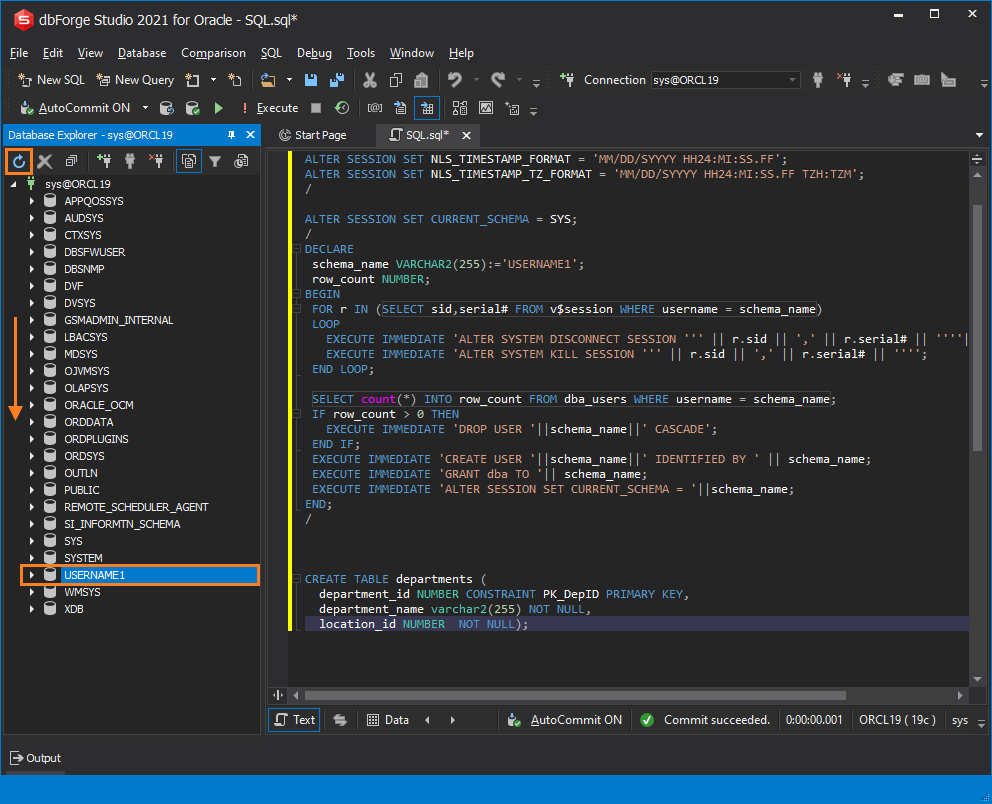
There are instances when old sessions remain running on the server. They might interfere with the execution of new commands. In the code above, all the old sessions are automatically located and removed from the server. Should you require to restart your current session, you can disconnect or kill it using one of these queries:
ALTER SYSTEM DISCONNECT SESSIONALTER SYSTEM KILL SESSION
How to Delete (Drop) User in Oracle
In case you need to remove any user for any reason, you should use the DROP USER command with the following syntax:
DROP USER <username>;In our test case, we are removing the user visitor created earlier:
DROP USER visitor;
However, there are several restrictions that you need to pay attention to before dropping the user:
- You can’t remove users without deleting all the related objects. Thus, you must drop all tables, views, procedures, etc. that this user created before proceeding to the DROP command.
- You can’t remove users that are connected to the database. First, you have to clear up all sessions that the user had. After that, you can drop the user itself.
There is a special command that allows for dropping the user with all its database objects in one shot:
DROP USER <username> CASCADE;Conclusion
Summing up, now you can use the Oracle SQL CREATE USER command to add new users, configure, and manage them. We used the examples for manual performance. However, the capabilities of the modern software solutions for Oracle databases can simplify this job, make it faster and more accurate. Feel free to give dbForge Studio a try with a free 30-day trial version.
Useful Links