
TL;DR
There are four main ways to create a database in Oracle: using the CREATE DATABASE command, the DBCA GUI tool, cloning from an existing database via scripts, or using SQL Developer. All methods involve configuration and instance setup, offering flexibility for different Oracle versions and user experience levels.
There are several approaches to creating a new database in Oracle that include GUI tools, Oracle syntax, and database migration. This article will describe the steps to create a database in Oracle: from the first preparation activities to using CREATE DATABASE. Here, you will find four ways to create a database in Oracle step by step. Two of them will be based on the command line: using the CREATE DATABASE command, as well as generating the CREATE DATABASE script from an existing DB. The other two will describe how to use such GUI utilities as DBCA, and Oracle SQL Developer. This tutorial is relevant for Oracle versions 12c, 11g, 10g, and higher.
Before creating an Oracle database
Before creating a database in Oracle, you will have to set an appropriate scene that will include standard PL/SQL packages installation and building views on the data dictionary tables. Without further ado, let us prepare the server for the Oracle database creation.
Usually, OUI sets ORACLE_HOME and ORACLE_SID automatically in the Windows registry. However, if you installed Oracle without setting up a database, you will have to configure ORACLE_SID manually.
Set the Instance Identifier (SID)
One of the most important environment variables is ORACLE_SID, which will be the name of the new Oracle database you are about to create. You will be able to set it using the following command:
set ORACLE_SID=testdbCreate the initialization parameter file
The next step would be the init.ora file creation. It will serve as the initialization file for the new database. Depending on your Oracle version, there might or might not be a sample init.ora file in ORACLE_HOME/dbs. If there is, you can use it as a template and edit the values according to your needs.
The initialization file for the new database should be in the following format: INIT{ORACLE_SID}.ora. In our case, the file name will be inittestdb.ora.
If there is no default init.ora template in ORACLE_HOME/dbs, use the following sample:
##############################################################################
# Example INIT.ORA file
#
# This file is provided by Oracle Corporation to help you start by providing
# a starting point to customize your RDBMS installation for your site.
#
# NOTE: The values that are used in this file are only intended to be used
# as a starting point. You may want to adjust/tune those values to your
# specific hardware and needs. You may also consider using Database
# Configuration Assistant tool (DBCA) to create INIT file and to size your
# initial set of tablespaces based on the user input.
###############################################################################

# Change '<ORACLE_BASE>' to point to the oracle base (the one you specify at
# install time)

db_name='ORCL'
memory_target=1G
processes = 150
db_block_size=8192
db_domain=''
db_recovery_file_dest='<ORACLE_BASE>/flash_recovery_area'
db_recovery_file_dest_size=2G
diagnostic_dest='<ORACLE_BASE>'
dispatchers='(PROTOCOL=TCP) (SERVICE=ORCLXDB)'
open_cursors=300
remote_login_passwordfile='EXCLUSIVE'
undo_tablespace='UNDOTBS1'
# You may want to ensure that control files are created on separate physical
# devices
control_files = (ora_control1, ora_control2)
compatible ='12.0.0'
Note:
The provided content may vary depending on the Oracle version.
Whatever the name of undo_tablespace is, make sure to use the exact same one while executing the CREATE DATABASE command.
Another important point is to edit the directory locations depending on your system. Do not forget to change “testdb” in the above example to your ORACLE_SID name.
For convenience, store your initialization parameter file in the default location, using the default file name.
Create an instance
The next step would be creating an instance. If it does not already exist, you will need to execute the ORADIM command from Command Prompt:
oradim -NEW -SID sid -STARTMODE MANUAL -PFILE fileReplace the sid placeholder with the SID parameter we set earlier. As to the file parameter, that would be the full path to the text initialization parameter file.
Connect to an instance
Once the instance has been created, you need to connect to it. In this article, we will be using SQL*Plus to do that. If you do not have it installed on your personal computer, it is available for download on the official Oracle website.
Having launched the SQL*Plus, connect to your Oracle Database instance with the SYSDBA administrative privilege:
$ sqlplus /nolog
SQL> CONNECT / AS SYSDBA
SQL*Plus will return Connected to an idle instance. as an output.
Create server parameter file (spfile)
Unlike the init.ora file, you cannot edit the server parameter file manually as it is binary. Instead, the spfile can be generated from init.ora. In SQL*Plus, run the following command:
CREATE SPFILE FROM PFILE;Run idle instance
Before creating the database, we must start an instance for the testdb database using the STARTUP NOMOUNT command. As you may have guessed by now, this command will not connect to the database. Instead, it will simply start an empty ORACLE_SID instance named testdb.
SQL> STARTUP NOMOUNT;
ORACLE instance started.

Total System Global Area 1258291200 bytes
Fixed Size                  1261564 bytes
Variable Size             520093700 bytes
Database Buffers          721420288 bytes
Redo Buffers               15515648 bytes
How to create a database in Oracle, using CREATE DATABASE command
Since we have already prepared a cozy place on the server, it’s high time we let a new database inside. Using the CREATE DATABASE statement is one of the most popular ways to create a database among the developers that work with Oracle tools.
The CREATE DATABASE statement will look somehow like this:
CREATE DATABASE testdb
   USER SYS IDENTIFIED BY sys_password
   USER SYSTEM IDENTIFIED BY system_password
   LOGFILE GROUP 1 ('/u01/logs/my/redo01a.log','/u02/logs/my/redo01b.log') SIZE 100M,
           GROUP 2 ('/u01/logs/my/redo02a.log','/u02/logs/my/redo02b.log') SIZE 100M,
           GROUP 3 ('/u01/logs/my/redo03a.log','/u02/logs/my/redo03b.log') SIZE 100M
   MAXLOGHISTORY 1
   MAXLOGFILES 16
   MAXLOGMEMBERS 3
   MAXDATAFILES 1024
   CHARACTER SET AL32UTF8
   NATIONAL CHARACTER SET AL16UTF16
   EXTENT MANAGEMENT LOCAL
   DATAFILE '/u01/app/oracle/oradata/mynewdb/system01.dbf'
     SIZE 700M REUSE AUTOEXTEND ON NEXT 10240K MAXSIZE UNLIMITED
   SYSAUX DATAFILE '/u01/app/oracle/oradata/mynewdb/sysaux01.dbf'
     SIZE 550M REUSE AUTOEXTEND ON NEXT 10240K MAXSIZE UNLIMITED
   DEFAULT TABLESPACE users
      DATAFILE '/u01/app/oracle/oradata/mynewdb/users01.dbf'
      SIZE 500M REUSE AUTOEXTEND ON MAXSIZE UNLIMITED
   DEFAULT TEMPORARY TABLESPACE tempts1
      TEMPFILE '/u01/app/oracle/oradata/mynewdb/temp01.dbf'
      SIZE 20M REUSE AUTOEXTEND ON NEXT 640K MAXSIZE UNLIMITED
   UNDO TABLESPACE undotbs1
      DATAFILE '/u01/app/oracle/oradata/mynewdb/undotbs01.dbf'
      SIZE 200M REUSE AUTOEXTEND ON NEXT 5120K MAXSIZE UNLIMITED
   USER_DATA TABLESPACE usertbs
      DATAFILE '/u01/app/oracle/oradata/mynewdb/usertbs01.dbf'
SIZE 200M REUSE AUTOEXTEND ON MAXSIZE UNLIMITED;- This example creates a database named testdb using the Oracle command line.
- Such parameters as global database name and
CONTROL_FILESare taken from the previously created initialization parameter file. - In the
LOGFILEclause, we specified three redo log file groups. Each of them has two members. - The
MAXLOGFILES,MAXLOGMEMBERS, andMAXLOGHISTORYparameters define limits for the redo log. MAXDATAFILESaffects the initial sizing of the control file and limits the number of data files that can be open in the DB.- As to
AL32UTF8andAL16UTF16, these are the character sets that will be used to store data in the database we are about to create. - Another important part of the
CREATE DATABASEcommand in Oracle is theSYSTEMtablespace. It consists of the operating system file /u01/app/oracle/oradata/mynewdb/system01.dbf and is created as specified by theDATAFILEclause. - The
SYSTEMtablespace is created as locally-managed. SYSAUXconsists of the operating system file /u01/app/oracle/oradata/mynewdb/sysaux01.dbf (as specified in theSYSAUX DATAFILEclause).DEFAULTTABLESPACEcreates and names a default permanent tablespace.DEFAULT TEMPORARY TABLESPACEcreates and names a default temporary tablespace.- If you specified the
UNDO_MANAGEMENTparameter asAUTOin the initialization parameter file,UNDO TABLESPACEcreates and names an undo tablespace that stores the undo data. USER_DATA TABLESPACEcreates and names the tablespace for storing user data and database options, e.g. Oracle XML DB.- Since the
ARCHIVELOGclause is not specified in thisCREATE DATABASEOracle line, online redo logs will not be archived. This part can be customized during database creation. You will be able to use anALTER DATABASEquery to switch to theARCHIVELOGmode.
Having executed the script above, you will create the testdb database.
Create Oracle database using DBCA (Database Configuration Assistant)
Now, let us describe how to create a container database in Oracle using DBCA. DBCA (Database Configuration Assistant) is a graphical tool that might be more useful for those who are not yet familiar with the command-line syntax. It can be used to create and delete databases, add options to existing ones, manage templates, etc.
Let us move on to the practical part of the database creation in Oracle using DBCA.
1. First of all, open the Database Configuration Assistant on your computer. You will see a list of the operations you can perform.
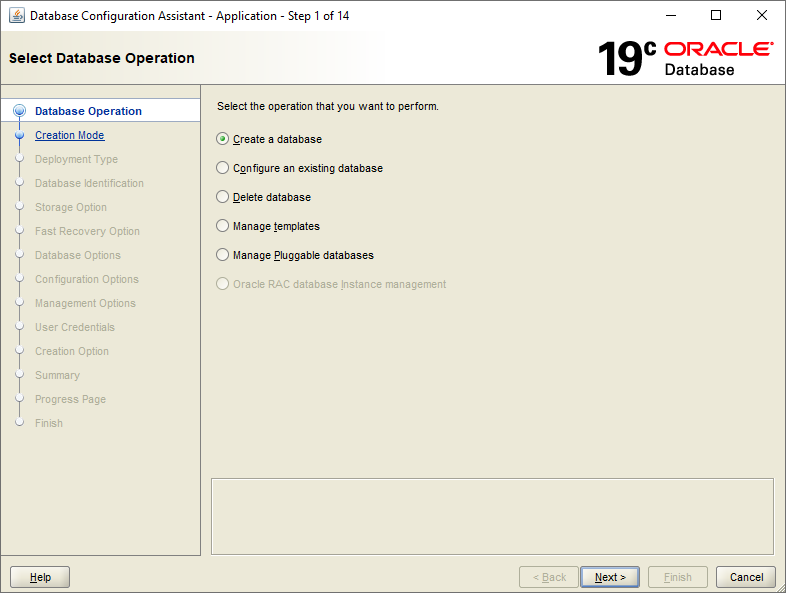
Select Create a database and click Next.
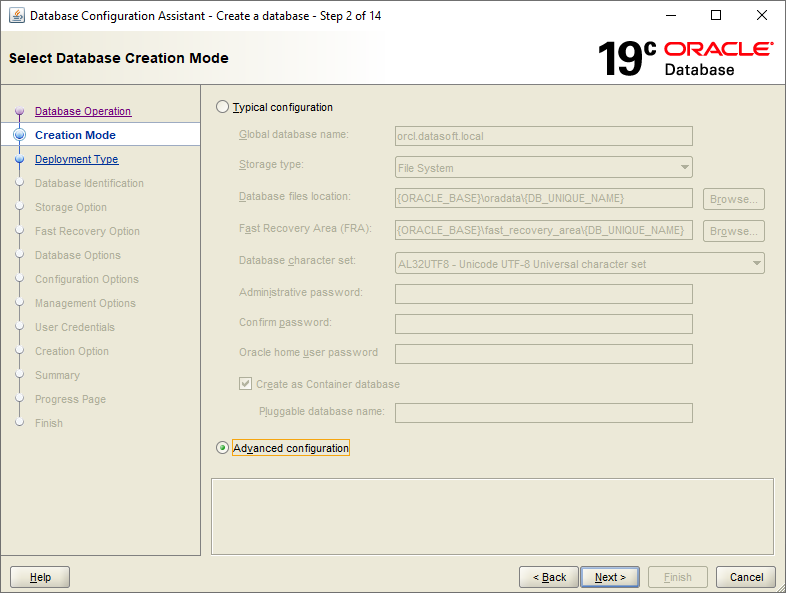
2. In Creation mode, opt for Advanced configuration and proceed to the next step.
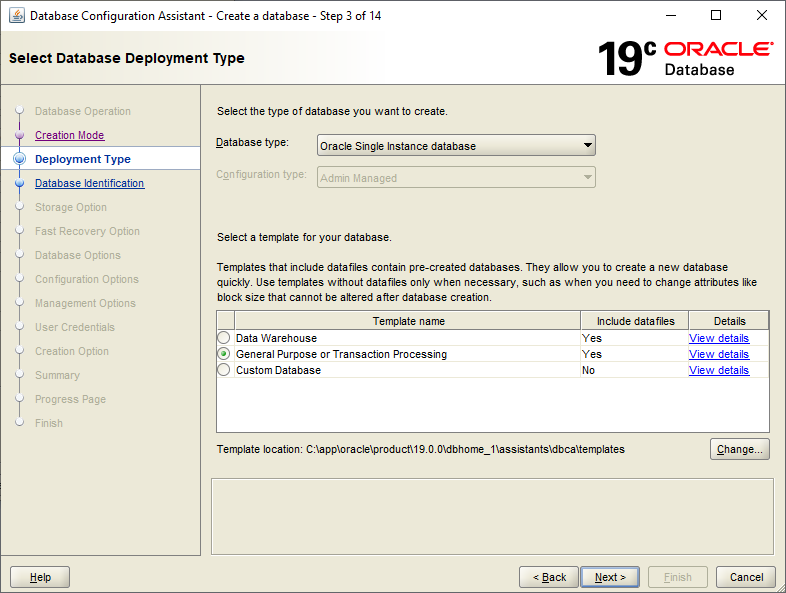
3. The wizard offers you to choose the database deployment type. Select the General Purpose or Transaction Processing option. Click Next.
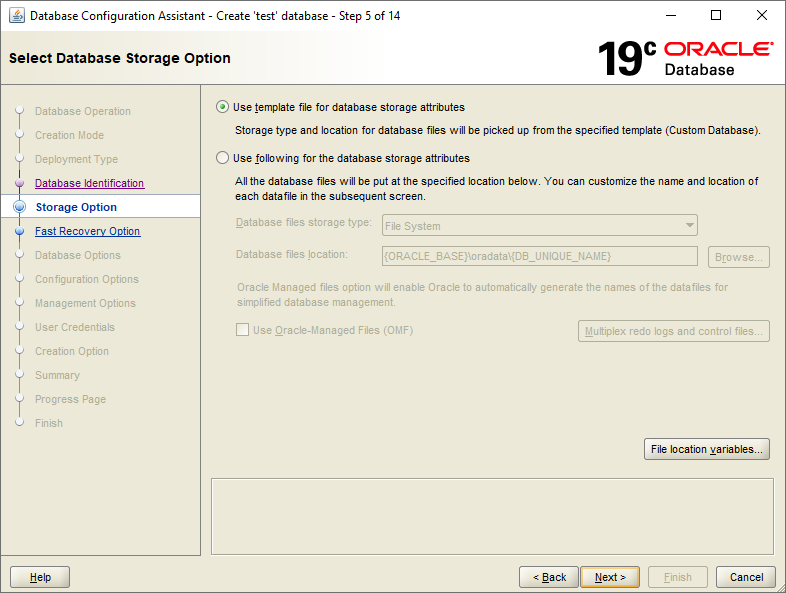
4. Among the different storage options, choose the first one: Use template for database storage attributes. Click Next.
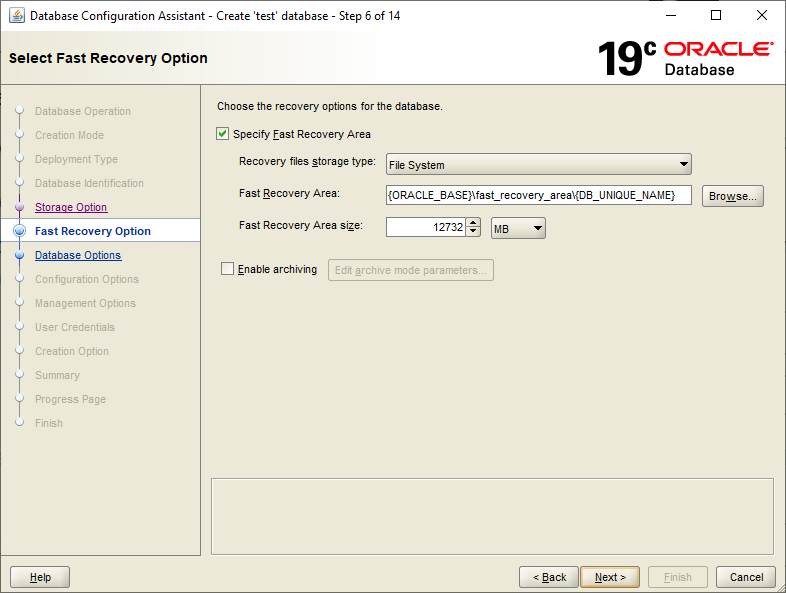
5. Just to play it safe, configure the fast recovery option for your database. Specify the recovery files storage type, fast recovery area, and sizing. Hit Next.
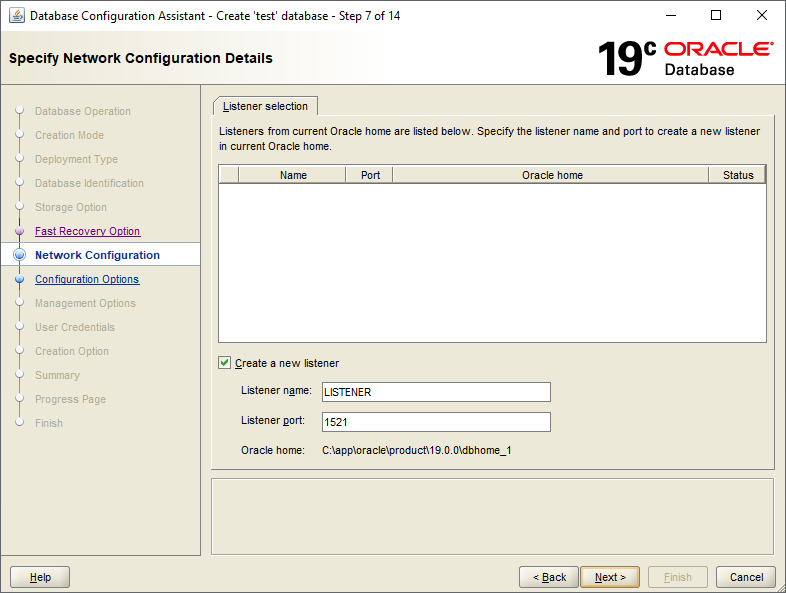
6. At the Network Configuration step, you will need to create a new listener. Enter the name and the port number for it and proceed to the next step.
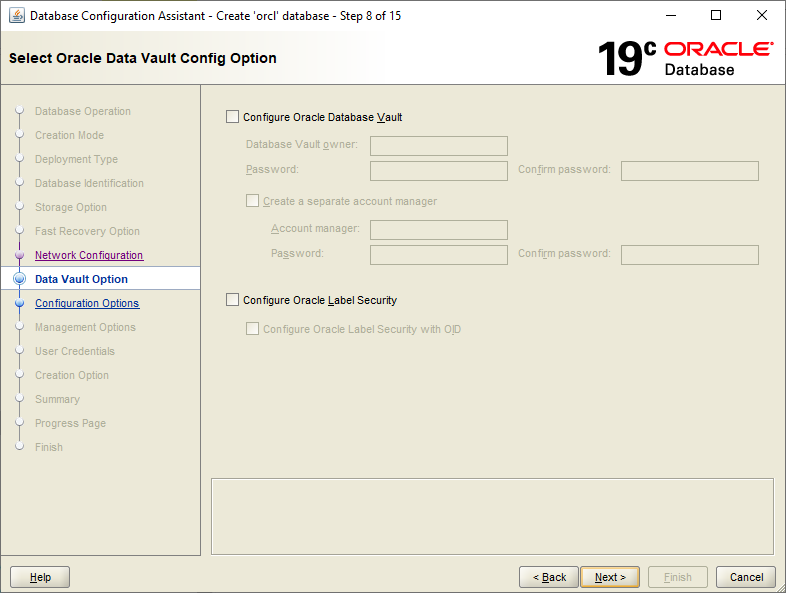
7. This is an optional step and we are going to skip it in this tutorial. For more information, feel free to refer to the official Oracle documentation.
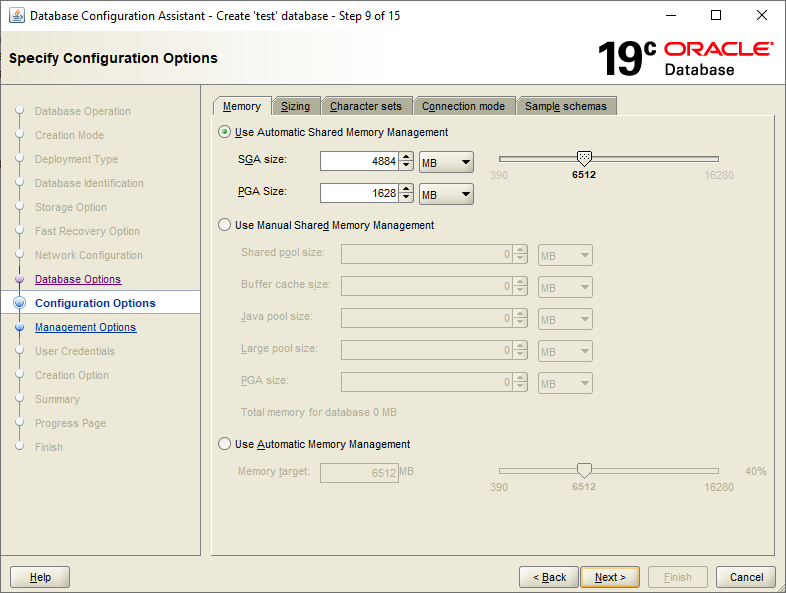
8. At the Configuration Options step you will see five tabs: Memory, Sizing, Character sets, Connection modes, Sample schemas. Opt for Automatic Shared Memory Management, specify the SGA and PGA sizes and move on to the next tab.
9. On the Sizing tab, specify the maximum number of processes that can be connected to our database at the same time.
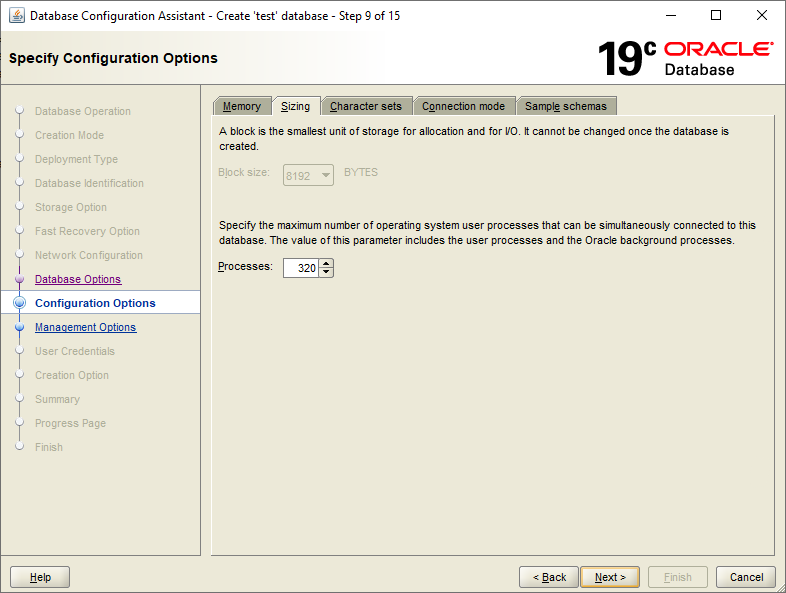
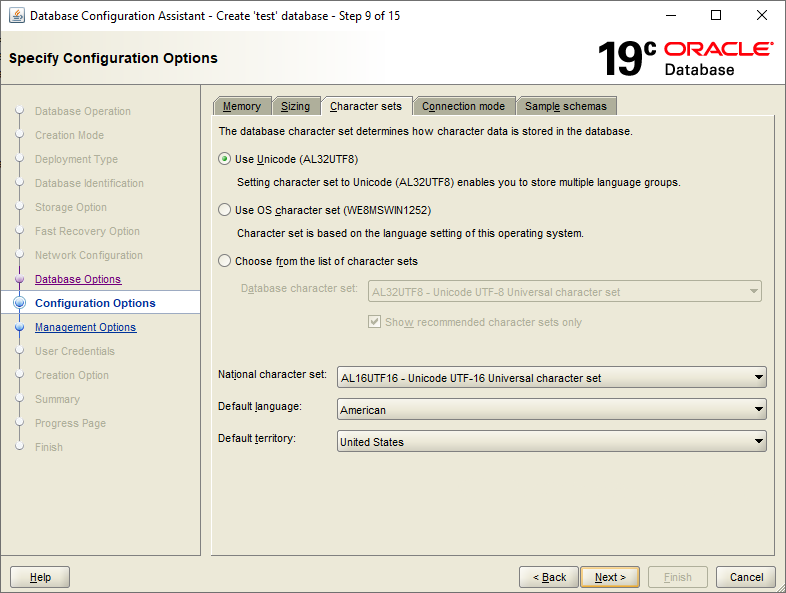
10. Here, choose AL32UTF8. For the National character set, opt for AL16UTF16. Once done, go to the next tab.
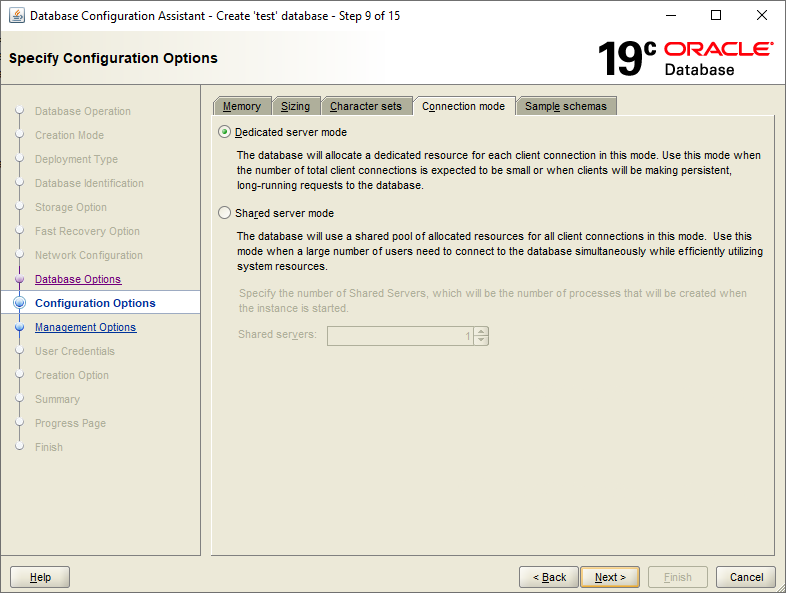
11. Select Dedicated mode on the Connection mode tab. Proceed to the next tab.
12. At the last tab at this step, select the Add sample schemas to the database checkbox and click Next.

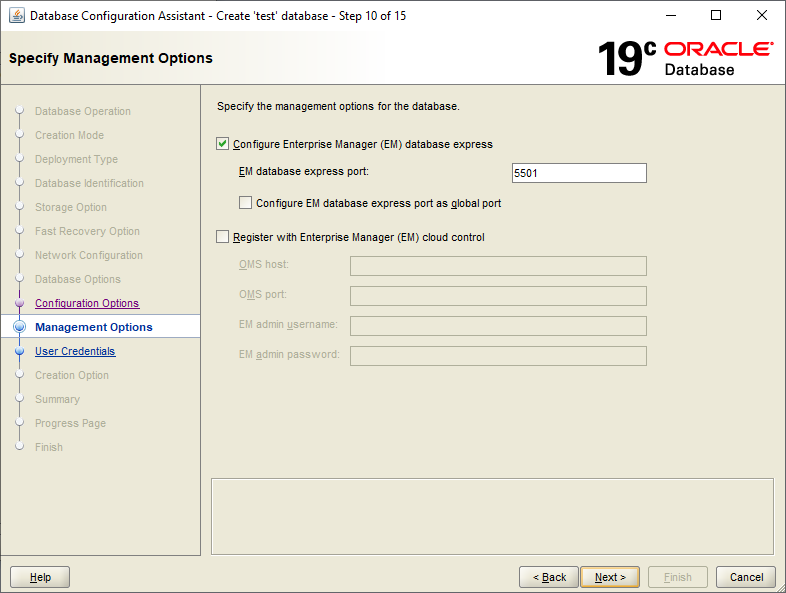
13. Once the configuration options are set, you are going to configure the management options. Select the Configure Enterprise Manager (EM) database express checkbox. Also, specify the corresponding port. Once done, click Next.
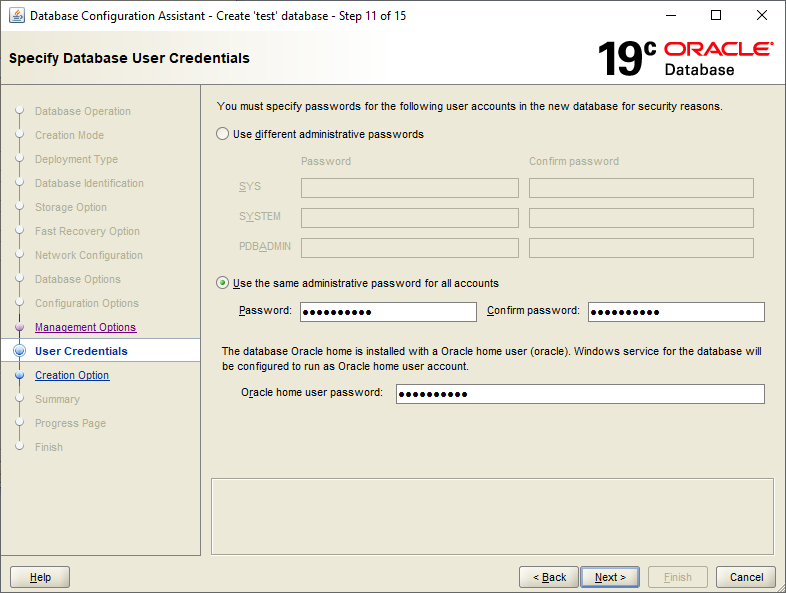
14. Set the same administrative password for all accounts and enter the Oracle home user password. Proceed to the next step.
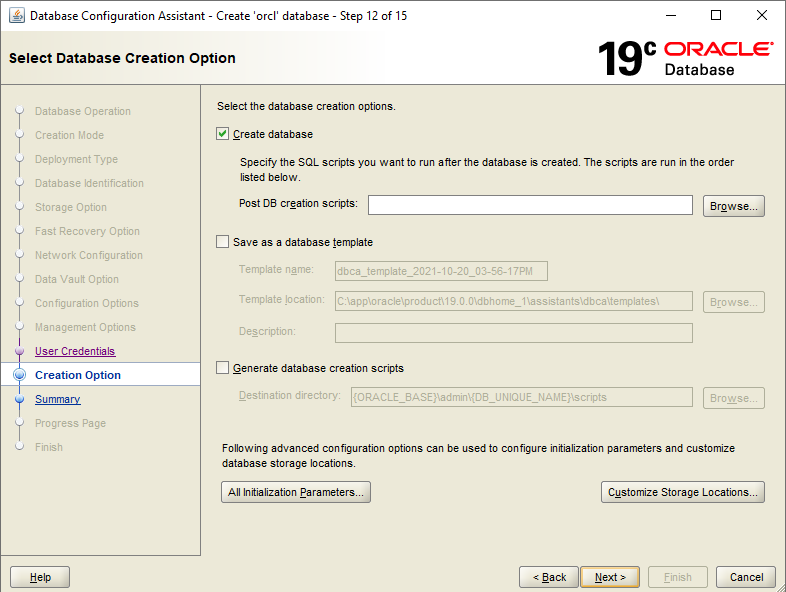
15. Now, the wizard allows you to choose what exactly is to be done during and after the database creation. You can specify the scripts to run after the DB is created; save the new DB as a template; generate a DB creation script so you don’t have to go through the whole process of Oracle database creation using DBCA. Tick the desired checkboxes and click Next.
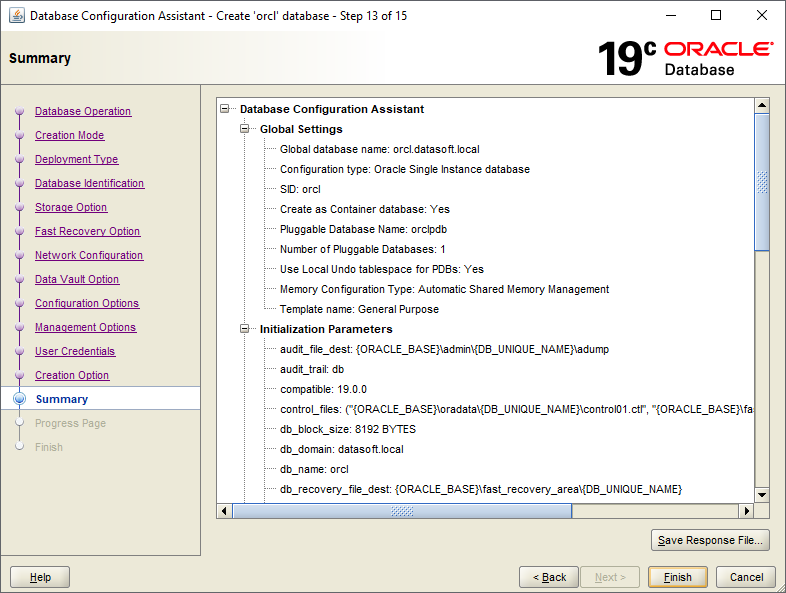
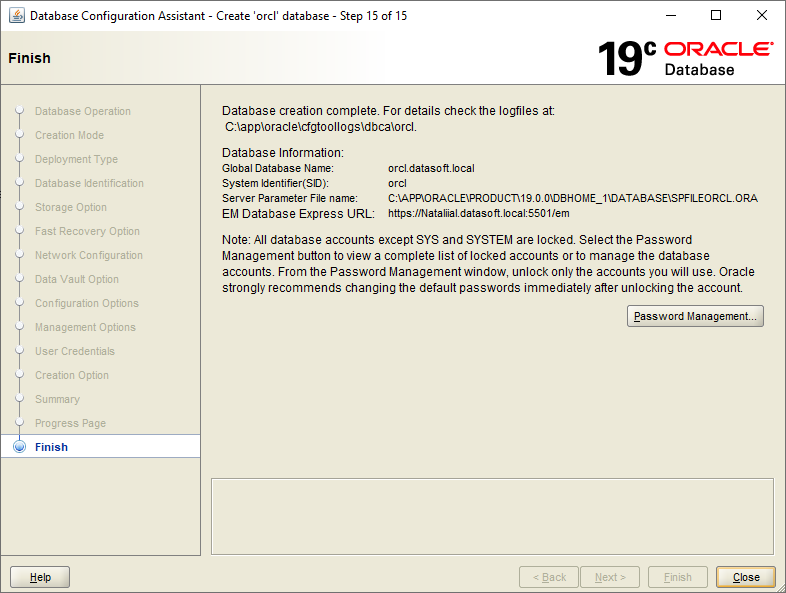
16. Double-check the generated database creation summary and hit Finish.
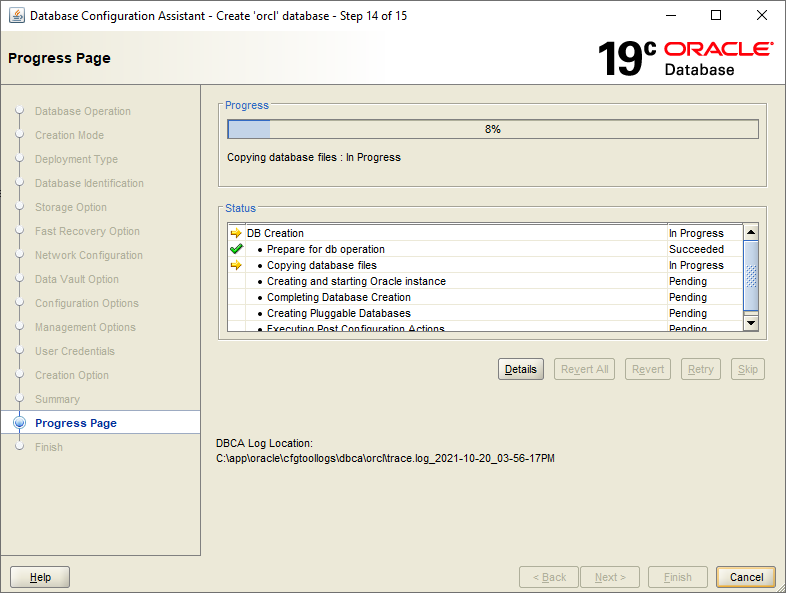
17. Allow the wizard to finish the database creation process. You will be able to see what exactly is being done at the moment and what is up next.
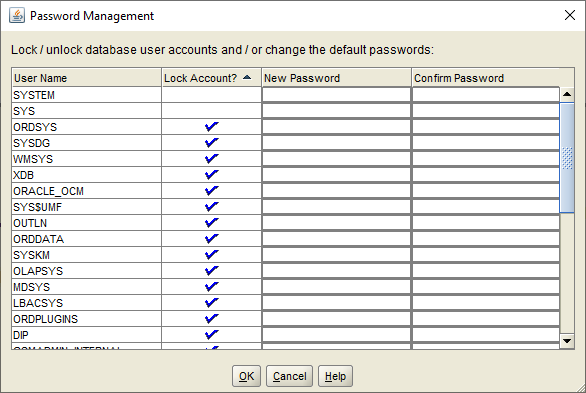
18. As soon as the process is over, you will be notified accordingly. Keep in mind that all the database accounts except SYS and SYSTEM are initially locked. To unlock them, click Password Management.
19. Set the passwords for the database accounts and click OK.
This is it! Your Oracle database is fresh from the oven and ready to serve its purpose.
Generate CREATE DATABASE script from an existing Oracle database
Creating an Oracle database might seem quite time-consuming and meticulous. To save you from going through this process over and over again, we decided to provide you with a way to generate a CREATE DATABASE script from an existing Oracle database.
As mentioned earlier, you can save the corresponding script in DBTA during the DB creation. However, how do you generate the CREATE DATABASE script from a database that already exists?
1. In this article, we will be using Database Configuration Assistant to do that. To begin with, open DBCA on your computer.
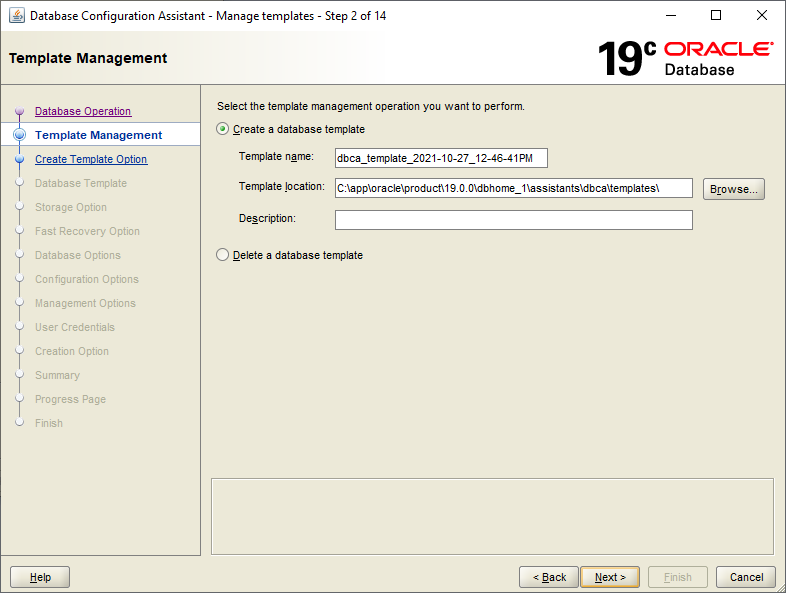
2. Select Manage Templates and click Next.

3. Enter the name of the future template and choose where to store it. Proceed to the next step.
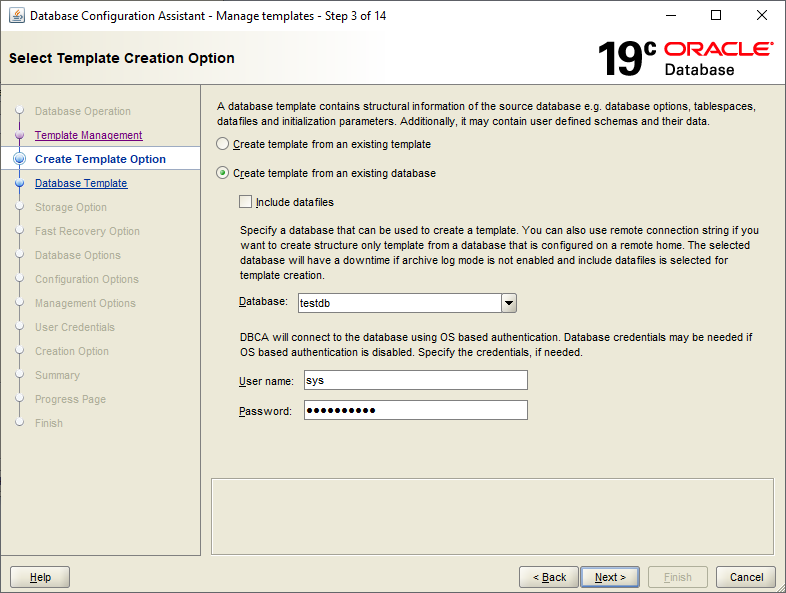
4. Now, click Create template from an existing database. From the dropdown menu, select the desired DB. Then, enter your user credentials. Hit Next once done.
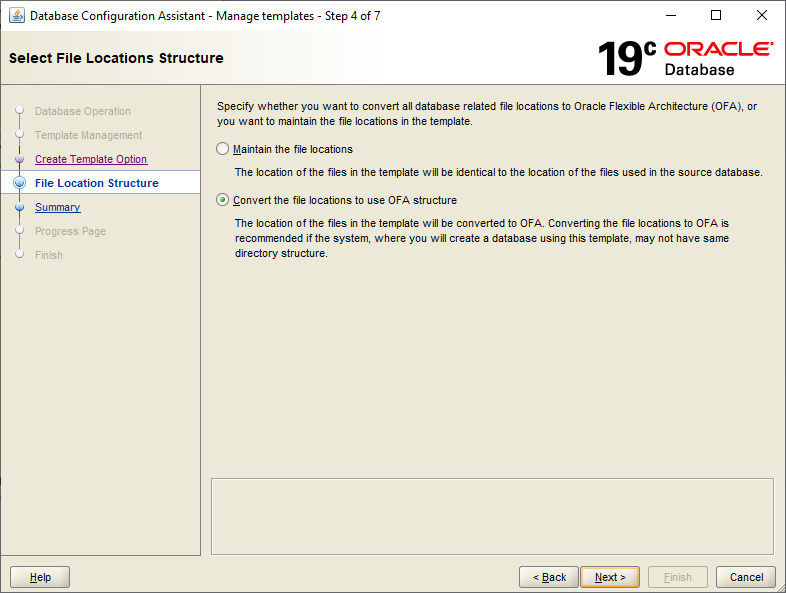
5. At this step, decide whether you would like to keep the file locations as is or to convert them to use OFA structure.
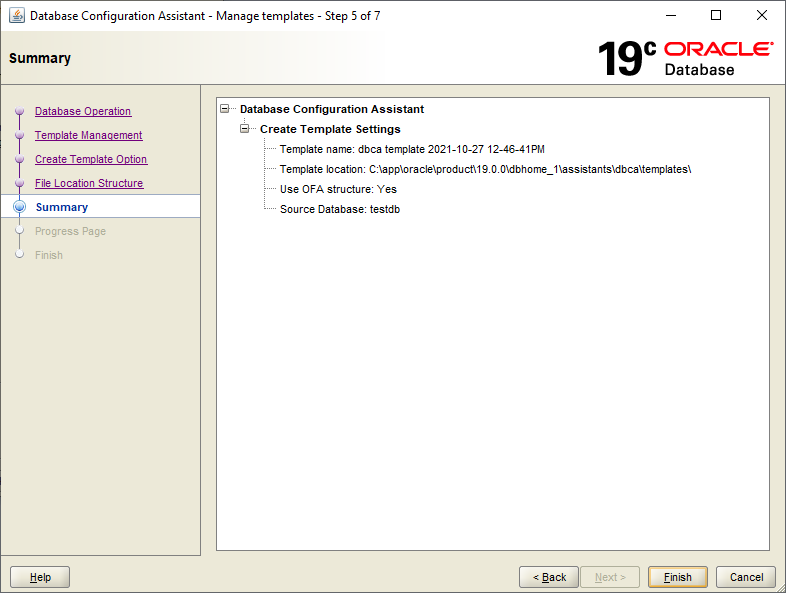
6. Review the template creation summary and click Finish.
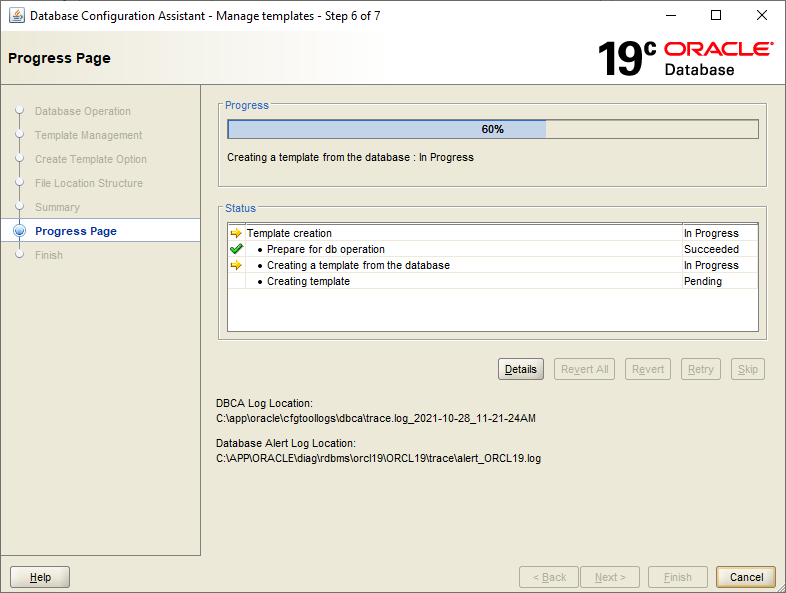
7. Allow some time for the template to be created.
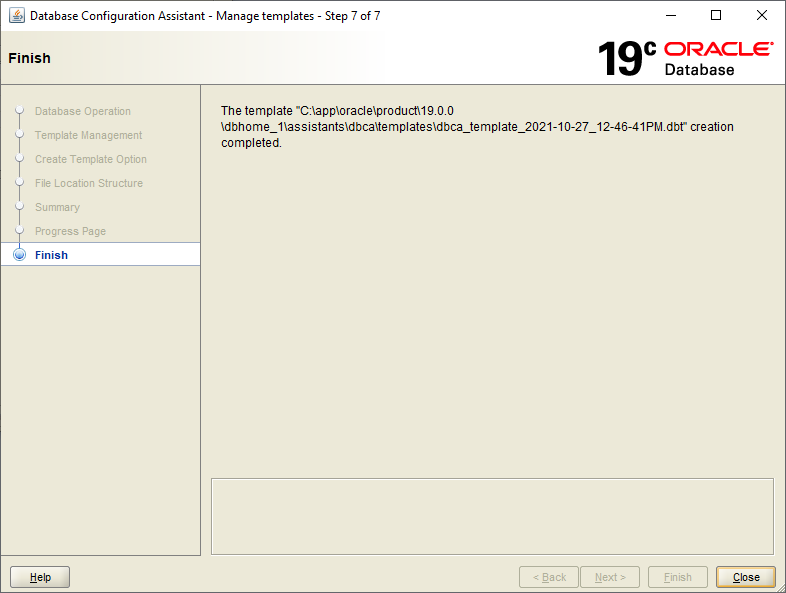
8. Now, you have your database saved as a template for future use. Click Close.
How to create a new database in Oracle SQL Developer
Oracle SQL Developer is a free GUI that allows you to browse database objects, execute SQL statements and scripts, edit and debug PL/SQL statements, manipulate and export data, view and create reports, and the list goes on. It also integrates interfaces into several related technologies, including Oracle Data Miner, Oracle OLAP, Oracle TimesTen In-Memory Database, and SQL Developer Data Modeler (read-only). Let us demonstrate how to create a database in Oracle SQL Developer.
1. Download Oracle SQL Developer.
2. Extract the files from the downloaded .zip archive and run SQL Developer.
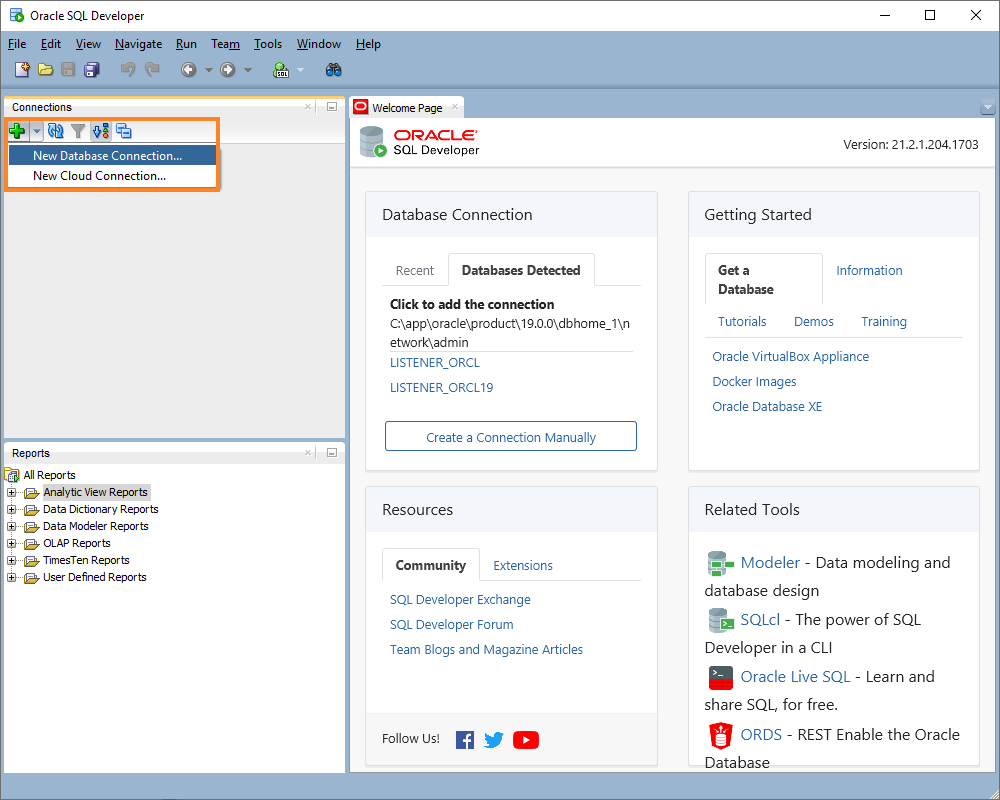
3. On opening the application, you will see the Start Page. Look for a green plus sign under Connections on the left. Click an arrow next to it and select New Database Connection.
4. The New/Select Database Connection window opens.
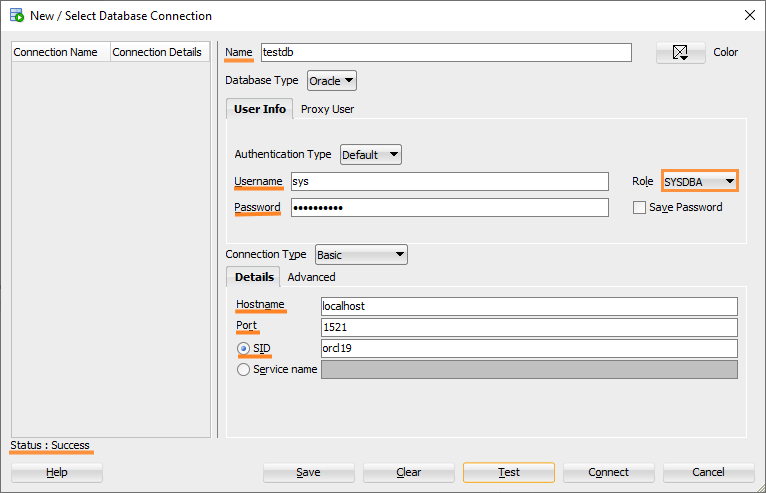
- First, enter the name of the future database.
- After that, fill in the corresponding boxes with the user credentials.
- If you are logging in as a sys user, make sure to choose SYSDBA or SYSOPER role from the dropdown.
- Enter the hostname, port, and SID.
- Click Test. If everything is okay, you will see the Status: Success message in the bottom left corner of the window. In case of any errors, there will be hints on how to fix them.
- Once you are ready, press Connect.
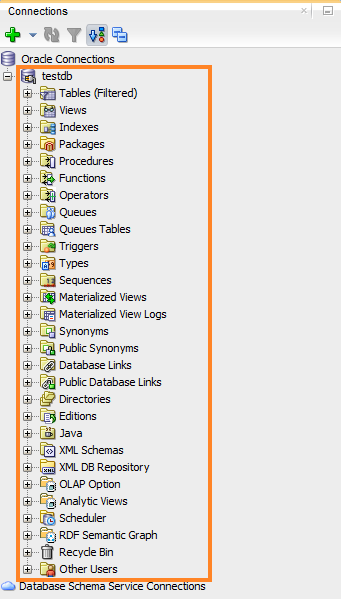
5. Now, you have created an Oracle database using SQL Developer. The new testdb database is located in the Oracle Connections list.
Conclusion
There are quite a lot of ways to create and manipulate Oracle databases out there. Moreover, Oracle requires knowledge, experience, and time to prepare and configure properly. We have just gone through some of the most popular and convenient ways to start a new Oracle DB: using the CREATE DATABASE statement in the command line, Database Configuration Assistant, and SQL Developer. Some of these tools require more experience than others, but we believe it is good to learn at least the basics about each one. This helps find the best solution for your business.

Useful links
If you are dealing with Oracle databases, these pages might be of use for you: