
In this article, we will provide you with a screenshot-infused step-by-step tutorial on how to convert a Microsoft Access database to SQL Server using dbForge Studio for SQL Server. This GUI tool can enhance nearly every aspect of working with databases, including database design, SQL coding, database comparison, schema and data synchronization, generation of useful test data, and many other functionalities.
Contents

Microsoft Access is a widely-used relational database management system that allows users to store and manipulate data simply and intuitively. However, as the amount of data grows and more complex queries are needed to handle it, MS Access databases can become slow and inefficient. In such cases, it might become crucial to migrate such databases to a more robust and scalable database system like SQL Server, which can improve performance and make data management more efficient.
Importing Data
In order to import data using dbForge Studio for SQL Server:
1. On the Database menu, click Import Data. Alternatively, you can right-click the target database, point to Tools, and select Import Data.
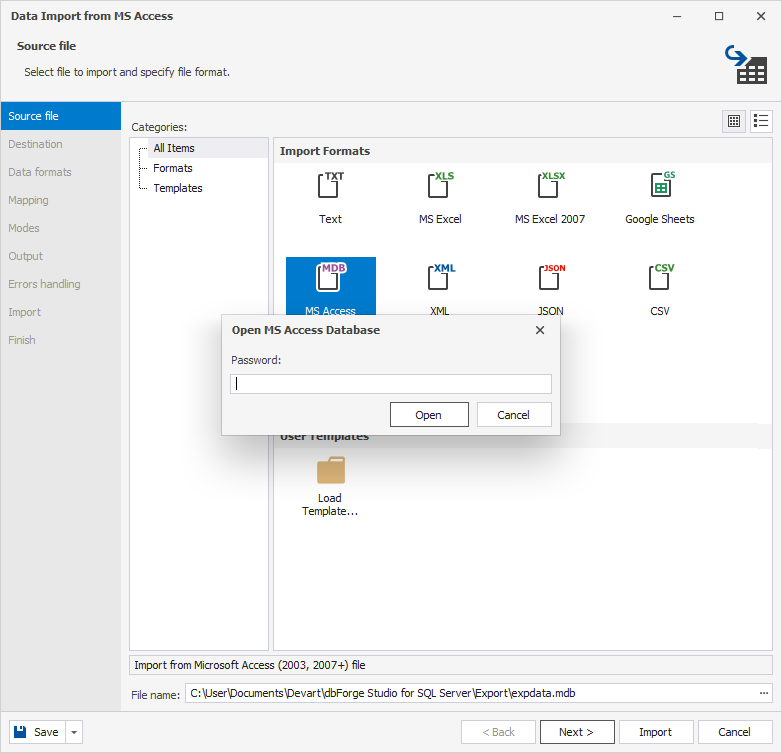
2. In the Data Import wizard that opens, select MS Access as an import format and specify the location of Source data. Click Next.
If the Source data is protected with a password, the Open MS Access Database dialog box appears where you should enter the password.
NOTE: To perform the transfer, you should install Microsoft Access Database Engine beforehand. It will install components that can facilitate the transfer of data between Microsoft Access files and non-Microsoft Office applications. Otherwise, the Import wizard will show the error:
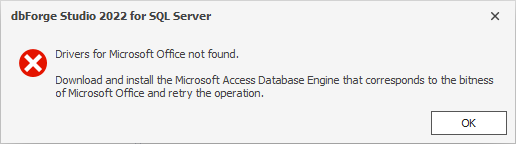
Should you face this issue, download the missing components here.
Make sure that the bit versions of both your Windows operating system and Microsoft Access Database Engine match. If you have a 64-bit system, you’ll need to use the 64-bit installer accordingly. However, there may be instances where 32-bit Microsoft Access is installed on a 64-bit Windows OS. If this is the case, follow these steps before proceeding with the installation.
- Click Start and type cmd.
- Right-click the Command prompt, and then select Run as Administrator.
- Type the file path where the installer is located on your computer followed by “/passive“:
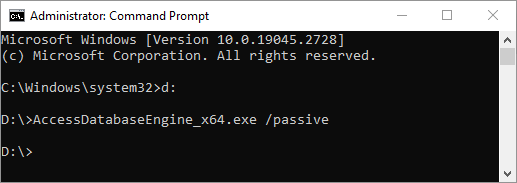
In the case above, the Windows OS is 64-bit, but the installed version of Microsoft Access is 32-bit. That is why the 64-bit installer is required.
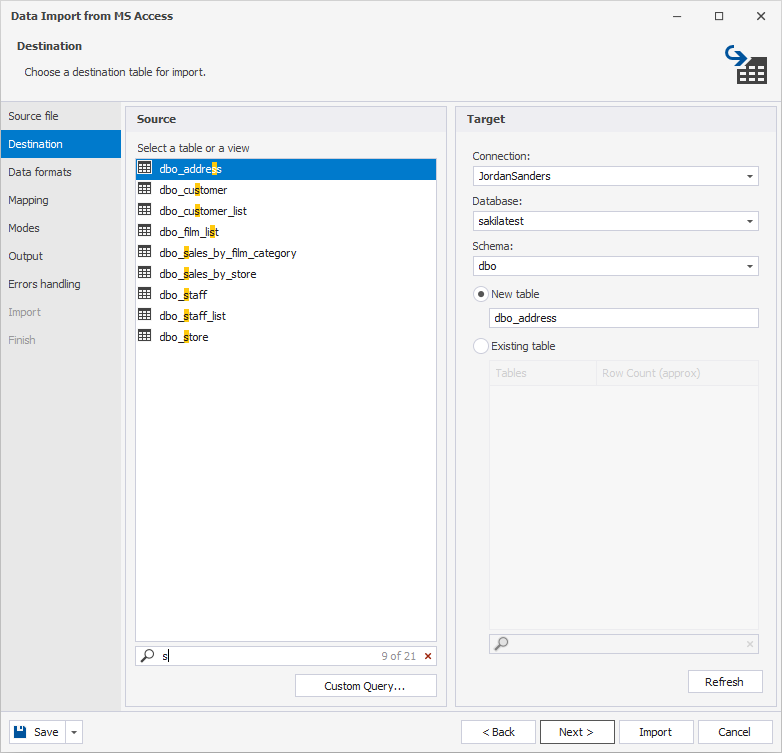
3. Select a source table. To quickly find a table in the list, start entering its name into the Search field. The list will be filtered to show only matching tables.
4. Specify a Target MySQL connection and a database to convert the data to. If you need to create a new table (if you need to import MS Access data to a new table), select New table and specify its name. Click Next.
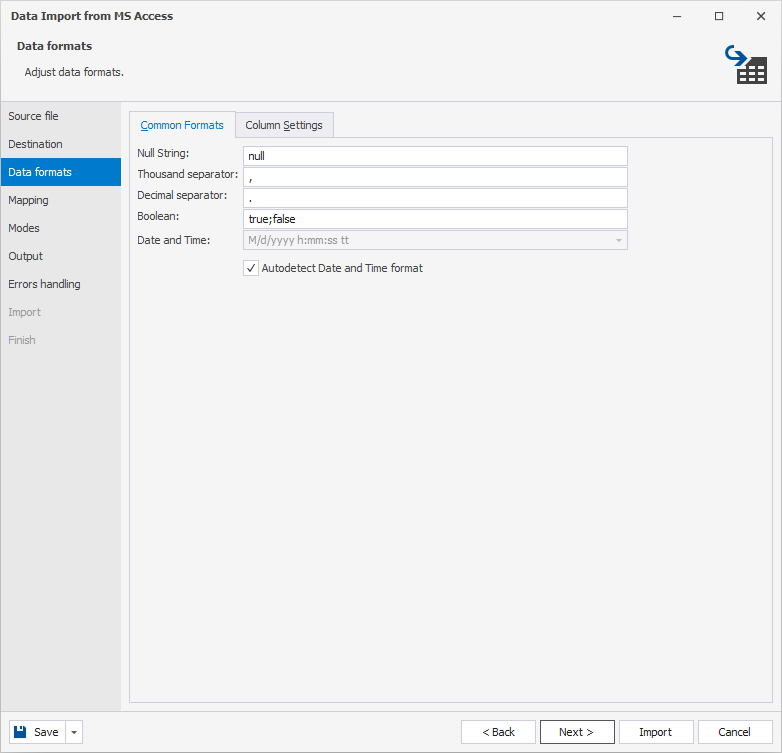
5. Adjust data formats:
6. Map the Source columns to the Target ones. Since we create a new table in SQL, dbForge Studio for SQL Server will automatically create and map all the columns, as well as data types for each column. If the automatic match of columns’ data types is incorrect, you can manually edit those. Click the Source column fields and select the required columns from the drop-down list.
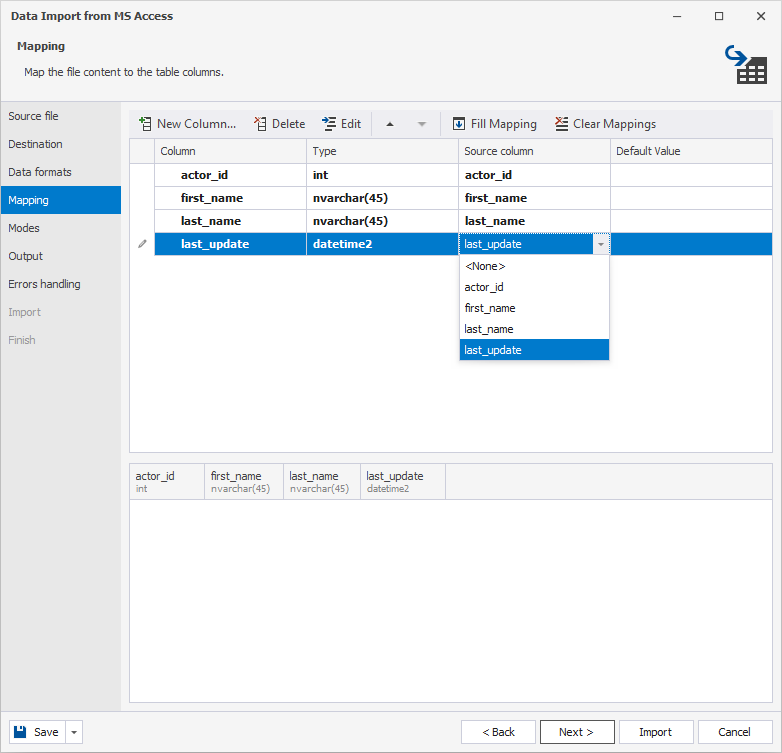
NOTE: To cancel the mapping of all the columns, click Clear Mappings on the toolbar. To restore it, click Fill Mapping.
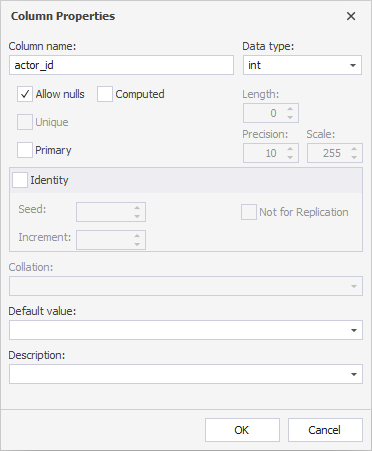
7. To edit the Column Properties, double-click the required column or right-click it and select Edit Column.
8. Choose an import mode:
- Append – add records to the destination table.
- Update – update a record in a destination table with a matching record from the Source.
- Append/Update – if a record exists in the destination table, update it. Otherwise, add it.
- Delete – delete records in the destination table to match the records in the Source.
- Repopulate – delete all records in the destination table, and repopulate from the Source.
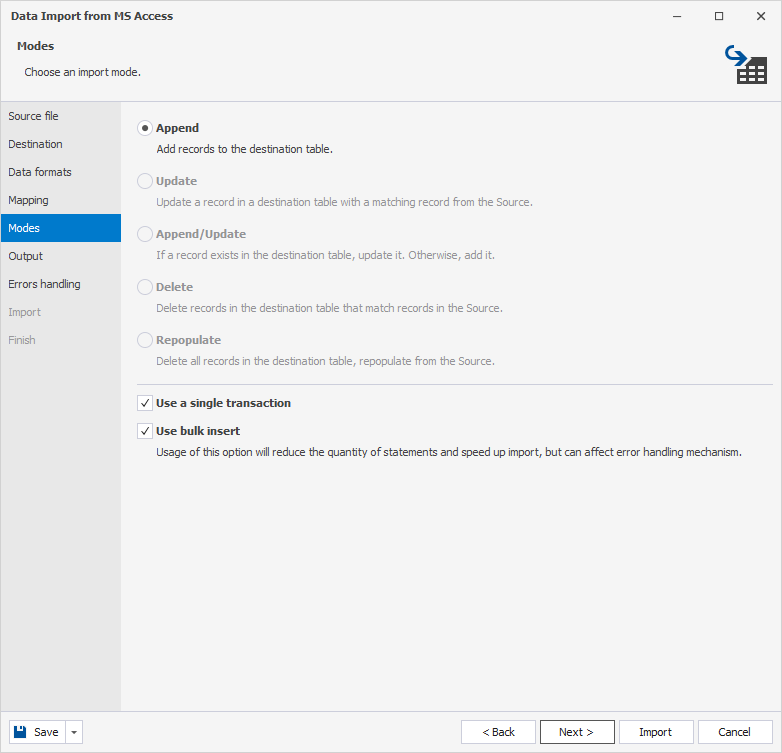
Here, you can also select to use a single transaction and/or bulk insert for this migration.
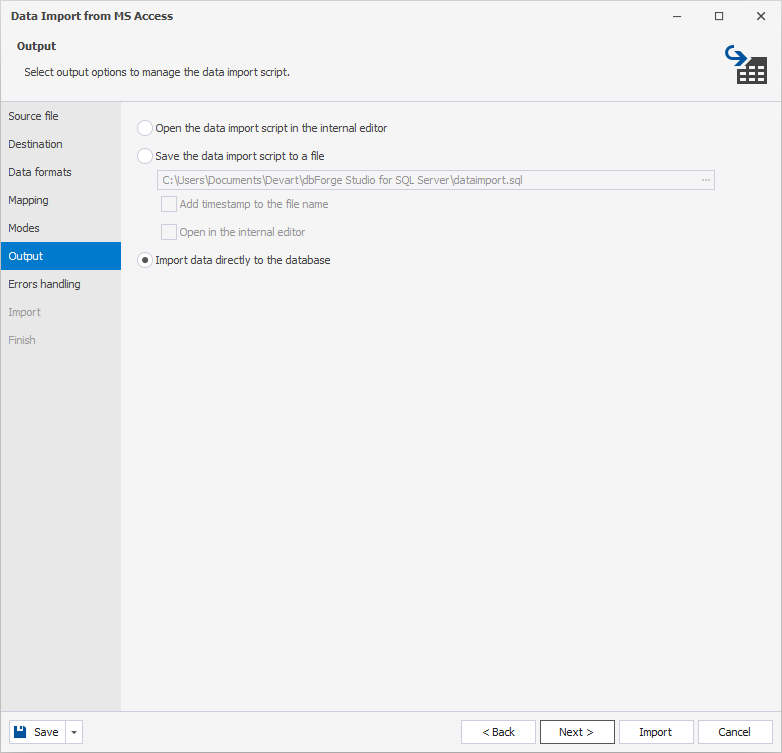
9. On the Output tab of the wizard, select output options to manage the data import script:
- Open the data import script in the internal editor.
- Save the data import script to a file.
- Import data directly to the database.
10. Configure the error processing behavior and logging options:
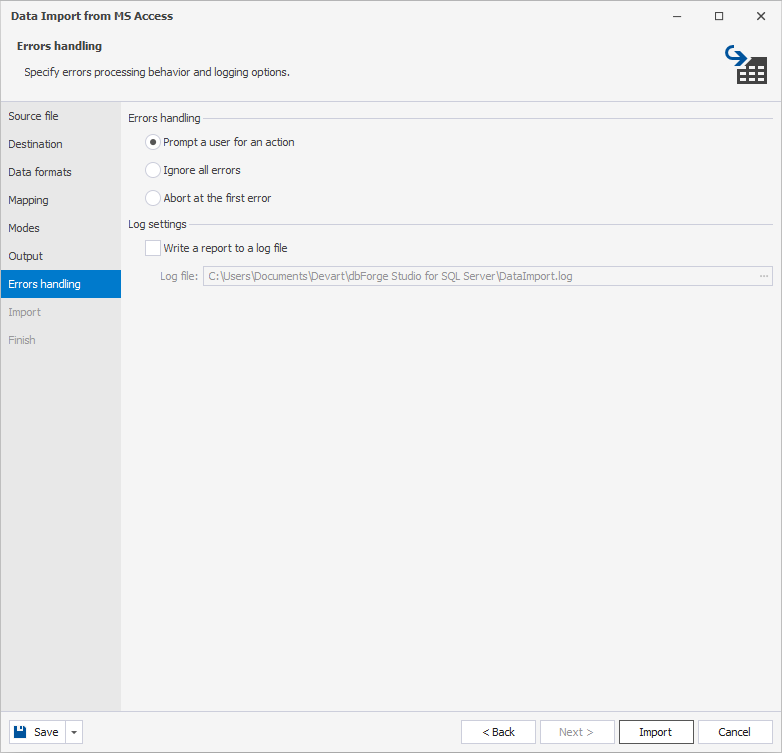
11. Click Import and see the import progress. dbForge Studio for SQL will notify you whether the conversion was completed successfully or failed. If you have chosen to write a report to a log file earlier, click the Show log file to open it.
12. Click Finish.
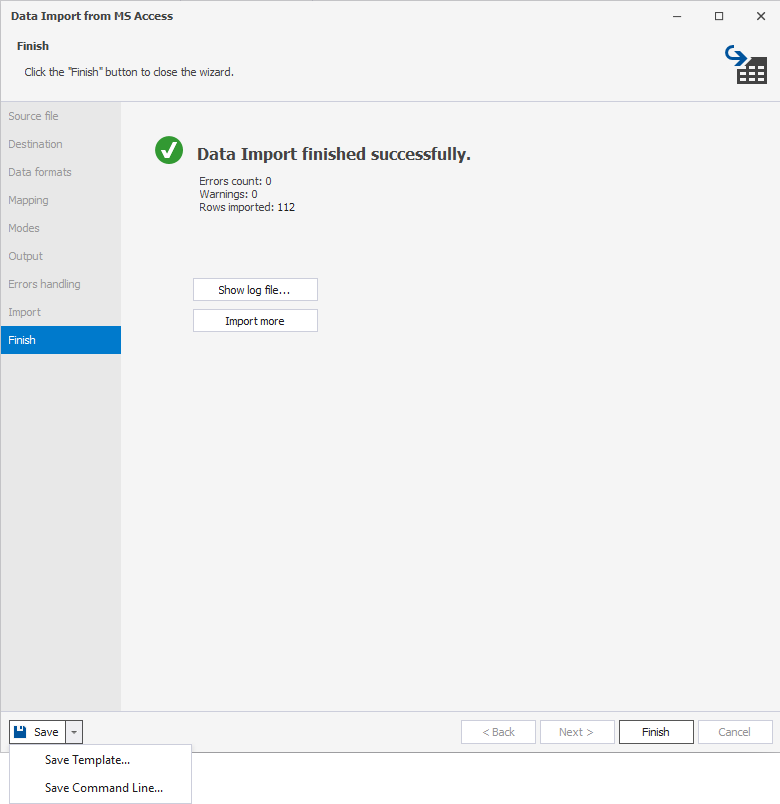
NOTE: You can save the import settings as a template for future uses. Click the Save Template button on any wizard page to save the selected settings. Next time you will only have to select a template and specify a location of the Source data – all the settings will be already there.
To import data from multiple tables simultaneously, even if the data import UI typically supports importing one table at a time, follow the approach outlined in Automating Bulk Data Import from MS Access to SQL Server.
Setting Up Constraints
After importing all necessary tables, you can set up new (or update the existing) relations between the converted tables by creating/editing foreign keys (if required).
Also, you may create primary keys if you skipped this step during the table creation.
Creating Foreign Key
- Right-click a table you need and select Edit Table.
- Switch to the Constraints tab.
- Click Add Foreign key.
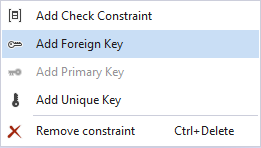
NOTE: To create a foreign key, the referenced table should have a unique index. Otherwise, dbForge Studio will prompt you to create it. Click Yes in the dialog, and the unique index will be added.
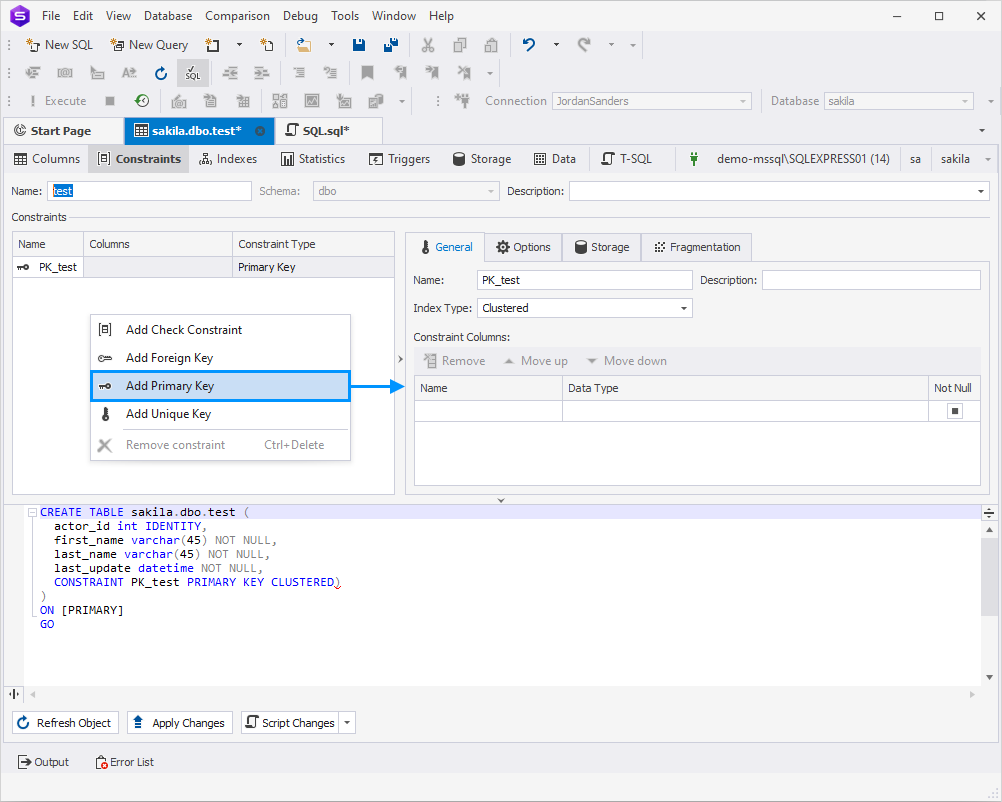
Creating Primary Key
- Right-click a table you need and select Edit Table.
- Switch to the Constraints tab.
- Right-click the empty area and select Add Primary Key.
- Add the required columns to the key and click OK.
Conclusion
As promised at the beginning of this article, we have provided a detailed step-by-step tutorial on converting a Microsoft Access database to SQL Server using dbForge Studio for SQL Server. With its user-friendly GUI and wide range of functionalities, including database design, SQL coding, schema and data synchronization, and test data generation, the IDE can significantly enhance your database management experience. Additionally, an interested user can take advantage of the 30-day free trial to test the tool’s capabilities firsthand.