
One of the daily tasks of database administrators is data migration between different databases. When dealing with large volumes of data, bulk data import comes in handy. It involves loading data from a file into a SQL Server table using a BCP utility, a SQL BULK INSERT statement, the command line, or SQL Server export/import tools such as dbForge Data Pump.
In this article, we’ll examine how to transfer data in bulk from MS Access tables to SQL Server using dbForge Data Pump and the PowerShell command line.

Contents
- SQL Bulk Insert vs BCP utility
- Introduction to Data Pump
- Retrieving all tables from an MS Access database
- Create a template to import settings
- Automating bulk data import
For migration of large datasets, manual data entry may be time-consuming. Instead, bulk data import is better to use, as it quickly transfers data between sources without the need to enter each record manually, as well as reduces the risk of data entry errors.
In addition, you can automate and schedule bulk data import to maintain regular data synchronization and keep data up to date. With data import, you can move data between tables in different formats.
As you can see, there are a lot of benefits to using bulk data import. So, it is time to take a quick look at how it can be implemented, and we start with a SQL Bulk Insert statement and BCP utility.
SQL BULK INSERT vs BCP utility
The BULK INSERT statement is used to insert large volumes of data from an external file into a SQL Server table or view. It is suitable for scenarios where data loading speed and efficiency are critical.
The statement has the following syntax:
BULK INSERT table_name
FROM 'path_to_file'
WITH (options);
where:
table_nameis the name of the table into which the data will be inserted. The name should be specified in the following format –database_name.schema_name.table_name.path_to_fileis the full path to the file with the data you want to import.optionsare various options or configurations for the bulk insert operation.
Another popular way to import data in bulk is to use the bcp command-line utility. BCP stands for Bulk Copy Program. It allows users to quickly import/export data from files into SQL Server tables or views.
BCP is designed for high-performance data transfer. It can efficiently handle large datasets and is often used for data migration, data warehousing, and ETL (Extract, Transform, Load) processes. BCP allows you to specify various options, including data format, field and row terminators, and authentication details to tailor the import or export process to your needs.
An example of the BCP command to import data from a CSV file into a SQL Server database table could be:
bcp MyDatabase.dbo.MyTable in datafile.csv -c -T ','where:
MyDatabase.dbo.MyTableis a target table where you want to import data. In this example, you are importing data into the “MyTable” table located in the “dbo” schema of the “MyDatabase.”inindicates that you are performing an import operation, i.e. copying data from an external file into the specified table.datafile.csvis an external data file (CSV file) from which you want to import data.-cindicates that you are using character data format during the import. It is used for importing text-based data like CSV files.-T ','is the field terminator used in the CSV file. In this case, it’s a comma (,), which is common for CSV files. This parameter tells BCP how to recognize the boundaries between fields in the CSV data.
While the BULK INSERT and BCP methods serve for bulk data operations, they are implemented differently. Let’s explore the similarities and differences they have.
Similarities:
- Efficient transfer of large volumes of data into SQL Server tables.
- Optimized for high-performance data loading.
- Support for data import from external sources into SQL Server tables.
Differences:
- BCP is a command-line utility used for importing/exporting data into SQL Server.
BULK INSERT is a Transact-SQL statement executed within SQL Server. It can only import data. - BCP can be typically used by database administrators and developers familiar with command-line tools. Therefore, it may require more setup and configurations.
BULK INSERT is more accessible for database developers and SQL Server users who are comfortable writing SQL queries. - BCP may require passing login credentials and passwords as command-line arguments, which can be a security concern.
BULK INSERT uses the SQL Server login when executing the statement, which can be more secure, especially when integrated with SQL Server security mechanisms.
Introduction to Data Pump
When you need to export/import data from external files to SQL Server databases easily and quickly, dbForge Data Pump for SQL Server is your go-to solution. It is a SQL Server Management Studio robust and versatile data migration add-in for populating databases with external source data and transferring data between various database systems, regardless of their formats or structures. The tool supports popular data formats to export or import data, including Excel, CSV, XML, JSON, Text, MS Access, etc. In addition, it is possible to create a template file with the same settings applicable to export/import operations and then use it for repetitive scenarios.
Let’s import data from MS Access tables to new SQL Server tables using dbForge Data Pump.
Retrieving all tables from an MS Access database
To begin with, prepare the Microsoft Access file that will contain data to be imported into SQL Server tables. First, retrieve a list of all tables from an MS Access database by executing the following SELECT statement:
SELECT name FROM MSysObjects WHERE type = 4where:
namespecifies the “name” column you want to get from the “MSysObjects” table. The “name” column typically stores the names of various database objects, including queries.MSysObjectsis a system table in Microsoft Access that stores information about various database objects.type = 4indicates a condition that filters the results. In Microsoft Access, a “type” with the value 4 typically refers to tables or saved queries. Thus, the query instructs the database to only select rows where the “type” column in the “MSysObjects” table is equal to 4.
Once done, save a file with the .accdb extension.
Next, move on to importing data using dbForge Data Pump.
Let’s ensure that the tables to import data to are empty. To do this, open the SSMS and execute the SELECT statements to retrieve the data.
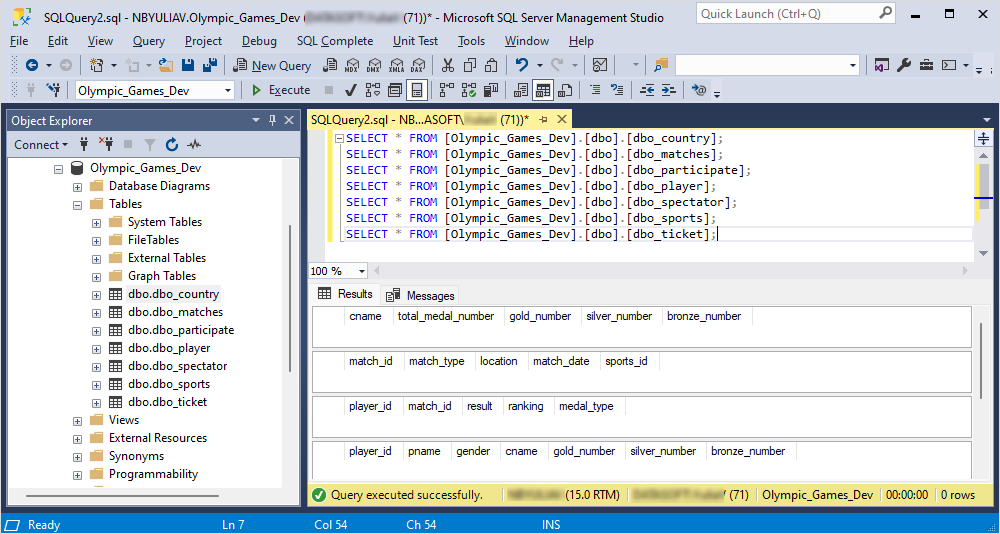
As you can see, the tables currently have no data, and we can proceed to populate the SQL Server tables.
Create a template to import settings
To make things easy, we’ll create a template with predefined import settings in the Data Import wizard available in dbForge Data Pump. Templates save time and effort by eliminating the need to configure import settings for each import operation manually. Instead of recreating settings from scratch, you can reuse a template with the desired settings, which simplifies the import process and reduces potential human errors.
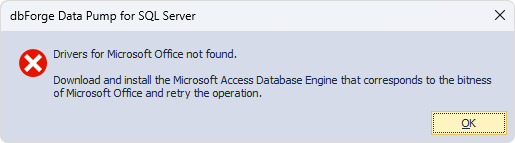
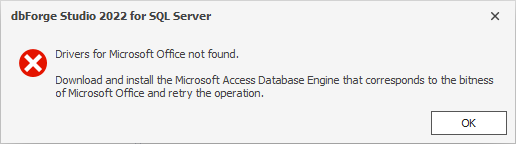
Beforehand, download Microsoft Access Database Engine to install some components that can facilitate data transfer between Microsoft Access files and non-Microsoft Office applications to other data sources such as Microsoft SQL Server. Otherwise, the Import wizard will show the error:
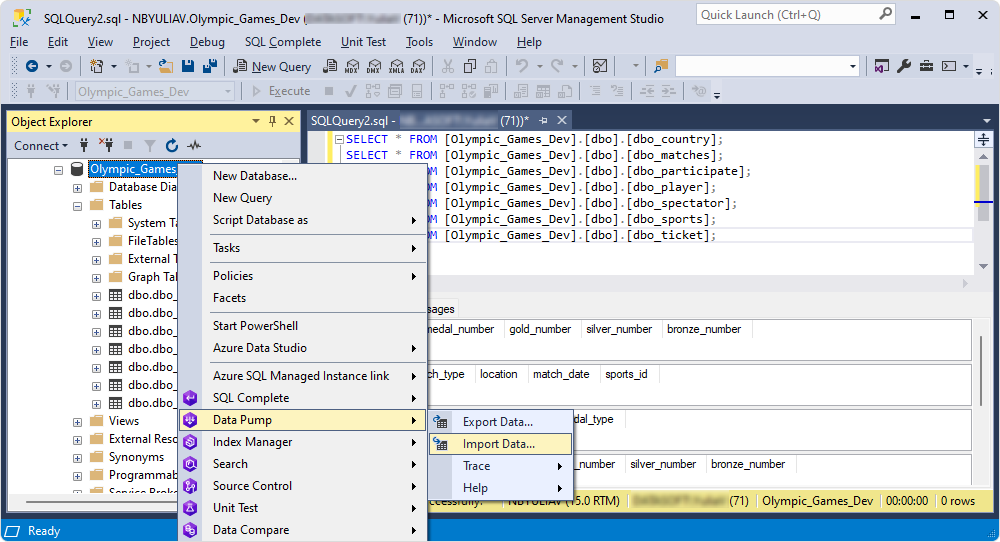
When all preparations are done, in SSMS Object Explorer, right-click the required database and select Data Pump > Import Data to open the Data Import Wizard.
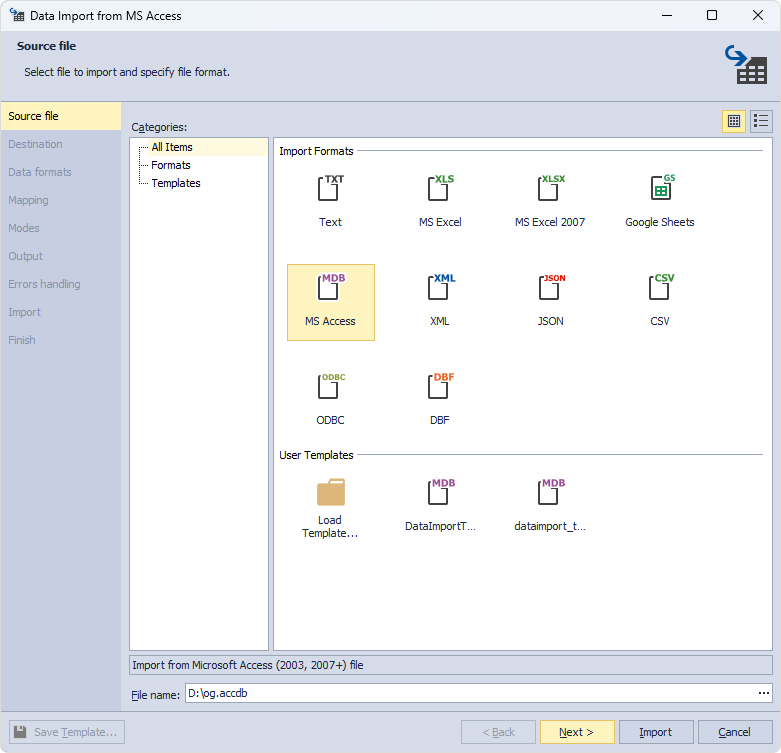
In the wizard, choose a .mdb format and the source file from which data will be imported, and click Next.
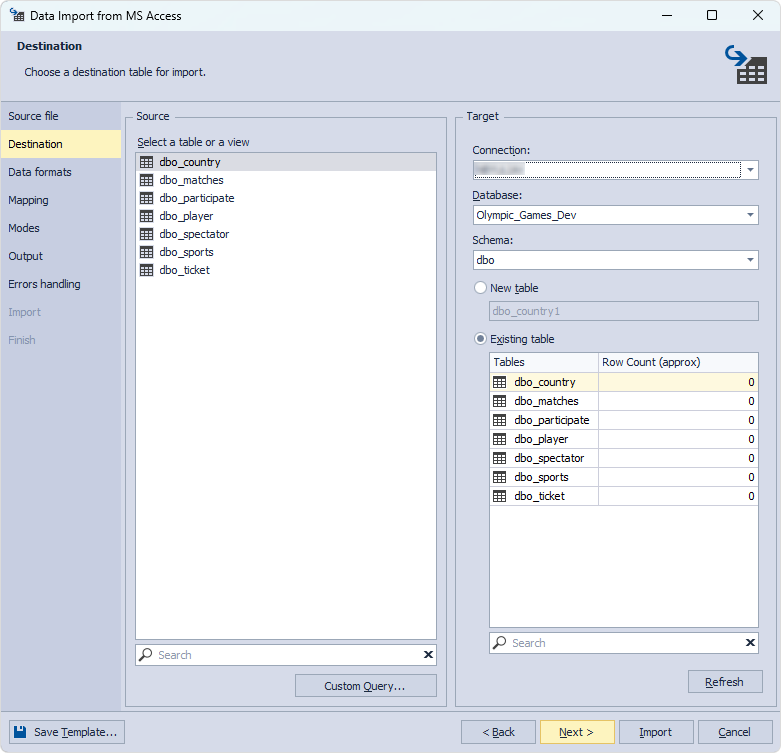
On the Destination page, select a source table and a target connection, a database, and a table to import data to. Then, click Next.
If you start the Data Import wizard from Object Explorer, it opens with the predefined connection parameters of the selected table.
Optionally, you can go through all wizard pages to specify the necessary information and settings.
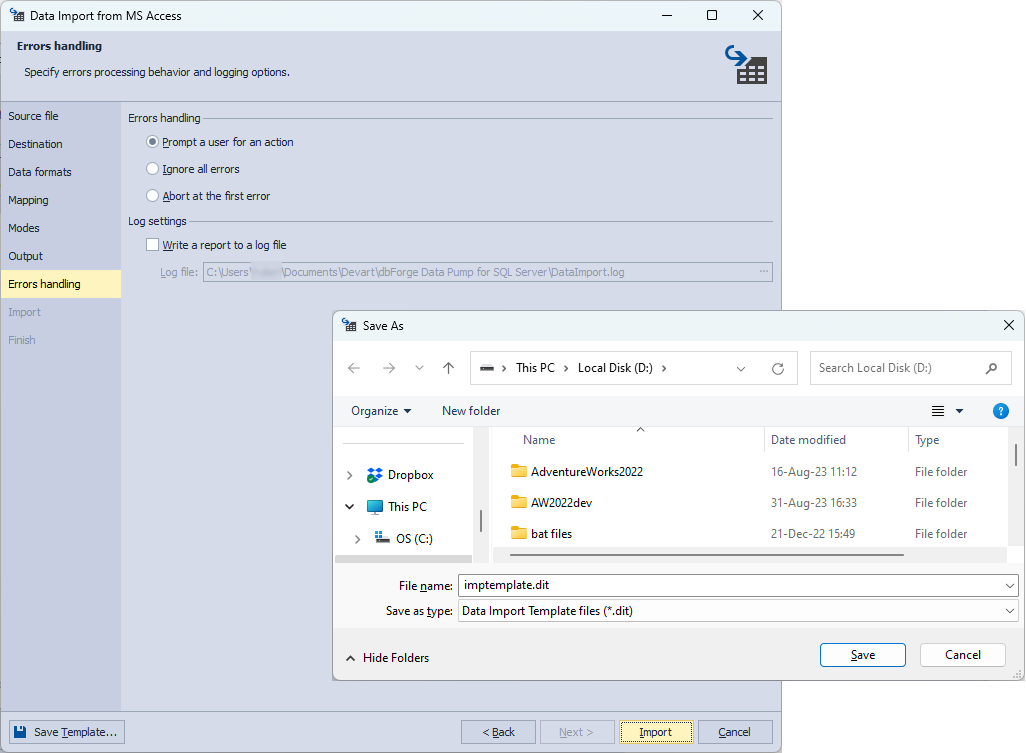
At the bottom of the wizard, click Save Template, specify the name and path to your template, and click Save to create a template. For proper work, it it recommended to store the template and all related files on your main D: hard drive.
Done! The template is ready to use. Now, we can import data in bulk with the PowerShell script.
Automating bulk data import
The PowerShell script is a collection of commands that instructs PowerShell to execute in sequence to run different actions.
Let’s create the PowerShell script that explains each step it performs to import data in bulk.
1. Start the PowerShell Windows Integrated Scripting Environment (ISE) console.
2. On the toolbar, click New Script and enter the following instructions:
# Define the path to the Microsoft Access database
$dbPath = "D:\og.accdb"

# Path to your DBForge
$diffToolLocation = "C:\Program Files\Devart\dbForge SQL Tools Professional\dbForge Data Pump for SQL Server\datapump.com"

# Define the provider and the data source
$connectionString = "Provider=Microsoft.ACE.OLEDB.12.0;Data Source=`"$dbPath`";"

# Create a new OleDb connection
$connection = New-Object System.Data.OleDb.OleDbConnection($connectionString)

# Open the connection
$connection.Open()

# Get the schema information for the data source
$tables = $connection.GetSchema('Tables')

# Filter out system tables to get only user tables
$userTables = $tables | Where-Object { $_.TABLE_TYPE -eq 'TABLE' -and $_.TABLE_NAME -notlike 'MSys*' }

# Process each table
$userTables | ForEach-Object {
    $tableName = $_.TABLE_NAME
    Write-Output "Processing table: $tableName"

    #Command-line string for importing data into your SQL Server database
    $process = Start-Process -FilePath $diffToolLocation -ArgumentList "/dataimport /templatefile:`"D:\imptemplate.dit`" /connection:`"Data Source=<server_name>;Integrated Security=True;User ID=<username>`" /inputfile:`"D:\og.accdb`" /inputtable:$tableName /table:`"Olympic_Games_Dev.dbo.$tableName`" /errormode:abort" #-PassThru -Wait -windowstyle hidden

    #If you need to process the tables one by one to reduce server load - uncomment it.
    #Start-Sleep -Seconds 10
                            }

# Close the connection
$connection.Close()
3. Substitute the following arguments with your relevant data:
$dbPath: Path to the MS Access source file from which data should be imported.$diffToolLocation: Path to the installation folder of dbForge Data Pump.$connectionString: OLE DB Provider to interact with Microsoft Access databases in the .accdb file format./templatefile: Path to the template .dit file you created in the Data Import wizard./connection: Connection parameters for the destination database tables you want to import to./inputfile: Name of the source file from which data should be imported./table: Full name of the target SQL Server table, including the corresponding schema and database, for example, Olympic_Games_Dev.dbo.$tableName.
Note that we declared a variable – $tableName – which means that all tables available in the database will be processed, and you won’t need to enter their names manually. This will simplify the process and reduce the risk of making mistakes.
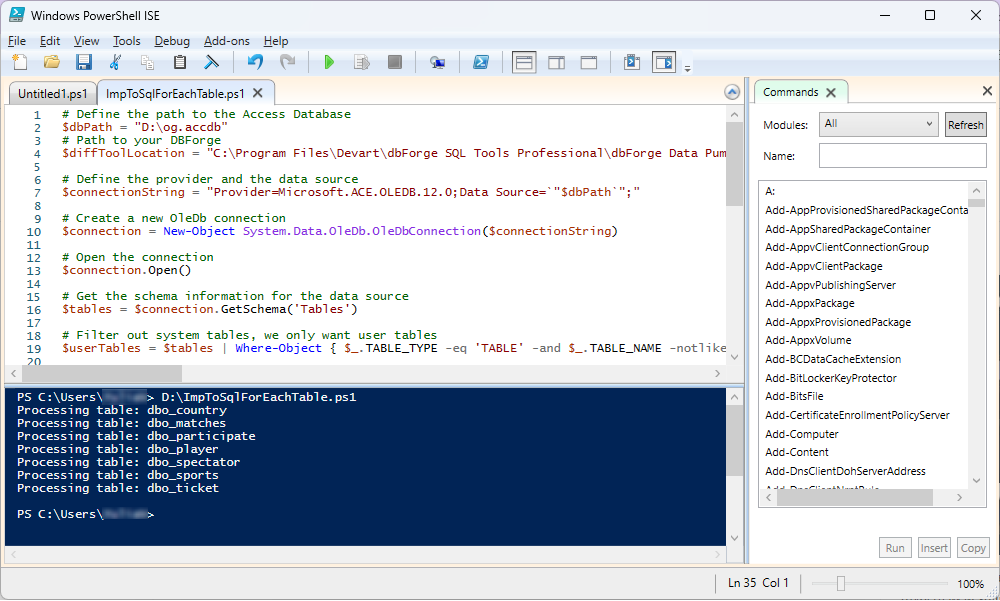
Once the script is created, execute it by clicking Run Script on the toolbar.
Done! Now, get back to dbForge Data Pump to ensure the data has been transferred from MS Access to SQL Server database tables. To do this, execute the SELECT statements.
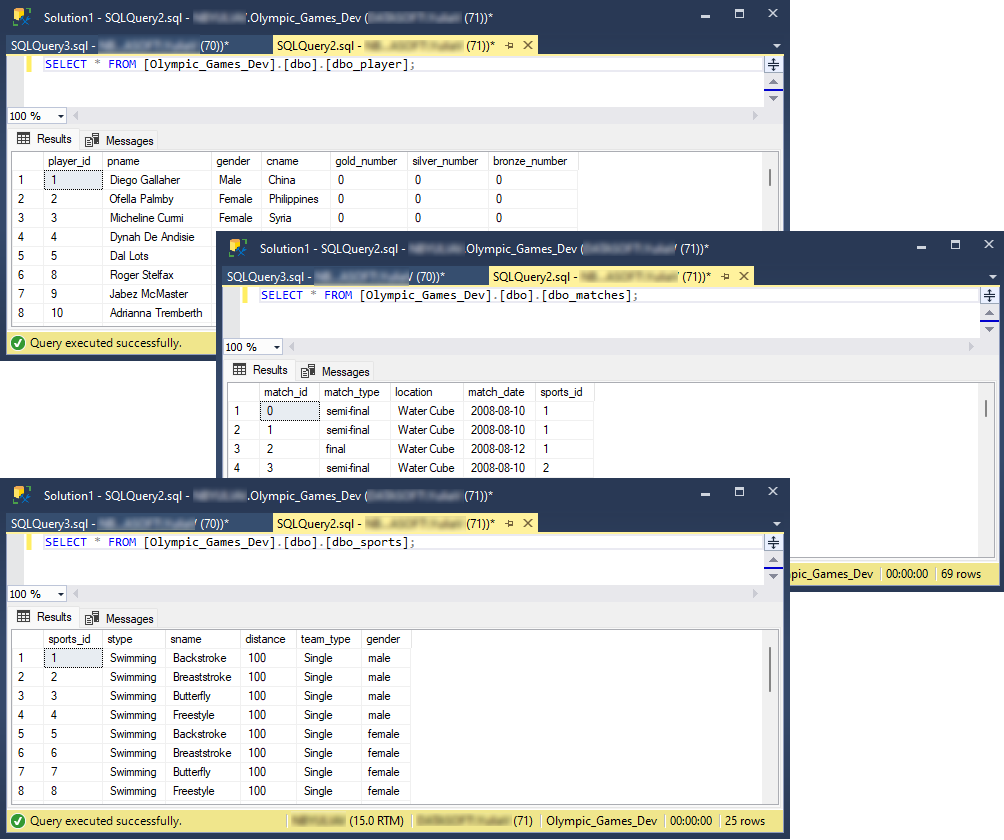
The output displays the tables that have been populated with data.
Conclusion
To sum it up, bulk data import is a critical task in the daily activities of database administrators. In this article, we briefly reviewed the methods to transfer data between different databases, namely how to import data from Microsoft Access to SQL Server. Also, we have demonstrated the easiest way to import data in bulk using dbForge Data Pump and PowerShell ISE script. All you need to do is create a template, replace the arguments in the script with your actual data, and run the script.
Download a free 30-day trial version of dbForge SQL Tools, including dbForge Data Pump, to explore the capabilities of every tool included in the package.