")
In the article, we are going to discuss different methods to copy and transfer databases between SQL Server instances. In addition, we explore the benefits and drawbacks of each method so that you can choose the one that suits you most.
Very often, developers need to make a copy of the database to protect the files and avoid data loss, or when there is a need to free up space on the disk. In their daily operations, they may also duplicate databases for testing purposes that may result in a time-consuming and challenging task. However, we want to show how easy and efficient it is to migrate databases with dbForge Studio for SQL Server.
In the article, we’ll discuss the following methods to transfer databases and show practical examples of how they work in dbForge Studio for SQL Server:
- Backup and Restore
- Detach and Attach
- Copy Database Wizard
- Schema & Data Compare
- Generate Schema Script Wizard
- Generate Scripts Folder
- Generate Schema Snapshot
Let’s take a closer look at each method and its peculiarities.
Backup and Restore
When you need to migrate the entire database to another server or to prevent databases from data loss regardless of they are user’s errors or hardware failures, it can be recommended to use the Backup and Restore functionality.
Restriction:
- A SQL Server version of the target instance must be the same or higher than on the source one.
Benefits:
- Online mode for a source database.
- Connections can be saved.
- Minimum risk of data loss.
- Quick recovery of a backup file.
- Backup and restore files can be located on multiple devices.
- Maintain database integrity.
- Generate a single backup file.
Drawbacks:
- Requires constant testing to maintain error-free and reliable database copy.
- A differential mode requires a full database backup made in advance. Prior to restoring a differential database backup, you should first restore its full backup.
- Requires a shared folder if you plan to share it with coworkers.
- Cannot be used on Microsoft Azure SQL Database.
- Requires more space.
- Does not allow you to back up separate objects and particular tables with data.
Note: Saving a database diagram file (.dbd) and then opening it on another server is not a viable method for transferring a database. The thing is that the .dbd file contains only references to objects in the server’s database, not the DDL of the objects, making it impossible to transfer a database using this method.
Copying a database using the Backup and Restore functionality
Step 1: Back up a database
1. In Database Explorer, right-click the database you want to back up and select Tasks > Back up.
2. In the Backup wizard, set the backup options and then click Back up.
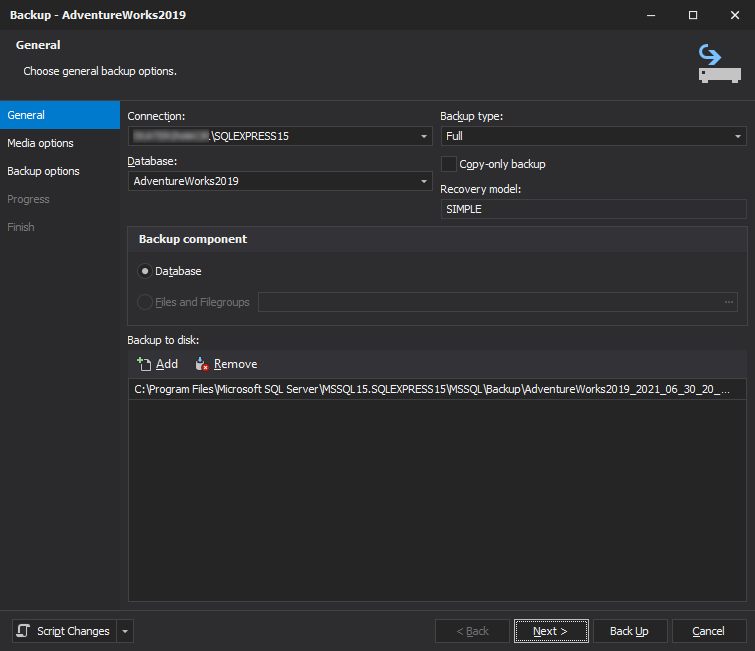
3. Once the backup process is complete, click Finish.
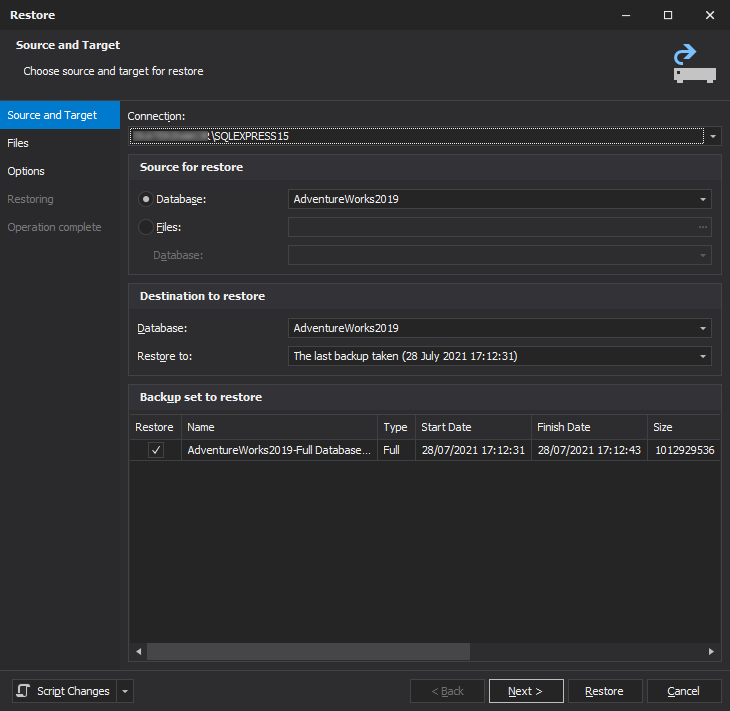
Step 2: Restore a database.
1. In Database Explorer, right-click the database you want to restore and select Tasks > Restore.
2. In the Restore wizard, set up options to restore the database and click Restore.
To learn more about how to backup and restore a database, see How to restore a SQL Server database to a new server and How to backup a SQL Server database to move it to another server topics.
Detach and Attach
If you want to migrate a database between different servers or SQL Server instances, you can use the Detach and Attach functionality. In this case, a database is attached to a new server or instance being in the same state as it was detached from the previous server.
Restrictions:
- A SQL Server version of the target instance must be the same or higher than on the source one.
- Active connections should be closed on the database.
- Only a detached or copied database can be attached.
- The attached database cannot be selected for attaching.
- Database snapshots should be removed from the database.
- The following databases cannot be detached: being mirrored, system, suspect, replicated, and published.
- It is not supported in the SQL Server Express version.
Benefits:
- The database to be migrated should be in offline mode.
- The fastest way to transfer databases.
Drawbacks:
- The database is offline until database migration is in progress.
- Runs slower for large databases.
- With full-text indexes, full-text catalog files should be migrated manually.
- All connections will be lost.
- Requires a shared folder.
- Cannot be used on Microsoft Azure SQL Database.
- Should not be used if downtime is a critical point.
To learn how to attach and detach a database in SQL Server, you can watch this video.
Copying a database using the Attach and Detach functionality
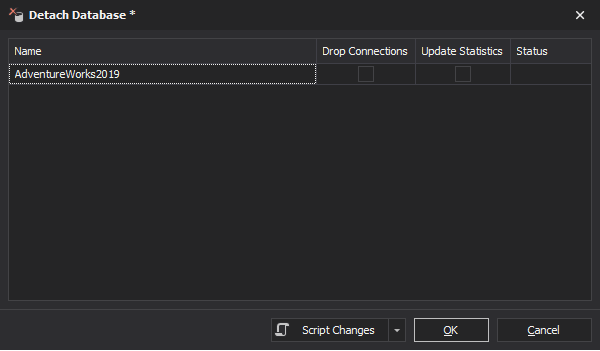
Step 1: Detach a database
1. In Database Explorer, right-click the database you want to detach and select Tasks > Detach Database.
2. In the Detach Database wizard, drop connections, update statistics, and click OK, and then click Close.
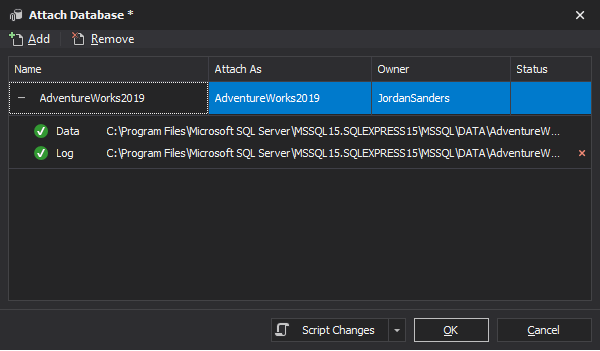
Step 2: Attach the database
1. In Database Explorer, right-click the instance for which you want to attach a database and select Tasks > Attach Database.
2. In the Browse files dialog, select the file with a .mdf extension. In the Attach Database dialog, click OK, and then click Close.
For more information about how to attach and detach a database, see How to detach a database in SQL Server and How to attach a database using dbForge Studio for SQL Server topics.
Copy Database Wizard
With the Copy Database wizard, you can migrate, copy, or override SQL Server databases with all their related objects between different servers. In addition, it can be used when upgrading a server.
Restrictions:
- It is not supported in the SQL Server Express version.
- The following databases cannot be copied: system, marked for replication, inaccessible, loading, offline, recovering, suspect.
- SQL Server version should be the same or higher.
- Have sysadmin fixed server privileges on the source and target servers.
- SQL Agent should run on a target SQL Server.
Benefits:
- Select a source and target servers and databases.
- Copy logins on a target server.
- Update the target database name and directory for the data and log files.
- Select a database to move, copy, or override.
- Handle errors and logging options.
- Move all database objects.
- Create a backup copy of the database.
Drawbacks:
- Requires a shared folder for data and log files in case of changing the target file directory.
- Selecting the Move option automatically removes a source database.
- Cannot be used on Microsoft Azure SQL Database.
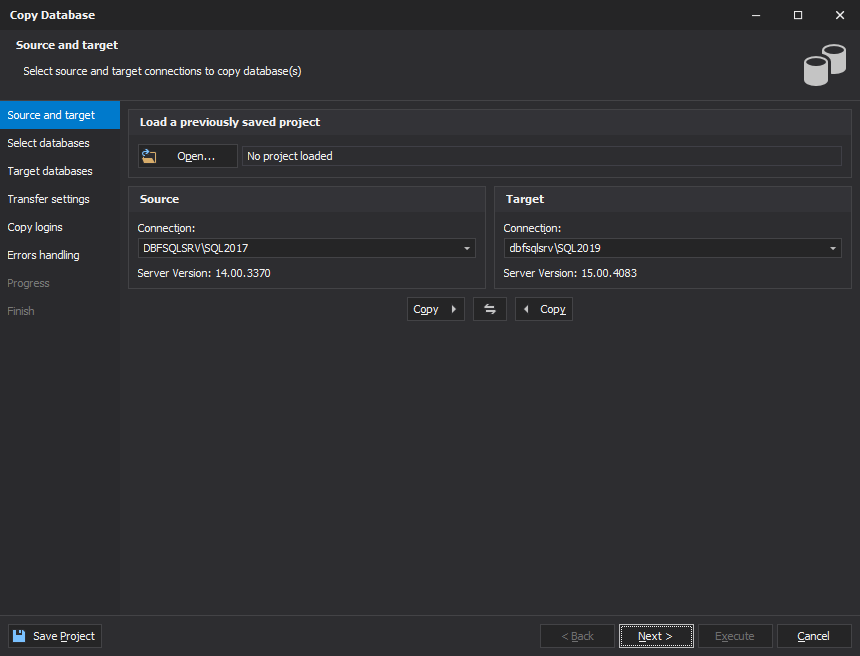
Copying a database using the Copy Database Wizard
1. In Database Explorer, right-click the database and select Tools > Copy Database.
2 In the Copy Database wizard, select the source and target servers and databases and configure the migration process. Then, click Execute.
For more information about moving databases with the help of the Copy Database wizard, see How to copy a database to another SQL Server database engine topic.
Schema and Data Compare functionality
When you need to move some specific database objects or update a target database with some partial data from the source database, it is better to use the Schema and Data Compare/Sync functionality. At first, you need to copy a database structure with the help of the Schema Compare tool and then copy data in the previously compared database structure by using the Data Compare tool.
Restrictions:
- Schemas of objects from the source and target databases should be identical only if you copy data without a database structure.
- Only tables and views with a primary key, a unique key, a unique index, or a unique constraint can be compared when migrating data with Data Compare.
Benefits:
- Move specific database objects from the source to the target database.
- Automate and schedule data comparison and synchronization by using the command-line interface and a Task Scheduler.
- Analyze data differences visually.
- Maintain data consistency between two databases.
- It is possible to transfer data both from an old version of SQL Server to a new one and vice versa. In addition, the tools will generate objects with the correct syntax of the target version.
Drawbacks:
- Data synchronization may modify or delete data in the target database. So, it is recommended to make a backup copy of the target database to prevent data loss.
- When migrating data from one database to another one, the needed amount of your local disk space should cover the total size of both source and target databases and the size of the generated script.
Also, you can watch this video to learn how to migrate a database with the Schema and Data Compare functionality provided in dbForge Studio for SQL Server.
Copying a database structure using Schema Compare
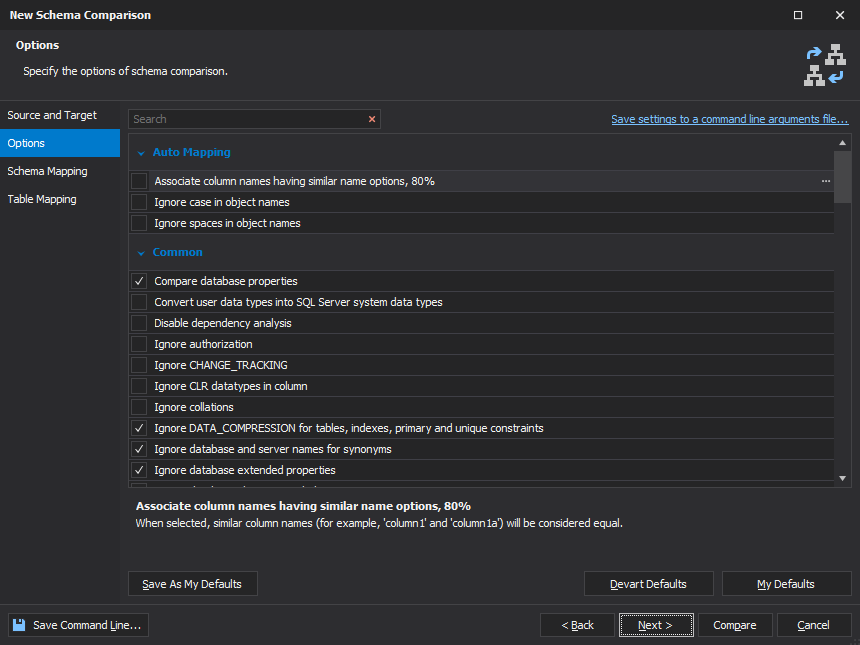
1. On the Comparison menu, select New Schema Comparison.
2. In the New Schema Comparison wizard, select source and target databases to be compared, set schema comparison options, schema and table mapping, and click Compare. For more information about the workflow of the data comparison process, see How to synchronize two schemas quickly.
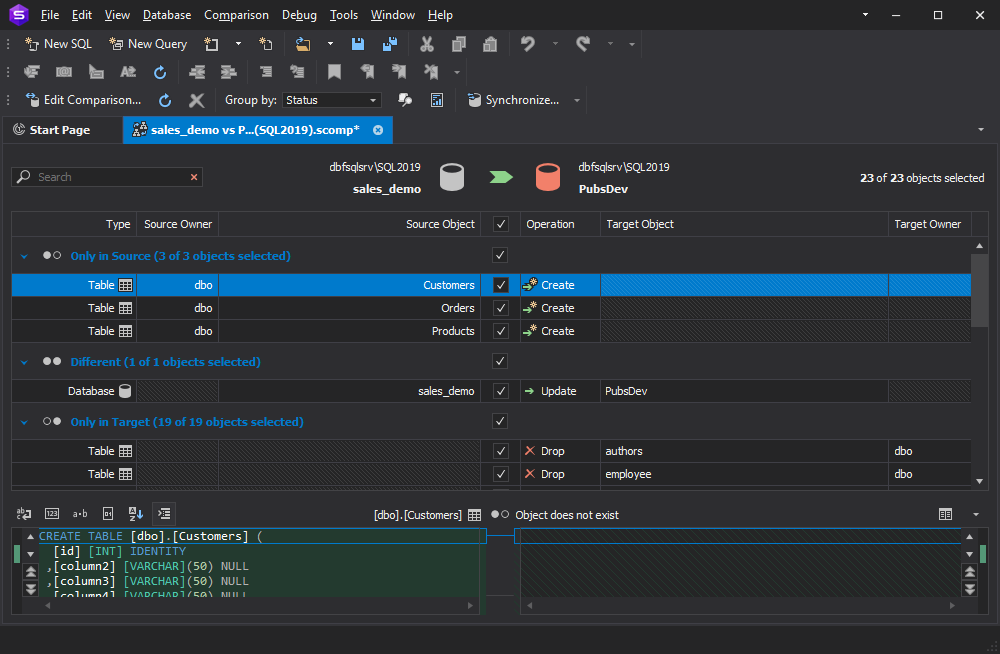
3. In the Schema Comparison document, select the schema objects and click Synchronize objects to the target database.
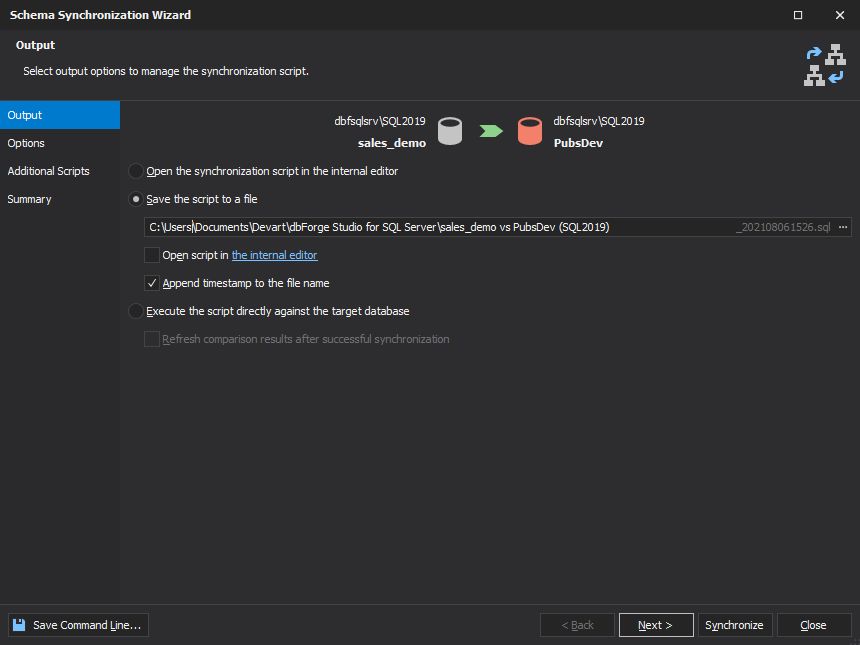
4. In the Schema Synchronization wizard, you can set output options to manage a synchronization script, set synchronization options, and click Synchronize. For more information, see How to synchronize two schemas quickly.
Additionally, you can copy a database structure using the command line. For this, refer to Automate schema comparison and synchronization from the command line topic.
Copying data using Data Compare
After that, you can start copying data to this database schema.
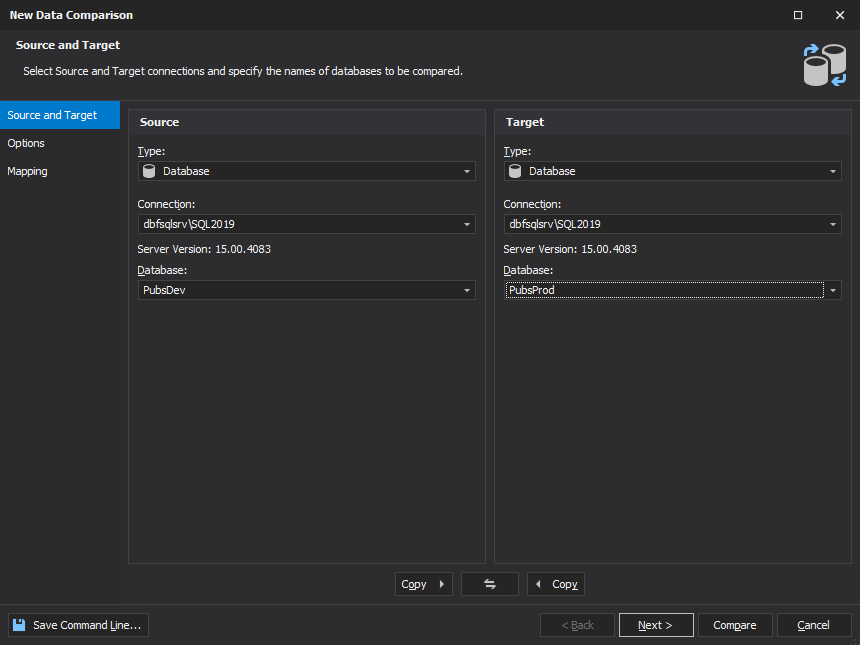
1. On the Comparison menu, select New Data Comparison.
2. In the New Data Comparison wizard, select source and target databases to be compared, set up comparison options, and click Compare. For more information about the workflow of the data comparison process, see How to set up data comparison.
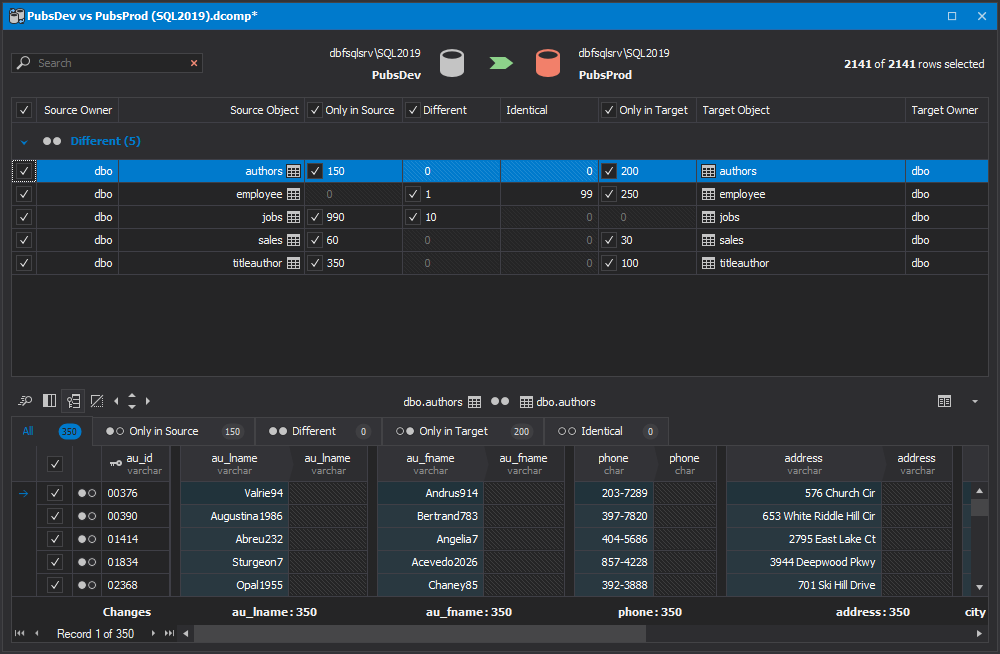
3. In the Data Comparison document, select the objects to be included in the synchronization and click Synchronize data to the target database.
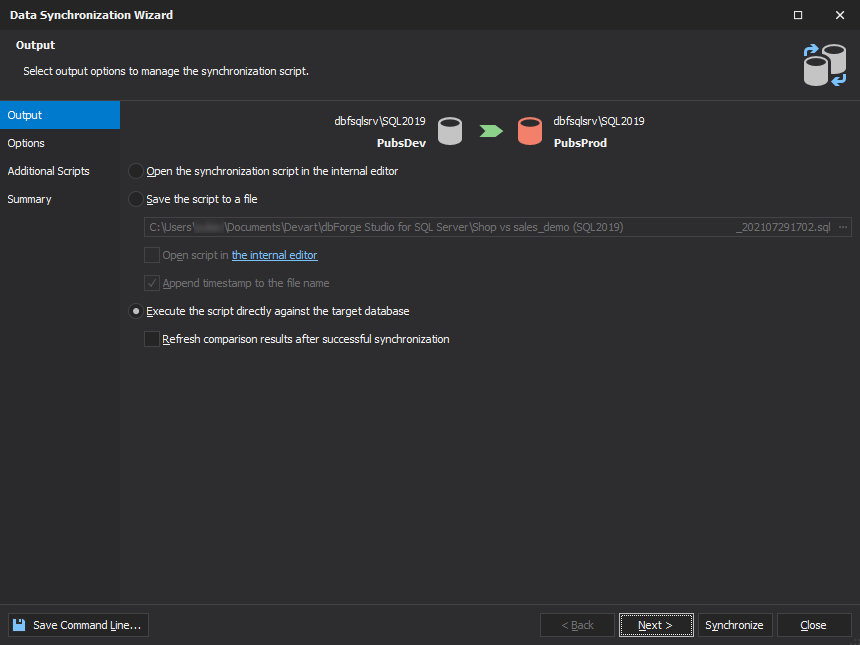
4. In the Data Synchronization wizard, you can save a synchronization script on your computer for later use or execute it against the target database after the synchronization is complete. Here you can also configure additional synchronization options. For more information about data synchronization workflow, see How to synchronize databases.
Additionally, you can copy a database structure using the command line.
For this, refer to Automate data comparison and synchronization from the command line topic.
Generate Schema Script Wizard
When you need to migrate a database to a lower version of a SQL Server instance, you may use the Generate Schema Script Wizard that allows creating the database schema and copying all its data.
Benefits:
- Database migration can be performed to a lower version of SQL Server, and database recovery can be done on the higher version.
- Choose whether to generate a script for a database schema and/or data.
- Save a SQL file as an encrypted zip archive.
Drawbacks:
- Takes much time and storage to migrate.
- May lead to memory overload when migrating large databases.
- Data cannot be encrypted.
Copying a database using Generate Script Wizard
1. In Database Explorer, right-click the required database and select Tasks > Generate Scripts.
2 In the Generate Script Wizard, set up script generation options and select objects for the script.
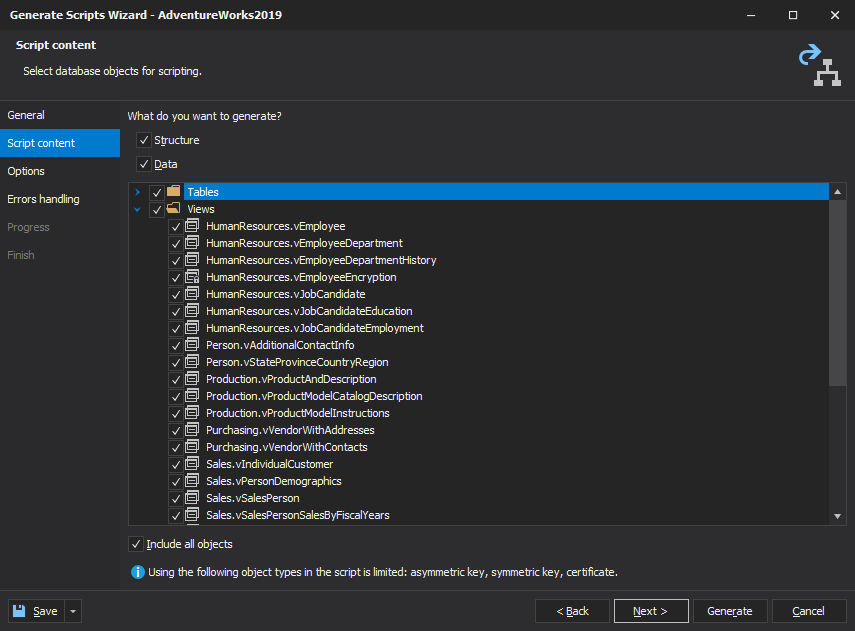
You can also configure how the script creation should be performed and handle error processing and logging options. Once done, click Generate. For more information about how to back up a database with the Generate Scripts Wizard, see How to generate SQL Server database scripts and How to generate DDL statements for database objects topics.
Then, on an SQL Server instance to which you want to migrate the database, execute the generated script.
Generate a Script Folder
SQL Schema Compare allows users to generate a script folder representing a database schema and data that can be used to update another database or script files.
Restriction:
- Available only in the Enterprise version of dbForge Studio for SQL Server.
Benefits:
- Generate the schema and data for one SQL file per object.
- Create a script folder from the command line.
- Specify a destination path for the script folder.
- The script file is generated per object, and all objects are grouped into subfolders.
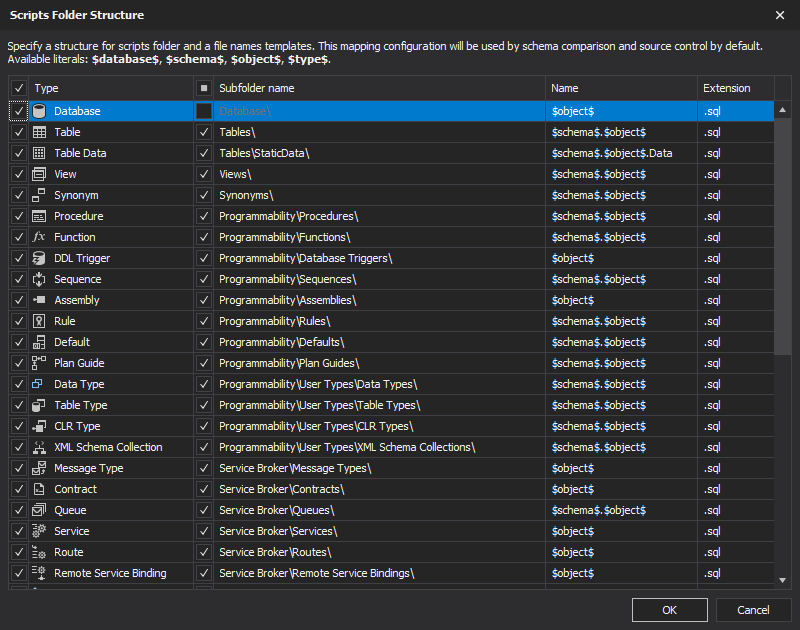
- Modify the default script folder structure and file names templates.
- Generate a scripts folder from a database, a snapshot, or another script folder.
Drawbacks:
- Enabling the Decrypt encrypted objects option may lead to slow performance.
- The decryption option is not available when creating a script folder from a database snapshot or another scripts folder
Creating a script folder
1. On the Database menu, select Tasks > Create Scripts Folder or Snapshot.
2. In the dialog that opens, select a source type. Then, depending on the type, specify its details.
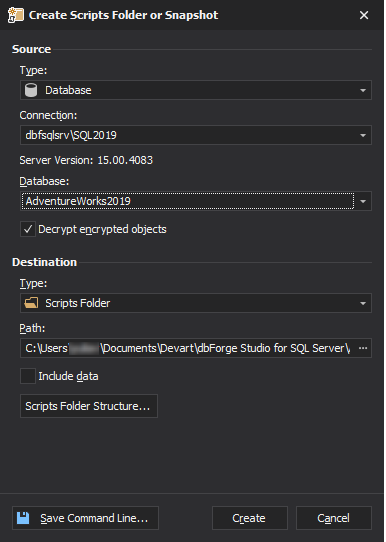
3. If you want to customize folder names and file names templates, click Scripts Folder Structure and then click OK.
4 In the Destination section, specify a path to store a script folder and then click Create.
Additionally, you can create a script folder using the command line. For this, refer to How to create a scripts folder or a snapshot topic.
Generate a Database Snapshot
Creating a snapshot may prevent losses in the case of database objects errors while editing. In this case, you can restore a database to the state when the snapshot was created.
Restriction:
- Available only in the Enterprise and Professional versions of dbForge Studio for SQL Server.
Benefits:
- Create a snapshot from the command line.
- Decrypt encrypted objects.
- Specify a destination path for the snapshot.
- Generate a snapshot from a database, scripts folder, or another snapshot.
- Reverting a database to the snapshot is faster than a backup recovery.
- A snapshot can be archived.
Drawbacks:
- A transactionally consistent, read-only, and static copy of the database located on the same SQL Server instance.
- Represents information only about database structure.
- Cannot contain table data.
- Enabling the Decrypt encrypted objects option may cause poor performance.
- When creating a snapshot from a script folder, the decryption option is not available.
- Database snapshots cannot be modified.
- In the case of reverting the database, a rollback is not possible.
Creating a database snapshot
1. On the Database menu, select Tasks > Create Scripts Folder or Snapshot.
2. In the dialog that opens, select a source type. Then, depending on the type you’ve chosen, specify its details.
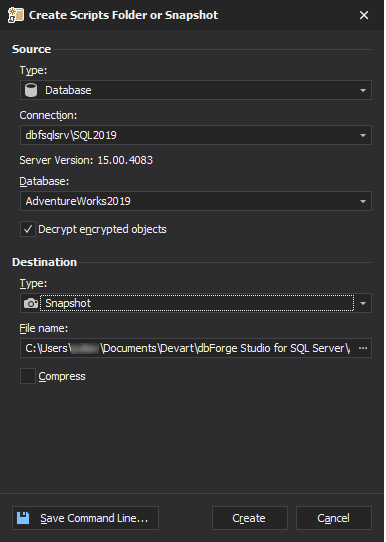
3 In the Destination section, specify a path to the snapshot and click Create.
Additionally, you can create a database snapshot using the command line. For this, refer to How to create a scripts folder or a snapshot topic.
Conclusion
In the article, we have reviewed approaches to SQL Server database migration which can be implemented with the help of dbForge Studio for SQL Server. In addition, the article highlights restrictions, advantages, and disadvantages of each method, and goes through a few examples.
