In this article, we will focus on starting a PostgreSQL server on your PC. Here, you will find a simple step-by-step PostgreSQL tutorial for Windows seasoned with comprehensive illustrations for your convenience.

Download and Install PostgreSQL-Step by Step Tutorial
PostgreSQL is an object-relational open-source system for database management (ORDBMS) based on Postgres 4.2. It supports most of the SQL standards and offers a variety of modern features. The software was developed at the Department of Computer Science, University of California, Berkeley.
To start a PostgreSQL server on your personal machine, you will need to perform the initial setup. The process of setting up PostgreSQL melts down to the following three steps:
- Downloading the PostgreSQL Installer for Windows.
- The installation itself.
- Verifying the installation.
Download PostgreSQL Installer for Windows
To begin with, you need to download the installer for Windows. It is worth mentioning that the PostgreSQL client is available for download for free.
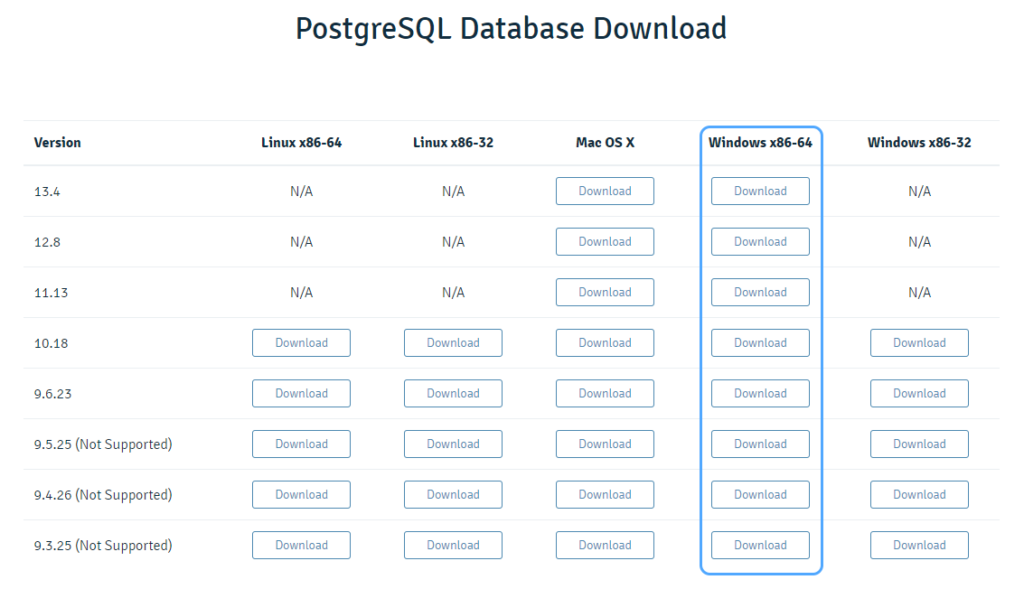
As you might have noticed, it is available for Linux, macOS, and Windows. Moreover, different versions of the installer are available. Make sure to choose the desired one from the list and click the Download button.
Allow the PostgreSQL ODBC driver a couple of minutes to download and open the file.
Install PostgreSQL on Windows
1. You will be presented with the following wizard once you launch the PostgreSQL installer:
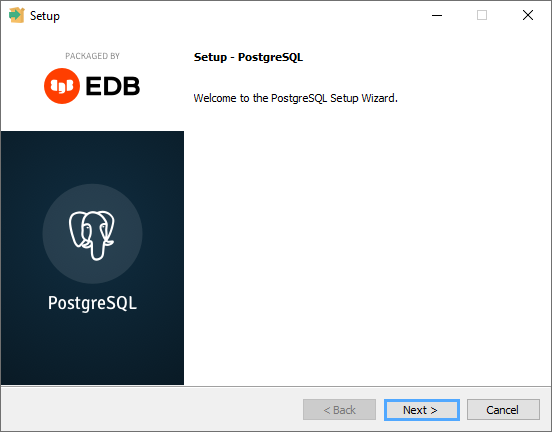
Simply click Next to continue.
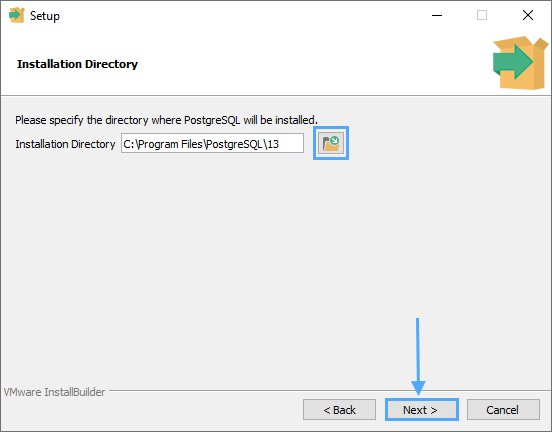
2. You need to choose the directory to install the PostgreSQL on Windows 10.
3. You will see a list of the components that can be installed along with the main product:
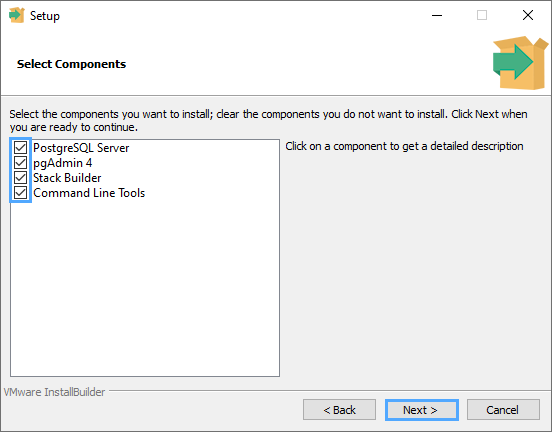
Depending on your preferences, select the components that you wish to be installed along with PostgreSQL. To get a closer look at what you are about to install, click on the corresponding component and you will see a brief description of what it is.
Once the desired components are selected, hit Next.
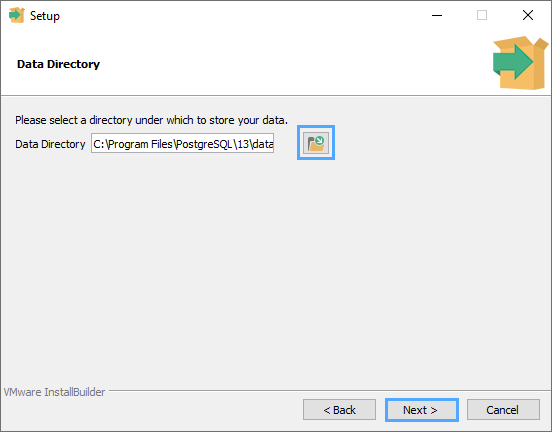
4. Subsequently, it is required to choose a folder to store your data in.
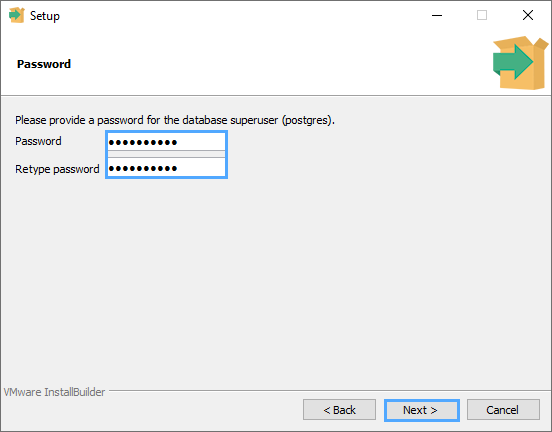
5. At the next step, you need to enter a password to the database superuser (postgres by default).
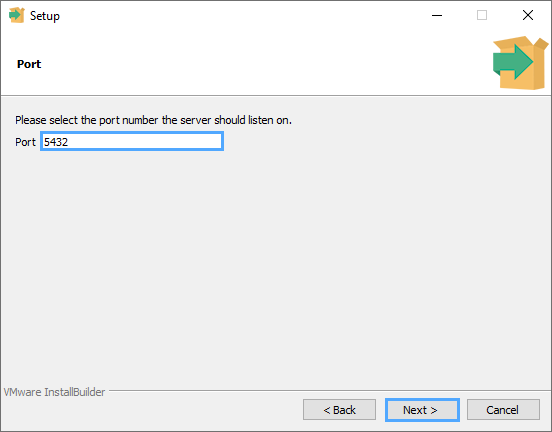
6. Now, enter the number of the port the server should listen to.
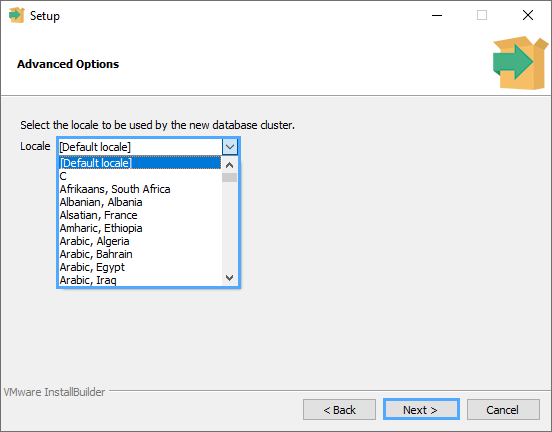
7. Here, choose the locale that will be used by the new database cluster. The list of all the possible options is available in the drop-down menu.
8. This is the final checkup point before the installation begins. Read the pre-installation summary carefully and make sure everything is configured correctly.
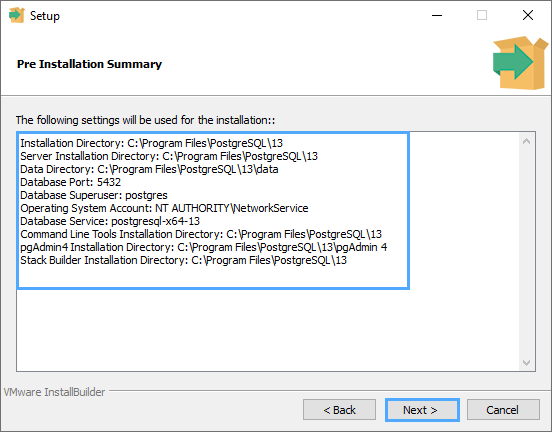
Once you are ready for the PostgreSQL install, hit Next. You will see that the wizard is ready to proceed with the installation. Finally, click Next again and allow the wizard to complete the process.
9. That’s it! The PostgreSQL is now installed on your computer.
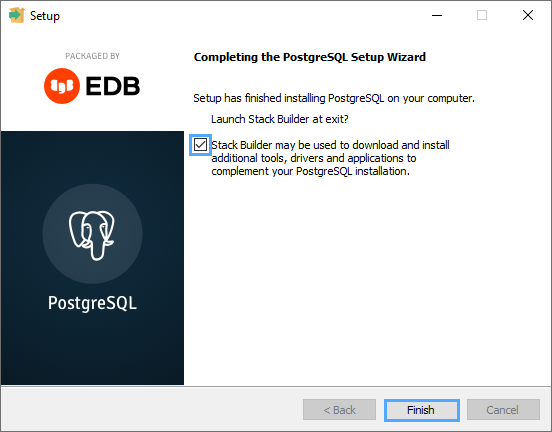
Now, in case you are willing to download and install additional tools, you can use the Stack Builder. If you do not wish to do that, remove the tick from the corresponding box and click Finish.
Note
PostgreSQL server is configured to listen on local ports by default, meaning that it can only accept connections from clients running on the same machine. If you plan to access the server remotely, you will need to enable remote connections to the postgres server.
Verify the Installation
In order to verify the installation, you can connect to the PostgreSQL database using the SQL Shell (psql), pgAdmin, or dbForge Studio. Let us take a closer look at each one of them:
SQL Shell (psql)
psql is a front-end to PostgreSQL represented as a terminal. It allows you to interact with PostgreSQL by typing in the queries, executing them, and getting the query results.
Let us describe how to connect to a database using psql:
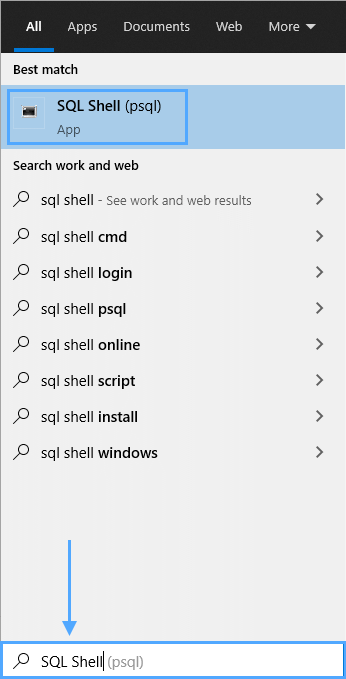
1. Launch SQL Shell (psql) on your computer. For this either open the PostgreSQL folder in the start menu or type SQL Shell in the Windows search bar.
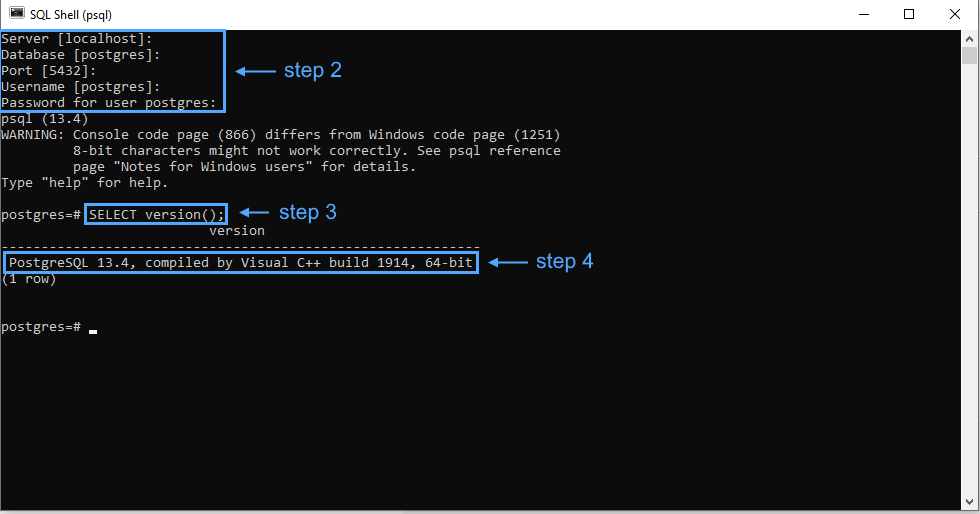
2. Enter the Server, Database, Port, Username, and Password. Press Enter. If you press Enter without making the configurations, they will be filled in automatically with the default values. Although, you will have to enter a password either way.
3. The following statement returns the current version of PostgreSQL:
SELECT version();Make sure to put a semicolon at the end of the query. Otherwise, you will get an error.
4. On pressing Enter, you will get the current PostgreSQL version on your system.
pgAdmin
pgAdmin is a GUI for PostgreSQL. It was created to simplify the PostgreSQL server administration. In order to connect a database using pgAdmin, please take these steps:
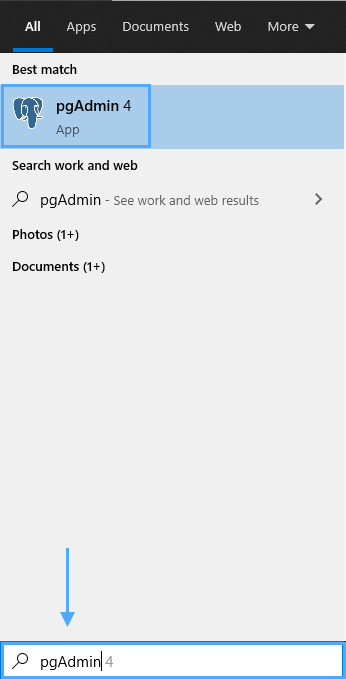
1. Find pgAdmin in the Windows start menu and open it.
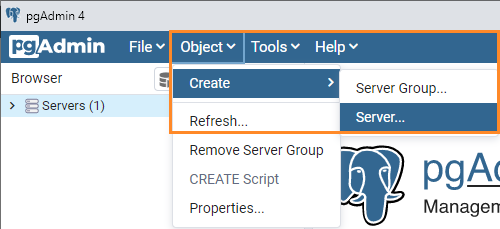
2. In Browser, select Servers. Then, click Objects, point to Create, and click Server.
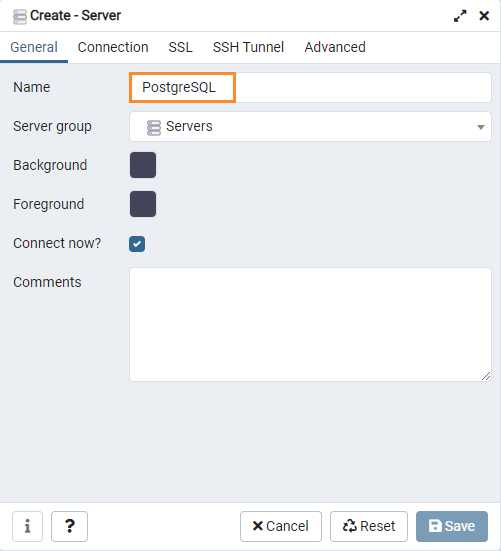
3. In the dialog box that pops up, enter the server name and go to the Connection tab.
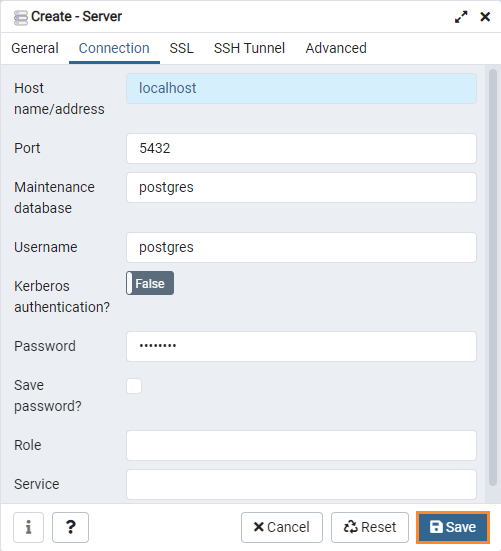
4. Before clicking the Save button, enter the hostname and password for the postgres user.
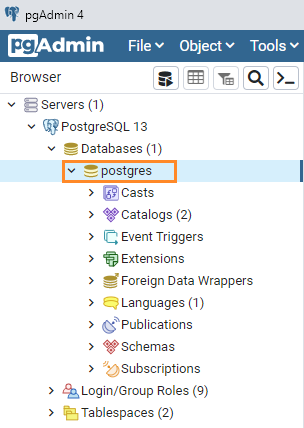
5. After that, click the Servers and expand the tree. By default, the PostgreSQL database is called postgres.
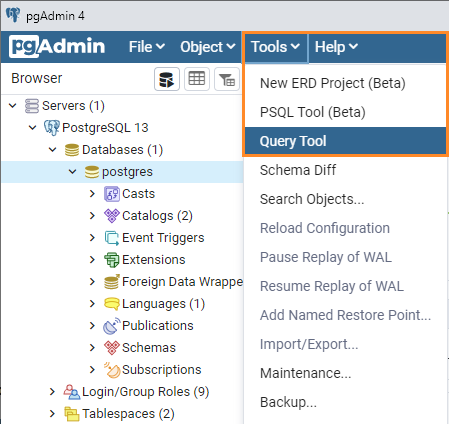
6. Go back to the Tools menu and click Query Tool.
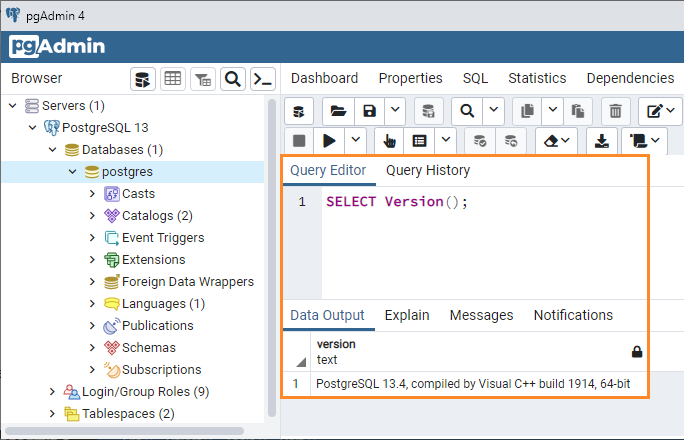
7. Enter the SELECT version(); query in the Query Editor and hit the Execute button. The result of the query will be displayed in the Data Output tab.
dbForge Studio
While pgAdmin is a standard tool that comes with the PostgreSQL installation, dbForge Studio for PostgreSQL is a competitive alternative to it. dbForge Studio is a graphical user interface solution created to help you develop and manage PostgreSQL databases. The tool allows you to edit, import, and export data, create data reports, pivot tables, and master-detail relations. All this is wrapped in the intuitive and user-friendly interface that makes working with PostgreSQL databases a lot easier.
You are always welcome to test dbForge Studio. With your convenience in mind, we have created a 30-day trial version that is available for free.
To verify the PostgreSQL installation, launch dbForge Studio on your PC.
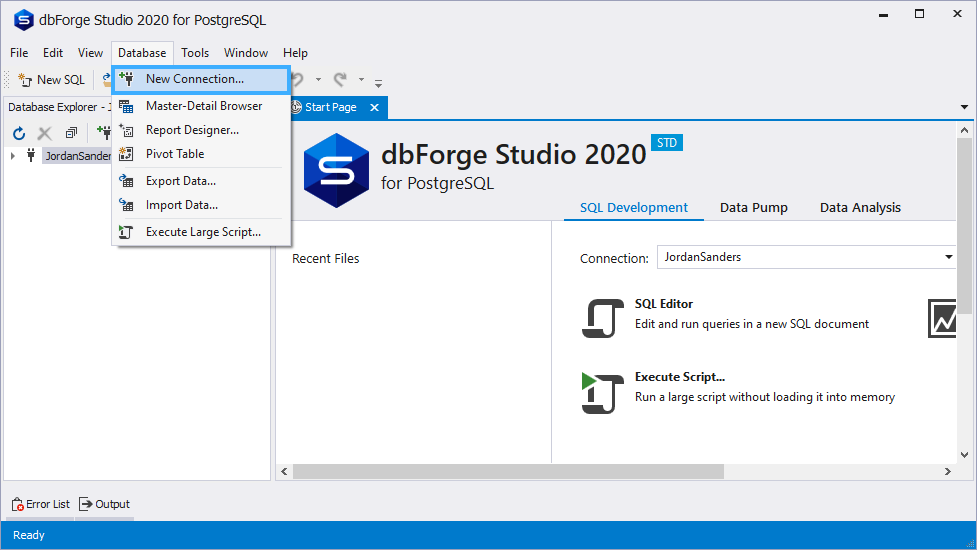
1. If you open the application for the first time, you will see that the Database Connection Properties dialog box opens automatically. Alternatively, go to the Database menu and click New Connection.
2. On the General tab, fill in the corresponding boxes with the database connection properties:
- Host – the name or IP address of the PostgreSQL Server host.
- Port – the TCP/IP port to connect to the server.
- User – the name of the user account.
- Password – the password of the user account.
3. Once done, click Test Connection. If all is set, you will see the following message:
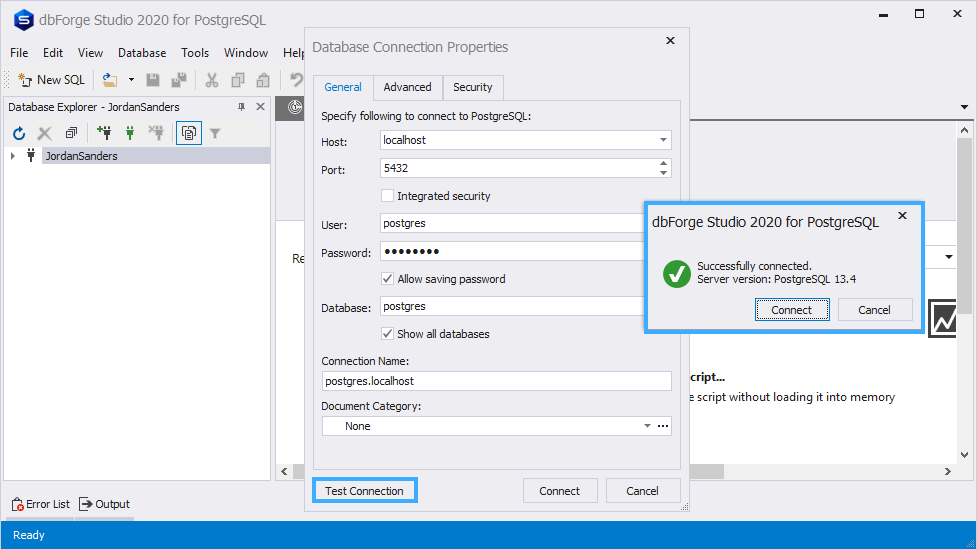
4. Having verified the connection, feel free to click Connect to save it.
Conclusion
In this article, we talked about installing PostgreSQL on your personal computer, starting the PostgreSQL server on Windows, and setting it up. Also, we have described the ways to add a postgres database and to verify the installation in different apps, including dbForge Studio for PostgreSQL. Should you require more information on the Devart products, check out the other tools for PostgreSQL.

