In this post, we are going to explore the way of how to import a .csv file through the command line in dbForge Studio for MySQL.
You will not have to waste your valuable time on manually specifying properties each time you need to create a new MySQL table. With this option, you can forget about going through this process over and over again. Instead, you can import data by creating a template based on the .csv file fast and in a few clicks.
In the following example, we are going to demonstrate the process of importing a .csv file through the command line in dbForge Studio for MySQL.

Step 1. Creating a data import template based on the .CSV file
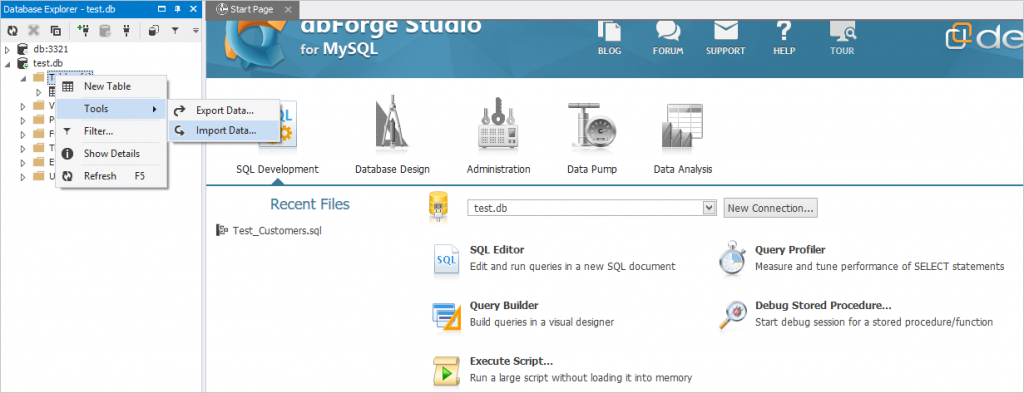
- In Database Explorer, right-click a required database.
- In the shortcut menu, point to Tools and click Import Data…
- The Data Import wizard opens. In the Source file tab, select the .csv data format and add the file name by clicking Browse…
- Open the previously created .CSV file and click Next.
- On the Destination tab, you can select a connection from the drop-down list or create a new one. Also, you need to choose a database and specify a name for the new table.
- The Options and Data formats tabs allow you to customize your table by specifying the properties and adjusting the data format you need.
- The Mapping tab allows you to map the file content to table columns.
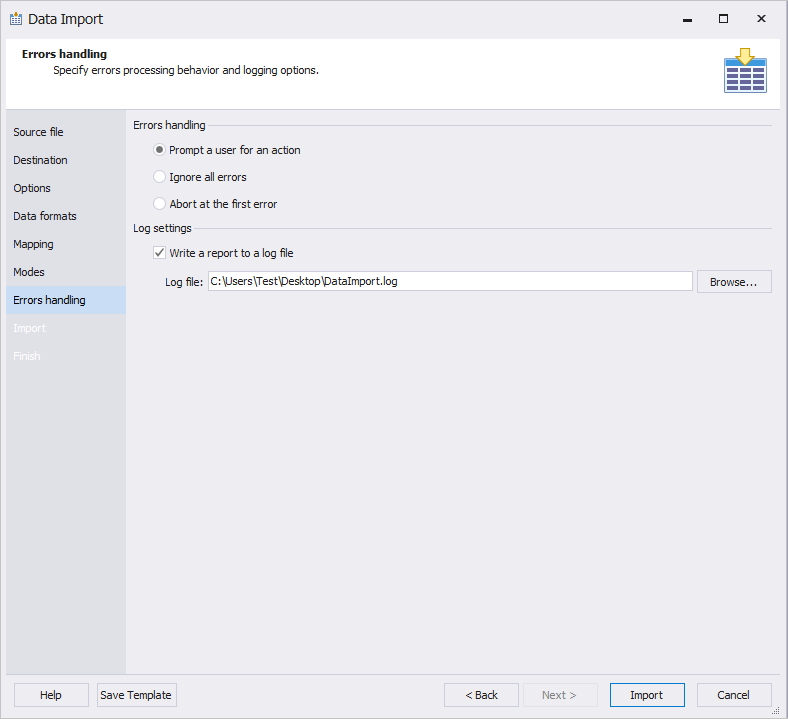
- You can handle errors by setting a particular option. Additionally, you can write a report to a log file.
- To complete the process of creating the template, click Save Template in the Data Import wizard.
Step 2. Creating a .bat file
- Open the template file in any third-party text editor, for example, Notepad++.
- Remove everything from the tag <ColumnMappings> along with the tag itself.
- Create .bat file with the following content, for example:
@echo off
set /P csv_file="Input csv file(full path): "
set /P table_name="Input table for import: "
set p=%ProgramFiles%\Devart\dbForge Studio for MySQL
"%p%\dbforgemysql.com" /dataimport /inputfile:"%csv_file%" /templatefile:"D:\template.dit" /table:%table_name%
where D:\template.dit is your template file.
Step 3. Importing a .CSV file through the command line
After successfully creating the .bat file, run it and then enter:
Once the data import process is successfully completed, go to dbForge Studio for MySQL table and click Refresh in Database Explorer.
Conclusion
To import data via the command line is much easier with dbForge Studio for MySQL. It simplifies the import process and saves much time on loading multiple .csv files in several clicks, efficiently and effortlessly.
There are other ways to import a CSV file to a MySQL database. Moreover, to get rid of manual work, you can automate this process. To learn more check out this blog post by Skyvia: How to Import CSV to MySQL.


Hi, I am using the ‘express edition’ and suspect that is why I do not have ‘save template’ option. Regardless, my question is: Is the generated import script standard SQL?, and if so, can it be saved in the database as a stored-procedure? Thanks!