The article presents a detailed step-by-step walkthrough on how to move a database scripts folder to the Azure Files storage and keep it up-to-date with the help of dbForge Studio for SQL Server.

Nowadays lots of businesses are moving their workloads to the cloud. There are tens of reasons for this: cost-efficiency, security, reduced load on internal facilities, easier collaboration, significant time savings, etc. One of the most popular cloud-based storage services today is Azure Files. Let’s look more into it and explore a scenario of using this platform in database development.
Contents:
- What is Azure Files storage?
- How to mount the Azure file share on Windows
- How to move the scripts folder to Microsoft Azure Files
- How to compare and synchronize the scripts folder with a live database
- Conclusion
What is Azure Files storage?
The Azure Files service offers fully managed shared storage in the cloud that is accessible via the industry-standard SMB and NFS protocols. With the Azure Files storage, you can create, access, and manage your file shares using the built-in UI, as well as the Azure CLI or PowerShell.
Why use Azure Files storage?
- Shared access
- Replacement or supplement for on-premises file servers
- Compatibility with most common automation tools
- REST API protocol
- Security
Scenario
Let us consider the following worked example. Suppose, we have a development database—AdventureWorks2019_Dev in our case. We want to keep its scripts folder in the Azure Files storage and regularly update it with the most recent changes.
Prerequisites:
- Create a database scripts folder.
- Create an Azure storage account.
- Download and install dbForge Studio for SQL Server.
How to mount the Azure file share on Windows
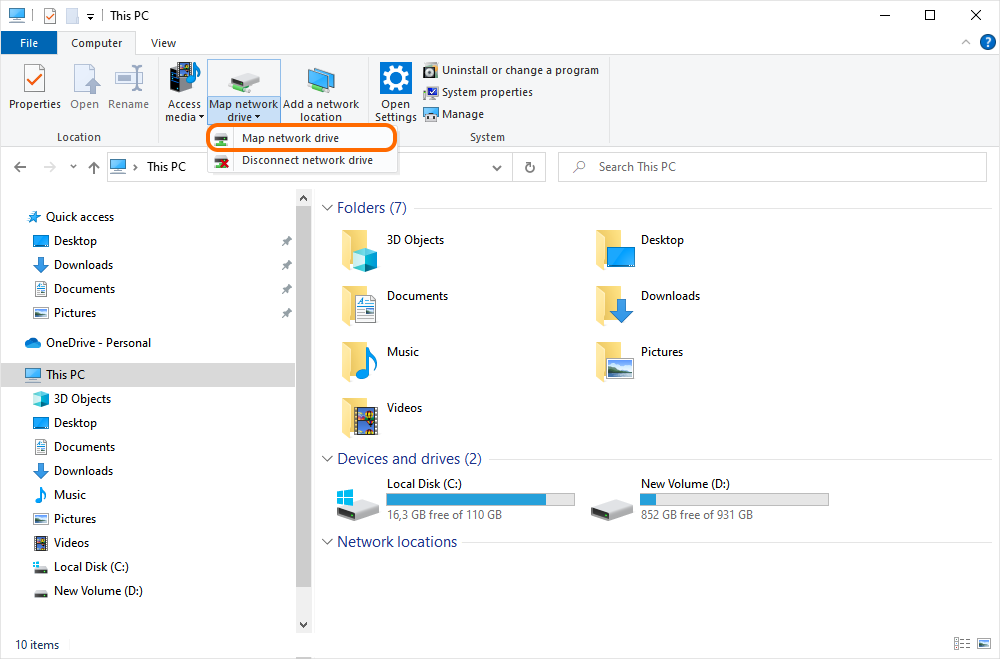
1. In File Explorer, go to This PC.
2. On the Map network drive dropdown, select Map network drive.
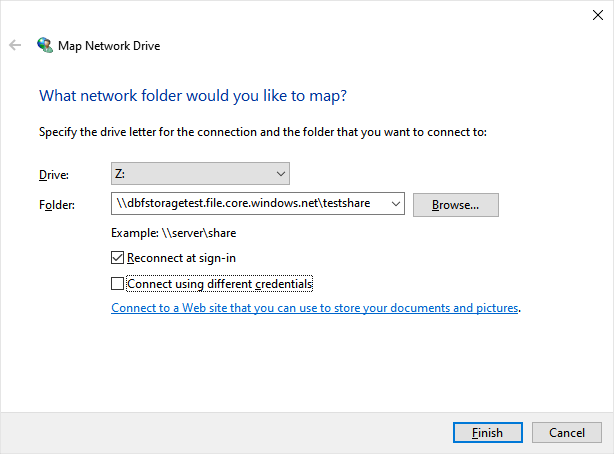
3. In the Map Network Drive dialog that opens, specify the drive letter for the connection and provide the UNC path. The UNC path format is as follows:\\<YourAccountName>.file.core.windows.net\<YourFileShareName>.
In our case, the UNC path looks as follows: \\dbfstoragetest.file.core.windows.net\testshare.
Then click Finish.
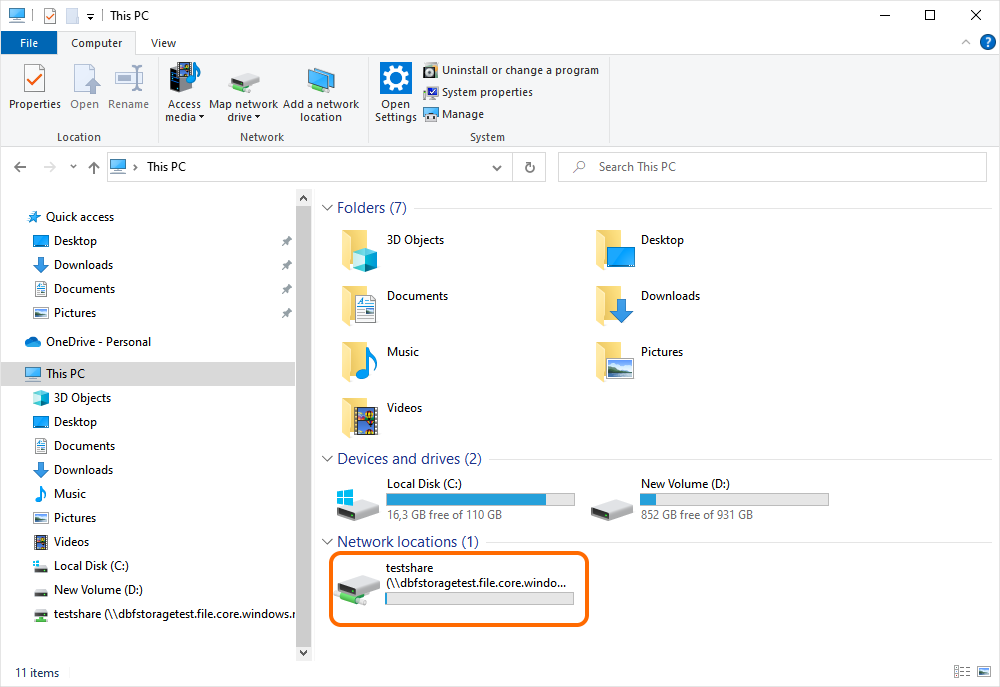
4. In the Windows Security dialog that opens, enter your credentials to connect to the Azure Files share and click OK.
5. You are ready to use the Azure file share.
How to move the scripts folder to Microsoft Azure Files
After you have mounted the Azure file share with File Explorer, simply copy the necessary scripts folder to the drive. In our worked example, we are moving the AdventureWorks2019_SF database scripts folder to the Azure file share.
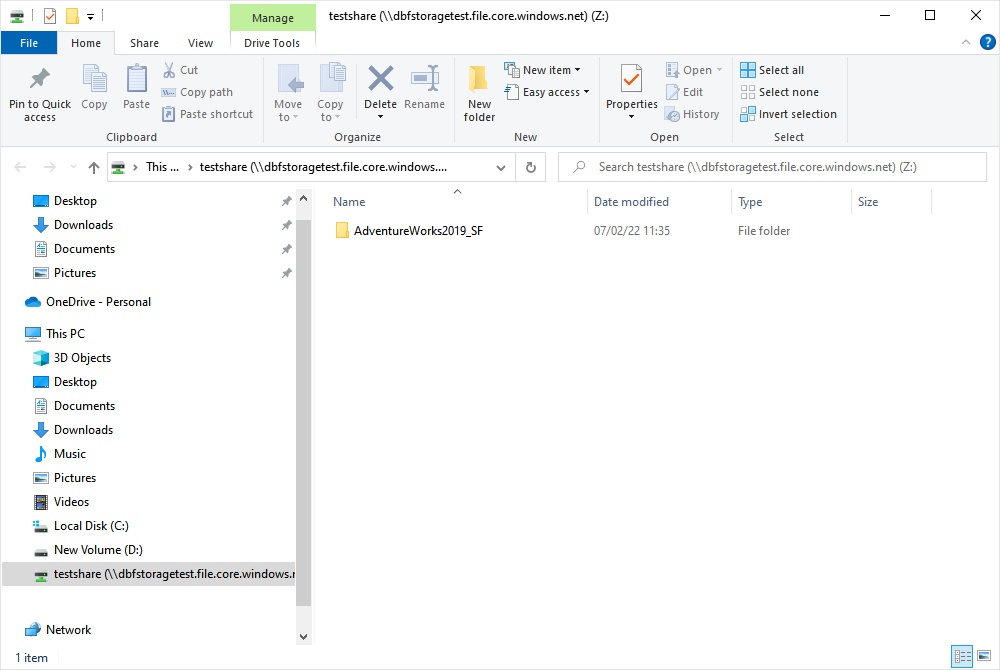
Let us also check the Azure Files web console.
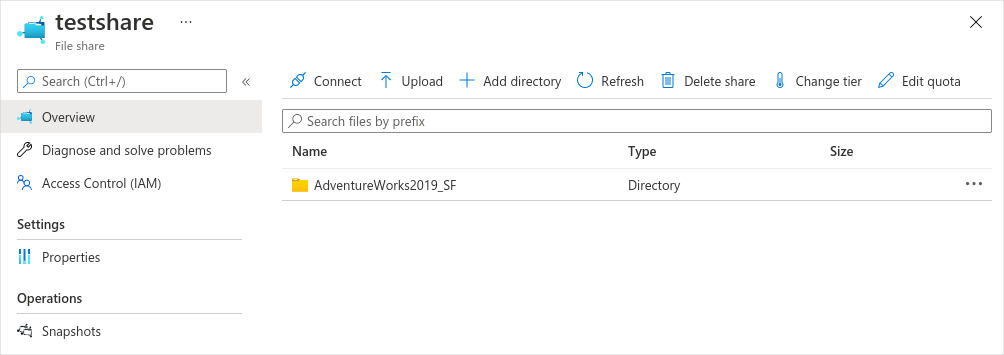
As you can see, we have successfully moved the scripts folder to the cloud.
How to compare and synchronize the scripts folder with a live database
Now that we are using the Azure Files cloud to store our database scripts folder, let’s look at how we can keep it up-to-date. In this tutorial, we will be using dbForge Studio for SQL Server—an ultimate all-in-one IDE for developing, managing, and administering SQL Server databases.
As you remember, we have a live development database and we want to keep our scripts folder that resides in the cloud current with that database. The logic behind this is to regularly run the schema and data comparison between the database and the scripts folder, and in case any differences are found—deploy them. To achieve this, we will use the Schema Compare and Data Compare functionality of the Studio.
Synchronize schemas
1. On the Comparison menu, click New Schema Comparison.
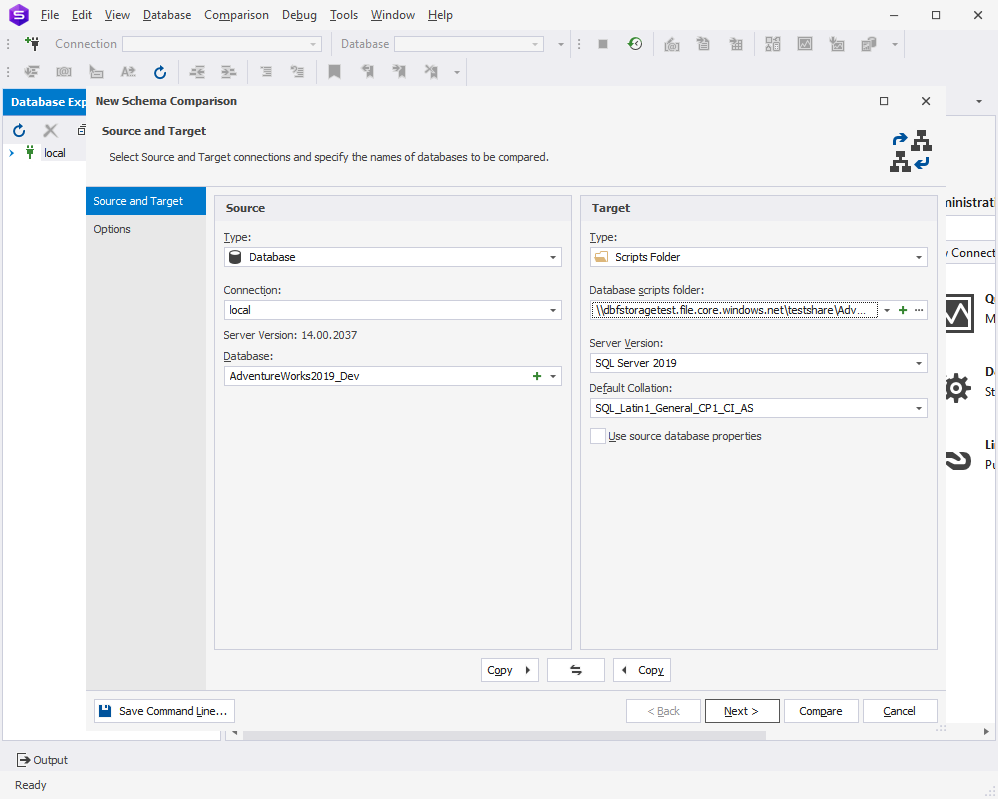
2. In the New Schema Comparison wizard that opens, specify the type of the Source and Target, provide connection details, and select the names of the databases to be compared. Click Next.
In our worked example, we are going to compare the AdventureWorks2019_Dev database that resides on our local server with the AdventureWorks2019 scripts folder stored in Azure Files.
3. Optional: On the Options tab, configure the schema comparison options and click Compare.
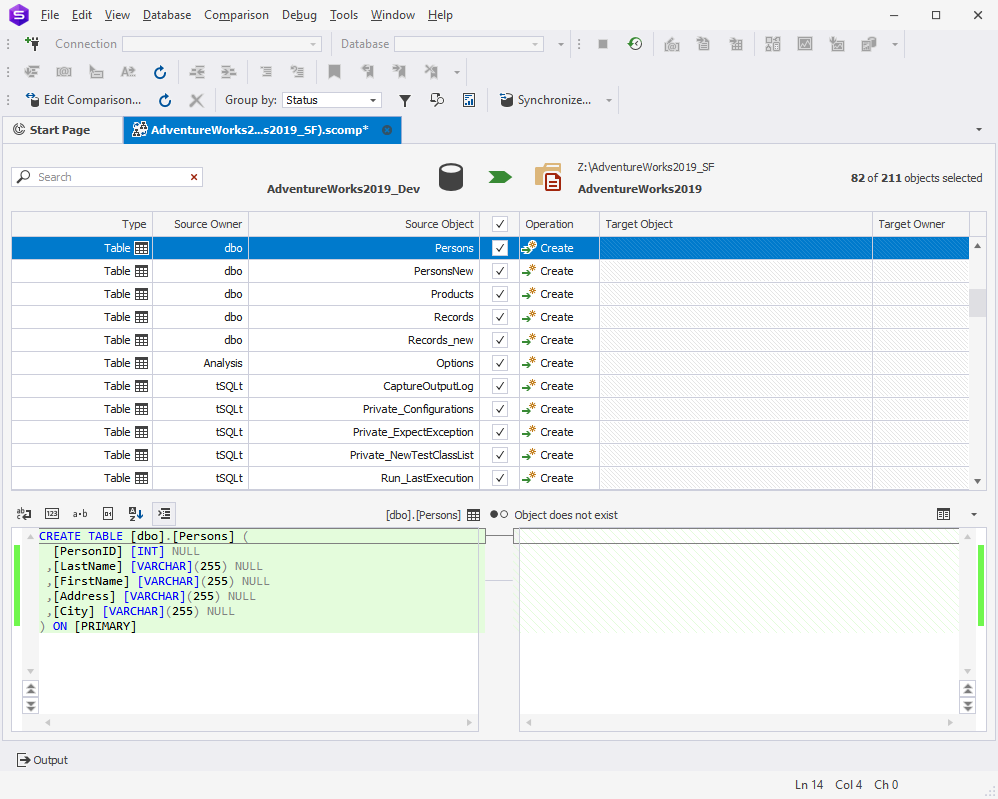
4. In the schema comparison results window that opens, analyze the differences and select the objects to be synchronized. Click to deploy the schema differences.
5. In the Schema Synchronization Wizard that opens, configure all the necessary options and click Synchronize.
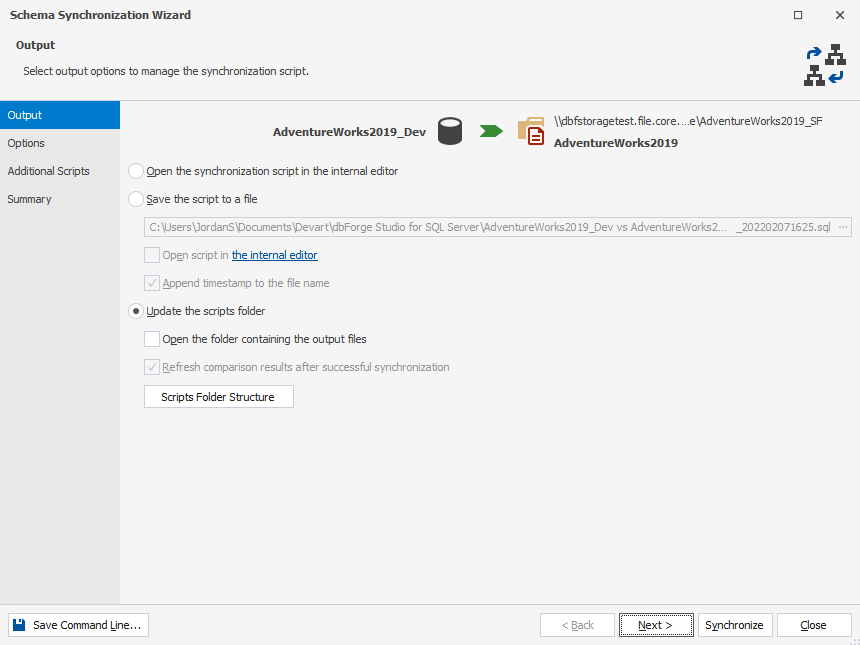
Now that we have synchronized the database structure, we can move on to comparing and synchronizing the database contents.
Synchronize data
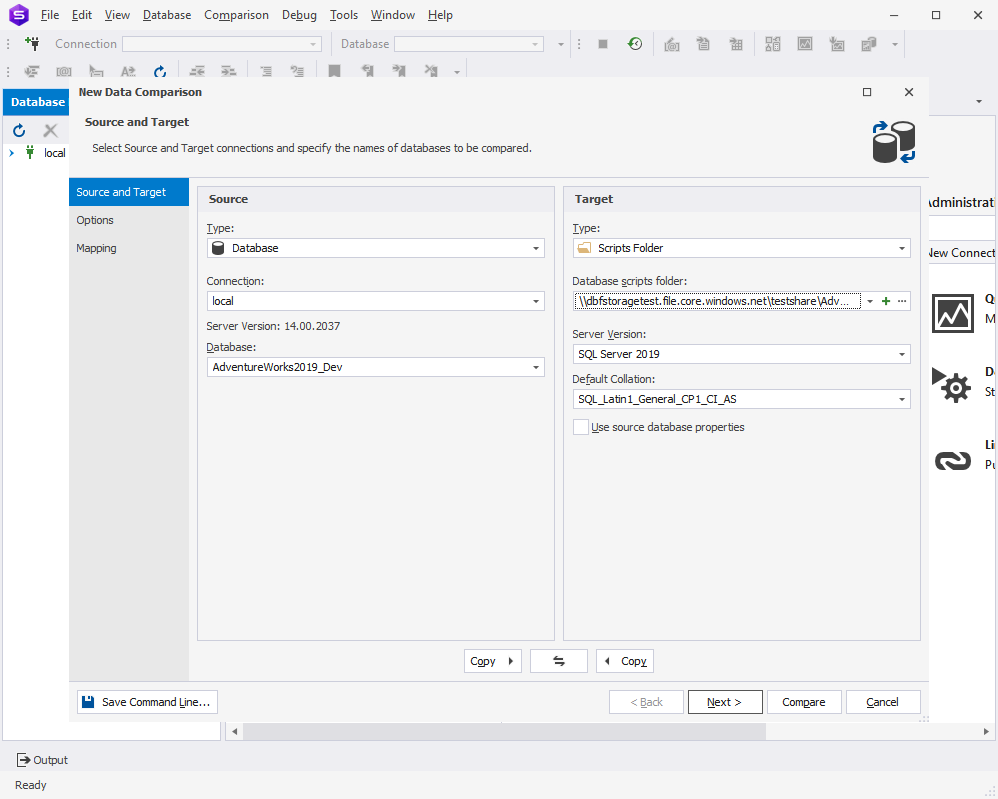
1. On the Comparison menu, click New Data Comparison.
2. In the New Data Comparison wizard that opens, specify the type of the Source and Target, provide connection details, and select the names of the databases to be compared. Click Compare.
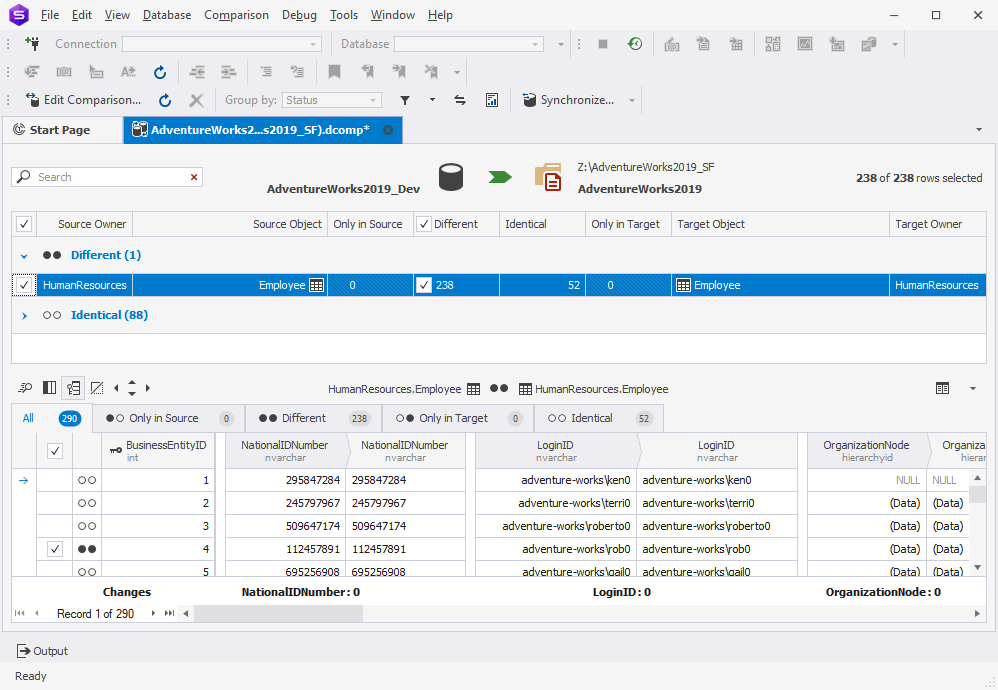
3. In the data comparison results window that opens, analyze the data differences and select the objects to be synchronized. Click to deploy the data differences.
4. In the Data Synchronization Wizard that opens, configure all the necessary options and click Synchronize.
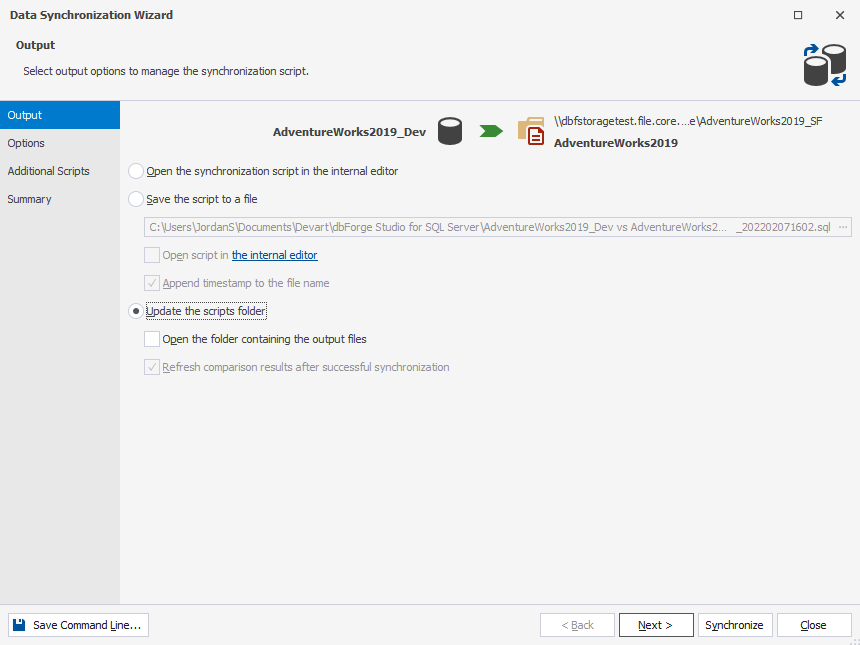
Now our scripts folder that is stored in Azure Files is up-to-date with our live development database.
Conclusion
Storing database scripts folders, backups, and other files in Azure Files, you can benefit greatly from the availability, durability, and scalability of the platform. In the article, we have considered the scenario of how you can keep the database scripts folders hosted in the Azure Files cloud storage up-to-date by synchronizing them with live databases. For this, we used the Schema Compare and Data Compare functionality of dbForge Studio for SQL Server.
The Studio comprises a feature-packed IDE, its functionality is vast, and it is impossible to fully observe it within one article. To better get to know the tool, download a 30-day free trial of dbForge Studio and test-drive all the advanced features it delivers.


