")
Developers using the RAD Studio environment frequently encounter challenges with database engines like Oracle. This happens particularly when they have to ensure compatibility and seamless data integration or struggle with matching Delphi data types to the ones used in a database. On the other hand, Universal Data Access Components can efficiently connect to and interact with different databases, including Oracle, without additional access layers or needing extra time to build tailored connectivity.
Continue reading this guide to learn how to use UniDAC with RAD Studio to access and query data within the Oracle database.
Table of contents
- What is UniDAC?
- A few things to consider before starting out
- Designing architecture for connectivity
- How to install UniDAC?
- How to create an application with RAD Studio and query data with UniDAC?
- Final thoughts
What is UniDAC?
Before we begin, it’s important to understand UniDAC and how it can help you pull data from a database into your development environment.
Universal Data Access Components (UniDAC) is a library that provides direct access to data stored in multiple databases from Delphi and C++Builder. These components act as middleware, offering a transparent, server-independent interface that is easy to use, requires minimal effort to master, and lets you switch between servers quickly.
What’s more, UniDAC supports Direct Mode for the Oracle Provider, overcoming the common problem of Oracle connection. By default, the Oracle provider uses the Oracle Call Interface (OCI) to connect to the Oracle database server. Working through OCI requires the Oracle client software to be installed on your machine or any client machines, which can be inconvenient and cause additional installation and administration expenses.
However, with UniDAC, you don’t need to install Oracle client software on your machine.
A few things to consider before starting out
Before diving into the setup and development process, it’s essential to understand a few key aspects to ensure a smooth experience:
- Ensure your UniDAC version is compatible with your RAD Studio and Oracle Database versions. Check the documentation for compatibility details to avoid any potential issues during the setup.
- Verify you have the RAD Studio, UniDAC, and Oracle Database licenses. Proper licensing ensures you have access to all features and receive official support when needed.
- Before making any changes to your development environment or database, it’s a good practice to back up your current setup. This allows you to restore your system to its previous state if anything goes wrong during the installation or configuration.
- If you plan to connect to a remote Oracle database, ensure your network configuration allows such connections. This includes opening the necessary ports and configuring firewalls to permit traffic to and from the Oracle server.
To demonstrate how to use RAD Studio and UniDAC, alongside the essential Oracle tools required for connectivity and testing, make sure to download and install the necessary tools and drivers.
- RAD Studio
- UniDAC
- Oracle Database and SQL Developer tool
Designing architecture for connectivity
The image below illustrates how UniDAC works with database engines such as SQL Server, Oracle, and others. In this architecture, UniDAC is a middle component between your application and the database layer to establish an Oracle database connection and perform database activities like INSERT, DELETE, and UPDATE. Direct Mode allows connecting to the Oracle database server without installing Oracle client software.
How to install UniDAC
Follow these steps to get UniDAC up and running on your system:
- Browse to the location where you downloaded the UniDAC installation file.
- Run the installation file and click Next.
- Select the destination folder for installation. Select Custom Installation instead of keeping Full mode if you want to install specific components.
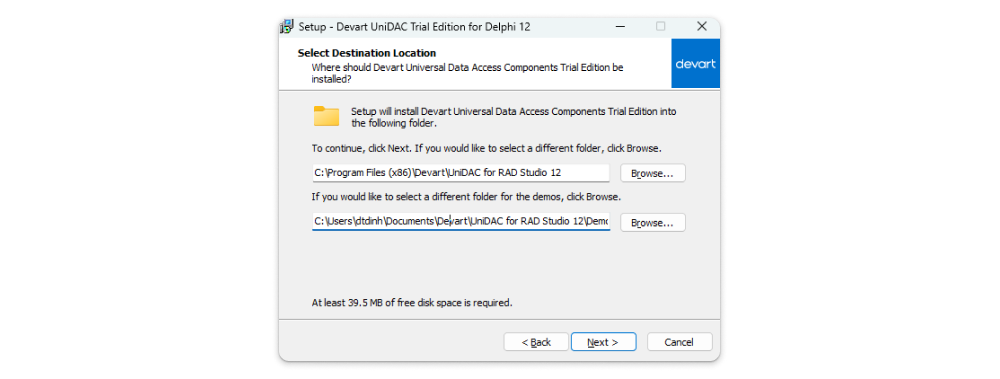
- Click Next to start the installation.
How to create an application with RAD Studio and query data with UniDAC
Creating an application with RAD Studio and UniDAC to connect and query data from an Oracle database is quite simple:
- Create a database user.
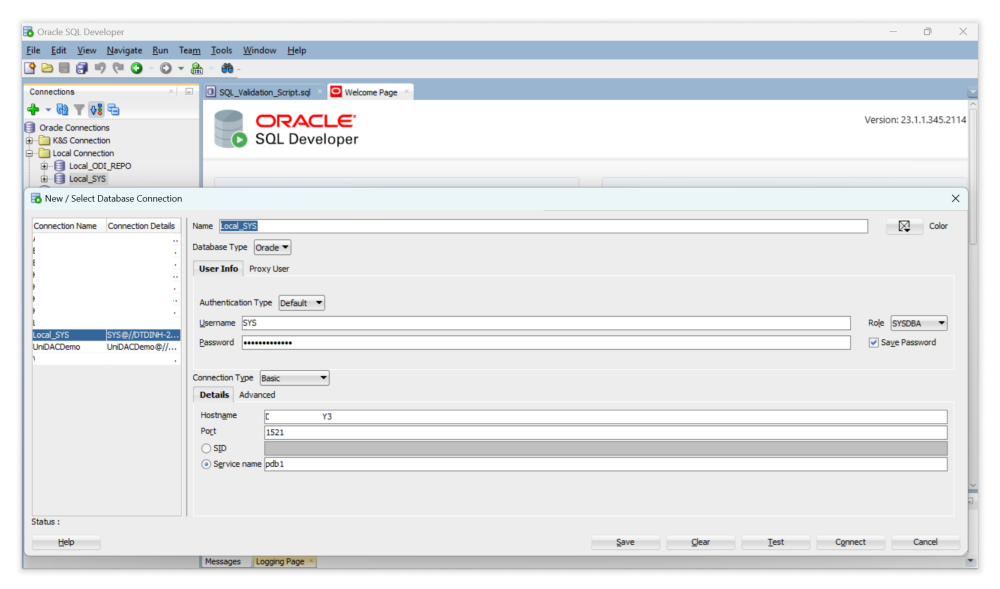
- Access the Oracle database as SYS Admin or DBA Admin. Then open SQL Developer and log in with the SYS user.
Run the following script to create a database user and grant the necessary privileges:
CREATE USER UniDACDemo IDENTIFIED BY "UniDAC@123456";

GRANT CREATE SESSION TO UniDACDemo;

GRANT CREATE TABLE TO UniDACDemo;

ALTER USER UniDACDemo QUOTA UNLIMITED ON USERS;
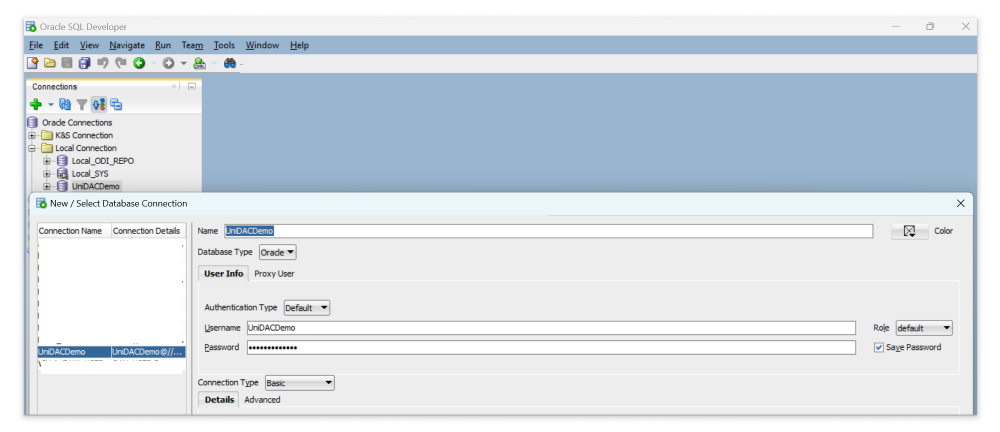
- Log in as a UniDACDemo user and create a table by running the script shown below:
CREATE TABLE Employee (EMPLOYEE_ID NUMBER(10,0), FIRST_NAME VARCHAR2(100), LAST_NAME VARCHAR(100), ACTIVE NUMBER(1,0));

INSERT INTO Employee

SELECT 1, 'AAAA', 'BBBB', 1 FROM Dual

UNION

SELECT 2, 'CCCC', 'DDDD', 1 FROM Dual;

COMMIT;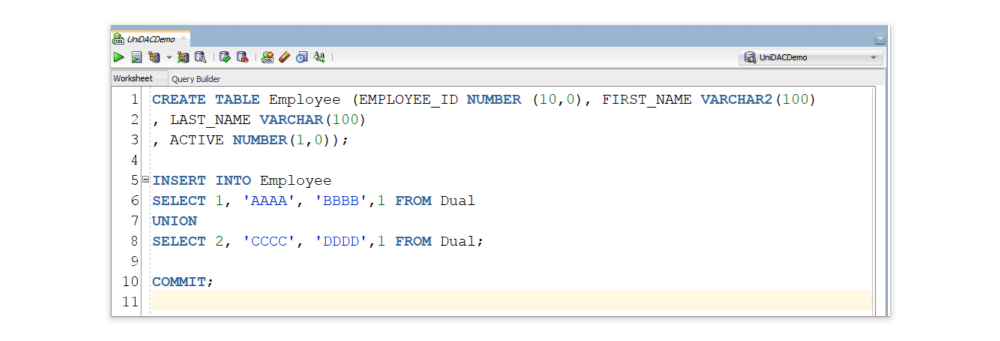
- Create a connection in RAD Studio.
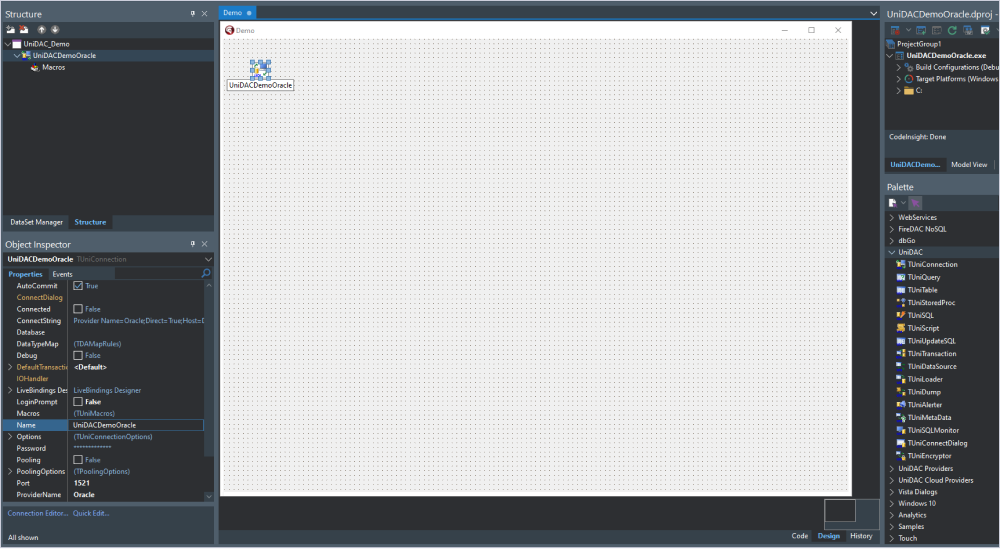
To do this, create a project in RAD Studio as a VCL Form application and name it UniDACDemoOracle. Then, drag and drop a TUniConnection component from UniDAC onto the form and name it UniDACDemoOracle.
After that, you will be able to enter the connection settings.
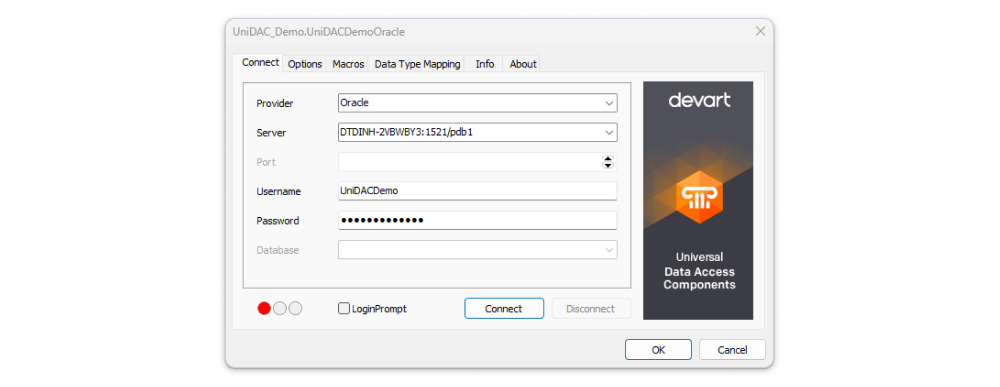
Double-click the connection icon to enter the connection details.
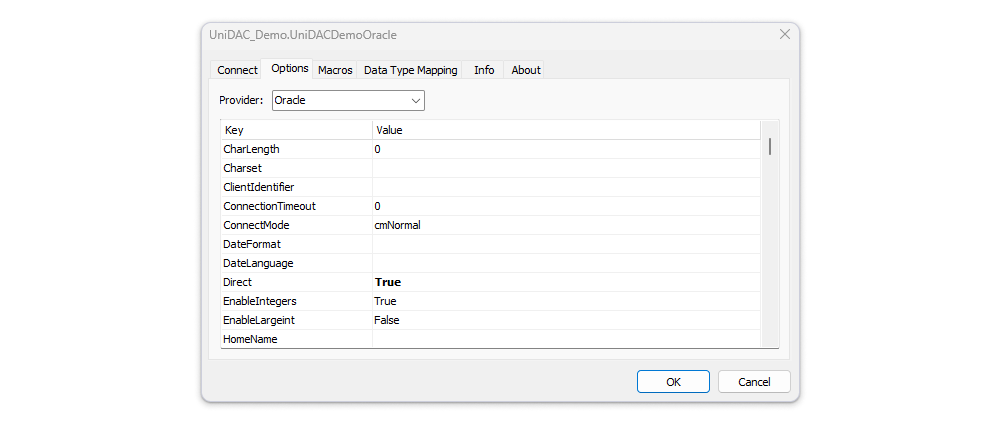
Go to the Options tab and set Direct value to True.
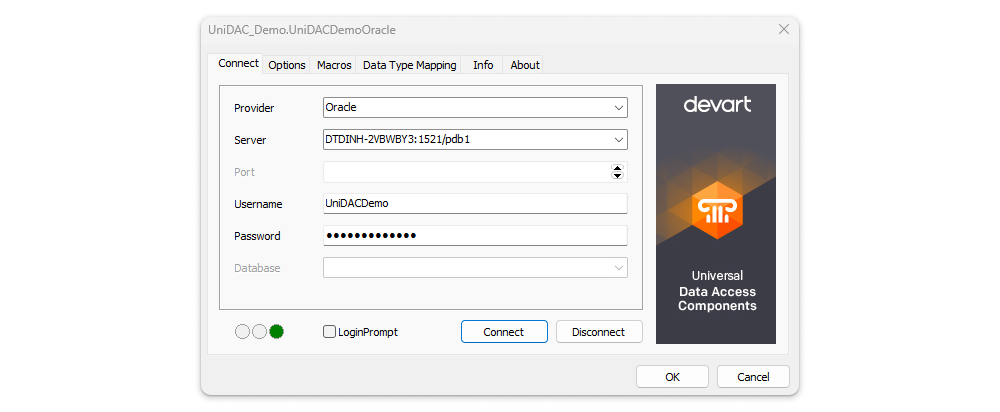
Go back to the Connect tab and click the Connect button. If the connection is successful, you will see a green indicator.
- Create a TUniTable to capture data from the Employee table.
To do this, drag and drop a TUniTable component from UniDAC onto the form. Change the Connection properties of this component to UniDACDemoOracle and name it UniTable_Employee.
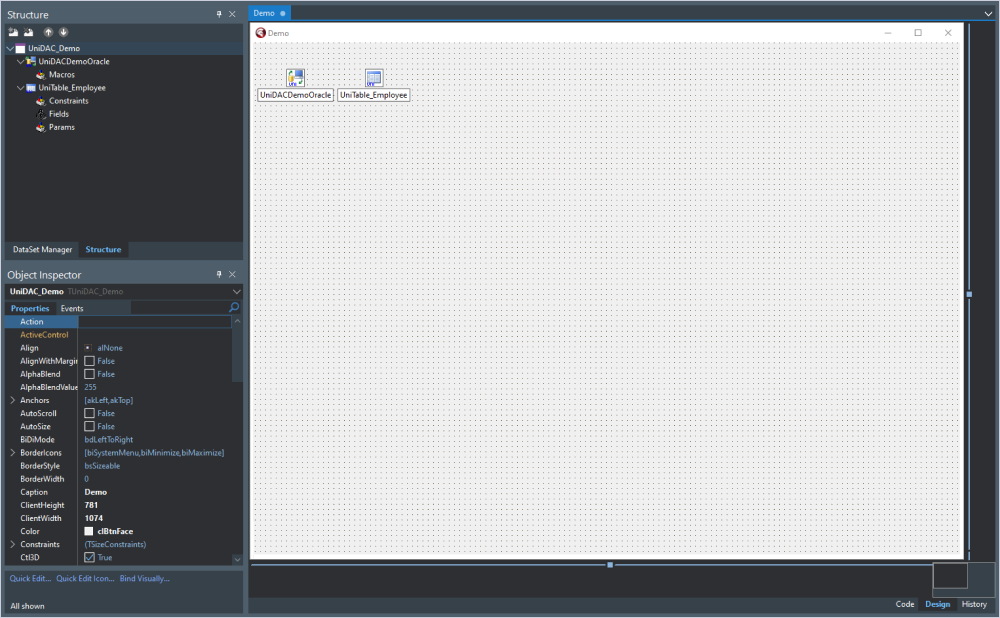
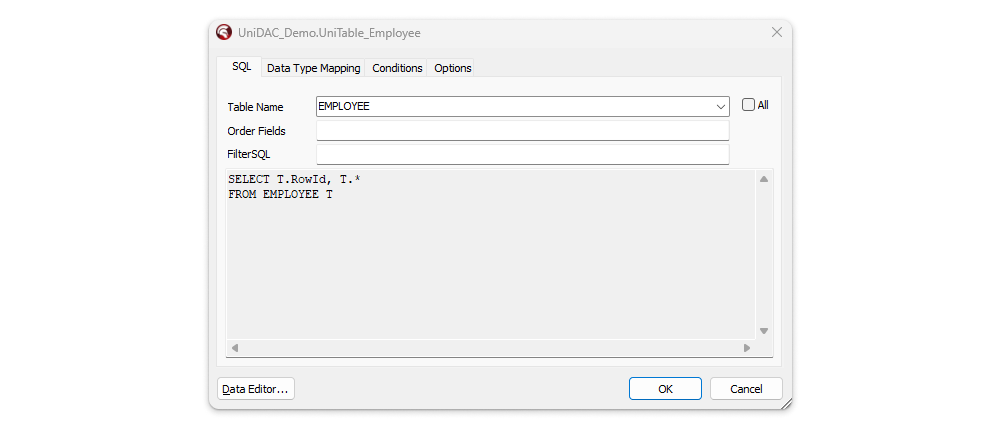
Double-click on UniTable_Employee and select the EMPLOYEE table you have created with the UniDACDemo user.
- Register Oracle Provider in your application.
Drag and drop a TOracleUniProvider component from UniDAC Providers onto the form.

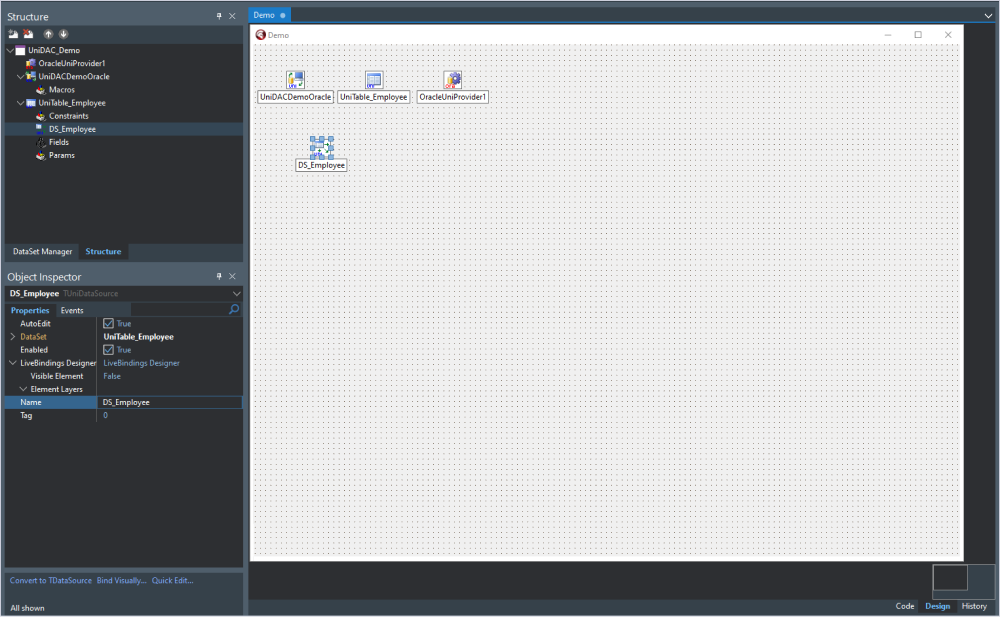
- Create a TUniDataSource to display employee data.
Drag and drop a TUniDataSource component from UniDAC onto the form, name it DS_Employee, and set its Dataset property to UniTable_Employee.
Drag and drop a TDBGrid component onto the form, name it DG_Employee, and set its DataSource property to DS_Employee.
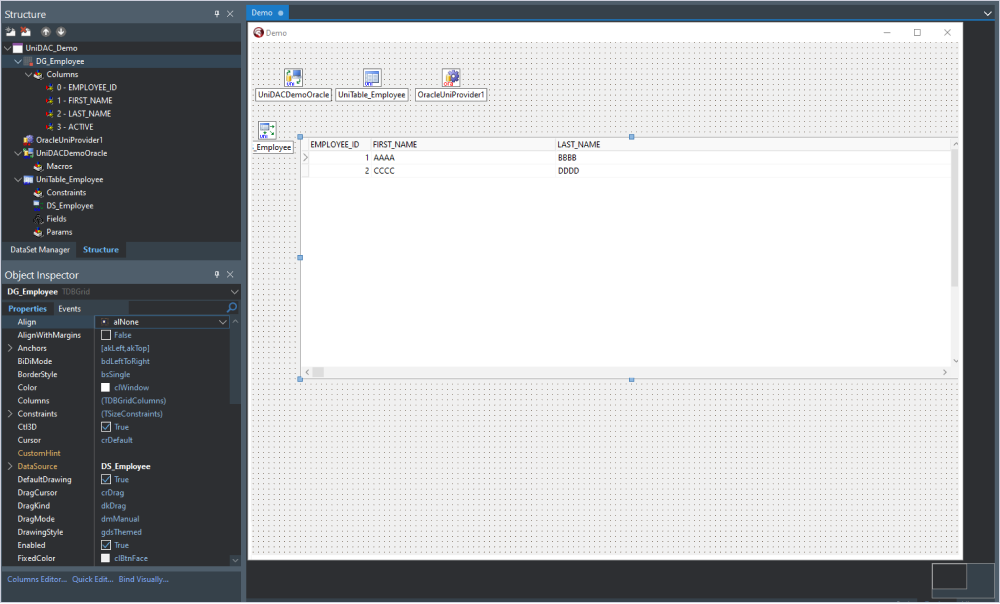
- Compile and run your program.
From the Run menu, choose Run (F9) or Run Without Debugging (Ctrl + Shift + F9). Browse to the project folder and run the .exe file.
Final thoughts
Using UniDAC components within RAD Studio allows developers to manage applications that interact with Oracle databases and other engines. UniDAC provides a server-independent interface, making development more flexible and straightforward without dependency on specific database engines. Follow this guide to set up and use UniDAC to connect to an Oracle database, execute queries, and display data within a RAD Studio application.
Ready to streamline your database application development? Start using UniDAC with RAD Studio today. Download UniDAC now and get started!
