
Database development is a combination of complex processes that work together in order to create a perfectly balanced (just as all things should be) product. Testing is one of the most important procedures in this process. It is supposed to put a database into the close-to-field conditions and detect any flaws before the production goes down due to any unexpected circumstances. In other words, testing helps convert such circumstances into preventable events.

Contents
- Create a demo database to populate with test data
- Create a Data Generator project
- Fill the tables with test data
- Conclusion
How do you create test data that matches the characteristics and distribution of the real one? In this article, we will describe the dbForge Data Generator functionality that is rather indispensable when it comes to test data generation.
Create a demo database to populate with test data
First of all, we are going to create a guinea-pig database that will be populated with the test data later in this article.

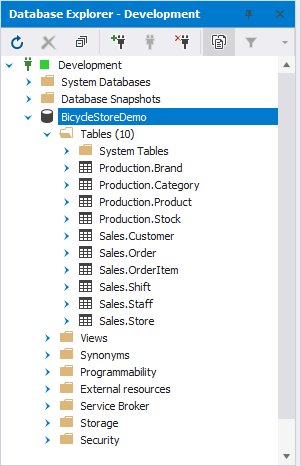
As you can see, there are no databases in the Development environment yet. Let us create one:
- To begin with, download this script: BicycleStoreDemo.txt.
- Once downloaded, change its extension to .sql.
- Open the file with dbForge Studio for SQL Server.
- Click Execute or press F5.
As a result, the BicycleStoreDemo database is created. It contains 10 tables:
Create a Data Generator project
Once we have prepared the ground, it is time for it to serve its purpose. The next step after creating a test database would be starting a new project in dbForge Data Generator:
1. Open Data Generator and click New Data Generation.
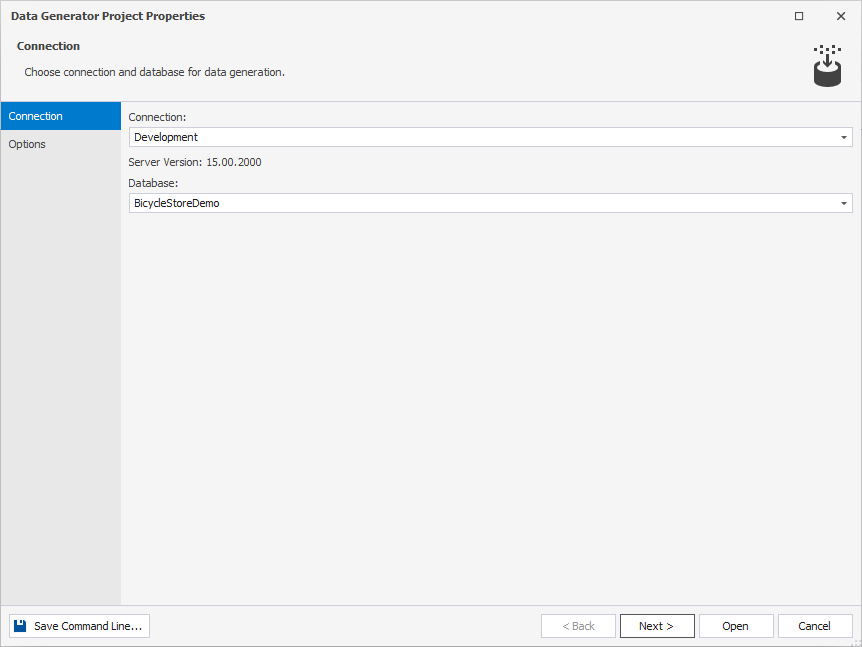
2. The Data Generator Project Properties wizard opens. On the Connection tab, choose the required connection and database and click Next.
3. On the Options page, choose the row and value distribution mode and how to treat the column properties.
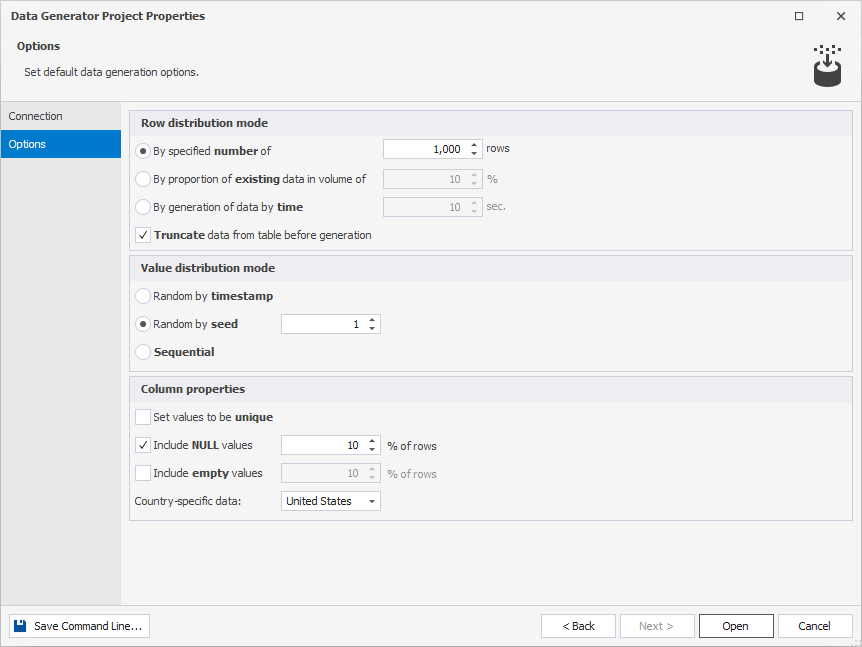
4. Click Open.
Fill the tables with test data
Finally, here comes the main course of this article. In this section, we are going to generate the test data and populate the BicycleStoreDemo database. Data Generator includes 200+ meaningful SQL data generators with sensible configuration options. It provides great flexibility and manual control over the creation of foreign key data. With column-intelligent data generation, the data in one column is based on the data of another.
Automatically assign meaningful data generators to the columns
In the previous section, we were talking about how to create a new Data Generator project. Now, we are going to figure out what to do next:
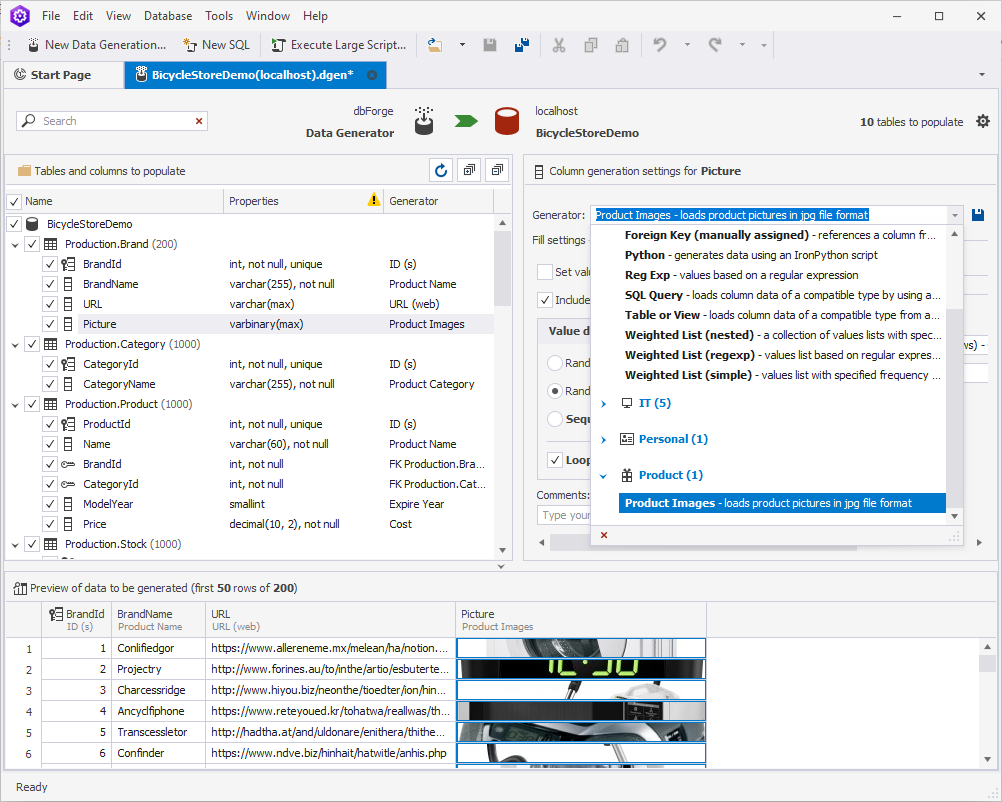
1. In the window that opens, you will see the list of tables to populate, column generation settings, and the preview of data to be generated, which is empty since no tables or columns are selected.
2. To see the generated preview, select the previously created BicycleStoreDemo database.

Note: If you select the database, all the tables in it will be selected automatically. You will be able to unselect each individual table and/or column.
3. You will see that the preview is generated instantly. dbForge Data Generator automatically fills each column with the corresponding type of data based on the table and column names, data types, etc.

Configure the data generation
If you click each individual column, you will be able to choose from the list of generators and/or fine-tune each one of those.
Brand
For example, let us take a closer look at the Brand table. As we can see, Data Generator has already filled each column with some data by selecting the appropriate generator in accordance with the name of the said column. However, the Picture column looks a little bit off. To make the table look more realistic we are going to change the avatar-like pictures to the ones that represent products:
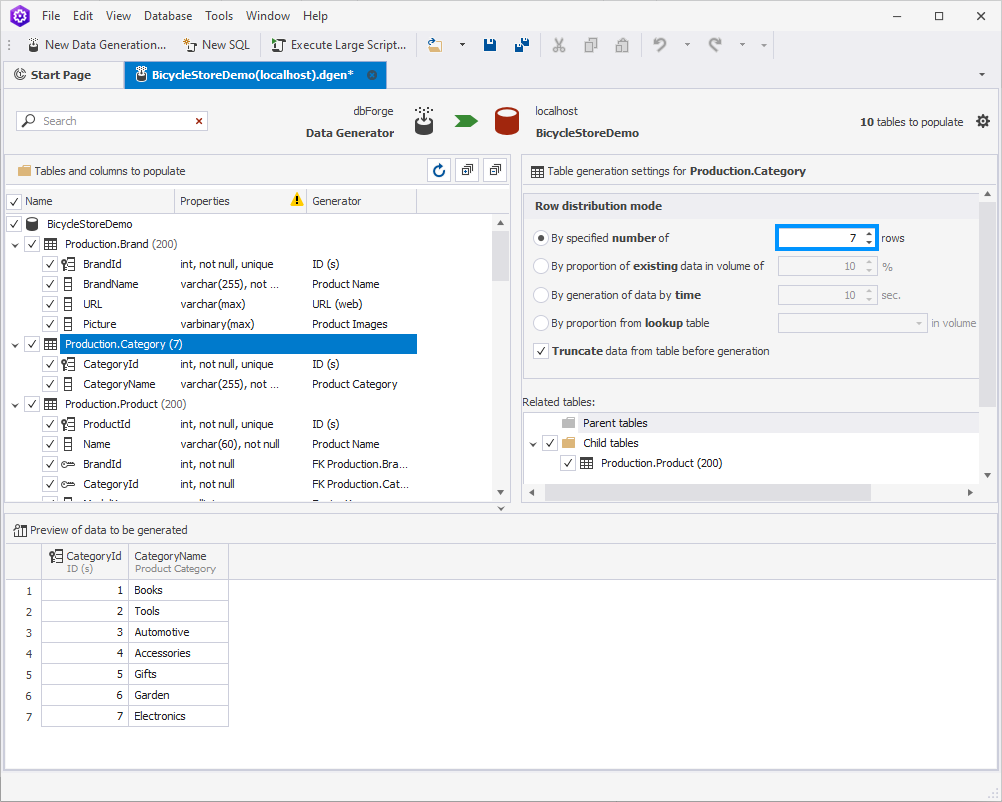
Category
Moving forward to another table – Category. Assuming that our Bicycle Store isn’t much of a capitalist tycoon, let us set the number of the product categories as 7:
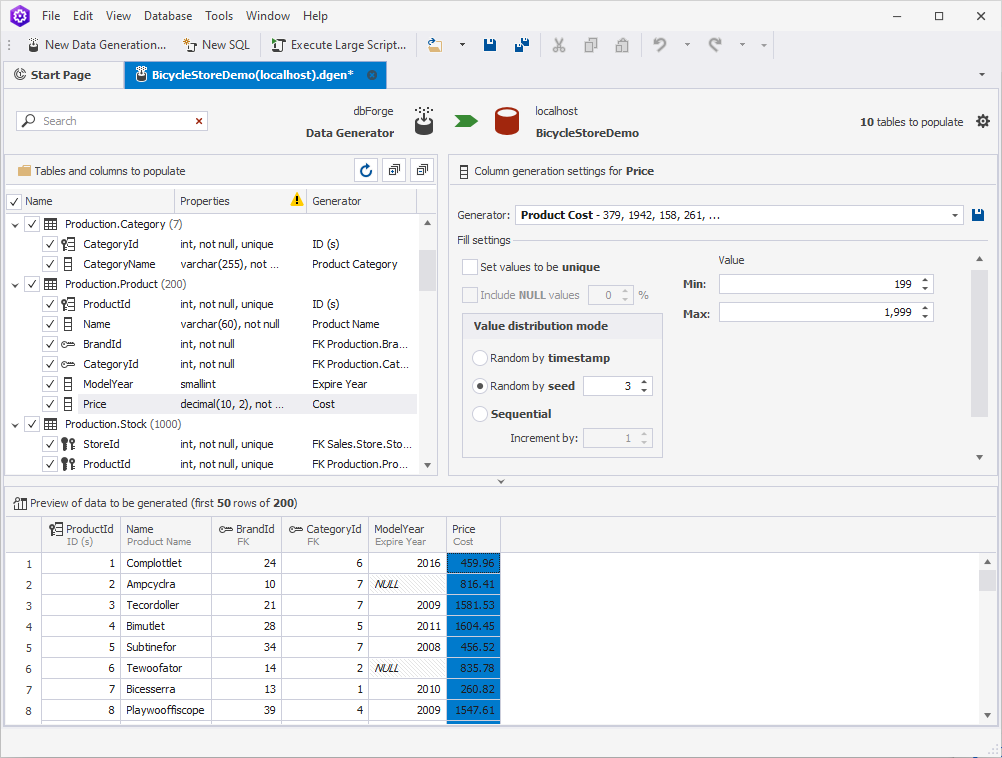
Product
In the Product table, we are going to lower the number of the products we offer to 200. Also, we will do the following:
- change the release year
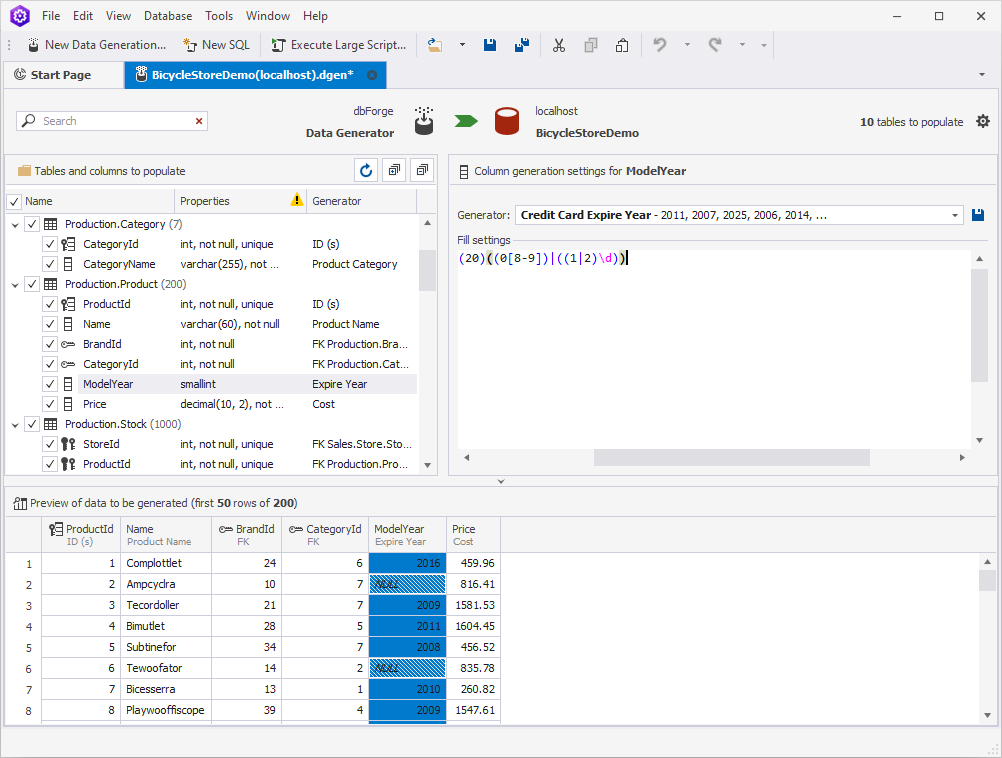
- adjust the prices
Order
As a functioning business, the bicycle store needs to fulfill customer orders. That is why there is a corresponding table in our database.
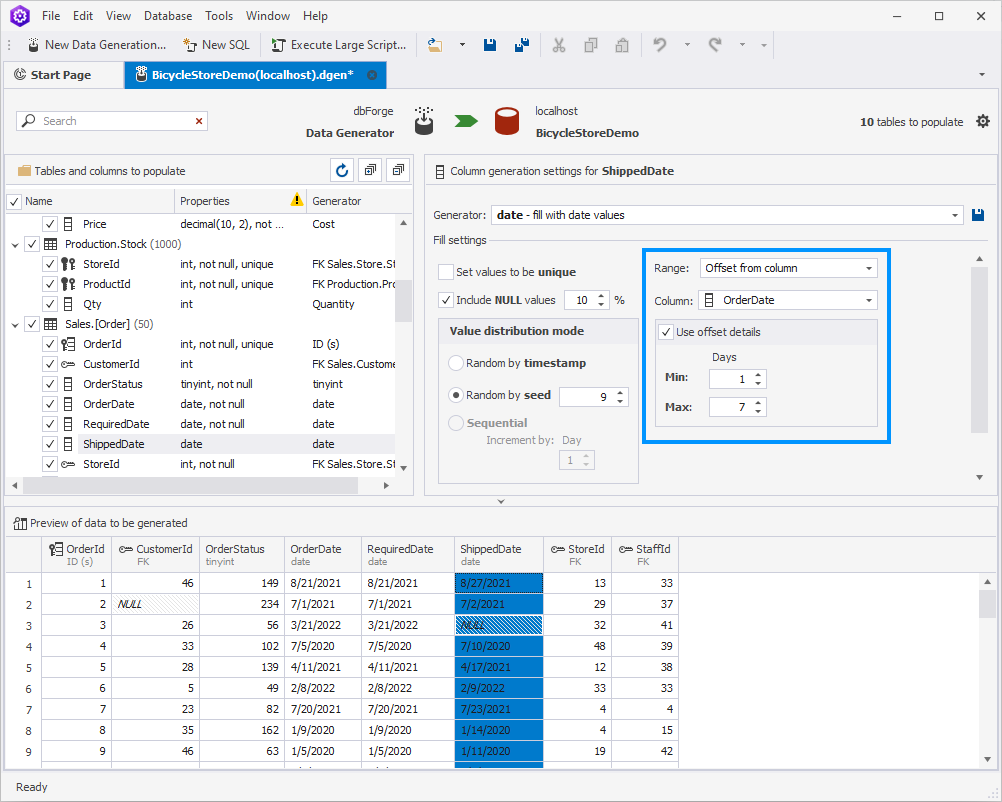
As you can see, Data Generator has filled the Order Date column by default, with the dates starting with 1/1/1970.
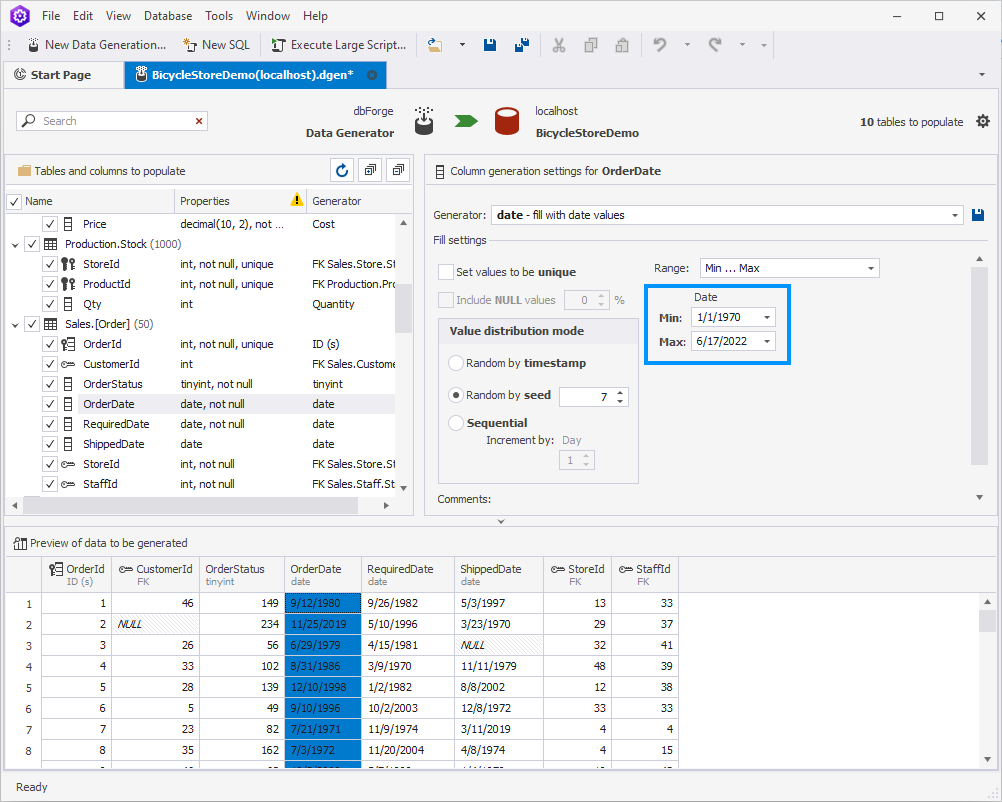
Let us assume that our store opened and started selling items only in 2020. To change the dates, simply change the minimum one to 1/1/2020.
As to the Shipped Date column, it goes without saying that the order could not have been shipped before it was made. That is why we need to set the dependency between the two columns. To do so, select Offset from column and choose OrderDate as a dependable column. Set the min and max values to your taste. We decided that our orders are usually shipped within 1-7 days from the moment they were created:
Order Item
The OrderItem table will be starring as the next example. Here, we are going to configure the orders in such a way that there are 2-4 items in each one of them. To achieve that, clear the Set values to be unique checkbox. Then, in Value distribution mode, choose Sequential, select Repeat each value, and set those values from 2 to 4.
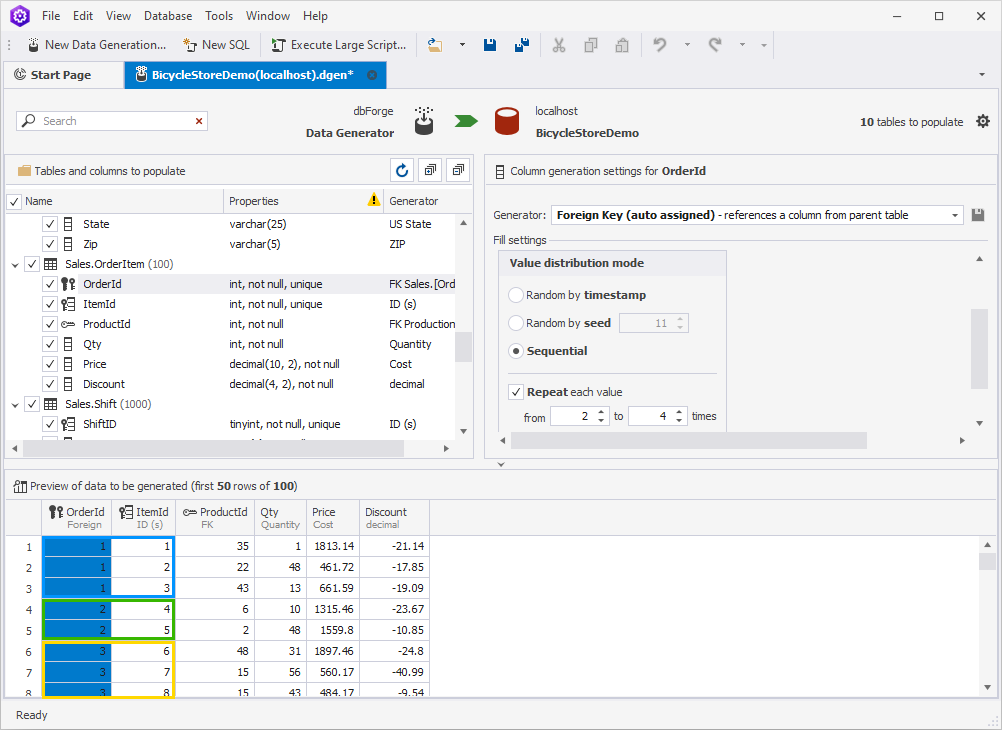
As a result, there are no orders with only 1 item in them. We only have orders with 2-4 products each.
Staff
Now, let us configure a couple of tables related to the staff of the store. Say we register each employee within our system and assign a unique email to them. The email address consists of the person’s first and last names plus the default domain name, for example:
($"[FirstName]").($"[LastName]")@staffbikestore.com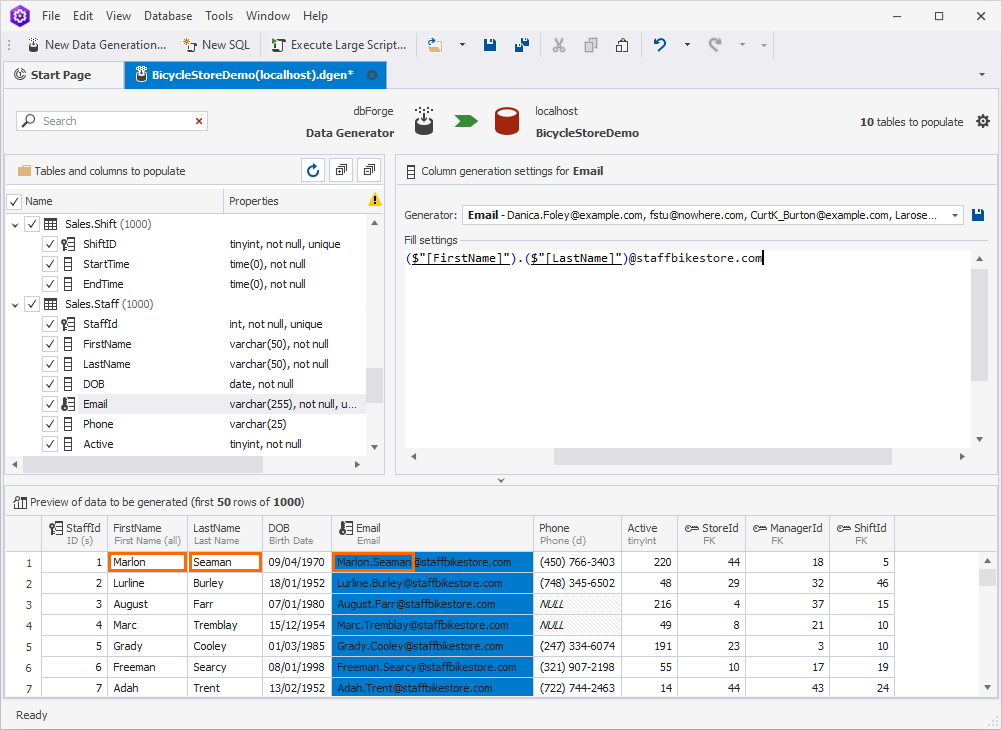
Shift
The last example we are going to give would be configuring the staff working hours. Assuming that our store works around the clock, we are going to set six 4-hour shifts counting from midnight.
In order to bring this idea to life, choose the StartTime column. In Value distribution mode, choose Sequential, select Repeat each value, and set the value to 04:00:00.
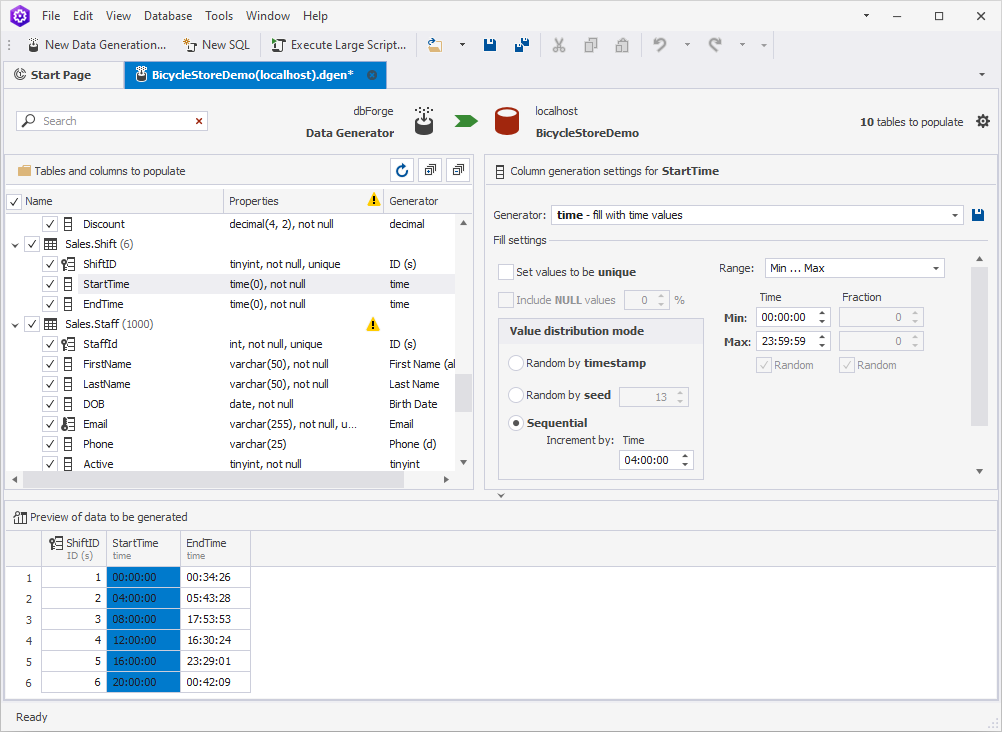
Next, choose the EndTime column. To establish the dependency of this column from the previous one, select Offset from column in the Range field and StartTime in the Column field. Finally, set the offset details to 04:00:00.
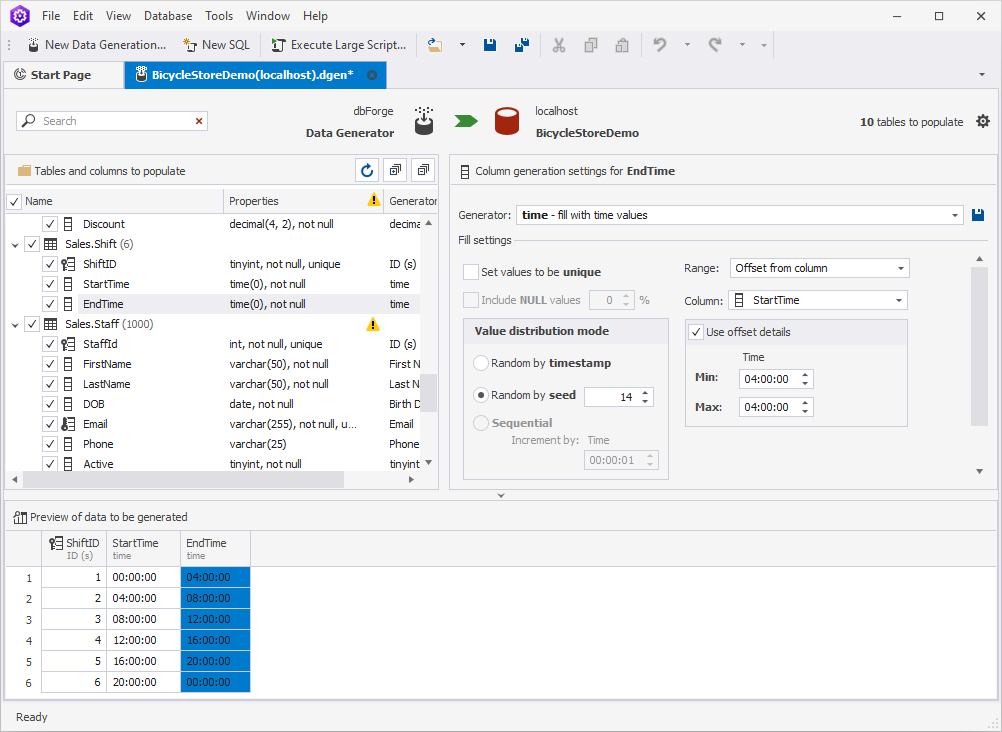
As a result, we have 6 shifts that last 4 hours each.
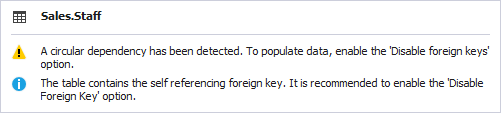
Note: The structure of the Shift table contains self-reference. You might face a warning while working with it. To be able to populate the table with data, make sure to disable the foreign keys in the Data Population Wizard.
Populate the tables with the test data
1. Once you are satisfied with the generated data, go ahead and hit Populate data to the target database.

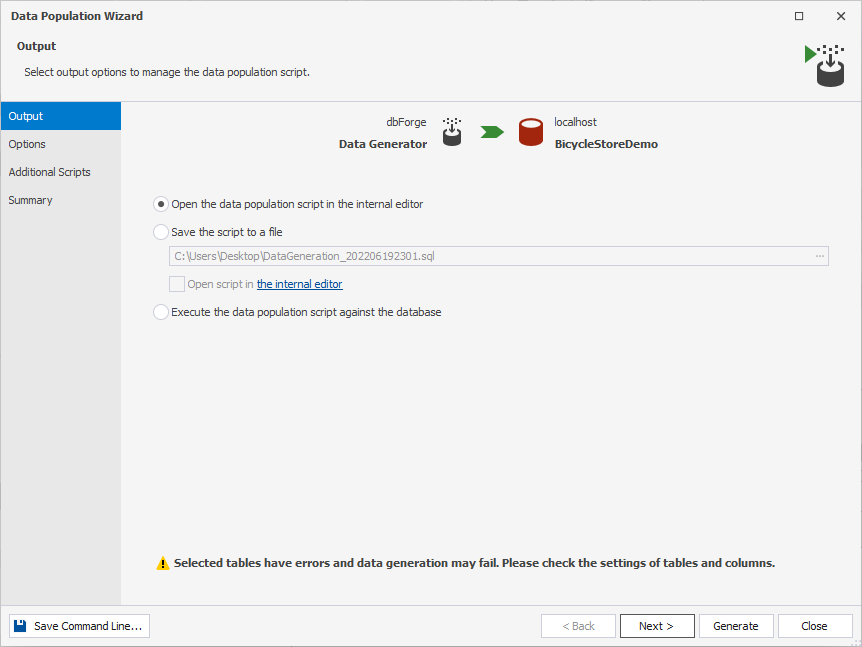
2. The final push will be configuring the data population process in the Data Population Wizard. Select the output options to manage the data population script:
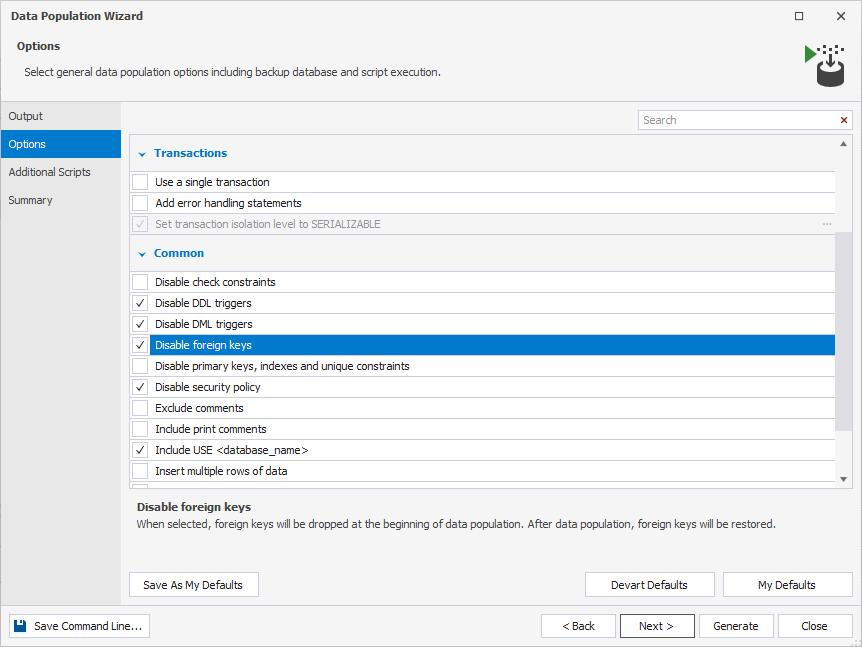
3. Configure general data population options including database backup and script execution. As you might remember, we need to disable the foreign keys due to having circular dependencies in one of our tables.
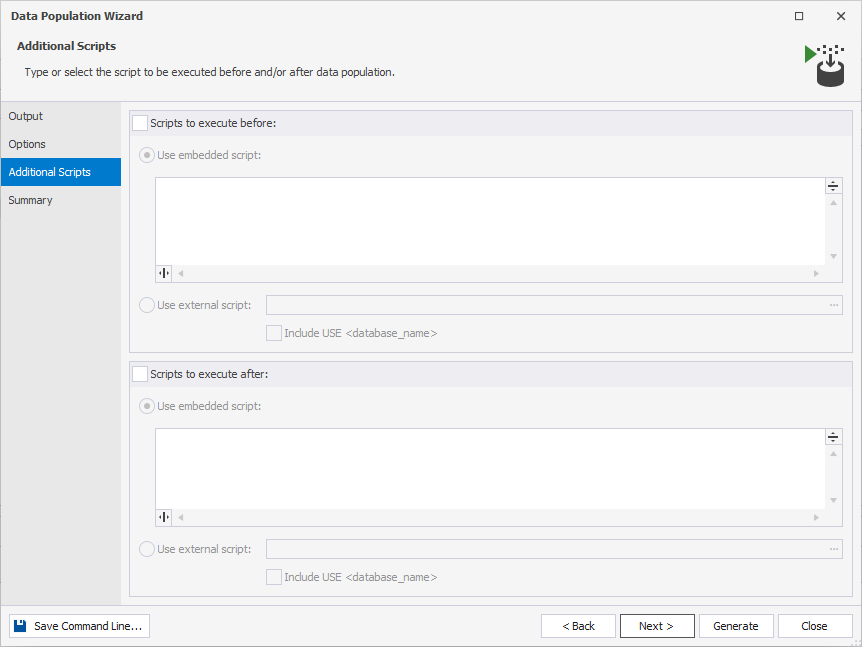
4. Should you require to run any type of script before or after the data population, you will be able to either enter the script directly or use the external script. Since we are not going to run any scripts before or after the data population, we leave this step intact.
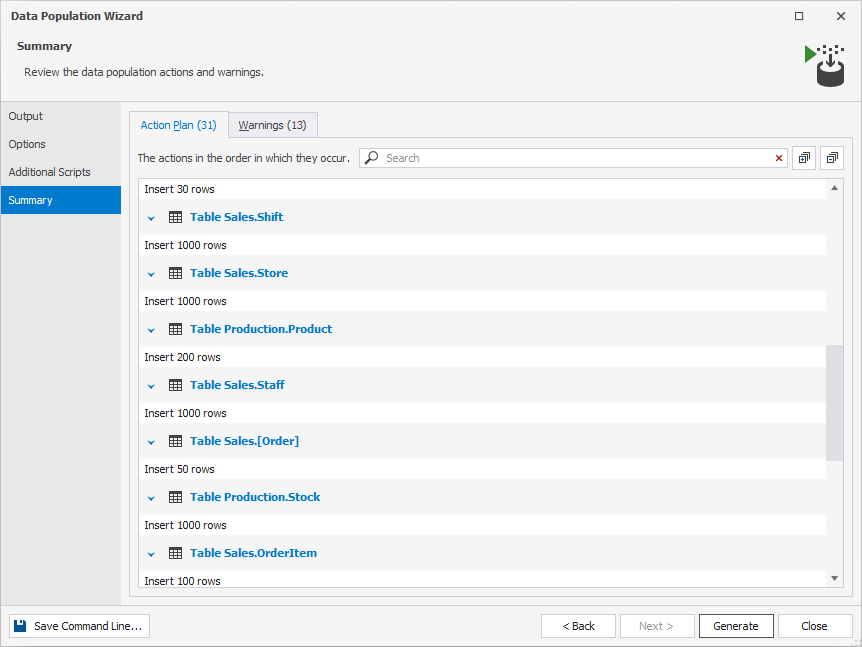
5. Check the list of actions that will take place once you hit the Generate button.
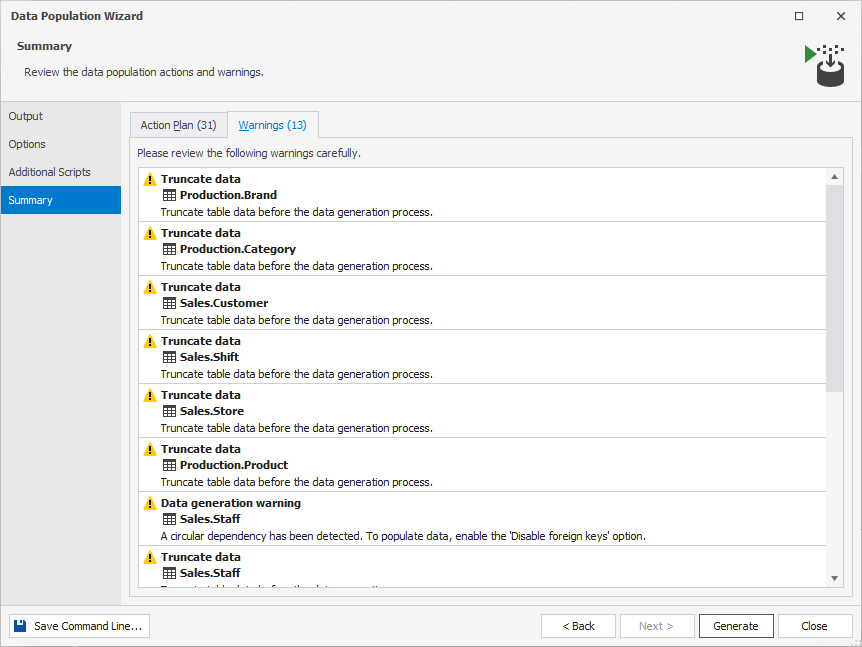
6. Finally, do not forget to review the data population warnings.
7. Click Generate to open the data generation script in the internal editor.
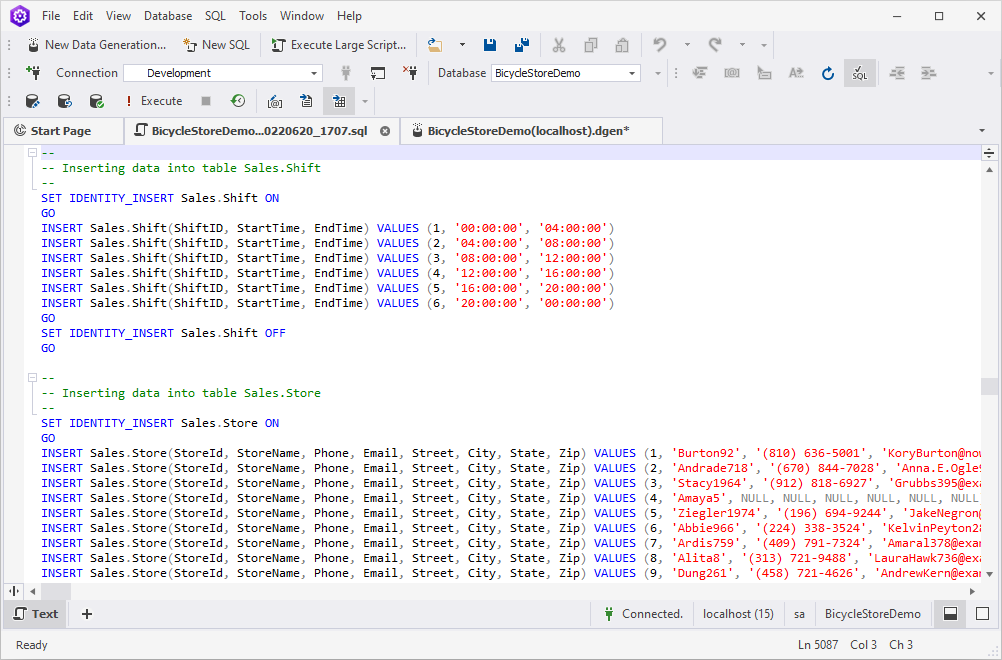
8. Having reviewed the script, either click Execute or press F5.
9. To check the data generation results, open dbForge Studio for SQL Server again, right-click the Shift table, and click Retrieve Data. Feel free to repeat this step for the other tables as well.
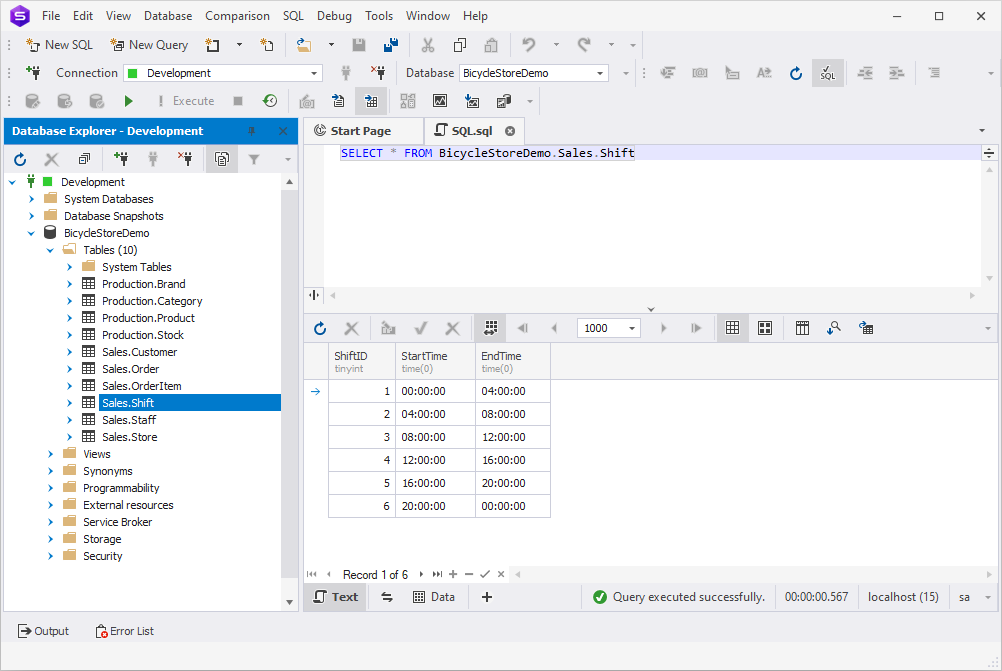
10. Now we see that all our hard work wasn’t in vain and all the tables have successfully been populated with the test data.
Conclusion
In this article, we have walked you through the whole process from database creation to populating it with the freshly generated test data. dbForge Data Generator is a very handy tool to have in your arsenal when it comes to database development and testing. It helps create large volumes of meaningful test data with no hustle and bustle as well as eliminate hours of manual data population and profit from new time slots.