In this article, you’ll learn what SQL UPDATE is used for. Also, you’ll explore different ways to update columns in a table with the help of the statement.
Contents
- Get started with the SQL UPDATE syntax
- SQL UPDATE statement examples
- UPDATE statements with dbForge Studio for SQL Server
- Conclusion
Get started with the SQL UPDATE syntax
SQL UPDATE statement is used to update the existing rows in a table. You should be careful with the statement because if you need to modify selected rows, you should use the WHERE clause. Otherwise, all the rows will be updated.
SQL UPDATE basic syntax looks as follows:
UPDATE table
SET column1 = expression1,
    column2 = expression2,
...
[FROM expressions]
[WHERE conditions]
Parameters:
<table>– the name of the table in which you want to update rows<column>– the name of the column in which you want to update data<expression>– the value to be applied for the column<conditions>– conditions to select rows for updating
SQL UPDATE statement examples
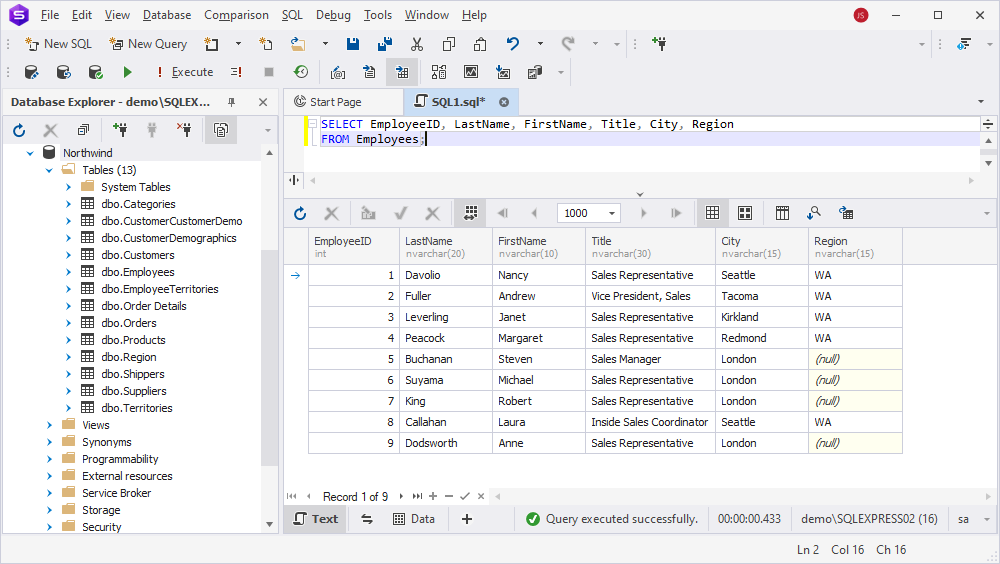
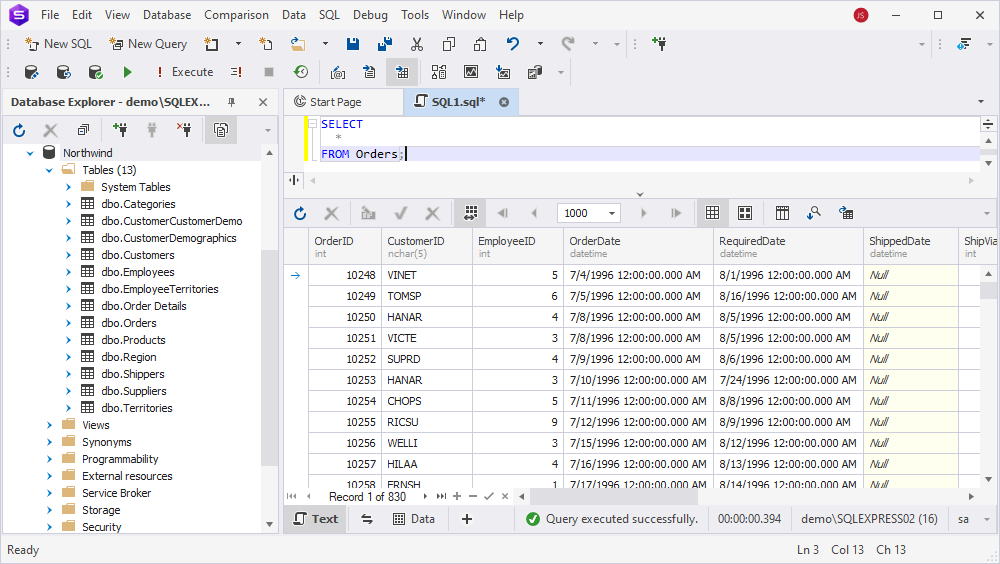
In this section, we’ll review the usage of UPDATE in the examples based on two tables:
- Employees:
- Orders:
Update one or several columns in a table
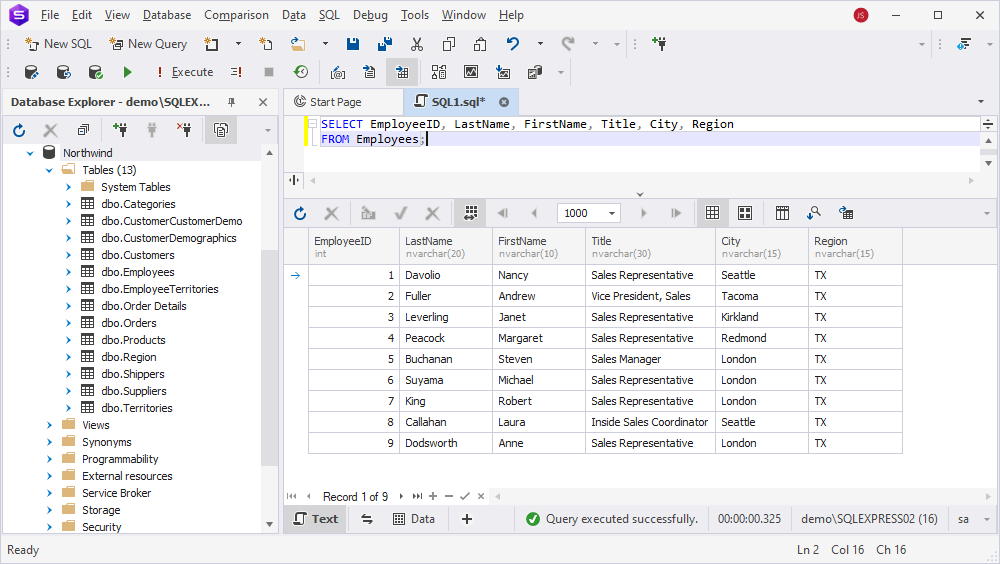
To update records, for example, in the Region column, you can run the following query:
UPDATE Employees
SET Region = 'ТХ';
The command updates records in the Employees table by setting the Region column to TX.
Let’s consider a more complex task. Suppose it’s required to change the job title to Regional Sales Manager of the employee with EmployeeID equal to 7. For this, run the following query:
UPDATE Employees
SET Title = 'Regional Sales Manager'
WHERE EmployeeID = 7;
To check that the record has been modified, execute this command:
SELECT
EmployeeID, LastName, FirstName, Title
FROM Employees
WHERE EmployeeID =7;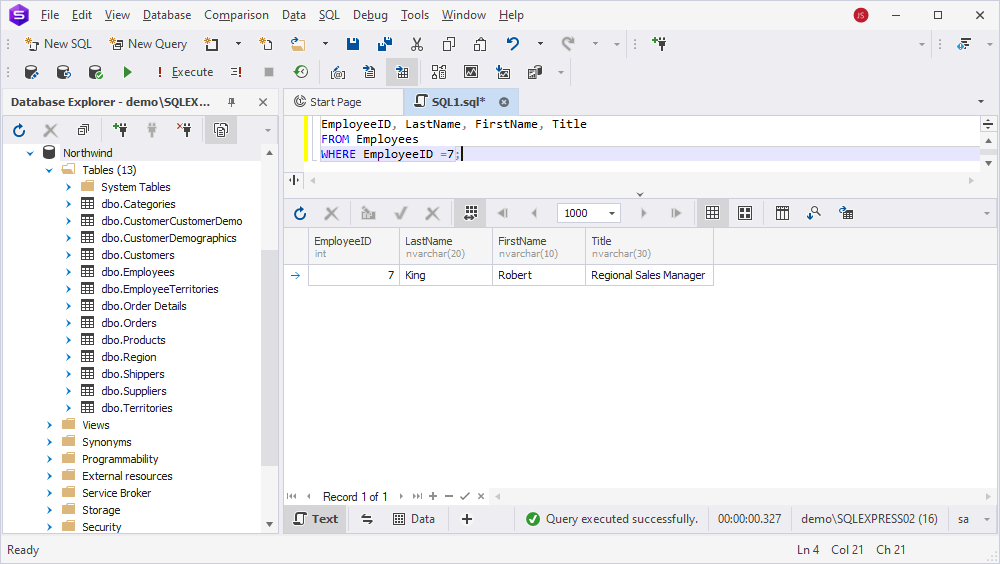
SQL UPDATE with date and time functions
The UPDATE statement can operate with date and time functions to manage date-related fields effectively and ensure that your data remains relevant and valid. To see how it works, let’s try this combination in practice.
The following query replaces records with the current date and time in the ShippedDate column for all rows in the Orders table:
UPDATE Orders
SET ShippedDate = GETDATE();
To check the result, retrieve the first ten records from the table:
SELECT TOP 10 o.OrderID, o.CustomerID, o.EmployeeID, o.ShipCity, o.ShippedDate
FROM Orders o;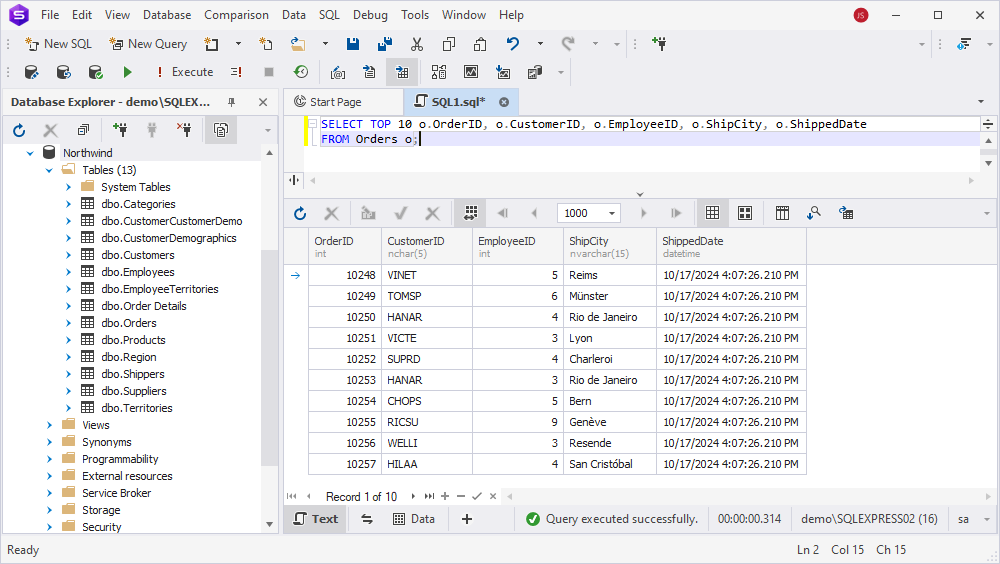
SQL UPDATE from SELECT using SQL JOINs
In SQL, the ability to update records based on values obtained from other tables is a powerful feature that enhances data integrity and efficiency. The bundle of UPDATE + SELECT+ JOINs can be a winning combo when you need to edit existing records by utilizing data from related tables.
This feature is especially beneficial in relational databases, where data is often distributed across multiple tables.
Currently, the Contact column in the Orders table contains null values.
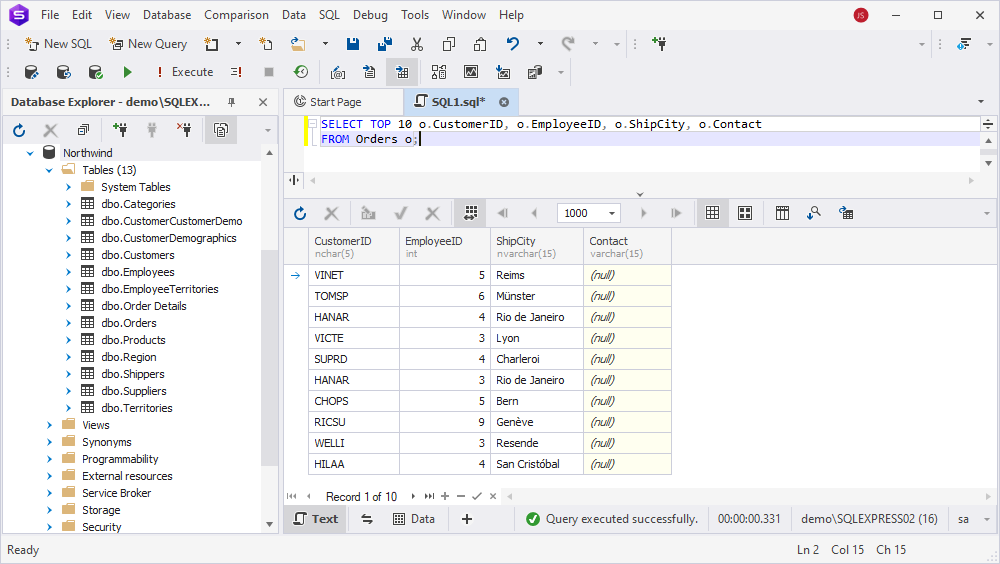
So, imagine that you need to update the column in this table to display the employee responsible for each order. This query updates Contact in Orders with the corresponding employee’s first name by linking the table to the Employees table using the EmployeeID:
UPDATE Orders
SET Contact = (SELECT e.FirstName FROM Employees e WHERE e.EmployeeID = Orders.EmployeeID);
After running the query, check the modified values in the column:
SELECT TOP 10 o.CustomerID, o.EmployeeID, o.ShipCity, o.Contact
FROM Orders o;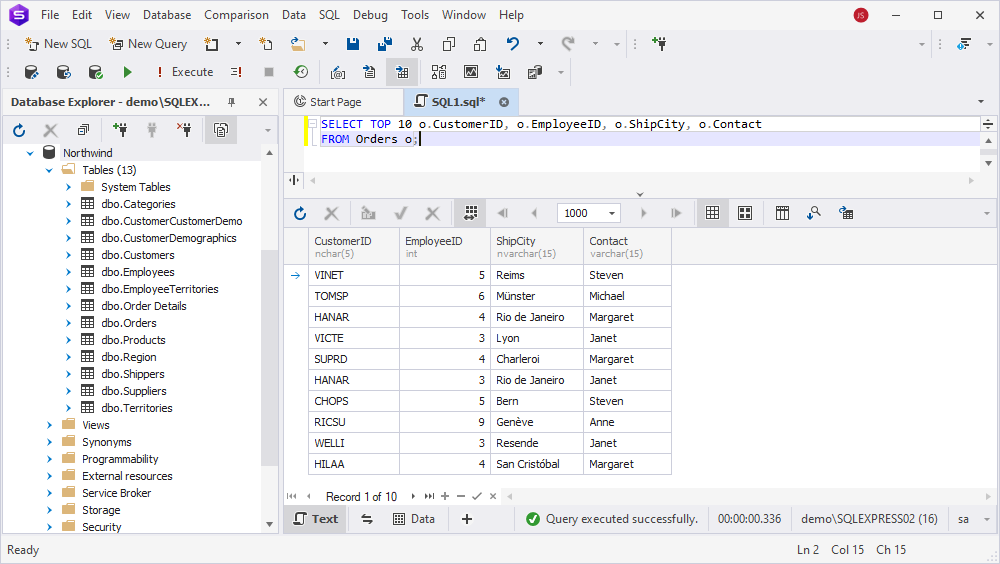
Also, it’s possible to perform the same operation with the help of JOIN. Let’s experiment with the example of the EmpCity column in the Orders table, which has the following values:
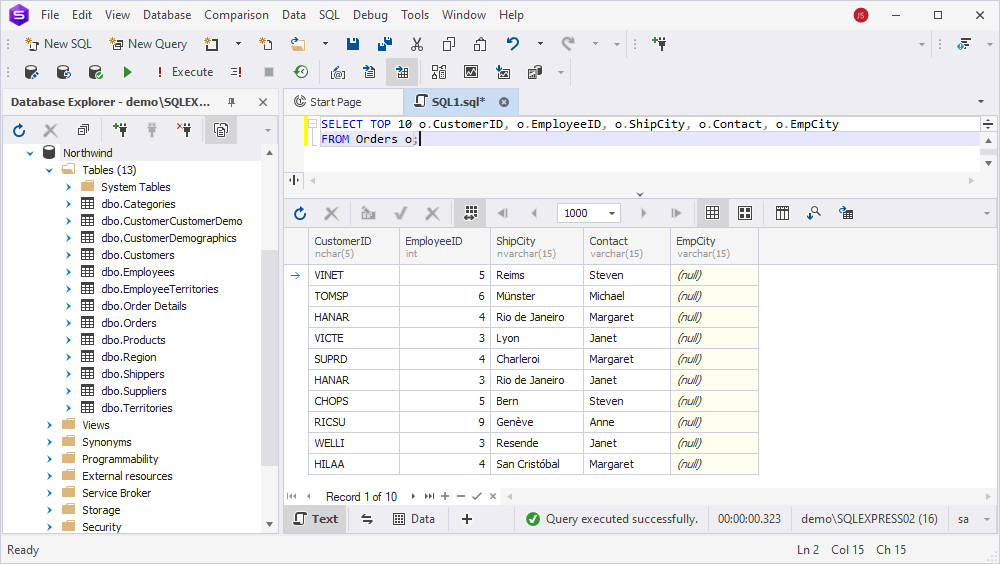
Our goal is to update this column based on the City column from the Employees table. In this query, JOIN is used to match the corresponding employee for each order and ensure that the employee’s city is correctly set in the Orders table:
UPDATE Orders SET orders.EmpCity = Employees.City
FROM Orders JOIN Employees ON Orders.EmployeeID = Employees.EmployeeID;
To check that the values have been updated, execute this query:
SELECT TOP 10 o.CustomerID, o.EmployeeID, o.ShipCity, o.Contact, o.EmpCity
FROM Orders o;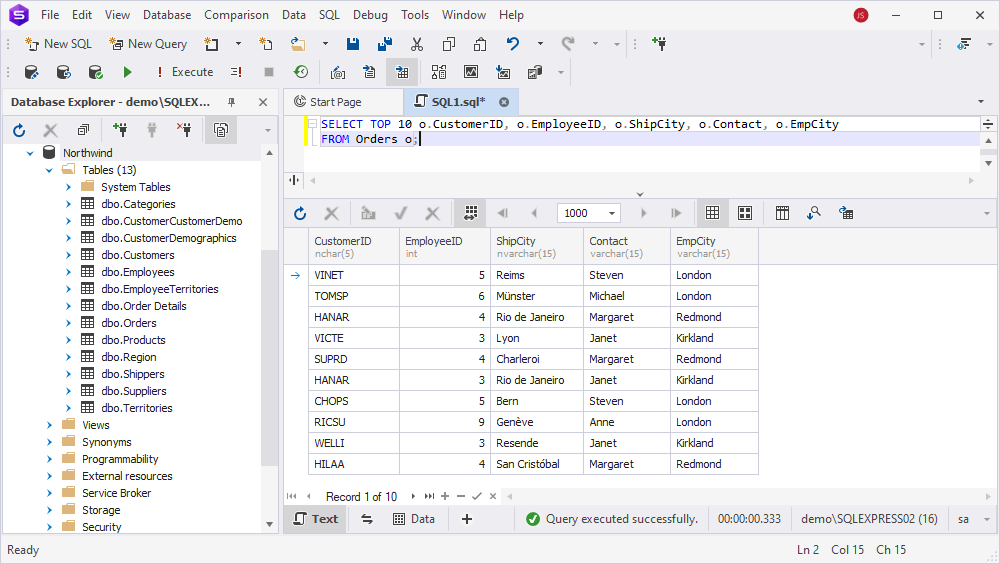
UPDATE statements with dbForge Studio for SQL Server
Using dbForge Studio for SQL Server, you can easily update table columns. The tool offers several ways to do this:
- Using the Code completion feature.
- Using the Generate Script As option.
Let’s try each way in practice.
UPDATE statement with the Code completion feature
There are two methods to write SQL UPDATE with the Code completion feature.
Method 1
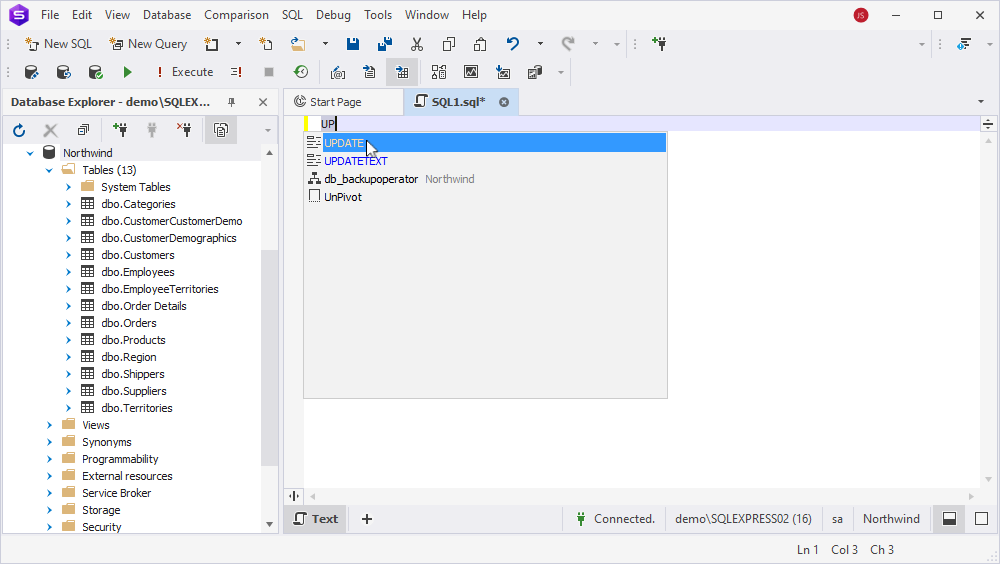
1. In the SQL Editor, start typing UPDATE. The drop-down menu will appear.
2. Double-click UPDATE:
3. Fill in the query and click Execute on the standard toolbar.
Method 2
1. In the SQL Editor, start typing UPDATE. The drop-down menu will appear.
2. Double-click UPDATE.
3. Double-click the table you want to update columns from:
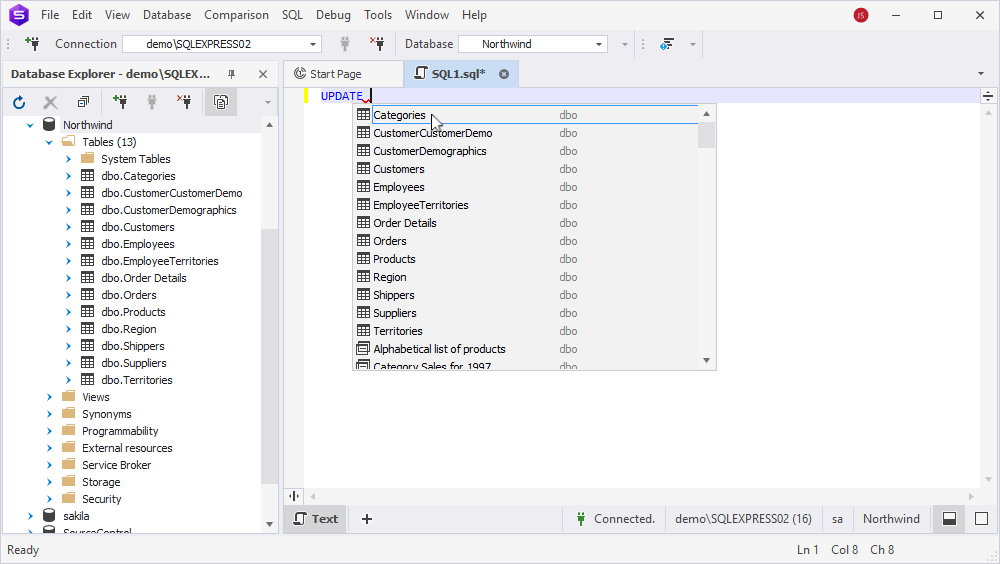
4. Press Tab to paste the full UPDATE statement.
UPDATE statement with the Generate Script As option
1. In Database Explorer, right-click the necessary table and navigate to Generate Script As > UPDATE > To New SQL Window:
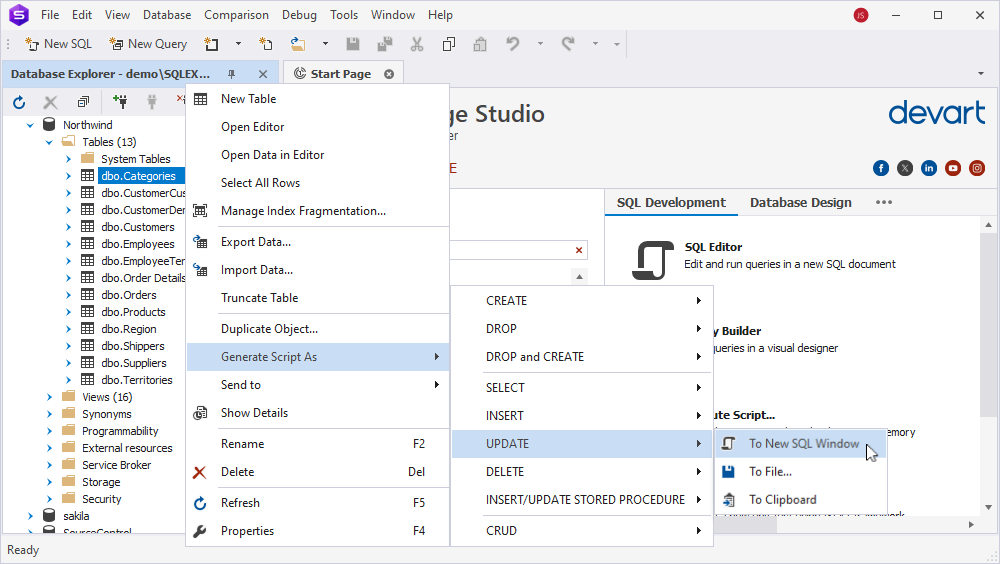
2. In the newly opened SQL document, adjust the query and click Execute on the standard toolbar.
Conclusion
In the database world, where data changes all the time, it’s necessary to keep it relevant. Knowing the common cases of SQL UPDATE usage, you’ll be able to safely and effectively modify columns in tables. If you want to optimize and speed up the update process, you should definitely try dbForge Studio for SQL Server. The solution will impress you with its powerful functionality. Just download the 30-day trial version and see it for yourself!

