
Data import and export might as well be the cornerstone of data management, an essential feature for regular use. The preconditions for easy and versatile import and export are rather simple. First, you need to have quite a few data formats to deal with, a dozen or so. Second, you need to tailor each operation to your needs and preferences with a selection of flexible settings. Third, you most certainly wouldn’t mind automating your recurring import and export tasks and thus save lots of the precious time that you’d rather dedicate to more important matters at hand.
This is where we’d like to show you how to manage data import and export using two different approaches. The first one is the command line, best illustrated with the well-known bcp utility. The second one involves dbForge Studio for SQL Server, a multi-featured database IDE that provides a handy wizard to guide you through the entire process and help you configure it with maximum convenience. Without further ado, let’s get started!

Contents
- A brief overview of the bcp utility
- Data export and import via the bcp utility
- How to export and import an entire table
- How to export and import query results
- How to create a format file for recurring export and import operations
- A brief overview of dbForge Studio for SQL Server
- Data export and import via dbForge Studio for SQL Server
- How to export data using Data Export Wizard
- How to export data from the command line
- How to import data using Data Import Wizard
- How to import data from the command line
A brief overview of the bcp utility
Let’s get started with the bcp (bulk copy program) utility, a command-line tool that copies data between an instance of Microsoft SQL Server and a data file in a user-specified format. It is more than capable of importing huge numbers of rows into your SQL Server databases as well as exporting your table data to files.
If you have Microsoft Command Line Utilities for SQL Server installed on your machine, you can check your current bcp version by running the bcp -v command.
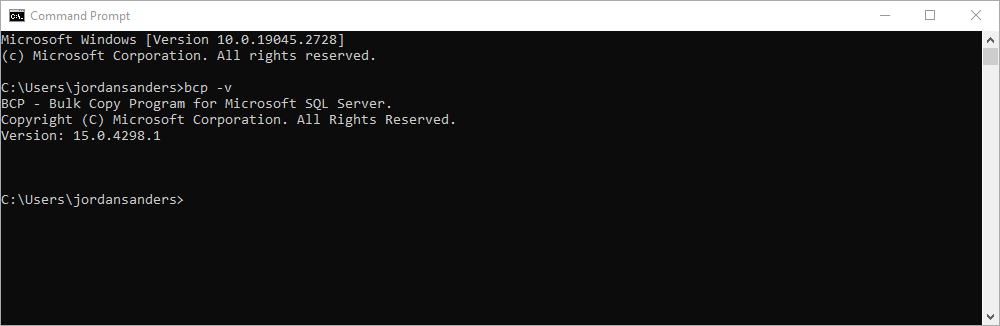
Otherwise, you can download them from the dedicated page.
Data export and import via the bcp utility
Now let’s see how it works. We’ll start with the basics and show you a few examples: how to export/import entire tables; how to export/import query results; and how to create a file with format information based on table metadata and apply it to recurring operations.
How to export and import an entire table
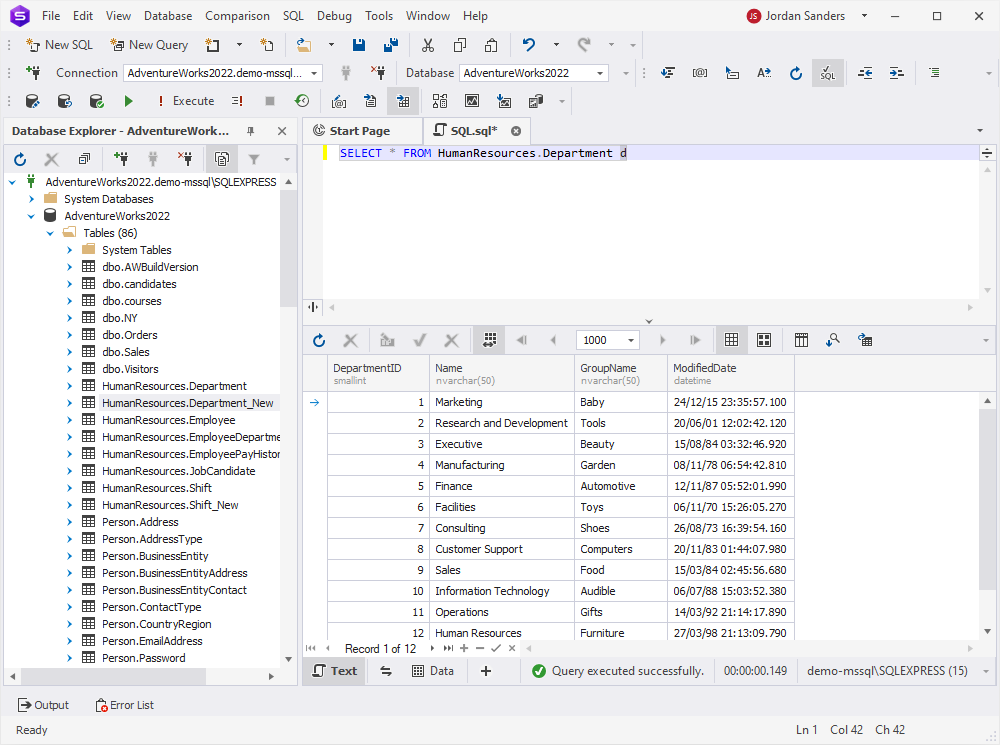
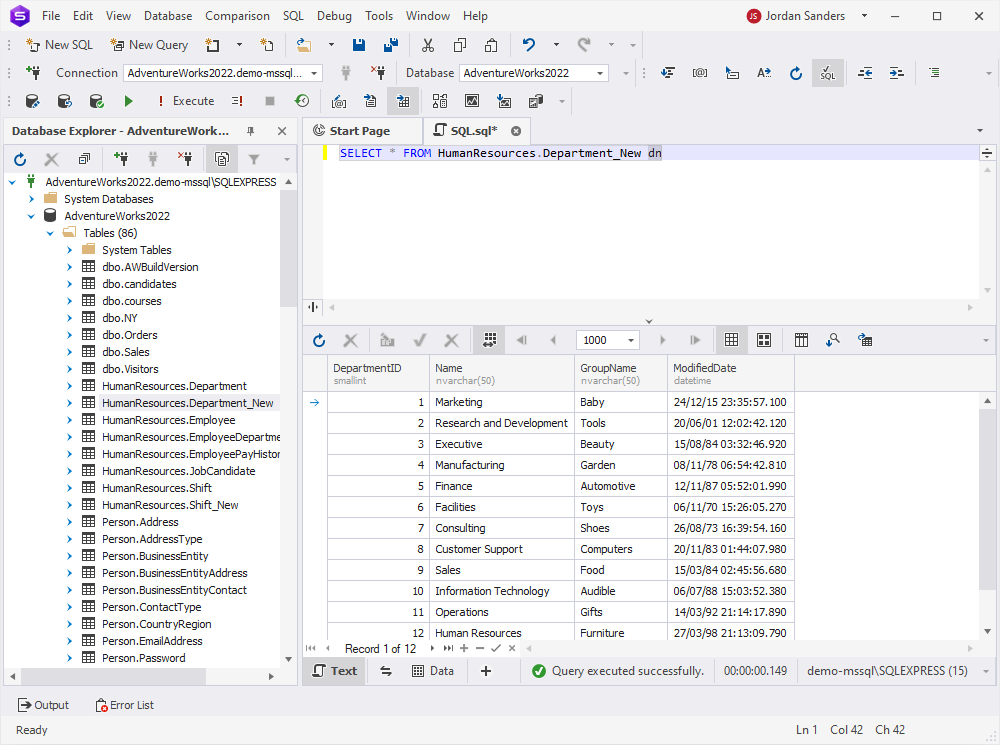
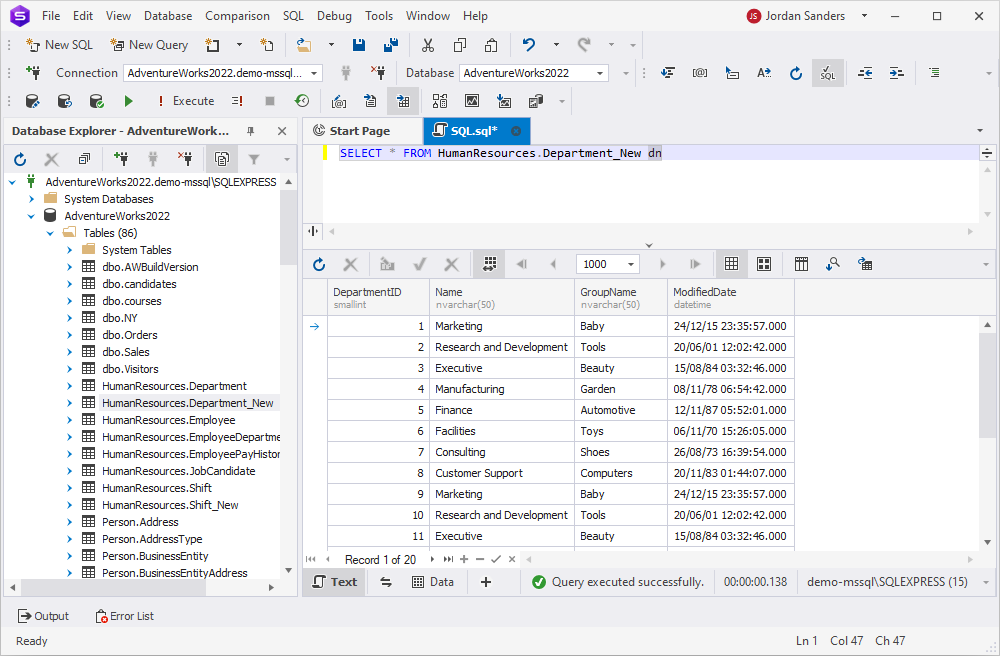
First off, let’s export an entire table with its data. For instance, we have a table HumanResources.Department. For your convenience, we’ll show you what it looks like in dbForge Studio.
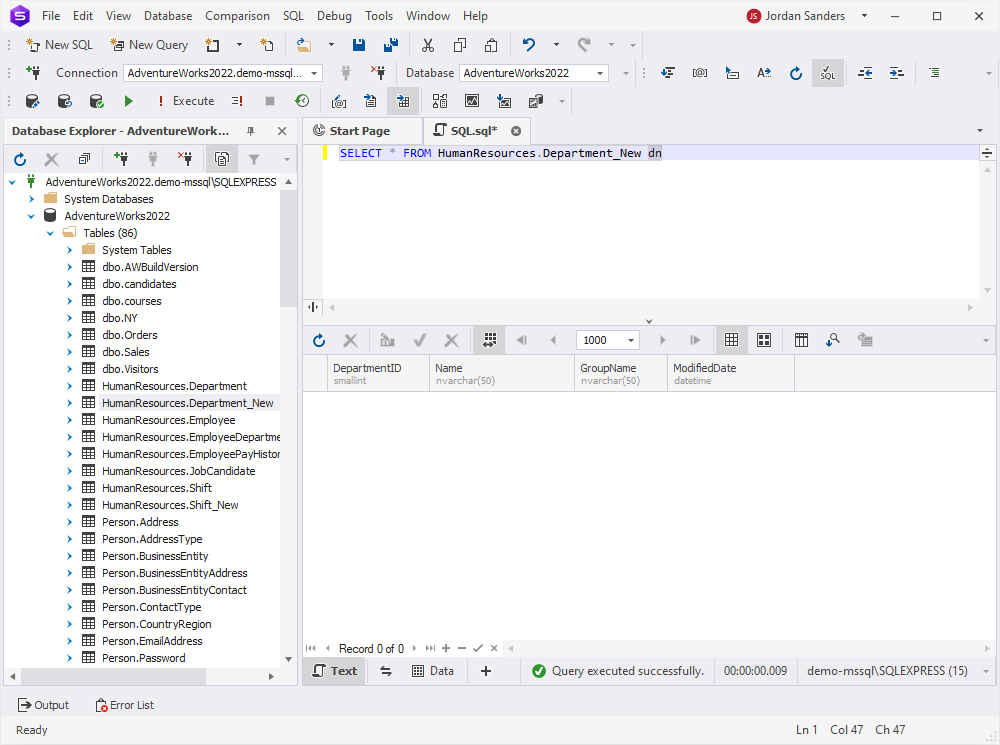
Then we have a second table, HumanResources.Department_New, which has the same structure but is empty.
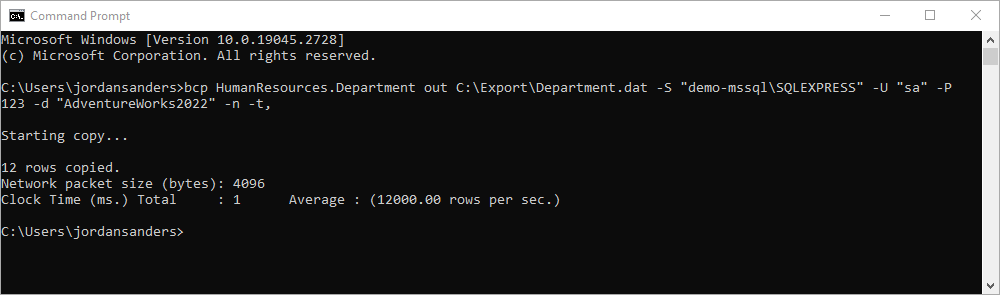
Now let’s use the Command Prompt with the bcp utility to export data from a table to a file with the following command.
bcp HumanResources.Department out C:\Export\Department.dat -S "demo-mssql\SQLEXPRESS" -U "sa" -P 123 -d "AdventureWorks2022" -n -t,
In this command:
- HumanResources.Department is the source table that we will export data from
- C:\Export\Department.dat is the path and the name of the output file that the data will be exported to
- -S “demo-mssql\SQLEXPRESS” is the server name
- -U “sa” is the username
- -P 123 is the password
- -d “AdventureWorks2022” is the database name
- -n instructs to use the native data type
- -t specifies the field separator; in our case it is “,“
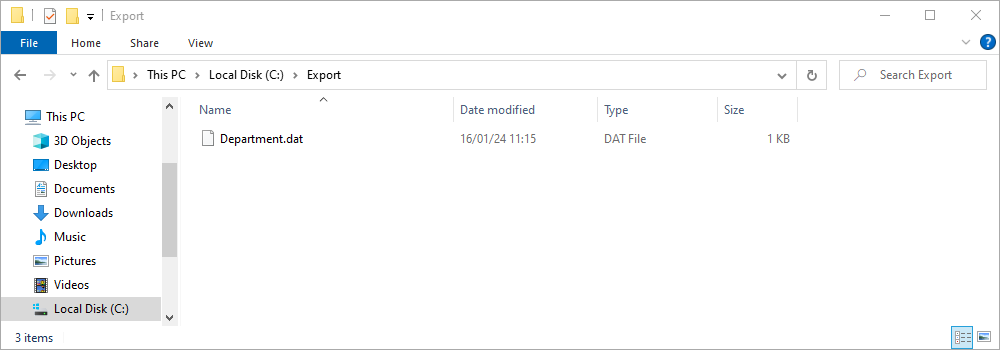
As you can see, the export has been successful.
The file is firmly in place. Note that here, DAT is the only format you can deal with, and it can be processed with the bcp utility only.
Our next step is to import the data from the said exported file into the empty second table, HumanResources.Department_New. To do that, we use the following command:
bcp HumanResources.Department_New in C:\Export\Department.dat -S "demo-mssql\SQLEXPRESS" -U "sa" -P 123 -d "AdventureWorks2022" -n -t,
In this command, the syntax is identical to that of the previous case; the only difference is that we have in instead of out, which means we are importing data instead of exporting it.
Let’s run it and see what happens.

Success! Now let’s go back to dbForge Studio and see whether the data has really been successfully imported. And indeed, it has! We’ve got our data in the new table.
How to export and import query results
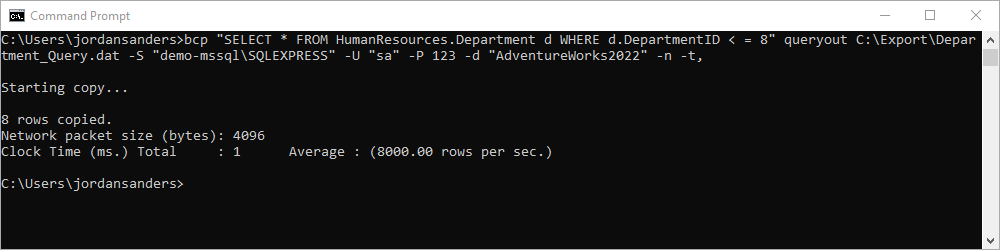
Now let’s clear HumanResources.Department_New with TRUNCATE TABLE and show you a bit more complex example — we’ll query data from HumanResources.Department and export it to a file with a single command. It is as follows:
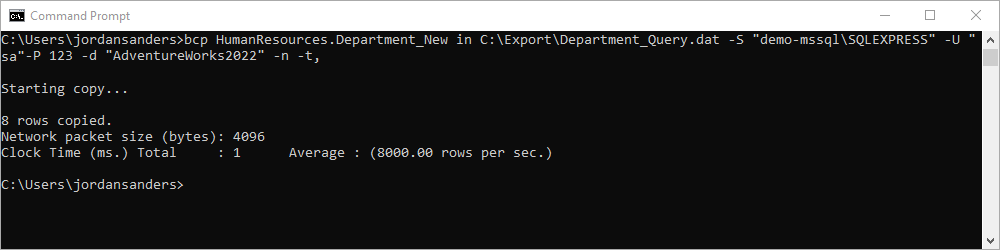
bcp "SELECT * FROM HumanResources.Department d WHERE d.DepartmentID < = 8" queryout C:\Export\Department_Query.dat -S "demo-mssql\SQLEXPRESS" -U "sa" -P 123 -d "AdventureWorks2022" -n -t,
We run it successfully.
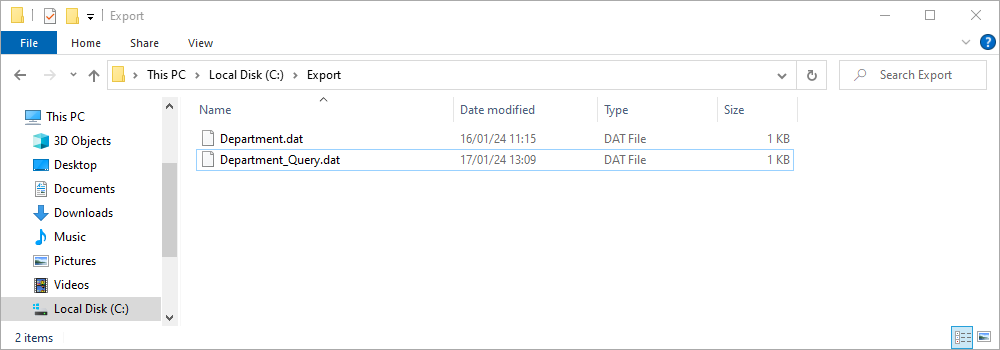
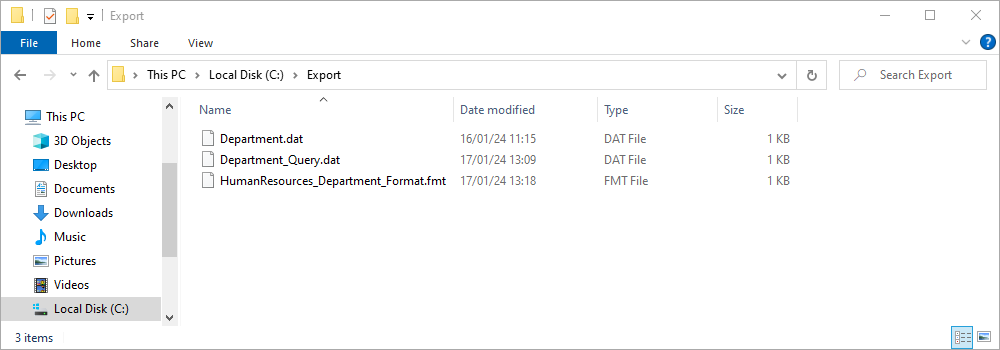
Next, we make sure that we’ve got the file.
Now let’s import it into HumanResources.Department_New.
Finally, we go back to dbForge Studio, run a SELECT query against HumanResources.Department_New, and see that we’ve got just what we expected.

How to create a format file for recurring export and import operations
The bcp utility supports format files, which contain format information for each record in any given table. A format file is based on the table metadata and is used as a predefined format profile for export and import operations. In other words, you configure the formats once, save them to a format file, and reuse the said file as many times as you wish.
Let’s see how it’s done. We’ll create a format file for the HumanResources.Department table and save it to an FMT file.
bcp HumanResources.Department format nul -n -f C:\Export\HumanResources_Department_Format.fmt -S "demo-mssql\SQLEXPRESS" -U "sa" -P 123 -d "AdventureWorks2022"
We run it.

And then we make sure we’ve got the file.
Next, we import data to HumanResources.Department_New using this file—and the format settings contained in it. Here is the command.
bcp HumanResources.Department_New in C:\Export\Department.dat -f C:\Export\HumanResources_Department_Format.fmt -S "demo-mssql\SQLEXPRESS" -U "sa" -P 123 -d "AdventureWorks2022" -n -t,
And so we run it…
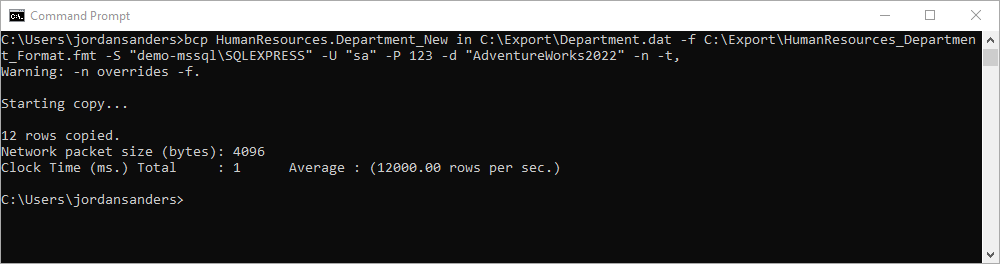
Now let’s check the imported data in dbForge Studio. Success!

That’s it! Now you know the basics of work with the bcp utility, it’s time to move on to something more advanced—and, dare we say, something far more convenient in everyday use.
A brief overview of dbForge Studio for SQL Server
What if we say you can do all that (and much more, in fact) with ease using a familiar graphical user interface? Yes, we are talking about dbForge Studio for SQL Server, an integrated environment that provides nearly all the tools you might need to effectively handle database development, management, and administration.
In terms of export/import, dbForge Studio offers the following features:
- Data export and import involving 14 most popular data formats
- Data migration from third-party databases to SQL Server
- Intuitive wizards with flexible settings for each format
- User templates for recurring scenarios
- Automation of operations from the command line
Now let’s see it in action!
Data export and import via dbForge Studio for SQL Server
The first step is, of course, to download dbForge Studio; for your convenience, it comes with a free 30-day trial. The rest is simple: you install it, then launch it, and then connect to the required database instance. After that, you can run both import and export in two possible ways: using a handy wizard and from the command line. Let us show you all of these ways in detail.
How to export data using Data Export Wizard
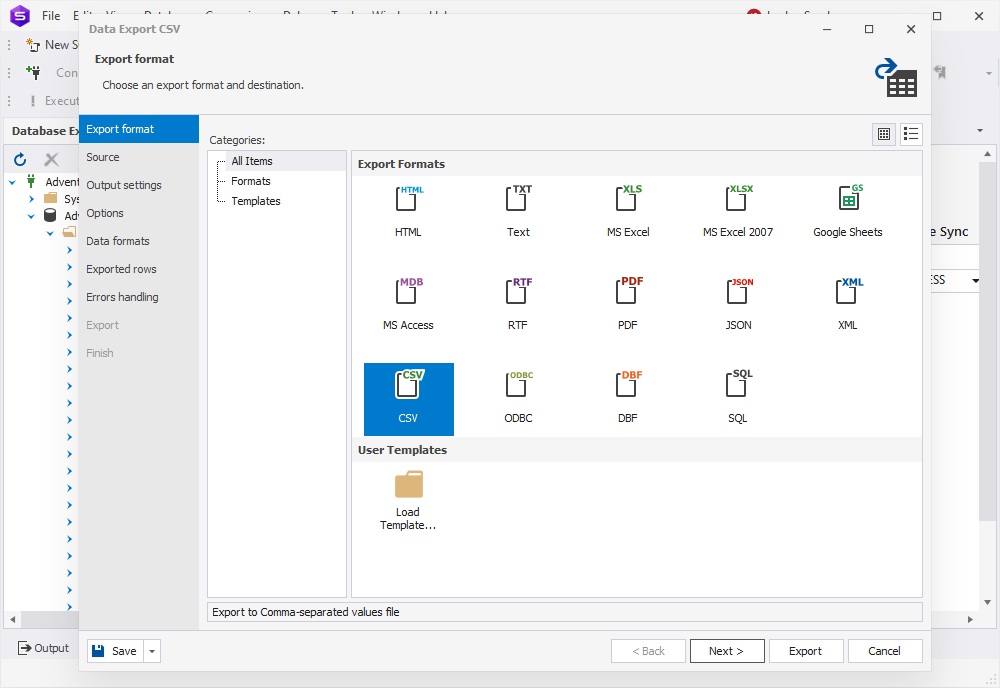
Now that we’re connected, we might as well start with export. We find the required table in Database Explorer, right-click it, and select Export Data from the shortcut menu. The export wizard opens and greets us with the Export format page. And when it comes to formats, the Studio’s a clear winner with 14 of them at your service: HTML, TXT, XLS, XLSX, MDB, RTF, PDF, JSON, XML, CSV, ODBC, DBF, SQL, and Google Sheets. This makes the Studio a far more flexible solution than bcp, which can export data to the DAT format that can be further processed only by the said utility.
That said, let’s pick CSV as our file format and click Next.
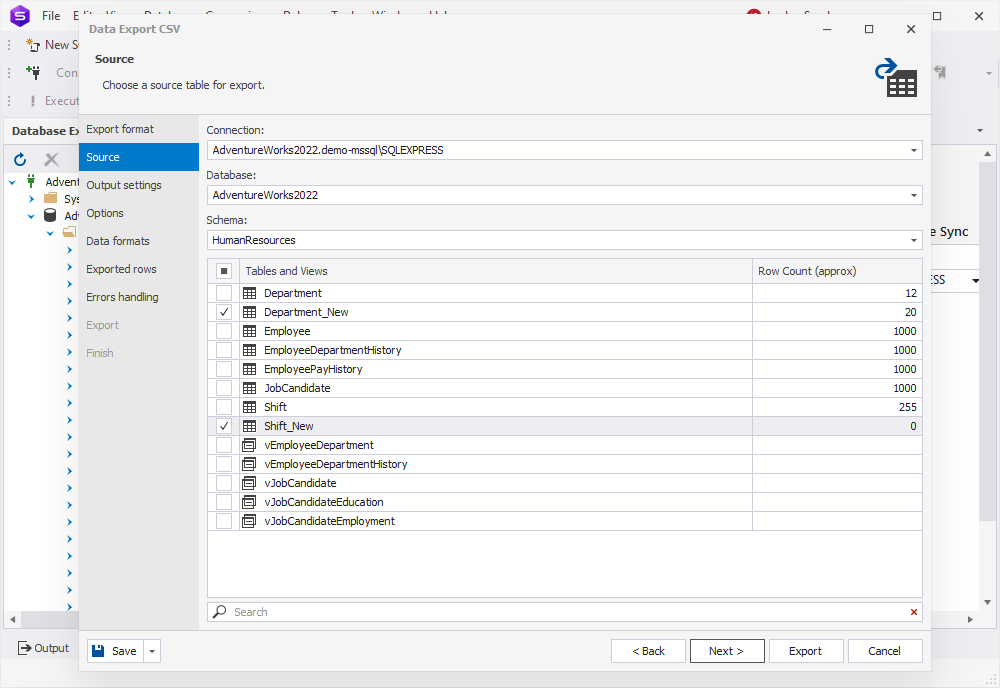
On the Source page, we can select a server connection, a database and its schema, as well as tables and views that we want to export.
It is worth noting that the bcp utility allows exporting only one table at a time. Meanwhile, in the Studio, you can work with multiple tables simultaneously. Now let’s export two tables—HumanResources.Department and HumanResources.Shift—and click Next.
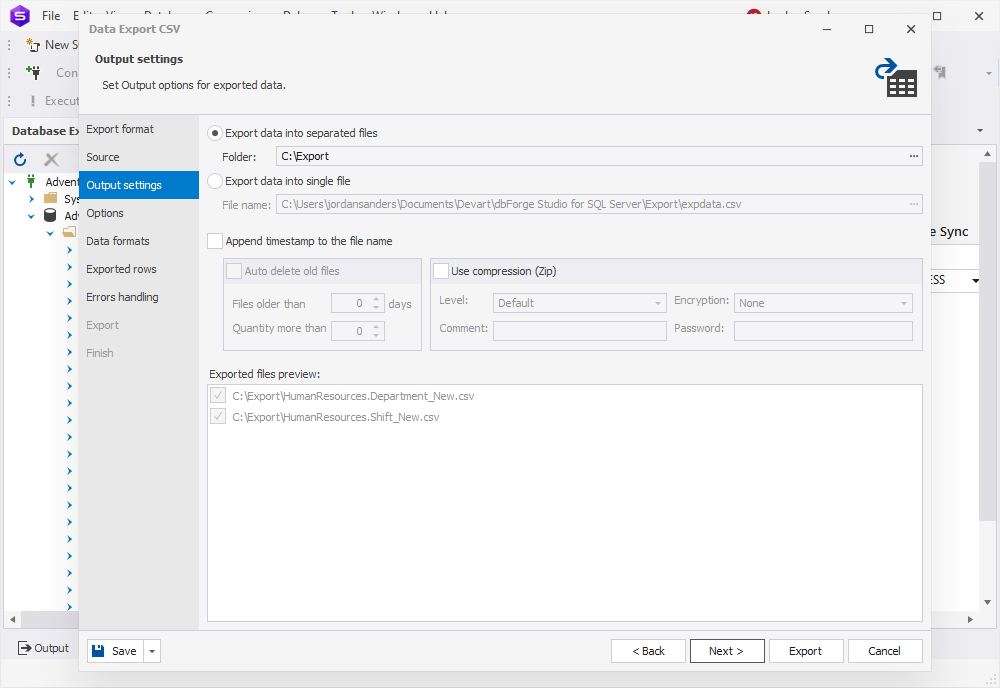
On the Output settings page, we can select to export data into either a single file or separate files. We’ll go with the latter option. Additionally, this page offers options to append a timestamp to the names of exported files, auto-delete exported files that are older than a specified number of days, and export files as a ZIP archive.
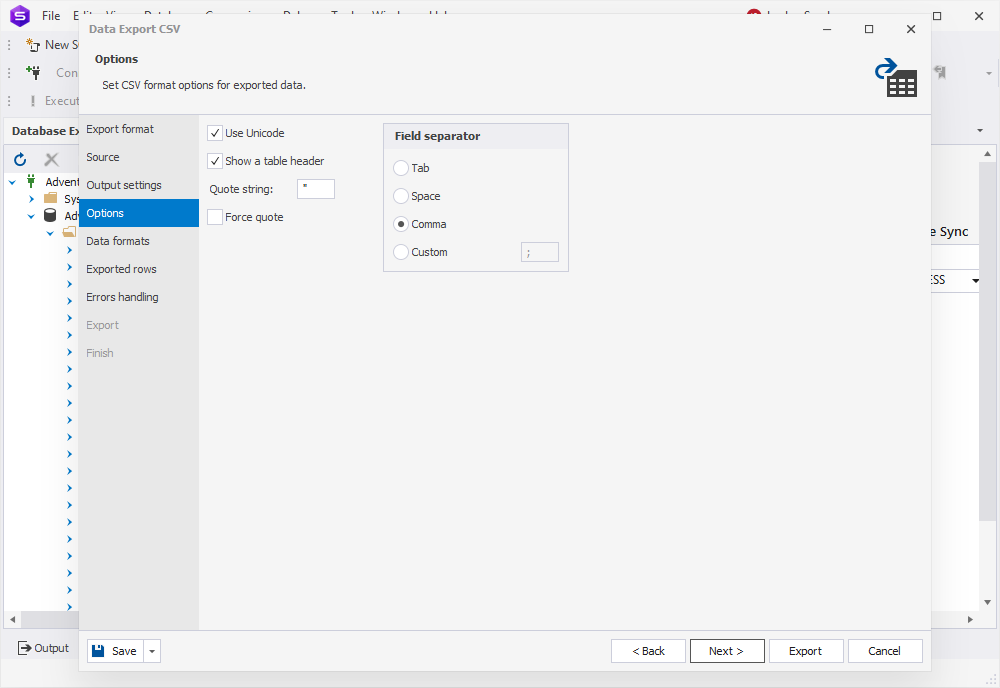
On the Options page, we can select whether to use Unicode, show the table header, and force quote strings (as well as specify a character for quoting in the Quote string field). Finally, we can select the required field separator (tab, space, comma, or a custom character) and click Next.
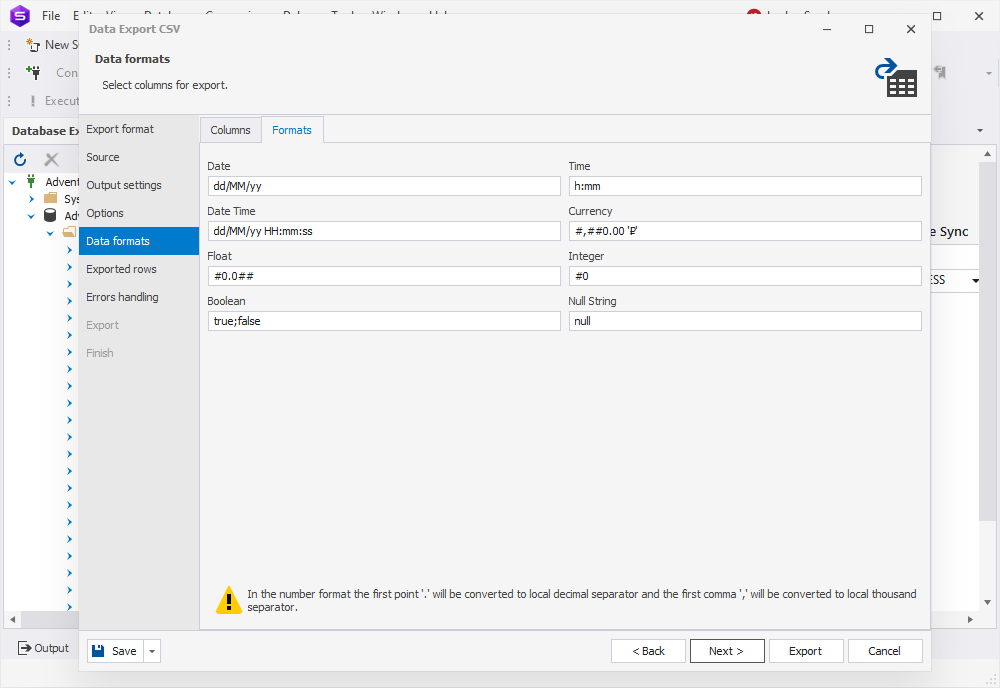
Next comes the Data formats page, where we have two auxiliary tabs. The first one is Columns, where we can further specify columns for export and check their aliases and data types.
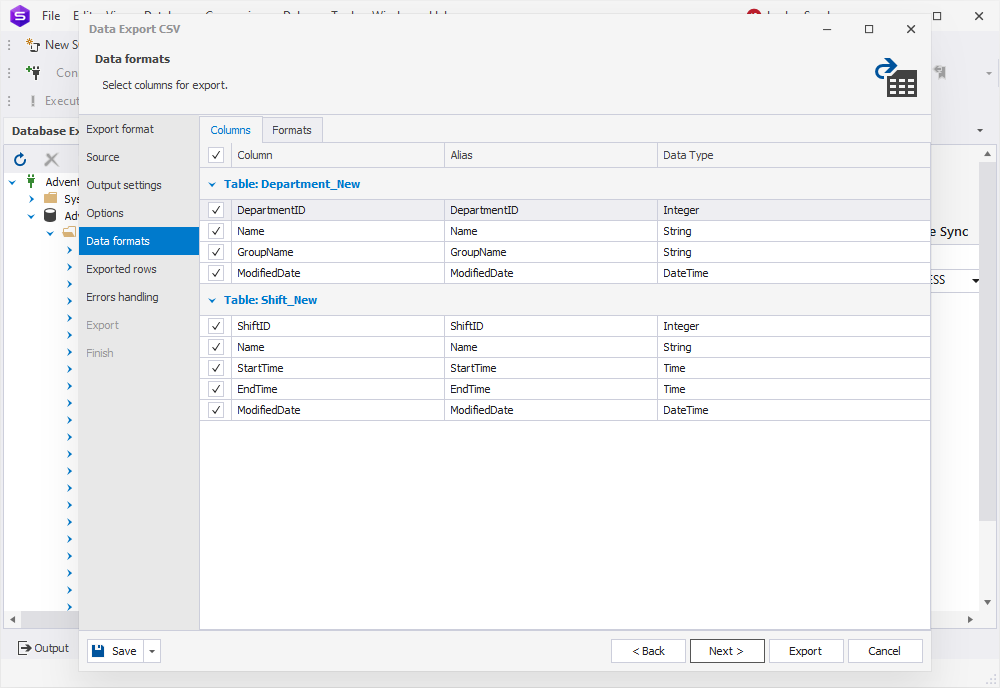
The second one is Formats, where we can change the default format settings for Date, Time, Date Time, Currency, Float, Integer, Boolean, Null String, as well as select the required binary encoding from the drop-down list.
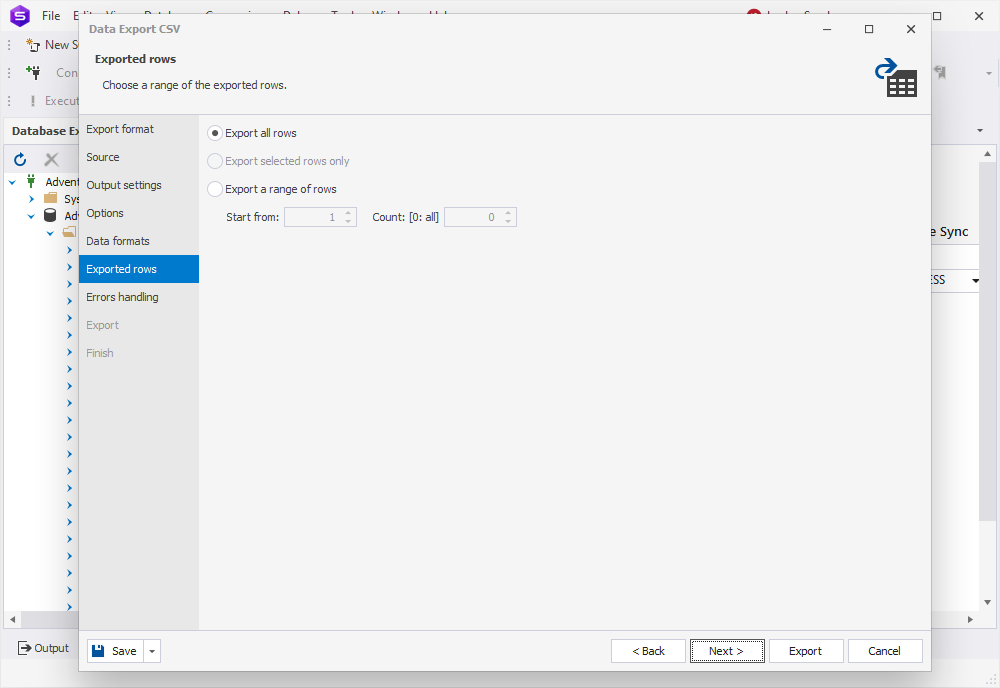
On the Exported rows page, we can select to export all rows, export the rows selected on the Data formats page, or export a specified range of rows. We’ll go with the first one.
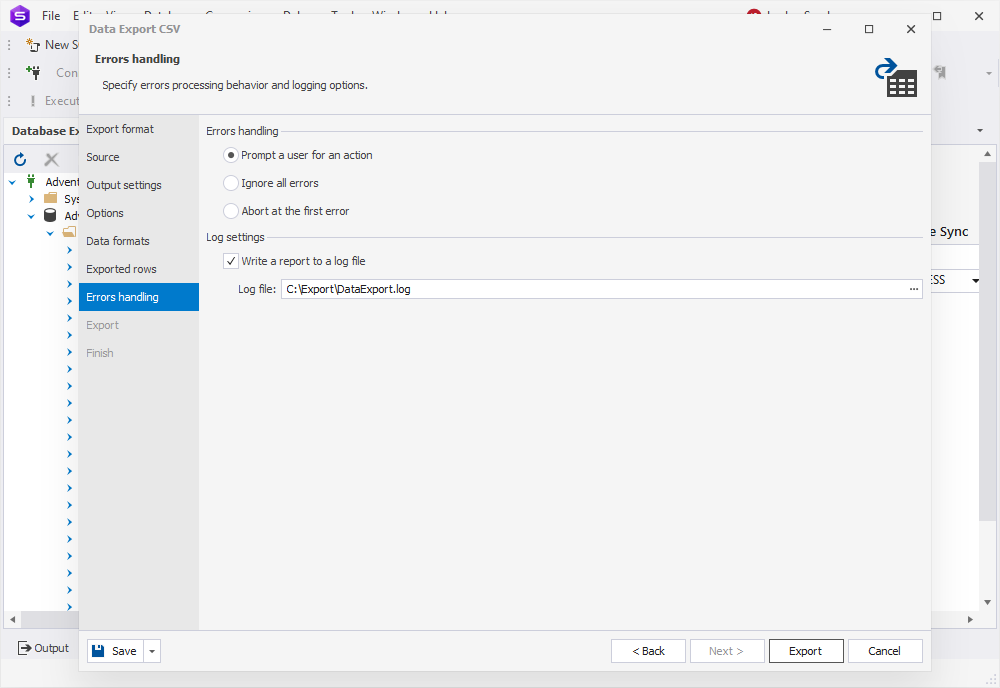
On the Errors handling page, we need to specify the error processing behavior (using one of the three available options: Prompt the user for an action, Ignore all errors, or Abort at the first error) and opt to write reports to a log file with a specified path.
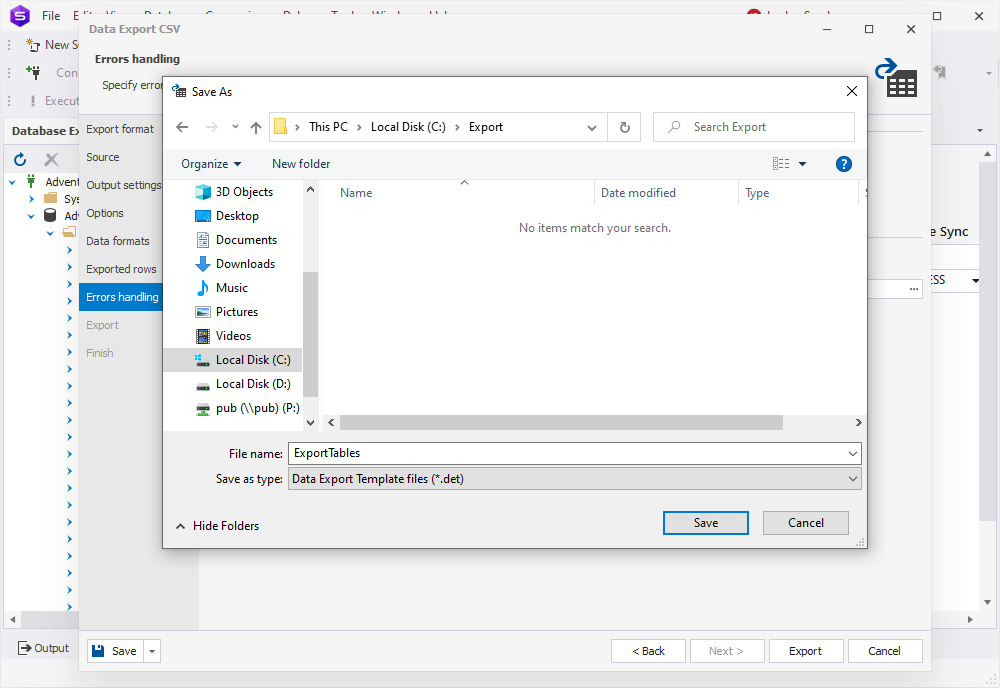
Once we finish configuring our settings, we can save a template with these settings or a command line via the Save button in the lower left corner of the wizard. This allows the automation of recurring export and import operations. Let’s save a template by clicking Save > Save Template. We’ll need it a bit later.
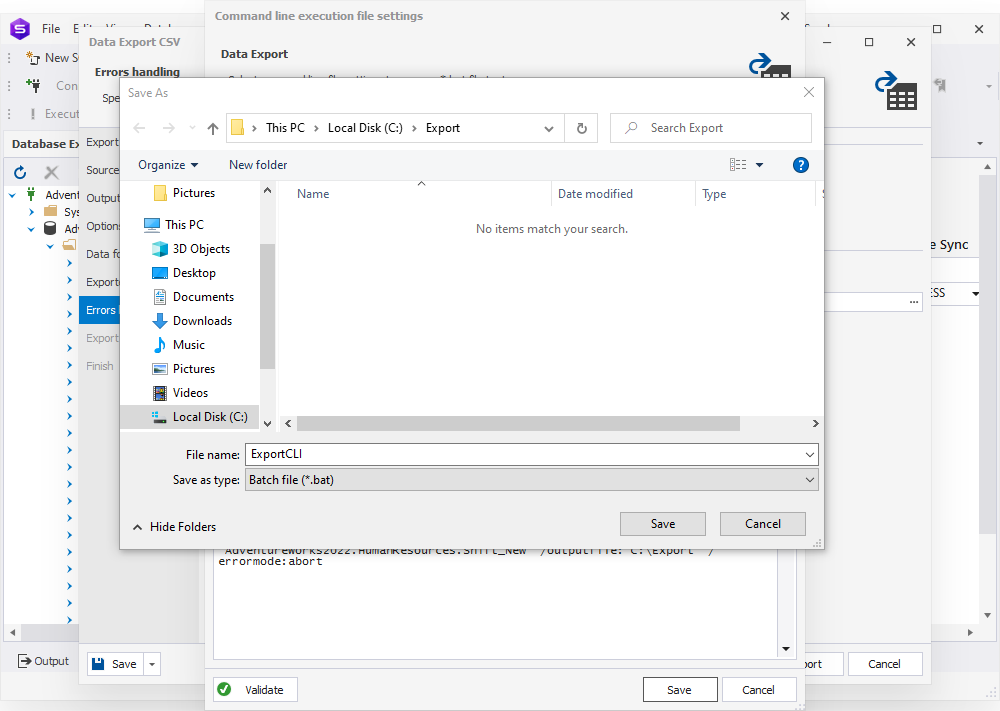
And if we go to Save > Save Command Line, we can quickly get a BAT file.
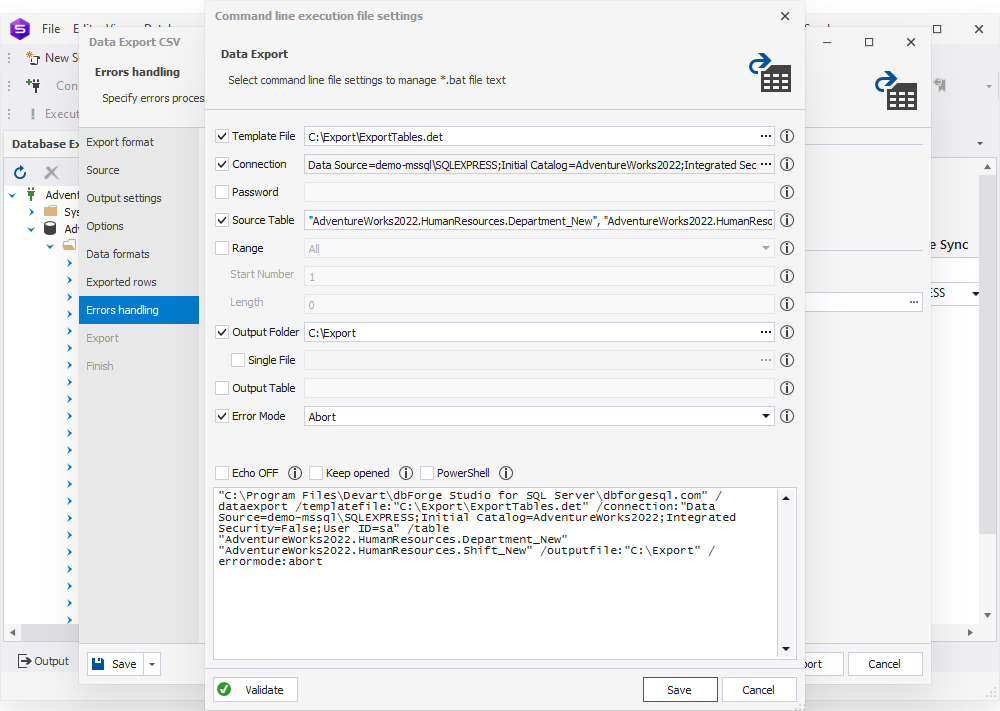
We’ll show you how it works shortly. First, let’s save it.
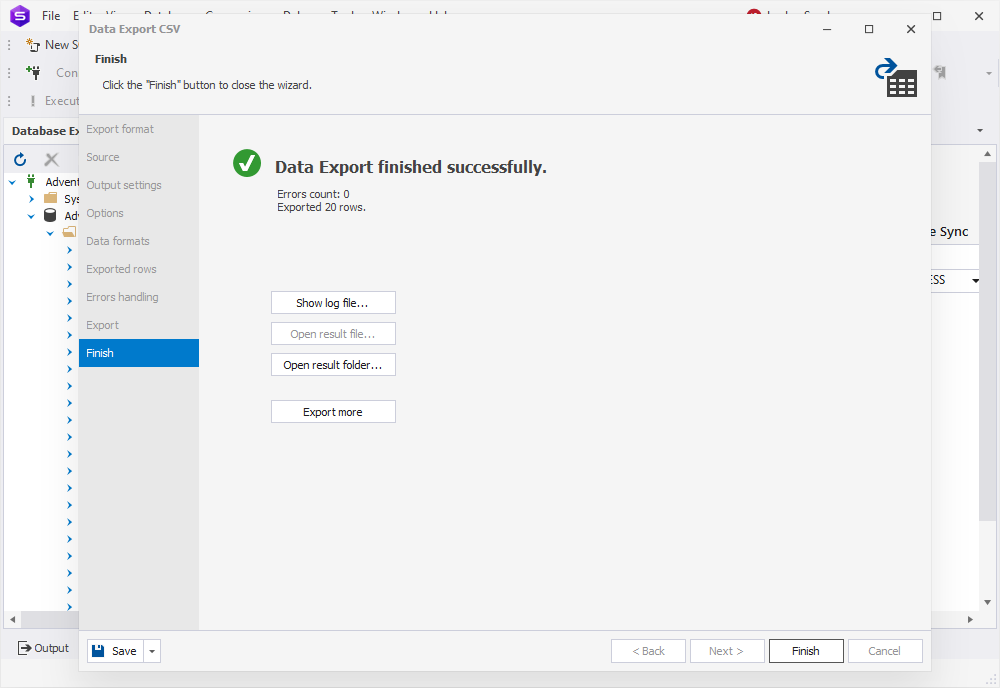
Now we can click Export. When our data export is completed, we have several options: we can open the exported file or folder, perform another export operation, view the log file, or simply click Finish.
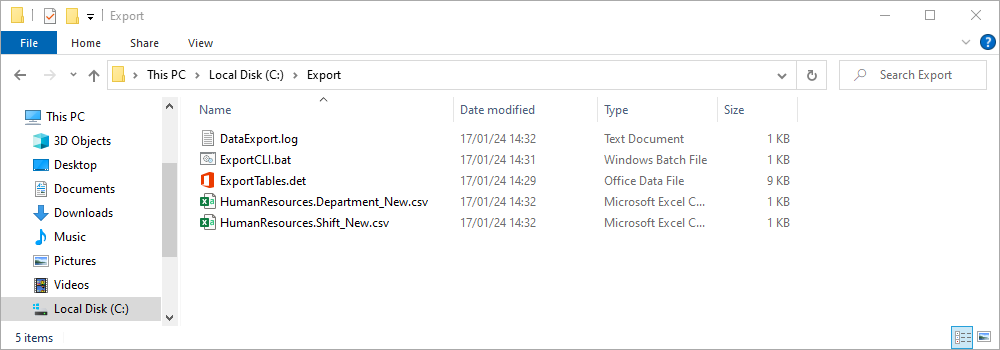
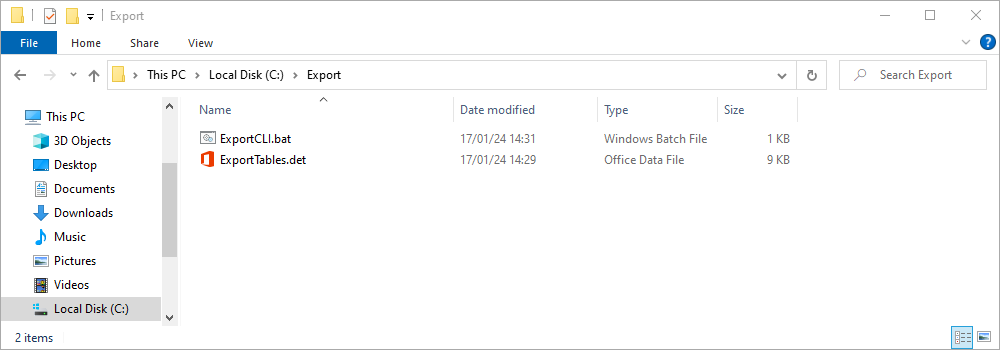
As you can see, we’ve got all the files we need in our folder: the log file (DataExport.log), the BAT file (ExportCLI.bat), the template with our configured settings (ExportTables.det), and two exported CSV files named after the tables they contain.
How to export data from the command line
Now let’s demonstrate how the saved BAT file handles your export. To do that, let’s delete the exported files and the log file.
Now let’s run our BAT file.
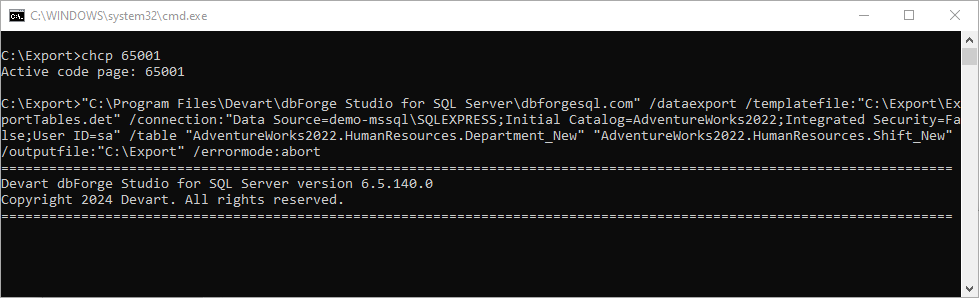
As you can see, the operation is successful. We’ve got our files exported again.
Note: You can just as easily perform export operations directly from the results grid—that’s how you can export query results. You can filter and select the data you want to export right there, right-click it, and click Export Data from the shortcut menu.
All right, now we can truncate HumanResources.Department and HumanResources.Shift and proceed to import data into them.
How to import data using Data Import Wizard
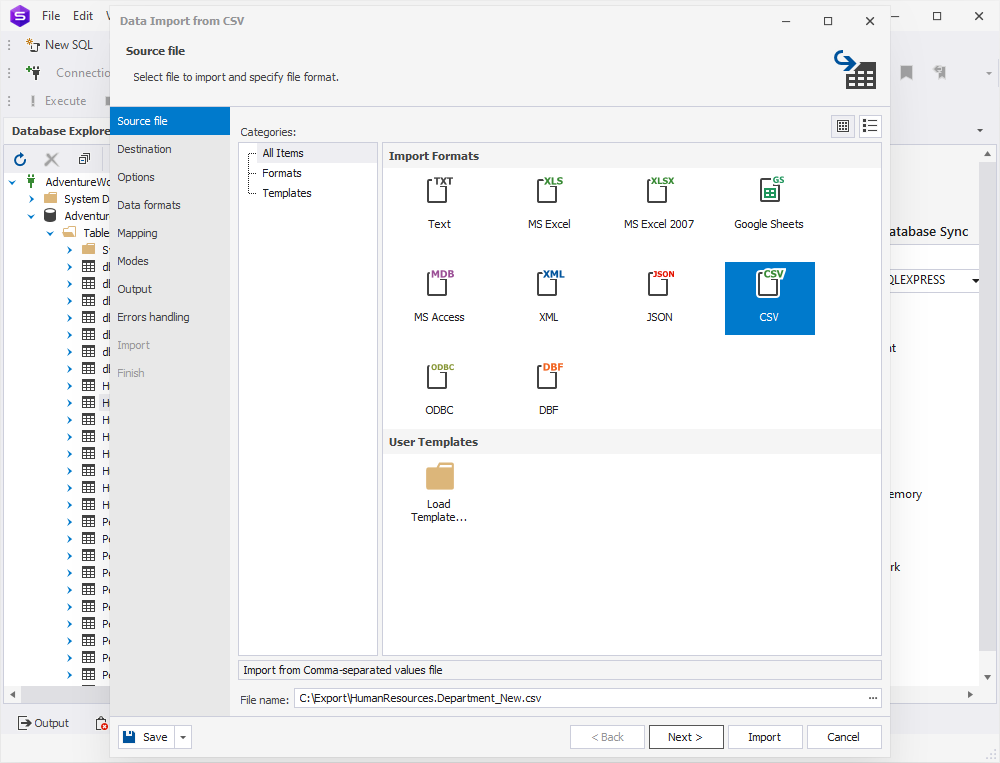
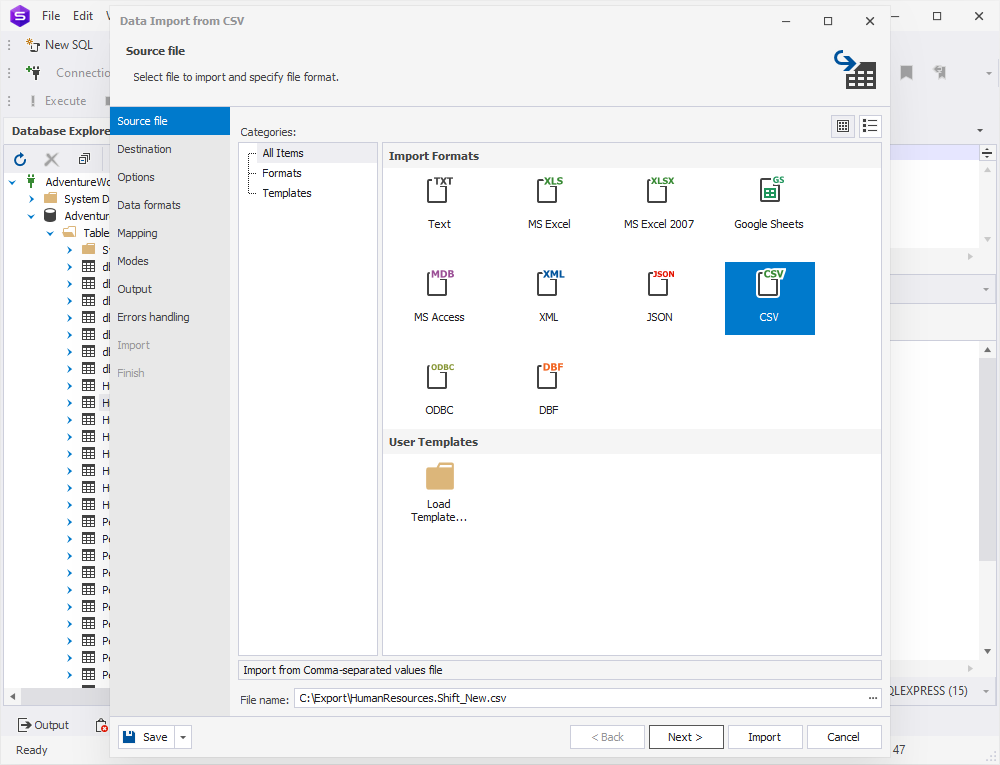
The import operation is just as simple and flexible. We find the required database table in Database Explorer, right-click it, and select Import Data from the shortcut menu. The import wizard opens. On the Source file page, we select CSV, and provide the path to the previously exported file. Now it’s our source file for import.
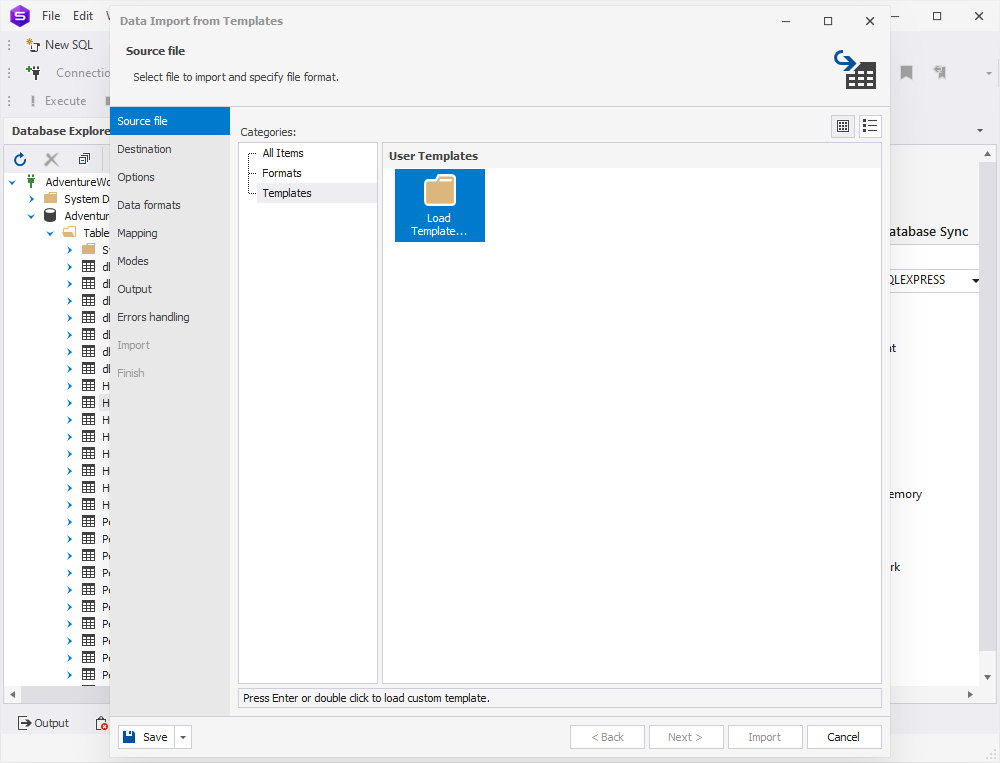
Note: This is also where you can load your templates with settings. Just switch to Templates under Categories, double-click Load Template, and select the required file.
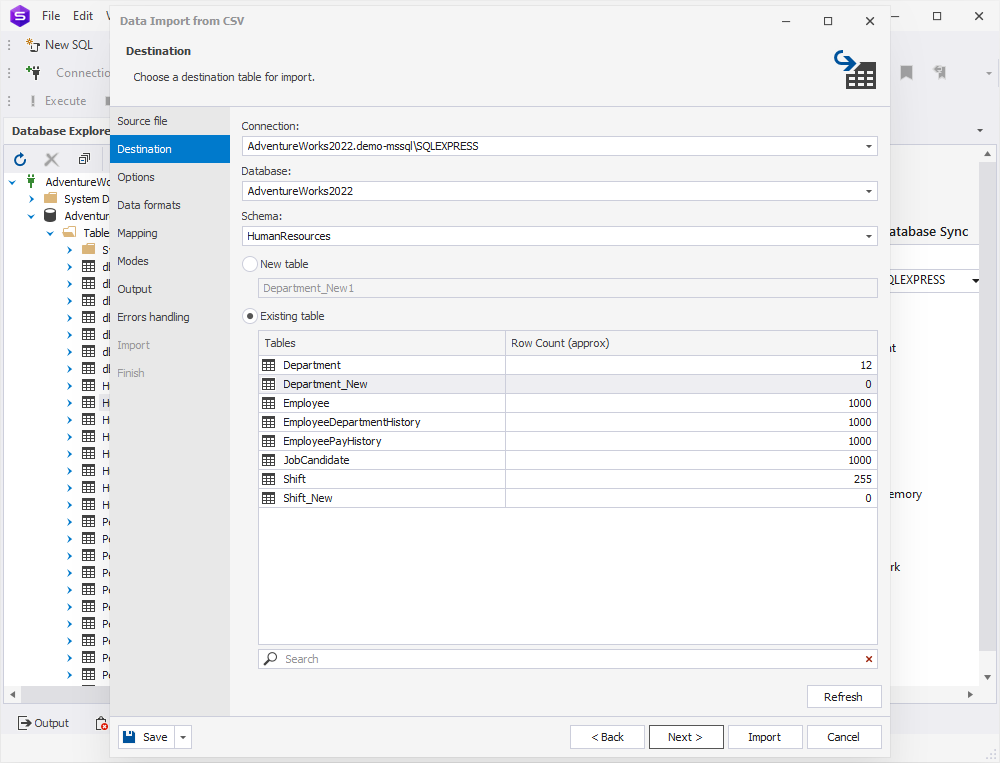
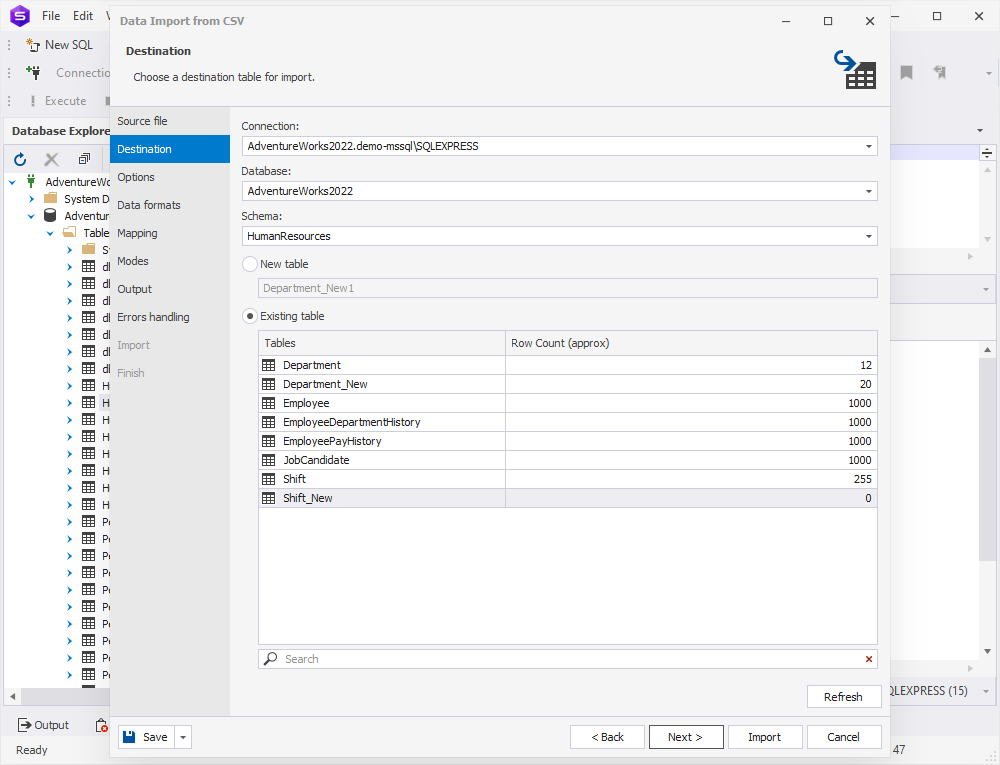
But as of now, we don’t have any import templates, so we proceed to the Destination page, we can check our server connection, database, and schema. Then we can select whether the data will be imported into a new table or into an existing table. Let’s select HumanResources.Department_New as our destination table and click Next.
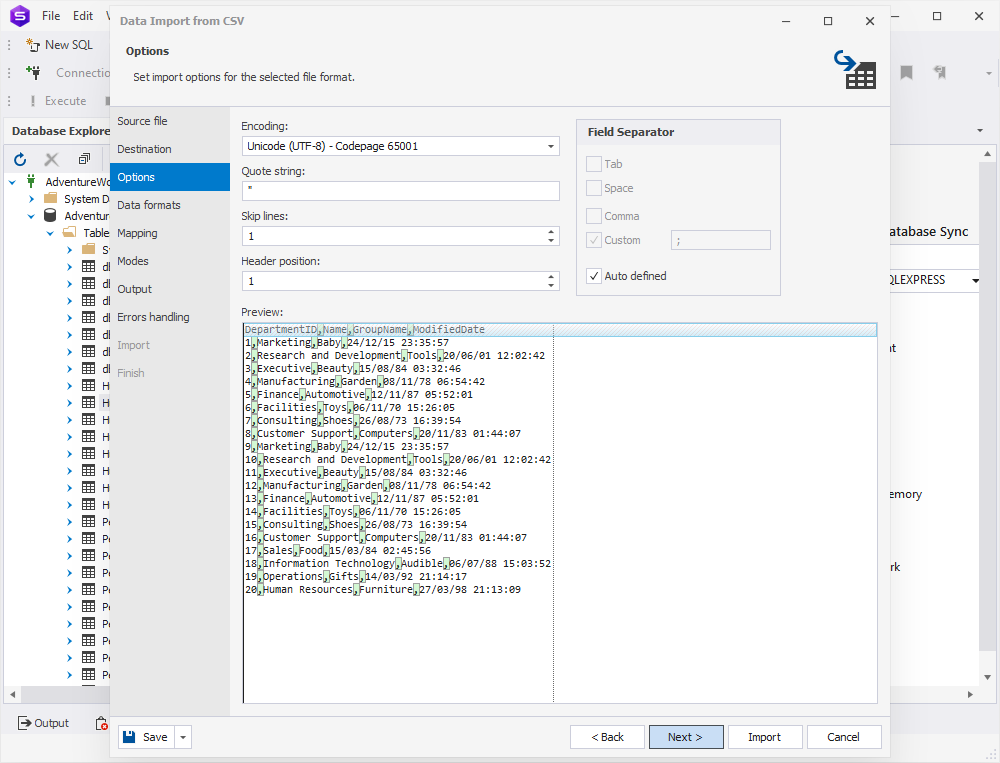
On the Options page, we can configure the options for imported data.
- We can check whether the Encoding is set correctly or select another one from the drop-down list.
- In Quote string, we can specify the character to be used for string quoting.
- In Skip lines, we can specify the number of lines to be skipped during import; the lines are counted from the top.
- We can specify the Header position (the required number of lines); if we don’t, the imported columns will get default names – column1, column2, and so on.
- We can specify the Field Separator by either keeping the Auto defined checkbox selected, or by clearing it and selecting one of the following options: Tab, Space, Comma, or Custom character.
We make sure we’ve got what we want and click Next.
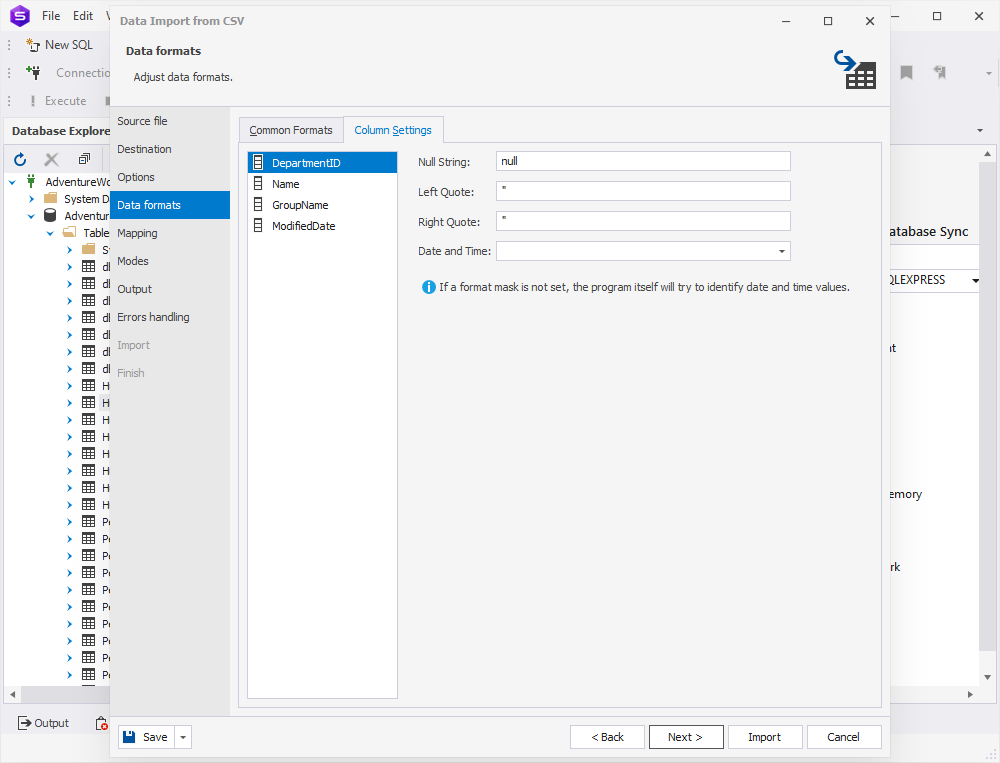
On the Data formats page, we have two auxiliary tabs. The first one is Common Formats, where we can specify the formats for null strings, thousand and decimal separators, boolean variables, date and time. There is also the Autodetect Date and Time format checkbox, selected by default.

The second tab is Column Settings, where we can configure the format settings for separate columns. We have four options here: Null String, Left Quote, Right Quote, and Date and Time. Note that if a format mask is not set, the application will identify date/time values automatically.
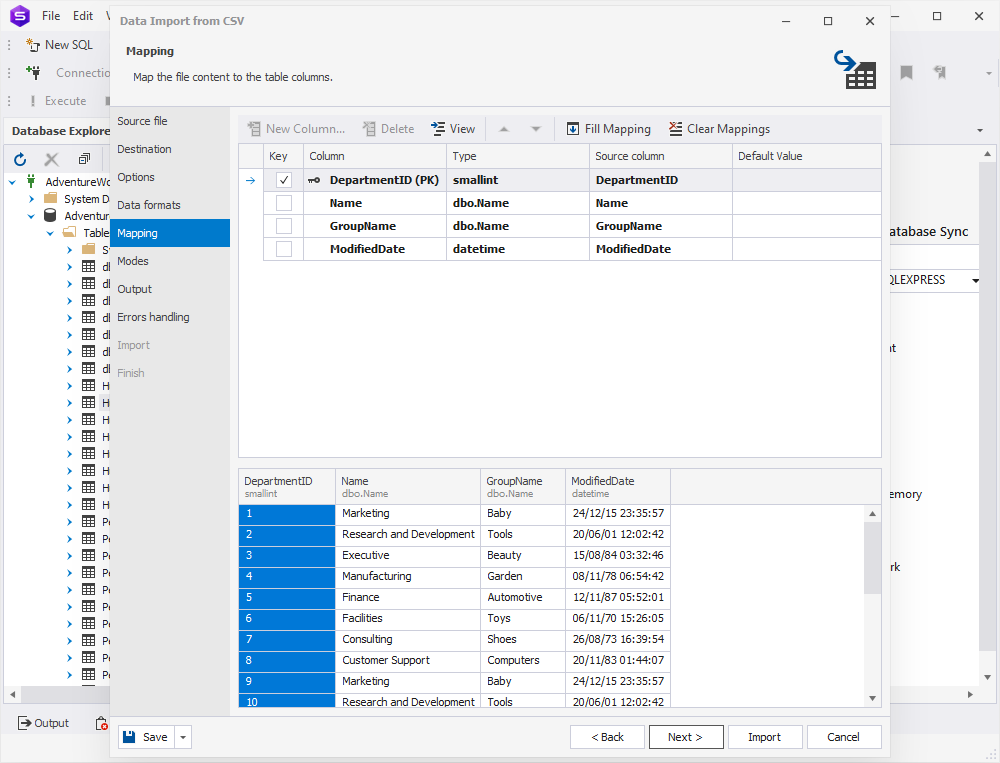
Our next page is Mapping, where we can map the source columns to the target ones. If we are importing data into a new table, the application will automatically create and map all the columns. We can see the results in the Preview section.
Additionally, we can view column properties, as well as clear and restore the mapping of all columns with corresponding buttons.
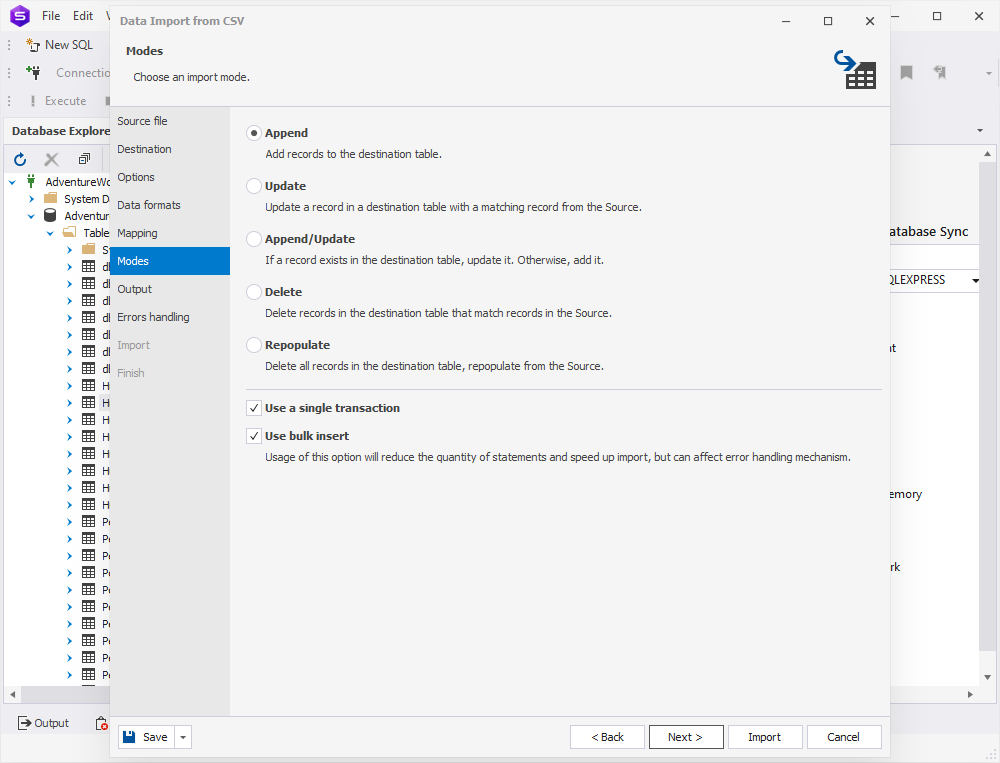
On the Modes page, we select an import mode. There are five available modes:
- Append – add records to the target table
- Update – update a record in the target table with a matching record from the source
- Append/Update – update a record if it exists in the target table; otherwise, add a record
- Delete – delete records in the target table that match records in the source
- Repopulate – delete all records in the target table and repopulate them from the source
Optionally, we can select the checkboxes Use a single transaction and Use bulk insert (the latter of which reduces the quantity of statements and speeds up the import operation, but can affect the error handling mechanism).
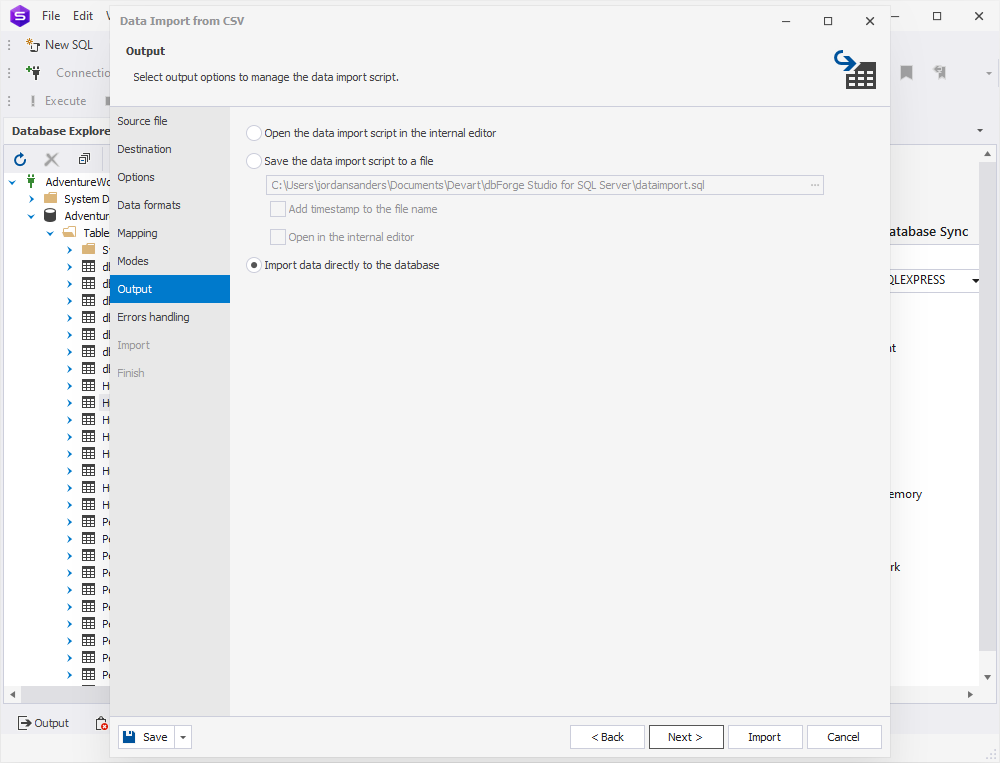
On the Output page, we have 3 options:
- Open the data import script in the internal editor
- Save the data import script to a file with a specified path and name; additionally, we can select to add a timestamp to the file name and open it in the internal editor
- Import data directly to the database
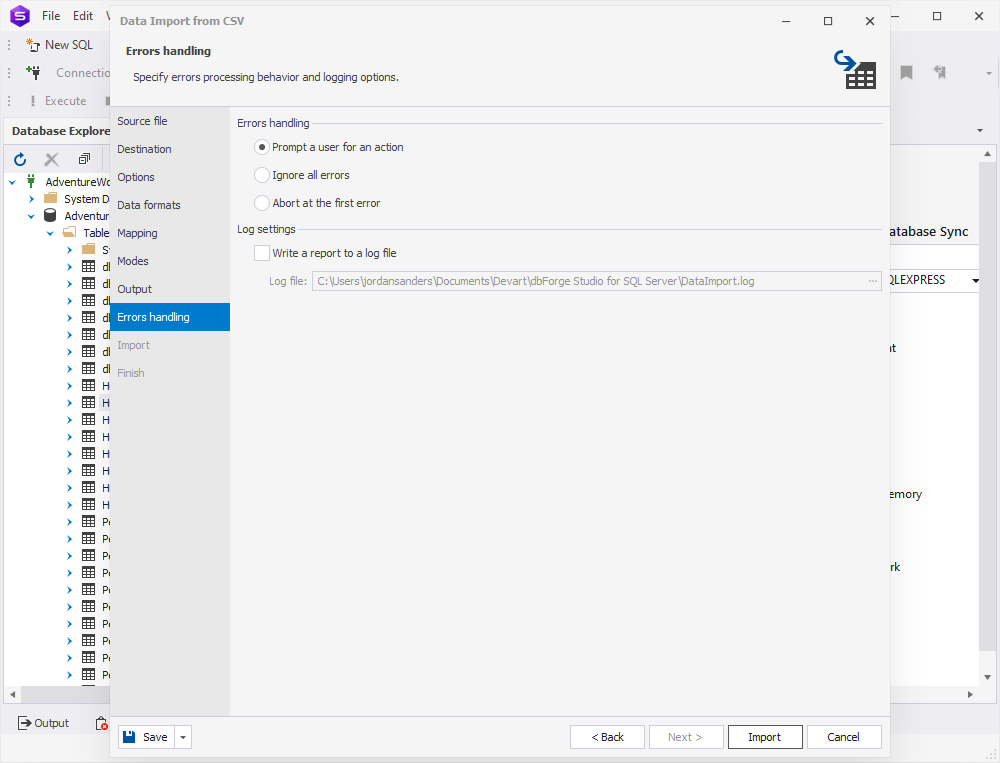
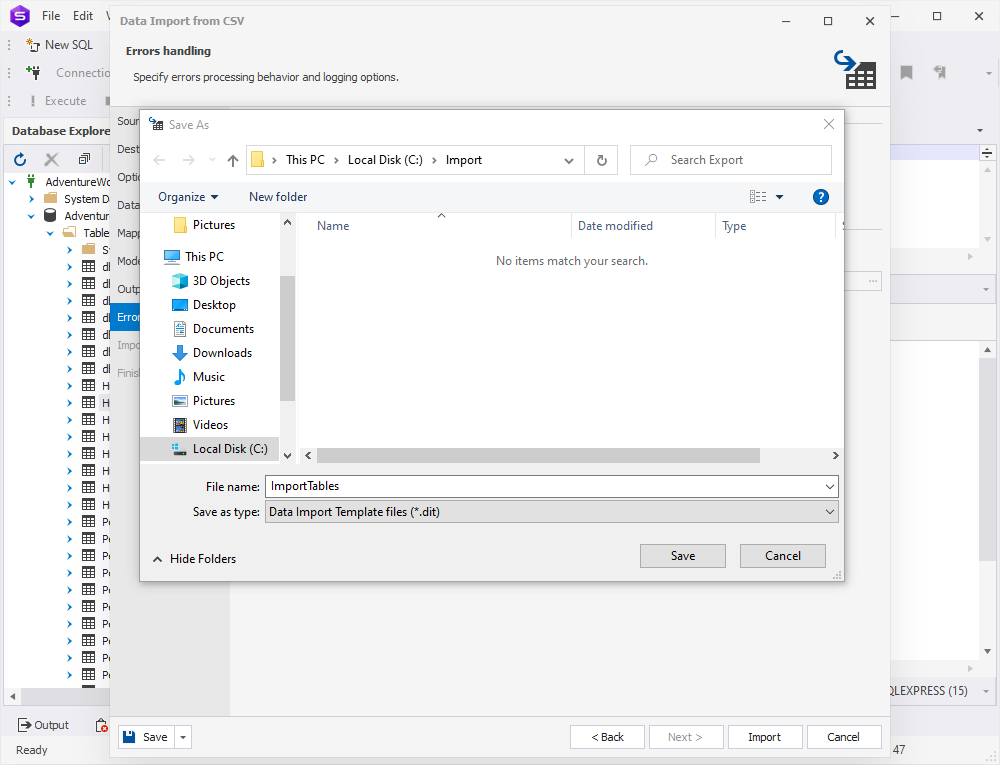
On the Errors handling page, we need to specify the error processing behavior (using one of the three available options: Prompt the user for an action, Ignore all errors, or Abort at the first error) and opt to write reports to a log file with a specified path.
Finally, we’ve configured everything, and now we can click Import. The operation is successfully completed.
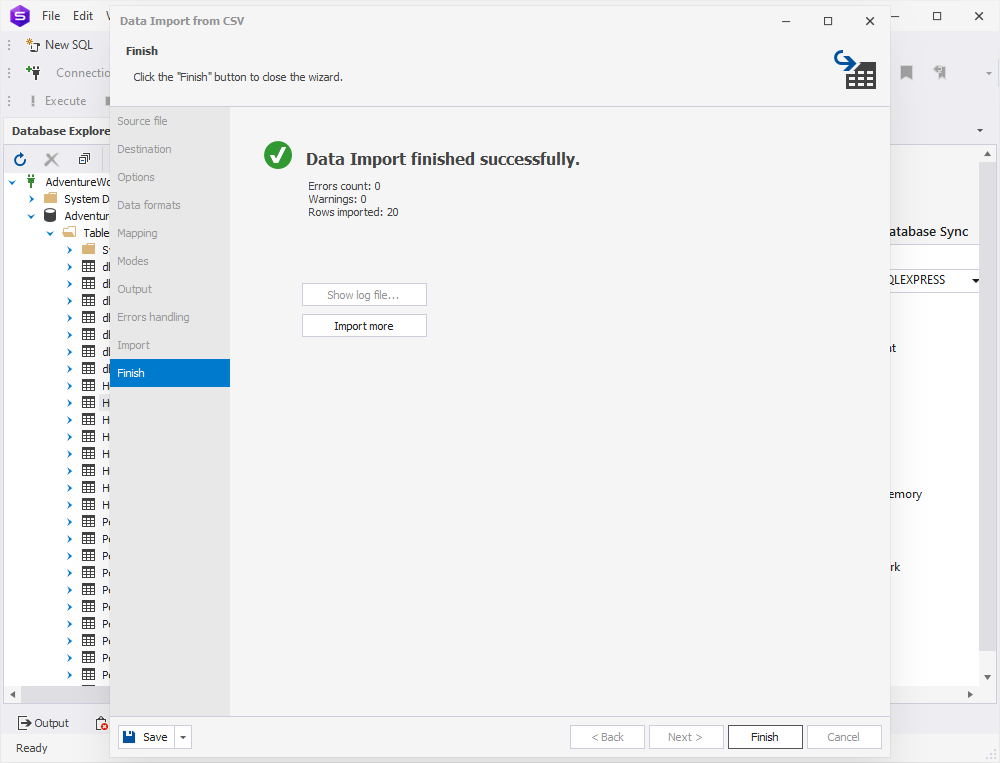
Now we can check whether the data has been imported. Success!
How to import data from the command line
We still have one more table, HumanResources.Shift, and now we’ll import data into it using a newly generated BAT file. Let’s go back to the Source file page, where we select CSV and the previously exported HumanResources.Shift.csv source file.
On the Destination page, we select HumanResources.Shift_New.
Now, to keep things short, let’s skip everything and proceed right to Save > Save Template and get ourselves a template file in the DIT format.
Similarly, we can go to Save > Save Command Line to save a BAT file that we’ll further use to import data.
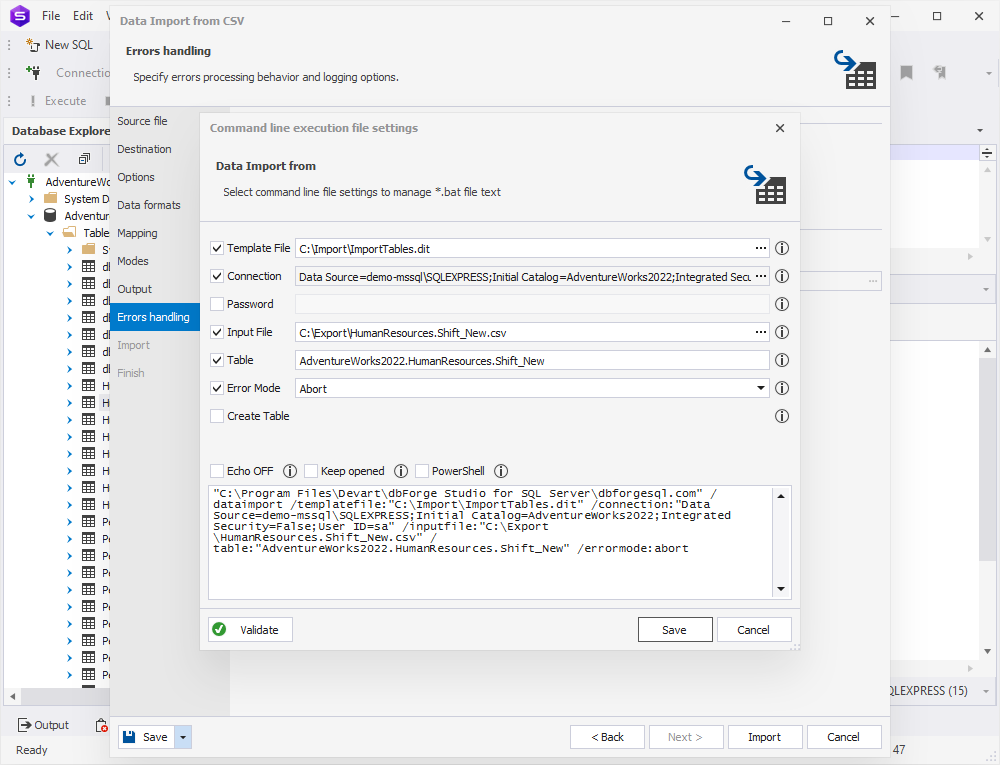
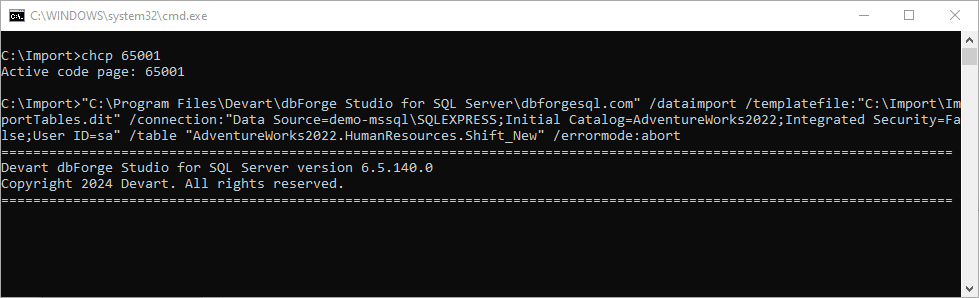
Now that we’ve got the command line, we run the file. It is instantly executed.
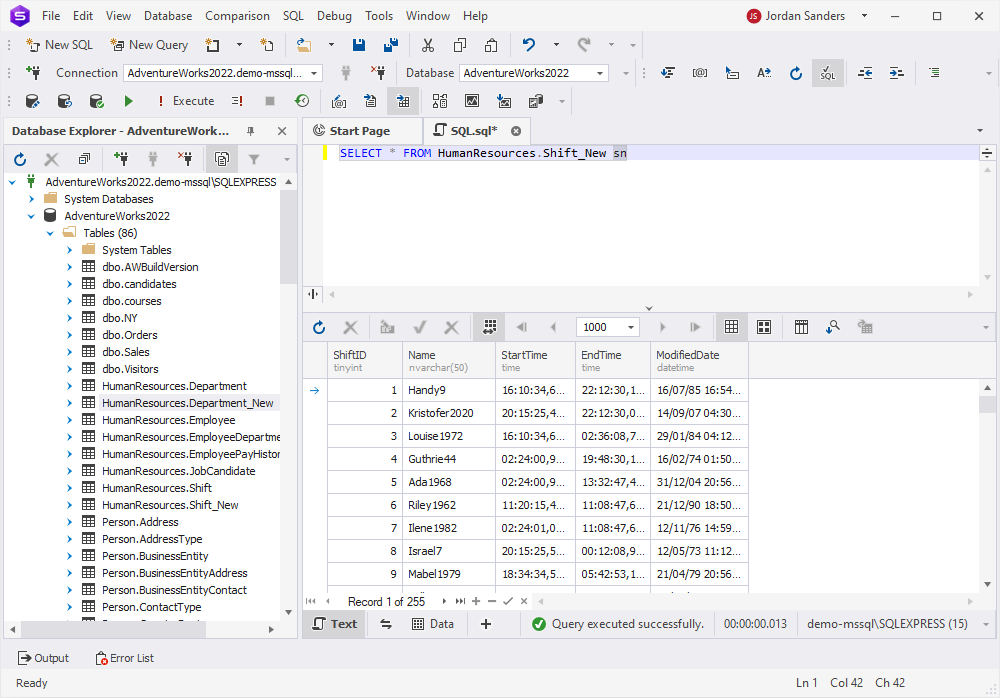
And now we can check our table and make sure that the data has really been imported. That’s it!
Note: If you are an avid user of SSMS, you can augment it with the exact same export and import functionality by installing an add-in called dbForge Data Pump.
Download dbForge Studio and make your daily work easier today!
Now that you know both approaches in detail, you can decide which one works best for you. And if you’d rather go with the GUI-powered dbForge Studio for SQL Server, we’d love to invite you to download it for a free 30-day trial and get some firsthand experience with all of its rich capabilities, including the import and export of your data.