
Querying PostgreSQL in plain English is no longer a futuristic idea; it’s something you can build today. With a Model Context Protocol (MCP) server, Claude Desktop connects securely to external systems, including databases, through a structured interface. Here, MCP acts as the bridge between Claude and PostgreSQL, allowing it to run queries, explore schemas, and return results instantly in Markdown.
This guide walks you through building that bridge in C#. You’ll create a console app, configure the database connection, implement extensions, and add MCP tools for schema inspection and SELECT queries. By the end, you’ll have a working MCP server, powered by dotConnect for PostgreSQL, that lets Claude interact with PostgreSQL in real time.
Table of contents- Why dotConnect for PostgreSQL?
- Prerequisites
- Creating a PostgreSQL MCP Server Step-by-step
- Connecting Claude Desktop to the MCP Server
- Troubleshooting
- Conclusion
Why dotConnect for PostgreSQL?
For Claude to query PostgreSQL through .NET, the connection layer has to be fast, reliable, and flexible, which is what dotConnect for PostgreSQL delivers. It’s an ADO.NET provider built for efficiency, with features that make it a natural fit for an MCP server.
The connector regularly undergoes security and performance testing to ensure it stays ahead of the competition. Extra benefits include priority support, frequent updates, and detailed documentation for a quick and easy start.
- Advanced ORM support: EF Core, Dapper, NHibernate, LinqConnect, and more
- Full compliance with ADO.NET standards
- Secure SSL/SSH connections, proxy servers, and HTTP tunneling
- Advanced encryption and data integrity
- Support for PostgreSQL notifications, bulk data loading, GEOMETRY, and more
- Comprehensive support for PostgreSQL-specific data types
- Integration with Visual Studio
In short, dotConnect handles the plumbing so you can focus on building MCP tools and letting Claude do the querying.
Prerequisites
Before you start, set up the following essentials:
- Visual Studio 2022: The IDE used in this guide. If it is not installed, download the free Community Edition from Microsoft’s website.
- dotConnect for PostgreSQL: An ADO.NET provider that manages connectivity between .NET and PostgreSQL.
- DVD Rental sample database: A dataset from the PostgreSQL docs, used for testing queries and schema inspection.
Creating a PostgreSQL MCP Server
This server will connect to a PostgreSQL database and allow Claude Desktop to query data and retrieve schema information in Markdown format. We’ll walk through creating a .NET console application, adding necessary extensions and tools, and configuring it to run as an MCP server.
Step 1: Create a console application project
We’ll start by creating a simple .NET console application named mcp-server, which will serve as our MCP server for Claude Desktop.
- Open Visual Studio or your preferred IDE.
- Go to File → New → Project.
- Select Console App (.NET 9 or later).
- Name the project mcp-server.
- Choose a location and click Create.
This project will host the server logic to handle MCP communication.
Step 2: Install required NuGet packages
Next, we need to add the NuGet packages that provide MCP functionality and networking support.
- Open the Package Manager Console.
- Run the following commands:
Install-Package McpDotNet
Install-Package Devart.Data.PostgreSQL
Install-Package Microsoft.Extensions.Hosting
Step 3: Configure connection string
To allow our MCP server to connect to a PostgreSQL database, we’ll create a configuration file named appsettings.json in the project root.
- In Solution Explorer, right-click the project and select Add → New Item → JSON File.
- Name the file appsettings.json.
- Add the following configuration:
{
  "ConnectionStrings": {
    "PostgreSql": "Host=127.0.0.1;Port=5432;Database=TestDatabase;User Id=TestUser;Password=TestPassword;Schema=TestSchema;License Key=**********;"
  }
} - Host, Port – Specify the database server and port.
- Database – Target database name.
- User ID, Password – Credentials for authentication.
- Schema – The schema where database objects are stored.
- License Key – A valid license key is required when using dotConnect data providers from third-party providers such as Devart.
This file will allow us to load database connection settings dynamically in our MCP server without hardcoding them.
Step 4: Create DbConnectionExtensions
We’ll now add an extension class that makes it easier to execute a SELECT query and return results in Markdown format. This helper will be used later by the MCP server.
In Solution Explorer, right-click the project → Add → New Folder → name it Extensions.
Inside the Extensions folder, add a new Class named DbConnectionExtensions.cs.
Paste the provided code:
using System.Data.Common;
using ModelContextProtocol;

namespace Devart.McpServer.Stdio.AdoNet.Extensions
{
    internal static class DbConnectionExtensions
    {
        public static async Task<string> ExecuteSelectQueryAsync(
            this DbConnection conn,
            string sql,
            IProgress<ProgressNotificationValue>? progress = null,
            CancellationToken cancellationToken = default)
        {
            if (!sql.Trim().StartsWith("SELECT", StringComparison.CurrentCultureIgnoreCase))
            {
                throw new InvalidOperationException("Invalid query. This tool executes exactly one SELECT statement. The SQL must start with the keyword SELECT and have no comments or other text before it.");
            }

            progress?.Report(new ProgressNotificationValue
            {
                Message = "Connecting to data source...",
                Progress = 0.0f
            });

            await conn.OpenAsync(cancellationToken);
            await using var cmd = conn.CreateCommand();
            cmd.CommandText = sql;

            progress?.Report(new ProgressNotificationValue
            {
                Message = "Executing SELECT query...",
                Progress = 10.0f
            });

            await using var reader = await cmd.ExecuteReaderAsync(cancellationToken);
            var result = await reader.GetMarkdownTableAsync(cancellationToken);
            return result;
        }
    }
}
How it works:
- Extension Method: Allows calling conn.ExecuteSelectQueryAsync(sql) on any DbConnection.
- Validation: Ensures the query starts with SELECT to prevent other SQL commands.
- Progress Reporting: Sends messages during connection and execution, including a heartbeat update every 30 seconds.
- Markdown Output: Uses GetMarkdownTableAsync() to return query results in a format that Claude can display nicely.
Step 5: Create DataTableExtensions
This extension converts a DataTable into a Markdown-formatted table.
It’s used later by our MCP server to display SQL query results in Claude Desktop.
In the same Extensions folder, create a new class named DataTableExtensions.cs.
Paste the provided code:
using System.Data;
using System.Text;

namespace Devart.McpServer.Stdio.AdoNet.Extensions
{
  internal static class DataTableExtensions
  {
    public static string ToMarkdownTable(this DataTable table, string[] columns)
    {
      if (table.Rows.Count == 0)
      {
        return "No data available.";
      }
      var sb = new StringBuilder();
      sb.AppendLine("| " + string.Join(" | ", columns) + " |");
      sb.AppendLine("|" + string.Join("|", Enumerable.Repeat("---", columns.Length)) + "|");
      foreach (DataRow row in table.Rows)
      {
        var rowValues = columns.Select(col => row[col]?.ToString() ?? "NULL").ToList();
        sb.AppendLine("| " + string.Join(" | ", rowValues) + " |");
      }
      return sb.ToString();
    }
  }
}
How it works:
- Input: Takes a DataTable and a list of column names.
- Output: Returns a Markdown table string that Claude Desktop can render.
- Empty Data: If no rows are found, it returns “No data available.”
- Formatting: Builds a proper Markdown header and data rows for readability.
Step 6: Create DbDataReaderExtensions
This extension reads query results directly from a DbDataReader and formats them as a Markdown table. It’s used by the MCP server when executing SELECT queries asynchronously.
Create a new class named DbDataReaderExtensions.cs.
Paste the provided code:
using System.Data.Common;
using System.Text;

namespace Devart.McpServer.Stdio.AdoNet.Extensions
{
  internal static class DbDataReaderExtensions
  {
    public static async Task<string> GetMarkdownTableAsync(
      this DbDataReader reader,
      CancellationToken cancellationToken = default)
    {
      if (!reader.HasRows)
      {
        return "No data available.";
      }
      var columnNames = Enumerable.Range(0, reader.FieldCount).Select(reader.GetName).ToList();
      var sb = new StringBuilder();
      sb.AppendLine("| " + string.Join(" | ", columnNames) + " |");
      sb.AppendLine("|" + string.Join("|", Enumerable.Repeat("---", columnNames.Count)) + "|");
      while (await reader.ReadAsync(cancellationToken))
      {
        var rowValues = Enumerable.Range(0, reader.FieldCount).Select(i => reader[i]?.ToString() ?? "NULL").ToList();
        sb.AppendLine("| " + string.Join(" | ", rowValues) + " |");
      }
      return sb.ToString();
    }
  }
}
How it works:
- Checks for Rows: Returns “No data available.” if the query result is empty.
- Column Headers: Dynamically retrieves column names from the reader.
- Asynchronous Reading: Reads rows asynchronously for efficiency.
- Markdown Output: Creates a Markdown table with headers and row data for easy rendering in Claude Desktop.
Step 7: Create IConfigurationExtensions
This extension simplifies retrieving connection strings from the appsettings.json file.
It ensures that the required database connection string exists and throws an error if it’s missing.
Сreate a new class named IConfigurationExtensions.cs.
Paste the provided code:
using Microsoft.Extensions.Configuration;

namespace Devart.McpServer.Stdio.AdoNet.Extensions
{
  internal static class IConfigurationExtensions
  {
    public static string GetSourceConnectionString(this IConfiguration config, string source)
    {
      var connString = config.GetConnectionString(source);
      return string.IsNullOrWhiteSpace(connString)
        ? throw new InvalidOperationException($"ConnectionStrings:{source} is missing in MCP server settings.")
        : connString;
    }
  }
}
Step 8: Create PostgreSqlTools
This step adds a tool class that defines the MCP server tools for working with a PostgreSQL database. It provides two main capabilities:
- Retrieving the database schema.
- Executing SELECT queries and returning results in Markdown.
Create a new folder named Tool and add a new Class named PostgreSqlTools.cs.
Paste the provided code:
using System.ComponentModel;
using System.Data;
using System.Text;
using Devart.Data.PostgreSql;
using Devart.McpServer.Stdio.AdoNet.Extensions;
using Microsoft.Extensions.Configuration;
using ModelContextProtocol;
using ModelContextProtocol.Server;

namespace Devart.McpServer.Stdio.AdoNet.Tools;

[McpServerToolType]
public static class PostgreSqlTools
{
  [McpServerTool(Name = "postgresql_get_schema"), Description("Returns information schema of PostgreSQL database in Markdown format.")]
  public static async Task<string> GetSchemaAsync(
    IConfiguration config,
    CancellationToken cancellationToken = default)
  {
    try
    {
      await using var conn = new PgSqlConnection(config.GetSourceConnectionString("PostgreSql"));
      await conn.OpenAsync(cancellationToken);

      var sb = new StringBuilder();
      sb.AppendLine($"# PostgreSQL Version: {conn.ServerVersion}");
      sb.AppendLine();

      var schemaName = string.IsNullOrWhiteSpace(conn.Schema) ? "public" : conn.Schema;

      var columns = await conn.GetSchemaAsync("Columns", [schemaName], cancellationToken);
      var columnsView = new DataView(columns)
      {
        Sort = "table ASC, position ASC"
      };
      sb.AppendLine("## PostgreSQL Columns");
      sb.AppendLine(columnsView.ToTable().ToMarkdownTable(["table", "name", "typename", "position"]));
      sb.AppendLine();

      var primaryKeys = await conn.GetSchemaAsync("PrimaryKeys", [schemaName], cancellationToken);
      var primaryKeysView = new DataView(primaryKeys)
      {
        Sort = "table ASC, name ASC"
      };
      sb.AppendLine("## PostgreSQL Primary Keys");
      sb.AppendLine(primaryKeysView.ToTable().ToMarkdownTable(["table", "name", "columnindexes"]));
      sb.AppendLine();

      var foreignKeys = await conn.GetSchemaAsync("ForeignKeys", [schemaName], cancellationToken);
      var foreignKeysView = new DataView(foreignKeys)
      {
        Sort = "table ASC, name ASC"
      };
      sb.AppendLine("## PostgreSQL Foreign Keys");
      sb.AppendLine(foreignKeysView.ToTable().ToMarkdownTable(["name", "table", "referencedkey", "referencedtable"]));

      return sb.ToString();
    }
    catch (Exception ex)
    {
      return $"Error retrieving schema: {ex.Message}";
    }
  }

  [McpServerTool(Name = "postgresql_read_query"), Description("Executes the provided SELECT statement against PostgreSQL database and returns result set in Markdown format.")]
  public static async Task<string> ReadQueryAsync(
    [Description("The SELECT statement to execute.")] string sql,
    IConfiguration config,
    IProgress<ProgressNotificationValue>? progress = null,
    CancellationToken cancellationToken = default)
  {
    try
    {
      await using var conn = new PgSqlConnection(config.GetSourceConnectionString("PostgreSql"));
      return await conn.ExecuteSelectQueryAsync(sql, progress, cancellationToken);
    }
    catch (Exception ex)
    {
      return $"Error executing SELECT statement: {ex.Message}";
    }
  }
}
MCP Tool Attributes: [McpServerToolType] and [McpServerTool] mark methods as callable tools in Claude Desktop.
GetSchemaAsync:
- Connects to PostgreSQL
- Retrieves and sorts column, primary key, and foreign key information
- Formats schema as Markdown.
ReadQueryAsync:
- Executes a SELECT query
- Uses ExecuteSelectQueryAsync to return results as Markdown.
Error Handling: Returns descriptive messages if database operations fail.
Step 9: Implement Program.cs to start the MCP Server
Finally, we’ll set up the entry point of our MCP server. This code initializes configuration, registers the MCP server, and loads the tools we’ve built.
Replace the default code in Program.cs with:
using Microsoft.Extensions.Configuration;
using Microsoft.Extensions.DependencyInjection;
using Microsoft.Extensions.Hosting;

var builder = Host.CreateEmptyApplicationBuilder(settings: null);

builder.Configuration
  .AddJsonFile("appsettings.json", optional: false, reloadOnChange: true);

builder.Services.AddMcpServer()
  .WithStdioServerTransport()
  .WithToolsFromAssembly();

await builder.Build().RunAsync();
How it works:
- Configuration: Loads appsettings.json so we can access connection strings and other settings.
- AddMcpServer: Initializes MCP server services.
- WithStdioServerTransport: Uses standard input/output to communicate with Claude Desktop.
- WithToolsFromAssembly: Automatically registers all [McpServerTool] methods (e.g., GetSchemaAsync, ReadQueryAsync).
- RunAsync: Starts the MCP server, making it available for Claude Desktop to use.
Step 10: Build and test your MCP Server
First, ensure your MCP server is working correctly:
# Build the project
dotnet build --configuration Release

# Test the server manually
dotnet run --project PostgreSQLMCPServer
If everything is ok, publish your application:
dotnet publish -c Release -o ./publish Your application will be output to the specified folder, for example:
C:\\path\\to\\your\\project\\mcp-server\\publish\\YourMCPServer.dll Connecting Claude Desktop to the MCP Server
To enable Claude Desktop to communicate with the MCP server we just built, we need to configure it properly.
Step 1: Create or edit the configuration file
Locate or create the claude_desktop_config.json file.
On Windows, it’s usually found in %APPDATA%/Claude/claude_desktop_config.json.
If it doesn’t exist, create it manually.
Add the following configuration:
{
  "mcpServers": {
    "Devart MCP Connections": {
      "command": "dotnet",
      "args": [ "C:\\path\\to\\your\\project\\mcp-server\\publish\\YourMCPServer.dll" ]
    }
  }
}
Devart MCP Connections is a friendly name for the MCP server (can be customized).
Env, in its turn, Sets environment variables; here, it increases the MCP tool timeout to 1 hour.
Step 2: Restart Claude Desktop
After saving the configuration file:
- Close the Claude Desktop completely
- Restart Claude Desktop
- The MCP server should automatically start when Claude Desktop launches
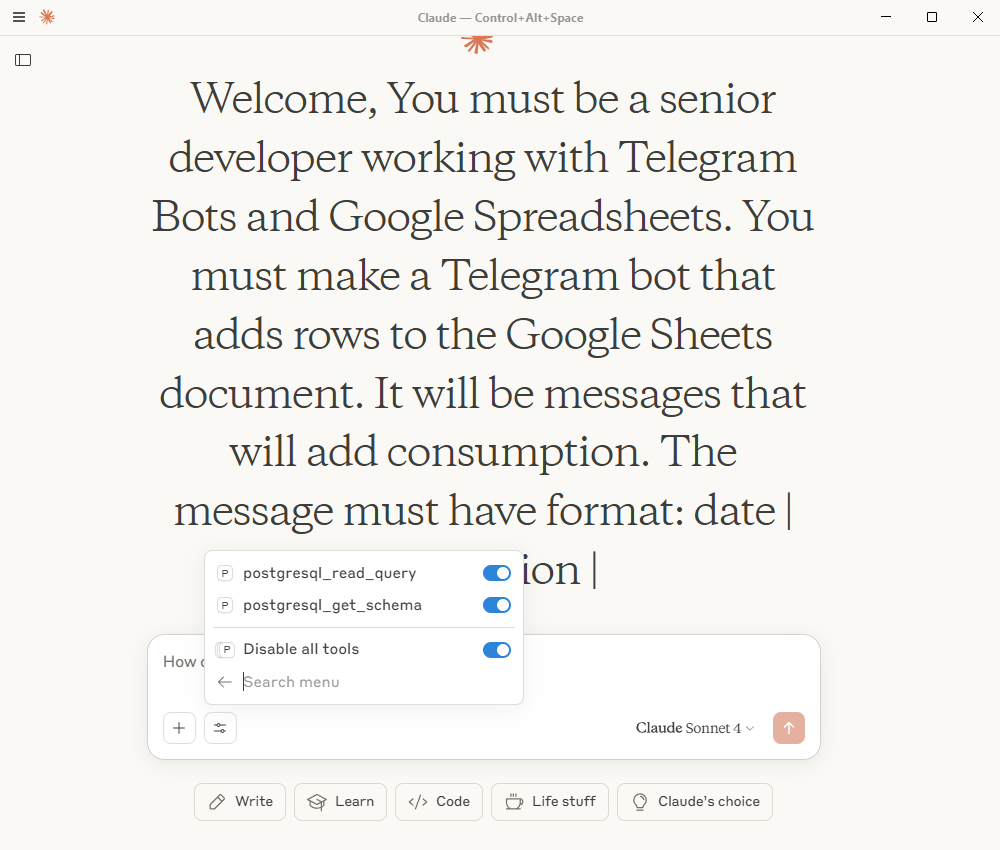
Step 3: Verify the connection
Once everything is configured, you can interact with your PostgreSQL database through Claude Desktop:
What tables are in my database? 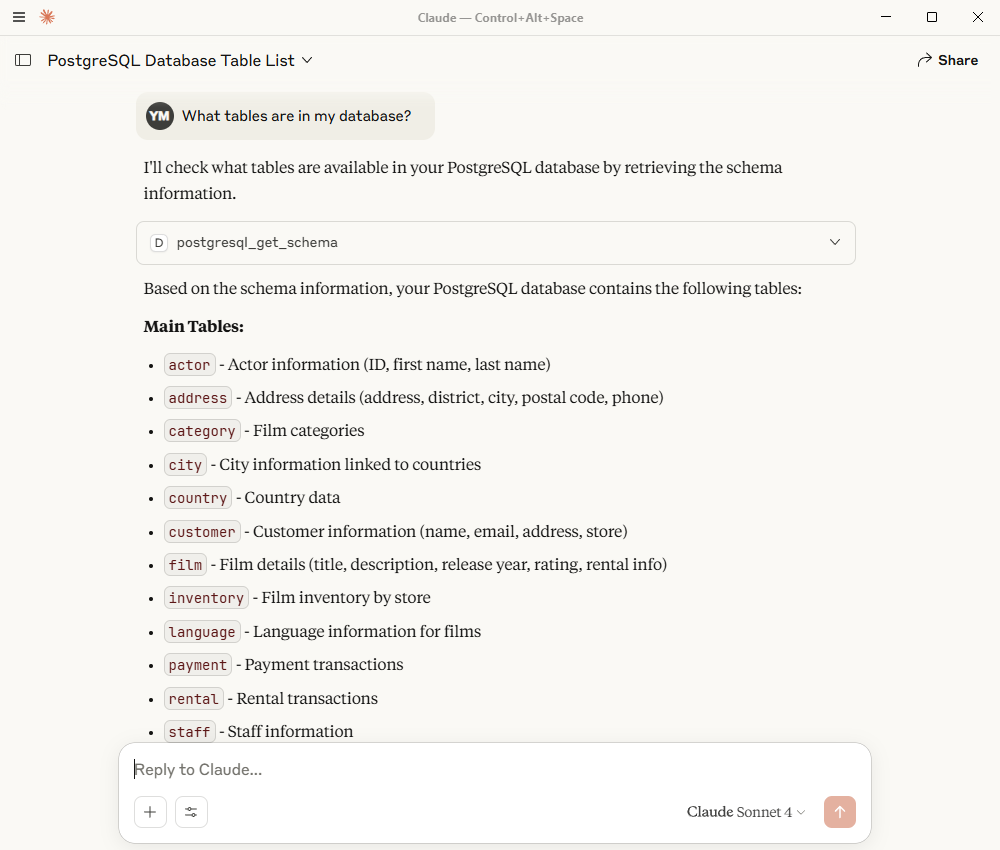
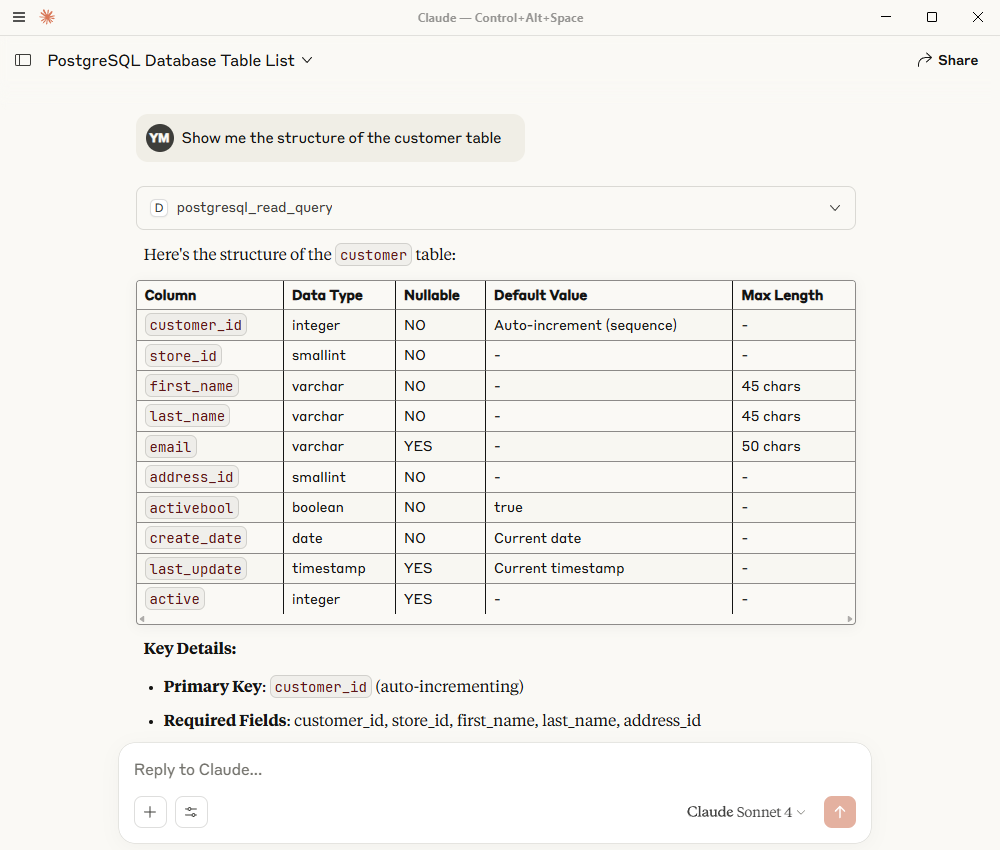
Show me the structure of the customer table
How many active customers do we have? 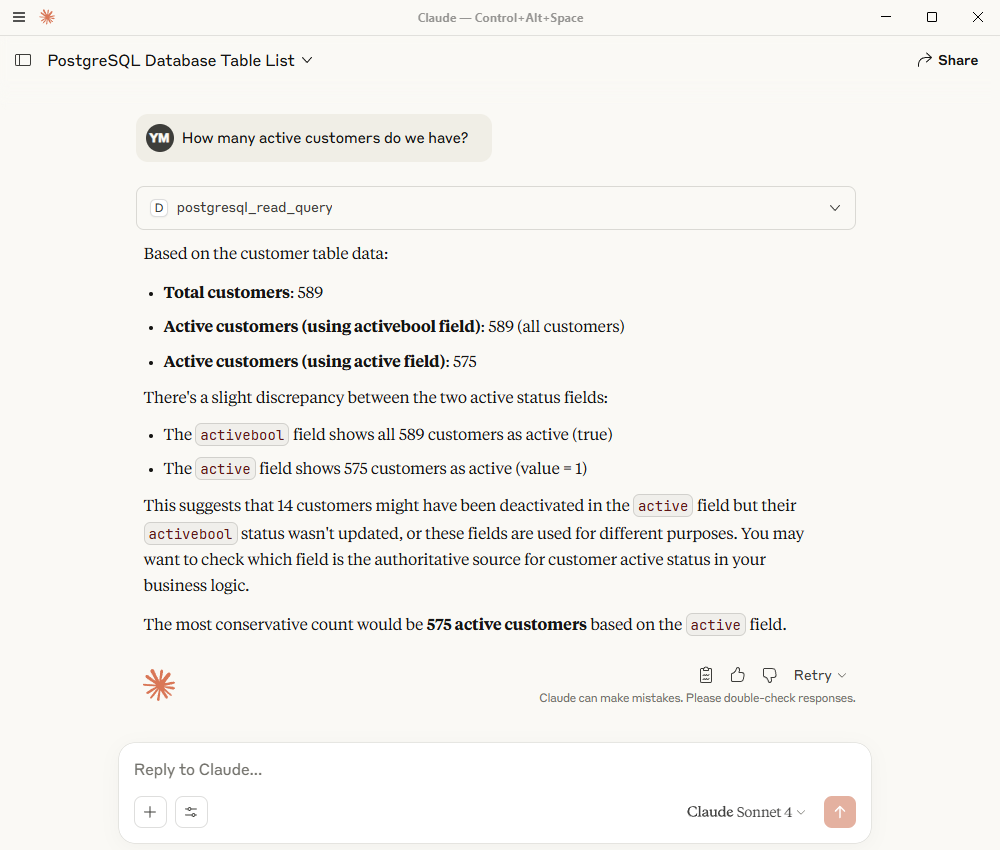
The MCP server will handle all the database interactions securely while providing Claude with the ability to help you analyze and work with your PostgreSQL data.
Extending MCP Server functionality
Once the basic MCP server is running, developers can enhance it with additional capabilities to meet more complex requirements. You can add a query interface for flexible database interactions, implement security and access control to manage permissions, and introduce data transformation or preprocessing for cleaner outputs. Other valuable enhancements include exposing metadata and documentation, adding governance and observability tools for better monitoring, and building a semantic layer or schema normalization to simplify data structures. These features can make the MCP server more robust, secure, and user-friendly when working with Claude Desktop and different data sources.
Troubleshooting
Even with everything set up, issues can arise. Here’s how to diagnose and resolve the most common problems.
Check if the MCP Server is running
Start by confirming whether the server is active:
- Open Task Manager (Windows) or Activity Monitor (macOS)
- Look for your PostgreSQL MCP Server process
- If it’s not running, check the configuration path and permissions
Common issues and fixes
After confirming the server is running, watch out for these potential misconfigurations:
Issue: “MCP server not found”
- Verify that the path to your executable is correct.
- Ensure the executable has proper permissions.
- Check that the .NET runtime is installed.
Issue: “Database connection failed”
- Verify your PostgreSQL connection string.
- Make sure the PostgreSQL server is running.
- Check firewall settings that may be blocking the port.
Issue: “Configuration not loaded”
- Confirm that the JSON syntax is valid.
- Check file permissions for the config file.
- Ensure the file is in the correct directory.
Debugging configuration
If errors persist, enable logging by updating your configuration file as follows:
{
  "mcpServers": {
    "Devart MCP Connections": {
      "command": "dotnet",
      "args": [ "C:\\path\\to\\your\\project\\mcp-server\\publish\\YourMCPServer.dll" ]
    }
  },
"logging": { "level": "debug" }
}
Security considerations
When deploying to production, apply the following best practices:
- Never commit connection strings with passwords to version control.
- Use environment variables for sensitive data.
- Consider using PostgreSQL connection pooling.
- Implement proper error handling for production use.
- Use SSL/TLS for database connections in production.
Conclusion
We’ve successfully built an MCP server in C# that connects Claude Desktop to a PostgreSQL database. Using dotConnect for PostgreSQL, we established a secure connection, executed queries, and returned results in Markdown format for seamless display in Claude. Along the way, we created a .NET console application, configured the database connection, implemented query extensions, added MCP tools for schema inspection and data retrieval, and integrated everything into Claude Desktop.
It’s worth noting that this approach is not limited to PostgreSQL. With other dotConnect data providers, the same pattern can be extended to MySQL, Oracle, SQL Server, and more. This allows Claude Desktop to operate as a versatile database assistant, capable of working across multiple systems in real time and supporting more advanced management and automation needs.