")
The article provides an overview of the column-level SQL Server encryption, including the definition of the Always Encrypted feature, the keys it uses, and their types, and describes how to enable Always Encrypted and set up COLUMN MASTER KEY and COLUMN ENCRYPTION KEY in dbForge SQL Complete.
Introduction
In terms of enhancing data security and preventing it from unauthorized access, each company makes its best to take care of customers’ data, such as credit card numbers, credentials, social security numbers, financial history, etc. As a rule, this information is stored in the databases. To keep important data in and avoid a data breach, you can use encryption for connections, data, databases, tables, and columns.
In SQL Server, there are different encrypting approaches applied at a column and database level that include certificates, asymmetric keys, and symmetric keys, encrypting algorithms, Transparent Database Encryption, Always Encrypted, and dynamic data masking. For example, with database encryption, the entire database and all associated log files, tables, and views can be encrypted and decrypted. With column-level encryption, only data in a column of the table can be encrypted or decrypted.
What is Always Encrypted
Always Encrypted is a feature used to manage encryption and decryption keys on the client side in order to keep sensitive data secure in the SQL Server databases. It allows you to control access to your sensitive data and limit possible data loss. You can set up the Always Encrypted feature for database columns by specifying encryption algorithms and keys.
Always Encrypted uses two encryption keys to protect data:
- Column Encryption Key (CEK) that encrypts data in an encrypted column.
- Column Master Key (CMK) that encrypts a column encryption key. At least one master key should exist to encrypt columns.
Always Encrypted supports two encryption types for the keys:
- Deterministic that generates the same encrypted value for any plaintext value. It allows using point lookups, equality joins, grouping, filtering, and indexing on encrypted table columns.
- Randomized that generates different encrypted values for the same plaintext value. It prevents from using joining, grouping, searching, and indexing on encrypted table columns.
To move on, we will explore how users can enable Always Encrypted for the database and create the column master and column encryption keys using dbForge SQL Complete.
Configuring Always Encrypted with SQL Complete
To set up column-level encryption with the help of SQL Complete, we’ll perform the following steps:
- Create a new database and a table.
- Insert columns with values into the table.
- Retrieve data from the table.
- Create a column master key.
- Create a column encryption key.
- Encrypt columns for the created table.
Step 1: Creating a new database and a table.
In this step, we create the Shop database and the Person table using the CREATE DATABASE and CREATE TABLE statements respectively. For this, execute the following script:
CREATE DATABASE Shop;

USE Shop

CREATE TABLE Person (
    PersonId INT IDENTITY (1, 1) PRIMARY KEY
   ,Name VARCHAR(100)
   ,Password VARCHAR(6) COLLATE Latin1_General_BIN2 not null
   ,SSN VARCHAR(11) COLLATE Latin1_General_BIN2 not null
);
The script creates the Person table containing four columns: PersonID, Name, Password, and SSN, and defines a primary key on the PersonID column. Also, we applied collations for two table columns – Password and SSN. The COLLATE clause should be specified to enable Always Encrypted on columns, using the Latin1_General_BIN2 value as a type of encryption.
If you ever need to update encryption settings or adjust column definitions, such as length or data type, you can use a SQL ALTER COLUMN operation with the ALTER TABLE … ALTER COLUMN syntax before applying encryption.
Step 2: Inserting columns with values into the table.
Now, add data to the Person table by executing the following script:
INSERT INTO Person (Name, Password, SSN)
VALUES ('James', 'dxv4cL', '417-86-5080'),
       ('Emily', 'trv5cN', '247-13-2079');
The script inserts two rows with the values for the Name, Password, and SSN columns.
Step 3: Retrieving data from the table.
In this step, retrieve data from the Person table by executing the SELECT statement:
SELECT * FROM Person;The output is as follows:
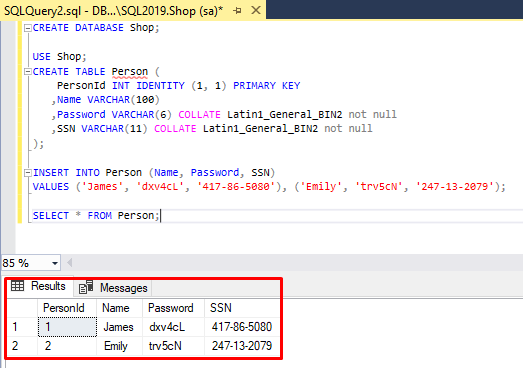
As you can see, the table displays the actual data without any encryption applied.
Step 4: Creating a column master key.
In this step, we use the CREATE COLUMN MASTER KEY statement to create a column master key:
CREATE COLUMN MASTER KEY MyCMK
WITH
(
    KEY_STORE_PROVIDER_NAME = N'MSSQL_CERTIFICATE_STORE',
    KEY_PATH = N'CurrentUser/my/215BE046B1650F033DD1742BA9FCE358E820C342'
)
GO
where MyCMK is the name of the master key.
To view the column master key you’ve just created, in Object Explorer, expand the Shop database and locate the key in the Security > Always Encrypted Keys > Column Master Keys folder.
Step 5: Creating a column encryption key.
The next step is to create a column encryption key using the CREATE COLUMN ENCRYPTION KEY statement:
CREATE COLUMN ENCRYPTION KEY MyCEK
WITH VALUES
(
    COLUMN_MASTER_KEY =  MyCMK,
    ALGORITHM = 'RSA_OAEP',
    ENCRYPTED_VALUE = 0x016E000001630075007200720065006E00740075007300650072002F006D0079002F0032003100350062006500300034003600620031003600350030006600300033003300640064003100370034003200620061003900660063006500330035003800650038003200300063003300340032007978F4B4753C7BEE506D330B87A447DBB5BA6D94A2A2B2B4764D2041D3482FCF4A08EEF875DA058315887D67AA55E6C73D5F53D803D9E4E3D6111896E3ED2751402D60F278F30D01C40E4752ACE6C6730C67BB57B6935EBDE694FB9D2AAE4FA4E4C36BA2B1E4391B2DF78D29A8124286A2831DF6AE88F8044FBD1204F3DF731552614A8905A601D8D4696C2DC059870FF1AAC47697E9A87EFCA81C993F5CCE9AA4E574146C89A9853882FC26A13639D6BFE1275EA153D770FC22C2A6D0BA4505068EED6C8AC0929B29121C0451C57AEB8E075CD48AA86CE2B9AE1DCFB550FA7E5C4A035ACD5CFB11E9E731FF8D6F80CAA80032C8E6D3B36F5F4BD1FCD048036E64EDE366D7B6F726A94F163E68D3D50BD7D0FBDF071959100B61DB7C2F49FDCD15EBDE4703A5327CEFF7C81F328EC78B95B1F2BF7D0AA8C19BA8A44A53C463012286128B2053157FFEBD78B3F0DA2E884D300D1947E23A050DE11021BE0837E7CEFAC4959DF95E21334CD3A3DCB77C391AAEFDE01D14FB08A63AC45B459ABF754CFAE467CDBF1969AA93A16DFEDF3AFB25996EB532592B7462FD42FE18F64C176CE207AC9F7D72414C4AD4CE5AF7750D4E07318D864F611A7A30A875353DC3797301C933C7F737DB5393610F3C8411E06493751FE8637BE07038AF98C45A429B270E08435CBC20166C31F64532A4A7CF476BEBDBFED2D104F54DDE0D35702115
);
where MyCEK is the name of the column encryption key.
To verify the column encryption key you’ve just created, in Object Explorer, expand the Shop database and locate the key in the Security > Always Encrypted Keys > Column Encryption Keys folder.
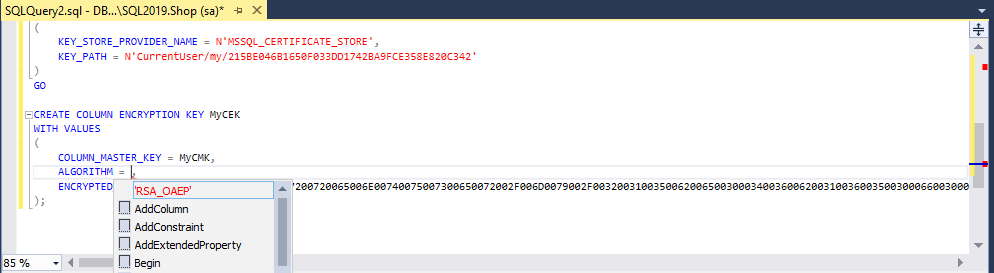
In addition, SQL Complete now suggests the following parameters in the CREATE COLUMN ENCRYPTION KEY statement:
- column master key
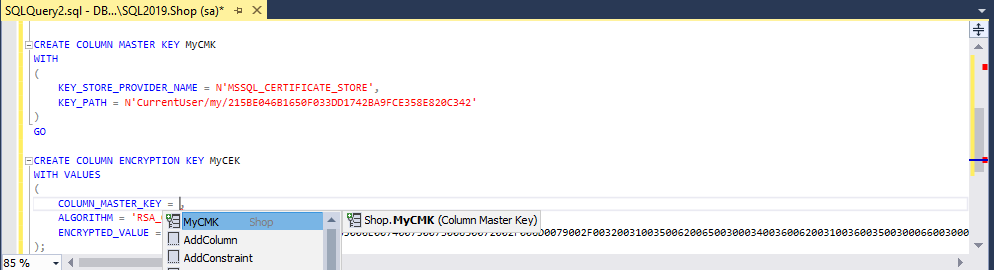
- RSA_OAEP encryption algorithm
Step 6: Encrypting columns for the created table.
After we have prepared the environment and created column master and column encryption keys, we can start encrypting the Password and SSN columns for the Person table by enabling Always Encrypted in SSMS.
To encrypt values in the columns, do the following:
1. In Object Explorer, right-click the Person table and select Encrypt Columns.

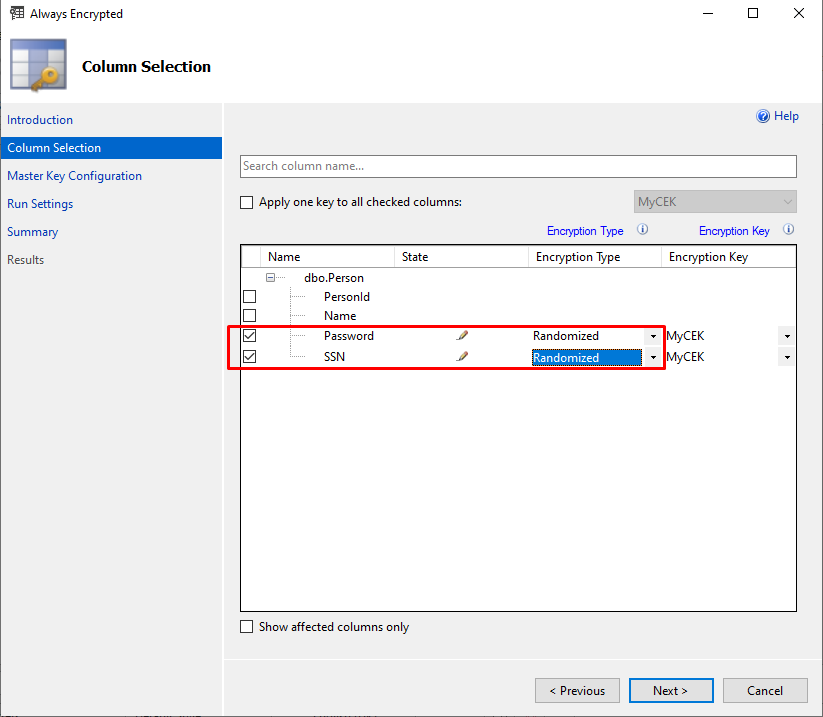
2. In the Always Encrypted window that opens, switch to the Column Selection tab, select the Password and SSN checkboxes and Randomized as an encryption type for both columns, and then click Next.
3. On the Master Key Configuration tab, we can skip this step and click Next because we have already configured column master and column encryption keys.
4. On the Run Settings tab, select Proceed to finish now and click Next.
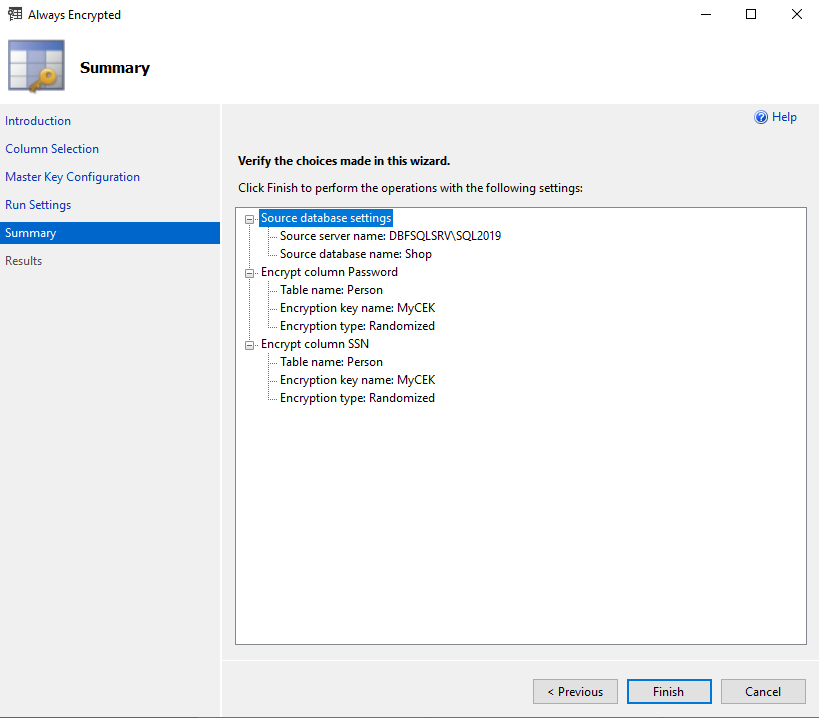
5. On the Summary tab, verify the parameters you defined in the previous steps and click Finish.
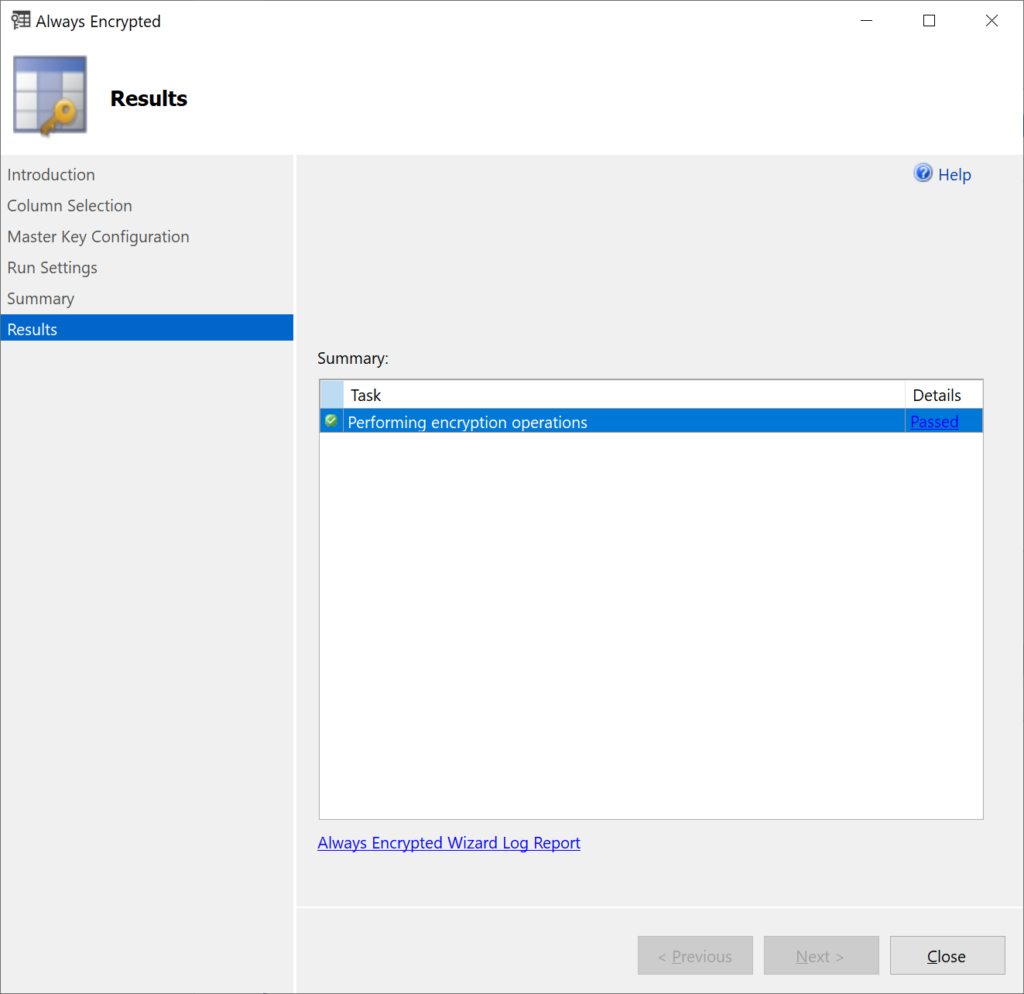
6. On the Results tab, monitor the encryption progress.
Now, retrieve the data from the Person table by executing the SELECT statement:
SELECT * FROM Person;As you can see, the columns Password and SSN are now encrypted:

Have faced some changes in database data or structure, and want to check the query history? Check how you can do it in SQL Server.
Conclusion
In the article, we have explored the Always Encrypted feature, a column master and column encryption keys, their types and exemplified how to configure column-level encryption in SQL Server using the SQL Complete tool.
Download a free 30-day trial version of dbForge SQL Complete to evaluate the features the tool provides.