
Azure Private Link is a secure means of accessing Azure PaaS Services (including Azure SQL Database and Azure Storage) over a private endpoint in a virtual network. In other words, you can create your own private link service in your virtual network and deliver it to your customers without exposing it to the public internet. And if you need a tool to develop and manage Azure databases in this environment, there’s no better option than dbForge Studio for SQL Server.
Contents
- The benefits of using Azure Private Link
- How to create an Azure Private Link
- How to connect to Azure SQL Database in dbForge Studio for SQL Server
The benefits of using Azure Private Link
Azure Private Link is best illustrated through the benefits it delivers. Here are some of them.
- You can use private endpoints to connect your virtual network to all services that can be used as application components in Azure.
- You can easily access services running in Azure from on-premises over ExpressRoute private peering, VPN tunnels, and peered virtual networks—all via private endpoints.
- You are well-protected against possible data leakage, since a private endpoint is mapped to an instance of a PaaS resource instead of the entire service. Thus, unwanted access to any other resource in the service is blocked.
- You can enable the same experience and functionality to render your service privately to consumers in Azure. By placing your service behind a standard Azure Load Balancer, you can enable it for Private Link. The consumer can then connect directly to your service using a private endpoint in their own virtual network.
If you would like to learn more about Azure Private Link, refer to What is Azure Private Link.
How to create an Azure Private Link
To get started, log in to your Azure Portal account. Note that you can create an Azure Private Link for your existing Azure services as well as during the initiation of a new server or database. Here, we’ll focus on the case where you are using an already existing database server.
Now let’s create an Azure Private Link for it.
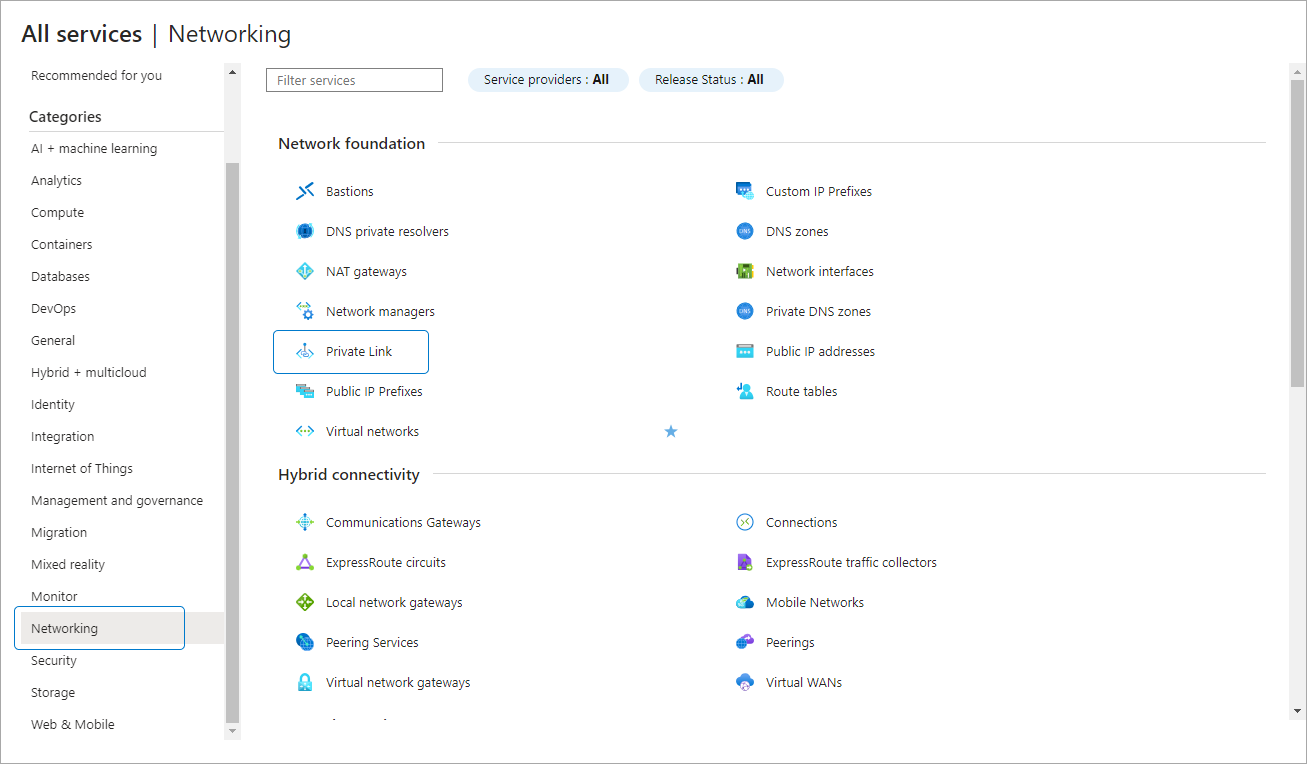
1. Go to All Services > Networking > Private Link.
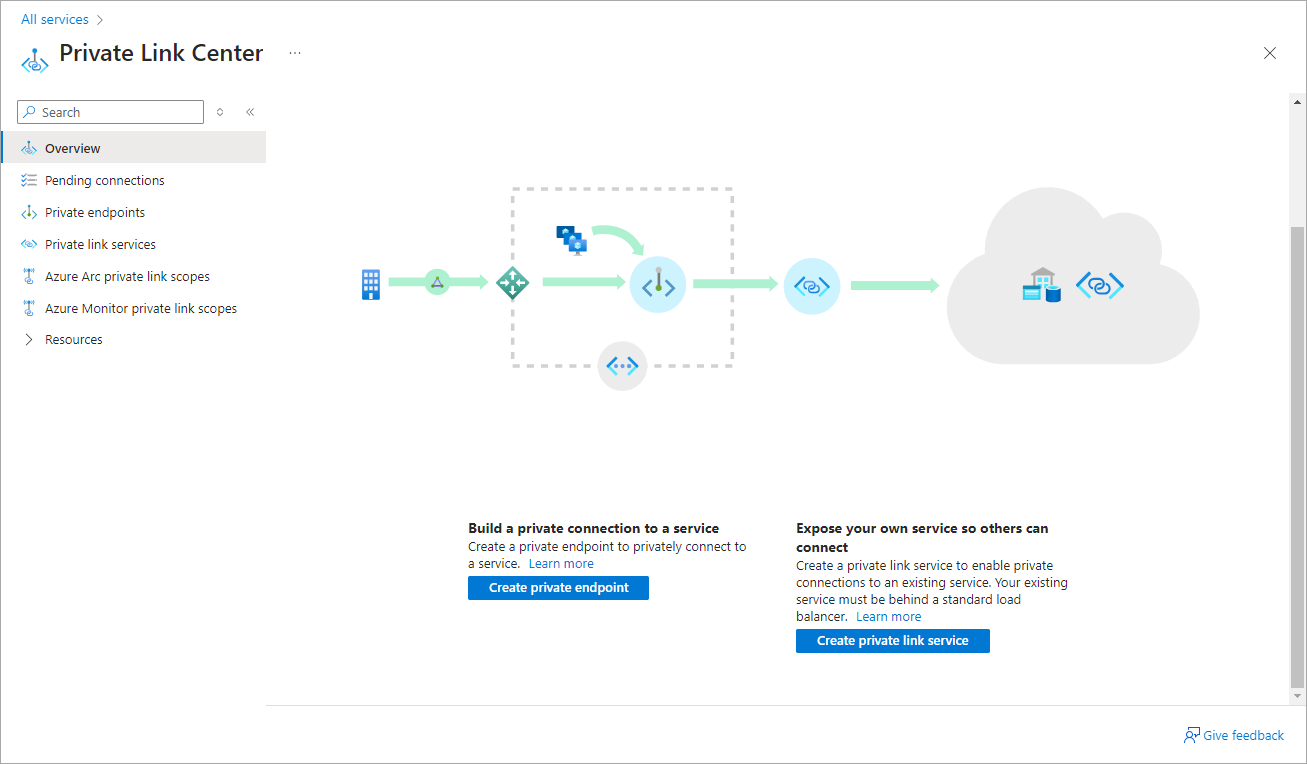
2. You will be taken to the Private Link Center page. Scroll down and click Create private endpoint at the bottom.
3. You will be greeted by the Create a private endpoint wizard. On its first page, called Basics, go to Project details and indicate your Subscription and Resource group.
Then, under Instance details, enter the Name of your Azure instance; the Network Interface Name will be generated automatically. Make sure your Region is correct and hit Next : Resource.

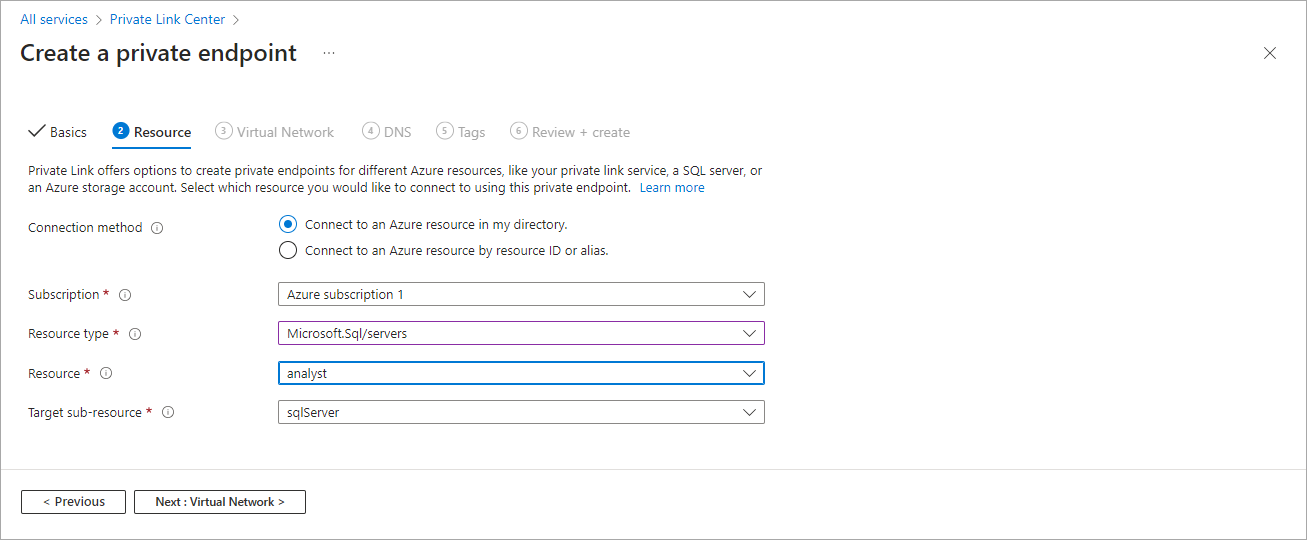
4. On the Resource page, enter the details about the Azure resource you want to create a Private Link for. Once it’s done, proceed to the next page.
5. On the Virtual Network page, select your Virtual network from the list and move on.
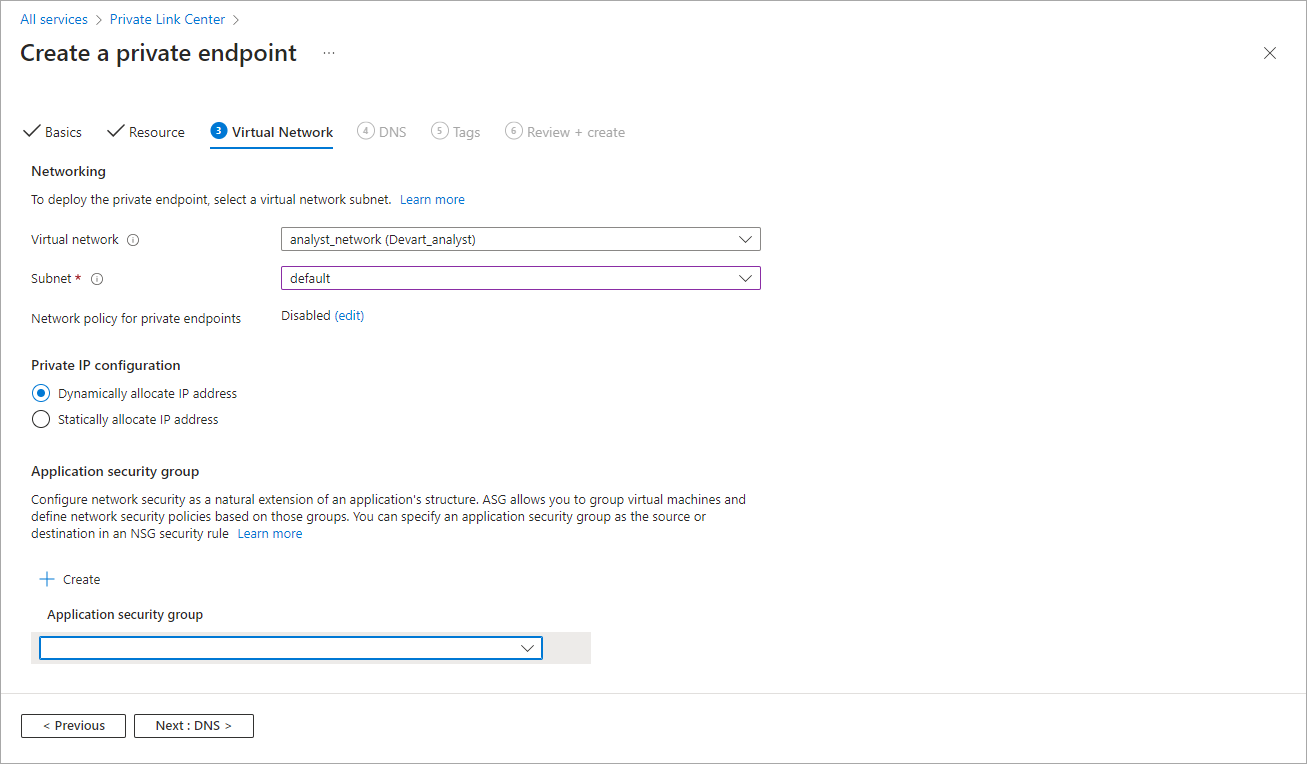
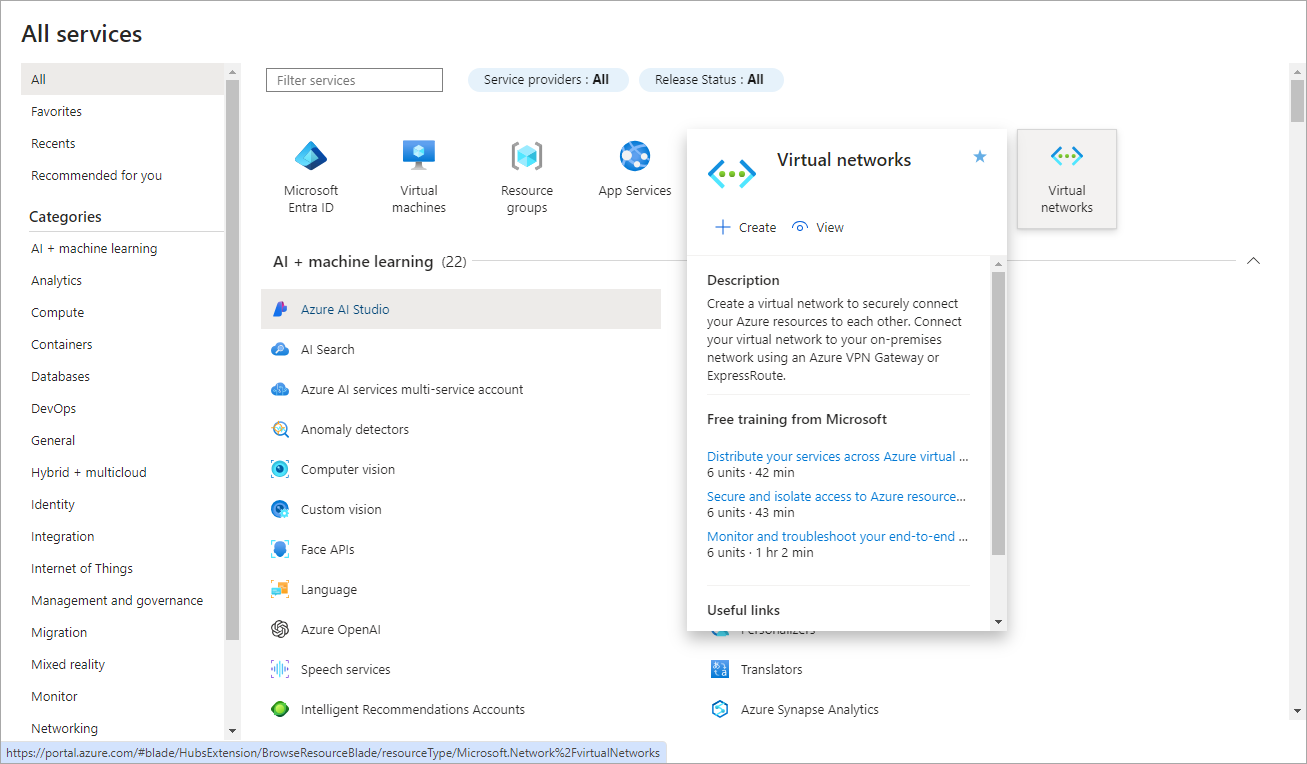
Note that if you don’t have a virtual network, you will need to create and configure it via Azure services > Virtual networks. To learn more about it, refer to Microsoft’s Azure Virtual Network documentation.
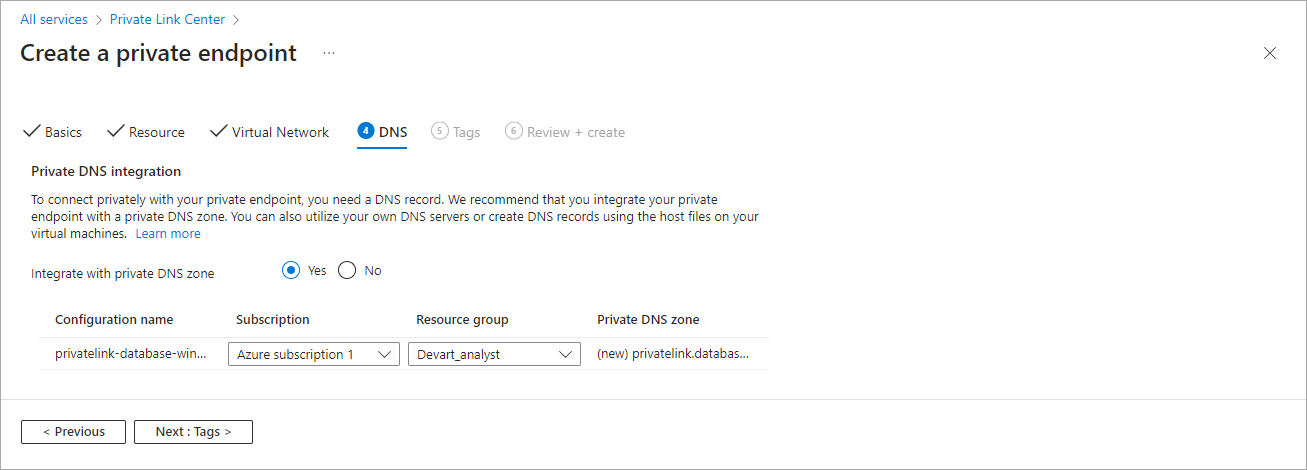
6. On the DNS page, select to Integrate with private DNS zone, make sure you have picked the correct Subscription and Resource group, and proceed to the next page.
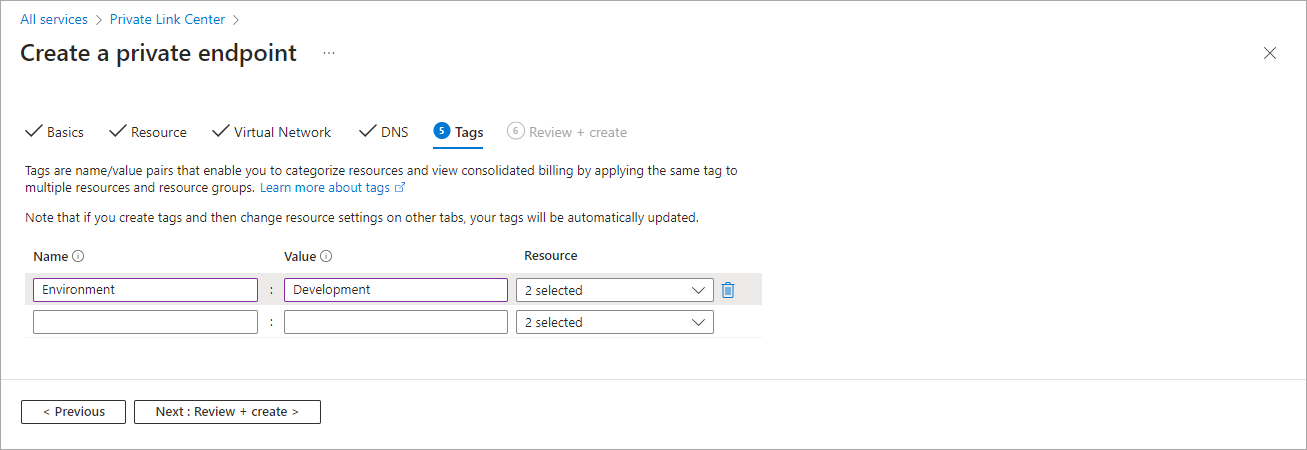
7. On the Tags page, configure your Name/Value pairs, if necessary, and go to the final page.
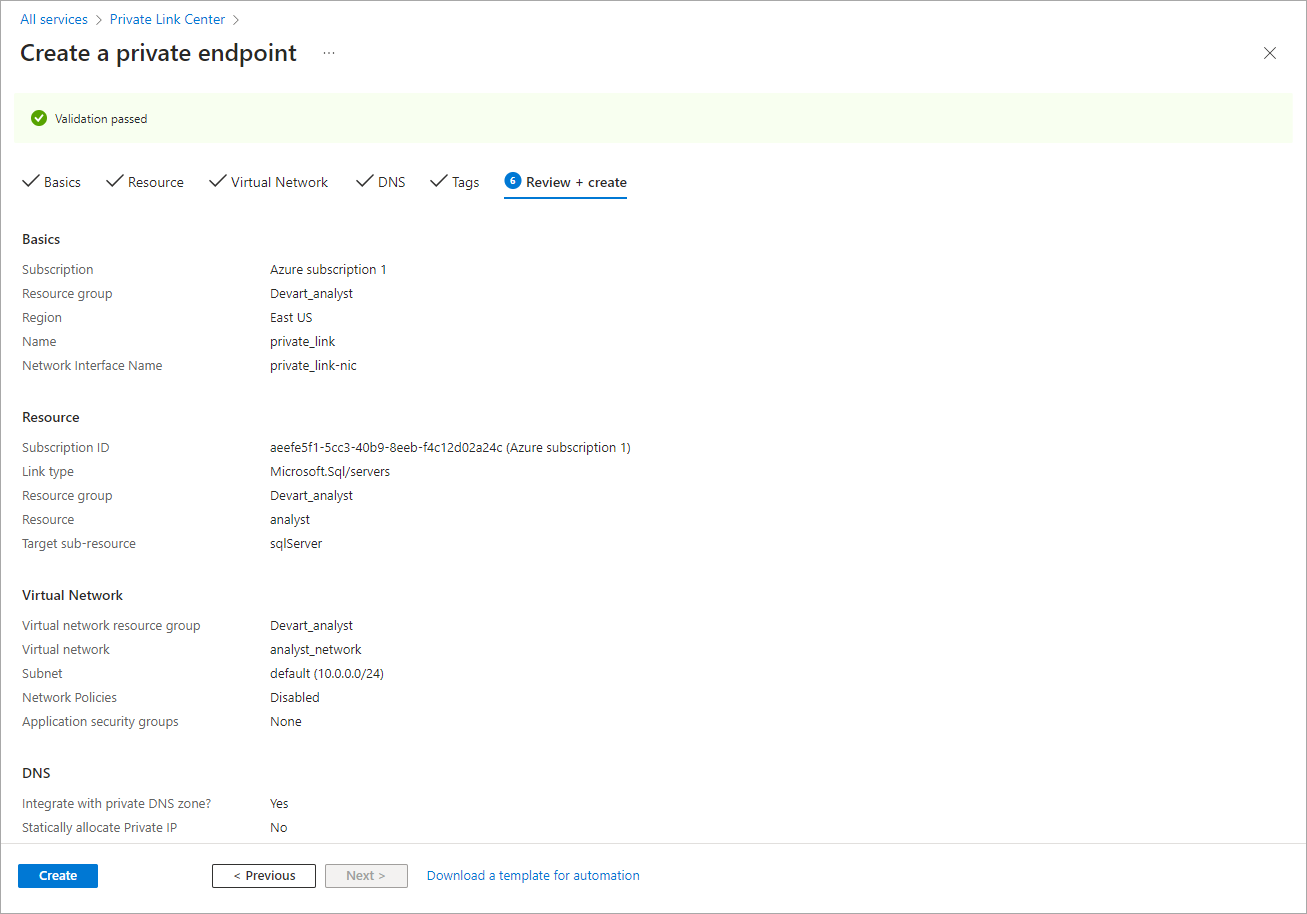
8. The final page is called Review + create. There, you can double-check all the details you have configured in this wizard. If something needs further adjustments, go back to any required page via Previous. If everything is correct, click Create.
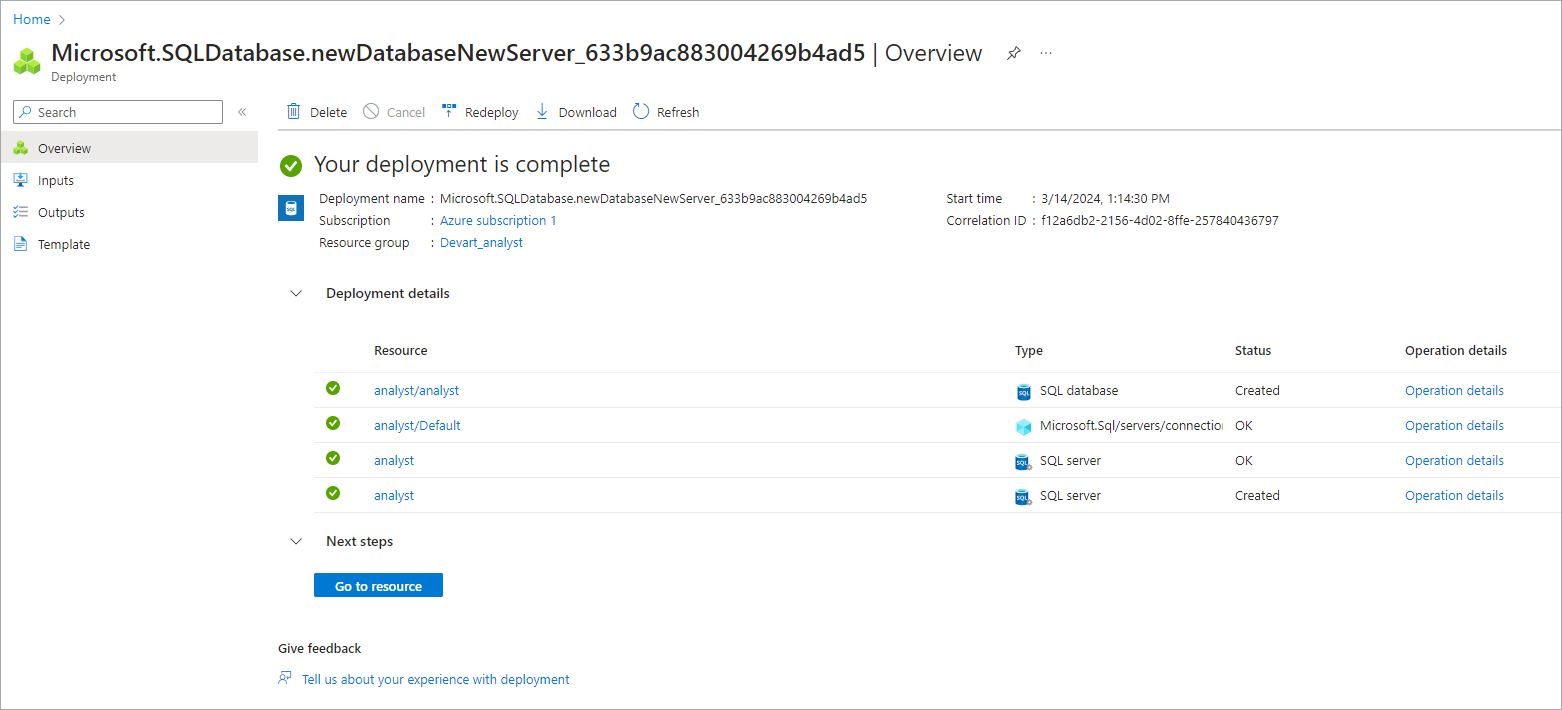
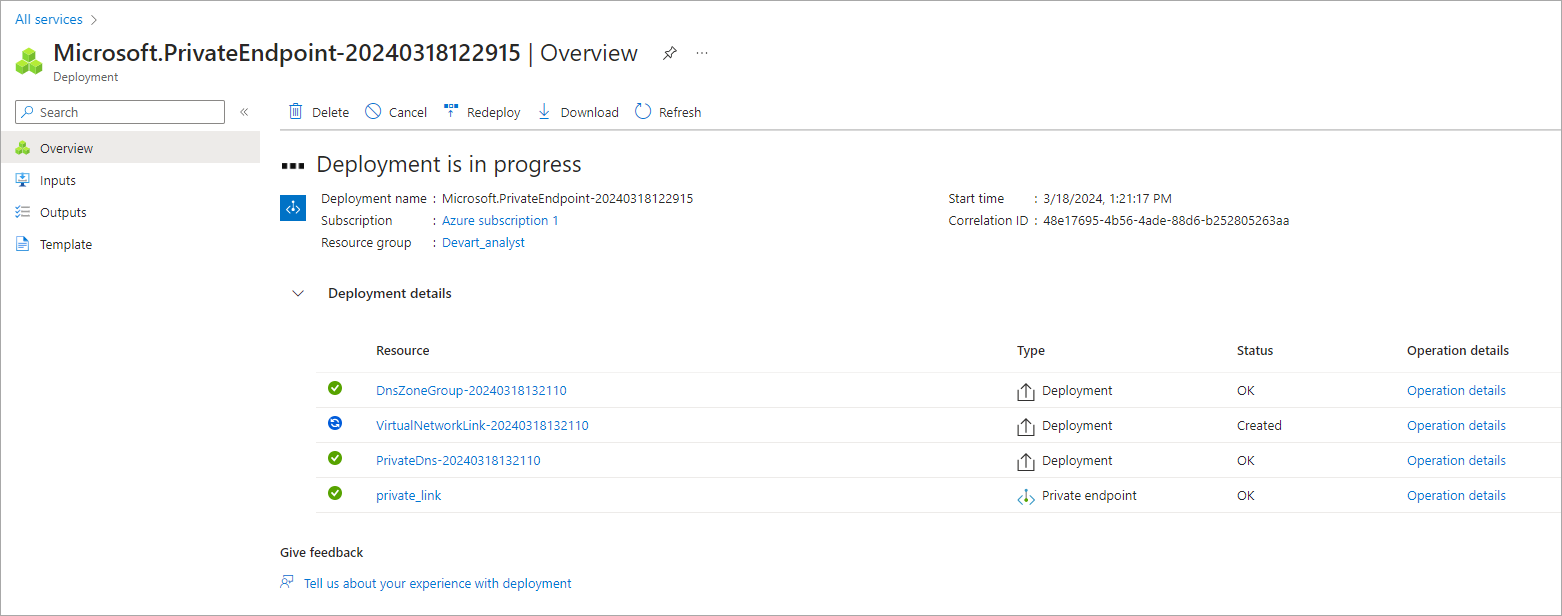
That’s how your Azure Private Link is created.
This is what its page looks like.
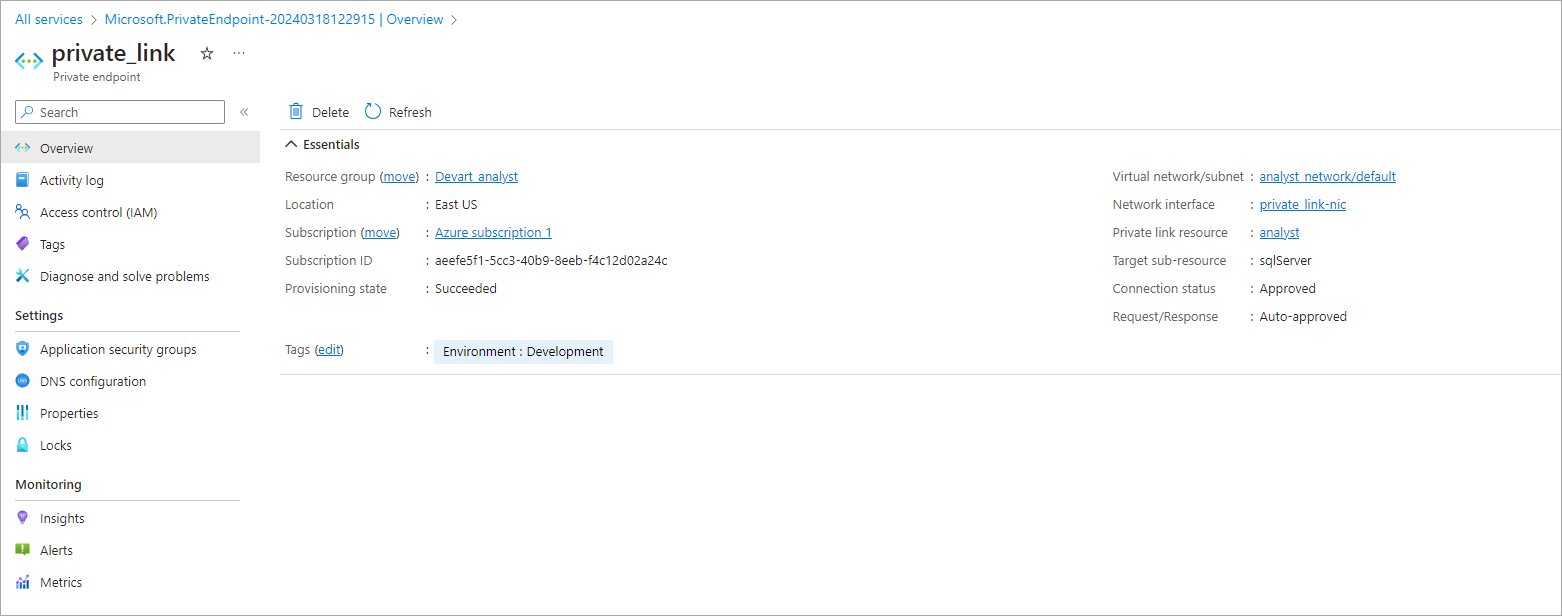
Now you can use this Private Link to get connected to Azure SQL Database via Azure VM or Azure VPN.
How to connect to Azure SQL Database in dbForge Studio for SQL Server
Everything is even easier with connecting to your Azure SQL Database instance via dbForge Studio for SQL Server, an all-in-one database IDE that perfectly suits SQL Server and Azure SQL alike. When you open the Studio for the first time, it will automatically suggest you connect to a database. Everything takes place in the Database Connection Properties window (which can be accessed at any moment from the Database menu > New Connection), where you simply enter the credentials to your Azure SQL Database instance. No additional tricks required.
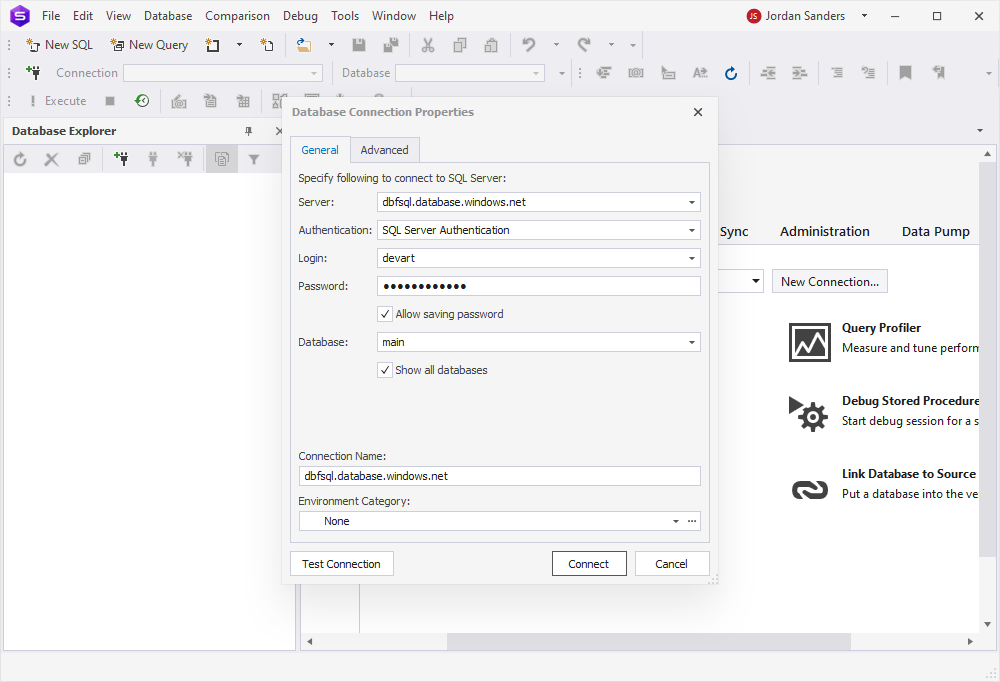
Optionally, you can click Test Connection. If the credentials are correct, you will be shown a corresponding message.
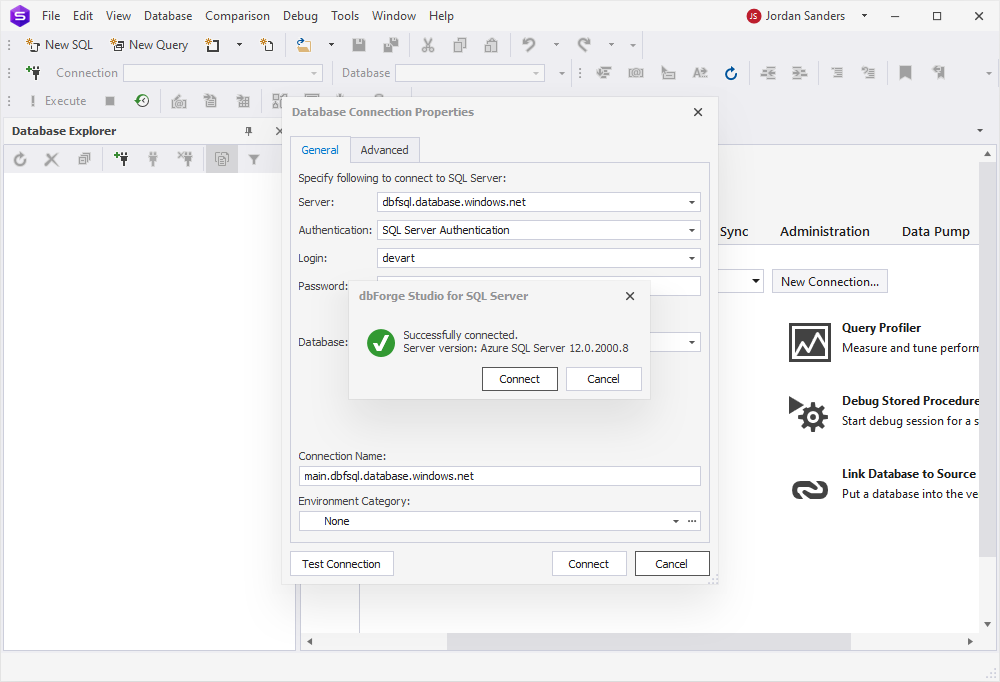
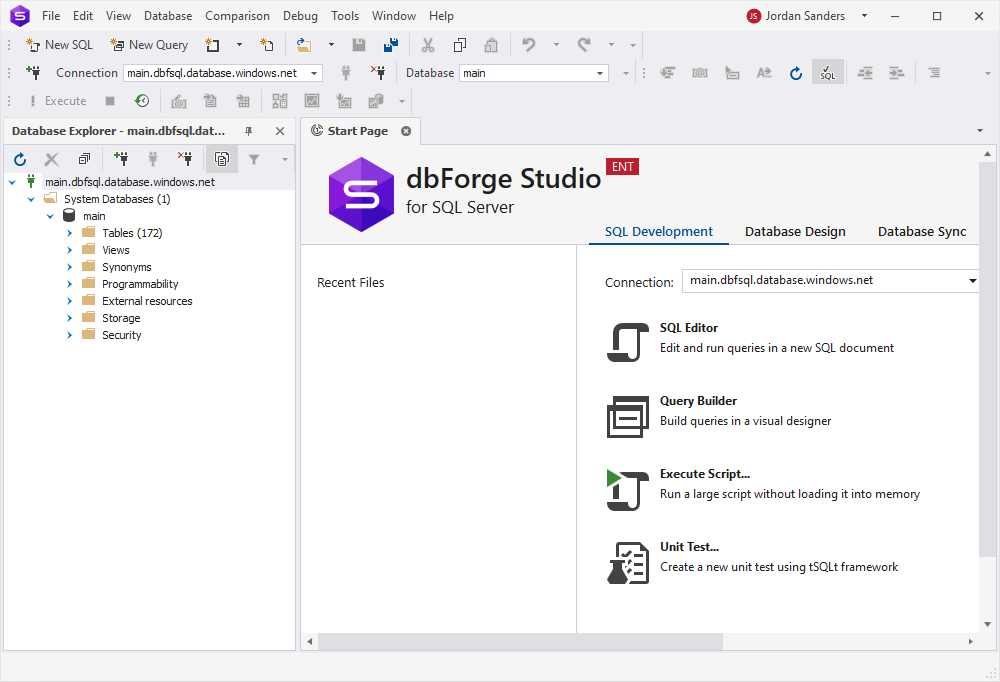
Click Connect, and that will be it! Now you are free to manage your Azure databases from the Studio.
Download dbForge Studio for a free 30-day trial today!
Thank you for making it this far, and this is where we’d like to suggest you get some firsthand experience with dbForge Studio. After all, it delivers quite a few tools that are simply indispensable when it comes to database development and administration.
- Context-aware SQL code completion, formatting, and refactoring
- Debugging of T-SQL scripts, stored procedures, triggers, and functions
- Visual query building on diagrams that eliminates the need for coding
- Query performance optimization
- Version control of database schemas and static table data
- Comparison and synchronization of databases
- Data aggregation in pivot tables
- Streamlined data migration (including import and export in multiple formats)
- Generation of complete database documentation
- Generation of column-intelligent, realistic test data
- Automated unit testing
- Server performance monitoring in real time
- Automation of recurring operations from the command line
This is not an exhaustive list of the Studio’s features; a truly exhaustive one would take up too much space, so we’d rather like to invite you to download the Studio for a free 30-day trial and start exploring its boundless feature set today. It might as well become your one-in-a-million perfect toolset for Azure SQL Database. Give it a go and see for yourself.