
It may be news to many database developers and administrators that SQL Server actually performs better on Linux. In this article we will go into how to install SQL Server and SQL Server command-line tools on Ubuntu and show how to connect to the server remotely.
Contents
- What is Linux?
- How to install SQL Server on Ubuntu 20.04|18.04|16.04
- How to connect remotely to a SQL Server running on Ubuntu
- How to uninstall SQL Server on Ubuntu
- Conclusion
What is Linux?
Linux is a free and open-source operating system, released under the GNU General Public License (GPL). What does open-source mean though? It means that anyone can use, study, modify, and redistribute the source code, or even sell copies of their modified code, as long as they do so under the same license. Linux is, in fact, the largest open-source software project in the world.
Linux is also the third most popular desktop OS after Microsoft Windows and macOS. Approximately a half of professional developers use Linux-based operating systems, which power almost 40% of websites and 85% of smartphones.
Because it is safe, reliable, flexible, and open-source, Linux presents the best platform for databases. At the same time, SQL Server is one of the best database management systems to be run on Linux. Nowadays, more and more companies are shifting to Linux, desiring to achieve higher performance with demanding workloads. And with data being the king of our digital era and databases being at the core of software development today, the problem of running a database management system on Linux becomes acute.
Can SQL Server work on Linux?
The following Linux distributions support SQL Server: Red Hat Enterprise Linux (RHEL), SUSE Linux Enterprise Server (SLES), and Ubuntu. SQL Server is also supported as a Docker image that can run on Docker Engine on Linux.
In this article, we will walk through installing, running, uninstalling, and connecting to SQL Server on the Ubuntu-based Linux distribution.
How to install SQL Server on Ubuntu 20.04|18.04|16.04
Prerequisites
- Stable Internet connection
- A system running a Linux distribution (for example, Ubuntu)
- An account with sudo privileges
- Access to the terminal
System requirements
Memory: 2 GB
File System: XFS or EXT4 (other file systems, such as BTRFS, are not supported)
Disk space: 6 GB
Processor speed: 2 GHz
Processor cores: 2 cores
Processor type: x64-compatible only
Install SQL Server on Ubuntu
Step 1: Add a repository key
Run the following command to import the public repository GPG keys from the Microsoft website. Once asked for it, enter the password for the sudo user. If the process is successful, the output will return OK.
wget -qO- https://packages.microsoft.com/keys/microsoft.asc | sudo apt-key add -
Step 2: Add a SQL Server repository
Run the following command to add the Microsoft SQL Server repository for SQL Server 2019.
sudo add-apt-repository "$(wget -qO- https://packages.microsoft.com/config/ubuntu/18.04/mssql-server-2019.list)"
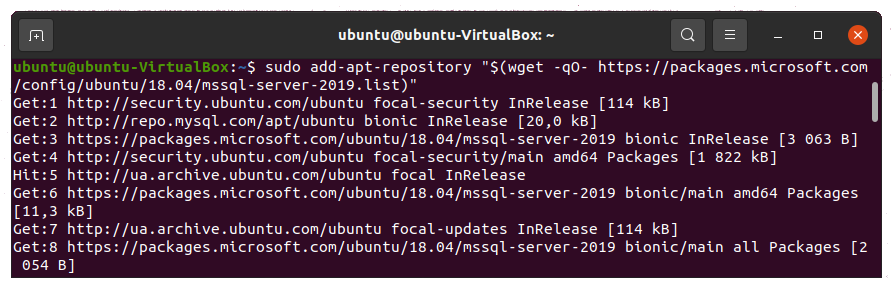
Note
18.04 is the version of Ubuntu we are installing SQL Server on. If you are running a different Ubuntu version, please modify the command.
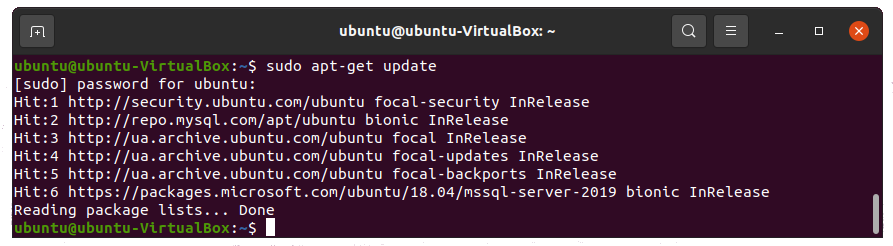
Now you need to update the repository to the latest version.
sudo apt-get update
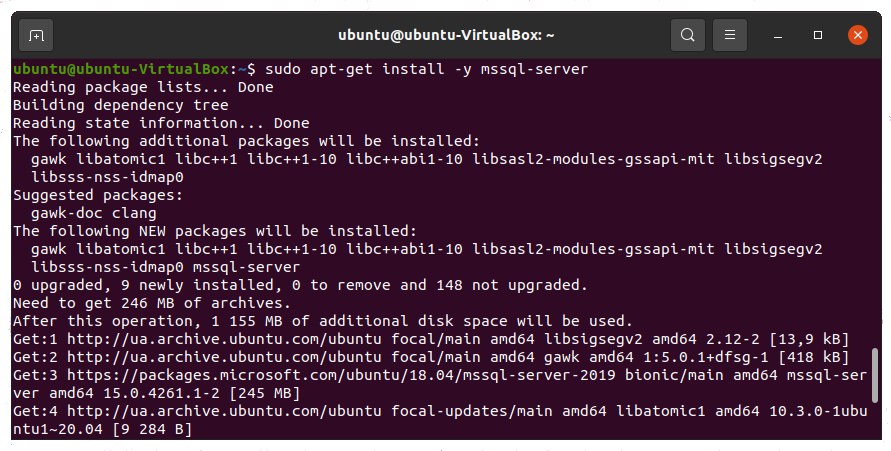
Step 3: Install SQL Server
Run the following command to initiate the SQL Server installation process.
sudo apt-get install -y mssql-server
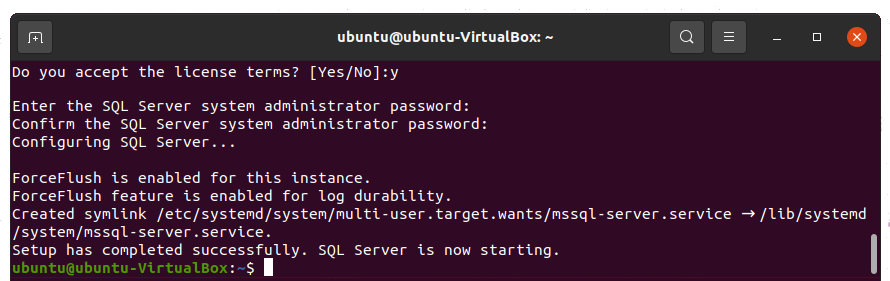
Step 4: Set up SQL Server
Now that you have installed SQL Server on your Linux distro, you can proceed to configure it. Run the following command to start configuring SQL Server.
sudo /opt/mssql/bin/mssql-conf setup

You will be asked to select a SQL Server edition. We need the Developer edition, so we enter 2. Next, you will need to accept the license terms.
And finally, you need to set up an SQL Server system administrator password.
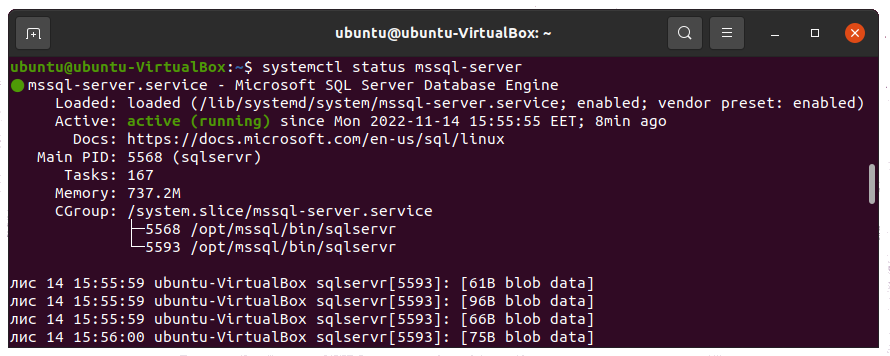
Step 5: Verify that SQL Server is running
Run the following command to check the mssql service status.
systemctl status mssql-server
Install the SQL Server command-line tools on Ubuntu
To interact with SQL Server, you need to connect to it with a tool that can run Transact-SQL statements. Walk through the following steps to install the sqlcmd and bcp SQL Server command-line tools.
To begin with, you need to install curl. For this, run the following commands.
sudo apt-get update
sudo apt install curl
Now, you need to import the public repository GPG keys.
curl https://packages.microsoft.com/keys/microsoft.asc | sudo apt-key add -
Next, you need to register the Ubuntu repository by running the following command.
curl https://packages.microsoft.com/config/ubuntu/20.04/prod.list | sudo tee /etc/apt/sources.list.d/msprod.list
The next step is to update the sources list and install the unixODBC developer package.
sudo apt-get update
sudo apt-get install mssql-tools unixodbc-dev
Now you update to the latest version of mssql-tools using the following commands:
sudo apt-get update
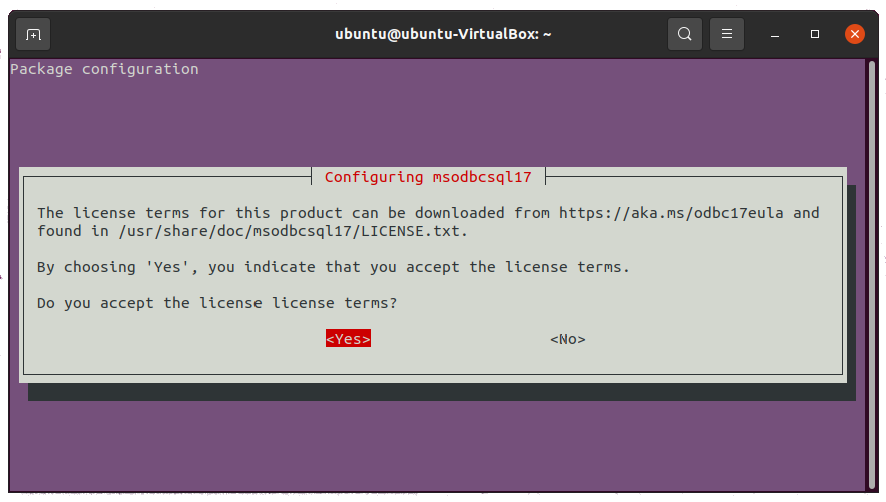
sudo apt-get install mssql-tools
Select Yes to accept license terms when asked.
And finally, add /opt/mssql-tools/bin/ to your PATH environment variable to make sqlcmd or bcp accessible from the bash shell. For interactive sessions, run the following command.
echo 'export PATH="$PATH:/opt/mssql-tools/bin"' >> ~/.bash_profile
For non-interactive sessions, use the following command.
echo 'export PATH="$PATH:/opt/mssql-tools/bin"' >> ~/.bashrc source ~/.bashrc
Connect to SQL Server locally
Use the following command to connect to your local SQL Server.
sqlcmd -S localhost -U sa -P '<YourPassword>'
You can omit the password; in this case, you will be prompted to enter it.
If successful, you will get to an sqlcmd command prompt: 1>.

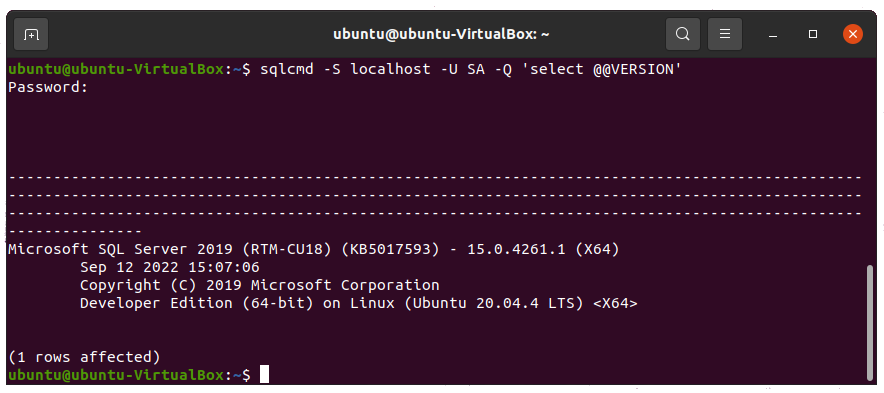
Check the installed SQL Server version
To check your current version and edition of SQL Server on Ubuntu, run the following command and provide a SQL Server password when asked for it.
sqlcmd -S localhost -U SA -Q 'select @@VERSION'
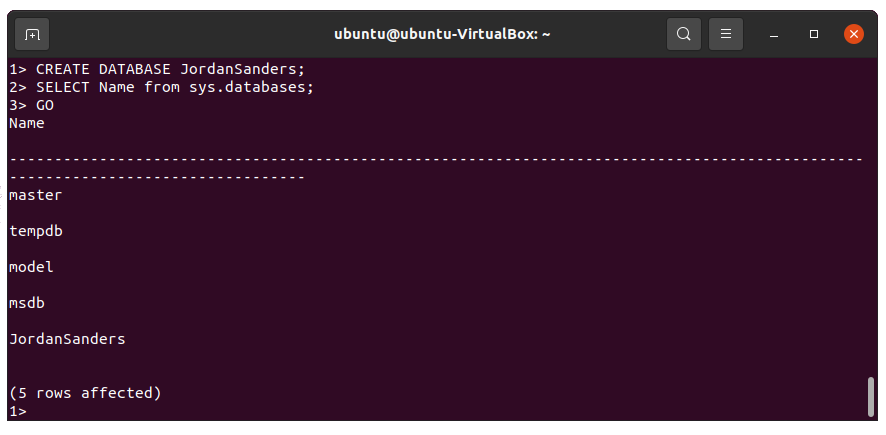
Create a SQL Server database on Ubuntu
To create a SQL Server database on Ubuntu, run the following commands.
CREATE DATABASE <database_name>;
SELECT Name from sys.databases;
GO
Note
The commands are not executed automatically. You need to enter GO from the new line to execute the previous commands.
How to connect remotely to a SQL Server running on Ubuntu
Step 1: Allow remote access to SQL Server
Run sqlcmd and execute the following query to allow remote access.
EXEC sp_configure 'remote access', 0;
GO
RECONFIGURE;
GO
Step 2: Check and configure the firewall
Run the following command to check the status of your firewall.
sudo ufw status
You can use the following commands to enable or disable the firewall on Ubuntu.
sudo ufw disable
sudo ufw enable
Disabling the firewall will allow you to connect to your SQL Server on Ubuntu without any problems. However, keep in mind that it is a bad idea to switch off the firewall because of possible security risks.
We recommend that you allow a connection to the firewall by specifying an IP address.
sudo ufw allow from 102.169.0.110
Step 3: Connect to SQL Server on Ubuntu
In this worked example, we will use dbForge Studio for SQL Server to connect remotely to our SQL Server running on Ubuntu.
What is dbForge Studio for SQL Server?
dbForge Studio for SQL Server is an all-in-one IDE designed to cover all possible database-related tasks, from database development to testing, data generation, and administration.
Ready to work with SQL Server on Linux? Check a comprehensive video tutorial on how to install dbForge Studio for SQL Server to streamline your routine.
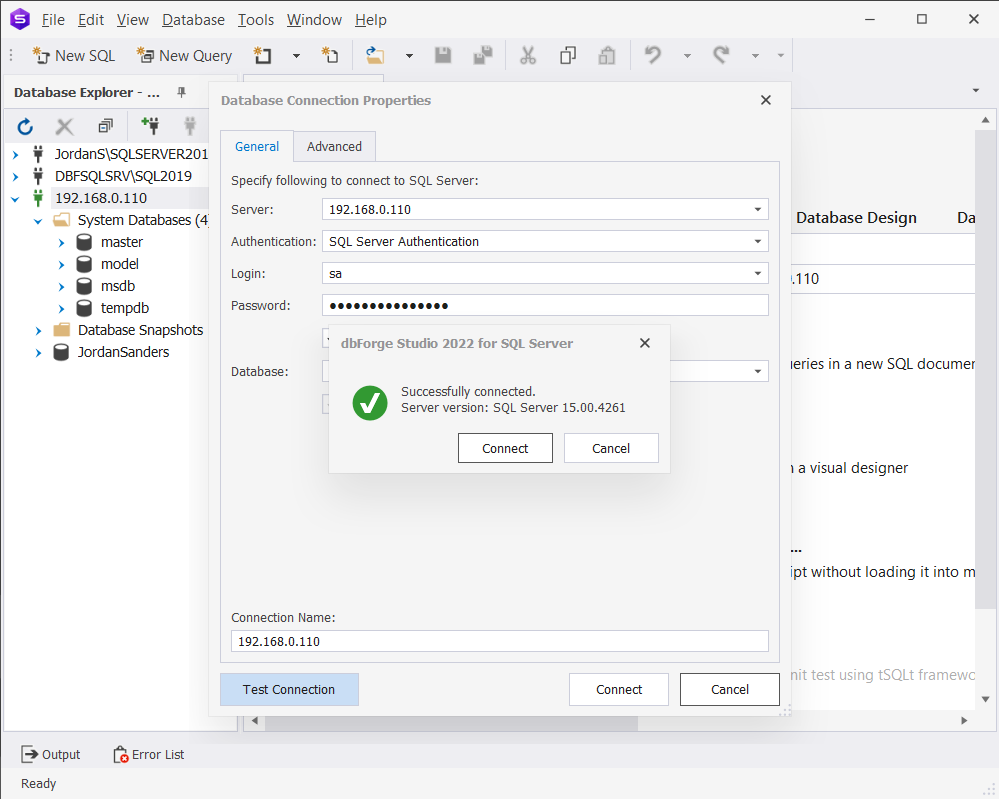
To connect to SQL Server on Ubuntu
- Run the Studio.
- On the Database Connection Properties > General tab, specify the connection details:
Server: Select the server from the drop-down list.
Authentication: Choose the authentication mode from the drop-down list. We select SQL Server Authentication.
Login and Password: Enter the user credential details respectively. By default, the password is saved automatically. If you don’t want to save the password, clear the Allow saving password checkbox.
Database: Enter the name of the SQL database you want to connect to or select the database from the drop-down list. By default, the Show all databases checkbox is selected. If you want to hide all available databases in Database Explorer, clear the checkbox.
Connection Name (optional): The connection name is generated automatically from the host name. If you want to create a distinctive name for the connection, type the new name.
Environment Category (optional): Select the document category (Development, Production, Sandbox, and Test) from the drop-down list. - Click Connect.
Do you know that with dbForge Studio for SQL Server, you can increase your daily efficiency by 20%? Learn more about its key features.
How to uninstall SQL Server on Ubuntu
Step 1: Check SQL Server Service status
Run the already known command to check the status of your SQL Server.
sudo systemctl status mssql-server
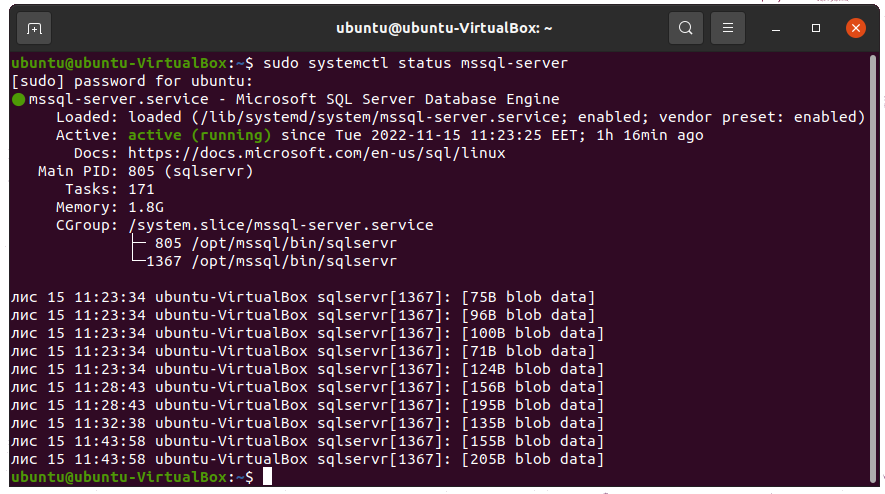
As you can see, our server is active and running.
Step 2: Remove the mssql-server package
Run the following command to remove the mssql-server package on Ubuntu.
sudo apt-get remove mssql-server
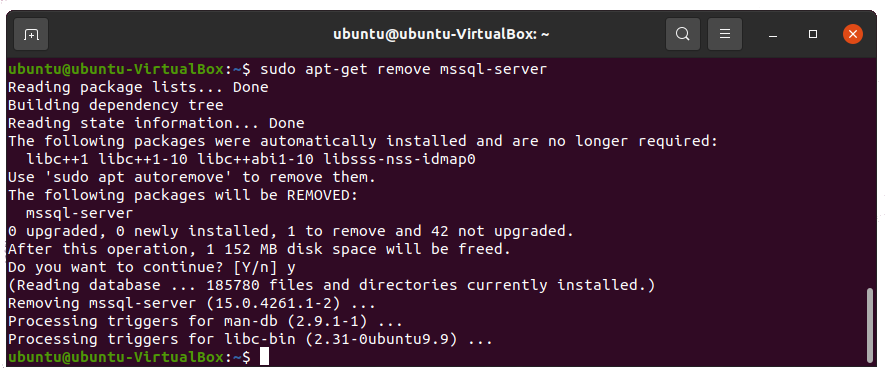
Note
Removing the mssql-server package will not delete the generated database files. To remove all the database files, run the following command.
sudo rm -rf /var/opt/mssql/
Conclusion
Linux is chosen over the rest of the operating systems because of its security and reliability. In this article, we have reviewed how to install SQL Server and its accompanying tools on Ubuntu, which is the most popular Linux distro. We have demonstrated how to connect to SQL Server both locally and remotely, how to create a SQL Server database, and how to uninstall SQL Server from the Ubuntu system. We have also covered the question of using a convenient GUI tool – dbForge Studio for SQL Server – to connect remotely to SQL Server running on Ubuntu. And now we invite you to download and test-drive the Studio to personally evaluate its powerful database development and management capabilities.
More than that, you can connect to your SQL Server running on Linux not only from dbForge Studio, but also from any tool belonging to the dbForge for SQL Server product line.
