
Manual updating of Salesforce records is far from optimal. If you have ever worked with this CRM, you should know it requires you to find the exact record you want to edit, and only then you’ll be able to change data in its fields. This is fine when you work with separate records, but what if you need to mass update records in Salesforce? If done manually, such an update might eventually lead to errors and consume time.
On the other hand, using Excel instead of CRM isn’t an option, even though it provides you with everything for bulk editing. But what if you could use Excel to perform such bulk updates?
It’s easier than you might have thought, and you won’t have to manually export and import records in CSV format to do the job.
In this article, we’re going to explore the cases in which mass updates are essential and dive into how you can mass update records in Salesforce using Excel Add-Ins to facilitate integration.
- In Which Situations Are Bulk Edits Required in Salesforce?
- Introduction to Excel Add-In for Salesforce
- How to Install & Configure Excel Add-In for Salesforce?
- How to Connect to Salesforce Using Excel Add-In?
- How to Mass Update Records in Salesforce?
- What Type of Salesforce Records Can You Bulk Update?
- Advantages of Excel Add-Ins for Salesforce
- Conclusion
In Which Situations Are Bulk Edits Required in Salesforce?
There are quite a few cases when you have to opt for records mass update in Salesforce, especially when you intend to use this data outside of CRM or plan on creating a combined data source.
Let’s overview them in a nutshell.
Adding & Updating Information
This is the most common case. For instance, at some point, you might need to change the sales figures or update contact information with the fresh data you have collected later. In such a situation, mass updates will work far better than old-fashioned copypaste.
Data Cleansing
Over time, data becomes depleted and accumulates inaccuracies. Bulk editing in Excel, on the other hand, lets you clean up your Salesforce records by removing duplicates, updating stale information, and correcting errors.
Standardizing Data
Creating accurate reports is impossible without data standardization. To ensure the consistency of your Salesforce data, you can use Excel, which supports custom data formats and will help you ensure its further usability.
Large-Scale Data Changes
Your company goes through a rebranding or changes its structure? Applying bulk edits in Excel will save your team a lot of effort, and you’ll be able to make changes in the Salesforce database literally in minutes.
Introduction to Excel Add-In for Salesforce
Before we explore bulk editing, let’s check how we can connect Excel and Salesforce CRM. To do it, you don’t necessarily have to export and import data manually since there’s Excel Add-In for Salesforce, which will let you quickly load data from Salesforce into Excel for further updates and manipulations.
With this tool, you’ll be able to:
- Load your records data from Salesforce into Excel and back
- Refresh the data whenever it gets updated
- Use SQL and SOQL to query the specific data you want to pull
- Validate the data you enter, highlighting any errors
Moreover, if you even get unfortunate enough to get offline before you finish editing, your updates will be safe and sound, and the moment you get online, you’ll be able to sync with Salesforce once more and push the updates.
How to Install & Configure Excel Add-In for Salesforce?
Now that we have explored the cases in which you can opt for Excel, and learned more about the add-ins that can facilitate the task, let’s move on to the process details.
Installing and configuring the Excel Add-In for Salesforce is very simple. Follow the steps below to set everything up.
- Download the Excel Add-In for Salesforce from its official page. You can use a trial version to try it in action.
- Run the installer and follow the on-screen instructions to complete the installation process.
- Once the add-in is installed, open Excel and locate a new Devart tab. Here, you can access all the features of the Excel Add-In.

How to Connect to Salesforce Using Excel Add-In
Connecting your Excel Add-In to Salesforce is a crucial step to start working with your data. The process involves logging in with your Salesforce credentials and using a security token for authentication.
How to Get a Security Token From Salesforce
To connect to Salesforce, you’ll need your security token. Follow the guide below to obtain it.
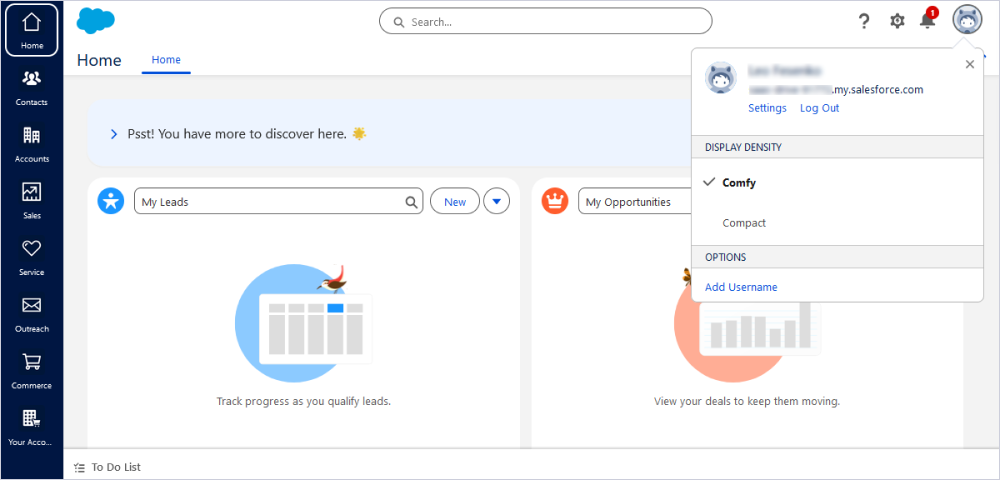
- Log in to your Salesforce account.
- Go to your profile and select Settings option.
3. Navigate to the Reset My Security Token section.

4. Request a security token reset.
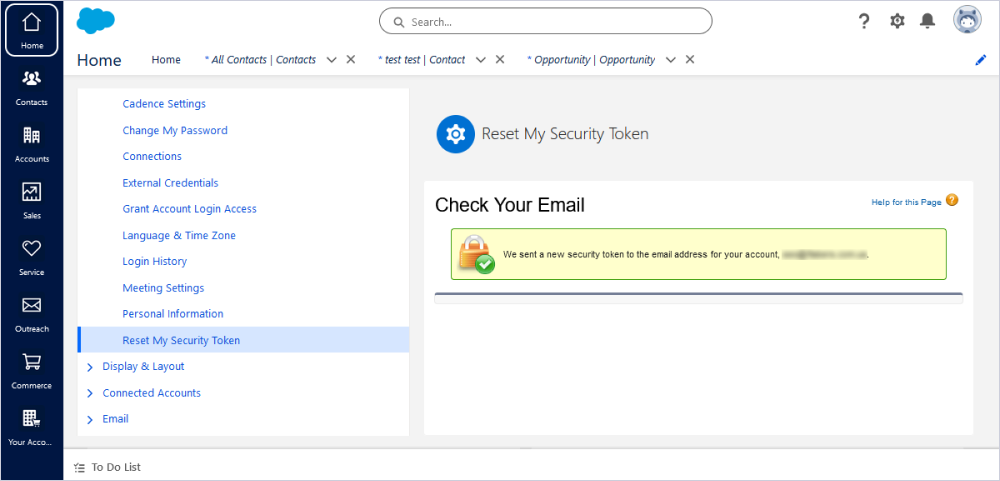
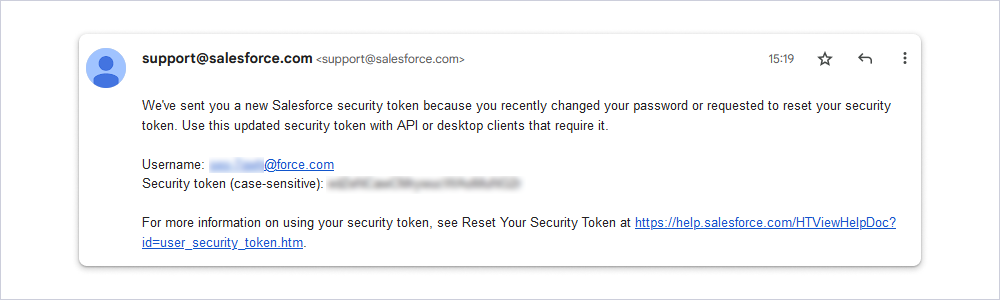
5. A new token will be sent to your email.
How to Connect to Salesforce
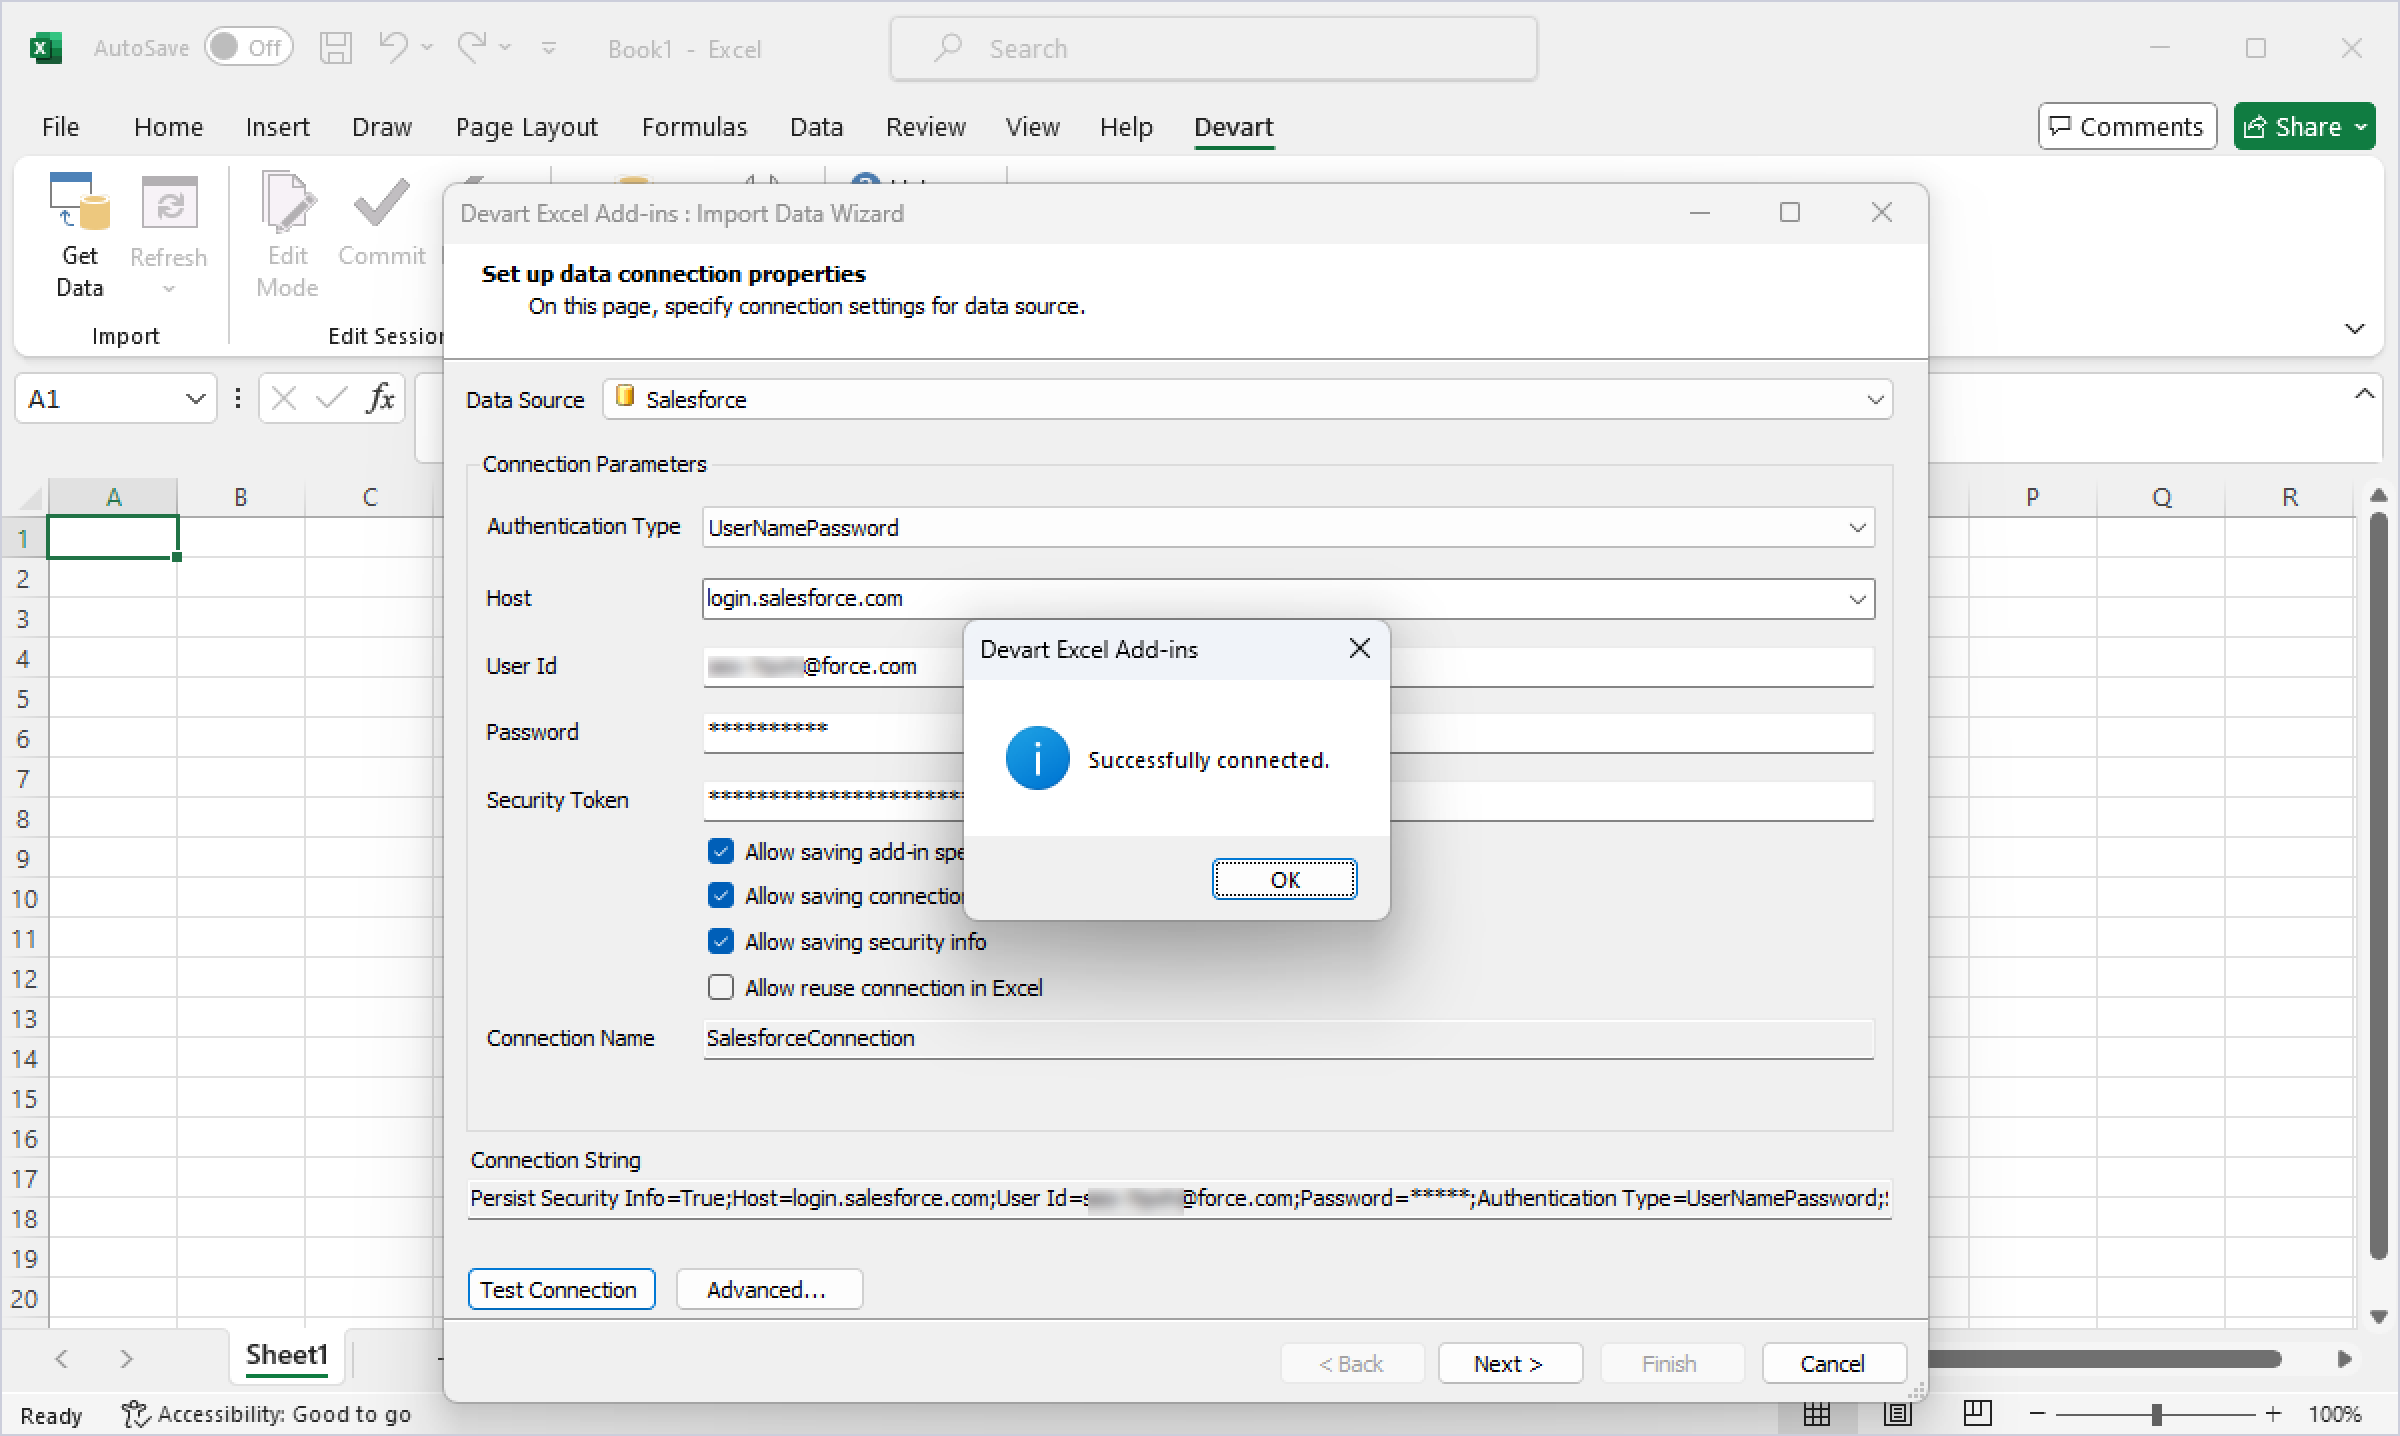
Once you have your security token, follow these steps to connect to Salesforce.
- In Excel, go to the Devart tab and select the Salesforce option.
- Choose the appropriate authentication type and enter your Salesforce host, login, password, and security token.
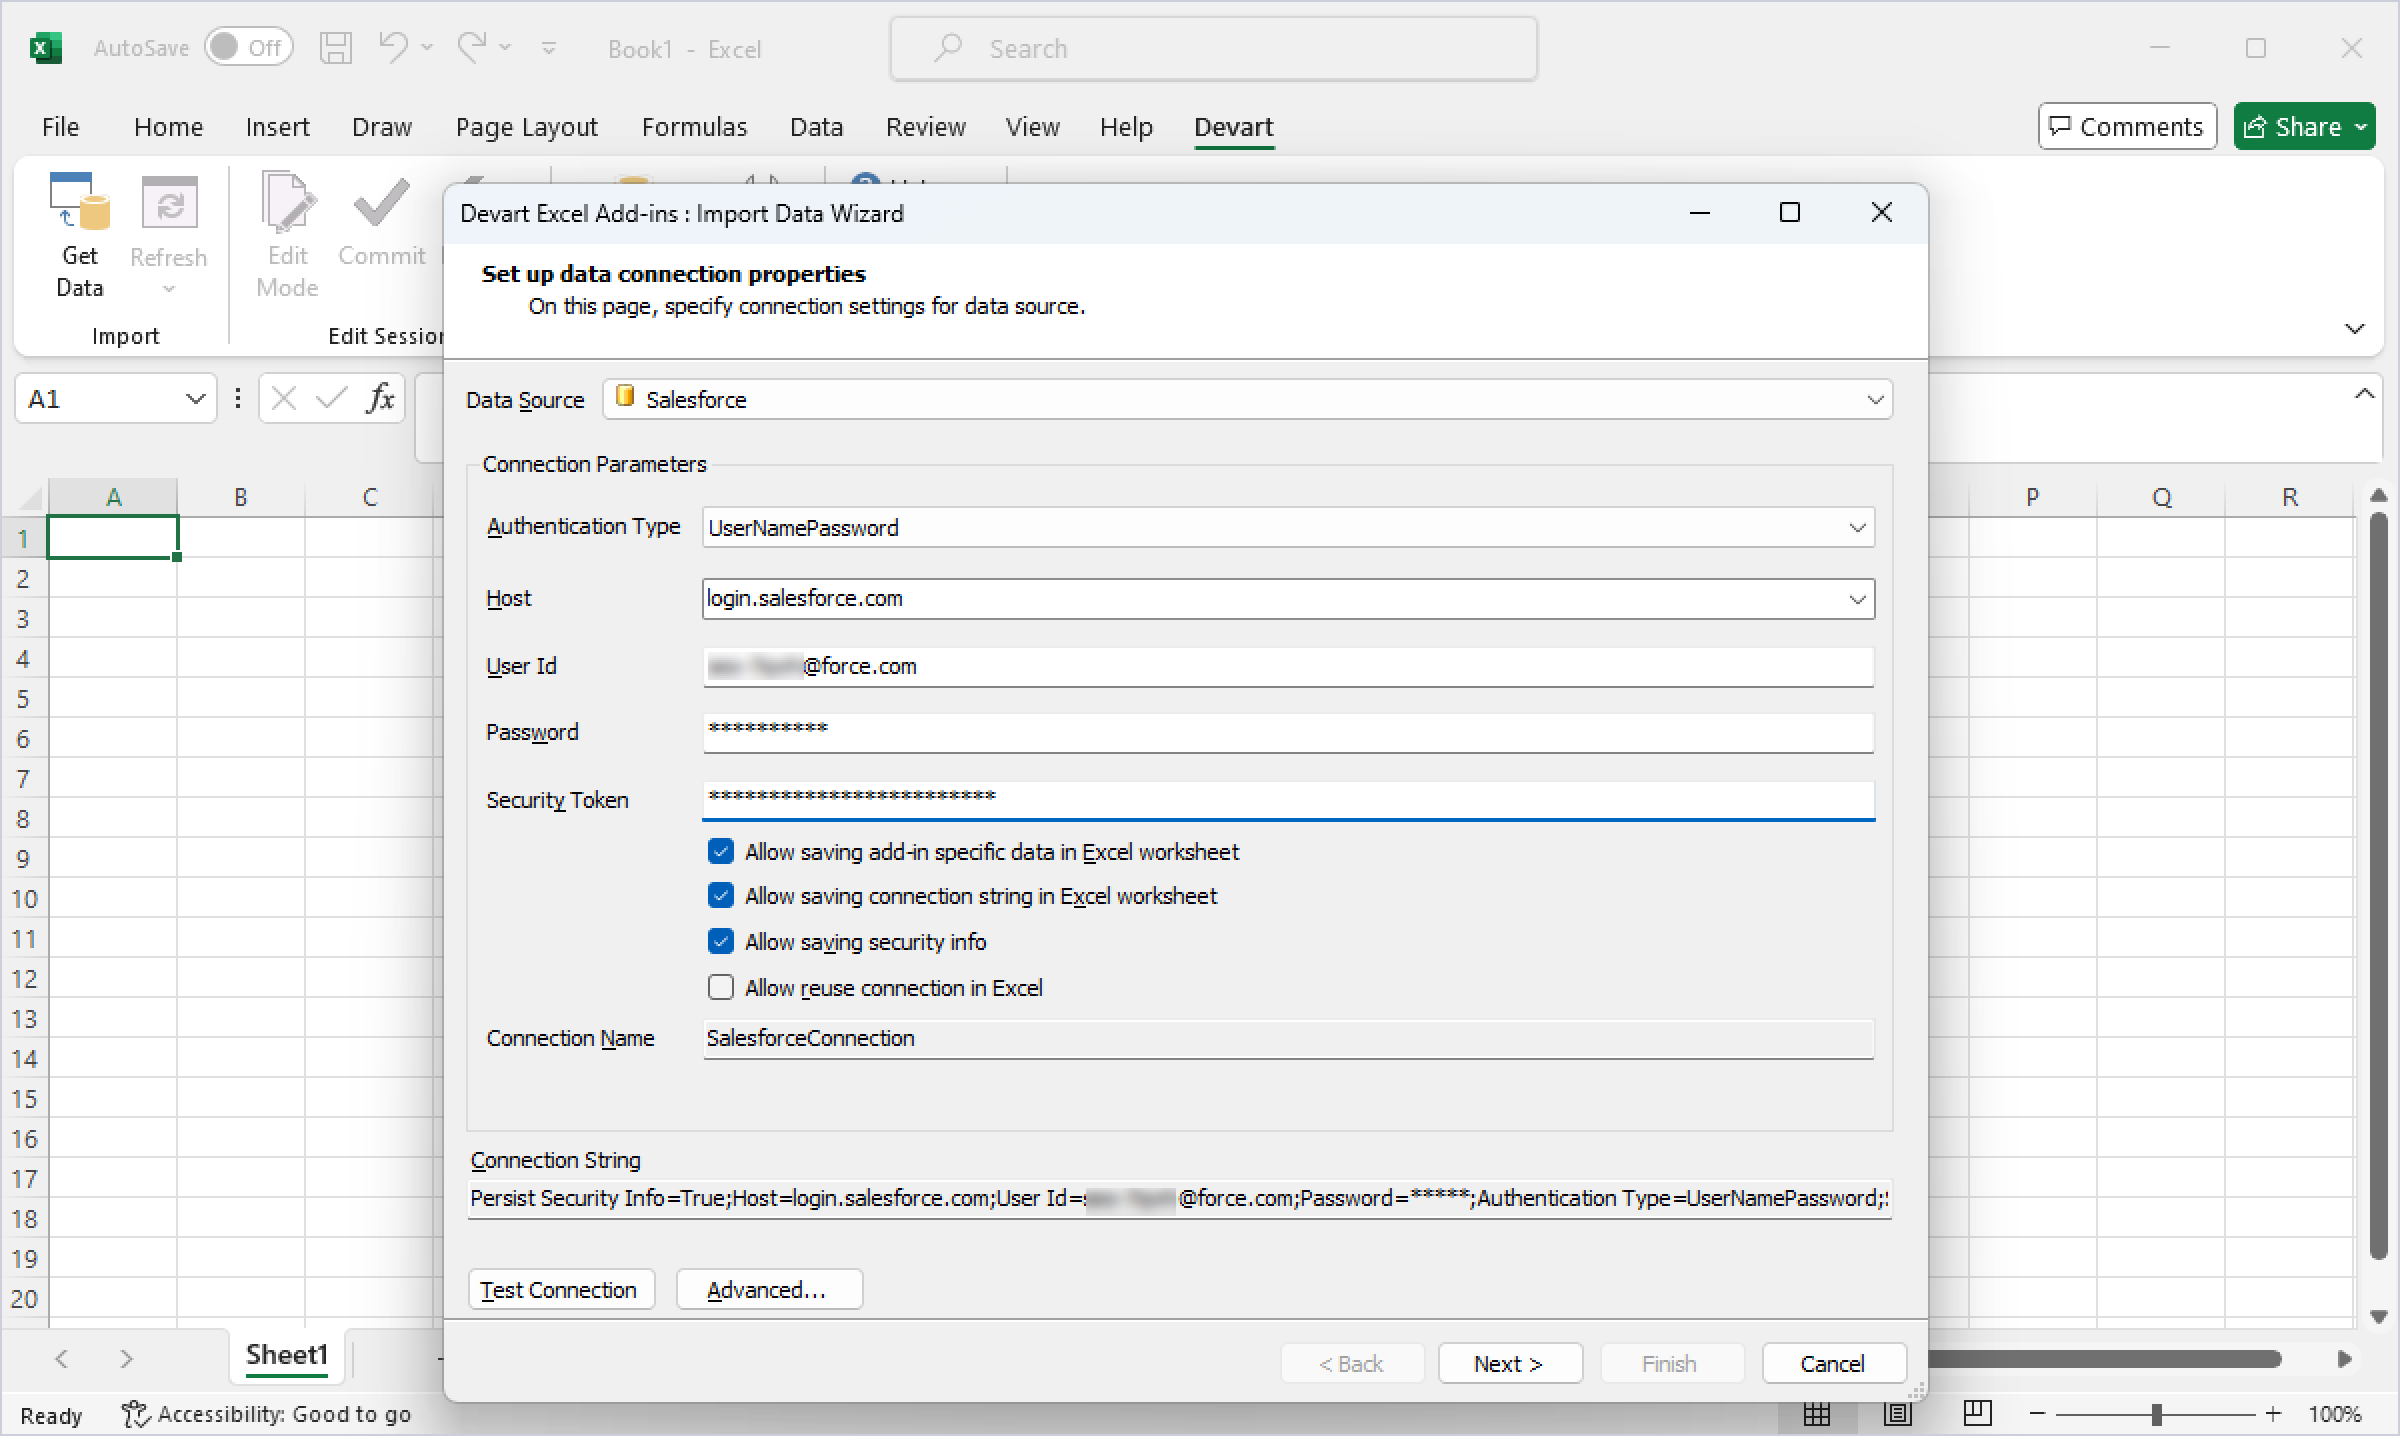
3. Test the connection to ensure everything is set up correctly.
How to Mass Update Records in Salesforce
Now that you have connected Excel with Salesforce, let’s move on to mass updates. This section will guide you through the practical steps of importing, editing, and updating data.
Import Salesforce Contacts into Excel
To start, you need to import the relevant data from Salesforce into Excel.
- Select the Contact table for data import.
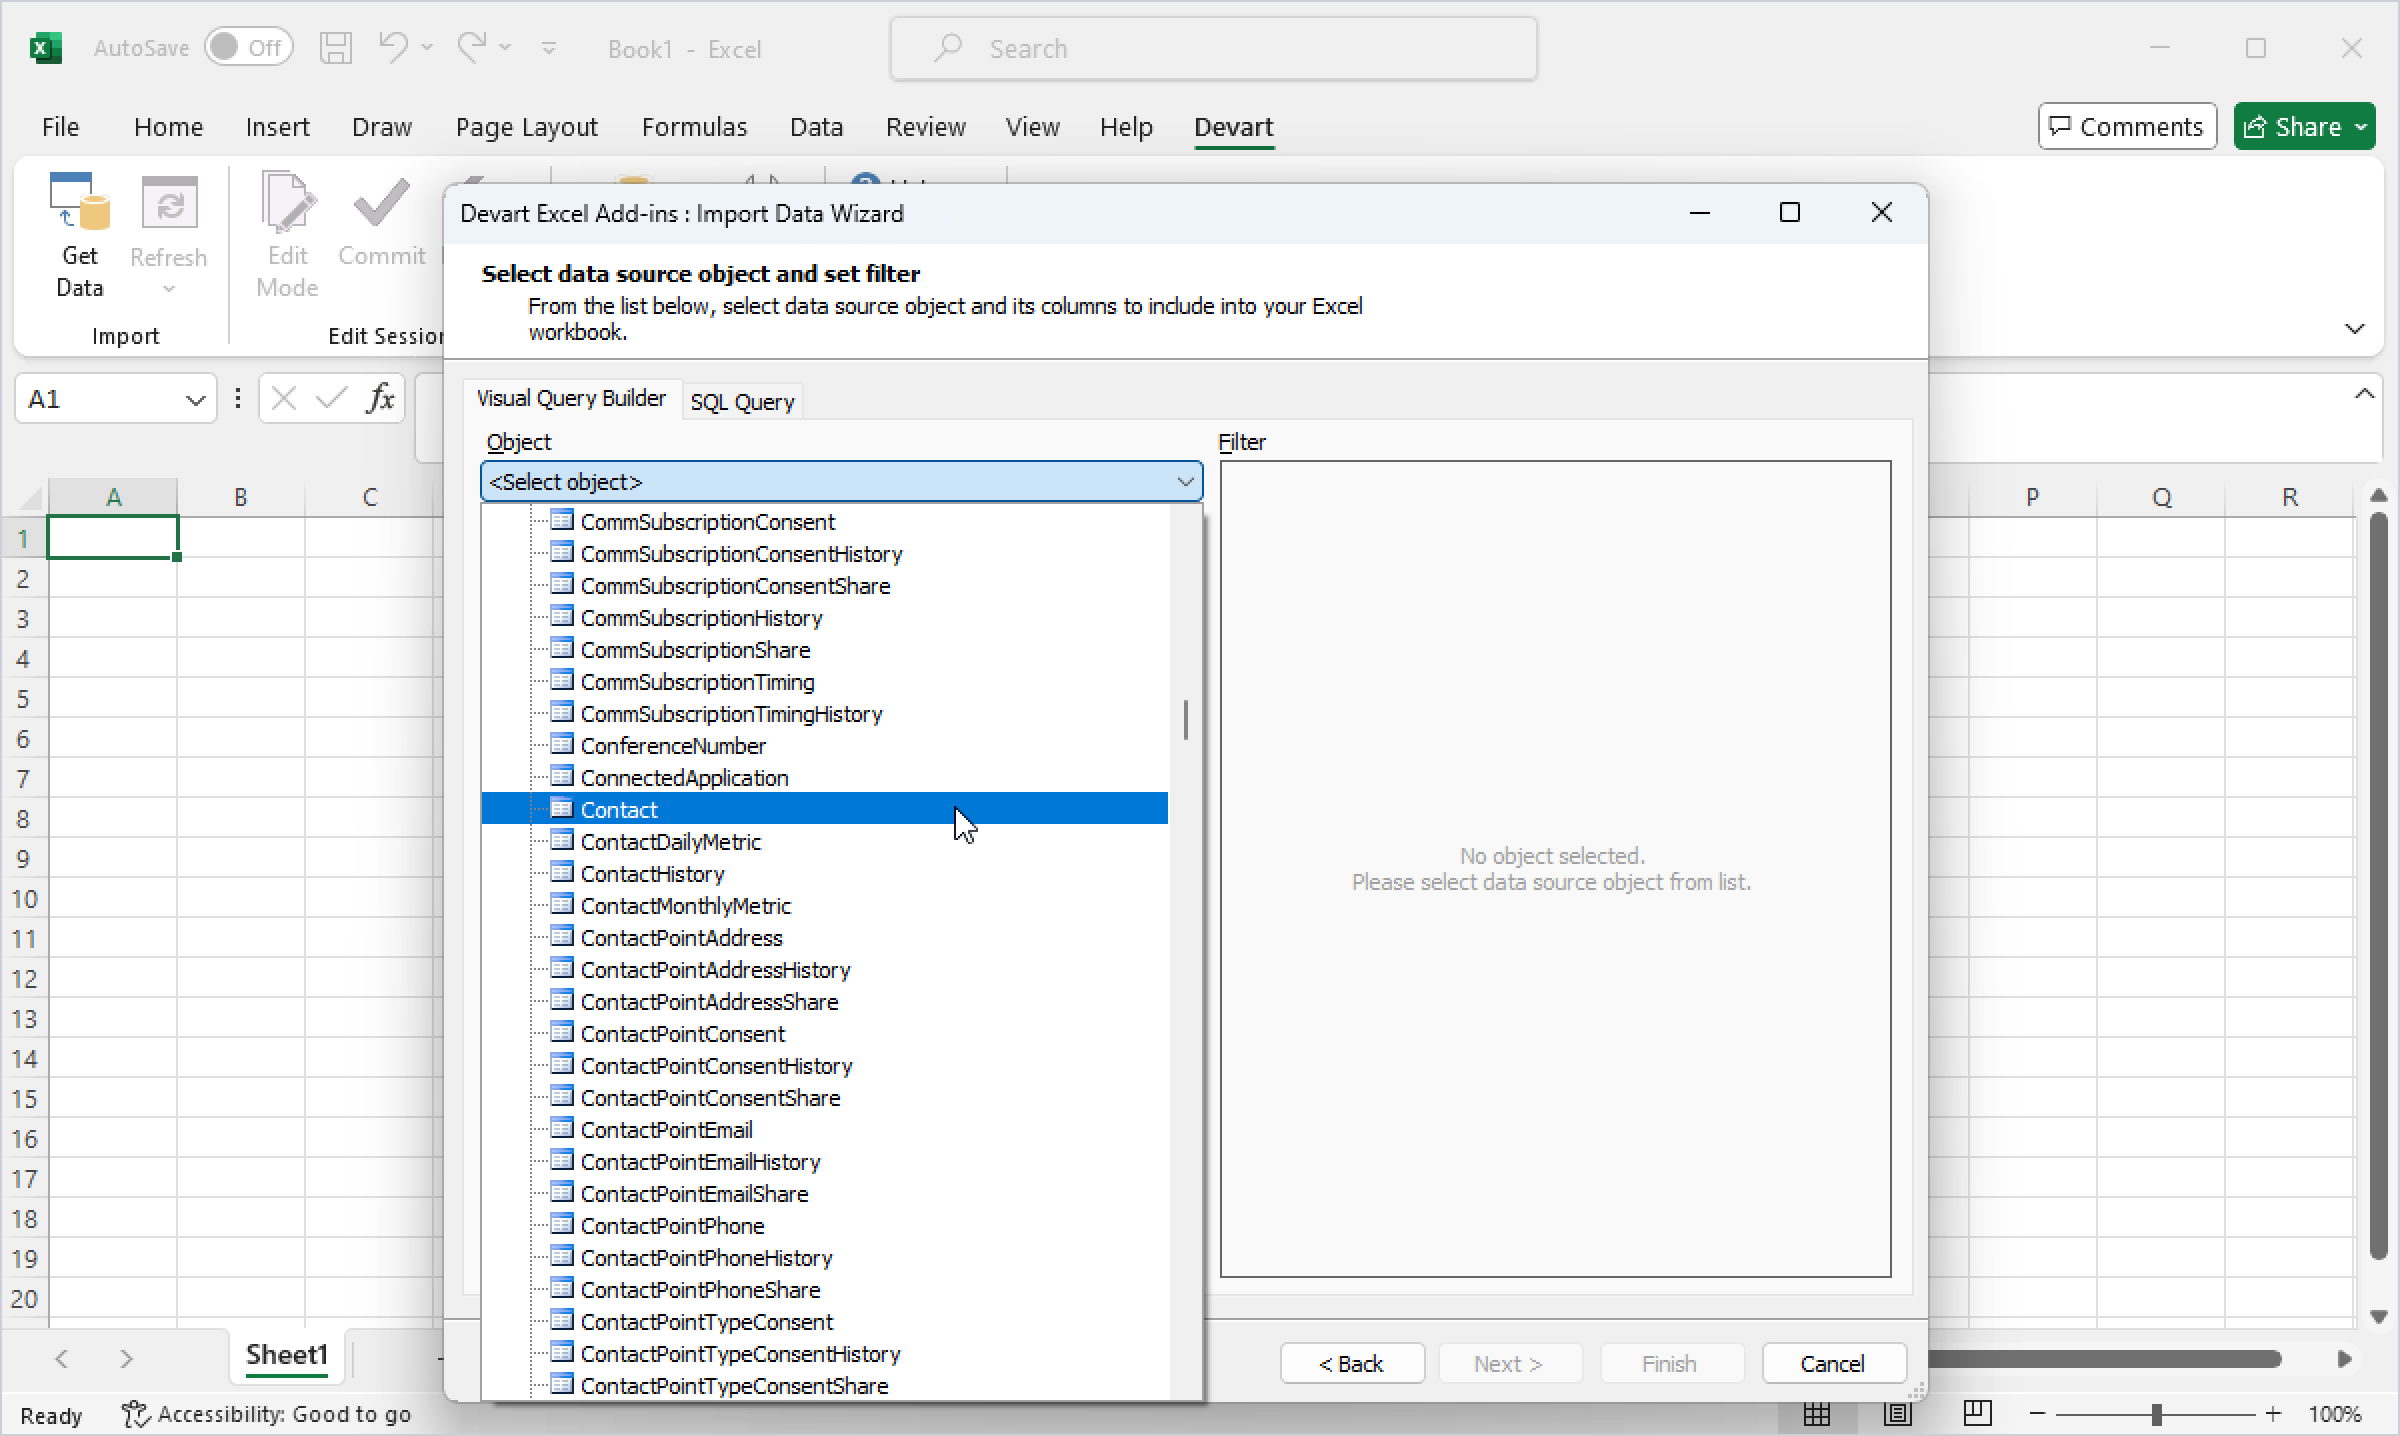
2. Choose the data that you would like to import.

Alternatively, you can use SQL query to import the data that matches specific criteria only.
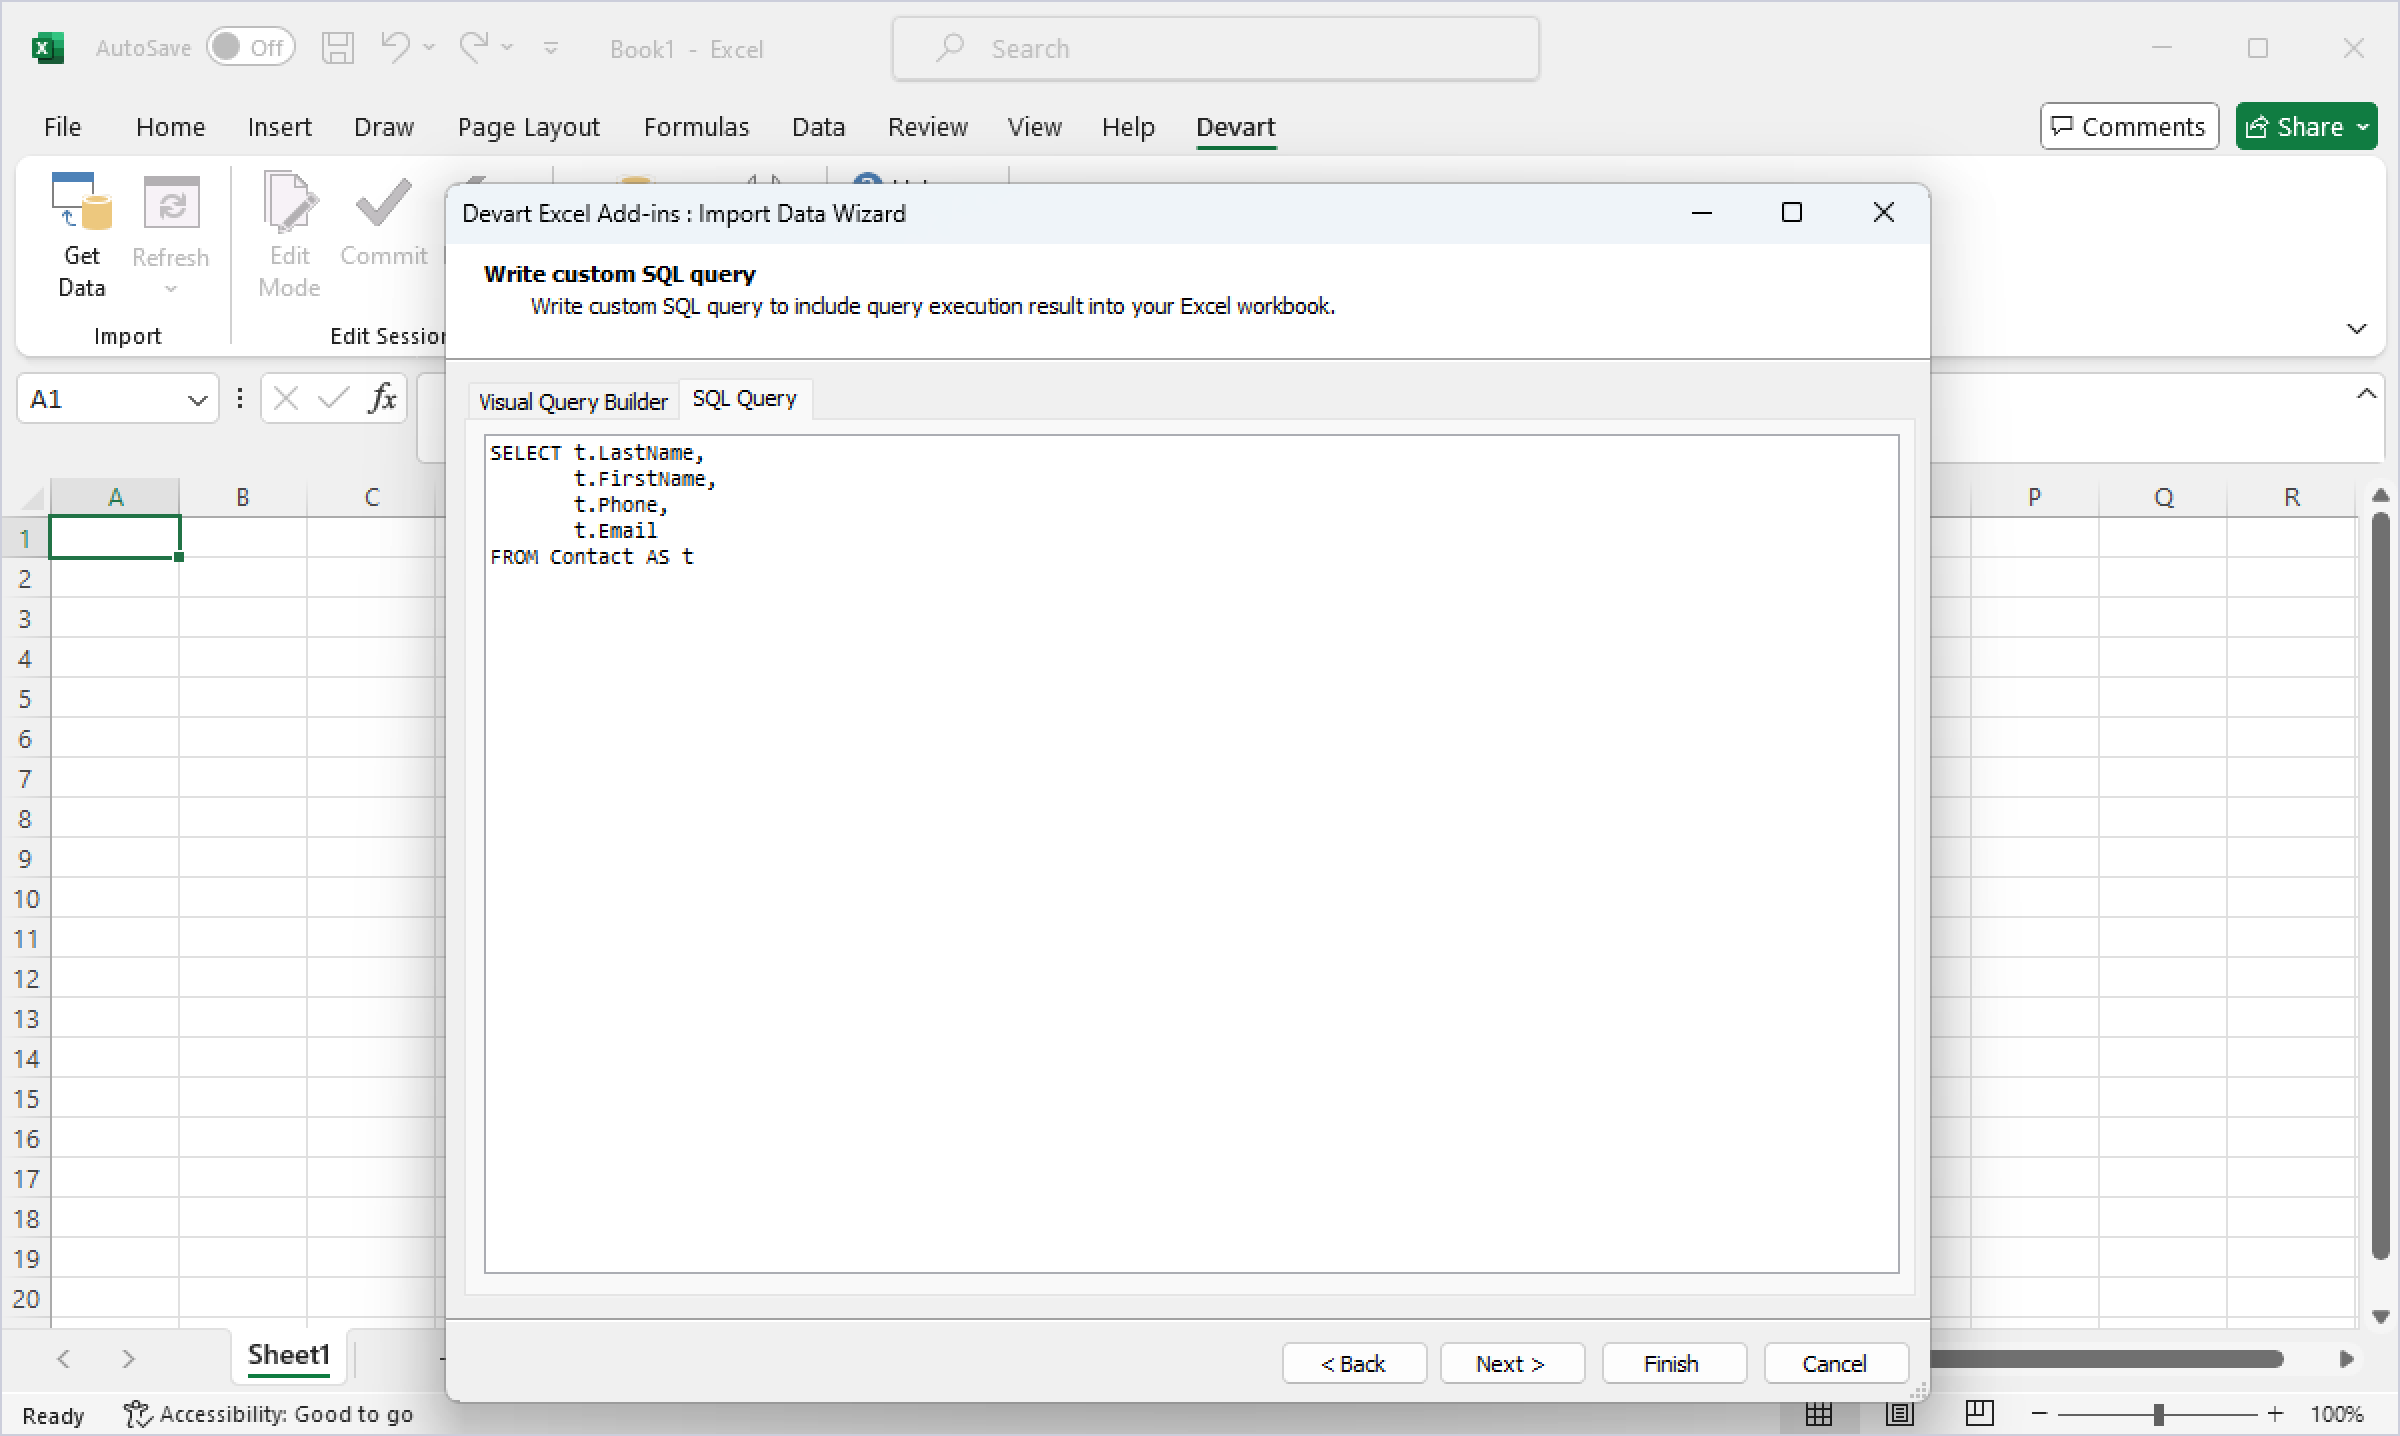
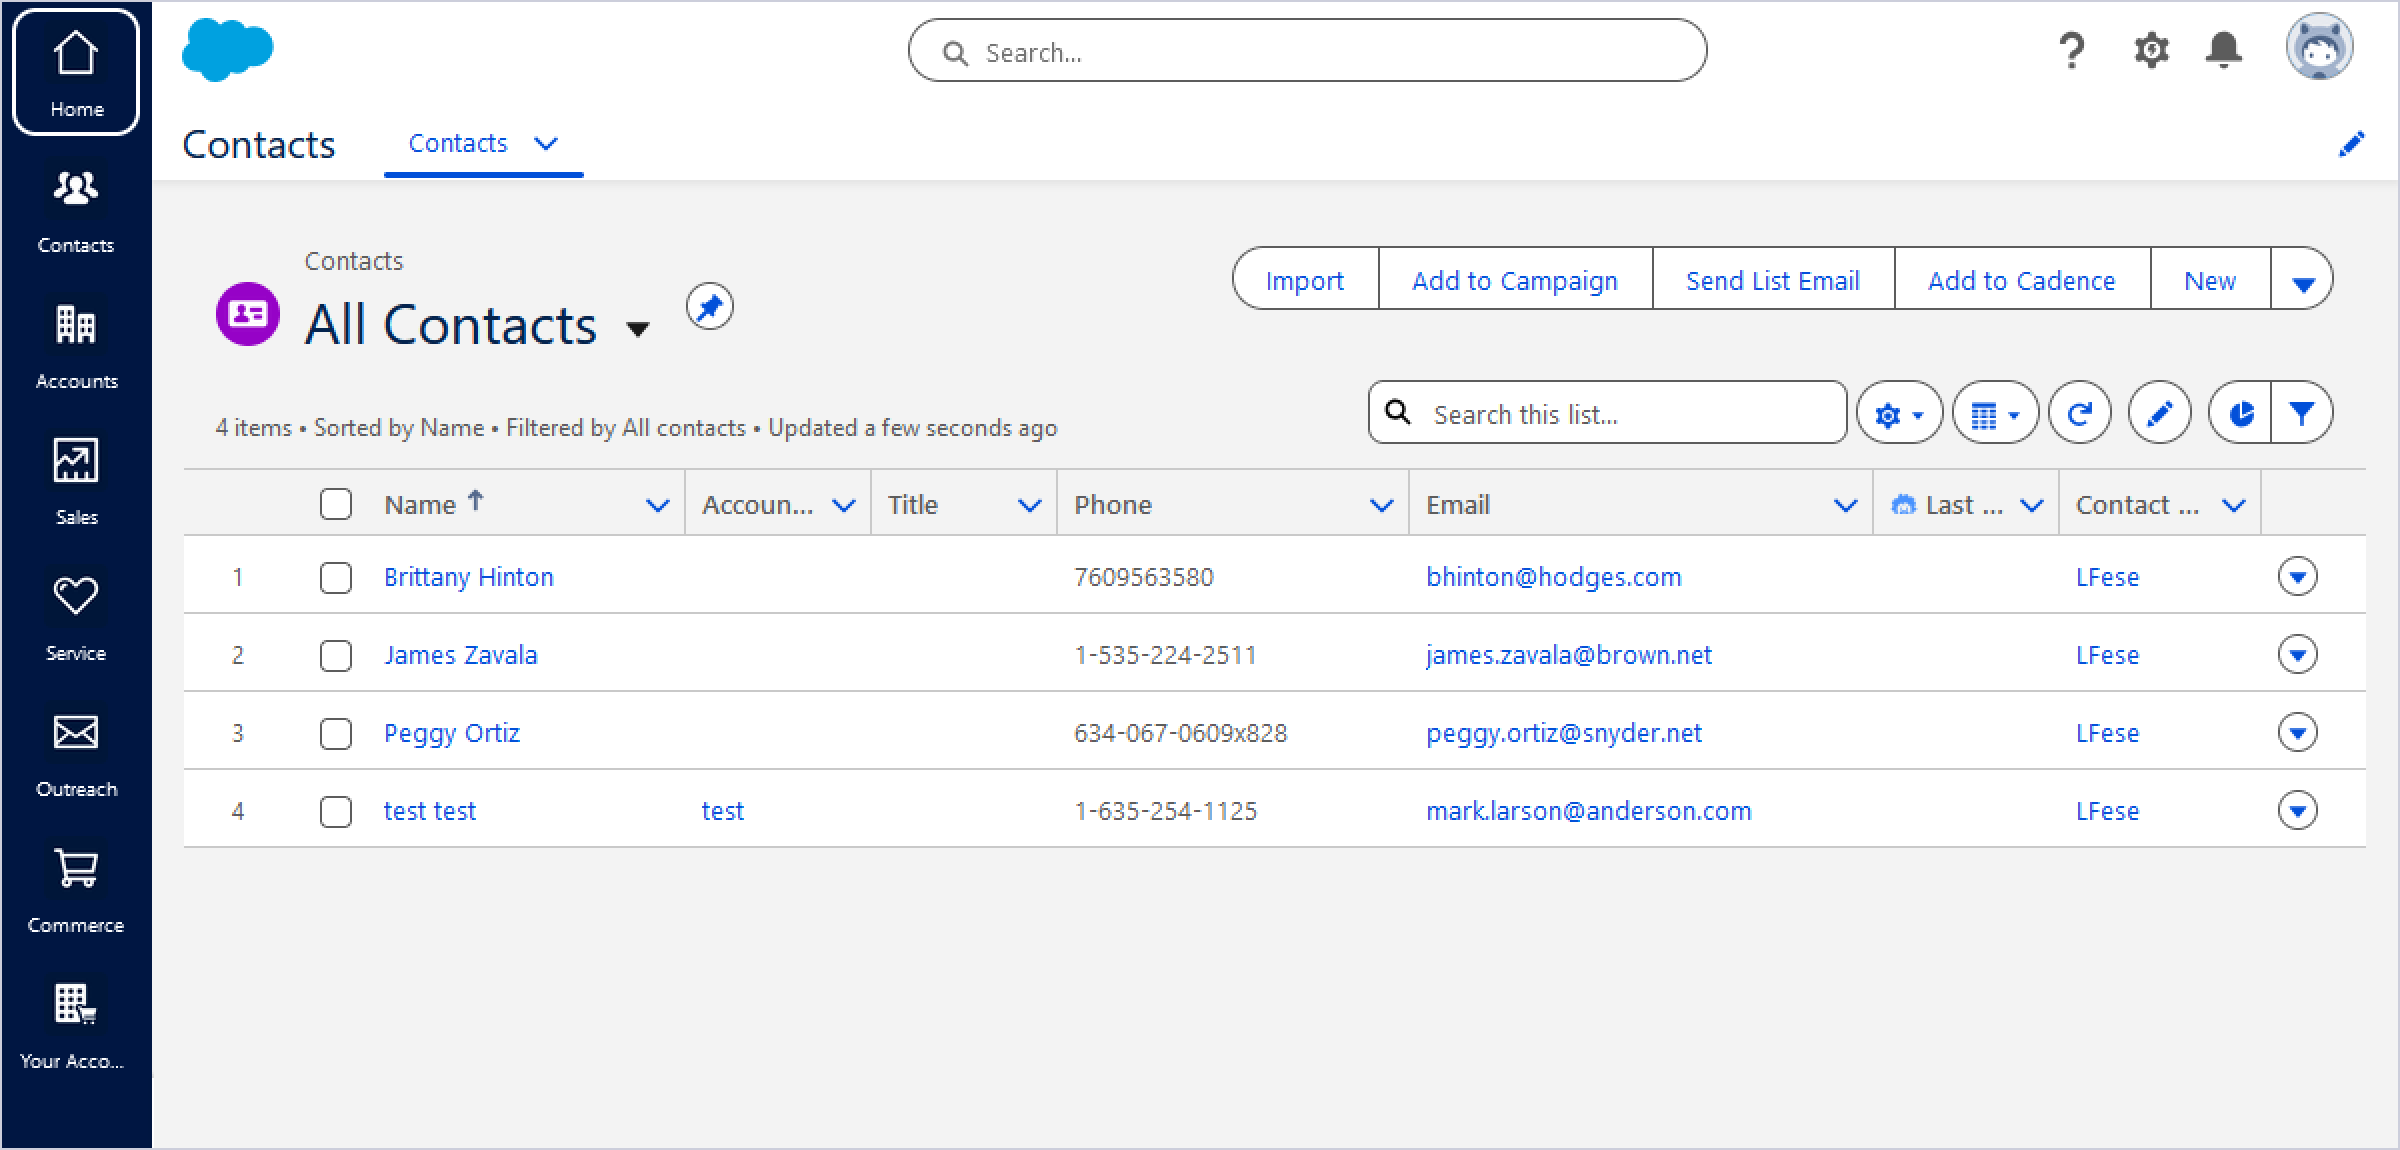
In our case, we’ll import the Last Name, First Name, Phone, and Email records.
Bulk Edit or Add New Records
With all this data imported, you can now enter the Edit Mode to make further changes.
- Update the necessary records or add the new ones directly in Excel.
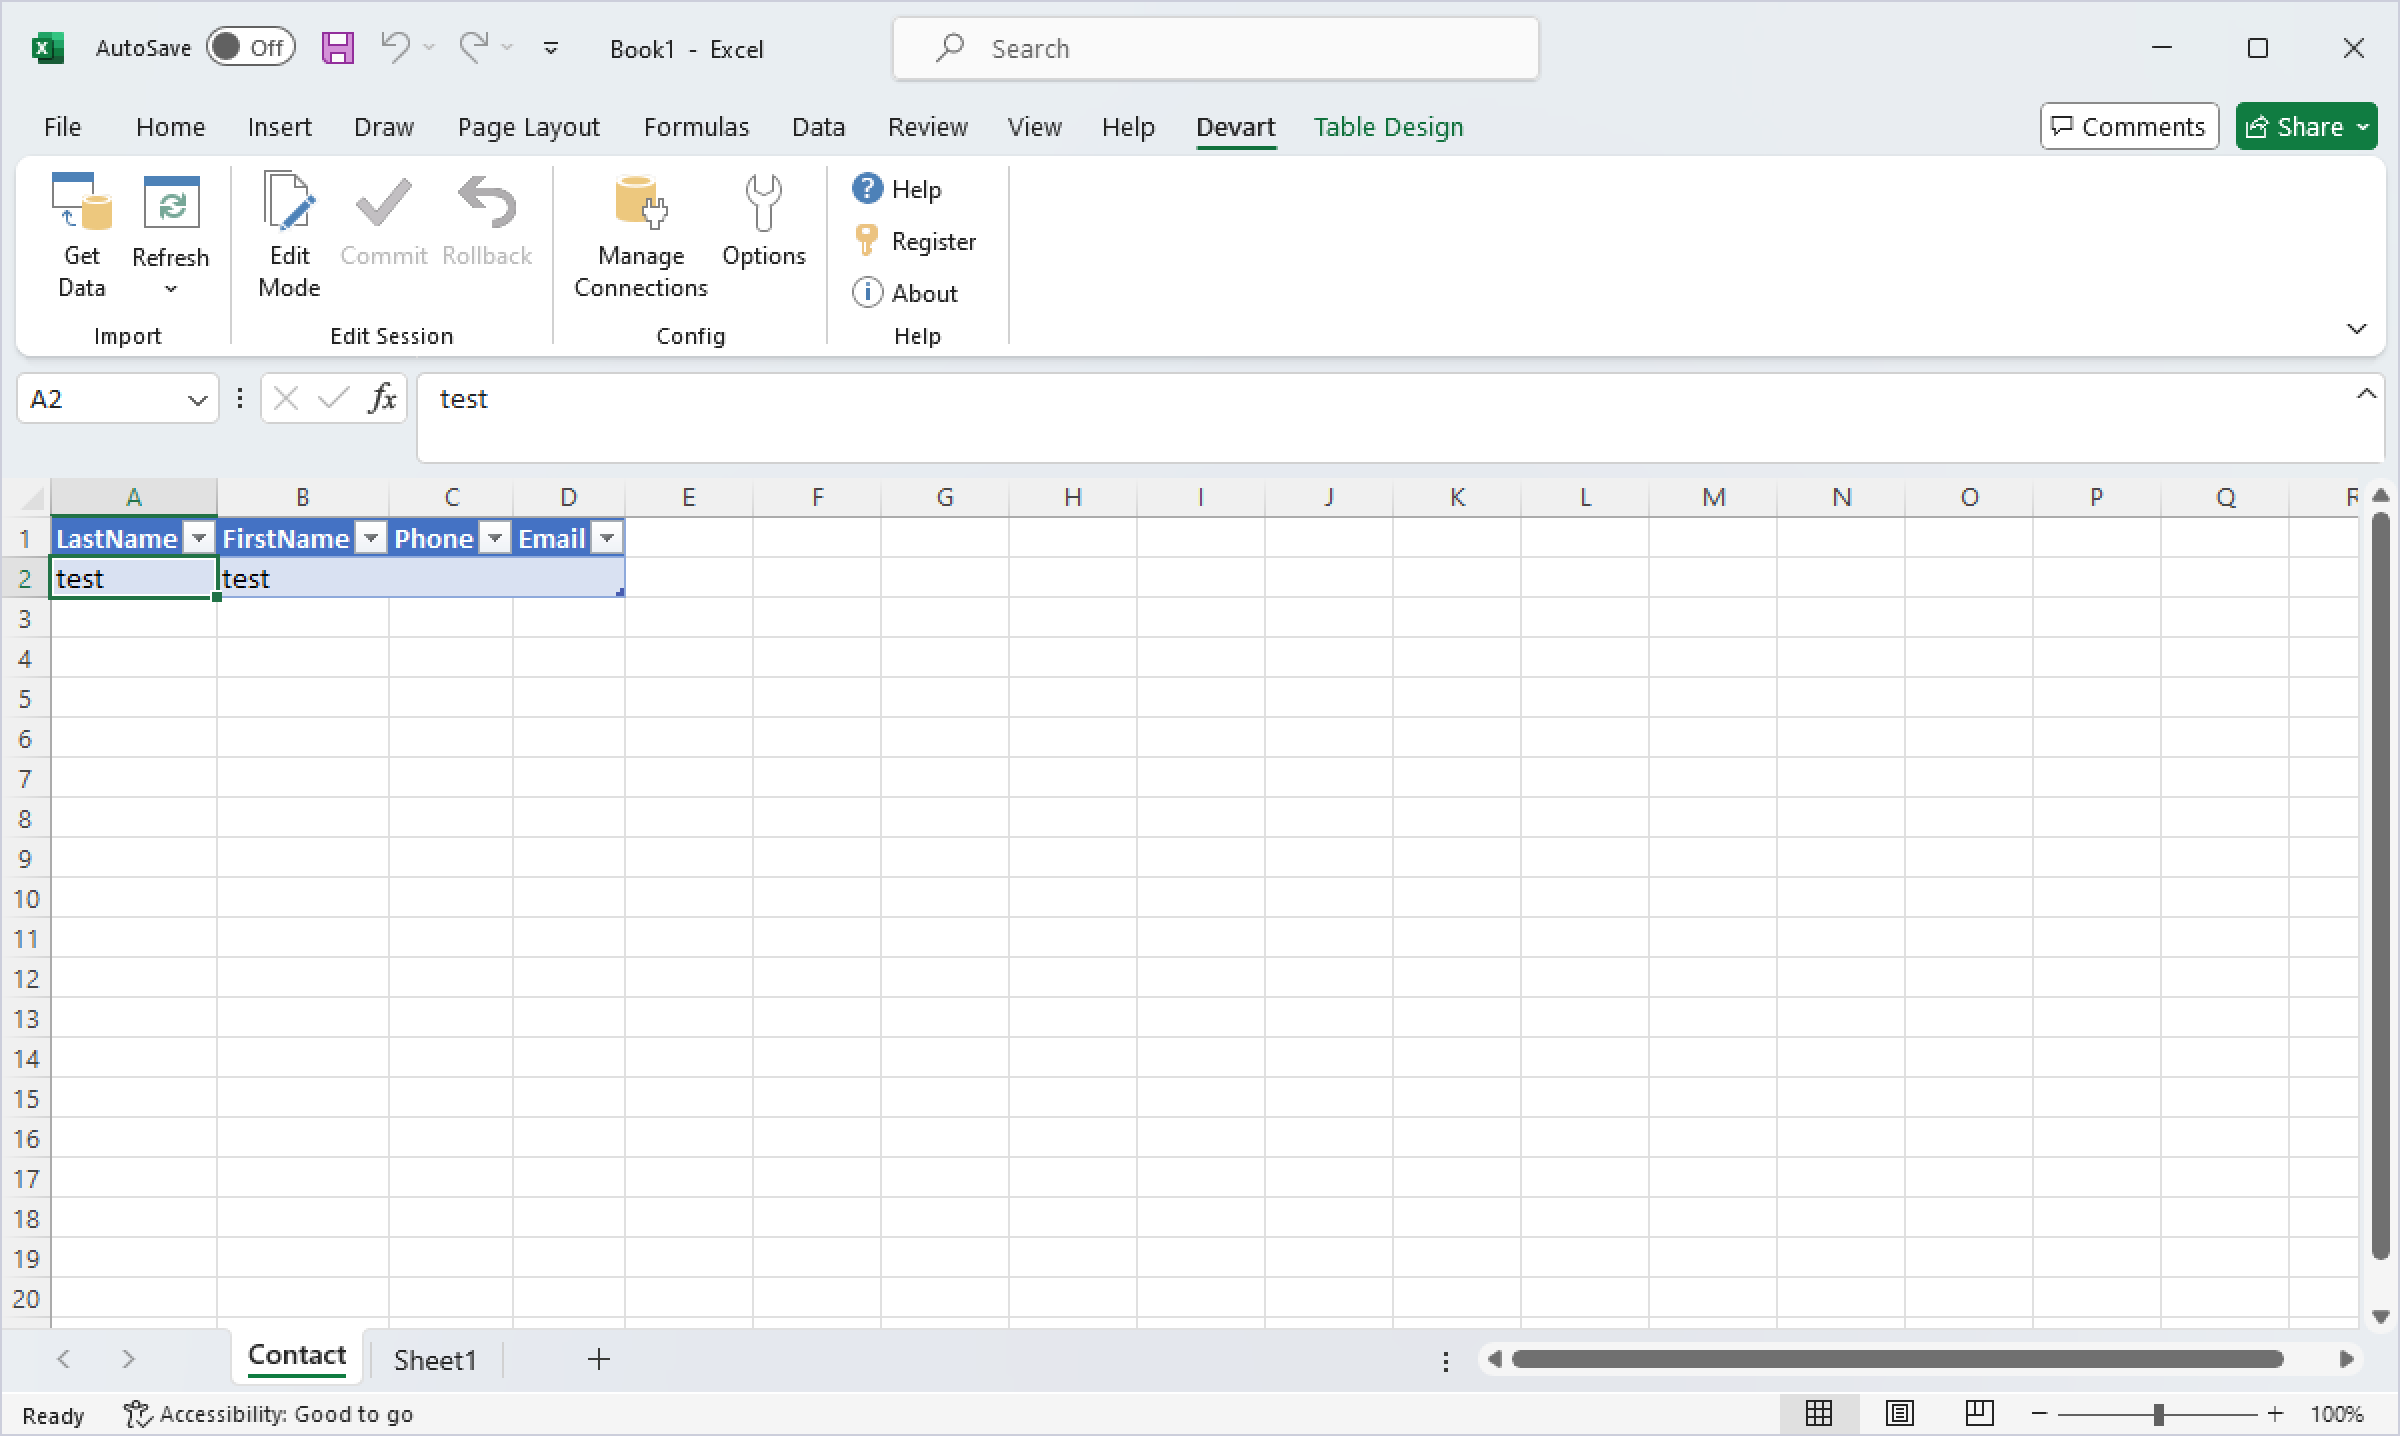
2. Once you’ve made your changes, click Commit to update the records in Salesforce.
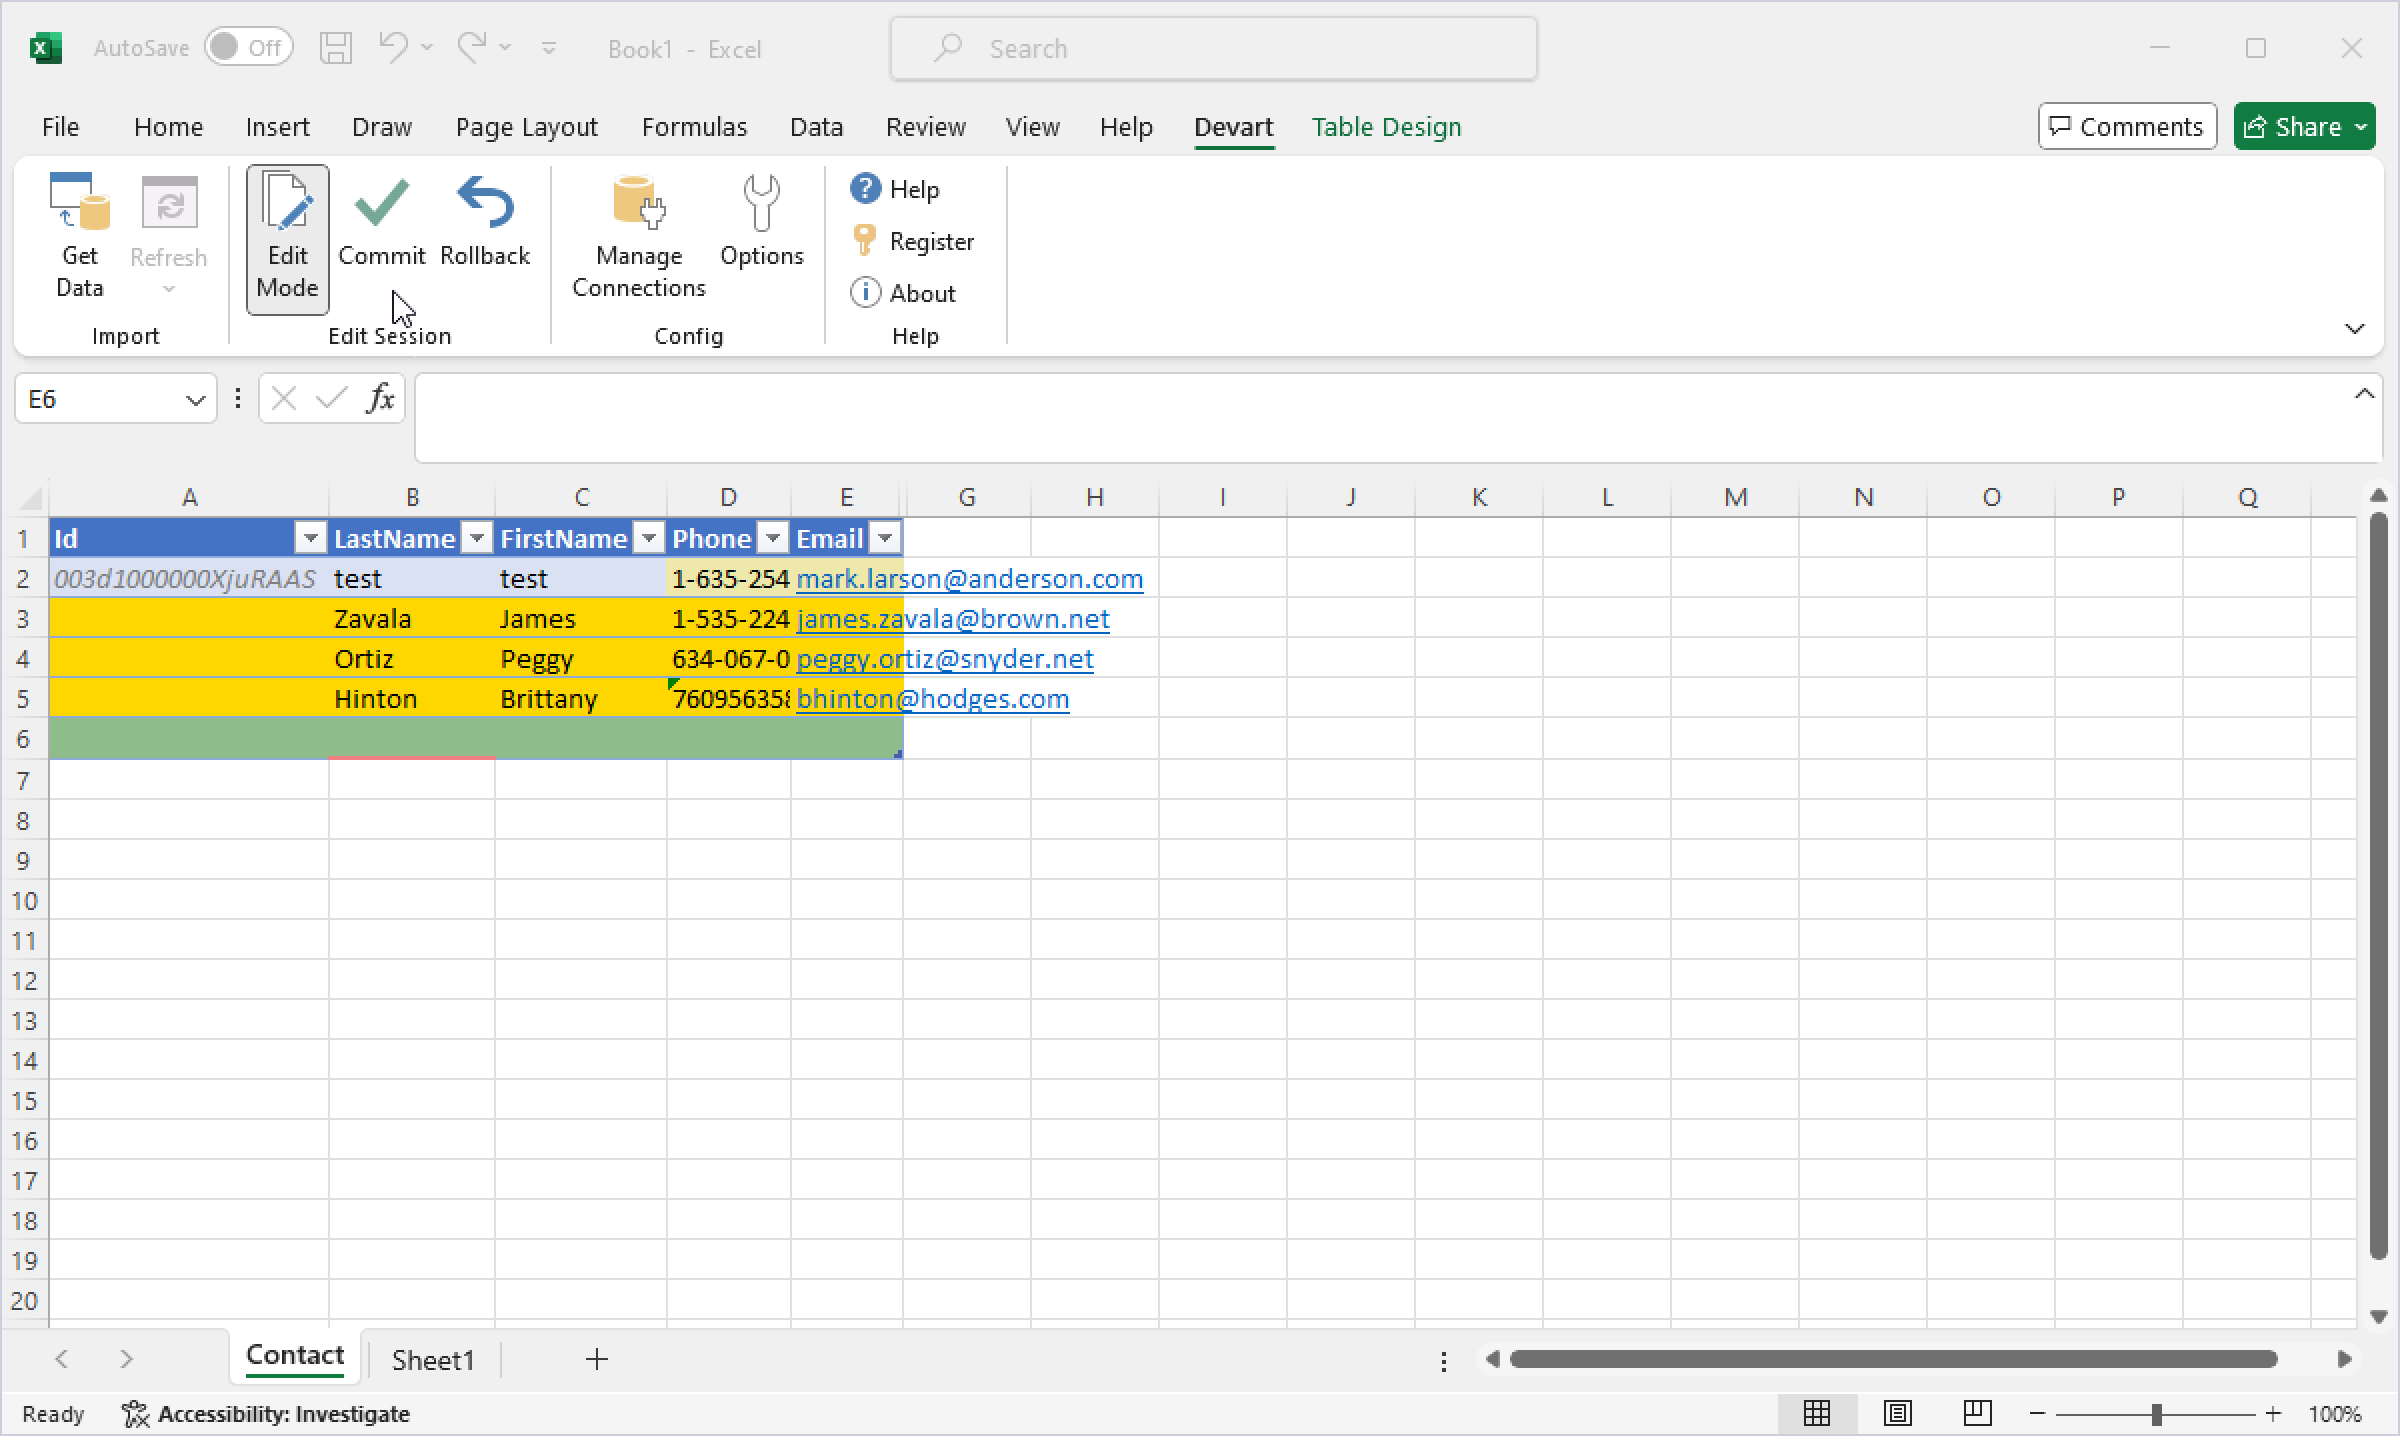
3. Verify the updates by checking the records in Salesforce.
What Type of Salesforce Records Can You Bulk Update
Now that you know how to set up the data import and export process, you can update records in Salesforce masses without breaking a sweat.
With Excel Add-In for Salesforce, you will be able to:
- Update lead information (status, source, or contact details).
- Modify sales opportunities (stage, value, or close dates).
- Manage customer support cases by updating statuses, priorities, or assigned agents.
- Edit or add tasks and activities for better productivity tracking.
- Adjust campaign details, such as start dates, budgets, or participant lists.
- Update calendar events to reflect new schedules or cancellations.
- Manage payment records, including amounts, dates, or statuses.
- Edit account information, such as names, billing addresses, or account types.
- Update rich text fields with formatted content.
- Modify list views to display specific data sets.
Advantages of Excel Add-Ins for Salesforce
With Excel Add-In for Salesforce, you will get increasingly better at keeping your Salesforce data clean, concise, and up-to-date. However, the features explained in this article cover only the basics of using this add-in. There is even more to it, especially when you work with several data sources that need to be kept updated and relevant.
You can use Excel Add-Ins from Devart to:
- Connect more than 20 cloud apps and databases with Excel
- Automate the process of refreshing the latest records
- Minimize errors with less manual entries

Conclusion
Whenever you manage data in Salesforce or have to ensure its consistency, Excel Add-Ins will save you time. With its help, you’ll easily be able to add new information, cleanse data, or make large-scale updates. This tool provides the flexibility and precision to keep your Salesforce data up-to-date and reliable.
Ready to streamline your Salesforce data management? Try our Excel Add-In for Salesforce with a free trial today and experience firsthand how it can transform your workflow!