
In database management, PostgreSQL is gaining more popularity for its full-featured set, reliability, and performance. This free and open-source database system supports relational and non-relational querying and allows defining custom data types, operators, and functions to tailor the database to specific requirements.
As PostgreSQL’s popularity grows, alternative means of installing a PostgreSQL server on different operating systems have also emerged. For example, for the installation on macOS, you can use Postgres.app, Homebrew, MacPorts, or Fink.
In this article, we’ll guide you through a native PostgreSQL server installer and the alternative installers of a PostgreSQL server for macOS, such as Postgres.app. In addition, we’ll analyze the benefits and disadvantages of each installer to help you decide on which one is the best choice for you.

Contents
- Overview of a native PostgreSQL server installer
- Overview of Postgres.app
- Which tool is the best one for macOS?
- How to install Postgres.app on macOS
- How to install a PostgreSQL server on macOS using a native installer
- Why dbForge Studio for PostgreSQL is the preferred tool for database management?
Overview of a native PostgreSQL server installer
A native PostgreSQL server installer is a software package to install the official and original PostgreSQL database management system with default settings. The package provides all the necessary components to create, manage, and interact with PostgreSQL databases on different operating systems, including macOS.
A native PostgreSQL server installer is a convenient way to get an up-to-date and secure version of the database because you download it from the official website. In addition, the official installer allows you to receive the latest security and feature updates, as well as customize your database using the recommendations and resources from the official PostgreSQL website.
Overview of Postgres.app
Postgres.app is one of the easiest ways to install Postgres on macOS. It has an intuitive interface and offers a simple PostgreSQL server setup. The key advantage of Postgres.app is its ease of use, which allows managing a ready-to-use PostgreSQL server by technically unsavvy users.
Which tool is the best one for macOS?
Let’s explore the advantages and disadvantages of each installer to help you choose between Postgres.app and a native PostgreSQL server installer to suit your needs.
Postgres.app: Pros and cons
Pros:
- Easy installation suitable for beginners and experienced users.
- Convenient user interface.
- Support for multiple versions of PostgreSQL, which makes it compatible with different projects or applications.
- Quick fully-functional setup of the PostgreSQL server.
- Zero complex configurations, making it perfect for beginners.
- Automatic minor updates.
- Built-in command-line tools.
Cons:
- The app runs only on macOS, so it is not suitable for users who require cross-platform compatibility.
- Dependency on updates. To keep the PostgreSQL environment secure and up-to-date, users must install the app’s updates.
- Increased system resource consumption compared to a minimal command-line installation.
- Lack of scalability needed for larger production environments.
- Other PostgreSQL installations must be uninstalled before using Postgres.app.
Native PostgreSQL server installer: Pros and cons
Pros:
- Free to use that allows you to have as many database instances as you need without a cost increase.
- Access to the full range of features and capabilities that PostgreSQL offers.
- Flexibility in customization to adjust default PostgreSQL configuration to meet your performance needs.
- Cross-platform compatibility allows you to install and configure PostgreSQL on various operating systems.
- Community support with extensive documentation and resources to troubleshoot issues and find solutions.
- The native installer ensures compatibility with third-party tools, extensions, and libraries developed to work with PostgreSQL’s official release.
- Regular security and feature updates.
Cons:
- Installation and configuration may be difficult for beginners.
- To stay up to date with security patches and updates, users must make manual updates.
- A rich set of features might result in higher resource consumption.
- Some extensions or tools might have specific dependencies that need to be managed.
Now, let’s see how to install a PostgreSQL server on a Mac. This might be challenging for those new to the platform. But don’t worry – we’ll help you get started with PostgreSQL on macOS easily by providing a step-by-step installation guide.
How to install Postgres.app on macOS
The first step is to download the latest Postgres.app installation package from the official website. In our example, it is version 15.
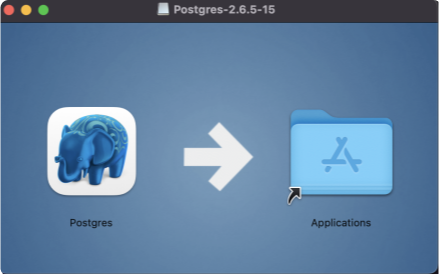
Then, navigate to the Downloads folder on your Mac and double-click the Postgres.app dmg file. Once done, drag the Postgres icon over Applications. This will install Postgres in your Applications folder.
In the Applications folder, double-click PostgreSQL to launch the application. The warning message opens, notifying you that the application you are going to run is downloaded from the internet. To proceed, click Open. You will see the PostgreSQL 15 window and a menu with a Postgres elephant icon on the top bar.
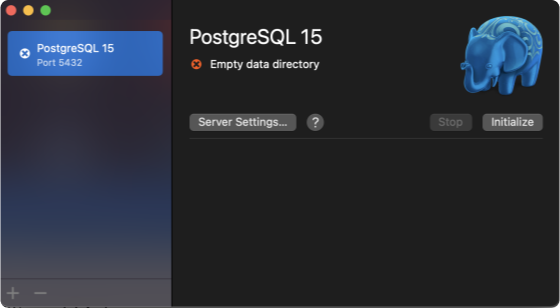
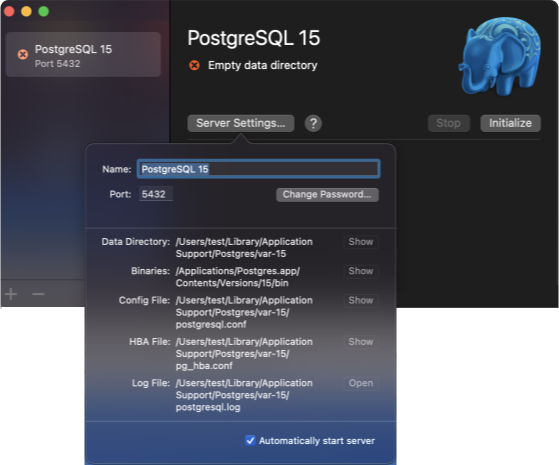
Clicking Server Settings will display the default path to the data directory, binaries, config file, HBA file, and log file that will be automatically created when you initialize the server for the first time.
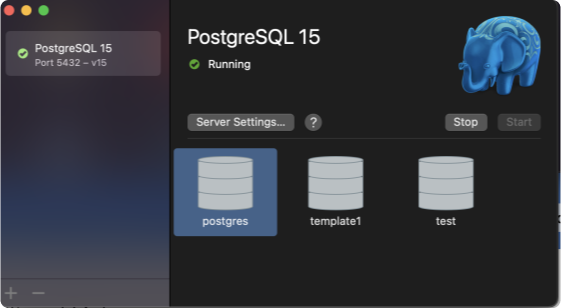
So, click Initialize to get a default Postgres database set up. As you can see, this action started the server and created default databases – postgres and test (the latter is based on the user currently logged in to the Mac).
Next, you can connect to the Postgres database using the included command-line tools. To do this, configure your $PATH to inform the terminal how to use those tools:
- Open the terminal and copy/paste the following code lines
sudo mkdir -p /etc/paths.d &&
echo /Applications/Postgres.app/Contents/Versions/latest/bin | sudo tee /etc/paths.d/postgresapp- Press Enter
- You will be prompted to enter the password of the user you are currently logged in
This will install the new tool. Now, we need to close the terminal and open it again to be able to use it. Once done, in the terminal, enter the psql command to connect to the required database:
Note: The values in the command should be replaced with your actual values.
psql database://user@localhost:5432/user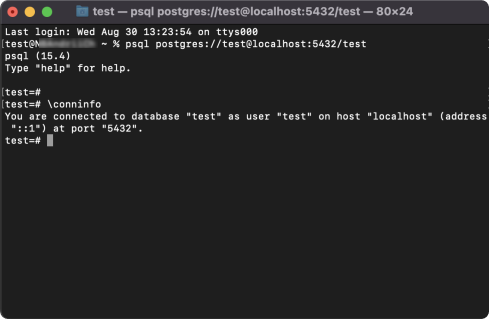
In our example, postgres is the database that we want to connect to, test is the user we are going to connect to, 5432 is the default port to a Postgres database, and test is the Postgres database we actually want to connect to. To confirm that we have connected to this specific database (‘test’), we execute the \conninfo command.
You can stop and start the PostgreSQL server from the Postgres.app window. Click Stop or Start as needed.
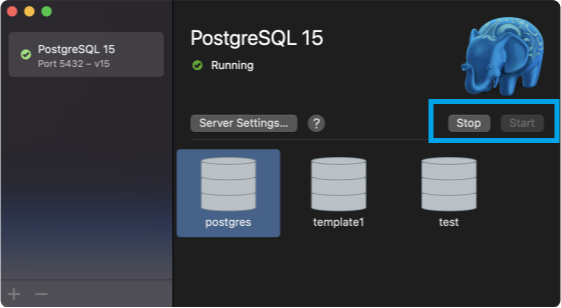
That’s it! You have successfully installed Postgres.app on your Mac. When you quit the app, the server shuts down.
Now, let’s see how to install a PostgreSQL server on macOS using a native Postgres installer.
How to install a PostgreSQL server on macOS using a native installer
The installer includes the PostgreSQL server and other tools such as pgAdmin, a GUI to manage and develop databases, and Stackbuilder, a package to download and install additional PostgreSQL tools and drivers. In addition, the installer can run in graphical mode or command line.
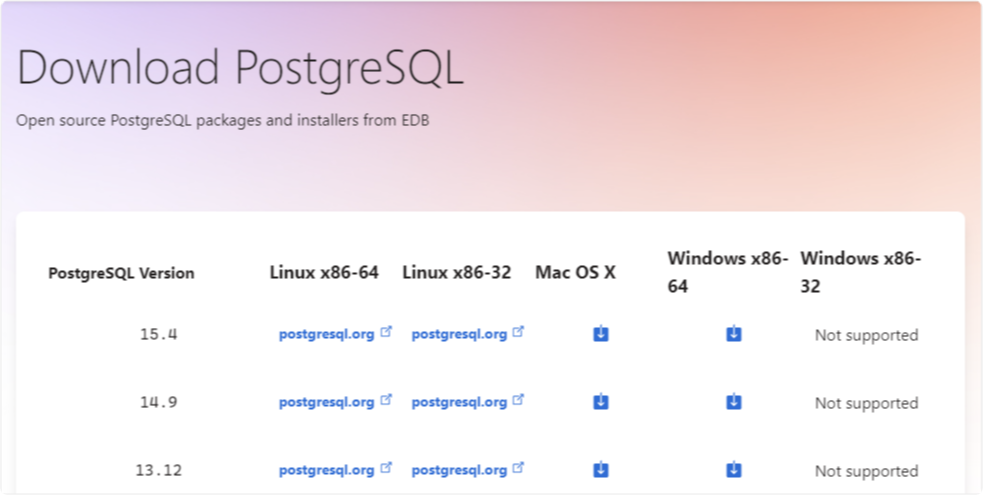
The first step to install a PostgreSQL server is to download the installation package. So, start by visiting the PostgreSQL website and clicking Download. On the Downloads page, click macOS under Packages and Installers. On the macOS packages page, click the Download the installer link. This will navigate you to the Enterprise DB with the Postgres installation packages for available operating systems. In the Mac OS X column, click the download link for the version of the server you want to install. In our example, it is the latest version 15.4.
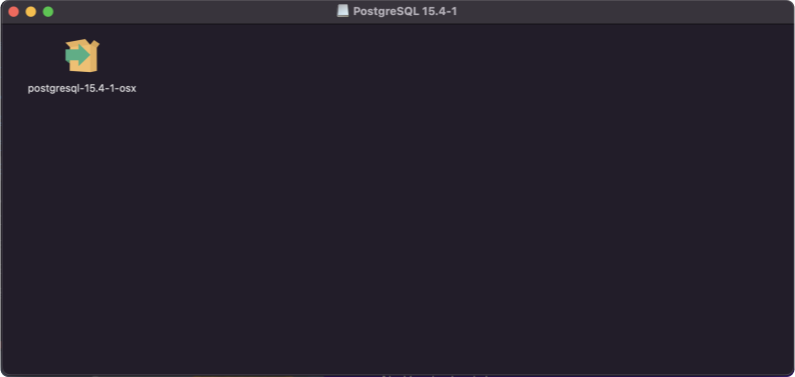
Go to the Downloads folder and double-click the Postgres .dmg file to open the installation package. The window opens, displaying the folder with another file. Double-click it to run the installation.
If a pop-up window warning you that the file has been downloaded from the internet appears, click Open. Then, enter the account password and click OK.
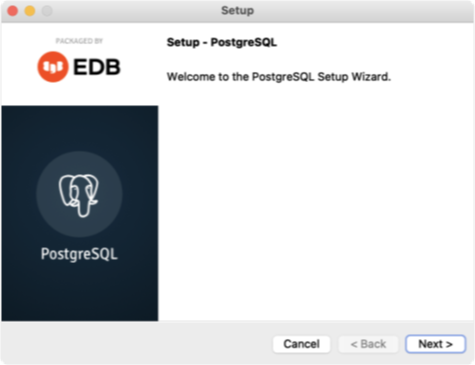
On the Welcome page of the PostgreSQL Setup wizard, click Next.
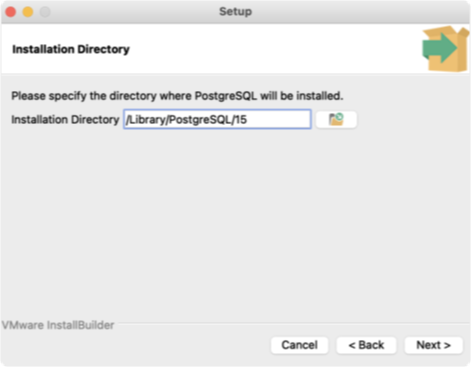
The default installation directory for the PostgreSQL server is specified. You can change it if needed. To proceed, click Next.
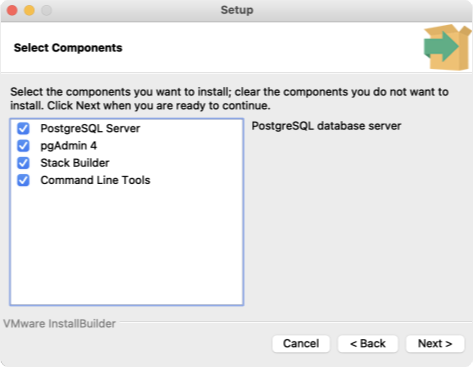
You can select the tools you want to install with the PostgreSQL server. If you want some tools not to be installed, clear the corresponding checkboxes. If any of these tools have already been installed on your Mac, they will be unavailable for selection. To proceed, click Next.
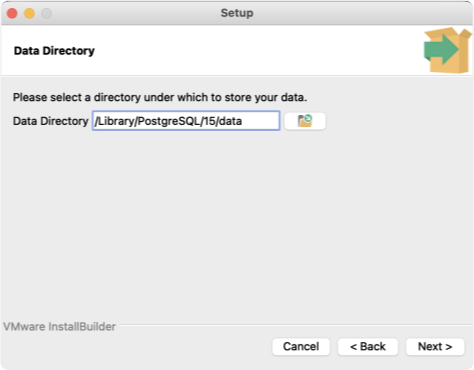
On the Data Directory page, the default directory to store your data is specified. Let’s keep it as is and click Next.
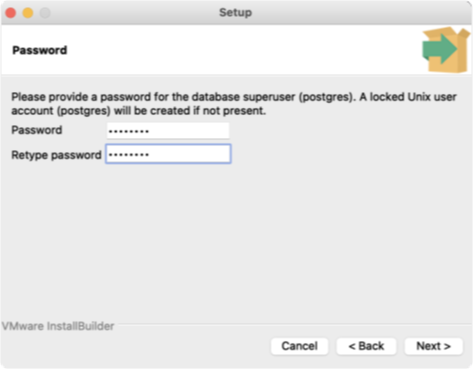
Here specify a password you want to use for a Postgres superuser, confirm it, and click Next. This password will be used when you connect to the database under the corresponding user.
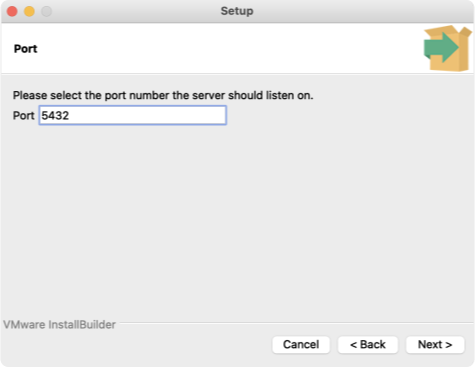
The next page displays the port, which is 5432 by default.
On the Advanced Options page, keep the default locale and click Next.

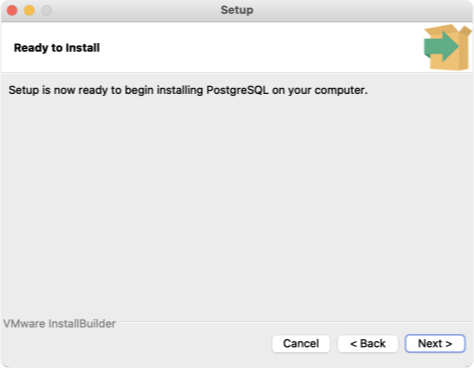
Now, you can review the settings to be used for the installation. If everything is correct, click Next. If you want to change any setting, click Back.

After that, click Next to start the installation of PostgreSQL on your Mac.
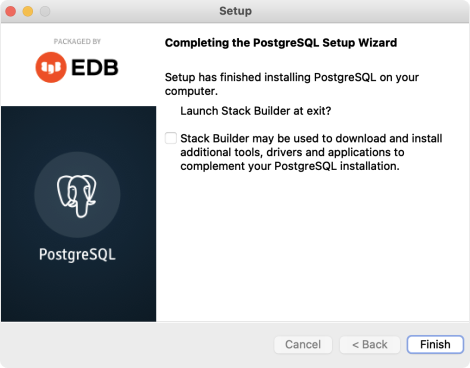
Once the installation is complete, the wizard will notify you that the setup is finished and recommend launching Stack Builder. Clear the checkbox and click Finish.
That’s it! Now, you can connect to the databases hosted on the PostgreSQL server you’ve installed. For example, you can use dbForge Studio for PostgreSQL to connect to the server.
Why dbForge Studio for PostgreSQL is the preferred tool for database management?
Among countless tools and platforms, finding the right tool that allows you to deal with data and databases within a single IDE might be a challenge. To help make the right choice, we would like to offer dbForge Studio for PostgreSQL and show why it is worth using.
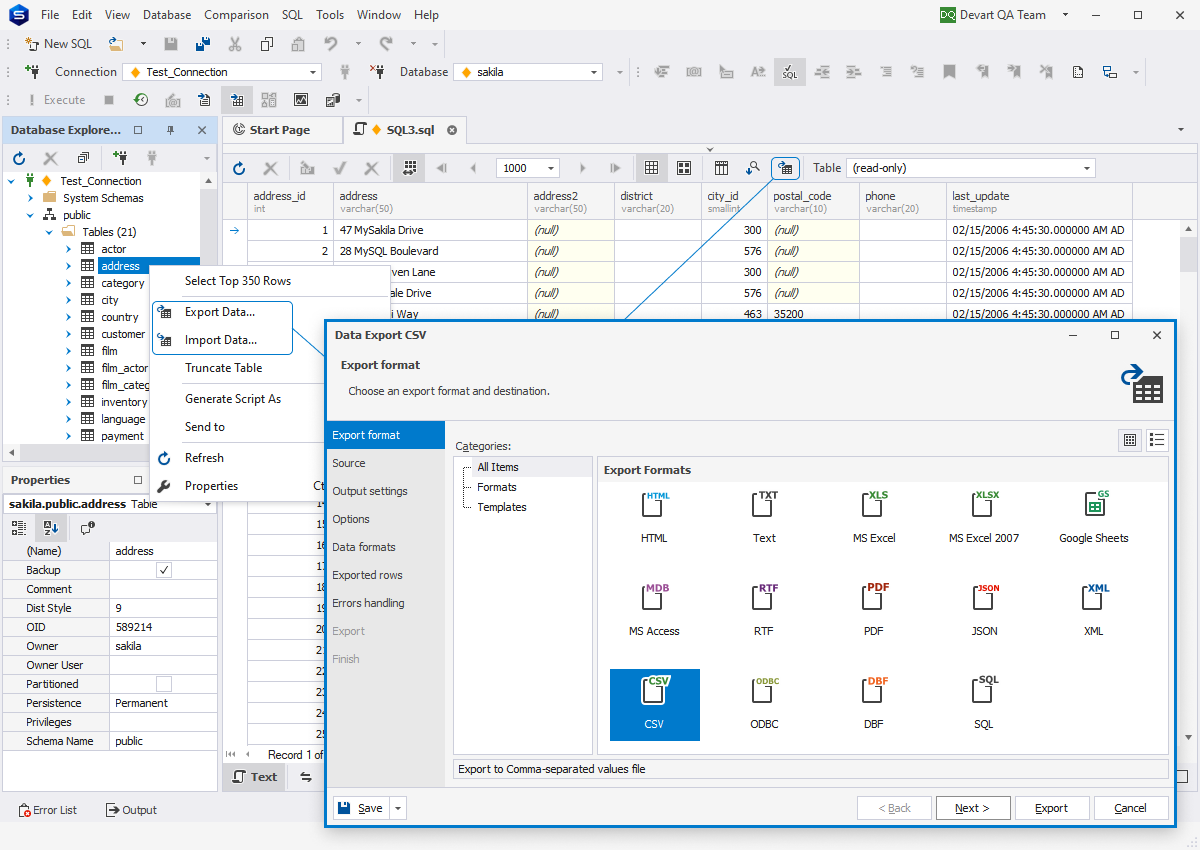
dbForge Studio for PostgreSQL is a powerful and user-friendly GUI tool for database development and management that can run on Windows, Linux, and macOS. It combines a bunch of advanced and versatile tools such as Query Profiler, Data Export/Import, Report Designer, Pivot Tables, Chart Designer, Data/Schema Compare, Master-Detail Browser, and Data Generator. All these tools are great assistants in streamlining database-related operations and improving developers’ productivity.
- PostgreSQL code completion
- PostgreSQL syntax checker and query validator
- Useful Code snippets functionality
- Data & schema comparison and synchronization
- Database migration tools
- Query Profiler to optimize query performance
- Data Editor to manipulate data in the results grid
- Visualization of pivot data in charts
Conclusion
In the article, we have made an overview of a native PostgreSQL installation package and its alternative, Postgres.app, as well as examined their advantages and disadvantages that might help you make the right decision about which tool would be preferable for you or your project. In addition, we have provided step-by-step guides about how to set up a native PostgreSQL server installer and Postgres.app on your Mac.
To make your work with databases more efficient and productive, download a 30-day trial version of dbForge Studio for PostgreSQL. Evaluate its features for free offered by this highly intuitive IDE.