
When dealing with substantial amounts of data, protecting against potential data loss stemming from hardware failures, software glitches, or human errors becomes crucial. This ensures the preservation and accessibility of critical information, a concern not limited to regular databases but extending to cloud services such as Heroku, Amazon S3, and Azure. Therefore, being able to create a backup and effectively restore it when necessary is essential. This article contains a comprehensive guide on backing up and restoring PostgreSQL data and schema using a command line and a user-friendly GUI tool — dbForge Studio for PostgreSQL. Here, you will discover carefully selected theoretical material designed to broaden your knowledge on the subject, complemented by practical examples to provide you with a hands-on learning experience. Let’s get it started!
Contents
- How to back up PostgreSQL using a command-line tool
- How to back up PostgreSQL using a GUI tool
- Exploring the advanced features of dbForge Studio for PostgreSQL
- Conclusion

How to back up PostgreSQL using a command-line tool
To begin with, let us dive into the intricacies of the pg_dump command-line utility. You will need to be familiar with it in order to execute precise backups for PostgreSQL databases, ensuring data security and recovery strategies are effectively implemented. In this section, we will guide you through the essential skills required to perform backups for a single database, all databases, and their schemas using the pg_dump and pg_dumpall commands.
pg_dump — Backup one database
In order to back up a single database, you can use the pg_dump tool, which dumps all the database content into a single file.
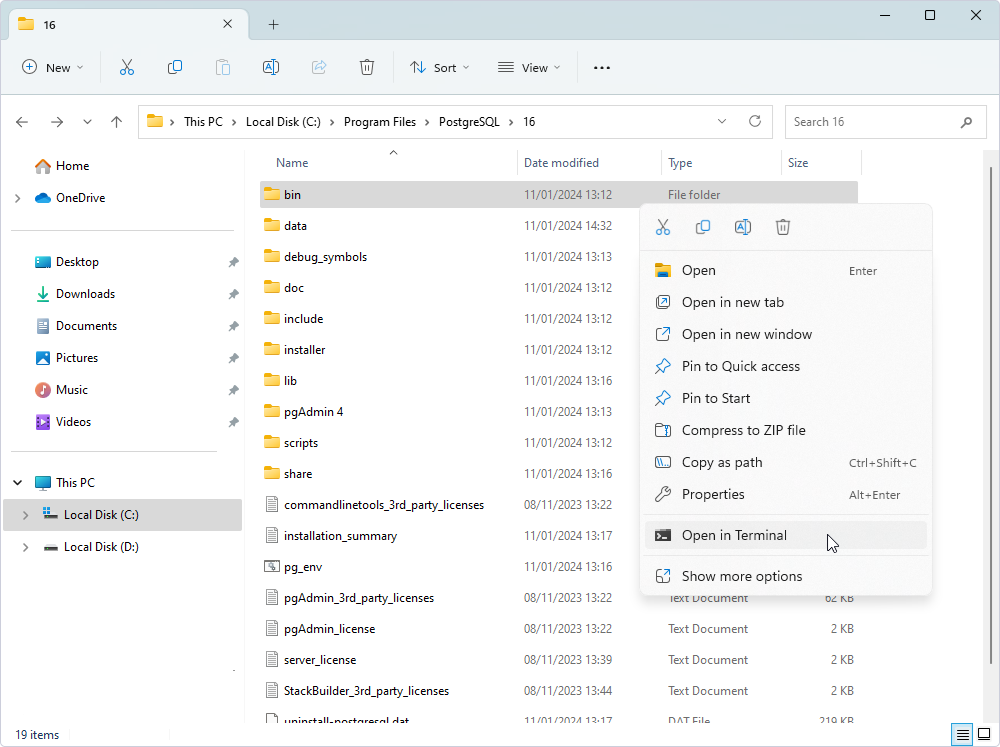
1. Navigate to the PostgreSQL bin folder, which is located here by default: C:\Program Files\PostgreSQL\16\.
2. Right-click the bin folder and select Open in Terminal.
2. In the window that opens, run the following:
./pg_dump -U [username] -W -F t [database] > c:\pgbackup\database.tarTo get a better understanding of the input we have just provided to the command line terminal and the resulting consequences it will yield, let us deconstruct the command into its constituent components. We will take a closer look at each segment and explain its purpose and implications:
./pg_dump: this is the command itself that allows you to dump the contents of a database into a script file or other archive file.-U [username]: specifies the username to connect to the PostgreSQL database. Replace the[username]placeholder with the actual username.-W: prompts for the password before connecting to the database. This security measure ensures the password is not visible in the command history or process listing.-F t: specifies the format of the output file. In this case, it is using the custom format (t), which is a .tar archive.[database]: specifies the name of the database to be backed up. Replace[database]with the actual name of your database.> c:\pgbackup\database.tar: redirects the output of thepg_dumpcommand to a .tar archive file. Thec:\pgbackup\is the directory where the backup file will be stored, anddatabase.taris the name of the backup file. Keep in mind that you can change both the directory and the file name according to your preferences.
In this example, we are going to create a backup of the bicyclestore database:
./pg_dump -U postgres -W -F t bicyclestore > c:\pgbackup\bicyclestore.tar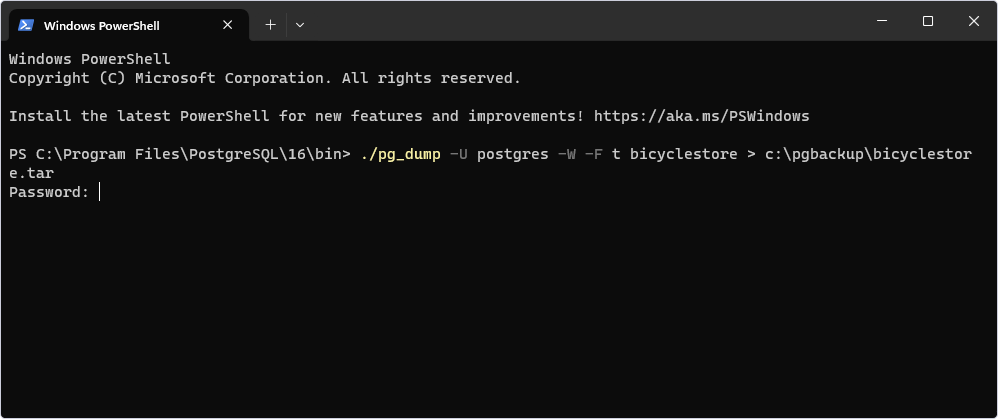
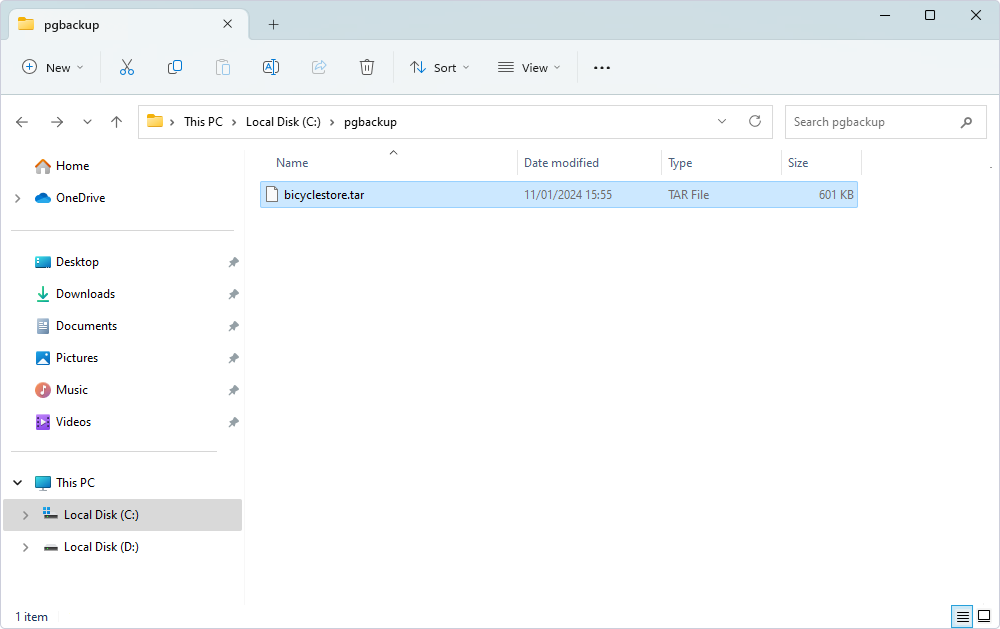
After running the command, you will be prompted for a password. Type it and press Enter. As a result, you will find the bicyclestore.tar file in the pgbackup folder:
pg_dumpall — Backup all databases
The next step on today’s agenda is backing up all the databases. There are two ways to go about this task:
1. Run the individual pg_dump command for each and every database there is.
- In psql, use the
\listcommand to list all available databases in your cluster. - Back up each individual database using the
pg_dumpprogram as described in the above section.
2. Besides the pg_dump, PostgreSQL also provides you with the pg_dumpall tool that allows backing up all databases at once. However, it is important to note that the latter may be less advantageous in certain scenarios compared to the former:
- The
pg_dumpallprogram exports all databases, one after another, into a single script file, which prevents you from performing the parallel restore. If you back up all databases this way, the restore process will take more time. - The processing of dumping all databases takes longer than each individual one, so you do not know which dump of each database relates to a specific point in time.
When dealing with activities that involve the entire PostgreSQL cluster, such as migrating to a new server or setting up a standby server, pg_dumpall is more suitable. It captures the cluster-wide information, making it easier to recreate the entire environment.
Let us try this tool in practice:
./pg_dumpall -U postgres -W > c:\pgbackup\alldatabases.sql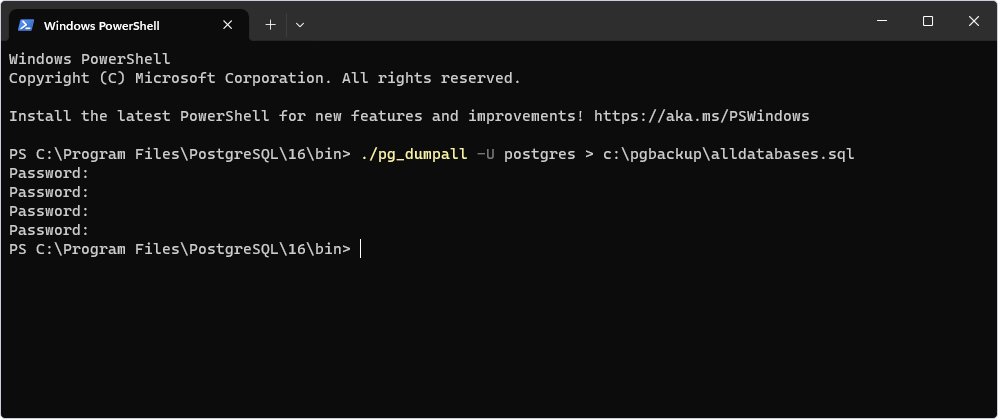
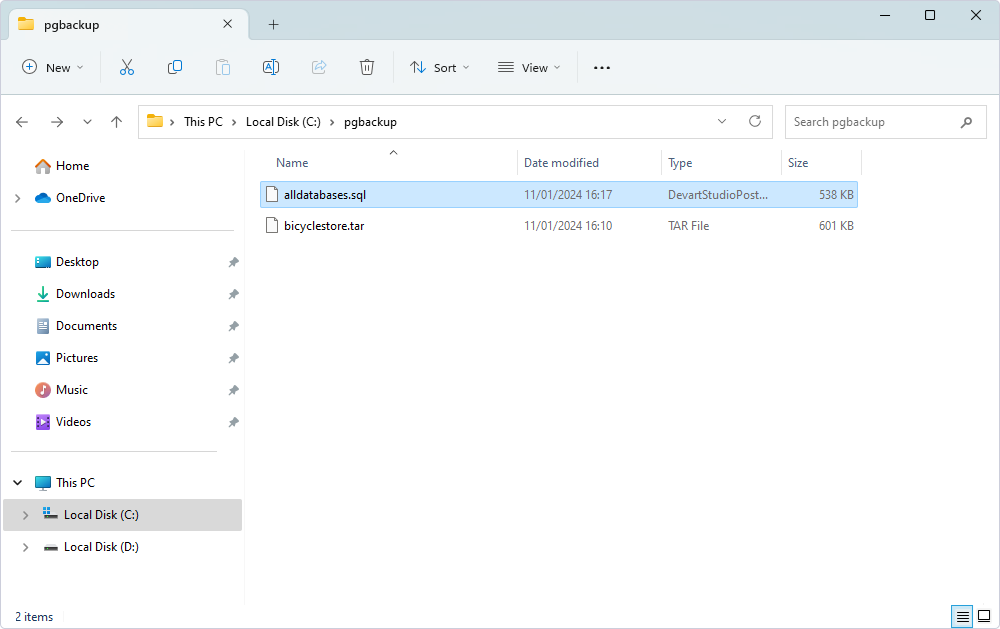
Upon executing the aforementioned command, you will encounter a password prompt for each database being backed up. Consequently, a full backup of all databases is now stored in the designated folder:
pg_dumpall — Backup database schema
In this section, let us talk about the cases when you need to back up only database object definitions, not the data. This is helpful in the testing phase, in which you do not want to move test data to the live system.
To back up objects in all databases, including roles, tablespaces, databases, schemas, tables, indexes, triggers, functions, constraints, views, ownerships, and privileges, you use the following command:
./pg_dumpall -U postgres --schema-only > c:\pgbackup\definitiononly.sql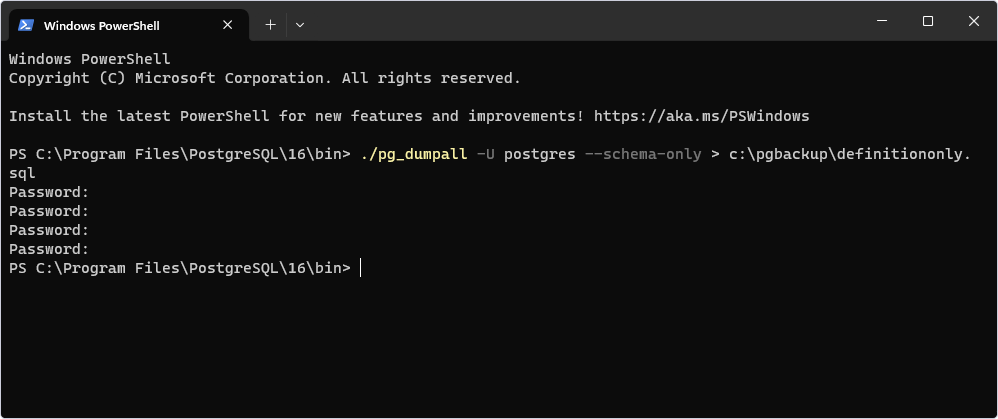
Note: To back up role definition only, use --roles-only instead of --schema-only. If you wish to back up tablespaces definition, use --tablespaces-only.
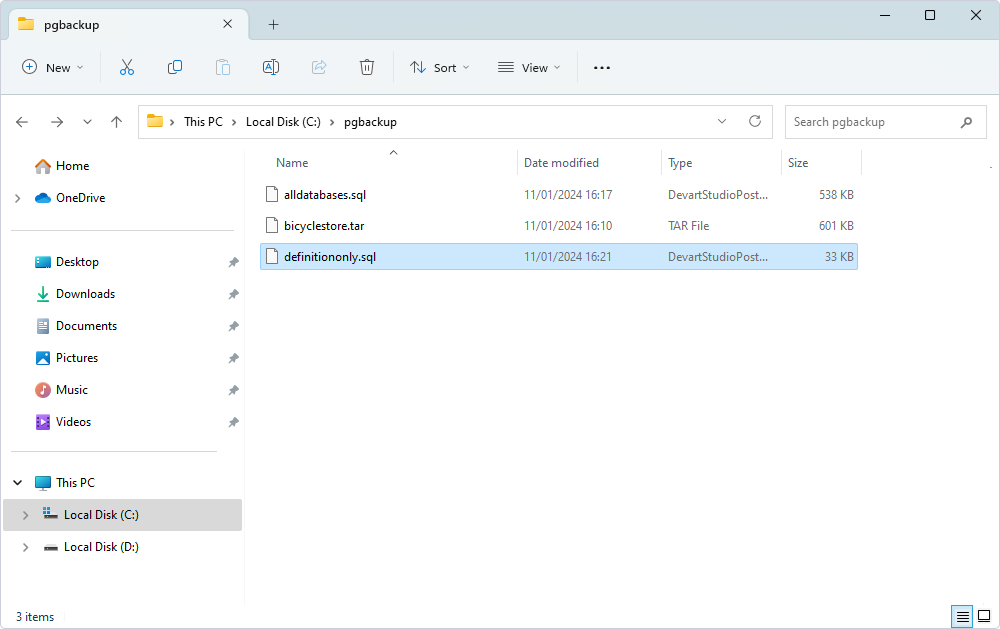
You will see the backup in the designated folder:
How to back up PostgreSQL using a GUI tool
Our next undertaking in today’s journey involves leveraging dbForge Studio for PostgreSQL to perform database backup and restoration seamlessly. This section walks you through how to export a PostgreSQL database using GUI tools, followed by steps for restoring it through schema comparison or data import. With dbForge Studio, the process becomes effortlessly streamlined as it allows users to export data from one or multiple tables to various file formats, ensuring flexibility and convenience:
- HTML (Hyper Text Markup Language) – data storage format used for web pages.
- Text – plain text format.
- XLS – Microsoft Excel spreadsheet.
- XLSX – Microsoft Excel 2007 spreadsheet.
- Google Spreadsheet – an online spreadsheet app included as part of a free, web-based software office suite offered by Google within its Google Drive service.
- MS Access – database of well-known Microsoft DBMS Access (2003, 2007+).
- RTF – Rich Text Format from Microsoft.
- PDF (Portable Document Format) – file format created by Adobe Systems for document exchange. (Only Latin charset data can be exported.)
- JSON – an open-standard format that uses human-readable text to transmit data objects consisting of attribute-value pairs.
- XML (XML Schema Definition) – XML data representation with data contained in attributes. Contains XML schema.
- CSV (Comma-separated values) – another name for the comma-delimited format of data storage.
- ODBC (Open Database Connectivity) – data storage format used to access any data from any application.
- DBF – database filename extension (Foxpro, dBase III, dBase IV, dBase 7). Other files can also be connected with DBF files, for example: .DBT (dBase III, IV, Clipper), .FPT (FoxBASE/FoxPro). While exporting data, an ANSI charset is used.
- SQL – format of the file that contains a SQL script.
Back up PostgreSQL database schema
The database schema is crucial for maintaining data integrity, optimizing performance, guiding development, ensuring security, and supporting the overall efficiency and effectiveness of a database system. Therefore, keeping a fresh backup at hand for restoration in case of any unexpected events is considered good practice.
dbForge Studio for PostgreSQL offers a simple yet efficient way to go about database schema backup. With its schema comparison feature, you can create a copy of any database in just a few steps.
The first thing you need to do is to create an empty database so it can serve as a target during schema comparison:
1. Click New SQL.
2. Execute the CREATE DATABASE targetdatabase; command. Keep in mind that you can change the name of the future database according to your liking.
As a result, we have an empty database ready for whatever comes next.
3. The next step is to copy the schema from a source database to the recently created one:
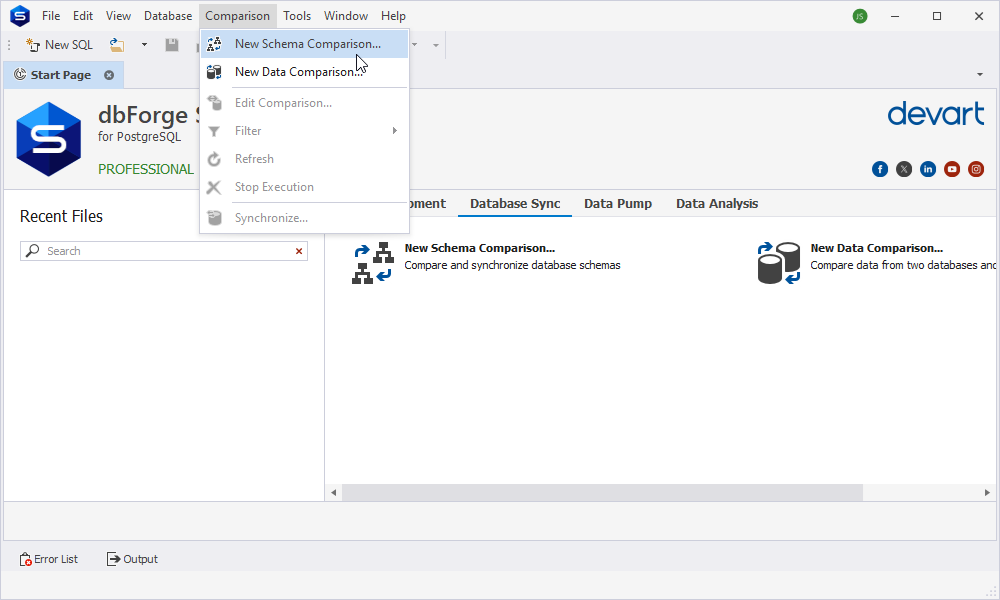
To start the new schema comparison, click New Schema Comparison on the Comparison menu. Alternatively, go to the Database Sync page on the Start Page and click New Schema Comparison.
In the New Schema Comparison wizard that opens, you first need to specify two data sources you would like to compare and how to connect to them.
Under the Source, select the required connection and database name in the Connection and Database dropdown lists. As to the Target, select the newly created empty database.
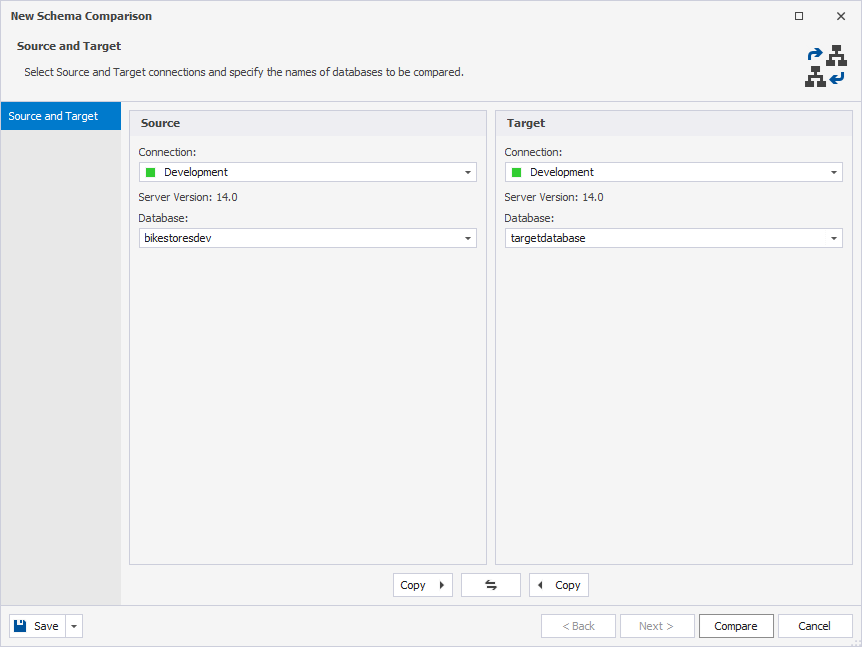
Once both Source and Target are selected, click Compare.
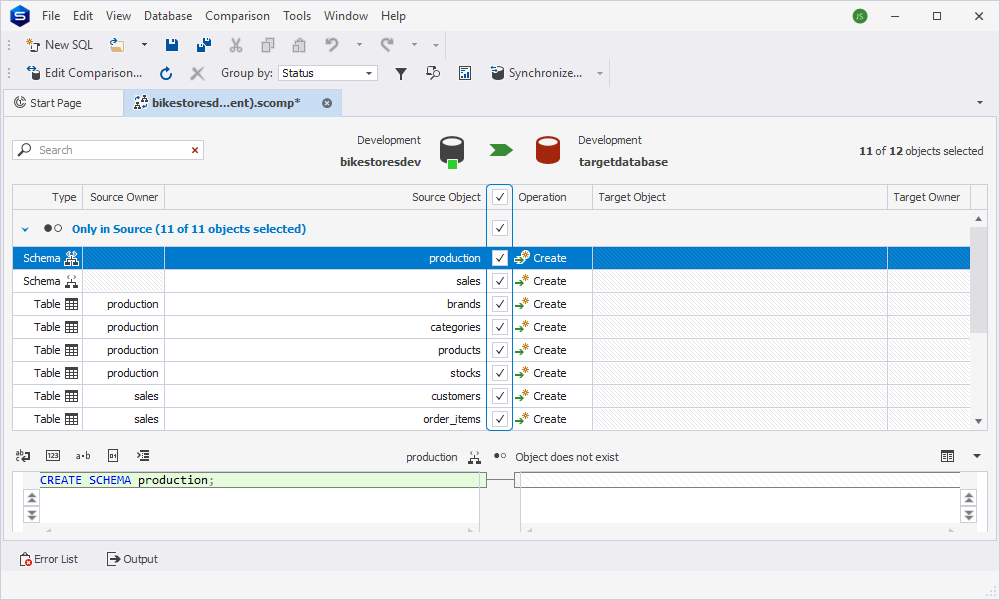
3. After you have compared the data sources, the comparison results will be displayed in the upper part of the Results window. Here, you can select objects for synchronization. By default, all objects are selected. However, if you do not wish to deploy an object, clear a checkbox next to it.
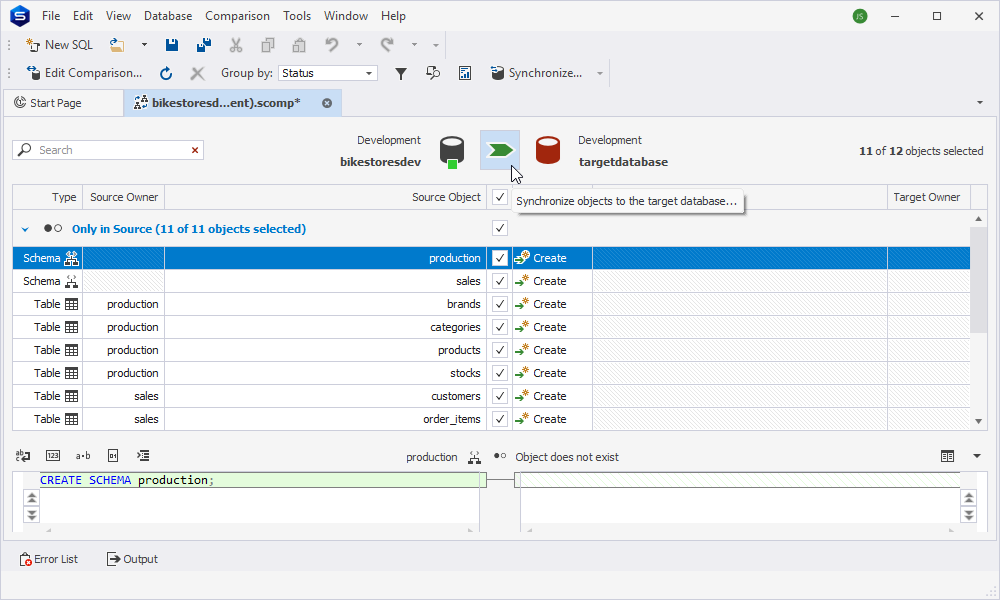
4. After you have selected objects, you can run the process of synchronization:
4.1. To open the Schema Synchronization Wizard, click Synchronize objects to the target database.
4.2. Select Save the script to a file as an output option.
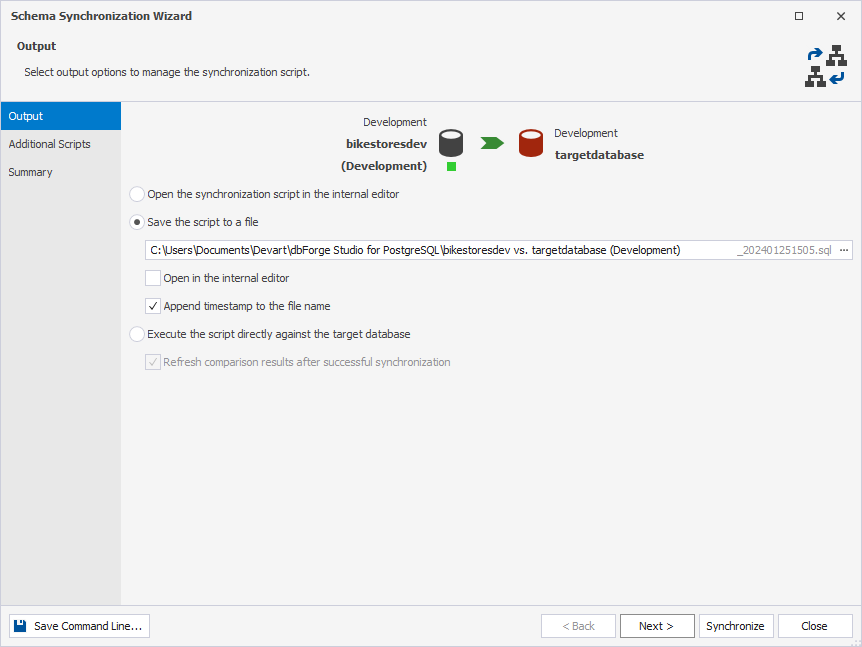
4.3. To close the wizard and proceed with the synchronization process, click Synchronize.
Once the process is over, you have a complete backup of the database schema stored in an .sql file
Dump PostgreSQL data to CSV
dbForge Studio for PostgreSQL allows you to create a .csv backup of a database with the help of its Data Export feature:
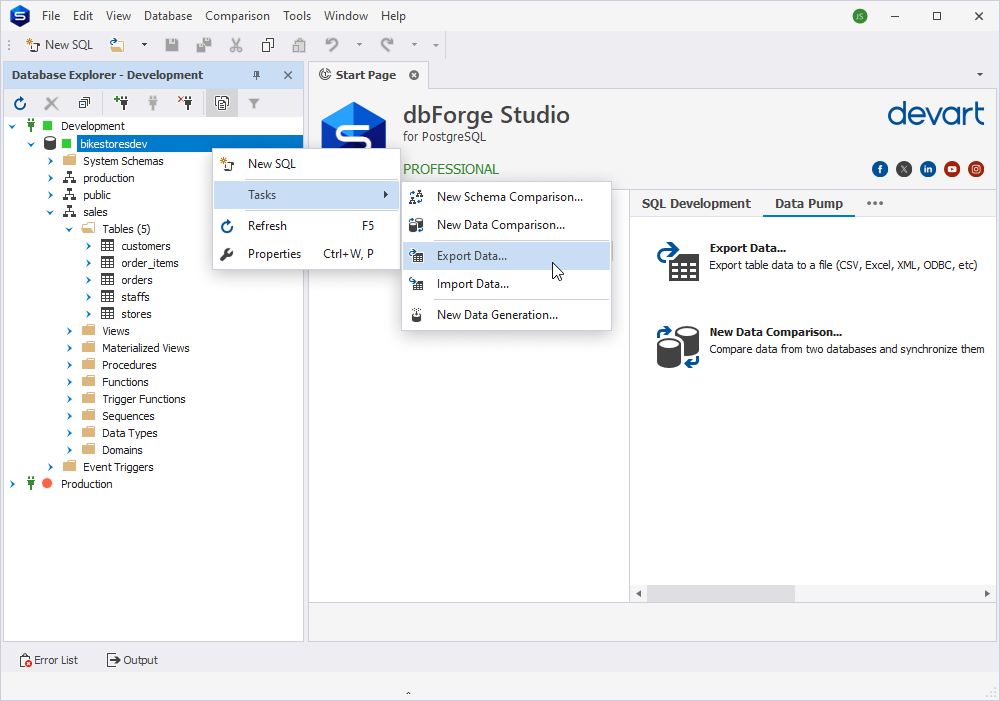
1. Open the Data Export wizard by doing either of these actions:
- On the Data Pump tab of the Start page, click Export Data.
- In Database Explorer, right-click a table or a view (or CTRL+click several tables and/or views) you want to export data from and select Export Data on the shortcut menu.
- Right-click the data grid and choose Export Data on the shortcut menu, or click Export Data on the Data Editor window toolbar.
- On the Database menu, click Export Data.
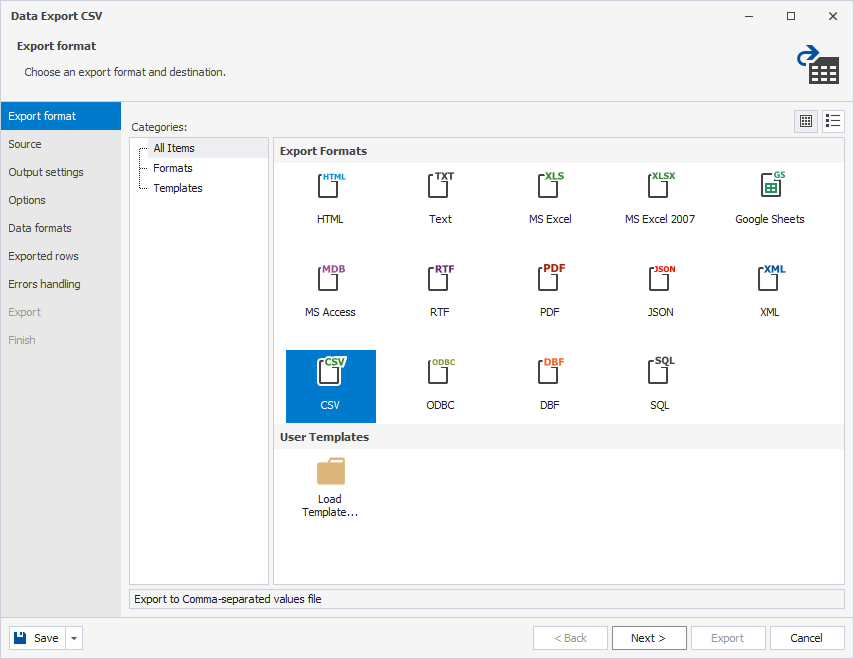
2. In the Export format tab, select the .csv format or load export options from a template file if you saved them previously, and click Next.
3. In the Source tab, select a required PostgreSQL server connection, a database, a schema, table(s), and view(s) you want to export. Click Next.
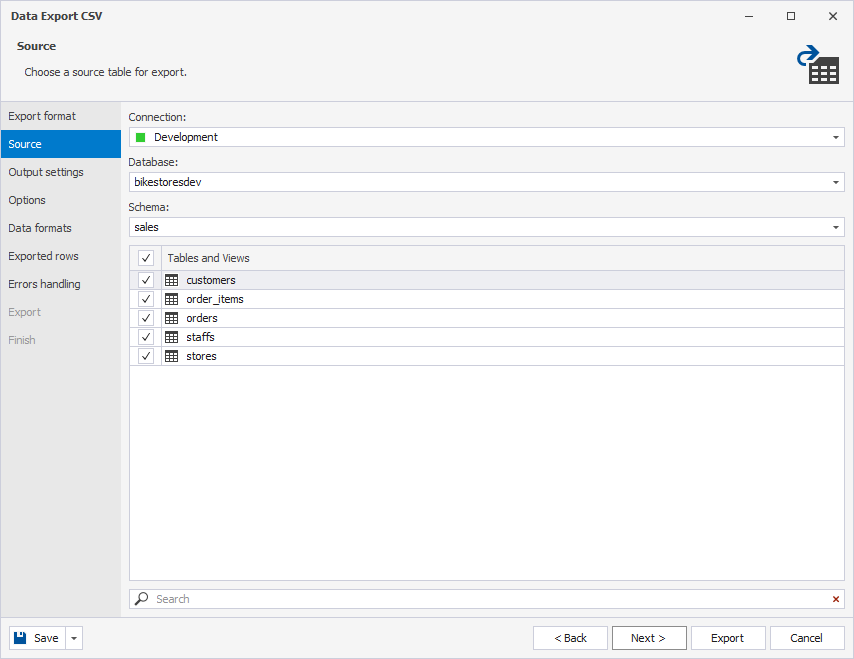
Note: If you open the wizard from the data grid, the Source tab will only allow you to specify a name and a path of the destination file (the one where the exported data will be saved).
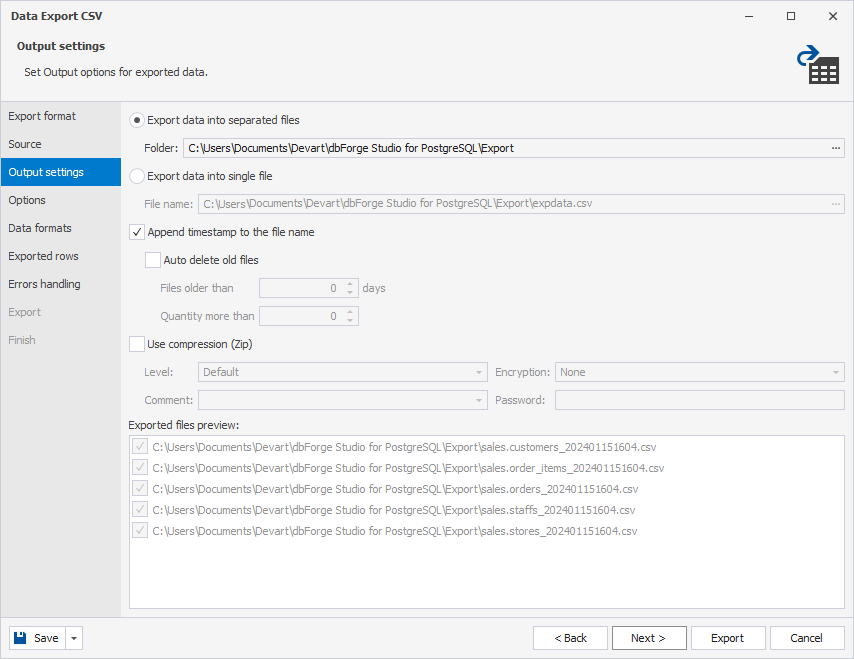
4. In the Output settings tab, select whether you would like to export data into a single file or into separate ones. Additionally, you can append a timestamp to the filename, configure the auto-deletion of old files, and compress the files if necessary.
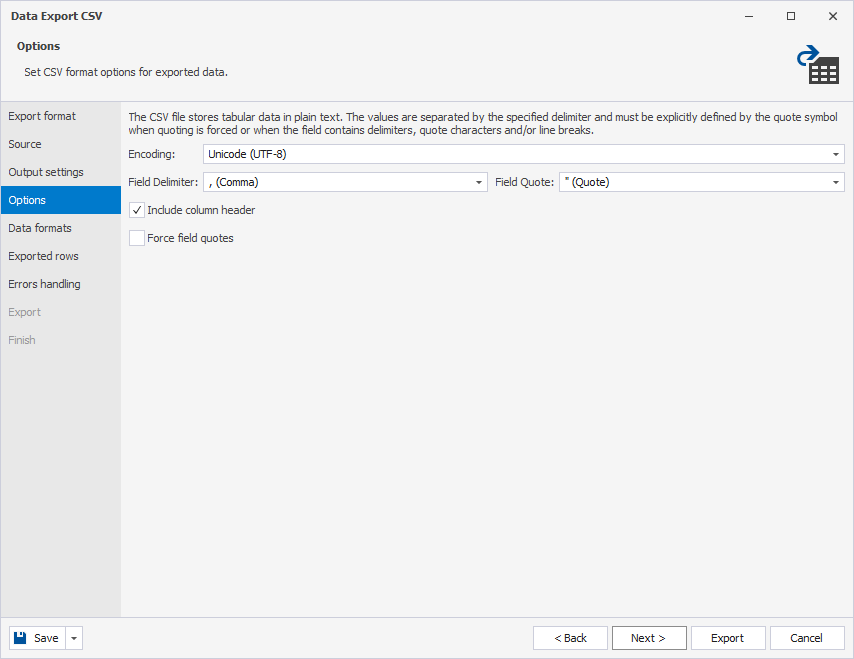
5. In the Options tab, set additional settings for the selected export format and click Next.
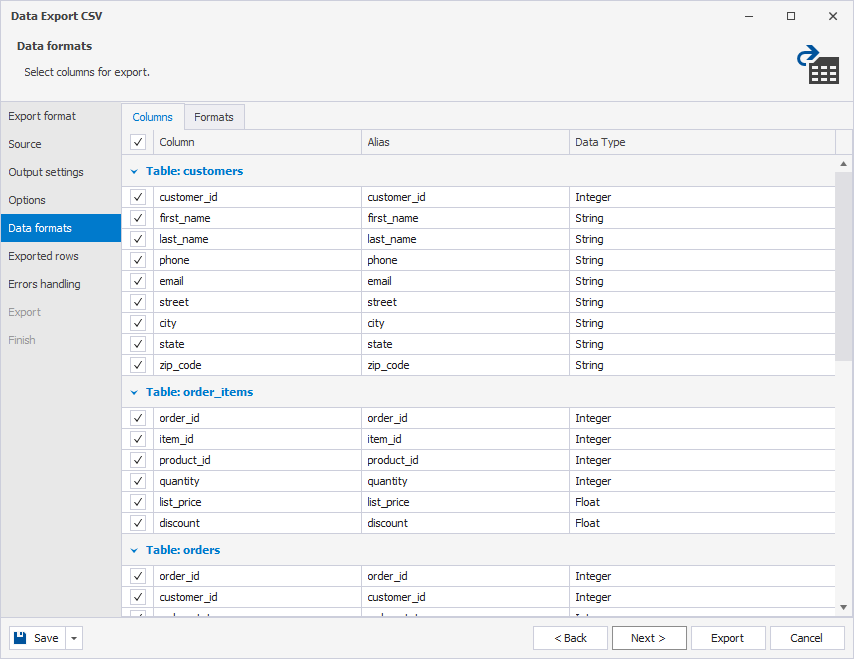
6. In the Data formats tab, select exported columns and click Next.
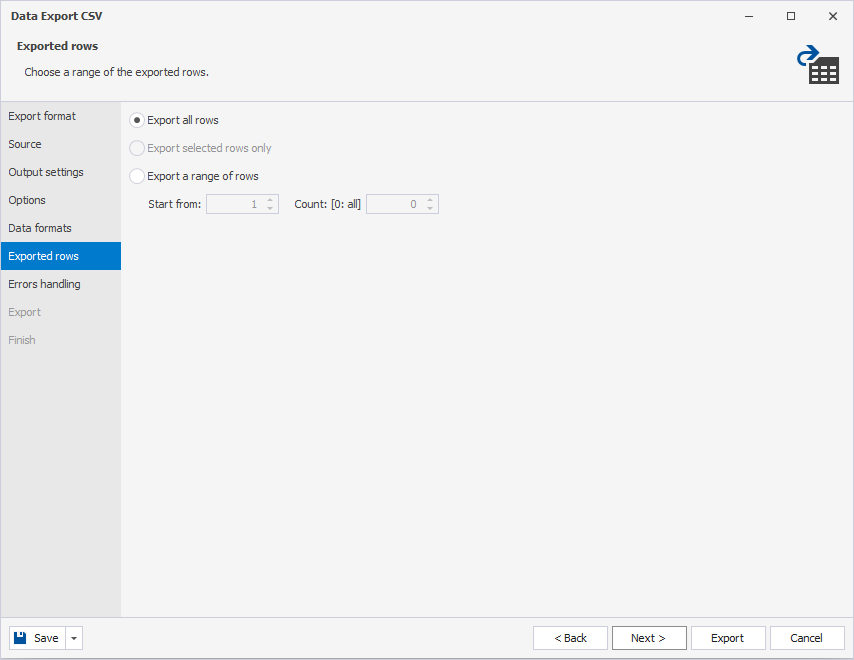
7. In the Exported rows tab, select exported rows. You can export all rows, only selected in the grid ones or a specified range.
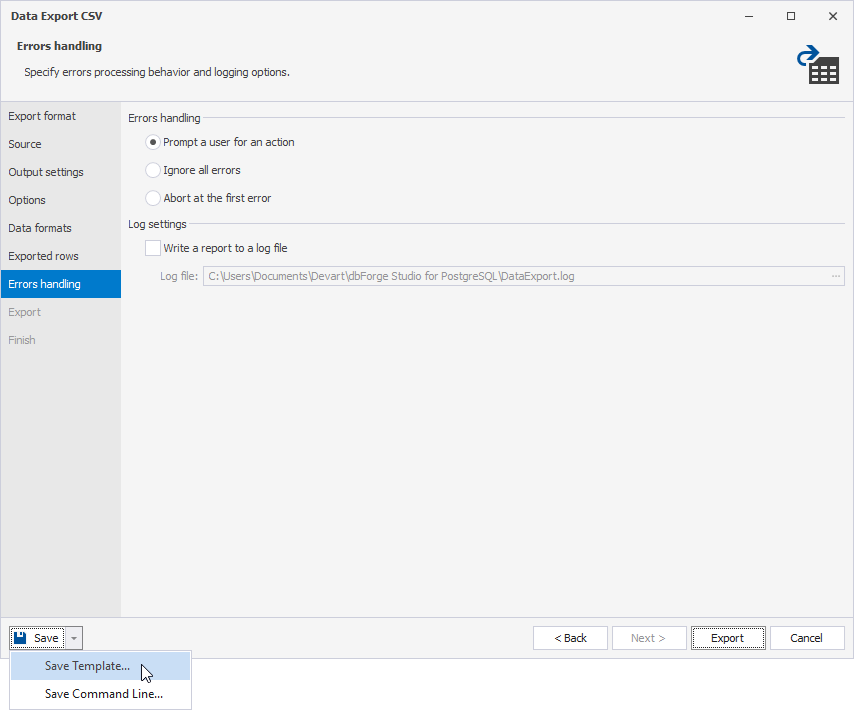
8. Specify how the application should behave when an error is encountered.
9. Optional: To export options to a template file for future usage, click Save Template and specify a path and the name of the template file.
10. Click Export and see the result of the export process.
11. Select whether to open the exported file or result folder and click Finish. Data export is now complete.
Restore PostgreSQL database schema
In the previous section, we discussed the creation of a backup for the PostgreSQL schema through the Schema Comparison feature of dbForge Studio. Now, to restore the earlier created .sql backup, you can follow these simple steps:
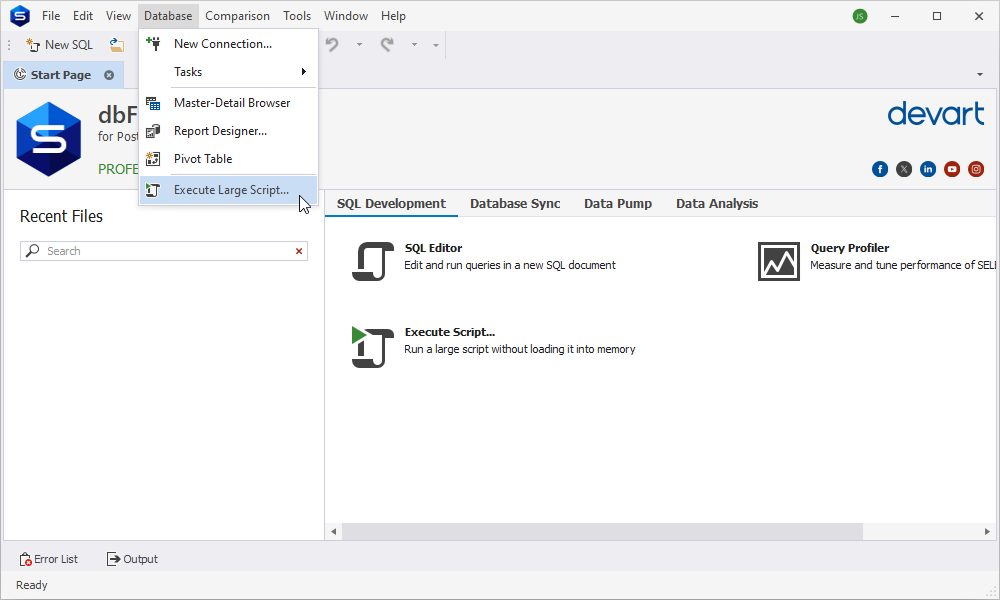
1. To open the Execute Script Wizard, go to the Database menu and click Execute Large Script.
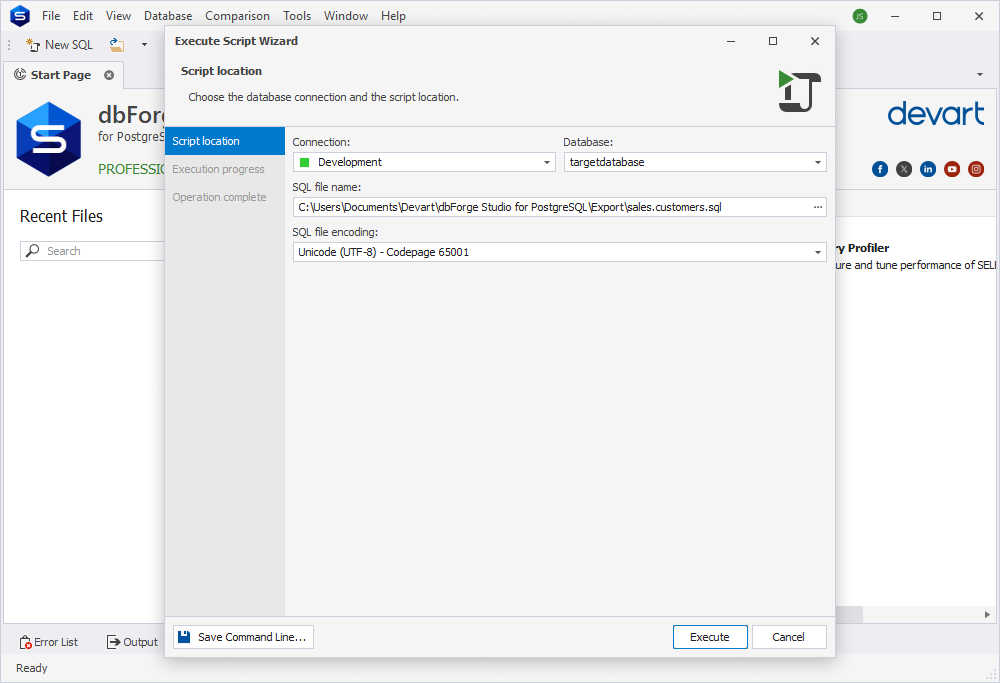
2. Click the Connection field to select a connection to a required database server against which you want to execute your script. In the drop-down list of the field, you can click the Manage link to open the Connection Manager dialog box. It will help you to create a connection if necessary.
3. Click the Database drop-down list to select a recently created empty one.
4. In the File name box, specify the path to the script you want to execute.
5. In the SQL file encoding field, check that the file encoding is selected correctly. The program automatically selects it based on the script. If it fails, the default encoding (the current Windows encoding on the machine where the program is running) is selected. You can always select a required encoding from the drop-down list.
6. Click Execute to execute the script.
This way, the schema previously saved will be deployed onto the empty database. This ensures that the restored schema aligns with the structure captured during the backup process.
Import data from CSV to PostgreSQL
You can restore all the data from a .csv file to a PostgreSQL database using the Data Import feature of dbForge Studio.
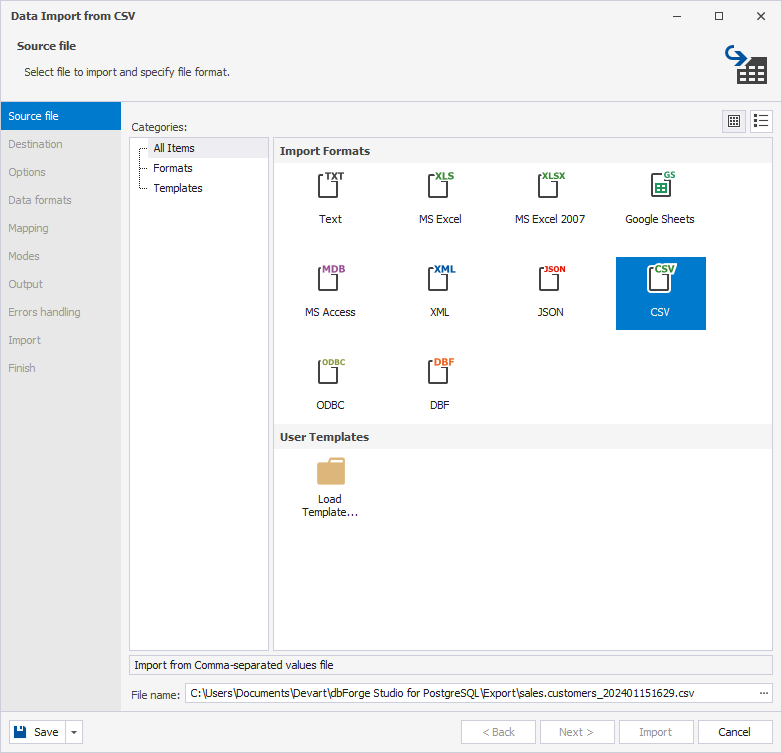
1. On the Database menu, click Import Data. The Data Import wizard opens.
2. Select the CSV import file format, specify the location of Source data, and click Next.
3. Specify a PostgreSQL connection, a database, a schema, and a table to import the data to.
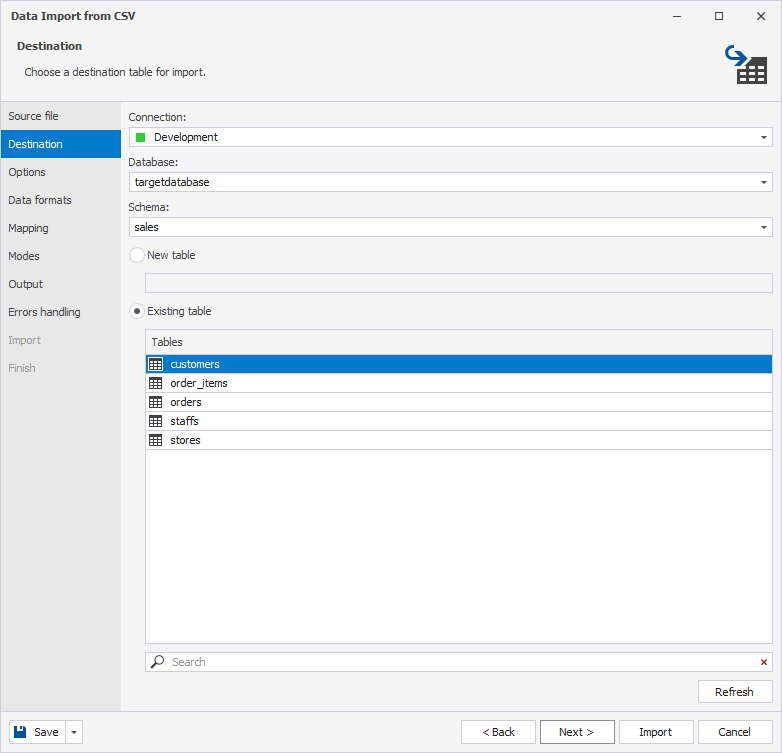
4. Click Import and see the import progress. dbForge Studio will notify you whether the import was completed successfully or failed.
5. Repeat steps 1-4 for all the tables you would like to restore.
6. To finish the import and close the wizard, click Finish.
7. Finally, you can run a SELECT query to make sure your data has been imported successfully:
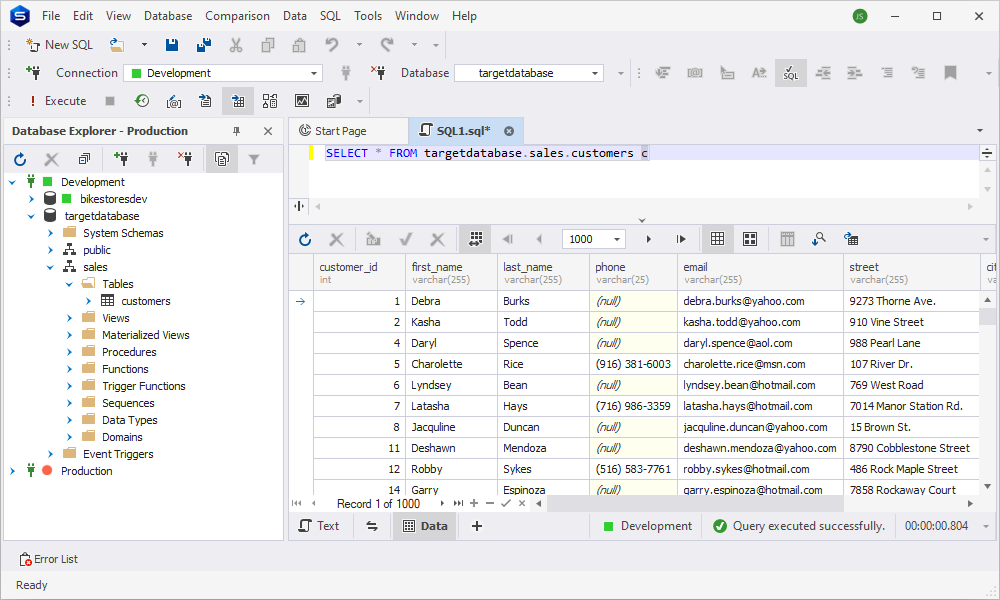
Exploring the advanced features of dbForge Studio for PostgreSQL
| Feature | Description |
| PostgreSQL Formatter | Boasts intelligent code completion for swift coding, a real-time syntax checker and validator for error highlighting, and convenient code snippets providing predefined blocks to streamline the coding process, enhancing overall efficiency. |
| Query Profiler | Analyzes and optimizes SQL queries, enhancing performance and resource utilization. You can easily navigate to your query and other tabs if needed without having to switch to additional windows and documents. |
| Database Explorer | Offers a quick and simple way to manage database connections through Database Explorer, which allows adding, editing, deleting, renaming, or duplicating existing database connections in just a few clicks. |
| Data Editor | Facilitates easy viewing, editing, and manipulation of database records. |
| Data Reports | Enhances the efficiency of your PostgreSQL databases, implements improved strategies, and organizes your data through customizable visualizations, enabling a deeper understanding and easy sharing via reports, charts, pivot tables, and various exporting options. |
| Data/Schema Comparison | Compares and synchronizes data and schemas, streamlining database management. |
| Data Export/Import | Enables seamless data transfer between PostgreSQL databases and 14 other formats. Relocate your workloads and data to new types of data storage and processing systems quickly and easily./td> |
| Master-Detail Browser | Helps you view and analyze related PostgreSQL data in parent tables or views, related child tables or views, and self-referencing tables. |
| Pivot Table | Allows you to aggregate, rearrange, summarize, and analyze large amounts of data without writing overcomplicated queries. |
| Data Generator | Offers the fastest way of creating massive volumes of realistic, column-intelligent test data. |
| Broad Compatibility Options | dbForge Studio for PostgreSQL supports the most popular cloud databases, services, storages, and search engines, thus allowing you to select the most suitable solutions for your particular needs. |
Conclusion
Mastering the art of PostgreSQL backup and restoration involves a dual approach: the command-line tools such as pg_dump and pg_dumpall offer precision and control, allowing for targeted backups of specific databases or comprehensive backups of the entire PostgreSQL cluster. Complementing this, GUI tools like dbForge Studio for PostgreSQL introduce a user-friendly interface, simplifying tasks like schema backup, CSV data dumping, and seamless restoration processes.
For a comprehensive experience that extends beyond basic backup functionalities, consider exploring the advanced features embedded in dbForge Studio for PostgreSQL. From efficient schema management to streamlined data import/export operations, this tool enhances the workflow for both database developers and administrators. If you are eager to unlock the full potential of dbForge Studio for PostgreSQL, we invite you to download a 30-day free trial. Discover firsthand the convenience, efficiency, and ease of use that come with this tool, making every facet of your database-related tasks a breeze.