
In this article, we are going to talk about the SQL INSERT statement and how to use it in order to insert new rows with data into an existing table. Here, you will find the basic syntax for the statement, as well as examples of different ways to use it.
SQL INSERT statement definition
Let us begin by defining the drawing card of this article. INSERT is a SQL query that is used to insert data into a table. SQL INSERT statement works by inserting new rows with values at the end of the table.
SQL is primarily an information-logical language designed to describe, modify and retrieve data stored in relational databases. In general, SQL is considered a Turing incomplete programming language, but at the same time, the language standard by the SQL/PSM specification provides for the possibility of its procedural extensions.
Basic syntax for INSERT INTO TABLE in SQL
Relational databases store data in tables consisting of rows and columns. As data grows, tables often need to be modified for better organization. This may involve adding new columns or rows.
To add a column to an existing table, use the ALTER TABLE ADD COLUMN command. To insert new rows with values, use the SQL INSERT statement.
The syntax of the INSERT statement will look somehow like this:
INSERT INTO TableName (Column1, Column2, Column3, ...)
VALUES (ColumnValue1, ColumnValue2, ColumnValue3, ...);
The SQL INSERT statement syntax includes but is not limited to the above examples. Let us take a closer look at the other variations of the query.
Inserting data in specific columns
There are cases when you need to insert values only to the particular columns in the table. To do that, you will need to specify the desired values in the code itself:
INSERT INTO TableName (Column1, Column3)
VALUES ('ColumnValue1', 'ColumnValue3');
The SQL statement above will add a new record, but only insert data in the specified columns.
Insert values into all columns
In case you are adding values for all the columns in the table, there is no need to specify the names of the columns in your SQL query. However, the order of the values is crucial. Make sure to enter the values in the same order as the columns in the SQL table. Here, the INSERT INTO syntax would look as follows:
INSERT INTO TableName
VALUES (ColumnValue1, ColumnValue2, ColumnValue3, ...);
SQL INSERT INTO with default values
In the following part of this article, we will focus on another syntactic feature of the SQL — INSERT ... DEFAULT VALUES statement. In this syntax, a single record is inserted into a table, containing only DEFAULT values for every row. This allows exchanging null values in non-nullable columns with the default value.
INSERT INTO TableName
DEFAULT VALUES;
INSERT ... DEFAULT VALUES syntax can come in really handy in situations where you would like to, that is to say, reserve, a row in the database. Later on, you will be able to run an UPDATE statement within the same transaction.
Examples of INSERT INTO TABLE command
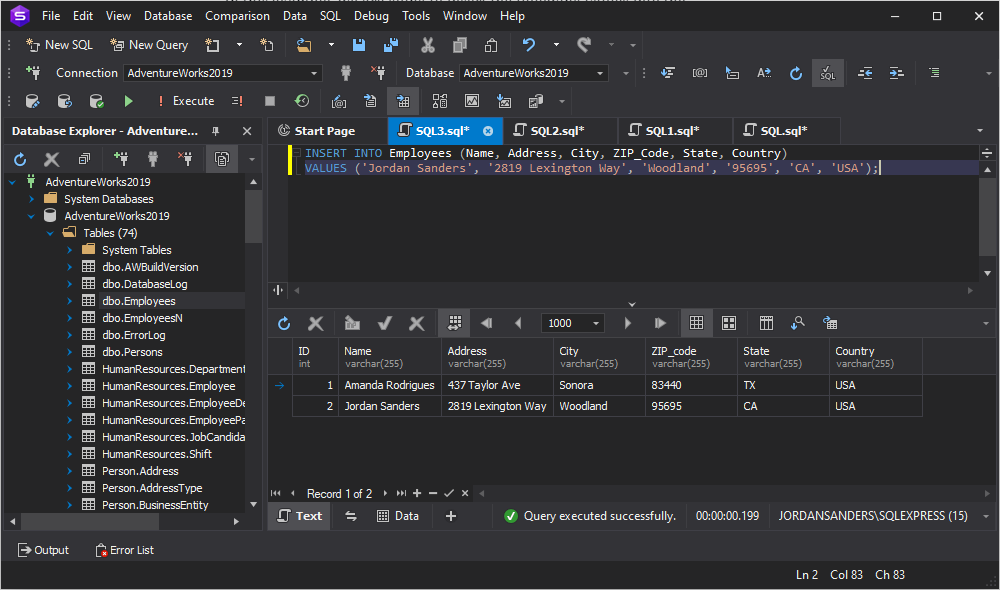
In this example, we are going to insert the following values into the Employees table: Name, Address, City, ZIP Code, State, and Country.
INSERT INTO Employees (Name, Address, City, ZIP_Code, State, Country)
VALUES ('Jordan Sanders', '2819 Lexington Way', 'Woodland', '95695', 'CA', 'USA');
As the result, another row is added at the end of the Employees table:
Using INSERT statement to insert one record
Basically, inserting a single value into a table does not look much more different than the examples provided above.
In case you are going to add only one record into a table, you will need to specify only the values you are willing to change. The query will look somewhat like this:
INSERT INTO Employees (Column3)
VALUES (ColumnValue3);
Using INSERT statement to insert multiple rows
The syntax of SQL Server allows inserting data into multiple rows of a table. However, INSERT can only operate within a single table. Therefore, it would not be possible to add values to different tables even within one database using this syntax.
INSERT INTO TableName (
    RowName1,
    RowName2,
    RowName3
)
VALUES
    (
        'Value1_for_Row1',
        'Value2_for_Row1',
        'Value3_for_Row1'
    ),
    (
        'Value1_for_Row2',
        'Value2_for_Row2',
        'Value3_for_Row2'
    ),
    (
        'Value1_for_Row3',
        'Value2_for_Row3',
        'Value3_for_Row3'
    );
In the query above, we are adding 3 rows with 3 columns each to a single table. The values for each row need to be separated by parenthesis for the correct execution.
Looking for optimal ways to import data to SQL Server from Excel? Check a detailed guide with expert tips and nuances.
Using SELECT in INSERT INTO statement
If you are looking for a proper SQL query to insert all rows from one table into another table, the INSERT INTO SELECT statement can come in handy. It simply copies data from one table and pastes it into another one without affecting the existing records in the target table.
INSERT INTO TableName2 (Column1, Column2, Column3, ...)
SELECT Column1, Column2, Column3, ...
FROM TableName1
WHERE Condition;
Practically, the query would be something along the lines of:
INSERT INTO Employees (Name, Address, City)
SELECT Name, Address, City
FROM Applicants
WHERE Country='USA';
Although the syntax is rather straightforward, you need to remember that the types of data in the source and target tables have to match.
Using INSERT INTO query in dbForge Studio for SQL Server
There is no need to waste time searching for or purchasing SQL Server Management Studio (SSMS) plug-ins across the Internet to get your work done – dbForge Studio for SQL Server has everything you need to set up your SQL development environment.
To insert information about customers, do the following:
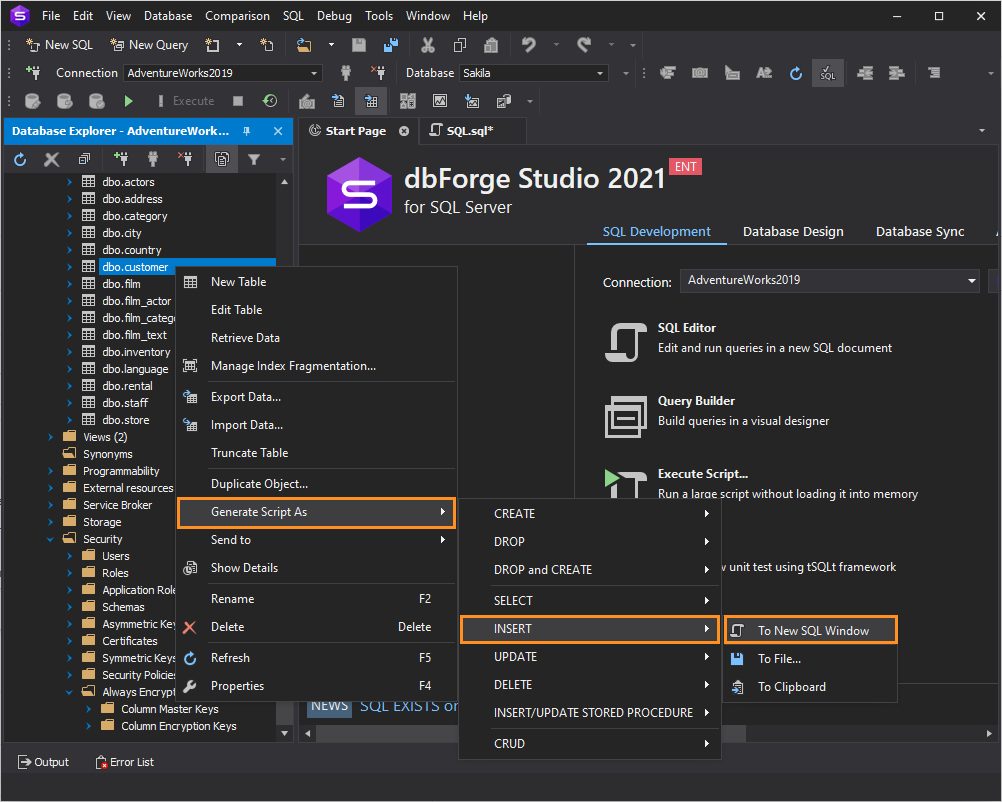
1. In Database Explorer, right-click the required table and select Generate Script As > INSERT > To New SQL Window. The SQL code editor opens containing the automatically generated script.
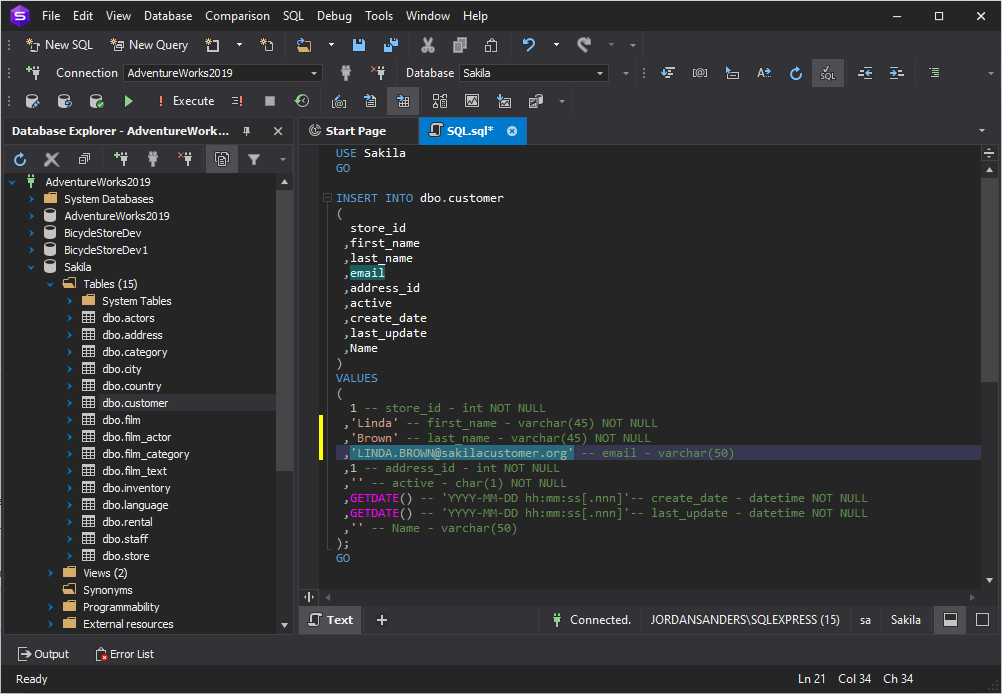
2. In the SQL document that opens, insert data for the specified columns (first_name, last_name, and email) into the VALUES clause.
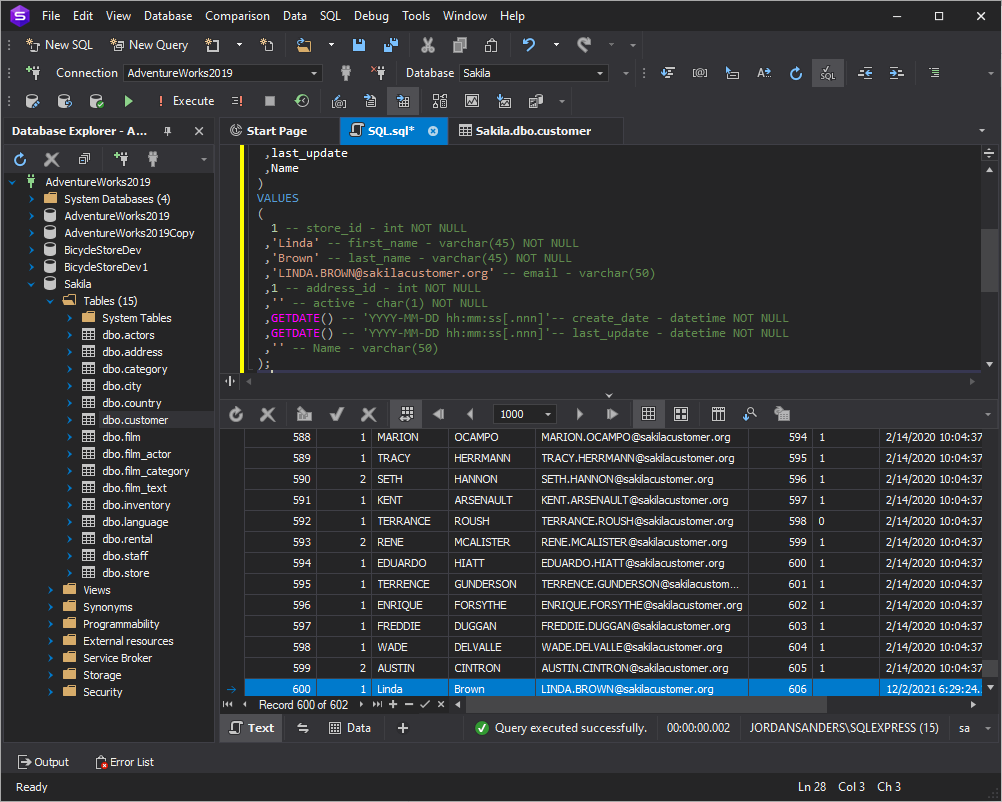
3. On the standard toolbar, click Execute. The statement adds the First Name, Last Name, and email of the new customer to the bottom line of the grid.
Conclusion
In this article, we have gone through different variations of the SQL INSERT statement with examples. Among many other IDEs that allow working with SQL Server, dbForge Studio can be considered the most convenient one since it includes the best and the most crucial parts of its competitors. SQL developers and DBAs performing complex database tasks can use the GUI tool to speed up almost any database experience, such as designing databases, writing SQL code, comparing databases, synchronizing schemas and data, generating meaningful test data, and much more.
In case you would like to check out the solution, feel free to download the 30-day trial version at no cost at all.