")
In the FinTech world, there are now more and more solutions for both offline and online payment processing. Stripe is very popular with many companies of all sizes that use alternative payment methods. However, even with the well-established company’s extensive offerings, there is certainly room for improvement. For example, more integrations with other market leaders, like in customer management.Managing payments and customer data separately can be time-consuming and inefficient.
With Stripe integration and Salesforce payment solutions, you can handle payments and track customer data in one place. Stripe offers secure payments and Salesforce helps you manage customer relationships.
- Why use Stripe with Salesforce?
- Overview of integration methods
- Step-by-step guide to integrating Stripe with Salesforce
- Using Stripe billing with Salesforce
- Automating workflows with Stripe and Salesforce using ODBC driver
- Managing events and settings in Stripe with Salesforce
- Wrapping up
Why use Stripe with Salesforce?
Speed, conversion, and personalization are key to success in digital commerce. These are the pillars of Stripe Salesforce partnership. This combination of powerful tools gathers Stripe benefits and Salesforce advantages in 1 place. You get a smooth process for payments and customer management. Salesforce integration with Stripe enables customers to achieve impressive business results by increasing conversion rates through a fast and easy checkout experience powered by out-of-the-box payments solutions on the leading commerce platform.
Getting all the Stripe Salesforce benefits is easy. Use pre-built connectors or APIs for an easy setup and better business insights, or use other connectivity options, such as an ODBC driver, to establish a secure and reliable connection.
Overview of integration methods
There are different ways to organize Stripe integration in Salesforce. The easiest one of integration methods is using pre-built Stripe connectors. They offer a fast setup with little effort. If you need more flexibility, third-party tools allow for customization. For full control, custom API solutions are available, but they require technical knowledge. Choose the method that works best for your business needs.
Step-by-step guide to integrating Stripe with Salesforce
Stripe Salesforce integration helps streamline payment processing and customer data management. How to integrate Stripe and make an easy Salesforce setup? Follow these simple steps for a smooth integration.
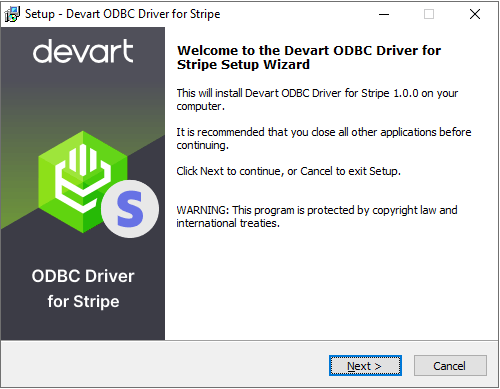
Installing the ODBC driver for Stripe from Devart
Start by installing the ODBC Driver for Stripe. It links Stripe with Salesforce. After installation, you can proceed with setting up Salesforce configuration.
- Download the installer and run it.
- Follow the Wizard. This setup tool provides handy on-screen steps to complete the process.
3. If you already have an older version of the driver installed, you’ll get a warning message. You can either overwrite the existing files or uninstall the old version first and then install the new one. We recommend the second option since it’s better for the performance.
4. On the Select Components page, choose whether to install the 64-bit version if needed. You can also choose to install additional help documentation and manuals.
5. Enter the License Key:
- If you have an activation key, select the Activation Key option and paste the key from your email or Devart’s Customer Portal.
- If you have a key file, click Load Activation Key and browse to the file.
- If you don’t have a key, select Trial to use the driver temporarily for evaluation.
- Click Next, Install, then Finish to finish installation.
- Configure the driver and set it up after installation.
Configuring user roles and permissions
Next, set up user roles and permissions in Salesforce. This ensures the right people can access payment data. Defining roles correctly is important for security. For a detailed guide on configuring user roles and permissions setup:
- Open ODBC Data Source Administrator. For this, search for ODBC Data Sources in Windows or find it in Control Panel > Administrative Tools.
- Select 32-bit or 64-bit based on your application. You can also run odbcad32.exe from the system folders.
- Go to the User DSN or System DSN tab and click Add.
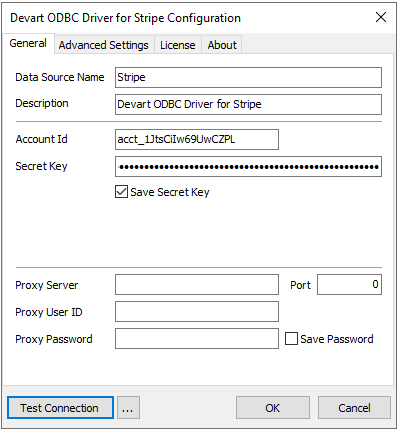
4. Choose Devart ODBC Driver for Stripe and click Finish.
5. Fill in the required connection information.
6. Click Test Connection to verify, then click OK to save the DSN.
This ensures that the right people can manage payments and data within Salesforce securely.
Using Stripe billing with Salesforce
Stripe Billing and Salesforce together simplify revenue management. In particular, Stripe handles billing and Salesforce tracks customer data. Together, in Stripe Salesforce integration, they automate invoicing, subscriptions, and payment processing.
Benefits of Stripe billing integration
Stripe Billing features make managing payments and subscriptions simple. It works well with Salesforce benefits, helping businesses track customer information. This integration saves time, reduces mistakes, and makes it easier to keep track of money coming in.
For example, SaaS companies can use Stripe to handle subscriptions and renewals automatically. E-commerce stores can process payments, refunds, and discounts easily. Service providers, like marketing agencies, can automatically send invoices and track payments. Nonprofits can manage donations and keep donor records updated without any hassle.
By using Stripe Billing with Salesforce, businesses can provide a smoother experience for customers. Invoices are sent on time, and automated reminders make sure nothing is forgotten. Payments are processed quickly and securely. This means businesses can focus on their customers, improve service, and keep them happy.
Use cases for Stripe billing and Salesforce
Real-world applications and case studies prove Stripe Billing and Salesforce make automating payments and managing customers easier. SaaS companies can manage recurring billing and renewals, making sure customers don’t leave. E-commerce stores can quickly handle payments, refunds, and track orders without errors.
Service-based businesses, like consultants or marketing agencies, can automate invoicing and payment collection through Stripe Salesforce integration. This helps them get paid faster and reduce time spent on admin work. Nonprofits can easily manage recurring donations and track donor subscriptions. Educational platforms can manage student payments and automate course renewals.
Event management companies can sell tickets and process refunds with Stripe Billing and Salesforce. Health and wellness businesses, such as gyms or online coaching, can use Stripe Salesforce integration to manage memberships and subscriptions. Companies using this integration have better control over their revenue, reduce mistakes, and provide a better customer experience.
Automating workflows with Stripe and Salesforce using ODBC driver
Using the ODBC driver, businesses can automate tasks between Stripe and Salesforce. Stripe integration in Salesforce through the ODBC driver saves time and reduces the need for manual work. With automation, Stripe handles payments, and Salesforce updates customer information automatically.
Setting up automation
To start, you need to install the ODBC driver to connect Stripe and Salesforce. Automation makes Stripe and Salesforce work together without manual effort. The ODBC driver connects both platforms, so data updates happen automatically.
For example, when a customer makes a payment in Stripe, Salesforce updates the record instantly. Subscription renewals, failed payments, and invoices get tracked without extra work.
After setting up automation, you can use tools like Power Automate to easily set up workflows. Businesses save time, avoid mistakes, and keep customer info up to date. This makes automation simple.
Examples of automated workflows
Automated workflow examples can help with tasks like invoicing, payment tracking, and subscription management. For example, when a payment happens in Stripe, Salesforce can automatically update the customer’s record. This keeps everything up-to-date without manual updates.
Another example of automation benefits is subscription management. If a customer cancels or renews their subscription, Stripe sends the info to Salesforce right away. Salesforce can then update the customer record automatically. You can also set up reminders for subscription renewals, which helps keep customers happy.
If a payment fails in Stripe, Salesforce will be notified and can automatically trigger actions, like sending a message to the customer or assigning someone to follow up. This helps solve payment issues fast and prevents losing revenue.
Managing events and settings in Stripe with Salesforce
Stripe integration in Salesforce can also help you in event management and settings configuration. You can track payments, subscriptions, and customer activity easily. This integration helps automate repetitive tasks and keeps everything running smoothly.
Migration steps for existing integrations
If you already have an existing integration, you can follow a simple guide with integration steps to migrate to Stripe and Salesforce.
Stripe for Salesforce creates webhooks to capture events automatically. These events update customer records in Salesforce.
- Open Stripe Universal Connector for Salesforce in App Launcher.
- Select your Stripe Account and click All Webhook Events.
- Choose a Stripe Object, toggle the events to track, and click Save.
- Check the Stripe Dashboard under Developers > Webhooks to view the new endpoint.
Automate with Salesforce
- Stripe events are stored in Stripe Events within Salesforce.
- Use DLM triggers and record-trigger flows to automate tasks.
- Create a Record-Triggered Flow in Salesforce to respond to Stripe events.
- Set conditions using stripeGC__Event_Name__c (e.g., customer.created event).
This integration keeps Stripe and Salesforce in sync with no manual effort.
Troubleshooting common issues
Sometimes, troubleshooting Stripe issues may arise with the integration. Common issues of Stripe Salesforce integration may include data, amendment, quote, price, or other problems.
For example, “Webhook delivery failed” – This can happen when the webhook doesn’t reach Salesforce. “Authentication failed” – when your API keys are incorrect. “Data mapping error” – when Stripe data doesn’t match Salesforce fields.
To fix these, check your connection settings and look at error logs. You can locate these errors in:
- Stripe Dashboard: Check webhook delivery logs, API key settings, and event triggers.
- Salesforce Setup: Use Debug Logs and Flow Error Logs to see detailed error messages and trace issues in your flows or triggers.
Wrapping up
Stripe Salesforce integration makes it easier to manage payments and customer data. The ODBC driver simplifies data integration, saving you time and reducing mistakes. This connectivity method lets you track payments and customer updates. It frees up time for you to focus on growing your business and providing a better customer experience.
