
In the realm of data management, especially when dealing with databases, it’s often critical to retrieve historical data from past points in time. Data in databases, however, is dynamic; it evolves continuously with the deletion of outdated information, the addition of new entries, and the formation of new relationships. A major challenge arises in accessing past data that may no longer exist in its original format.
The answer lies in utilizing historical data management techniques. In SQL Server, this is primarily achieved through system-versioned or temporal tables.
This article delves into the concept of system-versioned tables. We will examine their characteristics, guide you through the process of creating these tables, and unveil practical methods for querying them effectively.

Contents
Understanding system-versioned/temporal tables
In SQL Server, a system-versioned/temporal table is a specialized user table designed to maintain a complete history of data changes in each row. Specifically, this mechanism records every change made with every insert, update, or delete operation. This way, temporal tables allow an effortless point-in-time analysis without any manual record-keeping of alterations.
Typically, data history is preserved for an extended period, often months or even years, even if it isn’t regularly queried. The system (the database engine) manages the validity period of each row itself, that’s why the “system-versioned” name.
The concept of system-versioned temporal tables was initially introduced in the ANSI (American National Standards Institute) SQL 2011 standard. Nowadays, it’s available in SQL Server 2016 and subsequent versions. Temporal tables are considered a crucial feature for auditing SQL Server data.
The structure of temporal tables
A temporal table consists of two physical tables:
- The main table holds the currently valid records. This table is often referred to as the “current table” or simply the “temporal table.”
- The corresponding history table maintains archived records in a one-to-one correspondence with the main table. The system uses this history table to automatically store the previous version of a row every time a row in the temporal table is updated or deleted.
During the creation of temporal tables, users can specify an existing history table (which must comply with the schema) or let the system create a default history table.
Period columns in temporal tables
Each temporal table has two explicitly defined columns, both using the datetime2 data type. These columns are known as period columns. The system uses them to define the validity period of each row:
- Period start column: This column records the start time for each row and is often labeled as the “ValidFrom” column.
- Period end column: This column records the end time for each row and is usually labeled as the “ValidTo” column.
Therefore, the current table contains the actual values for each row, and the history table contains past values for each row along with the start and end times indicating their validity period.
Whenever you execute any data alteration query (INSERT, UPDATE, or DELETE) on a temporal table, the database engine will automatically add a row to the history table. It will do it even if no changes took place for the values in columns.
In various business scenarios, valuable insights can be gained through the analysis of data evaluations. Common use cases include:
- Auditing and investigating data changes as needed
- Reconstructing the historical state of data
- Ensuring data protection and recovery after accidents
- Calculating data trends over time
- Generating reports for historical data change analysis
For all these use cases (and more), temporal tables prove to be exceptionally beneficial.
Enhancing temporal table management
In this section of the article, we are going to examine the creation and querying of temporal tables. We will use dbForge Studio for SQL Server to illustrate the processes. This Studio is a more powerful alternative to the default SSMS IDE – a multi-featured system that covers all tasks on database development, management, and administration in SQL Server, offering a smart GUI and numerous automation options.
System-versioned tables are fully supported by dbForge Studio for SQL Server, so we will utilize this powerful IDE, especially its coding assistance features, to create and query temporal tables in the AdventureWorks2022 test database.
How to create system-versioned temporal tables
SQL Server supports two options for creating system-versioned tables: with the CREATE TABLE statement and with the ALTER TABLE statement. Let us examine both these methods.
Using CREATE TABLE for creating a temporal table
The basic syntax of the CREATE TABLE query is as follows:
CREATE COLUMN TABLE my_table (
<data columns>
<valid_from_columnname> TIMESTAMP NOT NULL GENERATED ALWAYS AS ROW START,
<valid_to_columnname> TIMESTAMP NOT NULL GENERATED ALWAYS AS ROW END,
PERIOD FOR SYSTEM_TIME (valid_from, valid_to)
)
WITH SYSTEM VERSIONING HISTORY TABLE my_table_history [[NOT]VALIDATED];
In this query, the valid_from and valid_to columns are timestamps that are maintained by the database engine. They are identified as periods for system_time values.
See the below example that demonstrates the creation of the temporal table in the AdventureWorks2022 test database:
CREATE TABLE HumanResources.SalesDept (
	BusinessEntityID INT NOT NULL,
	NationalIDNumber NVARCHAR(15) NOT NULL,
	JobTitle NVARCHAR(50) NOT NULL,
	BirthDate DATE NOT NULL,
	MaritalStatus NCHAR(1) NOT NULL,
	Gender NCHAR(1) NOT NULL,
	HireDate DATE NOT NULL,
	VacationHours SMALLINT NOT NULL CONSTRAINT DC_SalesDept_VacationHours DEFAULT (0),
	SickLeaveHours SMALLINT NOT NULL CONSTRAINT DC_SalesDept_SickLeaveHours DEFAULT (0),
	ModifiedDate DATETIME NOT NULL CONSTRAINT DC_SalesDept_ModifiedDate DEFAULT (GETDATE()),
	CONSTRAINT PK_SalesDept PRIMARY KEY (BusinessEntityID),
		SysStartTime datetime2 GENERATED ALWAYS AS ROW START NOT NULL,
		SysEndTime datetime2 GENERATED ALWAYS AS ROW END NOT NULL,
		PERIOD FOR SYSTEM_TIME (SysStartTime,SysEndTime)) WITH (SYSTEM_VERSIONING = ON);
Note: To avoid retrieving the records from period columns in the output of the standard SELECT * queries, it is better to apply the HIDDEN clause in the query as follows:
SysStartTime datetime2 GENERATED ALWAYS AS ROW START HIDDEN NOT NULL,
SysEndTime datetime2 GENERATED ALWAYS AS ROW END HIDDEN NOT NULL
In the future, if you need the data from the period queries in the SELECT statements addressed to the main table, specify those columns explicitly in the query.
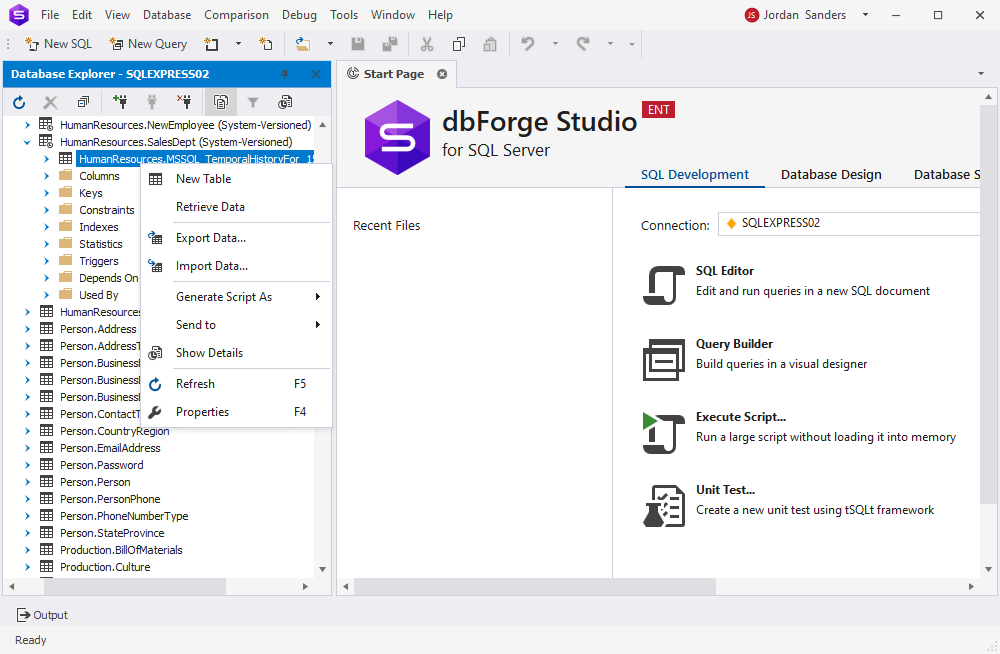
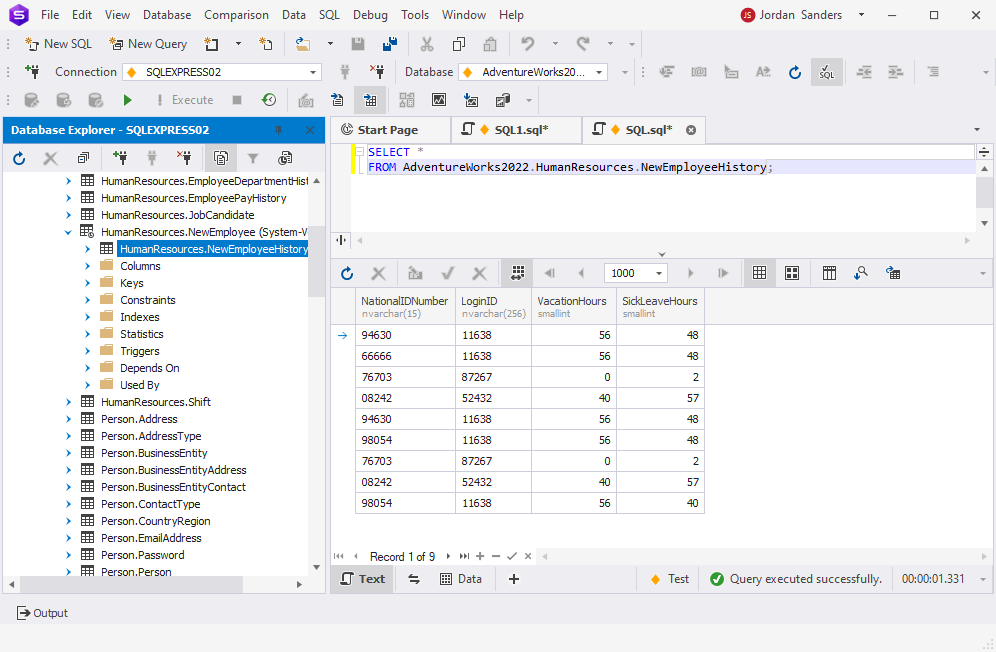
After executing the CREATE TABLE statement, you will see the temporal table together with the newly-created table. By default, the SQL Server automatically generates the name for the history table as dbo.MSSQL_TemporalHistoryFor_<ObjectID>

The history table has the same structure as the main table – the same columns. However, it does not have the primary key constraint. Besides, it includes the SysStartTime and SysEndTime columns.
Using ALTER TABLE for creating a temporal table
In SQL Server, we can enable system-versioning on a non-temporal table that already exists in the database. You need to add the period columns to the non-temporal table and set the tracking.
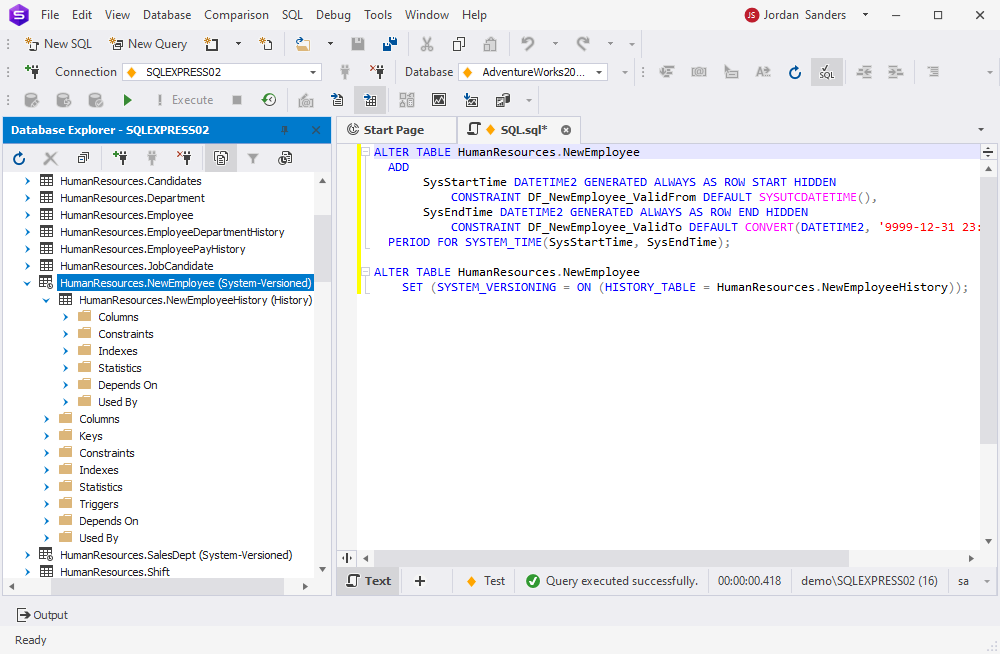
The below example demonstrates converting an existing non-temporal NewEmployee table into the system-versioned table:
ALTER TABLE HumanResources.NewEmployee
  ADD
       SysStartTime DATETIME2 GENERATED ALWAYS AS ROW START HIDDEN
           CONSTRAINT DF_NewEmployee_ValidFrom DEFAULT SYSUTCDATETIME(),
       SysEndTime DATETIME2 GENERATED ALWAYS AS ROW END HIDDEN
           CONSTRAINT DF_NewEmployee_ValidTo DEFAULT CONVERT(DATETIME2, '9999-12-31 23:59:59.9999999'),
  PERIOD FOR SYSTEM_TIME(SysStartTime, SysEndTime);

ALTER TABLE HumanResources.NewEmployee
    SET (SYSTEM_VERSIONING = ON (HISTORY_TABLE = HumanResources.NewEmployeeHistory));
Note that we have applied the HIDDEN clause to exclude the period columns results in the standard query output.
Important! UPDATE and INSERT operations are not allowed for temporal tables. You can use the DELETE command, though. Still, to permanently delete data from a system-versioned table you need to delete it from both the main and history tables: first, apply DELETE to the main table, and then execute the DELETE statement for the history table.
How to delete the system-versioned table
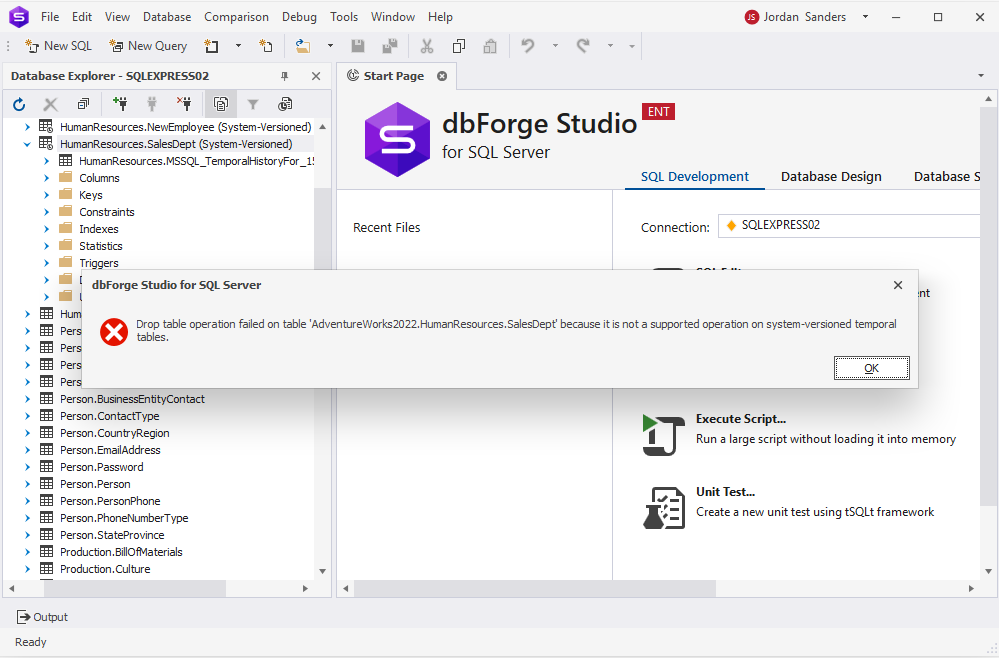
In case you don’t need the particular temporal table anymore, you can delete it permanently. However, this process can be a little tricky. The thing is, SQL Server does not provide an option to delete the system-versioned table directly:
When you are trying to delete the main table directly, SQL Server will throw an error:
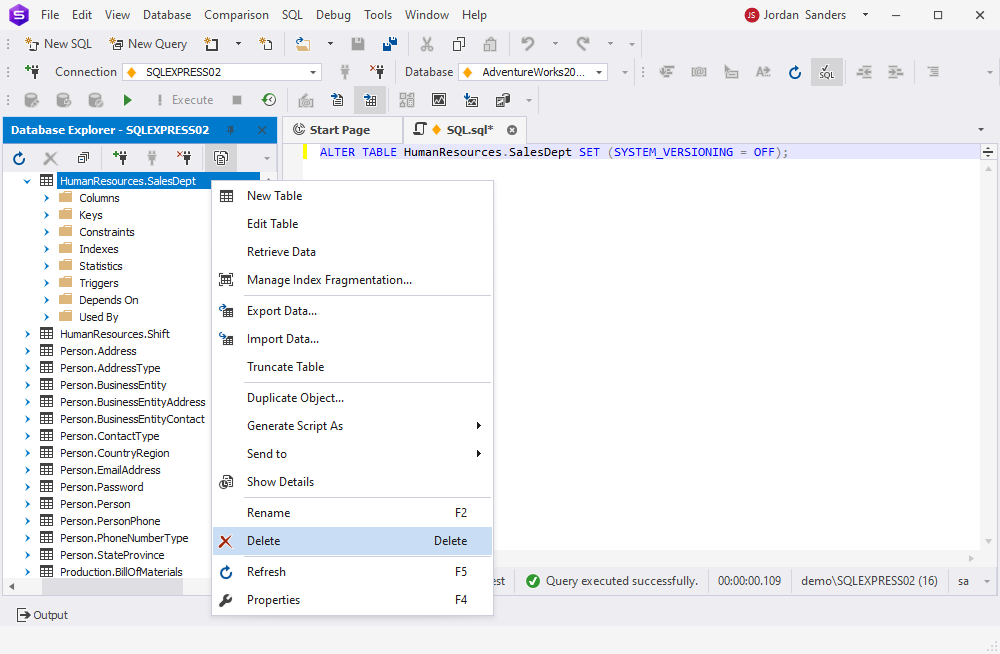
To delete the system-versioned table, we first need to disable the system_versioning setting in the following way:
ALTER TABLE [dbo].table_name SET (SYSTEM_VERSIONING = OFF);In our case, the query is:
ALTER TABLE HumanResources.SalesDept SET (SYSTEM_VERSIONING = OFF); After the execution of that query, you can see the temporal table as a separate table that can be easily deleted either with the DROP TABLE command or by selecting the Delete option in the GUI menu:
How to query temporal tables
You can query system-versioned tables in the same way as regular tables. The simplest option is to use the SELECT * command.
If you want to retrieve a data portion according to the more precise criteria, you can refer to the following time operators:
- AS OF – the clause serves to deliver you the data as it was at some specific point in time
- FROM…TO and BETWEEN… AND – these clauses deliver results for the specific period matching the values we specify in the query.
Note: You need to query the main table to retrieve the results.
The below example returns the state of the NewEmployee table AS OF a specific date and time in the past.
SELECT *
FROM AdventureWorks2022.HumanResources.NewEmployee
FOR SYSTEM_TIME AS OF '2024-01-04 20:57:10.7353564';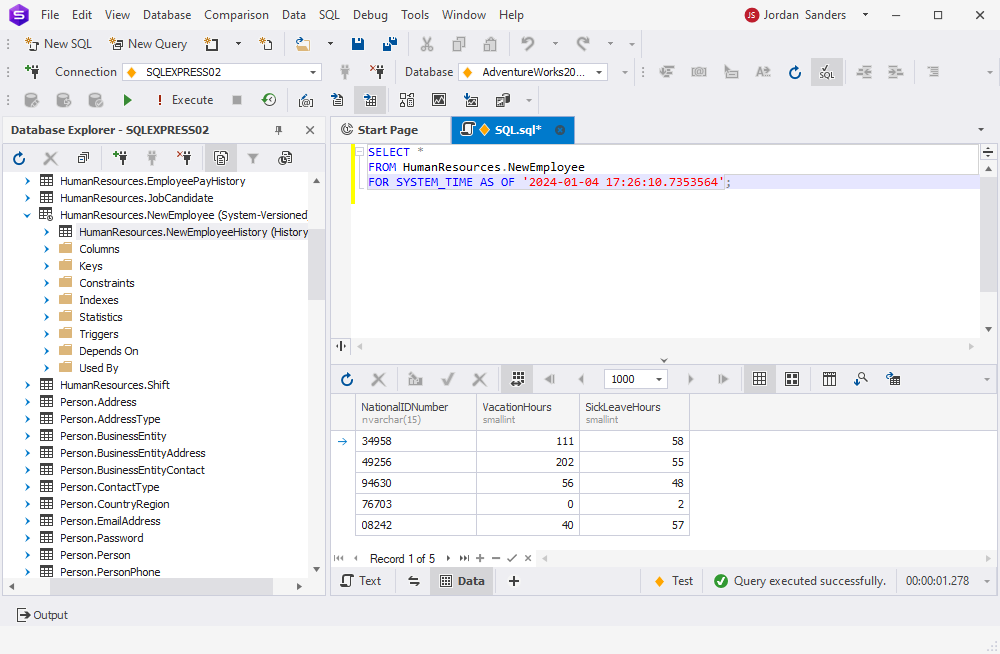
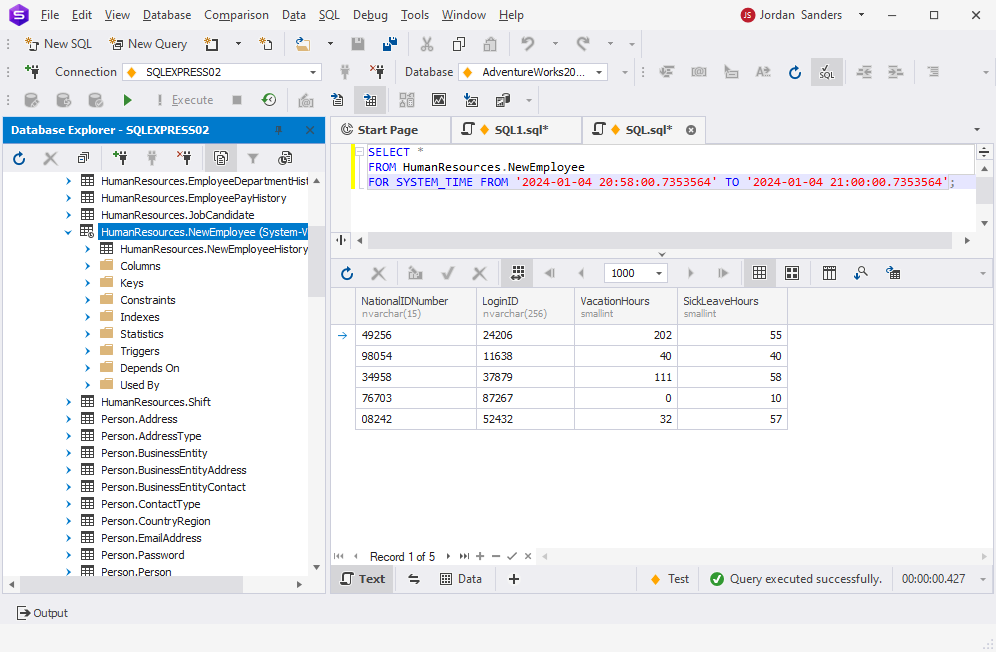
To get information about historical changes that happened to the values over a specific period, we can use the specialized temporal clauses: FROM … TO and BETWEEN … AND. These clauses allow us to get results for the specific period that matches the periods we specify in the query.
SELECT *
FROM HumanResources.NewEmployee
FOR SYSTEM_TIME FROM '2024-01-04 20:58:00.7353564' TO '2024-01-04 21:00:00.7353564';
Or
SELECT *
FROM HumanResources.NewEmployee
FOR SYSTEM_TIME BETWEEN '2024-01-04 21:10:00.7353564' AND '2024-01-04 21:15:00.7353564';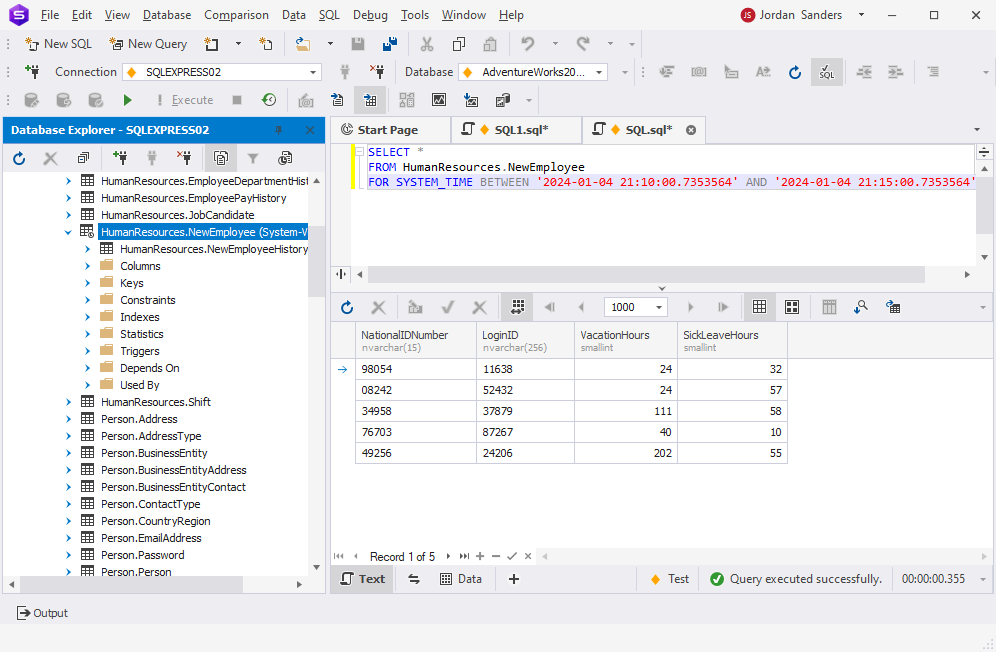
Conclusion
System-versioned or temporal tables enhance data integrity, simplify data management, and provide efficient tools for data analysis and recovery, making them a valuable feature in SQL Server for a wide range of applications.
If your responsibilities involve tasks like data auditing and analysis, you’ll find system-versioned tables indispensable. Furthermore, when working with system-versioned tables and other database components, having a powerful tool like dbForge Studio for SQL Server at your disposal simplifies the process.
dbForge Studio for SQL Server stands out with its multitude of coding assistance features and a comprehensive set of tools for database development, management, and administration. It significantly eases all tasks for SQL Server specialists, making their lives more manageable.
You can experience the capabilities of dbForge Studio for SQL Server in action by taking advantage of a fully functional free trial that lasts for 30 days. During this trial period, you’ll receive full support from the company, ensuring you get the most out of this resource for your database tasks.