
ASP.Net Core is a widely used, popular web application development framework with many features for building web modern web applications. This article talks about how you can upload one or more files in an ASP.NET Core 6 application.
In this article, we’ll connect to PostgreSQL using dotConnect for PostgreSQL which is high performance and enhanced data provider for PostgreSQL that is built on top of ADO.NET and can work on both connected and disconnected modes.
Pre-requisites
You’ll need the following tools to deal with code examples:

What Are We Building Here?
In this article, we’ll implement file upload using ASP.NET 6 MVC Core. Here are the steps we’ll follow throughout this article to accomplish this:
- Create an ASP.NET 6 MVC Core Web project in Visual Studio 2022
- Add the Devart.Data.PostgreSql NuGet package to the project
- Create a PostgreSQL database and the related table(s)
- Create an action method in the HomeController class to upload file(s)
- Update the default view of the Index.html file
- Test the application
Create a new ASP.NET 6 Core Web MVC App Project
In this section, we’ll learn how to create a new ASP.NET 6 Core Web API project in Visual Studio 2022.
Now, follow the steps outlined below:
- Open Visual Studio 2022.
- Click Create a new project.
- Select ASP.NET Core Web App (Model-View-Controller) and click Next. Refer to Figure 1 below:
Specify the project name and location to store that project in your system. Optionally, checkmark the Place solution and project in the same directory checkbox.
- Click Next.
- In the Additional information window, select .NET 6.0 (Long-term support) as the project version.
- Disable the Configure for HTTPS and Enable Docker Support options (uncheck them).
- Since we’ll not be using authentication in this example, select the Authentication type as None.
- Leave the Do not use top-level statements checkbox unchecked.
- Click Create to finish the process.
We’ll use this project in this article in the sections that follow to implement file upload and save functionality.
Install NuGet Package(s) into the Project
In your ASP.NET Core MVC project, i.e., the project you just created, you should install the dotConnect for PostgreSQL package in your project. dotConnect for PostgreSQL is a high-performance data provider for PostgreSQL built on ADO.NET technology that provides a comprehensive solution for building PostgreSQL-based database applications.
You can install this package either from the NuGet Package Manager tool inside Visual Studio or, from the NuGet Package Manager console using the following command:
PM> Install-Package Devart.Data.PostgreSQLCreate the Test PostgreSQL Database
You can create a PostgreSQL database using the pgadmin tool. To create a database using this Launch this tool, follow the steps given below:
- Launch the pgadmin tool
- Expand the Servers section
- Select Databases
- Right-click and click Create -> Database…
- Specify the name of the database and leave the other options to their default values
- Click Save to complete the process
Alternatively, you can use the following script to create the database:
-- Database: demo
DROP DATABASE IF EXISTS demo;
CREATE DATABASE demo
    WITH
    OWNER = postgres
    ENCODING = 'UTF8'
    LC_COLLATE = 'English_India.1252'
    LC_CTYPE = 'English_India.1252'
    TABLESPACE = pg_default
    CONNECTION LIMIT = -1
    IS_TEMPLATE = False;
Create a database table
Select and expand the database you just created
Select Schemas -> Tables
Right-click on Tables and select Create -> Table…
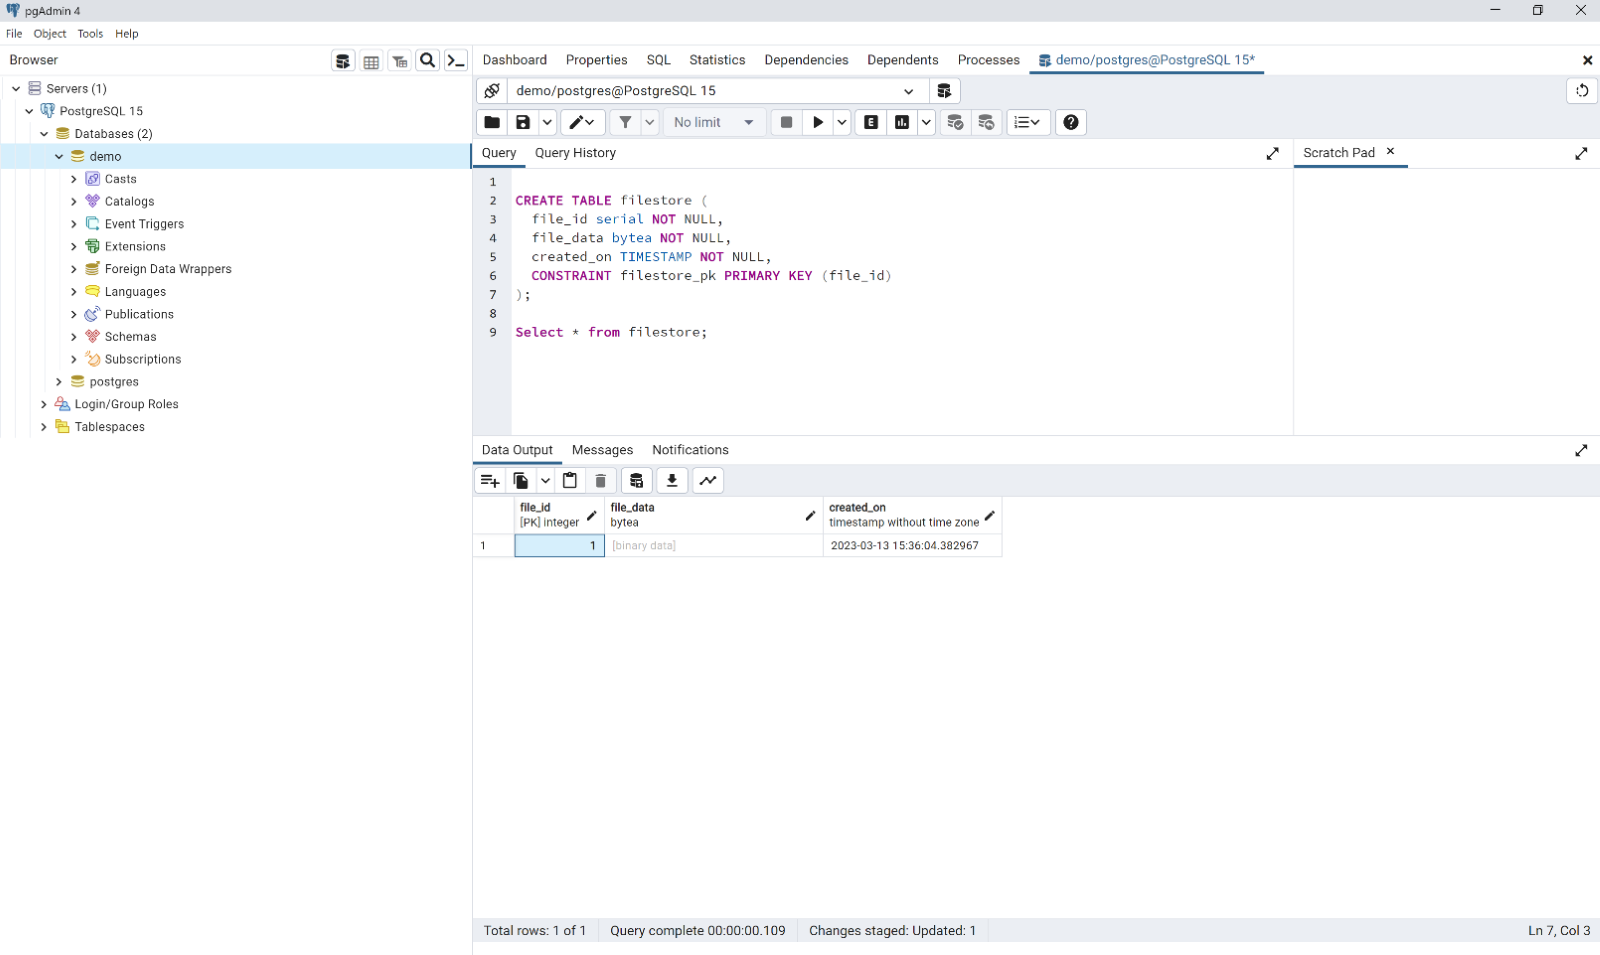
The table script is given below for your reference:
CREATE TABLE filestore (
  file_id serial NOT NULL,
  file_data bytea NOT NULL,
  created_on TIMESTAMP NOT NULL,
  CONSTRAINT filestore_pk PRIMARY KEY (file_id)
);
We’ll use this database in the subsequent sections of this article to demonstrate how we can upload files in ASP.NET Core MVC and store them in a database using dotConnect for PostgreSQL.
The IFormFile Interface
In this example, we will leverage the IFormFile interface pertaining to Microsoft.AspNetCore.Http namespace to upload files in our application. The IFormFile interface in Microsoft.AspNetCore.Http namespace represents a file uploaded through a web form. It allows developers to access the uploaded file’s content, length, and metadata. The IFormFile interface is given below for your reference:
public interface IFormFile
{
    string ContentType { get; }
    string ContentDisposition { get; }
    IHeaderDictionary Headers { get; }
    long Length { get; }
    string Name { get; }
    string FileName { get; }
    Stream OpenReadStream();
    void CopyTo(Stream target);
    Task CopyToAsync(Stream target, CancellationToken
    cancellationToken = null);
}
The IFormFile interface provides the following properties:
- ContentDisposition: Returns the content-disposition header for an uploaded file.
- ContentType: Represents the MIME type of the uploaded file.
- FileName: Returns the uploaded file name from the content-disposition header.
- Name: Returns the form field name of the uploaded file from the content-disposition header.
The IFormFile interface also provides methods for reading the file’s content:
- CopyToAsync(Stream): Asynchronously copies the uploaded file’s content to the specified stream.
- OpenReadStream(): Returns a Stream object to read the content of the uploaded file.
Create the View to Upload Files
Replace the default generated code of the Index.cshtml file with the following code:
@{
    ViewData["Title"] = "Home Page";
}

<body>
    <form method="post" enctype="multipart/form-data" asp-controller="Home"
        asp-action="Index">
        <span>Select File:</span>
        <input type="file" name="postedFile" />
        <input type="submit" value="Upload" />
        <br />
        <span>@Html.Raw(ViewBag.Message)</span>
    </form>
</body>
Create the Action Method to Upload Files
Create the following action method in the HomeController.cs file:
[HttpPost]
 public IActionResult Index(IFormFile postedFile)
 {
     if (postedFile == null || postedFile.Length == 0)
         return BadRequest("No file selected for upload...");

     string fileName = Path.GetFileName(postedFile.FileName);
     string contentType = postedFile.ContentType;

     return View();
 }
So far so good. We now need to store the content of the uploaded file into the database.
To do this, you should use a MemoryStream object and call the CopyToAsync method of the IFormFile interface to copy the file content onto a MemoryStream instance:
postedFile.CopyToAsync(memoryStream); You can then use dotConnect for PostgreSQL and write the following code to store the file content onto the database:
using(MemoryStream memoryStream = new MemoryStream())
{
 postedFile.CopyToAsync(memoryStream);

 using(PgSqlConnection pgSqlConnection =
   new PgSqlConnection("User Id = postgres; Password = sa123#;" +
              "host=localhost;database=demo;"))
    {
       using(PgSqlCommand pgSqlCommand = new PgSqlCommand())
       {
           pgSqlCommand.CommandText =
            "INSERT INTO filestore " +
            "(created_on, file_data) " +
            "VALUES (:createdon, :filedata)";
            pgSqlCommand.Parameters.Add("createdon", DateTime.Now);
            pgSqlCommand.Parameters.Add("filedata", PgSqlType.ByteA).Value =
            memoryStream.ToArray();

           pgSqlCommand.Connection = pgSqlConnection;
           if (pgSqlConnection.State !=
              System.Data.ConnectionState.Open)
           pgSqlConnection.Open();
           pgSqlCommand.ExecuteNonQuery();
       }
    }
}
The Complete Source Code
Here is the complete source code of the HomeController.cs file for your reference:
using Devart.Data.PostgreSql;
using Microsoft.AspNetCore.Http;
using Microsoft.AspNetCore.Mvc;

namespace FileUploadDemo.Controllers
{
     public class HomeController: Controller
     {
          private IWebHostEnvironment Environment;
          public HomeController(IWebHostEnvironment _environment)
          {
               Environment = _environment;
          }
          public IActionResult Index()
          {
               return View();
          }

          [HttpPost]
          public IActionResult Index(IFormFile postedFile)
          {
          if (postedFile == null || postedFile.Length == 0)
              return BadRequest("No file selected.");

          string fileName = Path.GetFileName(postedFile.FileName);
          string contentType = postedFile.ContentType;

          try
          {
                    using(MemoryStream memoryStream = new MemoryStream())
                    {
                         postedFile.CopyToAsync(memoryStream);

                         using(PgSqlConnection pgSqlConnection =
                         new PgSqlConnection("User Id = postgres; Password = sa123#;" +
                                   "host=localhost;database=demo;"))
                       {
                       using(PgSqlCommand pgSqlCommand = new PgSqlCommand())
                       {
                       pgSqlCommand.CommandText =
                          "INSERT INTO filestore " +
                                "(created_on, file_data) " +
                                "VALUES (:createdon, :filedata)";
                       pgSqlCommand.Parameters.Add("createdon", DateTime.Now);
                       pgSqlCommand.Parameters.Add("filedata", PgSqlType.ByteA).Value =
                                        memoryStream.ToArray();

                                   pgSqlCommand.Connection = pgSqlConnection;
                                   if (pgSqlConnection.State !=
                                        System.Data.ConnectionState.Open)
                                        pgSqlConnection.Open();
                                   pgSqlCommand.ExecuteNonQuery();
                              }
                       }
                    }
         }
         catch
         {
              return BadRequest(new
              {
                   message = "Error saving file to the database."
              });
         }
            return View();
       }
   }
}
License Key Validation Error
When you execute the application, you might run into license validation errors if no valid license key is available. If the license key validation fails, you will encounter a Devart.Common.LicenseException. To resolve this error, you must either have a license key and already be a user, or install the installation file which will install a trial key into the system.
Execute the Application
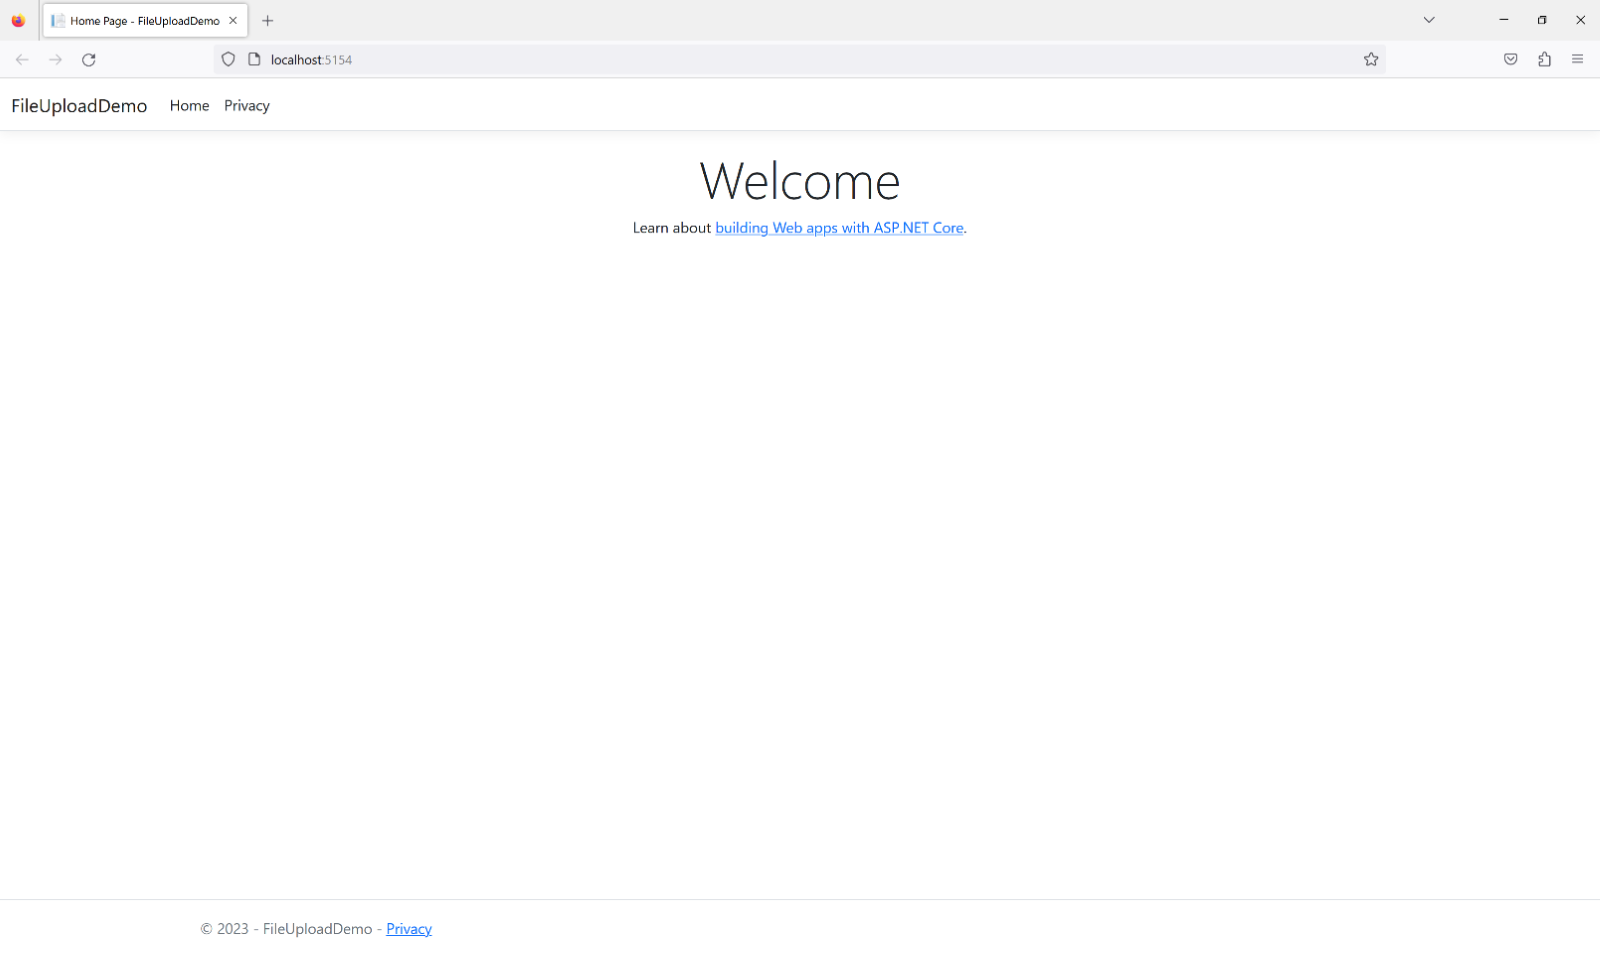
When you execute the application, the Index.cshtml file would be the default view and it would look like this:

Now, click on the “Browse…” button to select a file from your computer. Lastly, click the Upload button to upload the file you selected and store it in the database.
Once the file upload and save process is successful, the file will be saved successfully in your database:
Uploading Multiple Files
To upload multiple files you should use IEnumerable<IFormFile> or List<IFormFile> as a parameter in your action method. The rest of the code for this action method needs to be reorganized to allow multiple files to the uploaded and then saved in the database. Here’s the source code of the action method to work with multiple files:
[HttpPost]
 public IActionResult Index(List < IFormFile > postedFiles)
   {
     foreach(var postedFile in postedFiles)
     {

       string fileName = Path.GetFileName(postedFile.FileName);
       string contentType = postedFile.ContentType;

       try
       {
         using(PgSqlConnection pgSqlConnection =
           new PgSqlConnection("User Id = postgres; Password = sa123#;" +
             "host=localhost;database=demo;"))
         {
           if (pgSqlConnection.State !=
             System.Data.ConnectionState.Open)
             pgSqlConnection.Open();

           using(MemoryStream memoryStream = new MemoryStream())
           {
             postedFile.CopyToAsync(memoryStream);

             using(PgSqlCommand pgSqlCommand = new PgSqlCommand())
             {
               pgSqlCommand.CommandText =
                 "INSERT INTO filestore " +
                 "(created_on, file_data) " +
                 "VALUES (:createdon, :filedata)";
               pgSqlCommand.Parameters.Add("createdon", DateTime.Now);
               pgSqlCommand.Parameters.Add("filedata", PgSqlType.ByteA).Value =
                 memoryStream.ToArray();

               pgSqlCommand.Connection = pgSqlConnection;
               pgSqlCommand.ExecuteNonQuery();
             }
           }
         }
       }
       catch
       {
         return BadRequest(new
         {
           message = "Error saving files to the database."
         });
       }
     }
You should also update the markup code of the Index.cshtml file to allow multiple files to be uploaded by specifying the “multiple” attribute as shown in the code snippet given below:
@{
    ViewData["Title"] = "Home Page";
}
<body>
    <form method="post" enctype="multipart/form-data" asp-controller="Home" asp-action="Index">
        <span>Select File:</span>
        <input type="file" name="postedFiles" multiple />
        <input type="submit" value="Upload" />
        <br />
        <span>@Html.Raw(ViewBag.Message)</span>
    </form>
</body>
Lastly, execute the application and browse to select multiple files, and press the Upload button. You’ll observe that the content of all files selected will be saved in the database.
Summary
It should be noted that the encoding type of your form must be “multipart/form-data” to be able to upload files. Enctype determines how form data will be encoded for transmission when a post request is sent from the client to the server. Note that the file(s) are first uploaded in the memory and saved in a MemoryStream object before being stored in the database.