In this article, you will learn how to apply object filters within dbForge Schema Compare for SQL Server to be able to adjust the schema comparison and synchronization process to your needs by excluding and including the necessary objects and object types.
Why do we need to apply filters?
We usually apply filters when we obtain a large heap of information in the results, and we want to narrow it down to focus on something that is currently relevant for us. Often, there are some classes or types of database objects that we want to ignore completely during the comparison and synchronization process. That’s when object filters come into play.
Filters tell the Schema Comparison Engine to exclude or include certain objects according to their name or type. You can configure a filter in the way that only the objects meeting the given criteria are included in the comparison procedure or comparison results. The purpose of this is to have a clear picture of the differences between databases, check them for drift, and subsequently create an accurate synchronization script.
With filters, you can specify the parts of a database that must or mustn’t be in the development, test, or production versions of the database, which is crucial for proper database management. For instance, objects like synonyms, partitions schemes, and partition functions may be unnecessary for deployment, and you would probably want to exclude them from database deployment scripts.
Excluding database object classes
Quite often, you need to exclude certain object types from the comparison. An example of this can be users objects, which are usually added in the staging by the ops DBA. There probably are other objects that are necessary for the operation to function properly but are not included in the development databases. Using a filter will help you avoid any issues that can cause loss of objects in the target.
Excluding database objects or groups of objects
It may also be necessary to exclude meaningful parts of the databases, such as entire schemas, from the comparison, especially if those are managed by third-party organizations. If that’s the case, one should be extra careful and check the synchronization script for the object dependencies warnings.
Including only named objects
Supposing you need to work on a change made to a specific part of the database. You would probably want to focus on a particular schema for development work or pay attention to the part that has certain named objects or tables/views with a specific function.
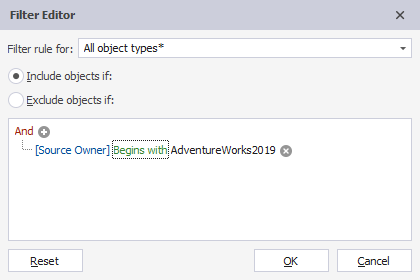
Hence, your primary task would be to modify only that part preserving the rest of the database unchanged. If you need to select a schema and the objects that are part of it, you can indicate All object types and specify a source owner (or schema) that you need:
After you have altered the objects, the next step would be to conduct a series of integration tests. So, you will need to deploy the changes to a test server. In doing this, the Schema Comparison functionality will suggest that any dependent objects ignored by your filter are properly located in the target database. This will help you ensure that the objects work properly and eliminate errors.
It is also quite simple to check that everything is functioning properly and check the object dependencies. If an excluded object is referenced by an object that you selected for synchronization, you will be notified of this dependency, and you can choose to synchronize the affected object on the Dependencies tab of the Schema Synchronization wizard. This will help you prevent possible conflicts. If the tool has not identified any unresolved object dependencies, you can easily deploy the changes you made to the target database. If this isn’t the case, resolving object dependencies should be the primary task prior to the next build.
Filters in the GUI of dbForge Schema Compare for SQL Server
The easiest way to set up a filter is by means of the dbForge Schema Compare for SQL Server, which works both ways, as an SSMS add-in and as a standalone tool. You can save the necessary filter and later use it in dbForge Studio for SQL Server. The filter is saved as an XML filter file with the .scflt extension.
By the way, to learn how to involve dbForge Schema Compare in the CI process, feel free to watch this video.
Schema Compare Tool
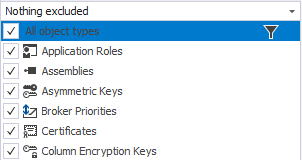
Schema Compare for SQL Server empowers you to configure and modify filters in order to decide which objects must be displayed in the comparison results and which, therefore, can be selected for synchronization. You can select individual object types or All object types (Nothing excluded) and edit the rules applying to those objects:
You can also select an available filter from the drop-down list. If the necessary filter is not listed, it is probably not in the default folder, so you can click the folder icon and browse to the filter you need:
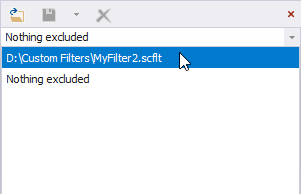
The default filter is Nothing Excluded. Once you have started editing this filter, Custom* is shown in the Filter box. The asterisk displayed next to the name of the filter you edit indicates that there are unsaved changes.
Let’s have an example. Supposing you want to see only the differences between database tables in the comparison results. In this case, you will configure a filter for object types that will include only the table objects and ignore the rest of the object types. To do that, click the filter icon located on the Schema Comparison toolbar or press Ctrl+L.
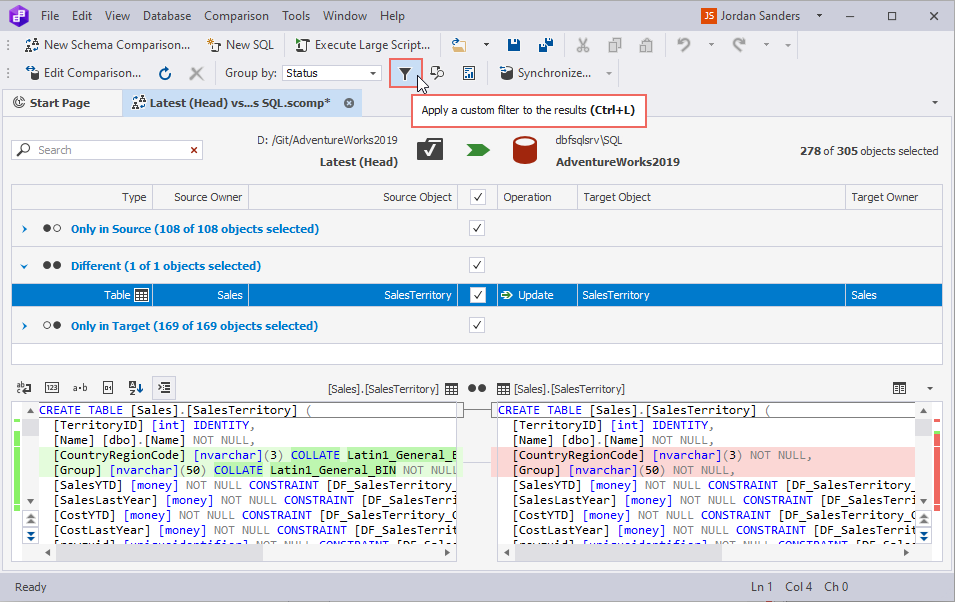
You are now ready to start setting up or editing filter expressions. You can select or unselect a checkbox next to the objects you want to include or exclude in the Filter pane.
You can now create your own filter or edit the existing filter. To open a Filter Editor, click the filter button next to the required object. This will cause the Filter Editor dialog box to be displayed. You can specify the rules for your filter: select the objects that the rules will apply to from the drop-down list and edit the rules.
Below, you can see an example of configuring a filter that includes only the tables that refer to the Person schema:
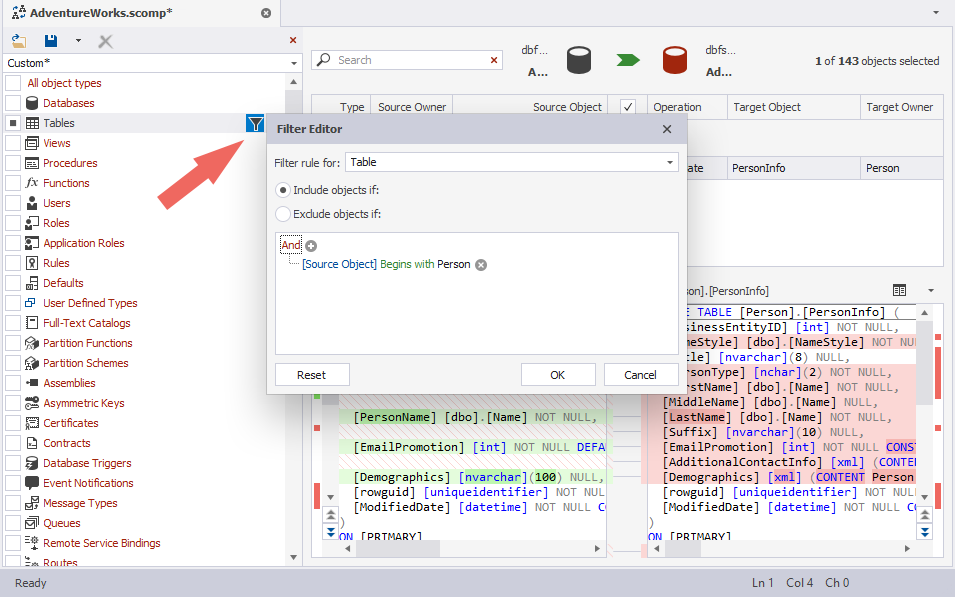
With the help of the Filter Editor, you can create rules to control the specified objects that a filter includes or excludes. You can go to the Filter rule for box and select individual object types or All object types, and then edit the rules by setting the condition(s) and defining the filter expression:
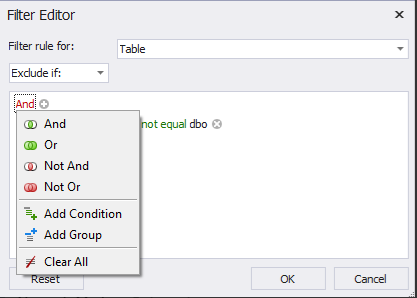
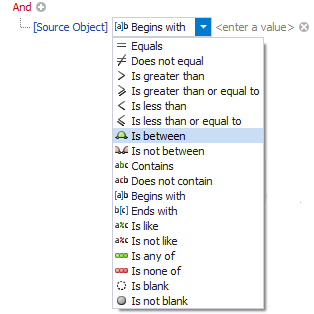
If you need to remove a condition, you can click the cross icon next to the Object in the Filter pane. And to edit the filter you can click the filter icon once again:
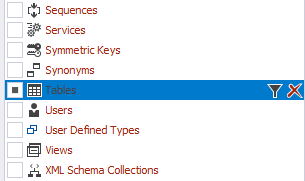
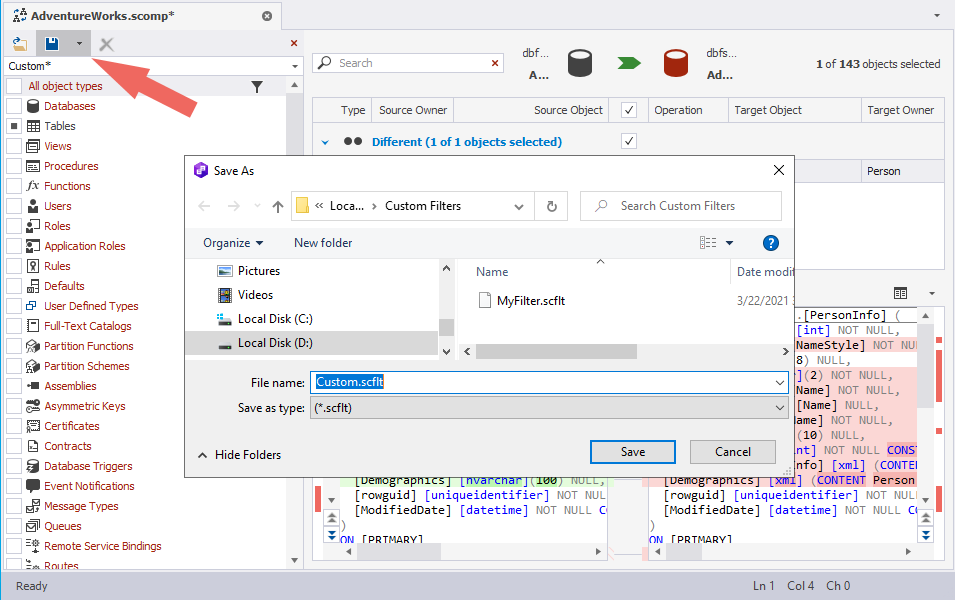
To save the current filter and be able to use it across multiple projects, click Save on the Filter pane and provide a name for your filter. You can also save the edited filter and overwrite the previously saved filter or create a new filter depending on your needs. If it is necessary to delete the current filter, you can click the cross icon on the Filter pane:
Editing filter files
dbForge Schema Compare for SQL Server allows creating filters within an XML file with the .scflt extension. Within the tool’s interface, you can create and modify the filter files without much effort, which is why it is by far the most convenient way to handle them.
However, if you don’t have access to the tool, you can easily view and modify the XML filter file itself. Filter files generally represent a list of each class of SQL Server objects with an indication of whether they should be included or excluded and the expression that should be tested for the action.
The class of objects is included in the comparison when the filter expression is equal to true, and it is excluded from the comparison when the expression is false. In the example that follows, views, which are checked as true, are included in the comparison whereas the objects checked as false are excluded. This is generally what the filter looks like if you unselect a checkbox next to a type of object (exclude if from the comparison). As you can see, the table class has a defined filter condition that excludes all table objects in the source if their names contain PersonInfo:

In the example below, the filter tells to include all object types into the comparison on the condition that they belong to the source owner (or schema) that equals Production:

And this means that we want to include all objects that refer to either Production or Person schema:

This filter is set to exclude the objects that are identical in source and target, the objects that contain the word ‘Address’, and those that belong to the Person schema.

Handling filter files
Filters are saved to the D:\Custom Filters folder on your computer. In Schema Compare for SQL Server, all files in this folder with the .scflt extension are displayed in the Filter drop-down list. You can easily access and apply the existing filters using both Schema Compare for SQL Server and dbForge Studio for SQL Server tools. Besides, you can copy and share the filter to be used on another computer.
Command-line access within Schema Compare
You can apply a filter from the command line if you use the /filter switch and then specify the path to the filter you want to use.
/filter:<D:\Custom Filters\MyFilter>Conclusion
To sum up, we have outlined the importance of applying filters to schema comparison results and reviewed the Object Filter functionality in the dbForge Schema Compare tool. The feature is designed to help you focus on what’s currently essential to you and implement error-free database deployments. Check other features that are part of Schema Compare for SQL Server.


