
Testing is an integral element of the development process for every application. There are many types of tests such as unit tests, integration tests, etc. Unit testing is an approach that is used to test units of the source code. You can take advantage of unit testing to validate business logic across all the components in your application.
The most common types of tests include:
- Unit Testing – which tests individual pieces or units of code.
- Integration Testing – which tests how different components work together in integration.
- Function Testing – which tests specific features of your application.
- System Testing – verifies conformity with the functional and non-functional requirements after integration testing.
- User Acceptance Testing – which tests everything together as a whole with real users.
- Regression Testing – which tests the application to verify that recent changes in the code haven’t broken any functionality.
Integration tests verify that the components work together correctly and can be integrated with other components or applications. In this article, we’ll examine how to build and execute integration tests using ASP.NET 6 Core.

Pre-requisites
You’ll need the following tools to deal with code examples:
What Are We Building Here?
In this article we’ll be writing integration tests to test APIs built using ASP.NET 6. Here are the steps we’ll follow throughout this article to accomplish this:
- Gain an understanding of Integration Testing
- Create an ASP.NET 6 Core Web API project in Visual Studio 2022
- Add the Devart.Data.PostgreSql NuGet package to the API project
- Write a simple controller and its associated classes
- Create an xUnit Project in Visual Studio 2022
- Add the Devart.Data.PostgreSql NuGet package to the test project
- Create a test class and Execute test method(s)
What is Integration Testing? Why do we need it?
Integration tests determine whether or not the individual components of an application continue to function correctly after being combined into a whole. You can perform integration testing at any point in a software development lifecycle, but it’s usually done after unit testing and before system testing. It’s important because it allows you to catch bugs at a point in the process where they are relatively easy to fix rather than later when they become more expensive to fix.
Integration testing aims to find issues related to data flow, security issues, performance issues, etc., to ensure that modules work correctly together when integrated as a whole. Integration tests are used to examine how effectively the various components of an application function when they are integrated. Integration tests guarantee that when the different components of the application are combined, they perform as intended.
Integration testing is necessary because it helps prevent integration issues from being overlooked. Integration testing should be used alongside other types of testing, including unit testing and functional testing, because it provides an opportunity to test how well the different parts of a system work together.
Create a new ASP.NET 6 Core Web API Project
In this section we’ll learn how to create a new ASP.NET 6 Core Web API project in Visual Studio 2022.
Now, follow the steps outlined below:
- Open Visual Studio 2022.
- Click Create a new project.
- Select ASP.NET Core Web API and click Next.
- Specify the project name and location to store that project in your system. Optionally, checkmark the Place solution and project in the same directory checkbox.
- Click Next.
- In the Additional information window, select .NET 6.0 (Long-term support) as the project version.
- Disable the Configure for HTTPS and Enable Docker Support options (uncheck them).
- Since we’ll not be using authentication in this example, select the Authentication type as None.
- Since we won’t use Open API in this example, deselect the Enable OpenAPI support checkbox.
- Since we’ll not be using minimal APIs in this example, ensure that the Use controllers (uncheck to use minimal APIs) is checked.
- Leave the Do not use top-level statements checkbox unchecked.
- Click Create to finish the process.
We’ll use this project in this article.
Install NuGet Package(s) into the API Project
In your API project, which you just created, you should install the dotConnect for PostgreSQL package. dotConnect for PostgreSQL is a high-performance data provider for PostgreSQL built on ADO.NET technology that provides a comprehensive solution for building PostgreSQL-based database applications.
You can install this package either from the NuGet Package Manager tool inside Visual Studio or from the NuGet Package Manager console using the following command:
PM> Install-Package Devart.Data.PostgreSqlCreate the PostgreSQL Database
You can create a database using the pgadmin tool. To create a database launch this tool, follow the steps given below:
- Launch the pgadmin tool
- Expand the Servers section
- Select Databases
- Right-click and click Create -> Database…
- Specify the name of the database and leave the other options to their default values
- Click Save to complete the process
Create a database table
Select and expand the database you just created
Select Schemas -> Tables
Right-click on Tables and select Create -> Table…
The table script is given below for your reference:
CREATE TABLE customer (
	id serial PRIMARY KEY,
	firstname VARCHAR ( 50 ) NOT NULL,
	lastname VARCHAR ( 50 ) NOT NULL,
	address VARCHAR ( 255 ) NOT NULL
);
We’ll use this database in the subsequent sections of this article to demonstrate how we can work with Integration Tests in ASP.NET Core using dotConnect for PostgreSql.
Add a few records to the Customer table
Now, run the following script in your database to insert a few records in the Customer table:
INSERT INTO Customer(firstname, lastname, address)
VALUES ('Joydip', 'Kanjilal', 'Hyderabad, India');

INSERT INTO Customer(firstname, lastname, address)
VALUES ('Steve', 'Smith', 'Chicago, USA');

INSERT INTO Customer(firstname, lastname, address)
VALUES ('James', 'Anderson', 'Dallas, USA');
Figure 1 below illustrates the pgAdmin editor where you can write and execute your scripts:
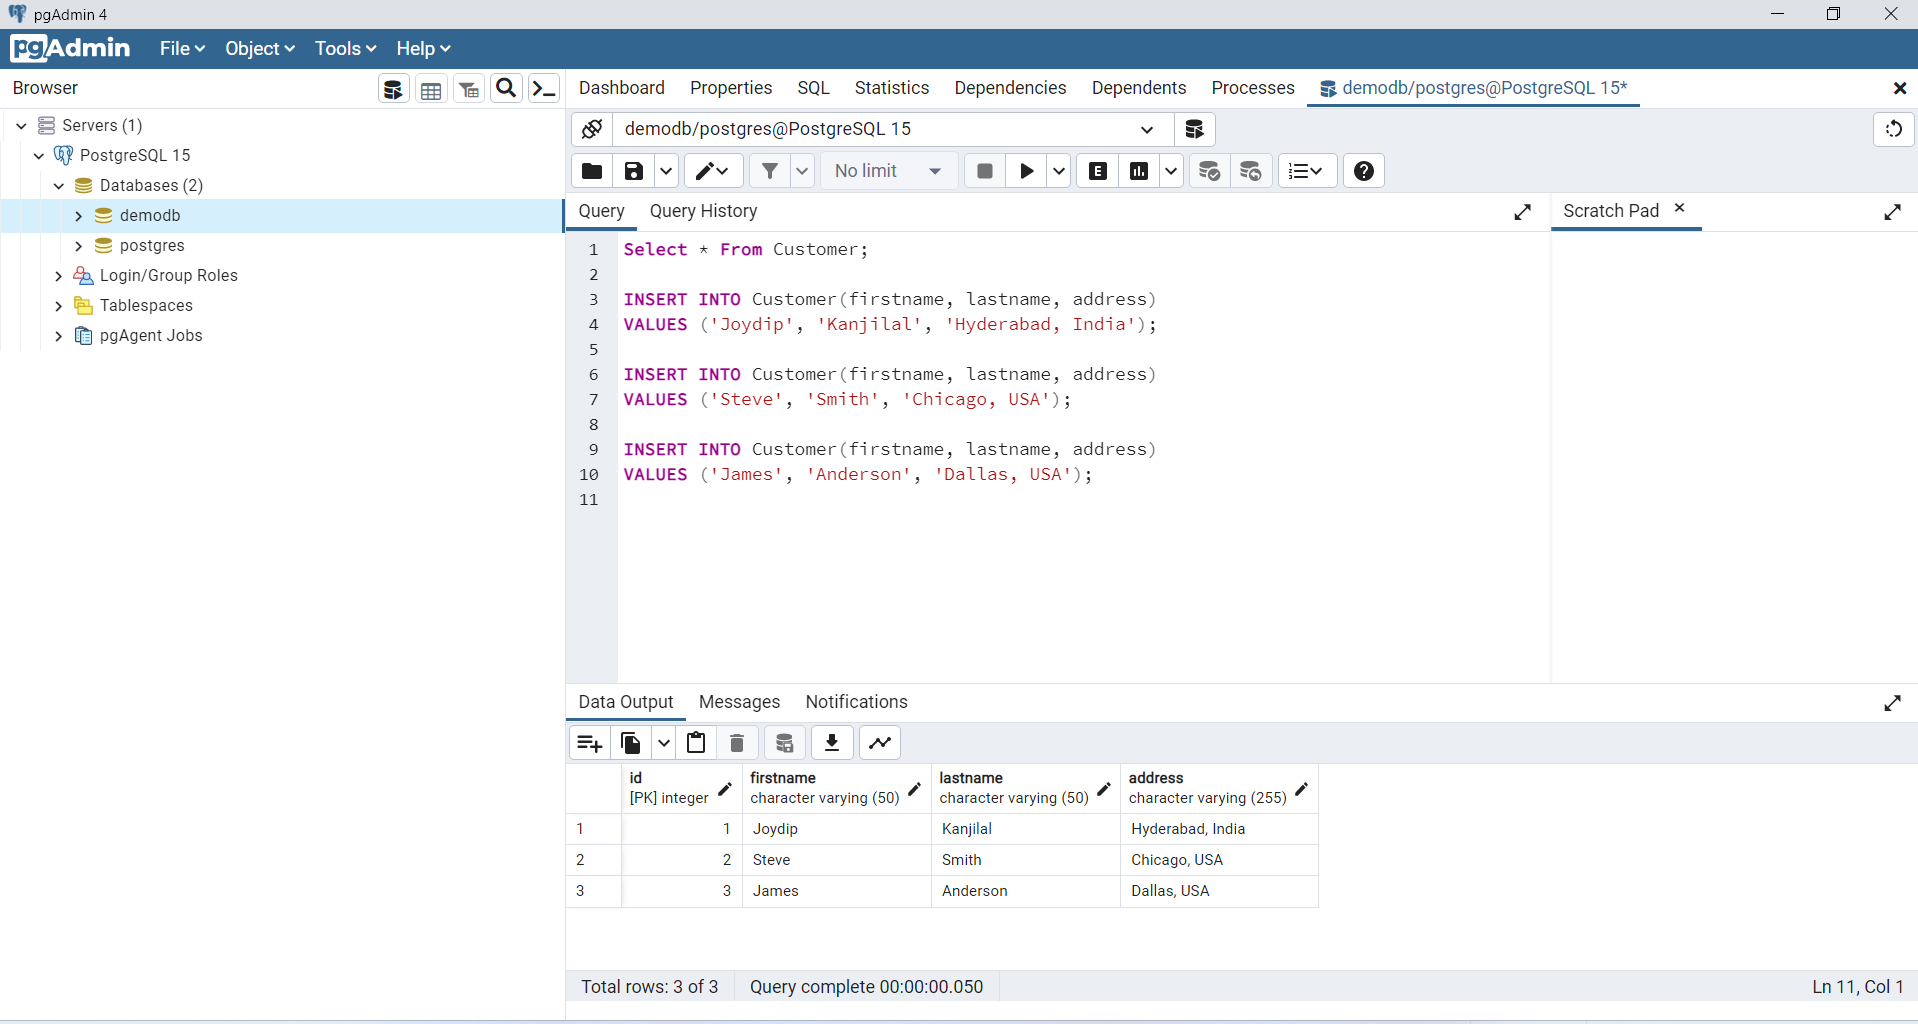
Figure 1: Records inserted into the Customer table
Create the Model Class
Create a solution folder in the Solution Explorer window and name it as Models. Next, create a .cs file called Customer.cs with the following code in there:
public class Customer
    {
        public int Id { get; set; }
        public string FirstName { get; set; }
        public string LastName { get; set; }
        public string Address { get; set; }
    }
Create the CustomerRepository Class
The ICustomerRepository interface would look like this:
 public interface ICustomerRepository
    {
        public List<Customer> GetCustomers();
    }
Note that for the sake of simplicity, we’ve only one method in the ICustomerRepository interface. The CustomerRepository class implements the GetCustomers method of the ICustomerRepository interface and encapsulates all database operations.
public class CustomerRepository : ICustomerRepository
    {
        public List<Customer> GetCustomers()
        {
            try
            {
                List<Customer> customers = new List<Customer>();
                using (PgSqlConnection pgSqlConnection =
                 new PgSqlConnection("User Id = postgres; Password = sa123#;" +
                 "host=localhost;database=postgres;"))
                {
                    using (PgSqlCommand pgSqlCommand = new PgSqlCommand())
                    {
                        pgSqlCommand.CommandText =
                        "Select * From public.Customer";
                        pgSqlCommand.Connection = pgSqlConnection;
                        if (pgSqlConnection.State !=
                        System.Data.ConnectionState.Open)
                            pgSqlConnection.Open();
                        using (PgSqlDataReader pgSqlReader =
                         pgSqlCommand.ExecuteReader())
                        {
                            while (pgSqlReader.Read())
                            {
                                Customer customer = new Customer();
                                customer.Id =
                                 int.Parse(pgSqlReader.GetValue(0).ToString());
                                 customer.FirstName =
                                 pgSqlReader.GetValue(1).ToString();
                                 customer.LastName =
                                 pgSqlReader.GetValue(2).ToString();
                                 customer.Address =
                                 pgSqlReader.GetValue(3).ToString();
                                customers.Add(customer);
                            }
                        }
                    }
                }
                return customers;
            }
            catch
            {
                throw;
            }
        }
    }
Create the CustomerController Class
Next, select and right-click on the Controllers solution folder and create a new controller class called CustomerController with the following code in there:
[Route("api/[controller]")]
    [ApiController]

    public class CustomerController : ControllerBase
    {
        private readonly ICustomerRepository _customerRepository;
        public CustomerController(ICustomerRepository customerRepository)
        {
            _customerRepository = customerRepository;
        }

        [HttpGet]
        public List<Customer> Get()
        {
            return _customerRepository.GetCustomers();
        }
    }
Note how an instance of type ICustomerRepository is injected in the constructor of the CustomerController class. Remember that you must add an instance of type ICustomerRepository to the services container using the following piece of code in the Program.cs file:
builder.Services.AddScoped<ICustomerRepository, CustomerRepository>();Create an xUnit test project in ASP.NET 6 Core
Now that the application to be tested is ready, follow the steps given below to create a new xUnit test project in Visual Studio 2022:
- Click on File > New > Project.
- Select “xUnit Test Project” from the list of the templates displayed.
- Specify a name and location for the test project.
- Select .NET 6.0 (Long-term support) as the project version.
- Click Create.
This would create a new xUnit test project which you can use to perform integration testing.
Install NuGet Package(s) in the Test Project
Next, install the Microsoft.AspNetCore.Mvc.Testing package in your test project. You can install it either from the NuGet Package Manager tool inside Visual Studio or, from the NuGet Package Manager console using the following command:
PM> Install-Package Microsoft.AspNetCore.Mvc.TestingImplementing the Unit Test Method
Let’s now implement the test method. For the sake of simplicity, we’ll create only one test method in this example. Now, create an instance of WebApplicationFactory and specify the name of the Program class as shown in the code snippet given below:
var webApplicationFactory = new WebApplicationFactory<Program>();Next, create instance of HttpClient using the CreateDefaultClient method of WebApplicationFactory as shown in the code snippet given below:
var _httpClient = webApplicationFactory.CreateDefaultClient();You can now leverage the GetAsync method of HttpClient and pass the requestUri as a parameter to retrieve the response.
var response = await _httpClient.GetAsync("/api/customer");You can then retrieve the customer data as a json string using the following code:
var result = await response.Content.ReadAsStringAsync();Lastly, you can assert to validate if the results obtained are the same as what you expected, i.e., if the actual and expected results match.
Assert.True(!string.IsNullOrEmpty(result));In your test project, change the name of the default test class to CustomerTests.cs and write the following code in there:
public class CustomerTests
    {
        private HttpClient _httpClient;
        public CustomerTests()
        {
            var webApplicationFactory = new WebApplicationFactory<Program>();
            _httpClient = webApplicationFactory.CreateDefaultClient();
        }

        [Fact]
        public async Task CustomerGet_ReturnsListOfCustomers()
        {
            var response = await _httpClient.GetAsync("/api/customer");
            var result = await response.Content.ReadAsStringAsync();
            Assert.True(!string.IsNullOrEmpty(result));
        }
    }
License Key Validation Error
If there is no valid license key available, the license validation will fail. If the license key validation fails, you will encounter a Devart.Common.LicenseException as shown in Figure 3.
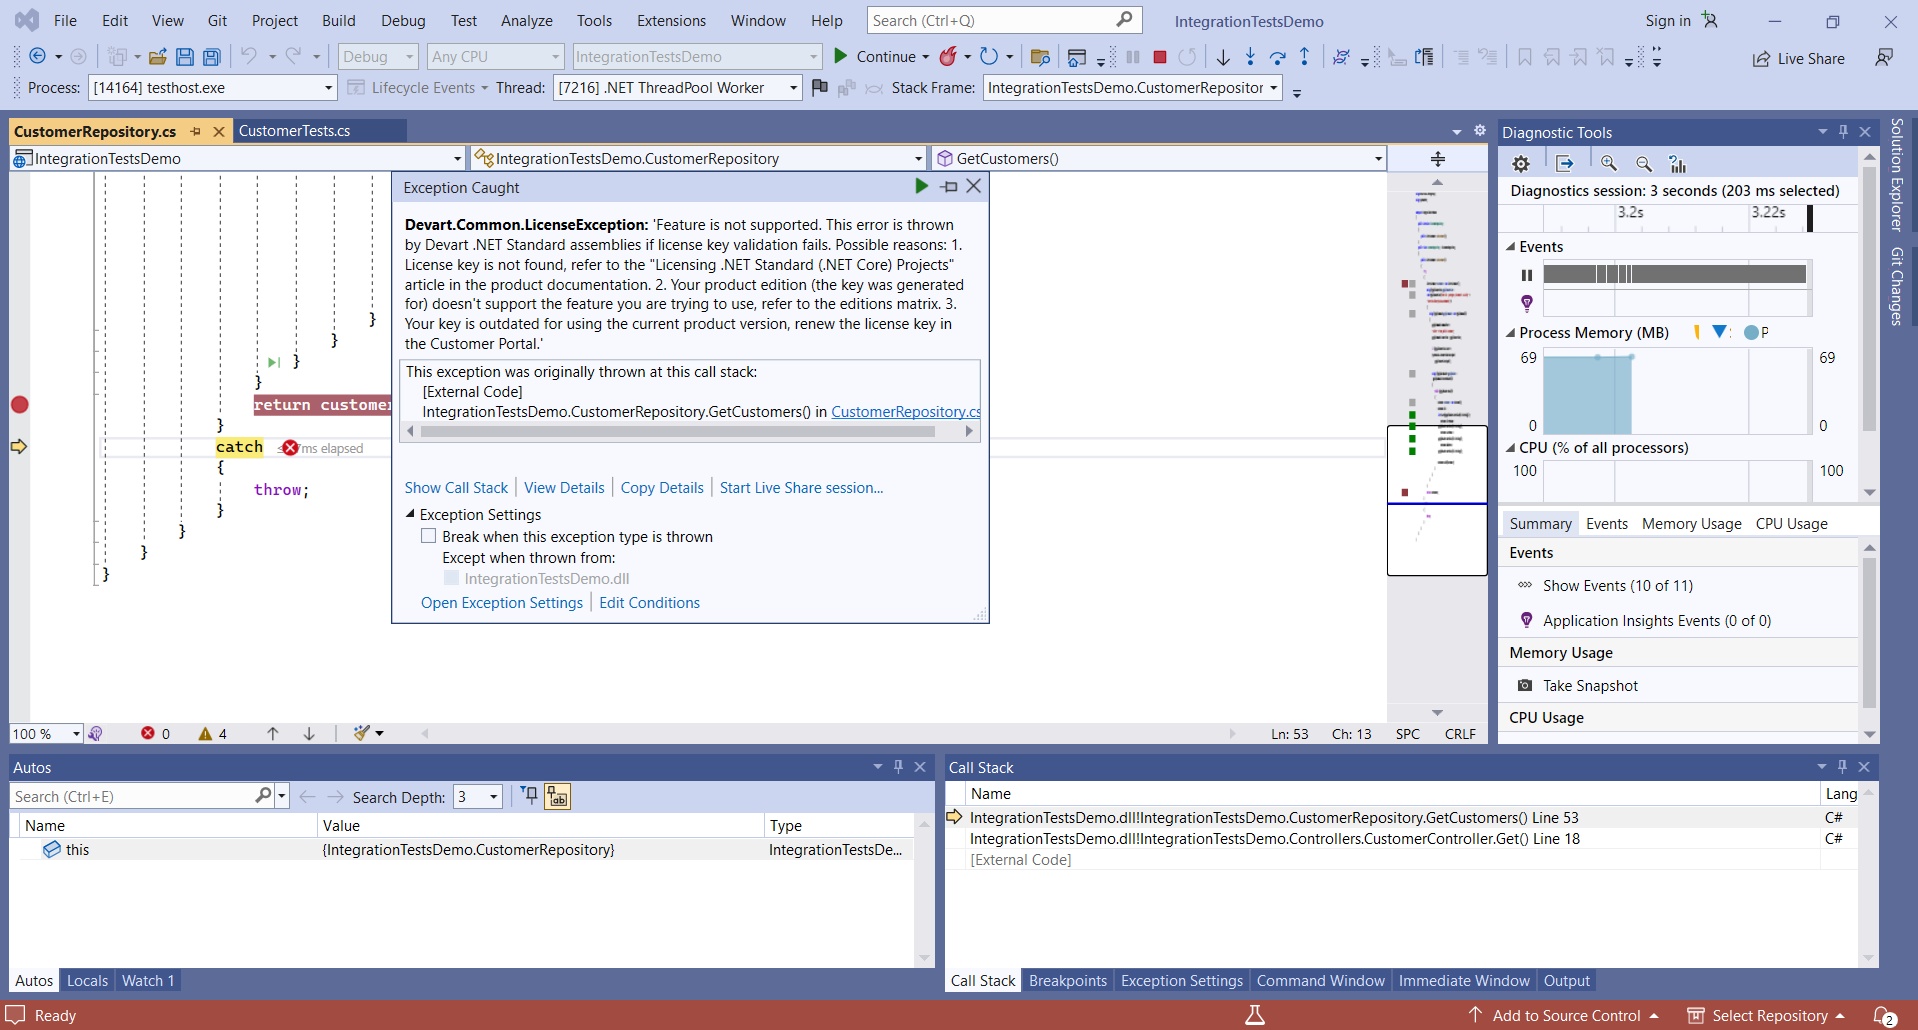
Figure 2: License key validation fails if there is no license key or the license key is incorrect
To resolve this error, you must either have a license key and already be a user, or install the installation file. Alternatively, you can install the installation, which will install a trial key into the system.
Figure 3 below shows the data returned when you run the preceding test method and set a breakpoint in your code:

Figure 3: Data returned upon execution of the integration test method

Summary
Integration testing your application might not be a walk in the park but is doable. Integration testing ensures that the modules integrate smoothly and work together according to the developer’s intended design. Integration testing is done after unit tests and before system testing.