Half a year ago we published an article describing the process of iOS application development in Delphi XE2. We received quite a lot of positive feedback on that article, but the main thing is that the article helped many our users create their first applications for iPhone, iPad and iPod. Since then, been a long time – and the new RAD Studio XE4 first saw the light of day, in which the process of iOS application development greatly changed. But, fortunately, all the changes were oriented to make the development simple and easier to understand.
iOS development limitations are not for us!
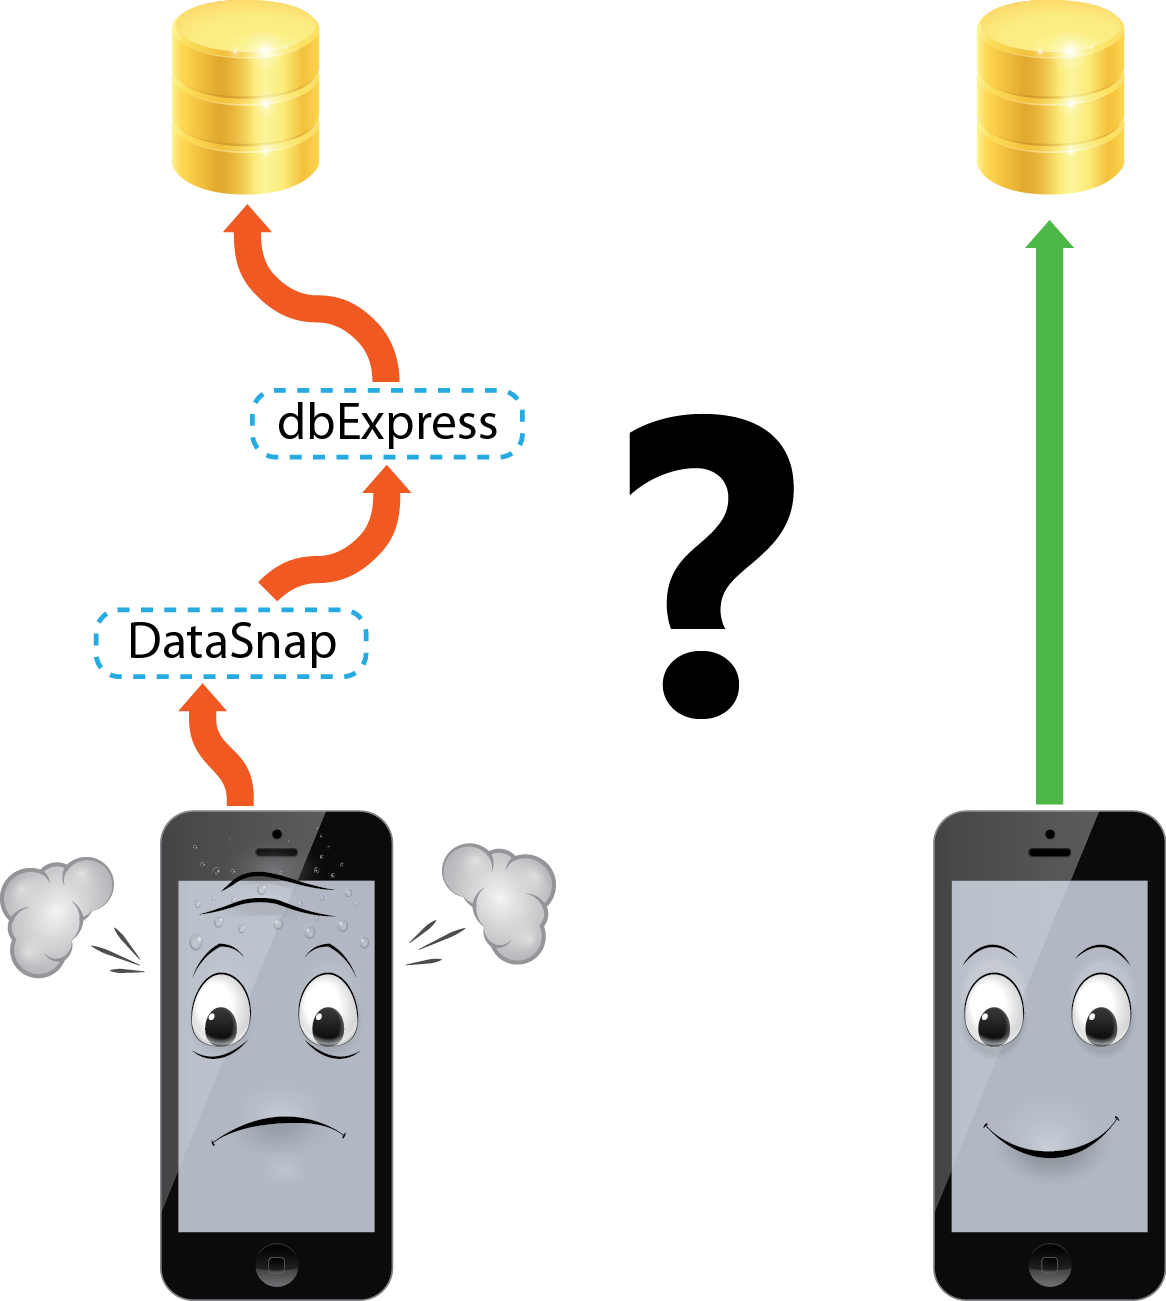
The matter is that iOS has a quite serious limitation on application deployment to iOS devices: you cannot deploy any libraries (*.dylib) along with your application. If you have developed applications for work with databases earlier, you should know that to work with any databases, you need either a client to be installed or a library allowing connection to a certain database. This can be a very serious brick wall when attempting to create a business-application that must work with databases on iOS.
But the point is that Devart data access components allow working with the most popular databases without installing any client software and require no libraries. Therefore library (*.dylib) deployment restrictions don’t apply to applications developed with Devart data access components, since your application simply won’t require these libraries.
In addition, we as developers did our best to enhance our products functionality – and now we can proudly claim that Oracle and InterBase ToGo are added to the list of the databases, that can be worked with from iOS. Here is the list of the databases, which your iOS applications will be able to work with:
- SQLite
- Oracle
- MySQL
- PostgreSQL
- InterBase ToGo
If you want your application to work with all these databases, you can use UniDAC; if you want to work with one DB, any of the following products will be suitable for you:
Direct data access or DataSnap
When working with databases, we should choose the way we want to work with data: directly or using DataSnap. Description of work with a database using DataSnap can be easily found in the Using DAC products in multi-tier DB application development article, so we will look at the second method.
 Today’s mobile platforms do not yet possess the hardware power, which modern computers have, so the main requirement for a mobile application remains low consumption of system resources. Proceeding from this, let’s consider creating an application, that will work with a database directly and show maximum performance on those resources, that they have available.
Connecting to a database from an iOS application
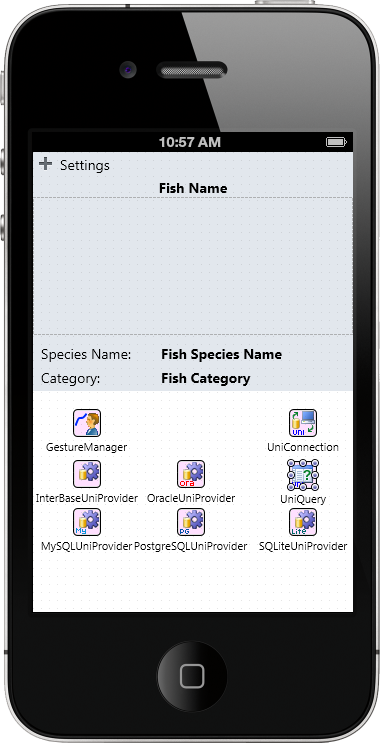
At the stage of mobile application design and development, work with UniDAC looks exactly the same, as when developing a normal desktop application.
We can place TUniConnection, TUniQuery and other components on the form in design-time:
Otherwise, we can create all necessary components in run-time. The very creation of components is pretty trivial, so let’s consider examples of how to initialize UniDAC connection for work in iOS.
SQLite
Since SQLite is a local DB, we don’t need Host and Port. We should just specify Database, the path to the database file on the hard drive. But since iOS has definite limitations on work with the file system, to retrieve the path to the database (to a folder, where the application can create and modify files), the following function may be used:
DocumentPath := TPath.GetDocumentsPath;
Besides this, if you are not sure that an SQLite DB exists on an iOS device (e.g., on the first start of your application), and you want to create it in this case, the following parameter must be set:
UniConnection.SpecificOptions.Values['ForceCreateDatabase'] := 'True';
And the most important — we should specify the Provider we are going to use. In other words, Provider defines the DB we want to work with:
var
  UniConnection:  TUniConnection;
begin
  UniConnection := TUniConnection.Create(nil);
  try
    UniConnection.ProviderName := 'SQLite';

    UniConnection.SpecificOptions.Values['ForceCreateDatabase'] := 'True';
    UniConnection.Database := IncludeTrailingPathDelimiter(TPath.GetDocumentsPath) + 'db.sqlite3';

    try
      UniConnection.Connect;
    except
      on E: Exception do
        ShowMessage(E.Message);
    end;
  finally
    UniConnection.Free;
  end;
end;
Oracle
Connection to Oracle in iOS is possible only in the Direct mode, since it doesn’t require Oracle client installation. The connection mode can be specified as follows:
UniConnection.SpecificOptions.Values['Direct'] := 'True';
In addition, the server name must be generated correctly, since, if we have no client, we have no tnsnames.ora file with the server list as well. Therefore, to establish connection in iOS, we need to know the server Host and Port, as well as its SID or Service Name.
To connect via the SID, the server should be set in the following way:
UniConnection.Server := 'Host:Port:sid=SID';
or a simplified way:
UniConnection.Server := 'Host:Port:SID';
To connect via the Service Name – as follows:
UniConnection.Server := 'Host:Port:sn=SID';
In other words, the ‘sid=’ prefix of the third parameter indicates that connection is established via the SID, and the ‘sn=’ prefix indicates that connection is established via the Service Name. If no prefix is specified, then, by default, it is considered, that we want to establish connection via the SID.
The majority of Oracle servers have the same SID and Service Name, so you, mostlikely, won’t have to go into such nuances.
And don’t forget to specify the provider:
UniConnection.ProviderName := 'Oracle';
Example:
var
  UniConnection:  TUniConnection;
begin
  UniConnection := TUniConnection.Create(nil);
  try
    UniConnection.ProviderName := 'Oracle';

    UniConnection.SpecificOptions.Values['Direct'] := 'True';

    UniConnection.Server := 'server:1521:orcl';
    UniConnection.Username := 'user_name';
    UniConnection.Password := 'password';

    try
      UniConnection.Connect;
    except
      on E: Exception do
        ShowMessage(E.Message);
    end;
  finally
    UniConnection.Free;
  end;
end;
MySQL
Work with MySQL server is also possible only in the Direct mode, and this parameter setting doesn’t differ from Oracle:
UniConnection.SpecificOptions.Values['Direct'] := 'True';
To establish connection, you need to know the Host and Port. Host can be represented by both server name:
UniConnection.Server := 'server';
and its IP:
UniConnection.Server := '192.168.0.1';
Since there can be several databases at the MySQL server, we have to specify the exact one we want to work with:
UniConnection.Database := 'database_name';
And, surely, we don’t forget to specify the Provider:
UniConnection.ProviderName := 'MySQL';
Example:
var
  UniConnection:  TUniConnection;
begin
  UniConnection := TUniConnection.Create(nil);
  try
    UniConnection.ProviderName := 'MySQL';

    UniConnection.SpecificOptions.Values['Direct'] := 'True';

    UniConnection.Server := 'server';
    UniConnection.Port := 3306;
    UniConnection.Database := 'database_name';
    UniConnection.Username := 'user_name';
    UniConnection.Password := 'password';

    try
      UniConnection.Connect;
    except
      on E: Exception do
        ShowMessage(E.Message);
    end;
  finally
    UniConnection.Free;
  end;
end;
PostgreSQL
UniDAC allows work with PostgreSQL exclusively in the Direct mode, therefore mode setting can be omitted. For the rest, establishing connection to PostgreSQL is almost the same as the one to MySQL. There also can be several databases at one PostgreSQL server, but, besides that, each DB can have several schemes. If we want to work with a scheme different from public, we should specify its name:
UniConnection.SpecificOptions.Values['Schema'] := 'schema_name';
Example:
var
  UniConnection:  TUniConnection;
begin
  UniConnection := TUniConnection.Create(nil);
  try
    UniConnection.ProviderName := 'PostgreSQL';

    UniConnection.Server := 'server';
    UniConnection.Port := 5432;
    UniConnection.Database := 'database_name';
    UniConnection.SpecificOptions.Values['Schema'] := 'schema_name';
    UniConnection.Username := 'user_name';
    UniConnection.Password := 'password';

    try
      UniConnection.Connect;
    except
      on E: Exception do
        ShowMessage(E.Message);
    end;
  finally
    UniConnection.Free;
  end;
end;
InterBase
You can work with both local and remote InterBase databases from iOS. Let’s consider both approaches. Firstly, as always, specify the provider:
UniConnection.ProviderName := 'InterBase';
For a local DB specify the path to the local file:
UniConnection.Database := IncludeTrailingPathDelimiter(TPath.GetDocumentsPath) + 'db.gdb';
For a remote database specify the server name and the path to the file on the server:
UniConnection.Server := 'server';
UniConnection.Database := 'D:db.gdb';
A sample of connection to a local DB:
var
  UniConnection:  TUniConnection;
begin
  UniConnection := TUniConnection.Create(nil);
  try
    UniConnection.ProviderName := 'InterBase';

    UniConnection.Database := IncludeTrailingPathDelimiter(TPath.GetDocumentsPath) + 'db.gdb';
    UniConnection.Username := 'user_name';
    UniConnection.Password := 'password';

    try
      UniConnection.Connect;
    except
      on E: Exception do
        ShowMessage(E.Message);
    end;
  finally
    UniConnection.Free;
  end;
end;
A sample of connection to a remote DB:
var
  UniConnection:  TUniConnection;
begin
  UniConnection := TUniConnection.Create(nil);
  try
    UniConnection.ProviderName := 'InterBase';

    UniConnection.Server := 'server';
    UniConnection.Database := 'D:db.gdb';
    UniConnection.Username := 'user_name';
    UniConnection.Password := 'password';

    try
      UniConnection.Connect;
    except
      on E: Exception do
        ShowMessage(E.Message);
    end;
  finally
    UniConnection.Free;
  end;
end;
DataBase deployment to iOS
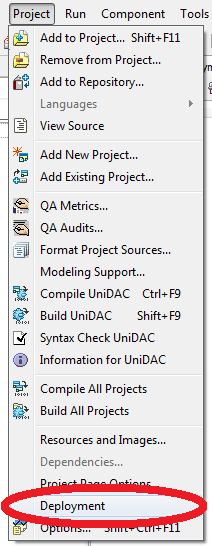
In order for our application to be able to work with local SQLite and InterBase ToGo databases, we should make sure these databases to be deployed to an iOS device. Here is nothing difficult at this. First we should call the Project->Deployment menu:
After this add our databases for SQLite and InterBase to the list of files, that must be deployed to an iOS device together with your application.
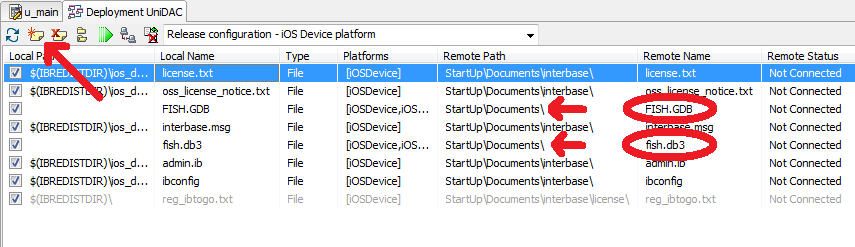 Don’t forget to change the Remote Path default value “.” with the correct one “StartUpDocuments” for the added files.
Application debug on iOS simulator
Let’s say you have created your first application (or taken a ready Demo-project, that can be found in the folder, where UniDAC was installed). The next step will be the application start on the iOS Simulator. For this, you need:
- Mac OS Lion (OS X 10.7) or Mountain Lion (OS X 10.8) — let’s consider you do have Mac OS, since iOS application development is just impossible without it;
- Xcode 4.3 for iOS 5.1 or Xcode 4.5 for iOS 6 — everything is simple here: in Mac OS go to https://developer.apple.com/downloads/ and download the needed Xcode;
- PAServer – nothing complicated here as well. In the folder, where you have installed RAD Studio XE4, there is a folder PAServer. There is an package RADPAServerXE4.pkg in this folder, it’s the PAServer installer for Mac OS. Copy it to your Mac OS and run it.
These are all the requirements for starting your application on the iOS Simulator. Now we can move directly to the application start.
The first step is PAServer start on Mac OS:
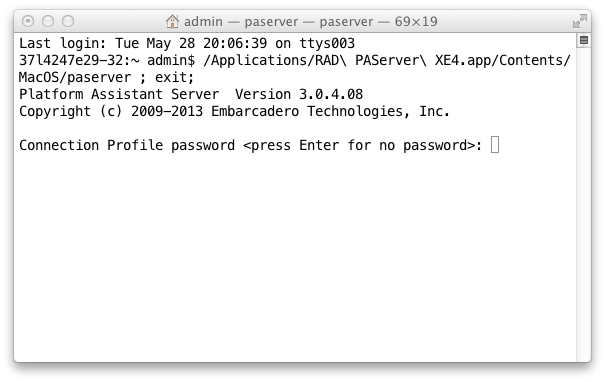 Set the password that will be needed to specify in RAD Studio XE4 for connectionto started PAServer (the password can be empty). Then we see a window offering toenter the admin password:
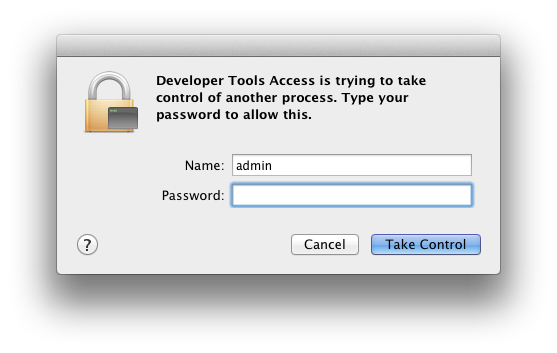 Enter the admin password. The Mac OS and PAServer preparation is now complete.
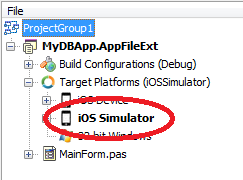
Now, run RAD Studio XE4, open our application and select the platform — iOS Simulator:
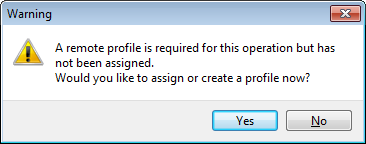
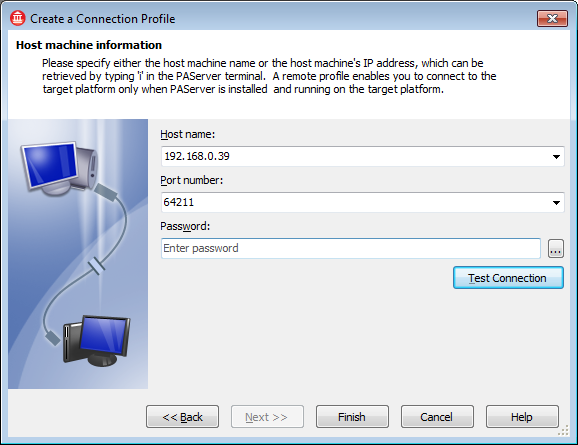
 When the platform is selected, we can try running the application. Most likely, there is no remote profile created yet, therefore you will be offered to create a new one:
 There is nothing difficult in a new remote profile creation. The following must be specified:
- the profile name;
- the HostName or IP of the computer with Mac OS, on which PAServer is started;
- the password that you have specified when starting PAServer (if you have specified it).
 And finally, having performed these simple steps, we run our application on the iOS Simulator:
Starting application on a real iOS device
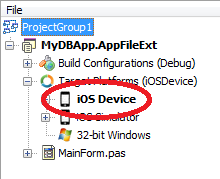
After your application starts working on the iOS Simulator, the last step remains — to run it on your iPhone, iPad, or iPod. If you have performed all the previous steps and run your application on the iOS Simulator, this means your Mac OS is already setup and ready for deployment of the created application to an iOS device. It remains only to select the platform — iOS Device:
 And of course, to run the application. When attempting to run the application ona real iOS device, you most likely will see such a window:
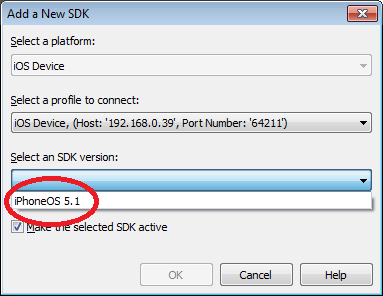
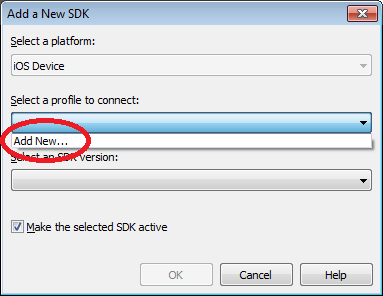 To run the application on a real iOS device, in addition to remote profile, an SDK version must be selected. To select an SDK, a new remote profile must be created (since a remote profile for the iOS Simulator differs from a remote profile for a real device).
Therefore we create a new remote profile (its creation has no difference with creation a remote profile for the simulator), and select the SDK compatible with the iOS version on your device:
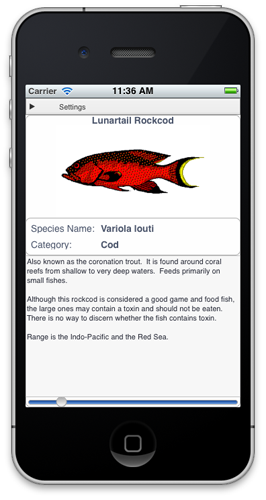
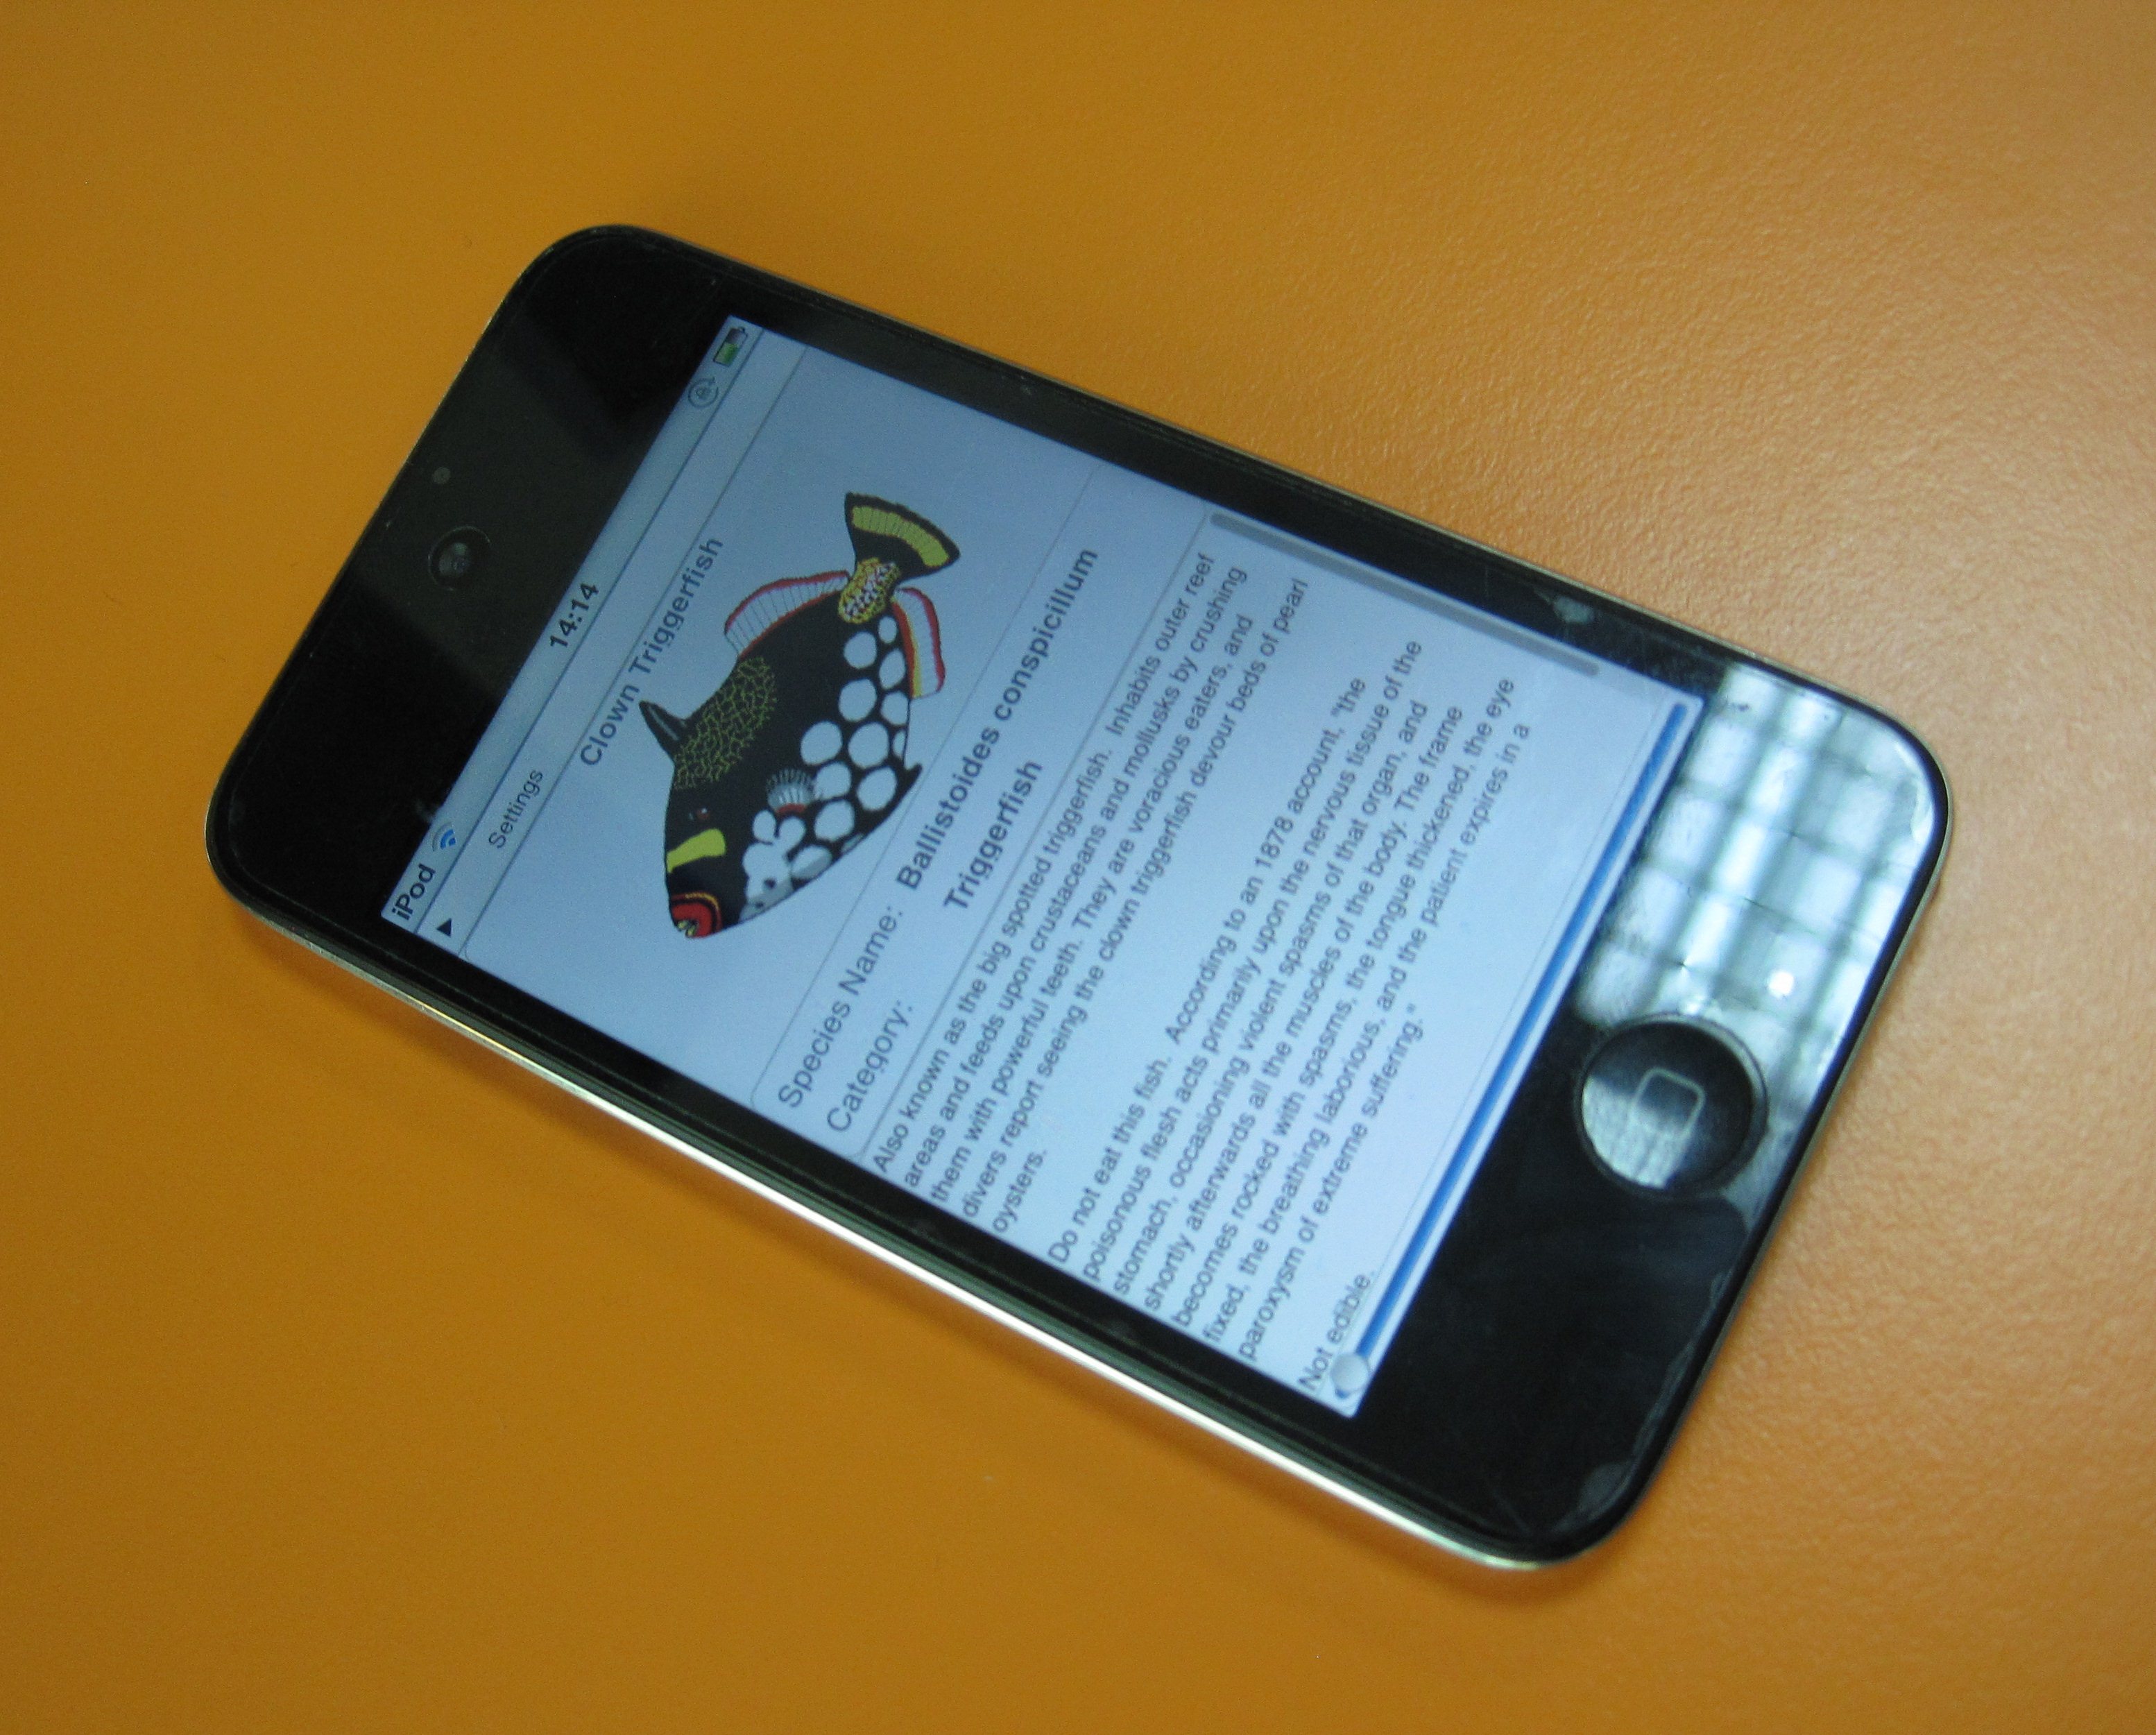
Now you can see your application work result not on an abstract simulator, but on a real device:
Conclusion
We have considered a sample of creating the simpliest database applications for iOS in Delphi XE4, which can establish connection to SQLite, Oracle, MySQL, PostgreSQL, and InterBase ToGo using UniDAC. And we hope this article will help you make the first step towards creation of your own applications for iOS.
I’ve been surfing online more than 4 hours today, yet I never found any interesting article like yours. It is pretty worth enough for me. Personally, if all webmasters and bloggers made good content as you did, the internet will be a lot more useful than ever before.
My website; Mobile application developers
Thank you for your kind words, Gayle. We are glad the article was useful for you. It seems the How to Develop Android Database Applications in RAD Studio XE5 article may be intersting for you as well.
How to Develop Android Applications in Delphi XE5 Using Devart Data Access Components…???
Thanx
Hello, aRiS!
We have revealed this topic in the “How to Develop Android Database Applications in RAD Studio XE5” article.
Tem previsão do UniDAC funcionar no AppMethod nova plataforma da embarcadero ?
The Edition with source code must work with it.
Thanks for the post. It was really helpful.