In this article, you’ll learn how to connect to Azure Database for MySQL and discover three scenarios of database migration from MySQL to Azure using dbForge Studio for MySQL.

The article demonstrates how to connect to Azure Database for MySQL Server via dbForge Studio for MySQL. It also explores three common approaches of using the Studio to migrate a database from MySQL to Azure MySQL server. The choice of an approach depends on the circumstances and project requirements.
Connect to Azure Database for MySQL using dbForge Studio for MySQL
Migrate a database using the Backup and Restore functionality
Migrate a database using the Copy Databases functionality
Migrate a database using Schema and Data Compare tools
Prerequisites
To walk through the steps of this guide, you need to:
- Create an instance in Azure Database for MySQL
- Install dbForge Studio for MySQL on your machine
Connect to Azure Database for MySQL using dbForge Studio for MySQL
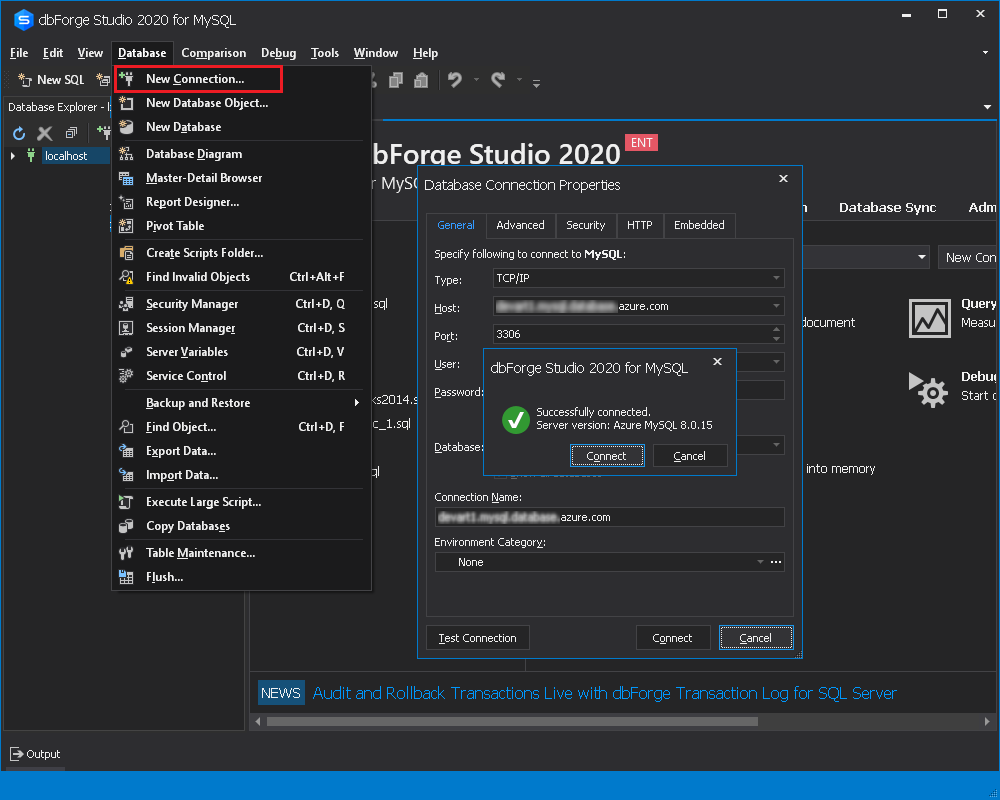
To connect to Azure Database for MySQL using dbForge Studio for MySQL:
- On the Database menu, click New Connection.
- Provide a host name and login credentials.
- Click the Test Connection button to check the configuration.
Migrate a database using the Backup and Restore functionality
The Studio allows migrating databases to Azure in a number of ways, the choice of which depends solely on your needs. If you need to move the entire database, it’s best to use the Backup and Restore functionality.
In this worked example, we will migrate the sakila database that resides on MySQL server to Azure Database for MySQL. The logic behind the migration process using the Backup and Restore functionality of dbForge Studio for MySQL is to create a backup of the MySQL database and then restore it in Azure Database for MySQL.
Step 1. Backup the database
1. On the Database menu, point to Backup and Restore, and then click Backup Database.
The Database Backup Wizard will appear.
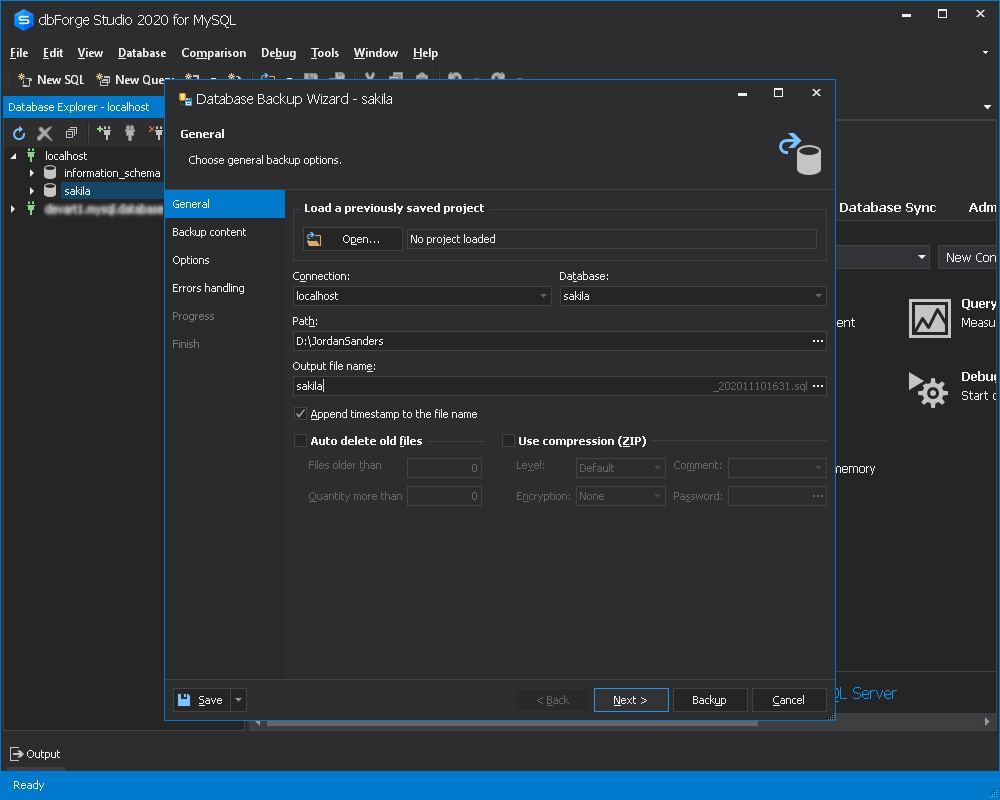
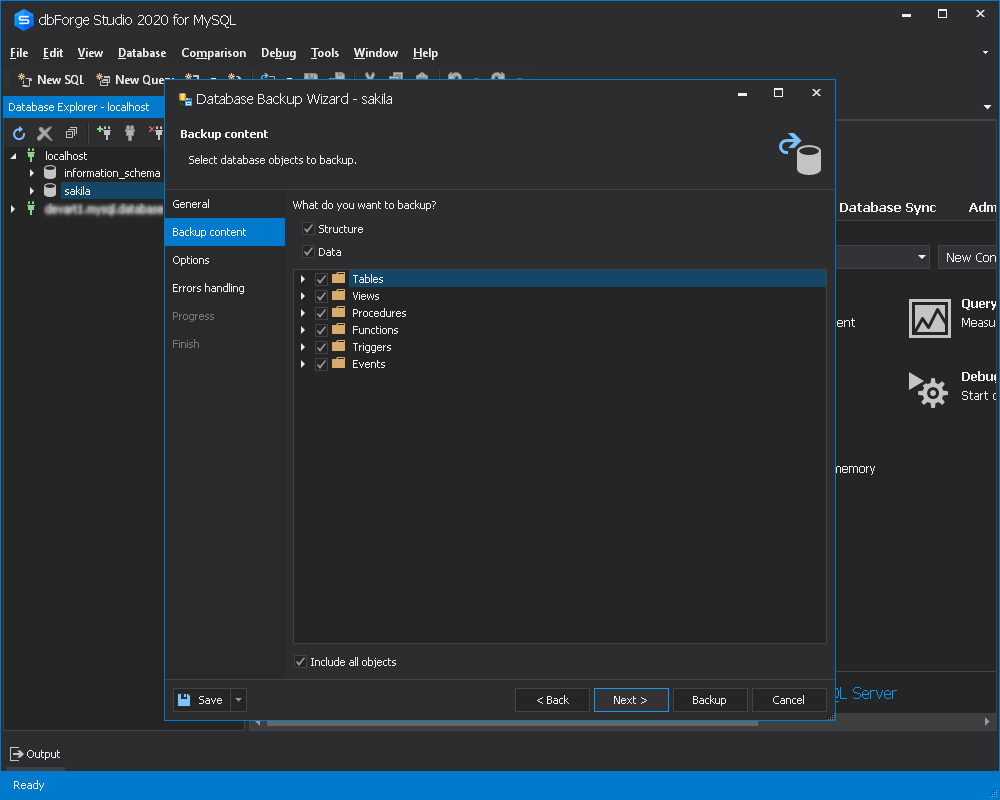
2. On the Backup content tab of the Database Backup Wizard, select database objects you want to backup.
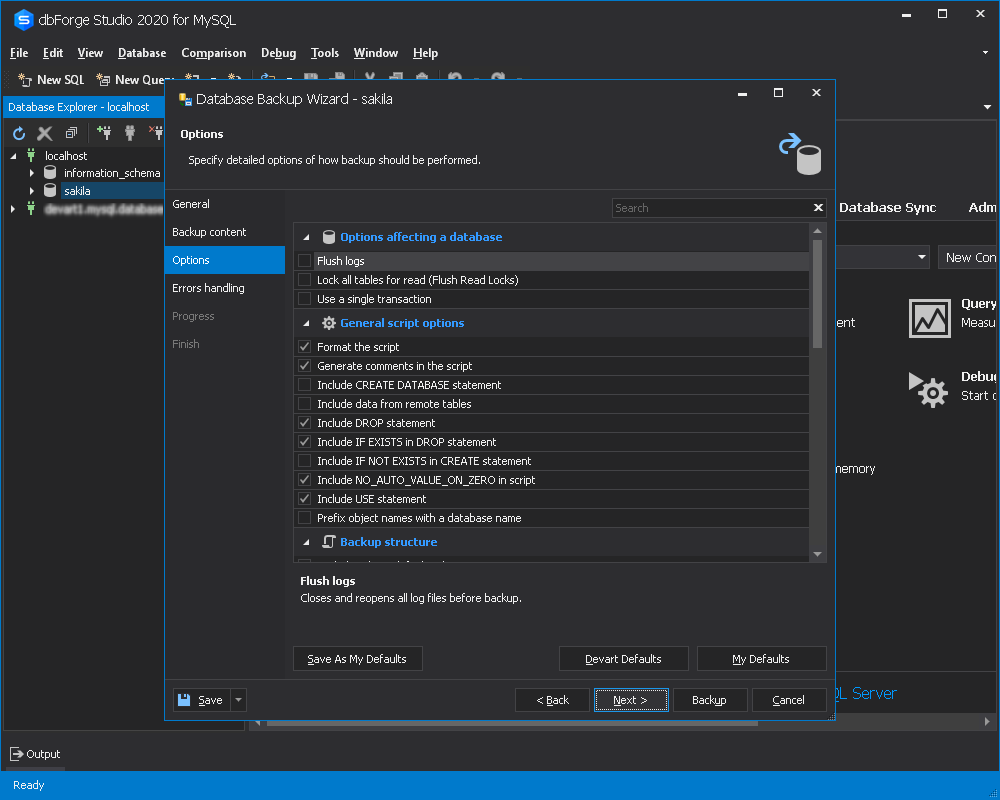
3. On the Options tab, configure the backup process to fit your requirements.
4. Specify errors processing behavior and logging options.
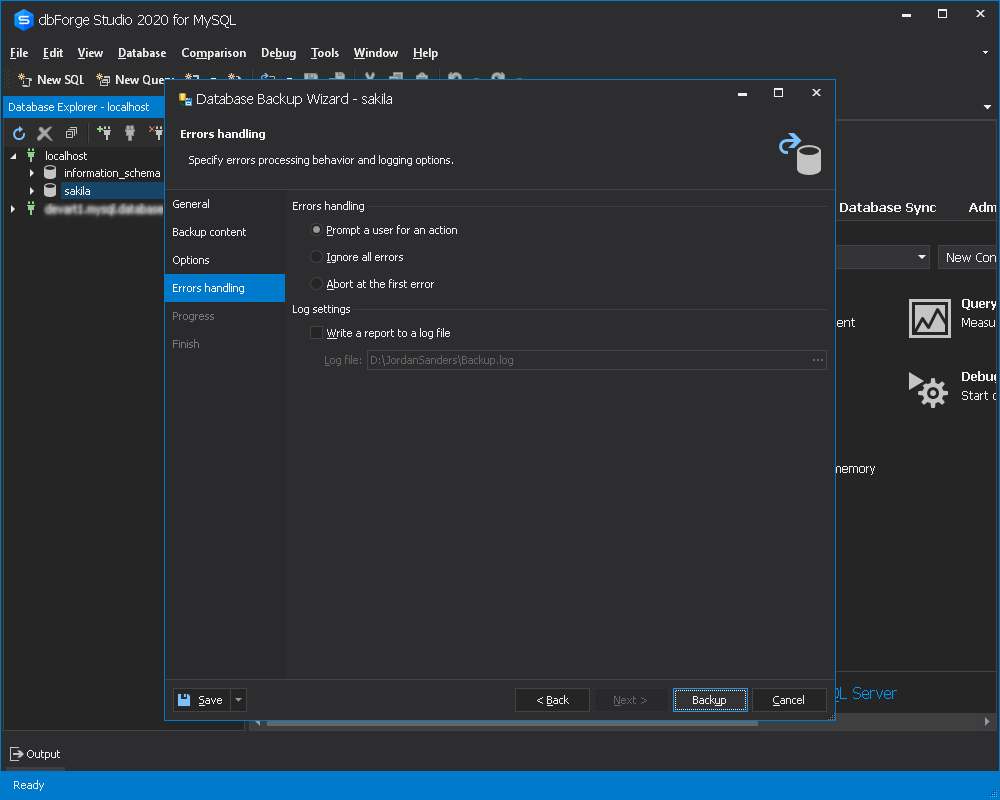
5. Click Backup.
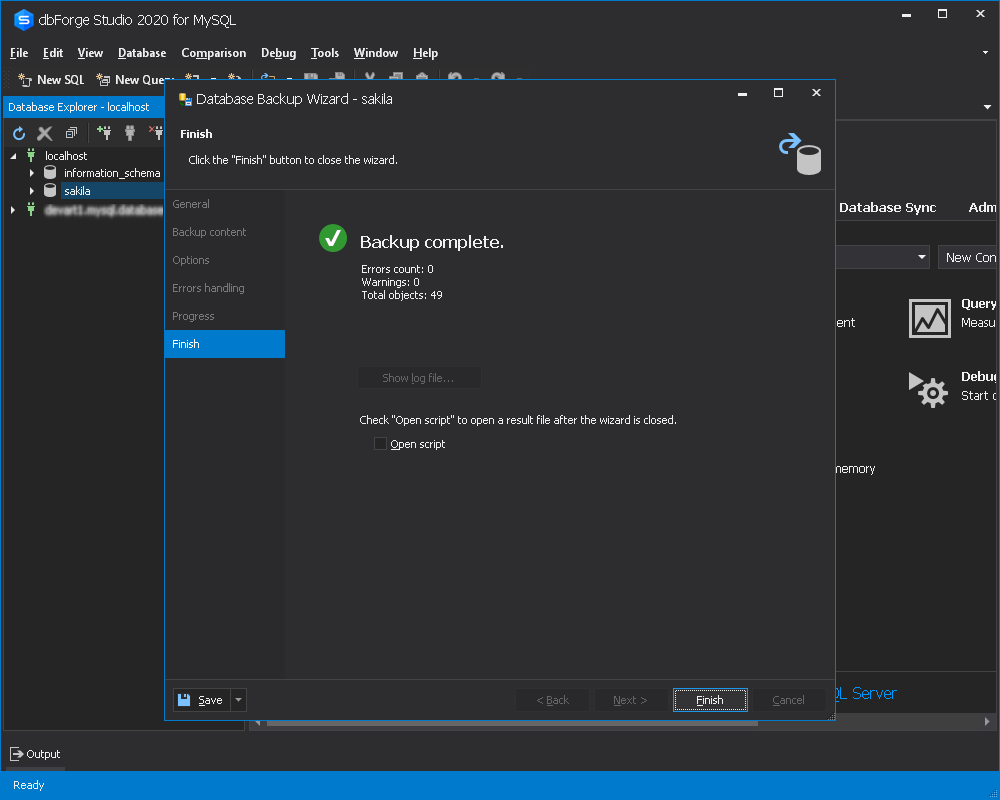
Step 2. Restore the database
1. Connect to Azure for Database for MySQL as described above.
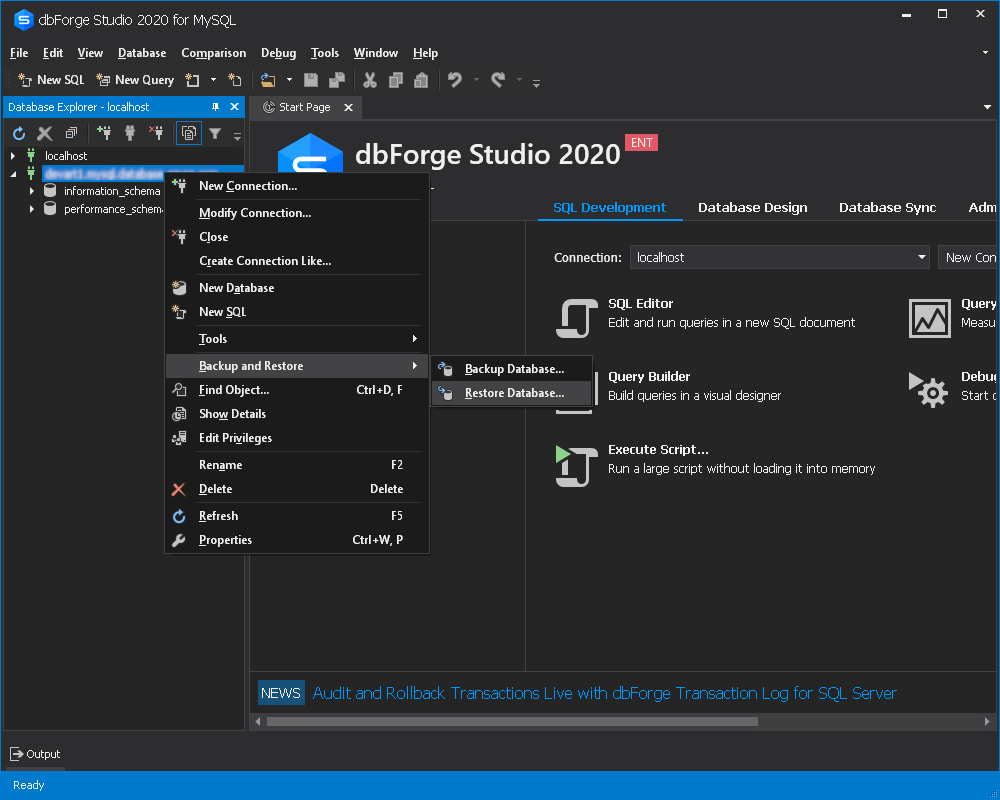
2. Right-click the Database Explorer body, point to Backup and Restore, and then click Restore Database.
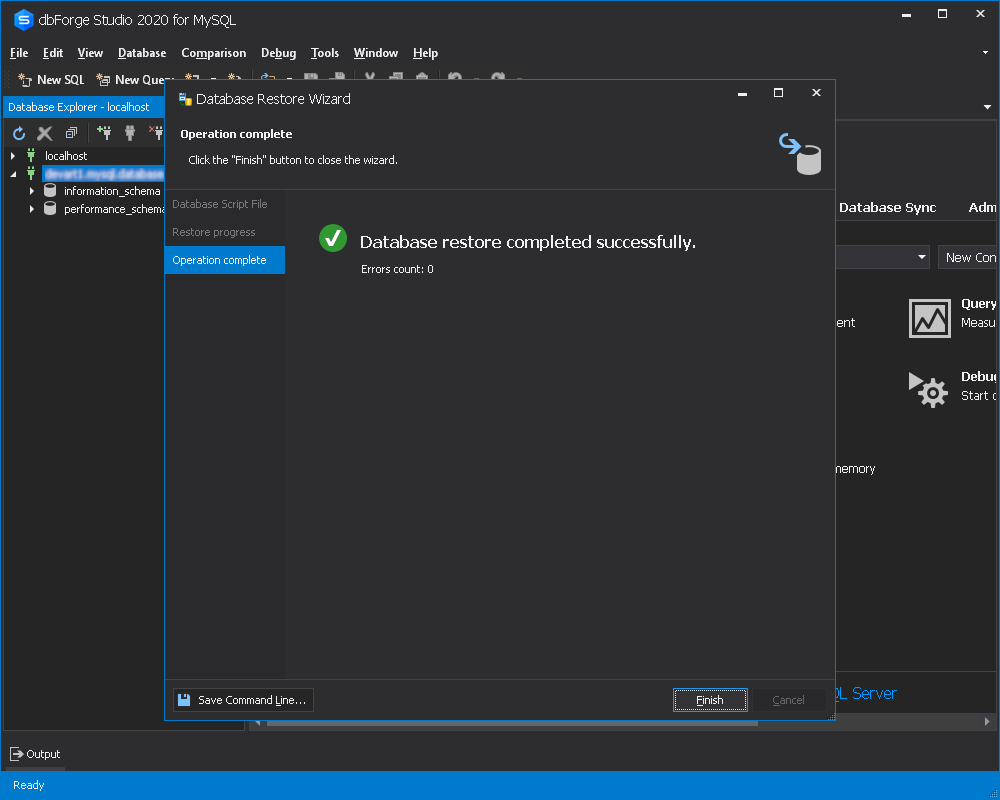
3. In the Database Restore Wizard that opens, select a file with a database backup.
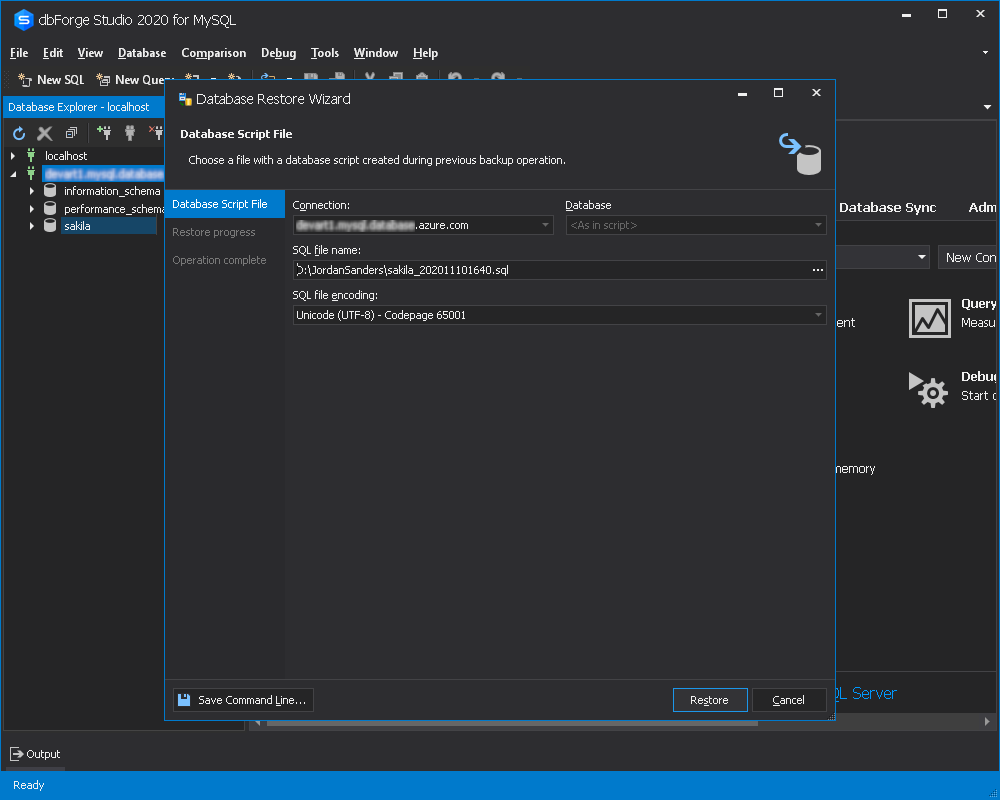
4. Click Restore.
Migrate a database using the Copy Databases functionality
The Copy Databases functionality is somewhat similar to the Backup and Restore, except that with it you do not need two steps to migrate a database. And what is more, the feature allows transferring two or more databases in one go. The Copy Databases functionality is only available in the Enterprise edition of dbForge Studio for MySQL.
In this worked example, we will migrate the world_x database from MySQL server to Azure Database for MySQL.
To migrate a database using the Copy Databases functionality:
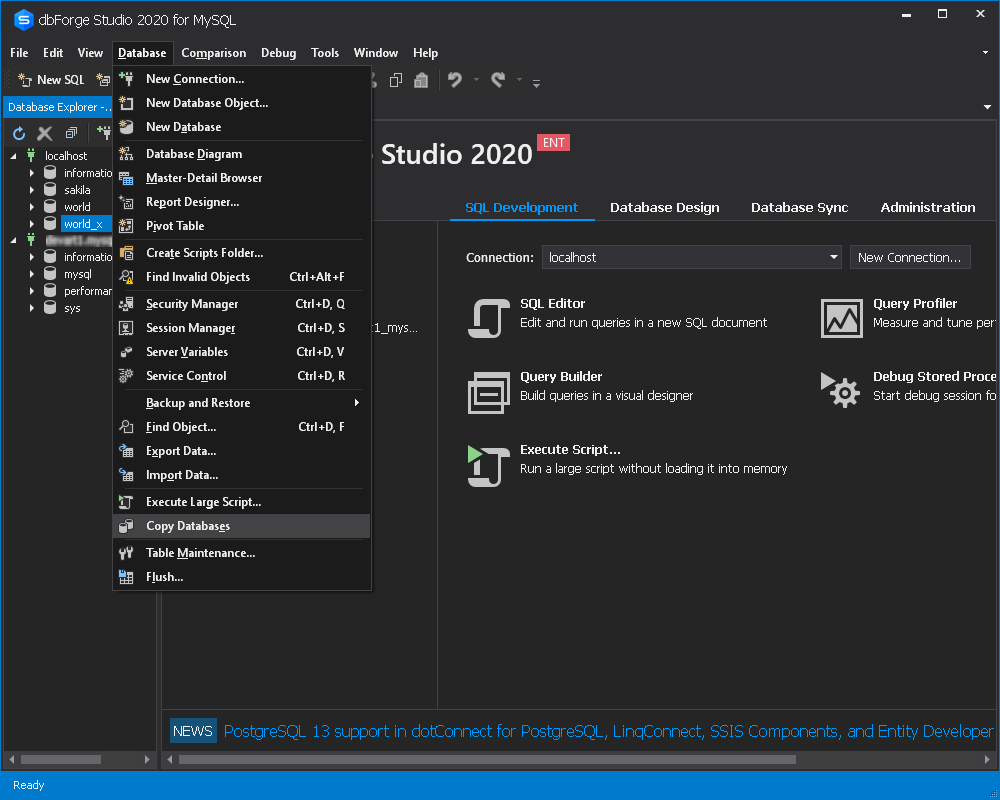
1. On the Database menu, click Copy Databases.
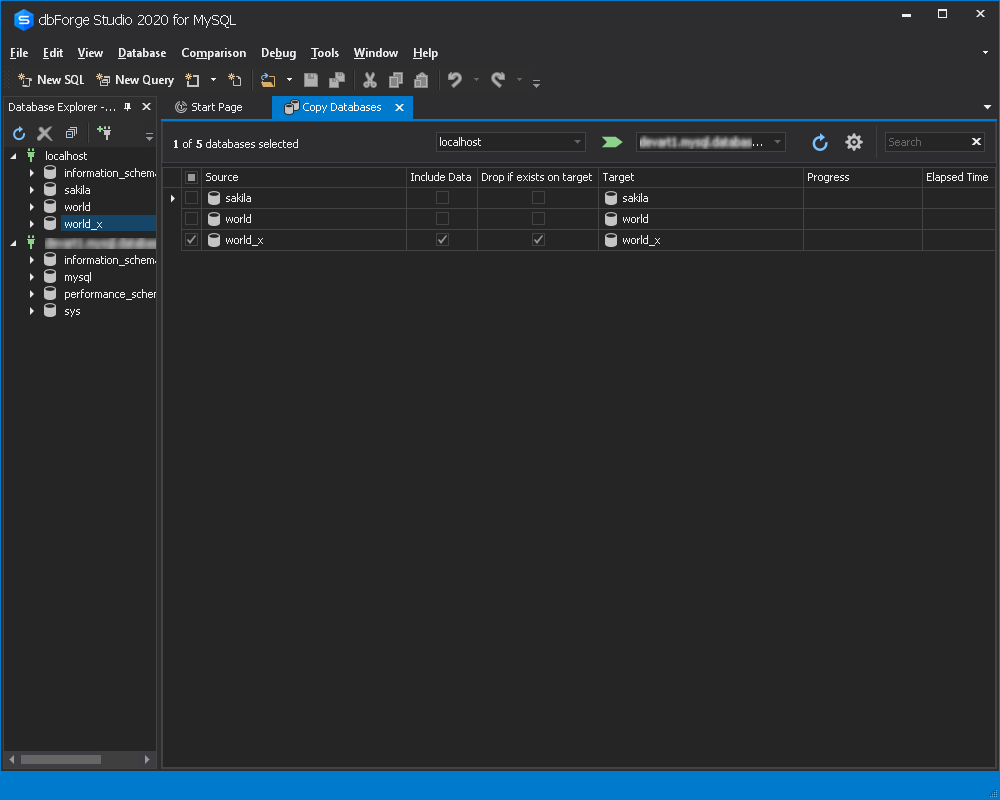
2. In the Copy Databases tab that appears, specify the source and target connection and select the database(s) to be migrated. We enter Azure MySQL connection and select the world_x database.
Click the green arrow to initiate the process.
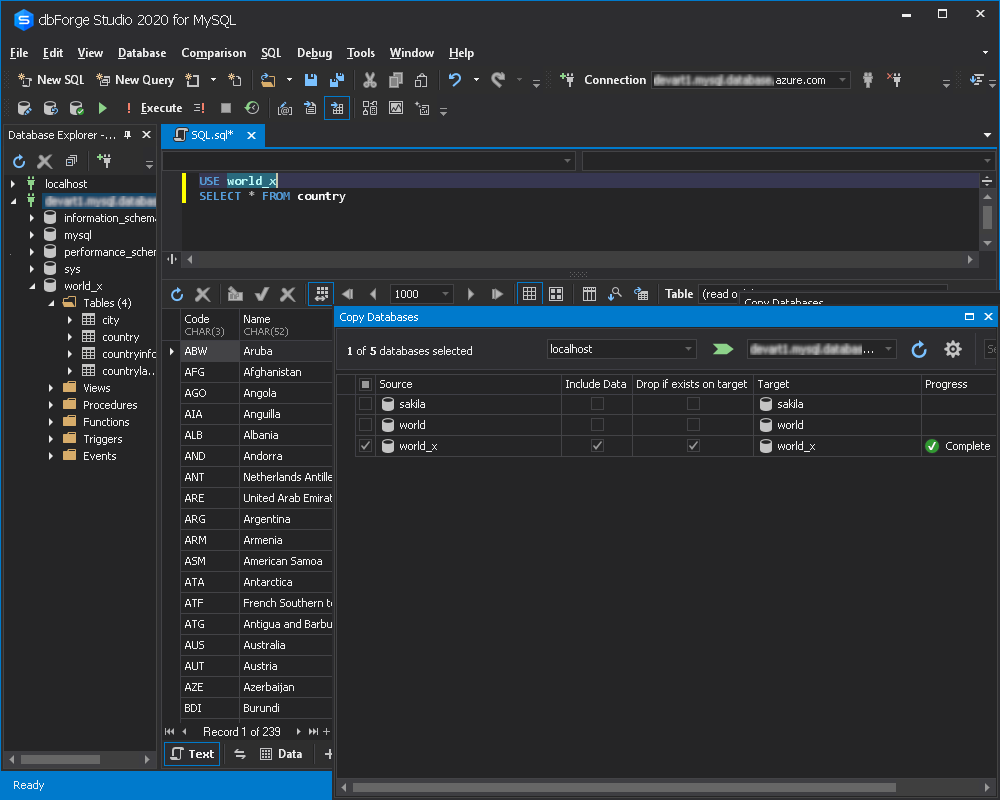
3. Check the result.
As a result of our database migration efforts, the world_x database has successfully appeared in Azure MySQL.
Migrate a database using Schema and Data Compare tools
dbForge Studio for MySQL incorporates a few tools that allow migrating MySQL databases, MySQL schemas and\or data to Azure. The choice of functionality depends on your needs and the requirements of your project. If you need to selectively move a database, i.e. migrate certain MySQL tables to Azure, it’s best to use Schema and Data Compare functionality.
In this worked example, we will migrate the world database that resides on MySQL server to Azure Database for MySQL. The logic behind the migration process using Schema and Data Compare functionality of dbForge Studio for MySQL is to create an empty database in Azure Database for MySQL, synchronize it with the required MySQL database first using Schema Compare tool and then using Data Compare tool. This way MySQL schemas and data will be accurately moved to Azure.
Step 1. Connect to Azure Database for MySQL and create an empty database

Step 2. Schema synchronization
1. On the Comparison menu, click New Schema Comparison.
The New Schema Comparison Wizard appears.
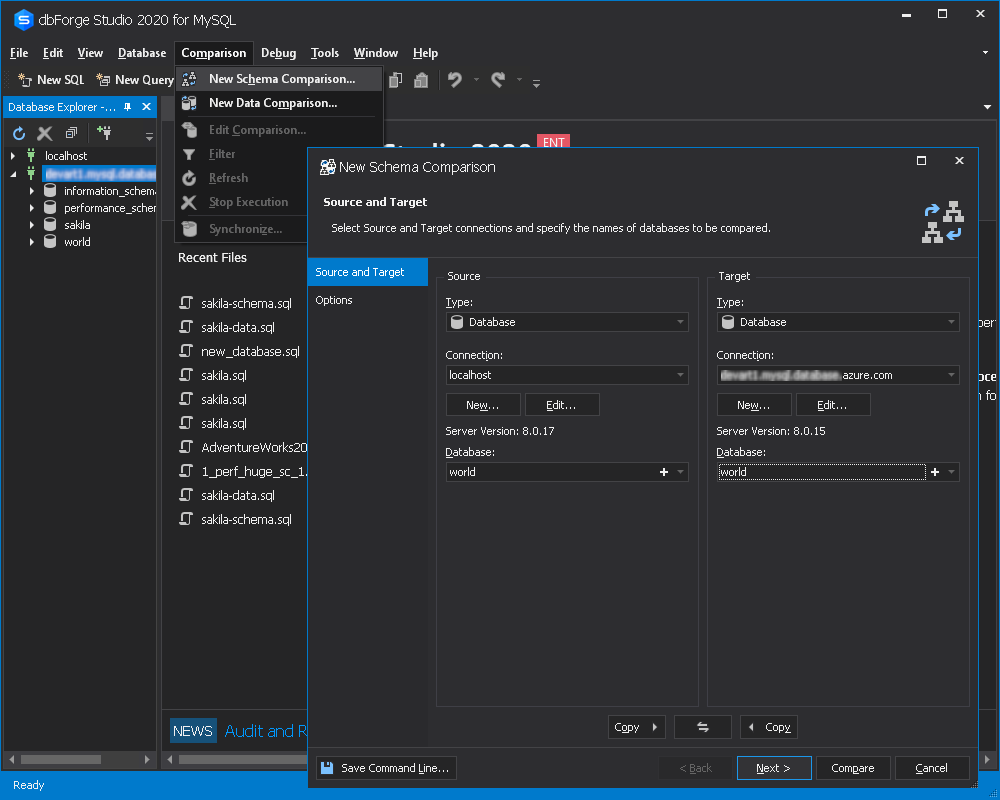
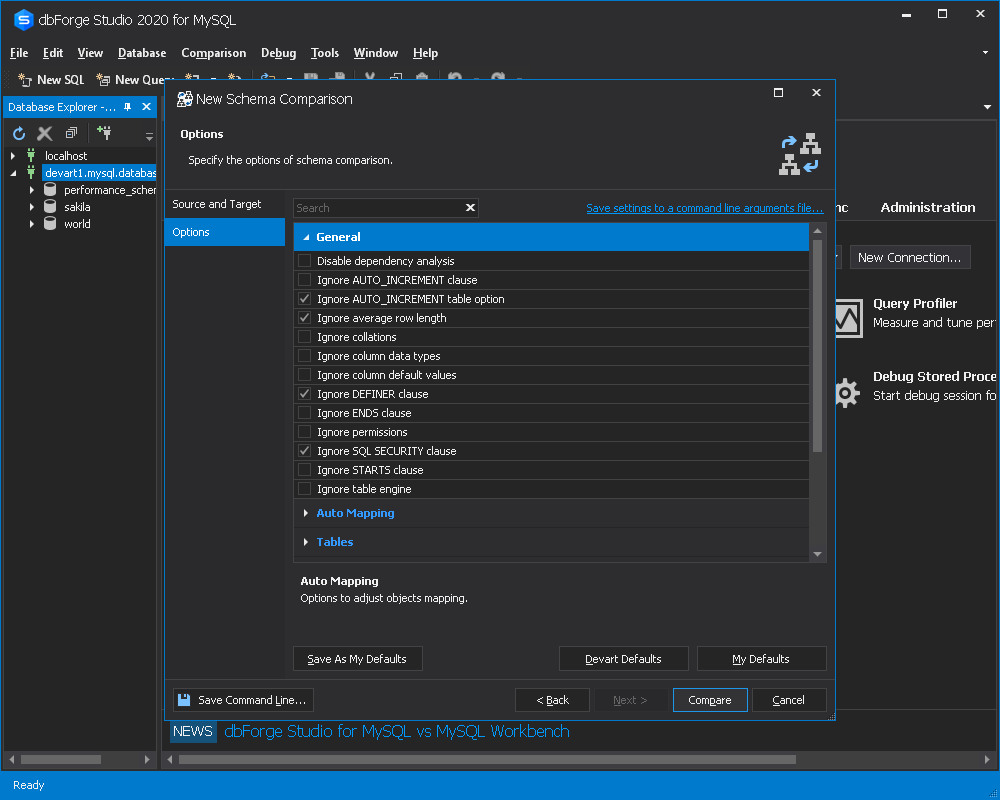
2. Select the Source and the Target, then specify the schema comparison options. Click Compare.
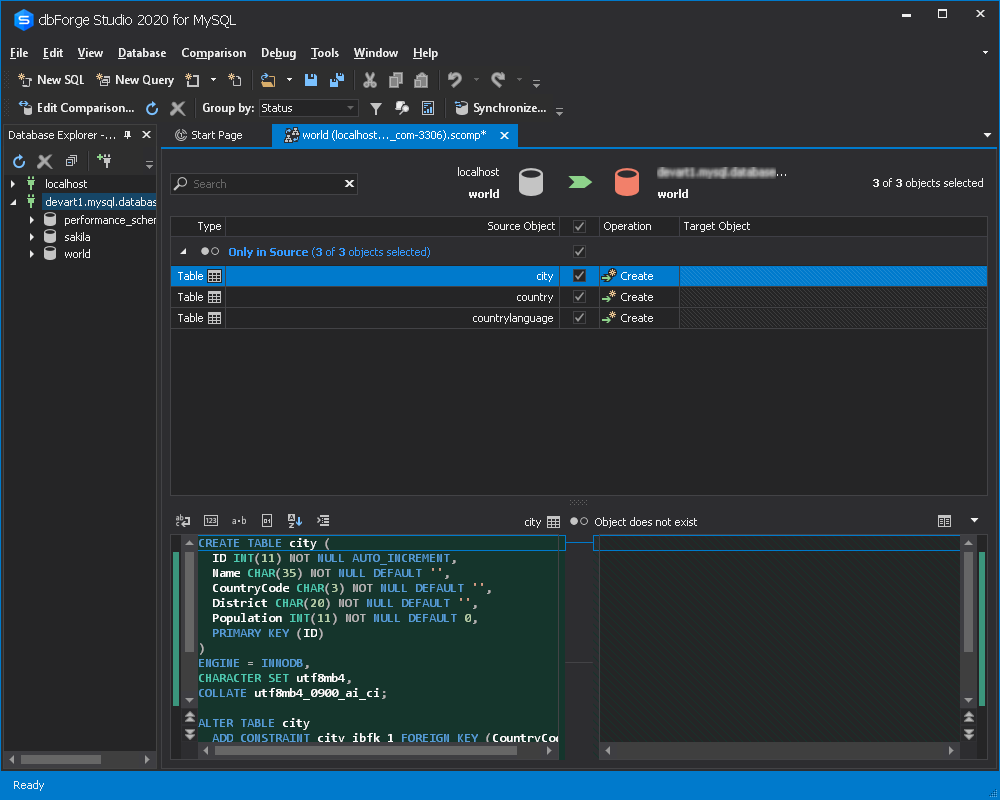
3. In the comparison results grid that appears, select objects for synchronization. Click the green arrow button to open the Schema Synchronization Wizard.
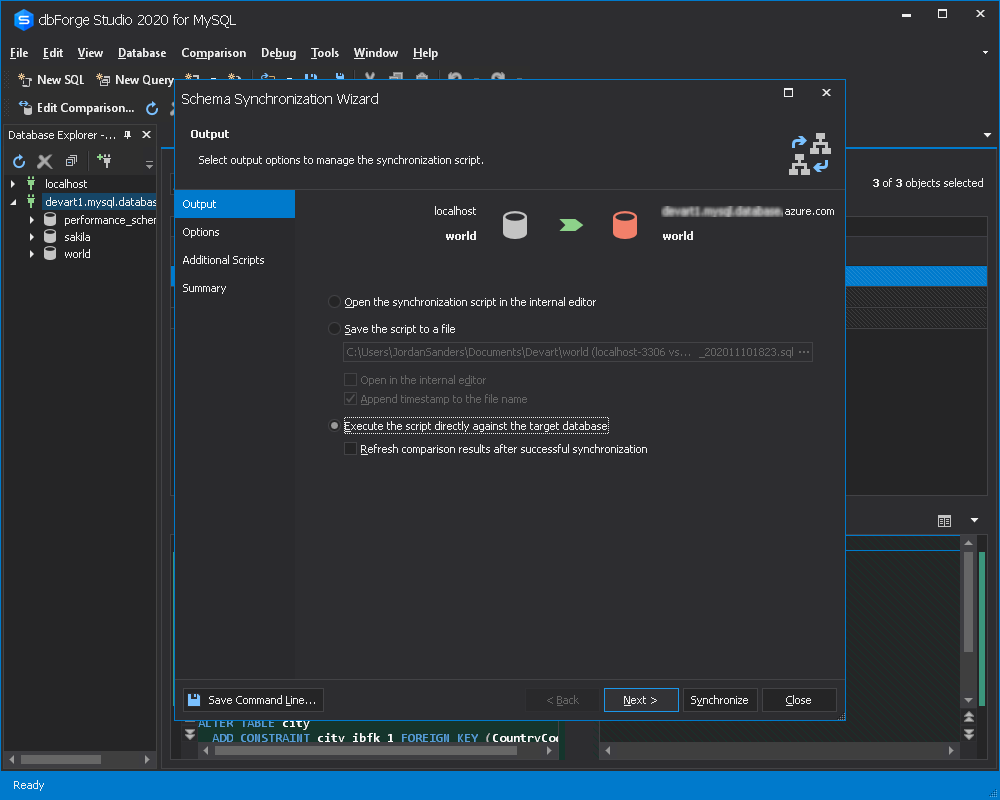
4. Walk through the steps of the wizard configuring synchronization. Click Synchronize to deploy the changes.
Step 3. Data Comparison
1. On the Comparison menu, click New Data Comparison. The New Data Comparison Wizard appears.
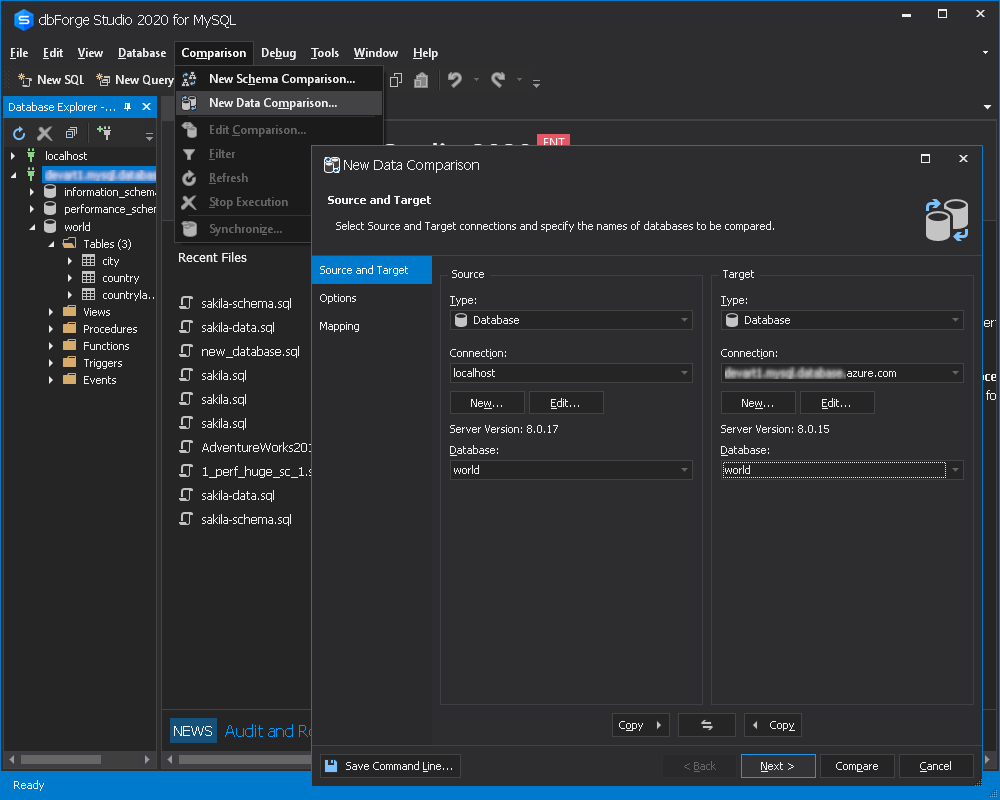
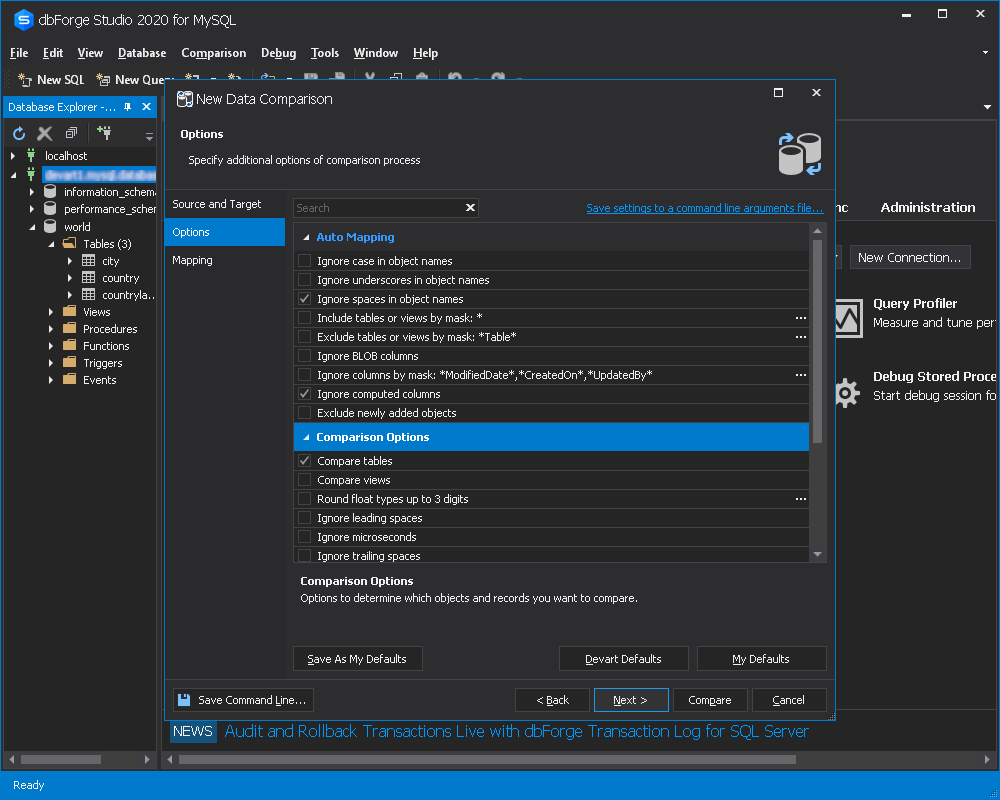
2. Select the Source and the Target, then specify the data comparison options and change mappings if necessary. Click Compare.
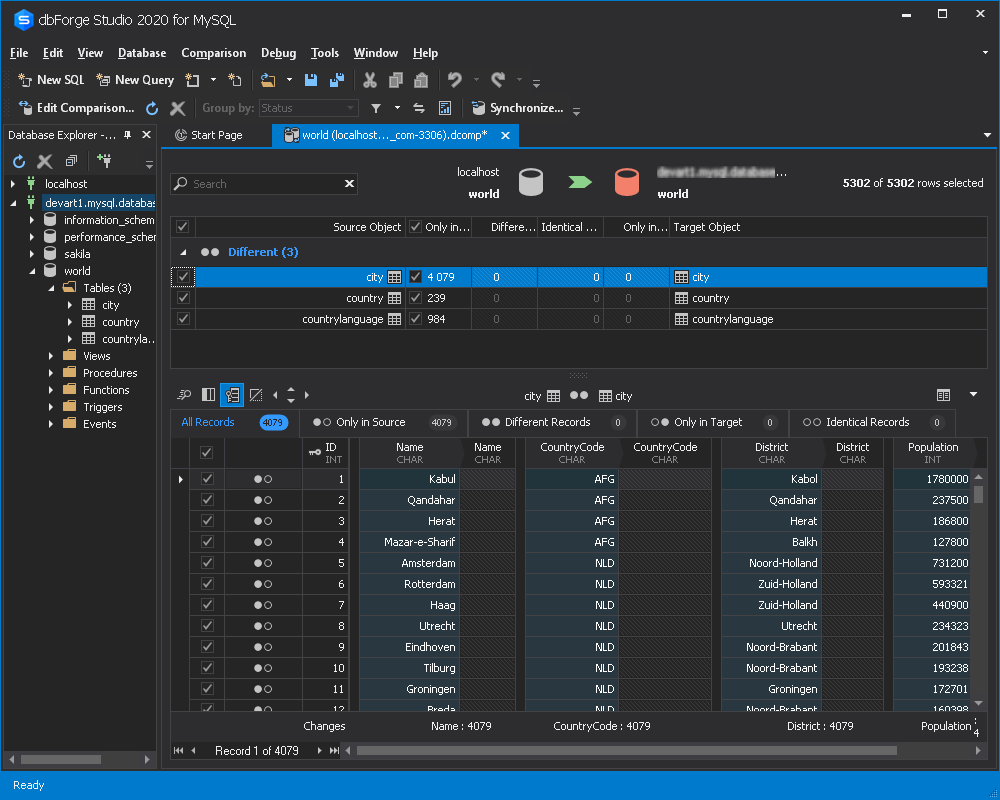
3. In the comparison results grid that appears, select objects for synchronization. Click the green arrow button to open the Data Synchronization Wizard.
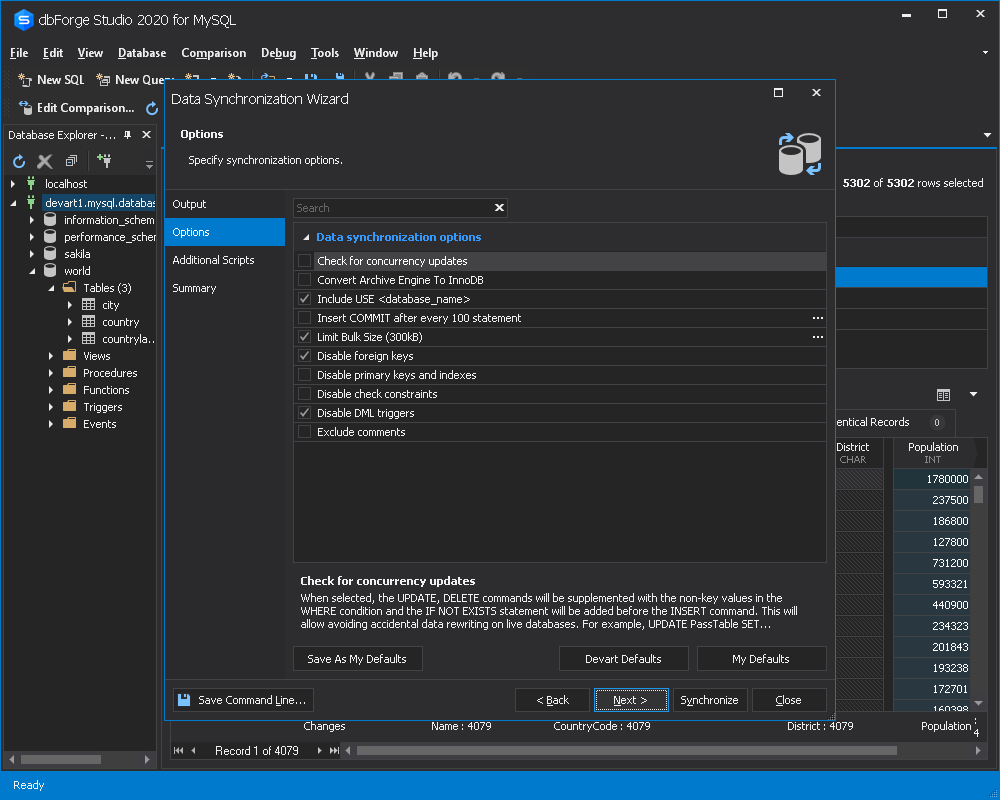
4. Walk through the steps of the wizard configuring synchronization. Click Synchronize to deploy the changes.
5. Enjoy the result.
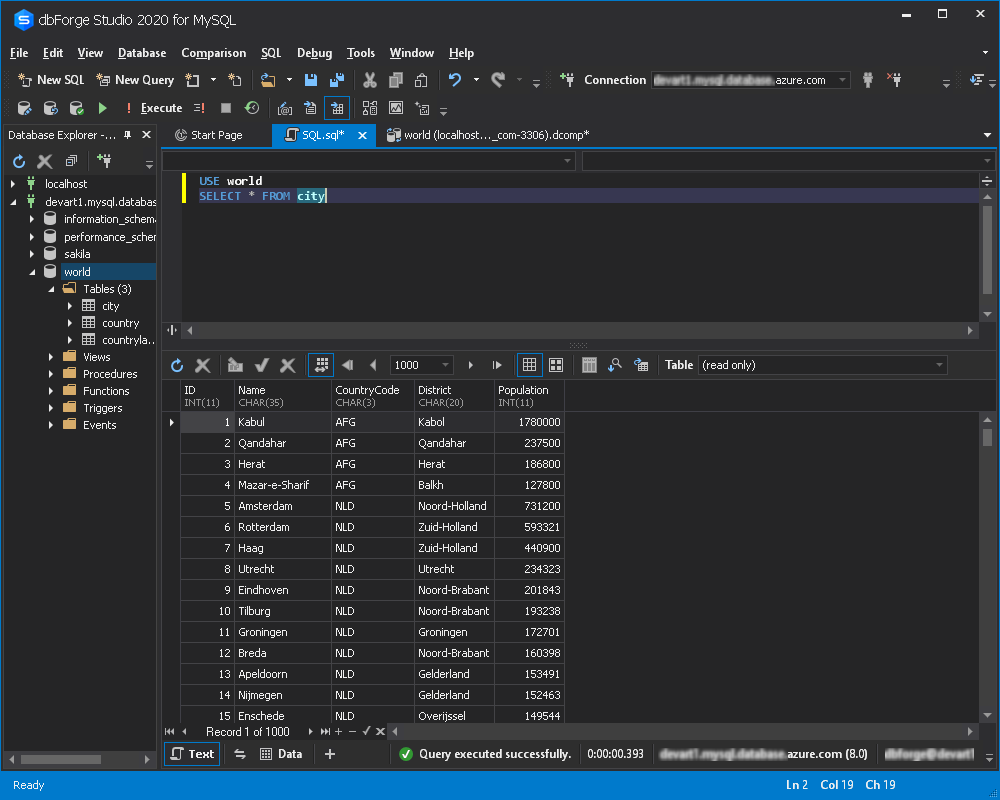
Summary
Nowadays more and more businesses move their databases to Azure Database for MySQL, as this database service is easy to set up, manage, and scale. That migration doesn’t need to be painful. dbForge Studio for MySQL boasts immaculate migration tools that can significantly facilitate the process. The Studio allows database transfer to be easily configured, saved, edited, automated and scheduled. More than that, dbForge Studio for MySQL supports a bunch of database servers to move your workloads from and to.


