
Oracle and MySQL stand out as the two most widely used relational database management systems globally, and they both are owned by Oracle Corporation. Many organizations incorporate these systems into their workflows. This prevalence often leads to the need for data migration between these systems.
Migrating data from MySQL to Oracle can be a wearisome task. It involves manual export/import steps and reconfiguration. To simplify it, lean on two of the best Oracle tools for this job, dbForge Edge and the Devart ODBC Driver for MySQL, to simplify connectivity, mapping, and execution.
Let’s delve into the process in more detail.
What are the advantages of migrating from MySQL to Oracle database?
Both MySQL and Oracle tools are viable database options for organizations, with the choice depending on specific needs and scenarios. Oracle stands out as a more robust solution, offering features unavailable in MySQL.
Migrating from MySQL to Oracle brings the following advantages:
- Enhanced performance and scalability for handling large and complex databases
- Advanced security features such as encryption, auditing, and extensive data access controls
- Data partitioning capabilities, ideal for managing large-scale data efficiently
- High flexibility for both static and dynamic environments
- Support for both SQL and PL/SQL programming languages
- Various storage options, including tablespaces and packages
- Support for multiple data models within a database, including Graph, Relational, Key-Value, and Document
- A variety of index types, like Normal, Bitmap, Partitioned, Function-based, and Domain indexes
- The Oracle Streams feature for efficient data replication and integration
- The Oracle RAC (Real Application Clusters) feature offers advanced clustering technologies
- Integration with a wide range of other enterprise applications and systems
- Comprehensive and precise documentation and community support
- Flexible pricing models allow users to select the option that best fits their needs
Thanks to Devart products, we can streamline switching to Oracle from MySQL, ensuring it is swift, straightforward, and user-friendly.
Prerequisites
In our demonstration, we will use two Devart products: dbForge Edge and the ODBC driver for MySQL.
dbForge Edge is a versatile software solution comprising four dbForge Studios, each tailored to a specific database management system (MySQL/MariaDB, SQL Server, Oracle, and PostgreSQL). Edge is particularly beneficial for organizations working on multiple projects across various RDBMSs, as it offers a comprehensive toolset to efficiently handle database tasks in each system.
The ODBC driver for MySQL is a specialized connectivity solution that provides direct and secure access to real-time data in MySQL, MariaDB, Azure for MySQL, and Amazon RDS for MySQL. It does not require any additional client software while ensuring full compliance with ODBC API and data types.
In our scenario, these two solutions enable us to migrate the data directly from the MySQL database into the Oracle database.
Importing data into Oracle using ODBC drivers
The ability to import data directly from various sources, including ODBC, is one of the benefits offered by dbForge Studio for Oracle (and other DBMSs).
Importing data via ODBC allows the users to retrieve data directly from various storage in different platforms and simplifies the tasks related to database-related objects, such as reports, ETL processes, etc. Devart currently offers ODBC drivers for 25 databases and 50+ cloud platforms.
To start, we need to install and configure the ODBC driver for MySQL, as it will allow us to connect to the MySQL database directly using dbForge Studio for Oracle.
Install and configure ODBC driver for MySQL
Devart offers ODBC Drivers for OS. In our case, we’ll use the ODBC Driver for Windows and illustrate the data migration process from MySQL to Oracle on Windows.
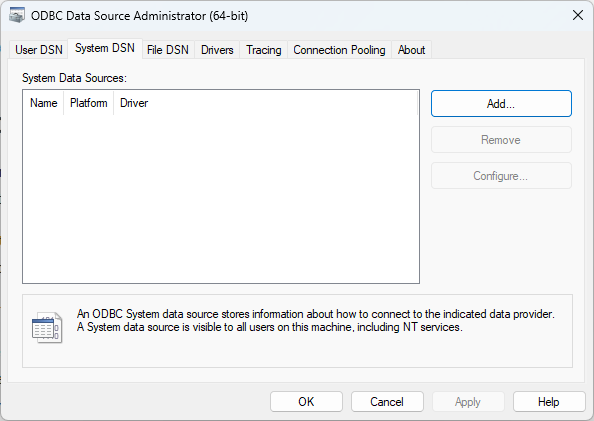
Download MySQL ODBC Driver from the official page and install it as described in the instructions – it only takes a couple of clicks. Then launch the ODBC driver after the installation and go to the System DSN tab. Click Add.
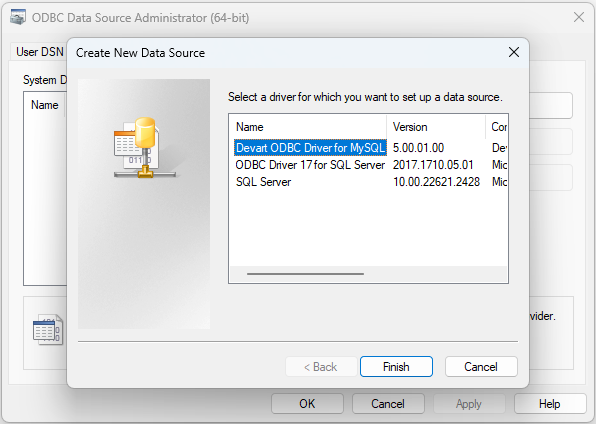
Select Devart ODBC Driver for MySQL and click Finish.
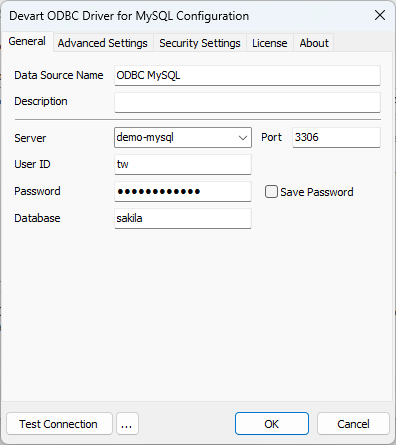
Connect to the MySQL database by entering the required details into the Driver configuration window (the data source name, the server name, the user ID, the password, and the target database). You can click Test Connection to check if everything is fine. Click OK to save your settings.
Now, we can proceed to the data import.
Import data from MySQL to Oracle via ODBC
Launch dbForge Studio for Oracle – it is available as a stand-alone software and is also provided as a part of dbForge Edge. If you are going to work with your data in Oracle, this Studio offers the complete set of features and options to perform database development, management, and administration tasks.
You can import the data into any database provided the user has the necessary rights. In our example, we import the data into the sakila database.
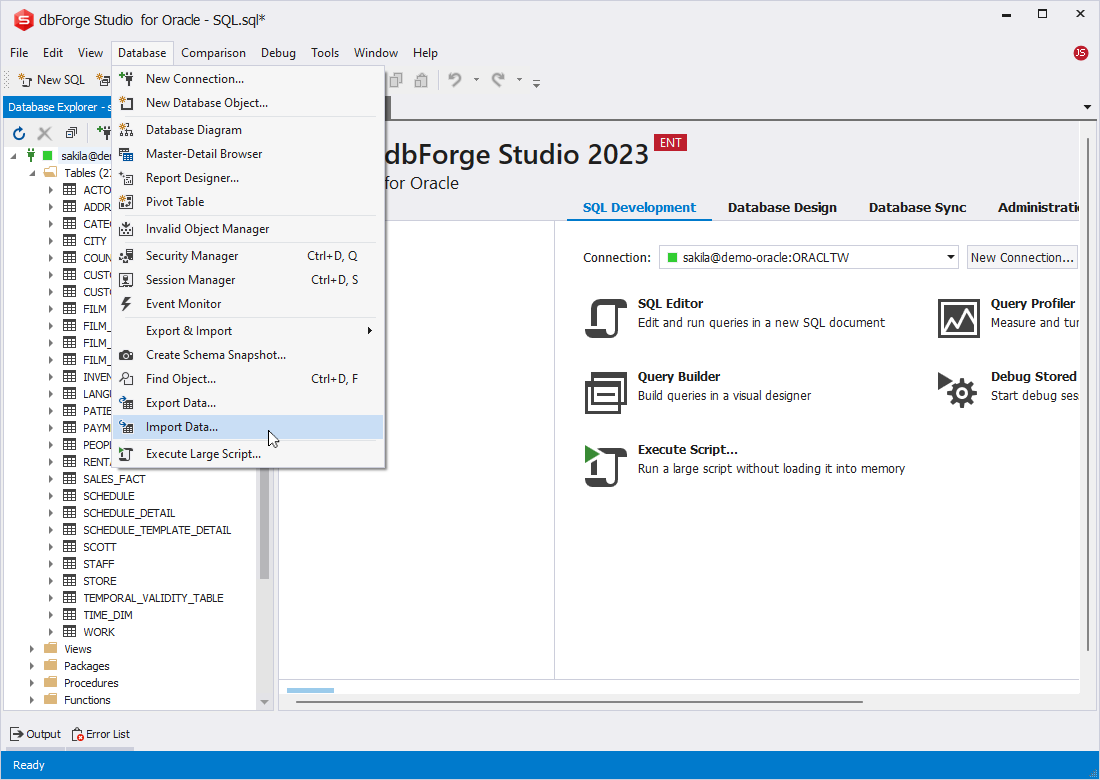
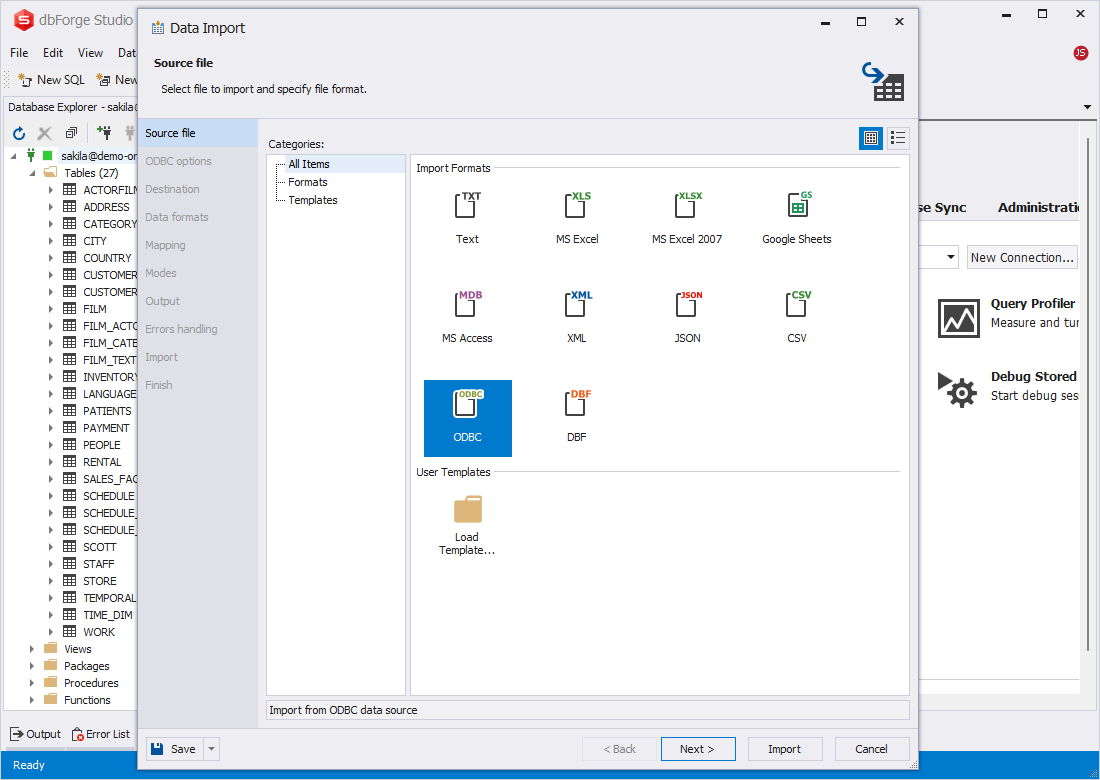
Start the data import: select Database > Import Data
In the Sources section, select ODBC and click Next
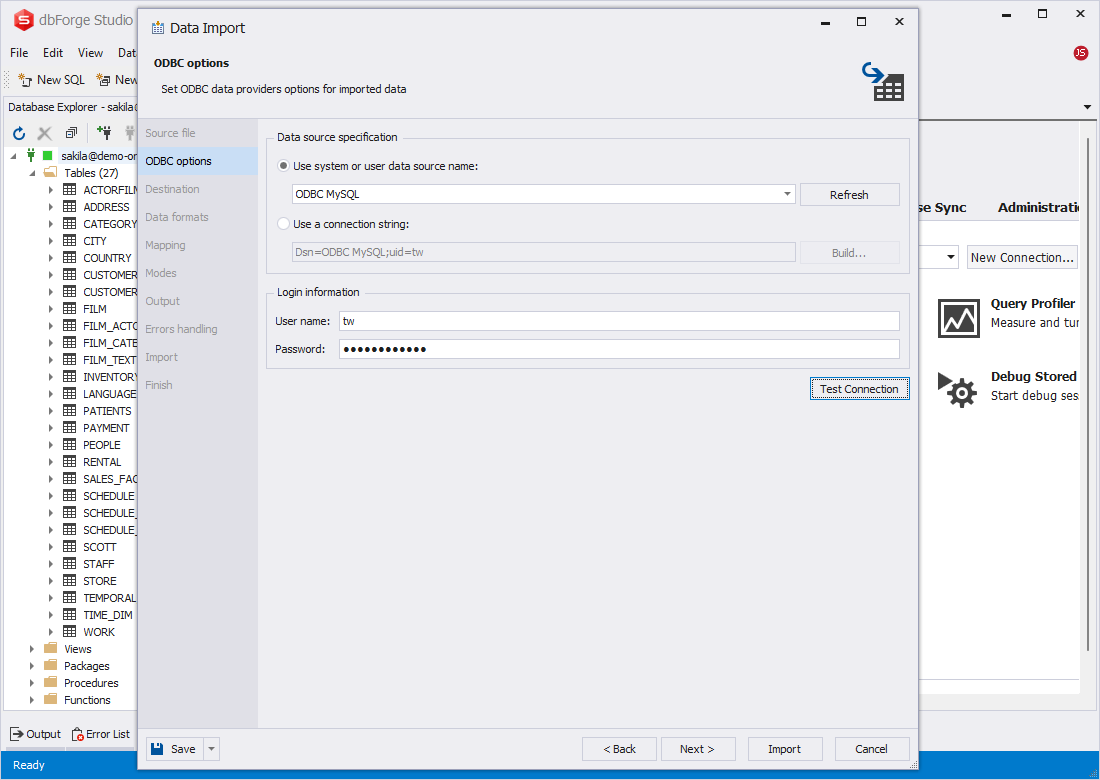
In the ODBC options section, select our ODBC Driver for MySQL as the data source and provide the username and password to connect to the MySQL server from the Studio for Oracle. Click Next.
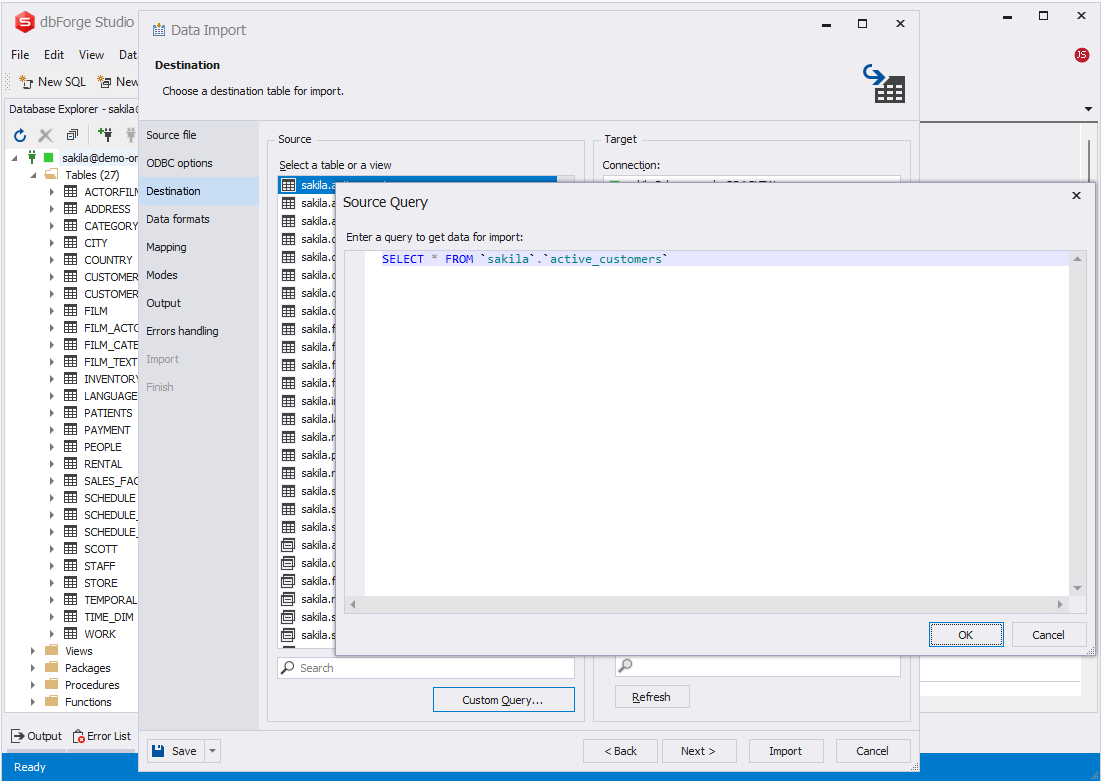
In the Destination section, select the table in the MySQL database to import data from it on the left Source pane. The target table is on the right pane – we can import data into the new or an existing table. In our example, we’ll import data into a new table – Active_Customers. This table is present in the sakila MySQL database but is absent in the sakila Oracle database.

If necessary, you can apply the custom query to import a data portion according to some criteria. Click the Custom Query button and enter the query. After that, click Next.
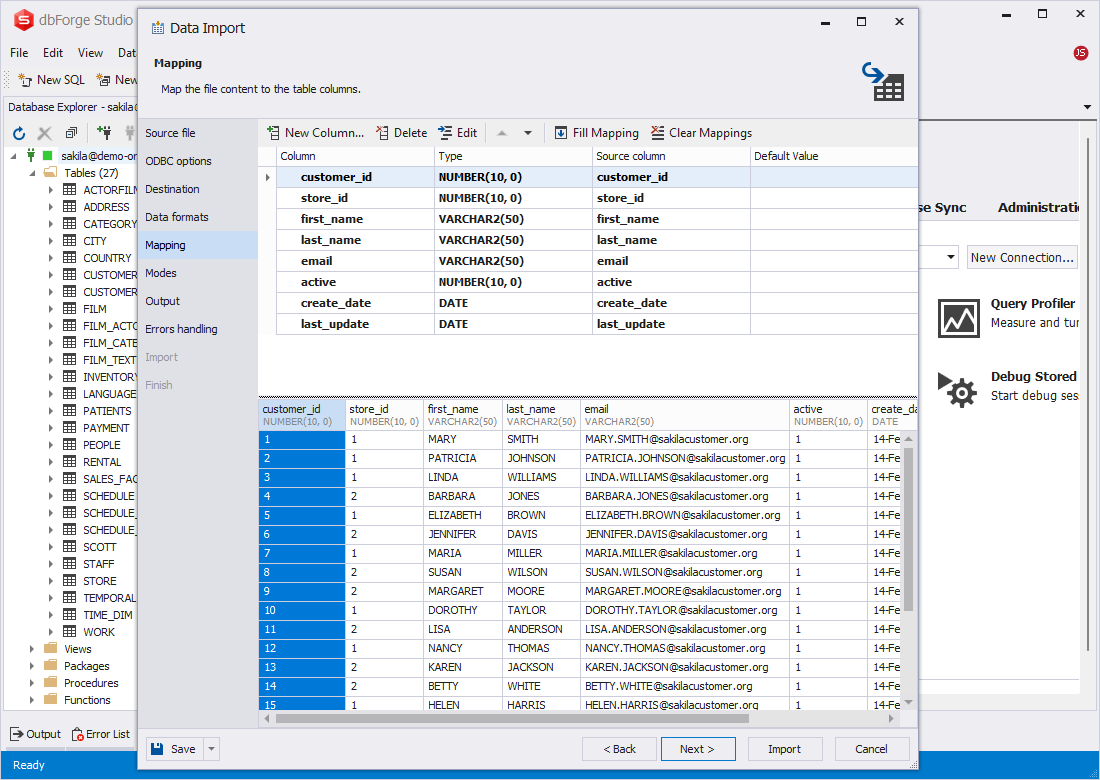
Check the data formats and mapping settings. By default, dbForge Studio for Oracle maps the columns itself for the new table. Click Next.
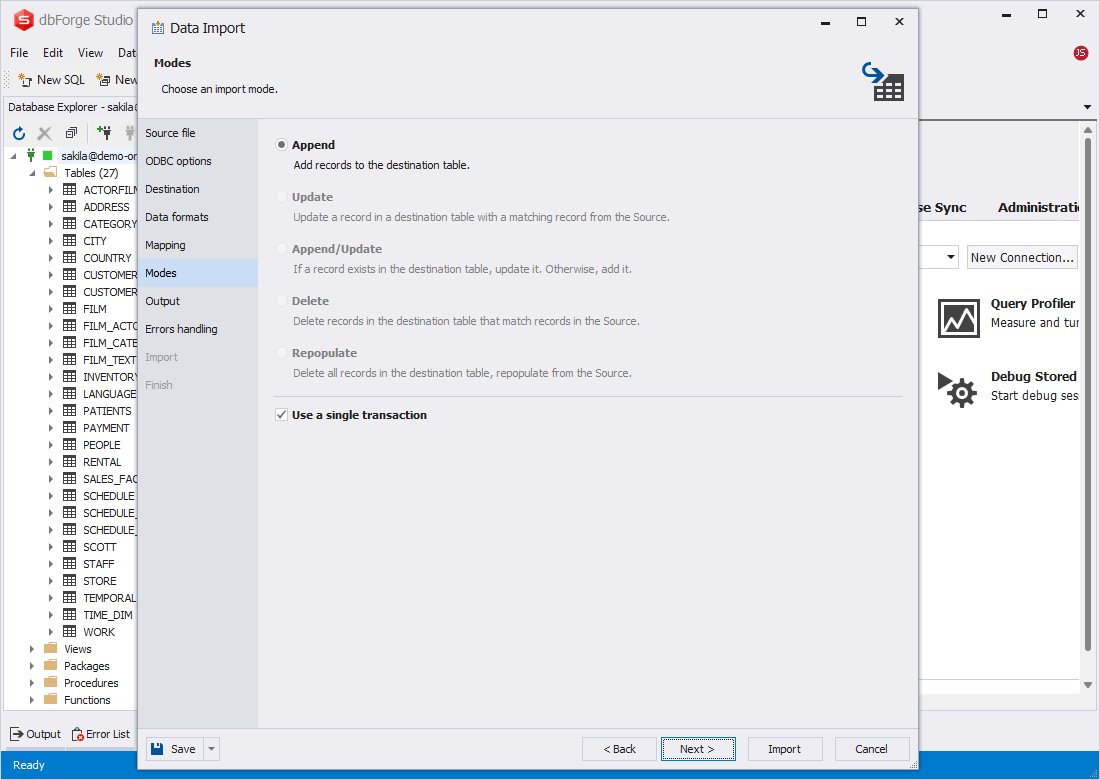
In the Modes section, select the import mode. For the data import into a new table, the Studio uses the default Append method. For importing data into an existing table, you can choose another mode that would suit your requirements, such as Update, Delete, or Repopulate method. Click Next.
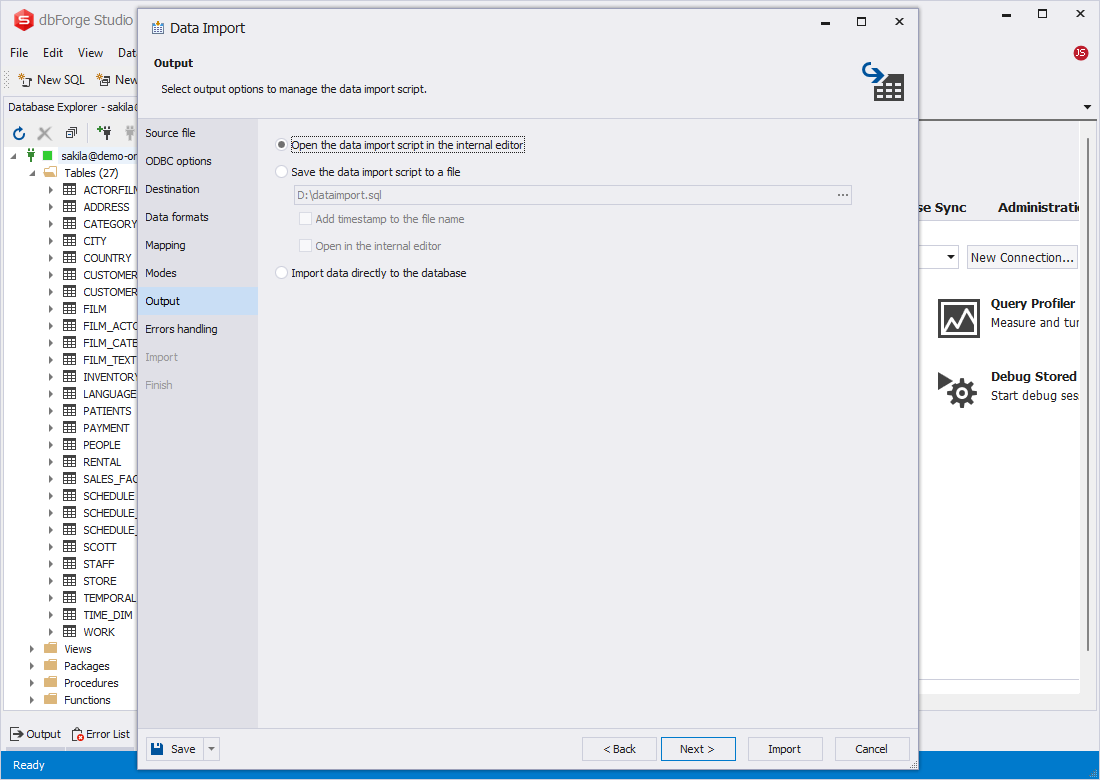
In the Output section, you decide how to import the data. The Studio allows us to import the data into the database directly (which is the default choice) or generate SQL scripts to perform this operation.
If you choose the Open the data import script… option, the Studio will present the script in the internal editor without making any changes to the target database. This option is helpful if you face a complex data migration task that involves compiling data from several tables or databases. dbForge Studio for Oracle will help you create the script to perform such a task. It can execute that script for you if necessary.
Finally, specify the desired Error handling behavior in the corresponding section.
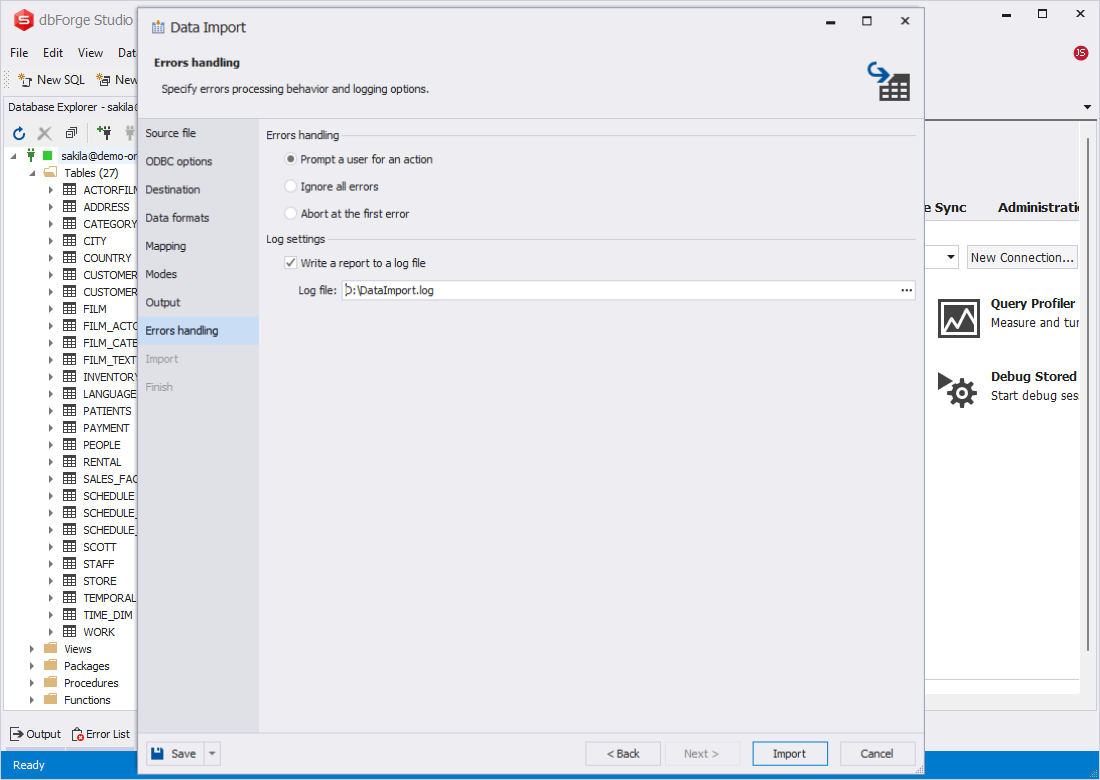
The task is configured, and we can import the data immediately. Click the Import button.
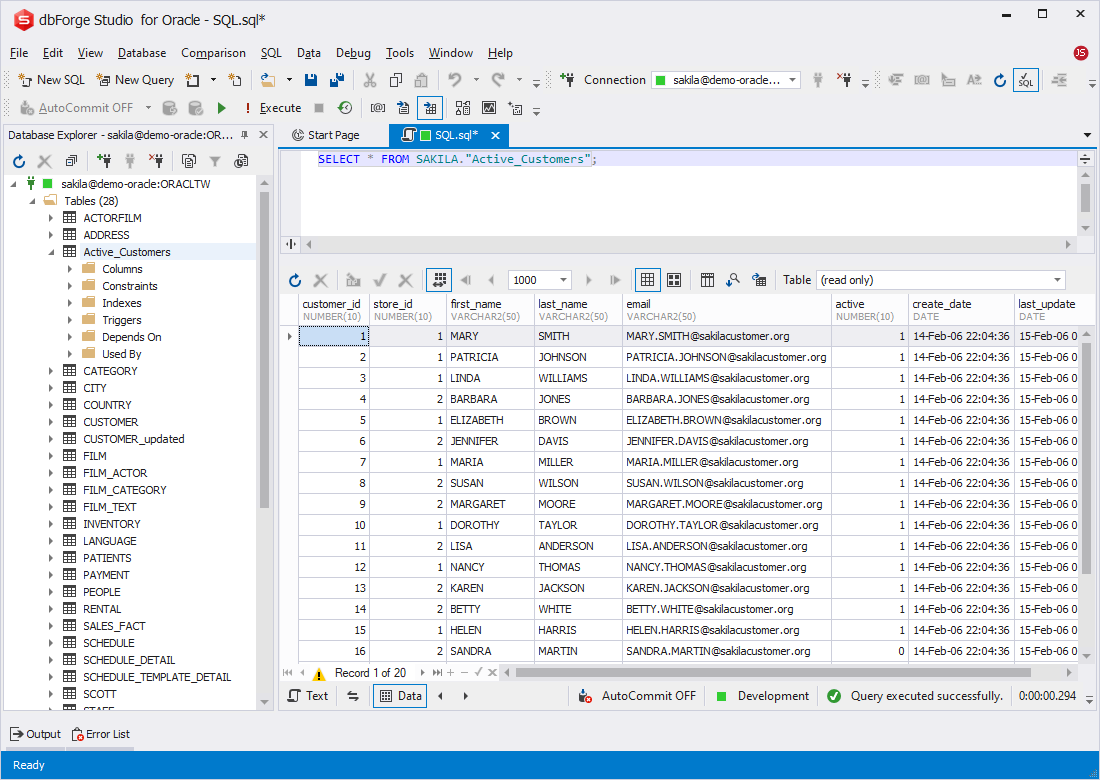
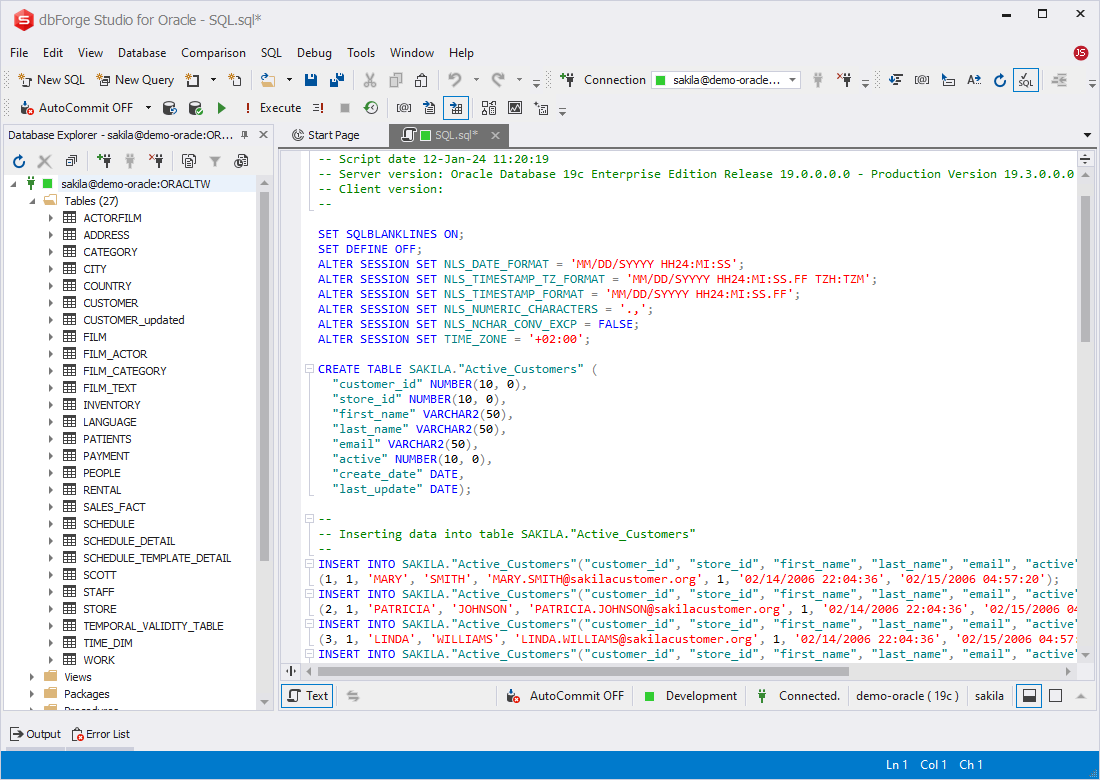
As you can see, a new Active_Customers table is added to the sakila database in Oracle, and all data is transferred successfully from the MySQL database.
If you choose the option to just generate the data import script, you will see that script in the in-built editor after clicking Import:
This way, we have imported the data from the specific table in a MySQL database into the Oracle database. The same task can be performed for multiple tables and views and for multiple databases. Besides, dbForge Studio for Oracle allows you to automate this task and save any task settings as templates for recurring jobs.
Conclusion
Utilizing dbForge Studio for Oracle in conjunction with an ODBC driver for a specific data source provides a potent and adaptable approach to data migration from other platforms to Oracle. We can import data directly into a different database management system (DBMS) or create a data import script to use it further as well as modify it for specific needs.
Our case demonstrated how to successfully migrate MySQL database to another server. However, the solution is capable of configuring and performing migrations between various data sources and databases in leading database management systems. If your work processes suggest the necessity of running such regular data migrations, you might utilize dbForge Edge as the most universal solution that covers all major database management systems.
The fully functional free trial of dbForge Edge is available for 30 days. This trial allows users to thoroughly test and fine-tune all database-related tasks, regardless of the size and number of databases across different systems, under actual workload conditions.