
In this article, we’ll examine how to build and execute integration tests using ASP.NET 6 Core. In this article, we’ll connect to PostgreSQL using dotConnect for PostgreSQL, a high performance and enhanced data provider for PostgreSQL built on top of ADO.NET and can work on both connected and disconnected modes.

Pre-requisites
You’ll need the following tools to deal with code examples:
What Are We Building Here?
In this article, we’ll be implementing health checks using ASP.NET 6. We’ll be creating two projects: a Health Check API project and a Project API project. Here are the steps we’ll follow throughout this article to accomplish this:
- What is Health Check? Why do we need it?
- Create an ASP.NET 6 Core Web API project in Visual Studio 2022 for the Health Check API
- Add the Devart.Data.PostgreSql NuGet package to the project
- Implement Health Check classes for testing database connection
- Configure Program.cs file to enable health checks
- Run the application and navigate to the health check endpoint
- Create another ASP.NET 6 Core Web API project for the Product API
- Implement Health Check for API
- Run both projects to view health check metadata
- View the Health Check information in a GUI
What is Health Check? Why do we need it?
A health check is a mechanism used in applications to determine if the application is functioning correctly, i.e., if the endpoints of the application are responding and if the application is able to communicate with external components correctly. The ASP.NET Core framework includes built-in middleware for implementing Health Checks.
Health Checks in ASP.NET Core are implemented using built-in middleware. Hence, you can use them in any application (Web API, Web UI) as long as they have access to the request and response context. Health Check is most commonly used for ensuring that certain services/components in your system are operating correctly. This is without the need to write tests for them or even run them at all times during development and production deployment.
Create a new ASP.NET 6 Core Web API Project for the Health Check API
In this section, we’ll learn how to create a new ASP.NET 6 Core Web API project in Visual Studio 2022.
Now, follow the steps outlined below:
- Open Visual Studio 2022.
- Click Create a new project.
- Select ASP.NET Core Web API and click Next.
- Specify the project name and location to store that project in your system. Optionally, checkmark the Place solution and project in the same directory checkbox.
- Click Next.
- In the Additional information window, select .NET 6.0 (Long-term support) as the project version.
- Disable the Configure for HTTPS and Enable Docker Support options (uncheck them).
- Since we’ll not use authentication in this example, select the Authentication type as None.
- Since we won’t use Open API in this example, deselect the Enable OpenAPI support checkbox.
- Since we’ll not be using minimal APIs in this example, ensure that the Use controllers (uncheck to use minimal APIs) are checked.
- Leave the Do not use top-level statements checkbox unchecked.
- Click Create to finish the process.
We’ll use this project in this article.
Add the Devart.Data.PostgreSql NuGet package to the project
In your API project, i.e., the project you just created, you should install the dotConnect for PostgreSql package in your project. dotConnect for PostgreSQL is a high-performance data provider for PostgreSQL built on ADO.NET technology that provides a comprehensive solution for building PostgreSQL-based database applications.
You can install this package either from the NuGet Package Manager tool inside Visual Studio or, from the NuGet Package Manager console using the following command:
PM> Install-Package Devart.Data.PostgreSqlCreate the Database
You can create a database using the pgadmin tool. To create a database using this Launch this tool, follow the steps given below:
- Launch the pgadmin tool
- Expand the Servers section
- Select Databases
- Right-click and click Create -> Database…
- Specify the name of the database and leave the other options to their default values
- Click Save to complete the process
Create a database table
Select and expand the database you just created
Select Schemas -> Tables
Right-click on Tables and select Create -> Table…
The table script is given below for your reference:
CREATE TABLE product (
	id serial PRIMARY KEY,
	productname VARCHAR ( 50 ) NOT NULL,
	price money NOT NULL,
	description VARCHAR ( 255 ) NOT NULL
);
We’ll use this database in the subsequent sections of this article to demonstrate how we can work with Integration Tests in ASP.NET Core using dotConnect for PostgreSQL.
Add a few records to the Product table
Now, run the following script in your database to insert a few records in the Product table:
INSERT INTO product(productname, price, description)
VALUES ('Lenovo', 8000.00, 'Laptop');

INSERT INTO product(productname, price, description)
VALUES ('HP', 8500.00, 'Desktop');

INSERT INTO product(productname, price, description)
VALUES ('Sony',5000.00, 'TV');
Figure 1 below illustrates the pgAdmin editor where you can write and execute your scripts:
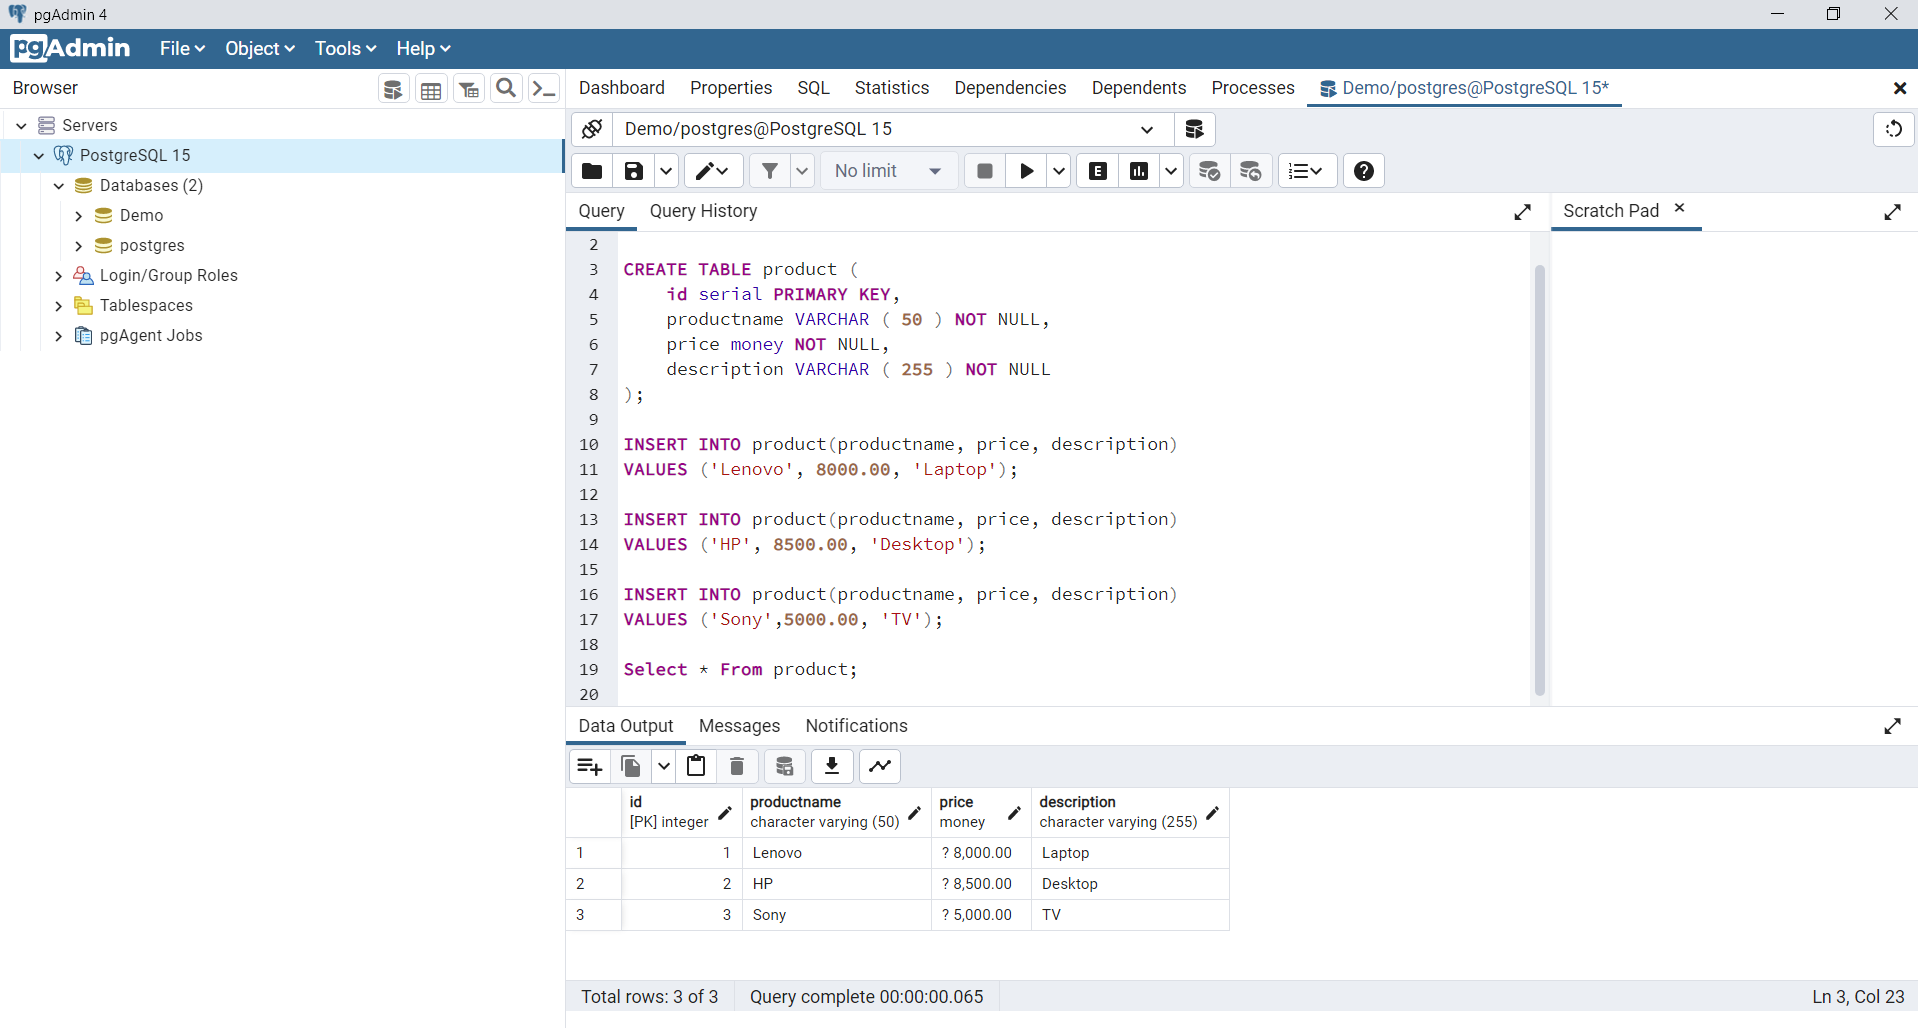
Figure 1: Records inserted into the product table
Create the Model Class
Create a solution folder in the Solution Explorer window and name it as Models. Next, create a .cs file called Product.cs with the following code in there:
 public class Product
    {
        public int Id { get; set; }
        public string ProductName { get; set; }
        public decimal Price { get; set; }
        public string Description { get; set; }
    }
Create the ProductRepository Class
The IProductRepository interface would look like this:
 public interface IProductRepository
    {
        public List<Product> GetProducts();
    }
The ProductRepository class implements the GetProducts method of the IProductRepository interface and encapsulates all database operations.
    public class ProductRepository: IProductRepository
    {
        public List<Product> GetProducts()
        {
            try
            {
                List<Product> products = new List<Product>();
                using (PgSqlConnection pgSqlConnection =
                 new PgSqlConnection("User Id = postgres; Password = sa123#;" +
                 "host=localhost;database=Demo;"))
                {
                    using (PgSqlCommand pgSqlCommand = new PgSqlCommand())
                    {
                        pgSqlCommand.CommandText =
                        "Select * From product";
                        pgSqlCommand.Connection = pgSqlConnection;
                        if (pgSqlConnection.State !=
                        System.Data.ConnectionState.Open)
                            pgSqlConnection.Open();
                        using (var pgSqlReader =
                         pgSqlCommand.ExecuteReader())
                        {
                            while (pgSqlReader.Read())
                            {
                               Product product = new Product();
                               product.Id =
                               int.Parse(pgSqlReader.GetValue(0).ToString());
                               product.ProductName =
                               pgSqlReader.GetValue(1).ToString();
                               product.Price =
                               decimal.Parse(pgSqlReader.GetValue(2).ToString());
                               product.Description =

                               pgSqlReader.GetValue(3).ToString();
                               products.Add(product);
                            }
                        }
                    }
                }
                return products;
            }
            catch
            {
                throw;
            }
        }
    }
Create the ProductController Class
Next, select and right-click on the Controllers solution folder and create a new controller class called ProductController with the following code in there:
[Route("api/[controller]")]
    [ApiController]
    public class ProductController : ControllerBase
    {
        private readonly IProductRepository _productRepository;
        public ProductController(IProductRepository productRepository)
        {
            _productRepository = productRepository;
        }

        [HttpGet]
        public List<Product> Get()
        {
            return _productRepository.GetProducts();
        }
    }
Note how an instance of type IProductRepository is injected in the constructor of the ProductController class. Remember that you must add an instance of type IProductRepository to the services container using the following piece of code in the Program.cs file:
builder.Services.AddScoped<IProductRepository, ProductRepository>();Implement Health Check classes for testing database connection
Follow the steps outlined in the “Create a new ASP.NET 6 Core Web API Project” section given earlier to create another ASP.NET Core WebAPI project in Visual Studio 2022. In this section we’ll implement a simple health check endpoint which would be used to determine is the API is up and running.
Configure Program.cs file to enable health checks
Create a new .cs file in your project named CustomHealthCheck.cs and write the following code in there:
using Microsoft.Extensions.Diagnostics.HealthChecks;
using System.Net.Mime;
using System.Text.Json;
using System.Text.Json.Serialization;

namespace HealthCheckDemo
{
    public class CustomHealthCheck : IHealthCheck
    {
        public Task<HealthCheckResult> CheckHealthAsync(
            HealthCheckContext context, CancellationToken cancellationToken = default)
        {
            try
            {
                return Task.FromResult(
                    HealthCheckResult.Healthy("The service is up and running."));
            }
            catch (Exception)
            {
                return Task.FromResult(
                    new HealthCheckResult(
                        context.Registration.FailureStatus, "The service is down."));
            }
        }
    }
}
Run the application and navigate to the health check endpoint
Next, select and right-click on the Controllers solution folder and create a new controller class called HealthCheckController and write the following code in there:
[Route("api/[controller]")]
[Controller]

public class HealthCheckController : ControllerBase
{
        private readonly ILogger<HealthCheckController> _logger;
        private readonly HealthCheckService _service;
        public HealthCheckController(ILogger<HealthCheckController> logger,
        HealthCheckService service)
        {
            _logger = logger;
            _service = service;
        }

        [HttpGet]
        public async Task<IActionResult> Get()
        {
            var report = await _service.CheckHealthAsync();
            string json = System.Text.Json.JsonSerializer.Serialize(report);

            if (report.Status == HealthStatus.Healthy)
                return Ok(json);
            return NotFound("Service unavailable");
        }
}
Note how an instance of type HealthCheckService is injected in the constructor of the HealthCheckController class.
Create another ASP.NET 6 Core Web API project for the Product API
To get started working with health checks in ASP.NET Core, you should first register the health check service in the Program.cs file. Now, register the health check in the Program.cs file using the following code:
builder.Services
    .AddHealthChecks()
    .AddCheck<CustomHealthCheck>(nameof(CustomHealthCheck));
Then you should add the health check endpoint using the following code snippet in the Program class which will set up the endpoint URL for your health check:
app.MapHealthChecks("/health", new()
{
ResponseWriter = UIResponseWriter.WriteHealthCheckUIResponse
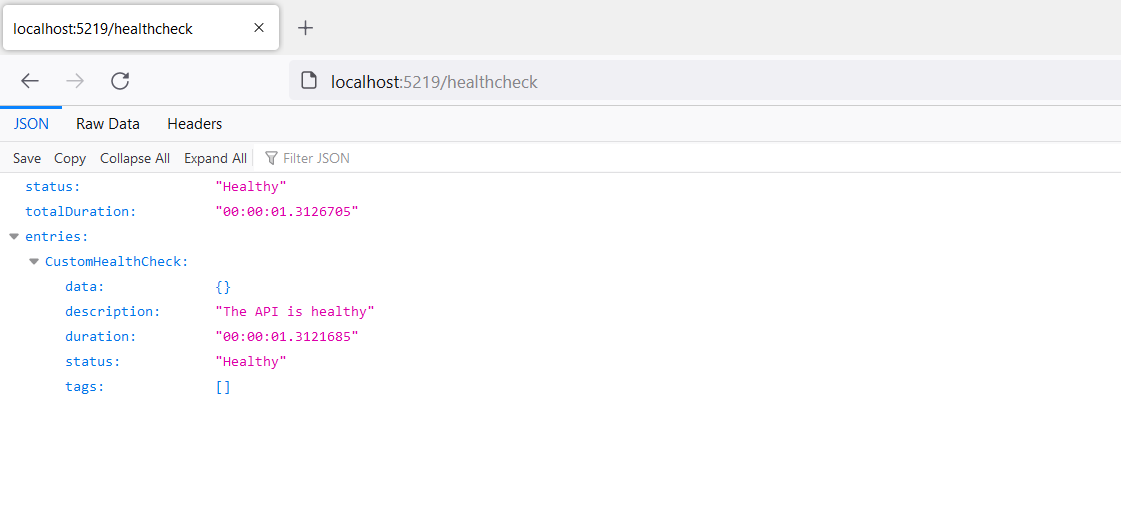
});When you execute the application and navigate to /health endpoint, it will return the text “Healthy” as a response assuming that your application is up and running fine.
When you run the application and browse the /health endpoint, the health metadata for the endpoint will be generated as a JSON string and displayed in the web browser. Figure 1 shows what the response would look like:
Implement Health Check for API
Create a new .cs file in your project named DbHealthCheck.cs and write the following code in there:
using Microsoft.Extensions.Diagnostics.HealthChecks;
using System.Net.Mime;
using System.Text.Json;
using System.Text.Json.Serialization;
namespace HealthCheckDemo
{
public class DbHealthCheck : IHealthCheck
{
public Task<HealthCheckResult> CheckHealthAsync(
HealthCheckContext context, CancellationToken cancellationToken = default)
{
try
{
using (PgSqlConnection pgSqlConnection =
new PgSqlConnection("User Id = postgres; Password = sa123#;" +
"host=localhost;database=Demo;"))
{
if (pgSqlConnection.State !=
System.Data.ConnectionState.Open)
pgSqlConnection.Open();
if (pgSqlConnection.State == System.Data.ConnectionState.Open)
{
pgSqlConnection.Close();
return Task.FromResult(
HealthCheckResult.Healthy("The database is up and running."));
}
}
return Task.FromResult(
new HealthCheckResult(
context.Registration.FailureStatus, "The database is down."));
}
catch (Exception)
{
return Task.FromResult(
new HealthCheckResult(
context.Registration.FailureStatus, "The database is down."));
}
}
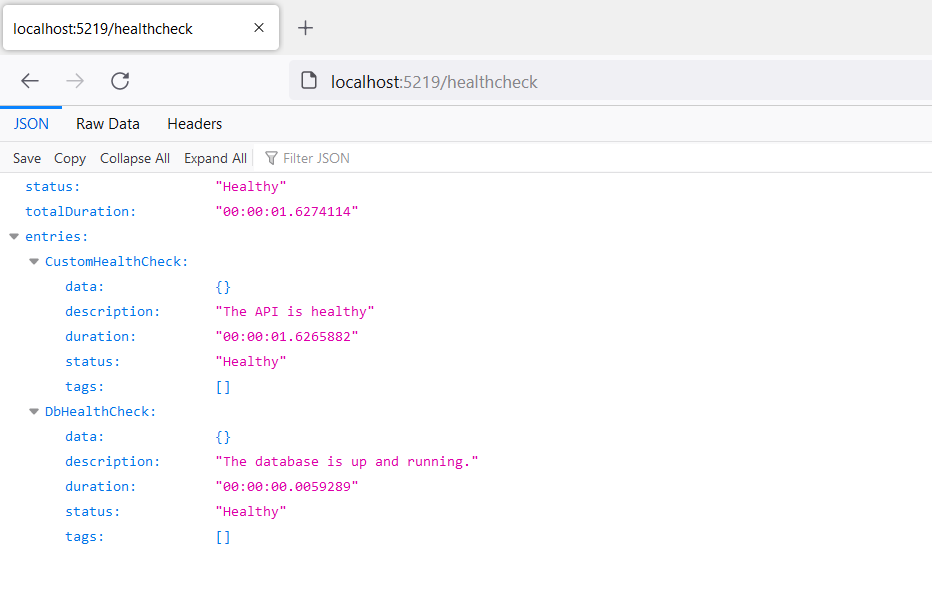
}}In the preceding code listing, a connection is made to the database and an attempt is made to open the database connection in the CheckHealthAsync method of the DbHealthCheck class. Based on whether the database connection was established successfully, appropriate messages are returned.
When you run the application this time, you’ll be able to see the message:
Run both projects to view health check metadata
Let us now create an API Health Check class to test if the Product API is running fine. To do this, create a new file in your API Health Check project called ApiHealthCheck.cs and write the following code in there:
public class ApiHealthCheck : IHealthCheck
    {
        private readonly IHttpClientFactory _httpClientFactory;
        public ApiHealthCheck(IHttpClientFactory httpClientFactory)
        {
            _httpClientFactory = httpClientFactory;
        }
        public async Task<HealthCheckResult> CheckHealthAsync
        (HealthCheckContext context,
            CancellationToken cancellationToken = default)
        {
            using (var httpClient = _httpClientFactory.CreateClient())
            {
                var response = await
                httpClient.GetAsync("http://localhost:5075/api/product");
                if (response.IsSuccessStatusCode)
                {
                    return await Task.FromResult(new HealthCheckResult(
                      status: HealthStatus.Healthy,
                      description: "The API is up and running."));
                }
                return await Task.FromResult(new HealthCheckResult(
                  status: HealthStatus.Unhealthy,
                  description: "The API is down."));
            }
        }
    }
You should write the following code snippet in the Program.cs file to add IHttpClientFactory and the other associated services to the services container:
builder.Services.AddHttpClient();You should also add the health check we just created using the following code snippet:
builder.Services
.AddHealthChecks()
.AddCheck<ApiHealthCheck>(nameof(ApiHealthCheck))
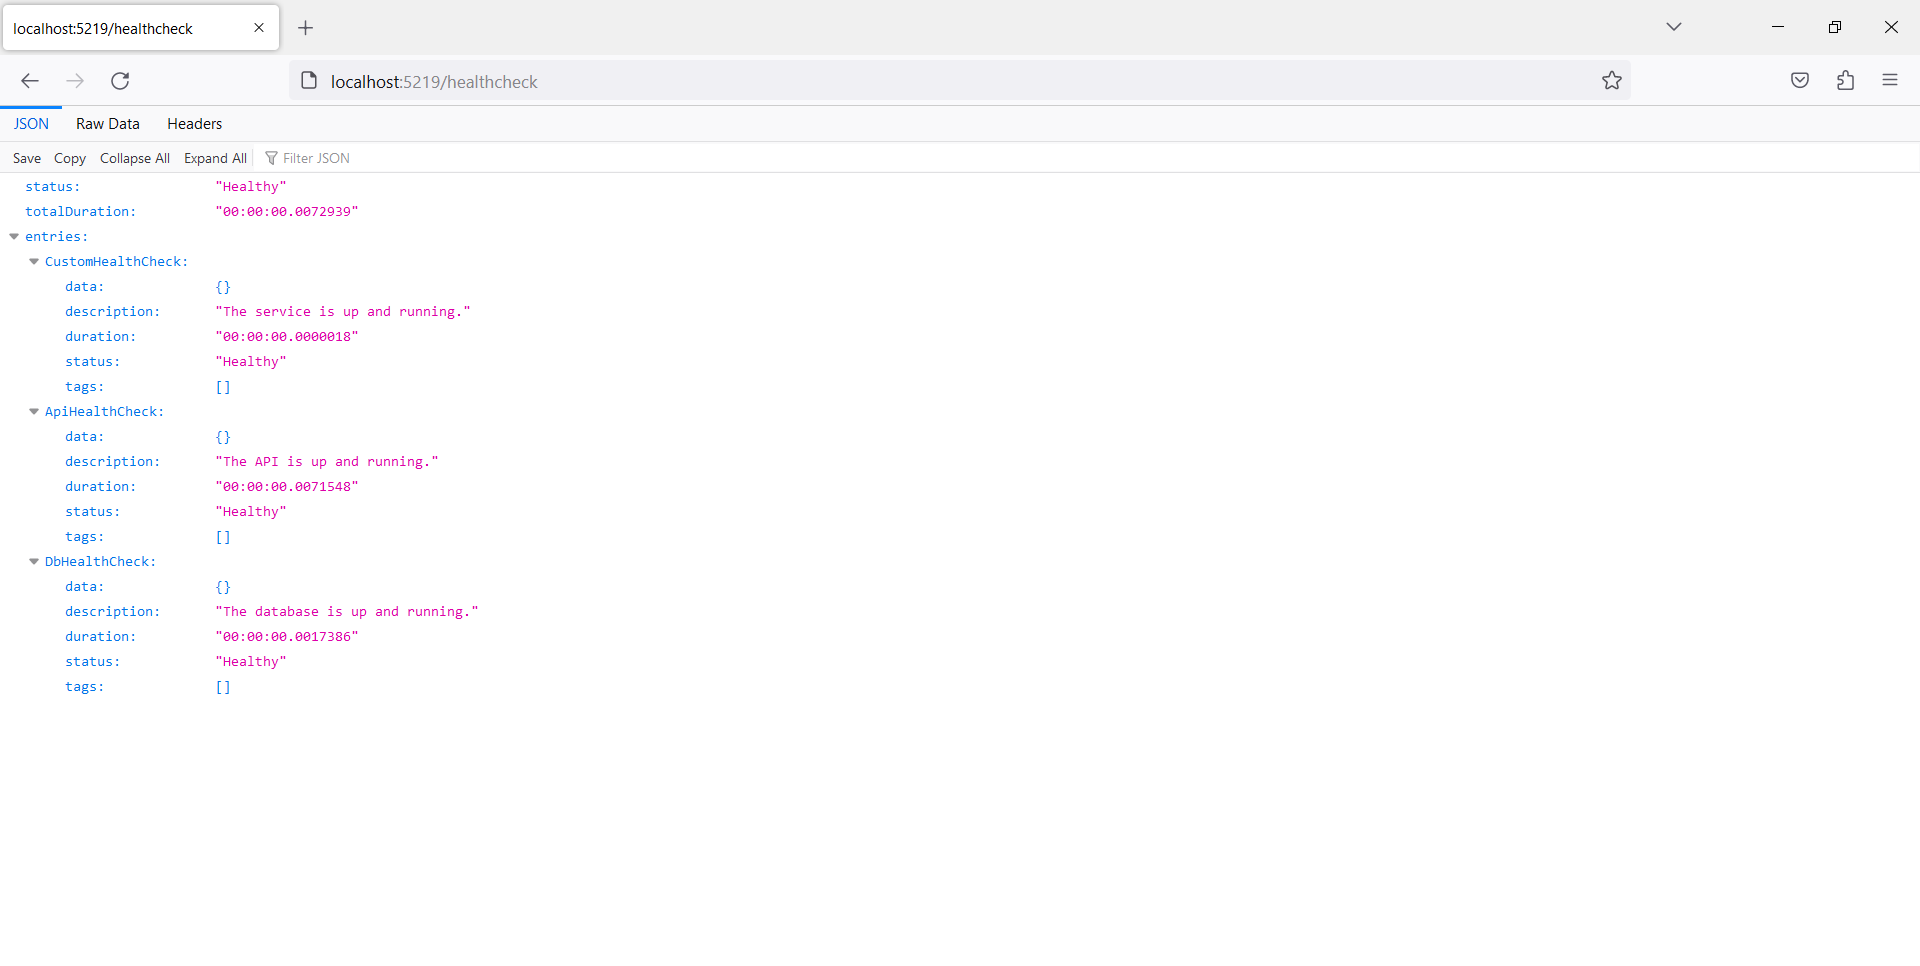
.AddCheck<DbHealthCheck>(nameof(DbHealthCheck));Now, open both the Product API and the Health Check API solutions and run them. When you
Browse the /healthcheck endpoint, the health check details will be displayed in the web browser as shown in Figure 4:
View the Health Check information in a GUI
We can also view the health check metadata in a graphical user interface. Add the following NuGet packages to the Health Check API project:
AspNetCore.HealthChecks.UI
AspNetCore.HealthChecks.UI.Client
AspNetCore.HealthChecks.UI.InMemory.Storage
Now, add the HealthCheckUI service to the services container using the following code:
builder.Services
    .AddHealthChecksUI(options =>
    {
        options.AddHealthCheckEndpoint("Healthcheck API", "/healthcheck");
    })
    .AddInMemoryStorage();
Next, to configure the Health Check GUI, write the following code snippet in the Program.cs file:
app.MapHealthChecks("/healthcheck", new()
{
    ResponseWriter = UIResponseWriter.WriteHealthCheckUIResponse
});

app.MapHealthChecksUI(options => options.UIPath = "/dashboard");
Here is the complete source code of the Program.cs file of the Health Check API project for your reference:
using HealthCheckDemo;
using HealthChecks.UI.Client;
var builder = WebApplication.CreateBuilder(args);
// Add services to the container.
builder.Services.AddHttpClient();
builder.Services.AddControllers();
builder.Services
.AddHealthChecks()
.AddCheck<CustomHealthCheck>(nameof(CustomHealthCheck))
.AddCheck<ApiHealthCheck>(nameof(ApiHealthCheck))
.AddCheck<DbHealthCheck>(nameof(DbHealthCheck));
builder.Services
.AddHealthChecksUI(options =>
{
options.AddHealthCheckEndpoint("Healthcheck API", "/healthcheck");
})
.AddInMemoryStorage();
var app = builder.Build();
app.UseHttpsRedirection();
app.UseAuthorization();
app.MapControllers();
app.MapHealthChecks("/healthcheck", new()
{
ResponseWriter = UIResponseWriter.WriteHealthCheckUIResponse
});
app.MapHealthChecksUI(options => options.UIPath = "/dashboard");
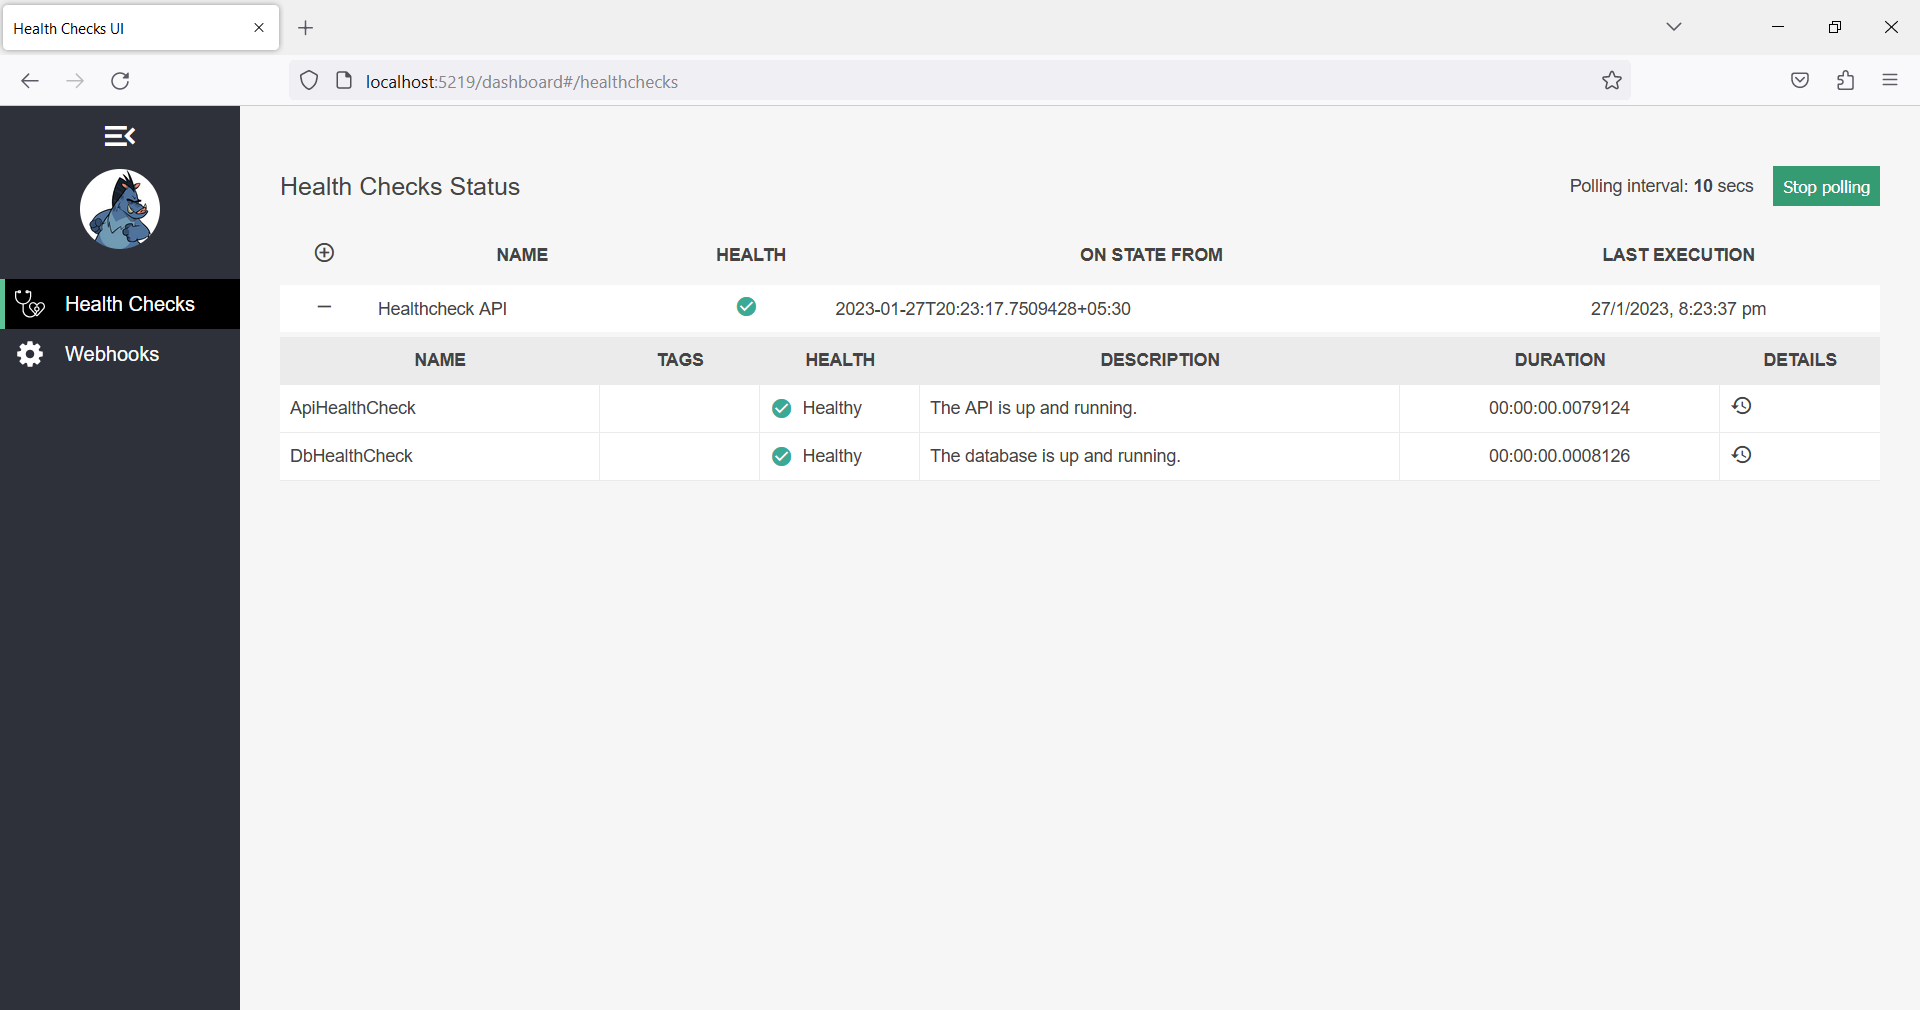
app.Run();Now, run the two API projects one after the other and browse to the /dashboard endpoint. Figure 5 shows how the health check information will be displayed in the GUI:
Summary
Health checks can be used in applications to check the status of a backend service, database, etc. You can use health checks to determine if a service is up and running or if your database is running fine.