
There are many solutions for version-controlling databases. We are going to review one of them, namely Source Control which comes in the SQL Tools pack. As an example, we will use the JobEmplDB database for a recruitment service:
Contents
- Overview of the Source Control menu options
- Connecting the database to the Source Control
- Committing changes to a repository
- Reverse-engineering a database using the Source Control tool
- Conclusion

We have covered the database design basics in SQL Database Design Basics with Example.
Overview of the Source Control Menu Options
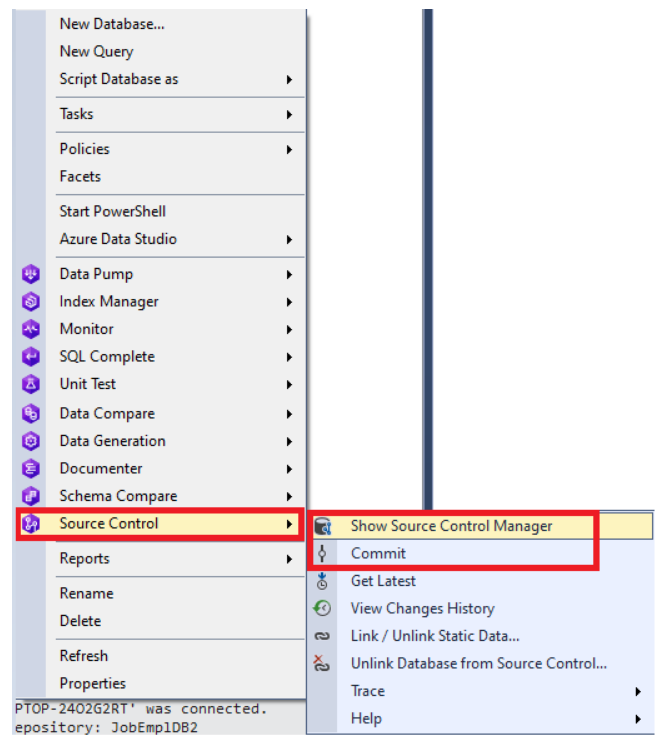
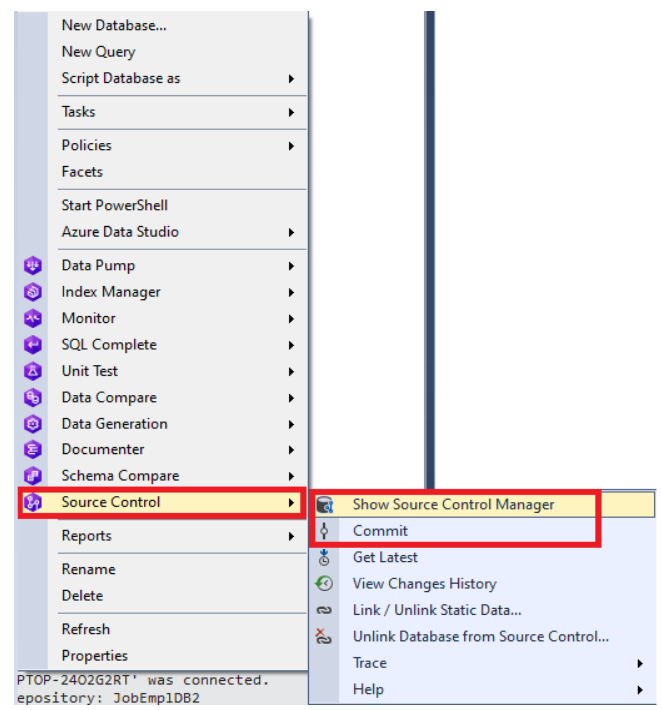
Now, we are going to review the options available on the Source Control shortcut menu:
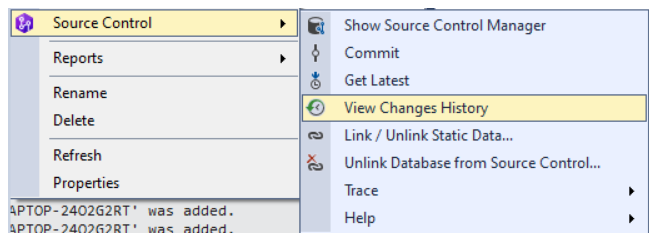
The main options of the Source Control menu include the following commands:
- Show Source Control Manager displaying the local changes window.
- Commit displaying the preparation to commit window.
- Get Latest showing the latest changes in the remote repository (in fact, it precedes the Pull procedure).
- View Changes History showing the database changes history.
- Link/Unlink Static Data that can link and version-control the static table data (references, regulatory references, lists, etc.). More information is available at Linking Static Data, and the worked examples are present at Version-controlling Static Data: Conflicts.
- Unlink Database from Source Control that can unlink the current local database from the source control repository.
Additionally, to get more information about dbForge Source Control, feel free to watch this introductory video.
Connecting the Database to the Source Control
To start with, connect the database to the source control repository.
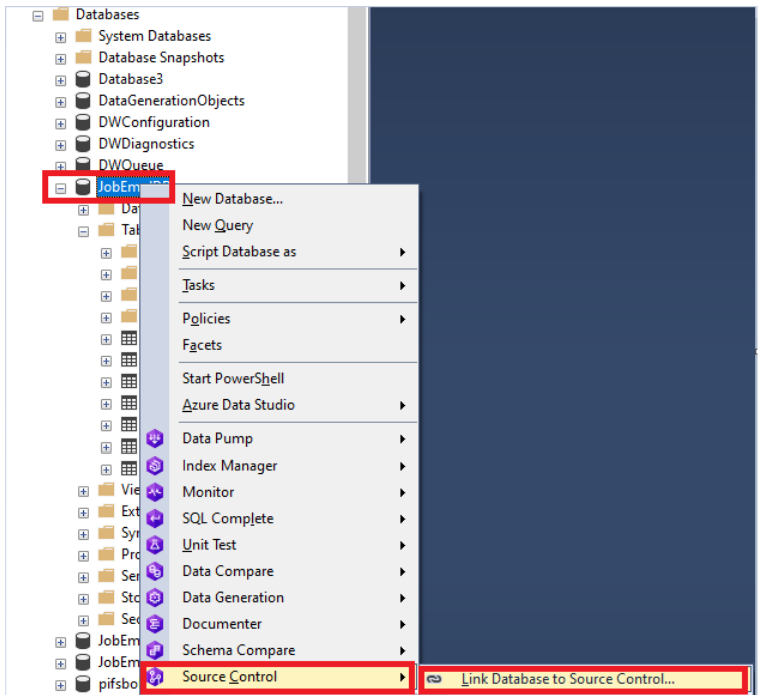
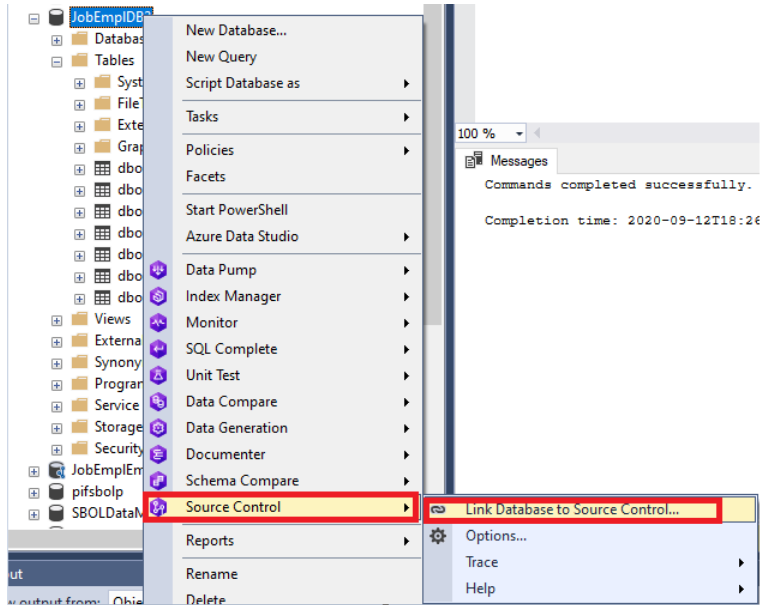
For this, right-click the necessary database, point to Source Control, and then click Link Database to Source Control on the shortcut menu.
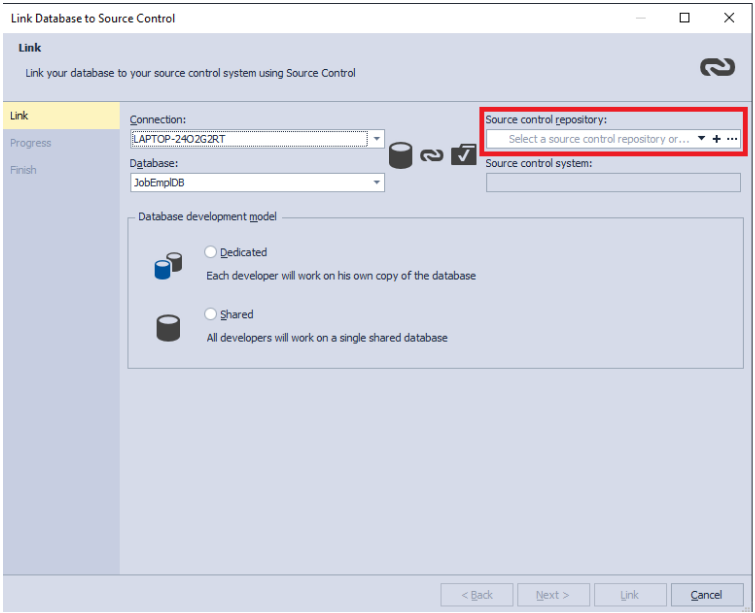
In the Link Database to Source Control window that opens, navigate to the Source control repository field, and click the plus icon:
In the Source Control Repository Properties window, select the required source control system:
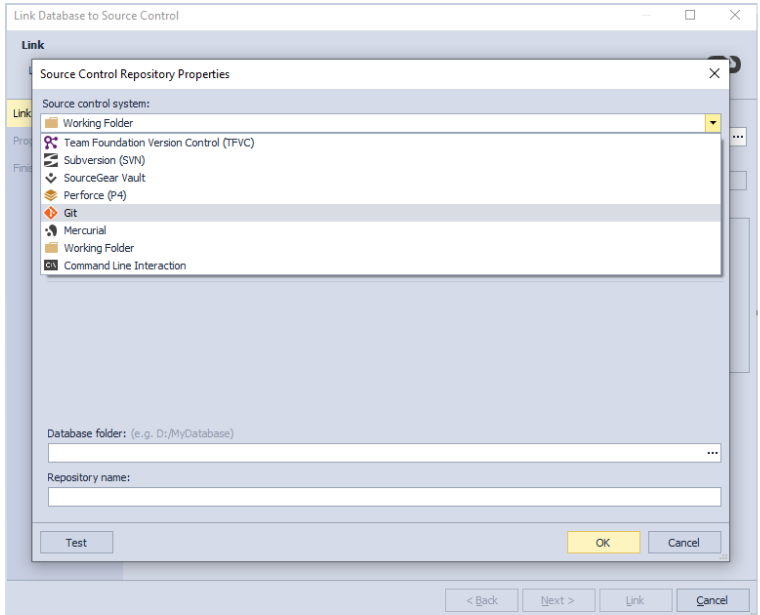
Note: The Source Control tool supports various types of source control systems, including Working Folder, Git, SVN, and Mercurial.
In our example, we select Git and enter the required details:
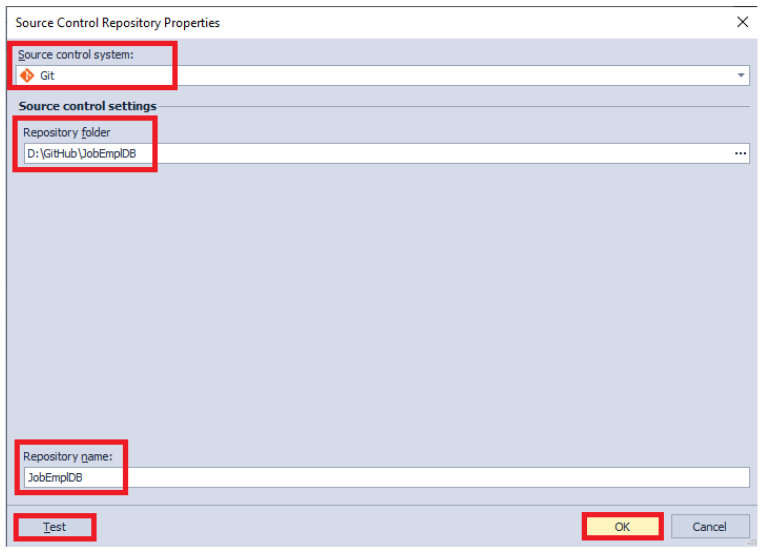
Here we need to fill the following fields:
1. The Repository folder is the path to the local repository on your PC. Thus, you need first to clone a Git repository. For instance, GitHub allows cloning via a link – you click Clone in the necessary repository and copy the link provided there:
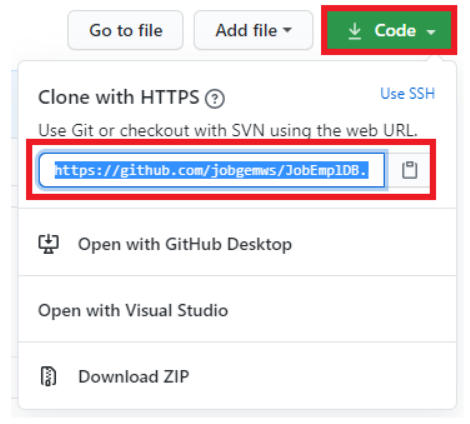
2. A repository name is the local repository name.
After filling in the necessary fields, click Test and make sure that the connection has successfully been established:
After that, click OK, and then click OK again.
Now, select the created source and click OK:
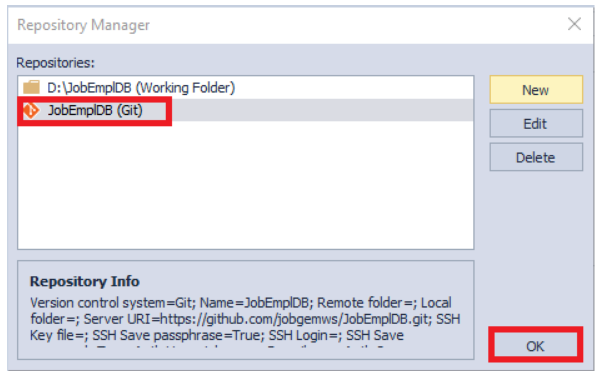
For more information about how to connect to Git, see Linking a Database to Git.
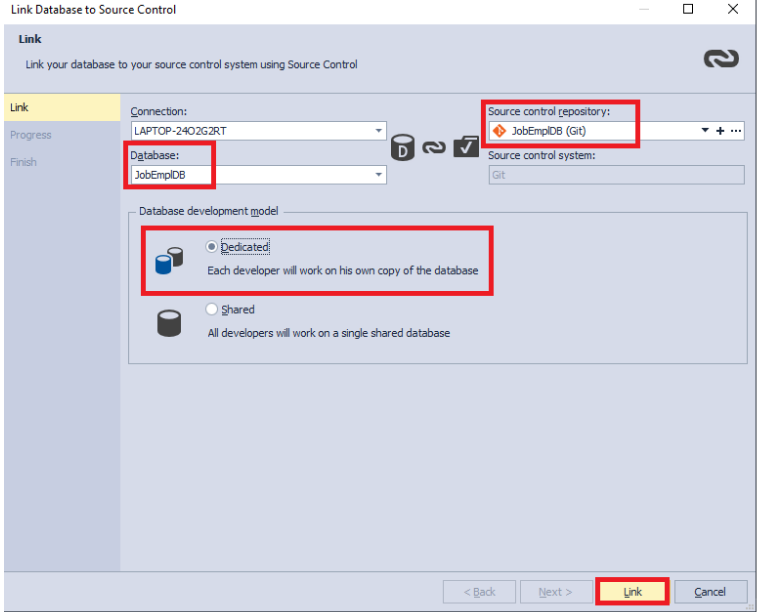
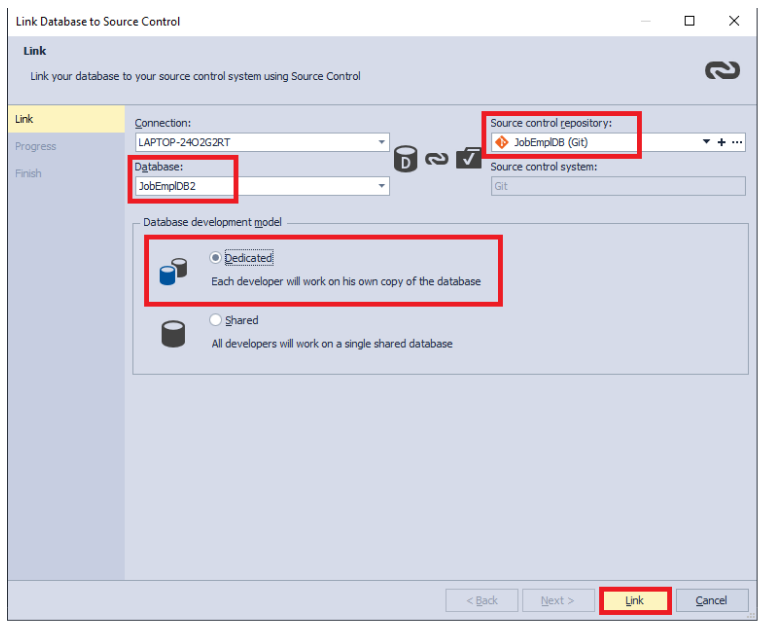
Then, select the database development model and click Link:
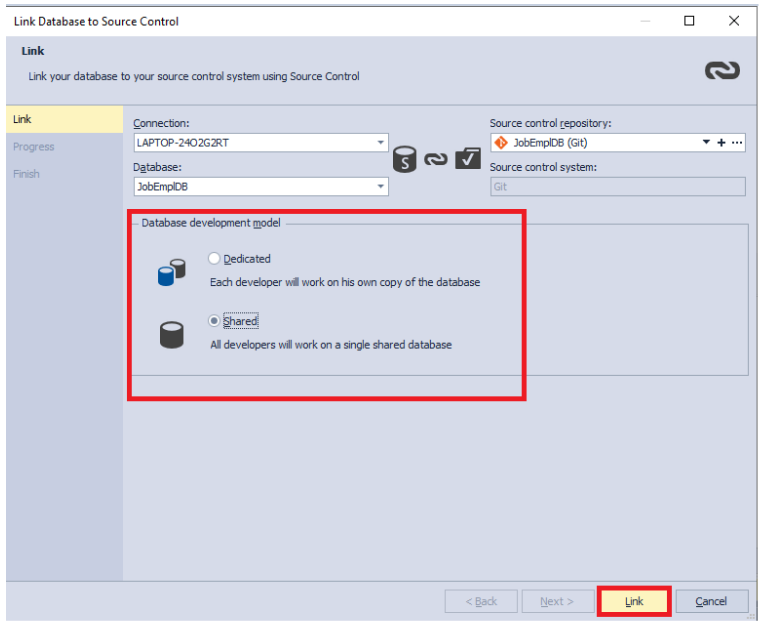
There are two database development models:
- Dedicated is the model where each developer works on his/her database definition copy.
- Shared is the model where all developers work on the same database definition copy.
In our case, we select the shared database development model for simplicity. However, in projects, we often need a dedicated model.
Committing Changes to a Repository
Adding changes to a repository
After configuring all settings, click Link and wait for the connection process to finish:
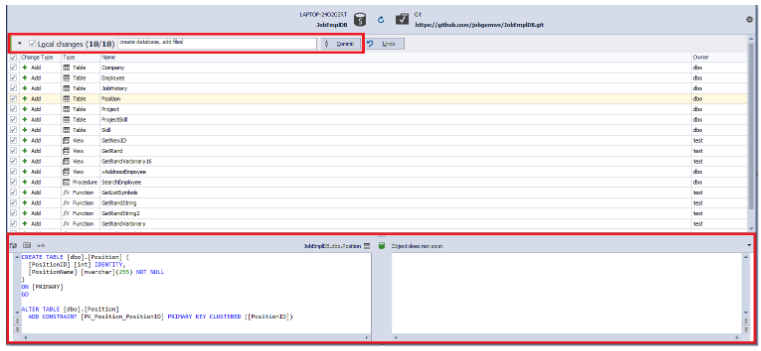
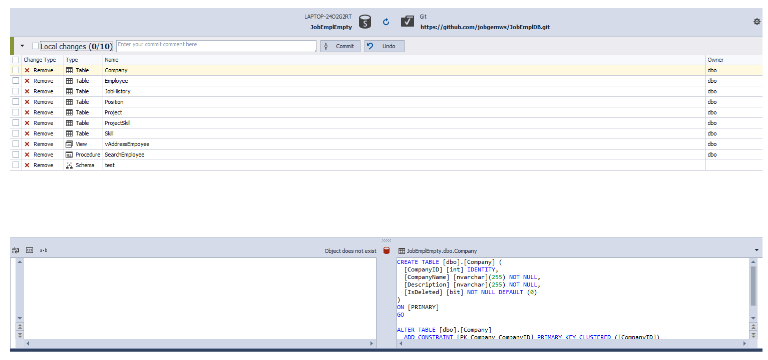
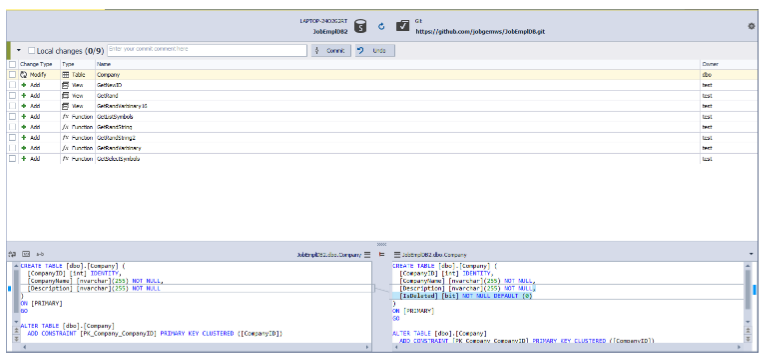
A window that displays a table with the following columns will appear:
- A check box to include the object into the commit
- A change type
- An object type
- An object name
- An object schema
Have a look at the bottom pane. To the left, it displays the object description in a local repository (the change we want to deliver with the commit), and the object description in a source control repository (what we want to update).
Note: The object definition is present on the left but is absent on the right. It means that the object doesn’t exist in the repository yet. We intend to add this object to the version control repository.
Next, select all objects and add them to commit. Then, write a comment there and click Commit.
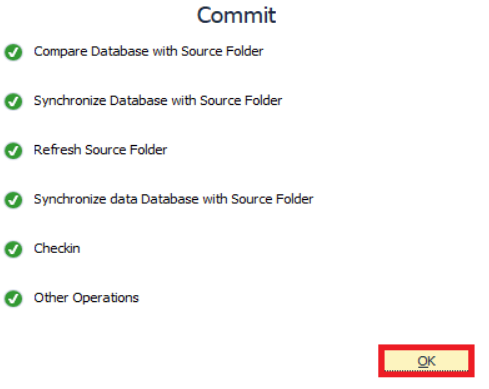
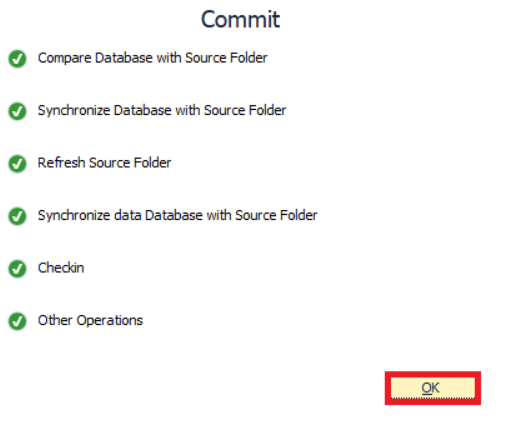
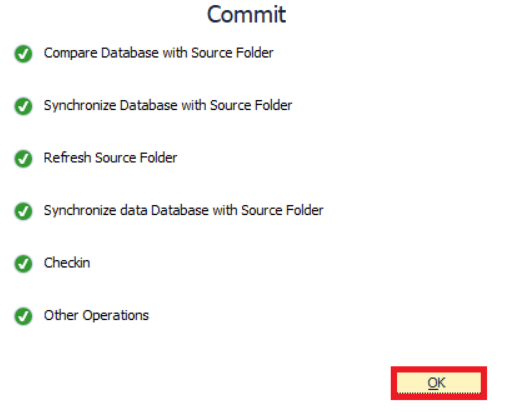
If the commit is successful, you’ll see the following window at the end of the process. Then, click OK.
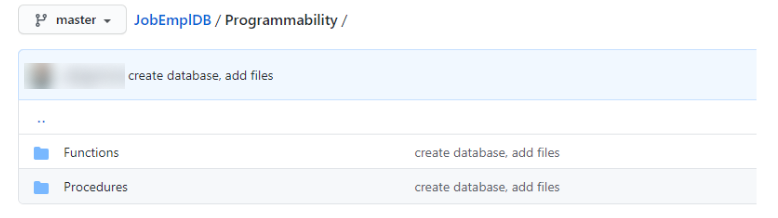
Go to the GitHub repository to make sure that all the necessary files are created:

As you see, the object definitions in a repository are grouped by types:
1. The Programmability folder contains the respective user object definitions grouped by functions and stored procedures.
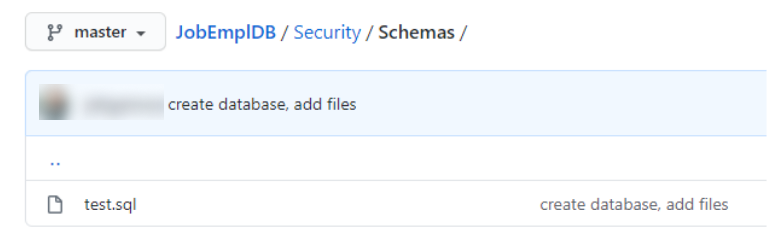
2. The Security/Schemas folder contains the schema definitions:
3. The Tables folder contains all user table definitions with their indexes and constraints, as well as primary and foreign keys:

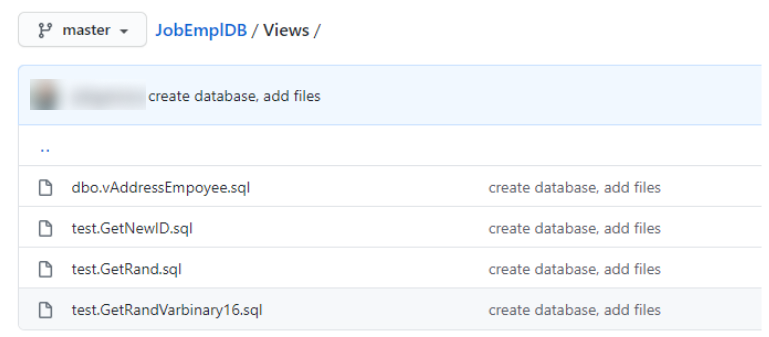
4. The Views folder contains the definitions of all views:
Deleting objects from a repository
To delete all unnecessary objects, use the following script:
USE [JobEmplDB]
GO

DROP VIEW [test].[GetNewID];
GO

DROP VIEW [test].[GetRand];
GO

DROP VIEW [test].[GetRandVarBinary16];
GO

DROP FUNCTION [test].[GetListSymbols];
GO

DROP FUNCTION [test].[GetSelectSymbols];
GO

DROP FUNCTION [test].[GetRandString];
GO

DROP FUNCTION [test].[GetRandString2];
GO

DROP FUNCTION [test].[GetRandVarbinary];
GO
Then, commit all changes. For this, right-click the necessary database, point to Source Control, and then click Show Source Control Manager or Source Control from the shortcut menu:
After that, the tool displays the Update window, and then opens a window containing the table of changes:
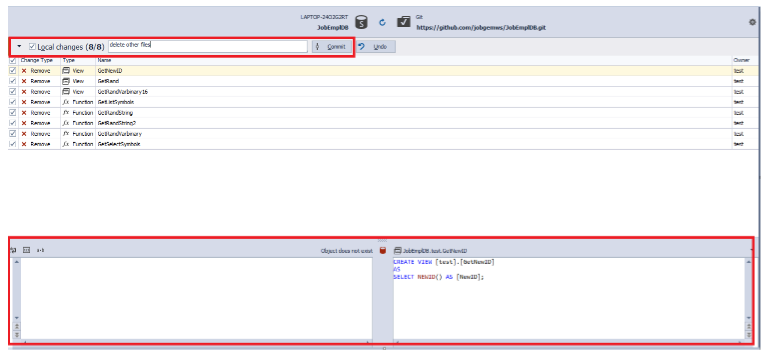
Take a look at the bottom pane. The object definition is absent on the left but is present on the right. It means that we are going to delete an object from a repository.
We select all changes, add a comment, and click Commit. Then, in a new window, click OK:
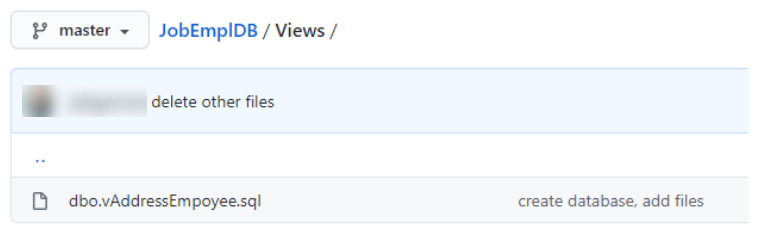
If we go to the database view in the GitHub repository, we can see that there is just one necessary view left:
Changing objects in a repository
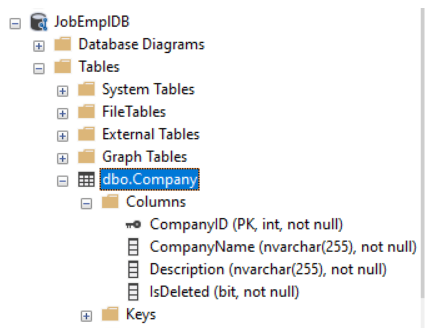
Let’s alter the Company table by adding the IsDeleted column to the Company table:
ALTER TABLE [dbo].[Company]
ADD [IsDeleted] BIT NOT NULL DEFAULT(0);
Have a look at the Company table definition in a repository at GitHub:
As you see, the source control repository does not include the IsDeleted column in the definition of the [dbo].[Company] table so far.
To move on, commit the changes, as before. For this, open the Source Control window:
If the window is already open, click Refresh:
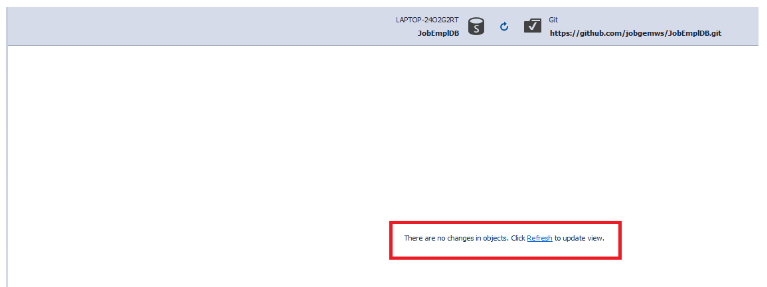
After refreshing the data about the state of our local repository, we again get the commit preparation table:
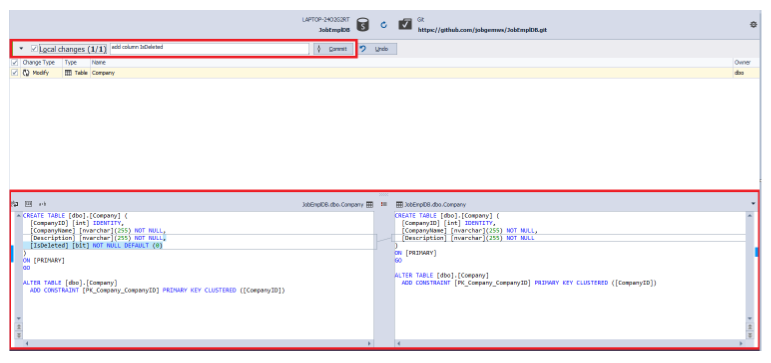
Have a look at the bottom pane. The object definition is present both on the right and on the left. Thus, it is present in both the version control repository and in our local repository. Therefore, we alter the object definition.
Select all changes, add a comment to describe them, and click Commit. Then, in the new window, click OK.
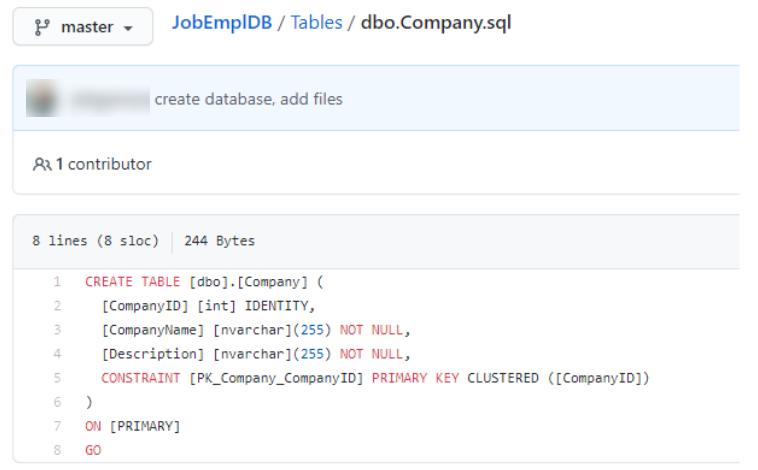
Now, go to the page that contains the Company table definition in the GitHub repository:
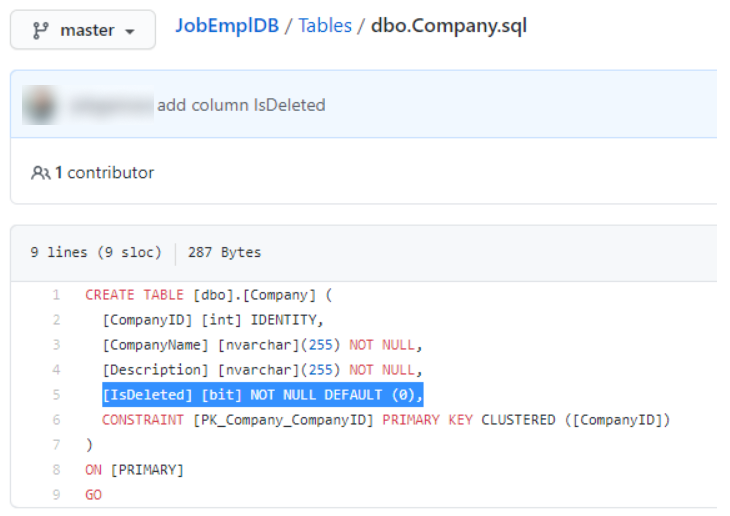
We can see a new IsDeleted column added to the [dbo].[Company] table definition.
Canceling changes
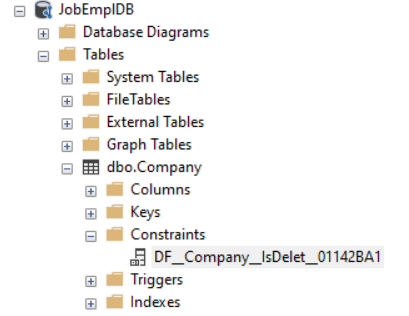
Now, delete a previously created IsDeleted column from the Company table by using the following script:
ALTER TABLE [dbo].[Company] DROP CONSTRAINT [DF__Company__IsDelet__01142BA1];
GO

ALTER TABLE [dbo].[Company]
DROP COLUMN [IsDeleted];
Important: You need to find the correct name of the DF constraint for the IsDeleted column.
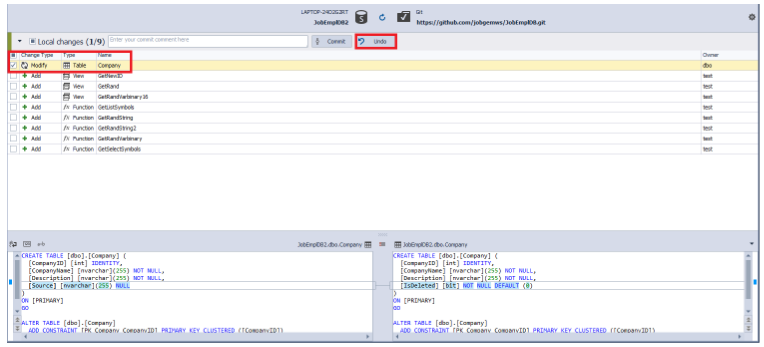
Open again the Source Control window:
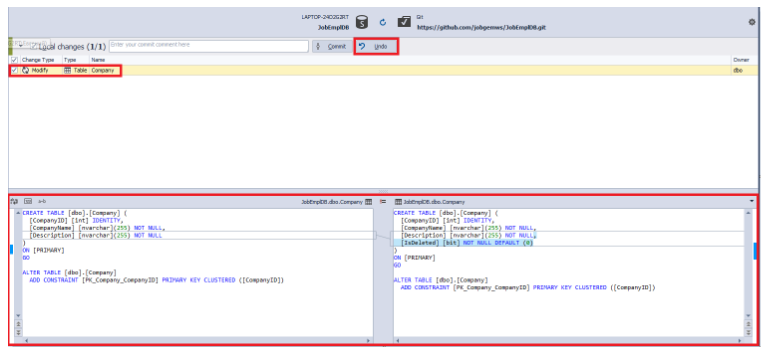
At the bottom, we see the differences in the Company table definition between our local repository and the remote repository.
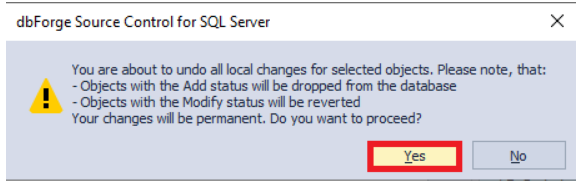
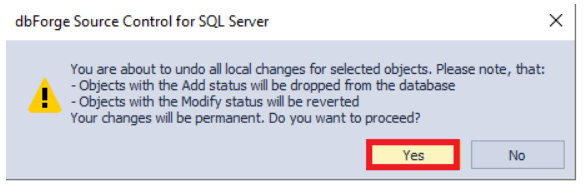
Select all changes and click Undo. This way, we cancel all selected changes. Then, in a new window that appears, click Yes.
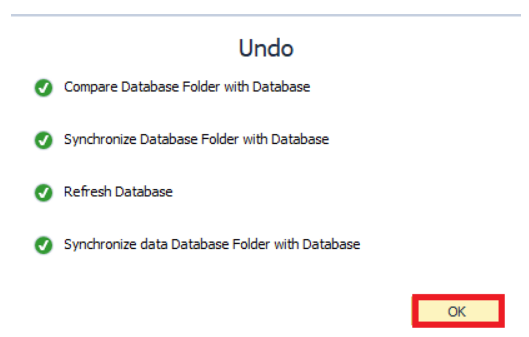
When the rollback operation is successfully completed, a new window will appear. Click OK.
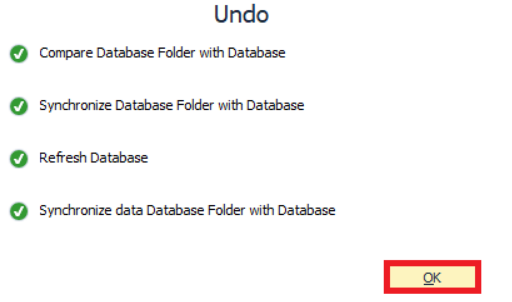
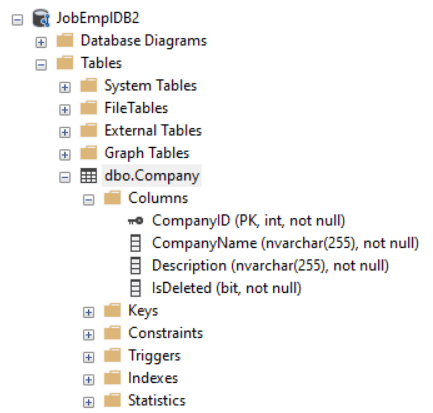
SSMS shows that the IsDeleted column returns to the Company table:
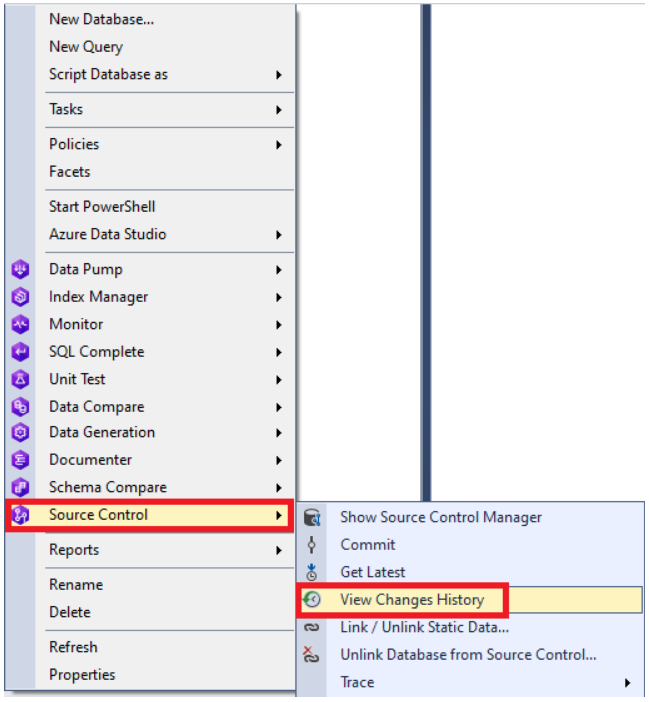
Viewing the Changes History
We can view the history of changes in a database.
To view the history of changes, right-click the database, point to Source Control, and then click View Changes History on the shortcut menu:
The database changes history window appears. On the top left of the window, see the changes log with the following columns:
- Revision
- Date
- Author
- Comment
On the top right of the window, see the comment to the change itself, the type of operation defined, and the full path to the changed file.
The differences are displayed at the bottom of the window: to the left, we see the previous state, and to the right, we see the current state.
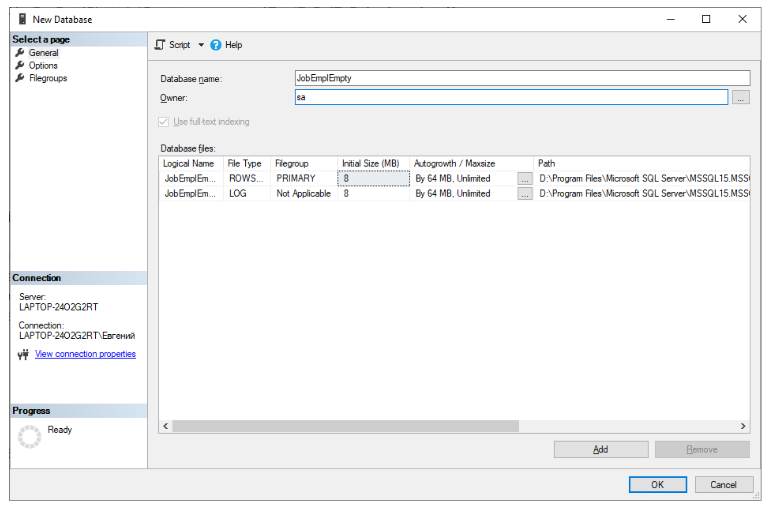
Reverse-engineering a database using the Source Control tool
Let’s create an empty JobEmplEmpty database:
Right-click the database you’ve created, point to Source Control, and select Link Database to Source Control:
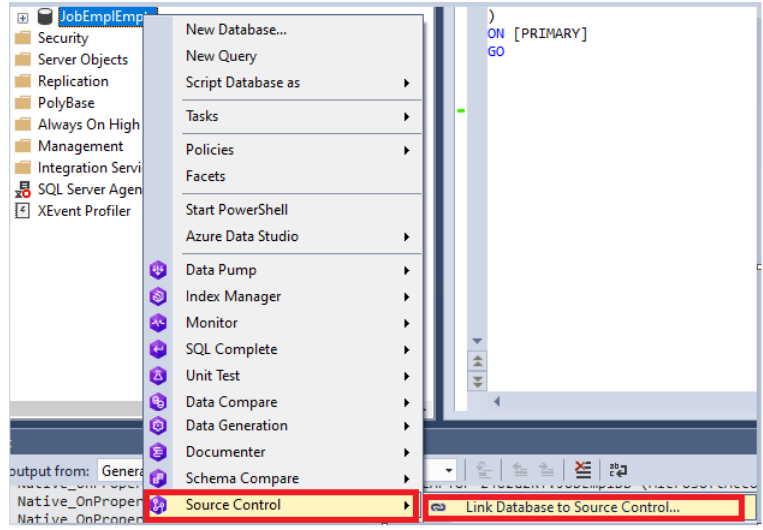
In the Link Databases to Source Control window that opens, configure the necessary parameters and click Link:
Note: For reverse engineering, you need to select the Dedicated model.
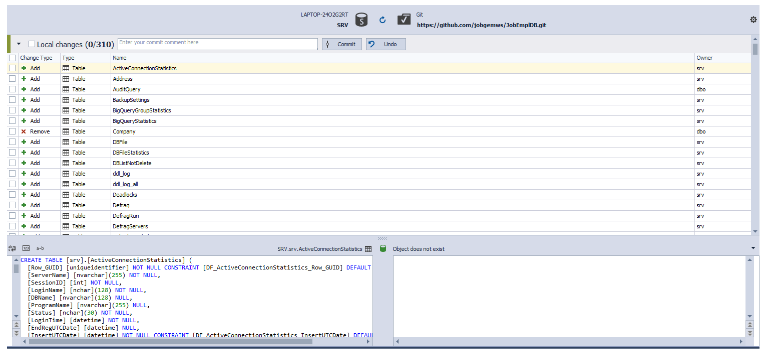
The window showing the differences between local and remote repositories appears:
We must ensure that the JobEmplEmpty database is really empty:

Now, return to the Source Control window, select all changes, and then click Undo:
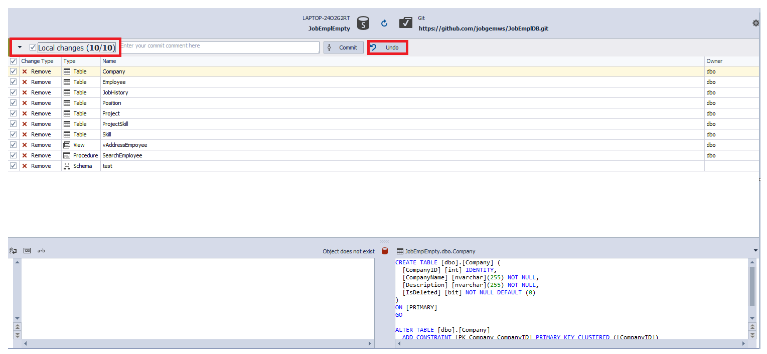
After that, a new window appears asking to confirm the rollback of local changes. To confirm, click OK.
In the window informing that the local changes have been rolled back successfully, click OK.
Now, the new JobEmplEmpty database definition completely matches the database definition from the source control repository at GitHub:
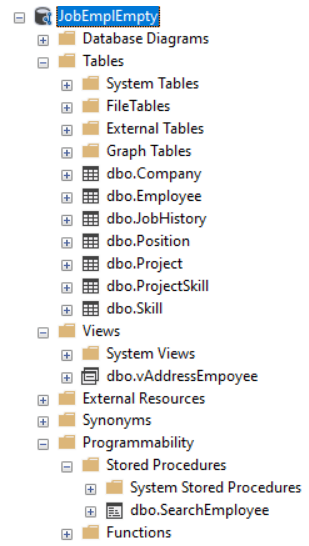
This way, we’ve performed reverse engineering. We used an empty database and restored the database definition from the source control repository to it. Similarly, we can connect any database to the source control and view the differences:
For the demo purpose, review the definition changes for absolutely different databases:
Updating the table from the repository
What if we update the table from a repository? Will it delete the table data? Let’s check it.
Create a JobEmpplDB2 database – a copy of JobEmplDB, using the JobEmplDB database backup. Then, in the JobEmpplDB2 database, execute the following code fragment:
ALTER TABLE [dbo].[Company] DROP CONSTRAINT [DF__Company__IsDelet__01142BA1];
GO

ALTER TABLE [dbo].[Company]
DROP COLUMN [IsDeleted];

ALTER TABLE [dbo].[Company]
ADD [Source] NVARCHAR(255);
By running this script, we’ve deleted the IsDeleted column and added the Source column to the Company table.
Now, link the JobEmplDB2 database to a repository we created earlier.
Right-click the JobEmplDB2 database, point to Source Control, and then click Link database to Source Control on the shortcut menu:
In the Link Database to Source Control window, configure necessary parameters and click Link:
In the window that opens, select changes for the Company table and click Undo:
When a warning appears, click OK to roll back the local changes we’ve selected (those that mismatch the source control repository):
At the end of the rollback process, click OK in a new window:
Thus, we’ve synced the Company table definition with the source control repository at GitHub:
To ensure that the data has not been deleted, use a simple SELECT query:
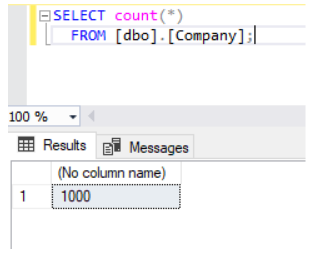
It turns out that the Source Control in SQL Tools updates the database definition incrementally, without recreating the changed tables. This way, it grants safe reverse engineering to a non-empty database.
Conclusion
To sum it up, we have exemplified how to use dbForge Source Control for SQL Server to version-control and reverse-engineer the SQL Server database.
Download a free 30-day trial version of the dbForge SQL tool pack, which includes dbForge Source Control for SQL Server, to evaluate the features and capabilities that will help you perform SQL Server tasks easily and effectively.
