
Data migration involves transferring databases and data between different sources, such as on-premises servers and other cloud platforms. In this article, we’ll focus on moving data between Azure SQL and MySQL Server. The reason for using Azure SQL may be adjusting resources as needed to ensure optimal performance and saving costs by paying only for the resources you use.
In this article, we’ll briefly review some advantages of SQL Azure, a Microsoft cloud-based SQL database service, and explore how to export and import data between Azure SQL and MySQL server using a universal ODBC driver for SQL Azure and a powerful MySQL tool – dbForge Studio for MySQL.

Contents
- Introduction to Azure SQL
- Advantages of Azure SQL
- Prerequisites
- Export MySQL tables and data to CSV
- Universal data export to Azure SQL using ODBC Driver
- How to migrate data from Azure SQL to MySQL
Introduction to Azure SQL
Azure SQL is a database service to store, manage, and process data in the cloud. It offers different products for data manipulation, including:
- Azure SQL Database, which is a managed relational database service with multiple features such as automatic backups, high availability, and scalability to build, scale, and extend applications in the cloud.
- Azure SQL Managed Instance, which allows improving SQL Server applications by combining the fully managed benefits of Azure SQL Database with the rich features of SQL Server database engine. Azure SQL Managed Instance allows you to migrate on-premises SQL Server applications to the cloud with minimal changes.
- SQL Server on Azure Virtual Machines, which lets you deploy and run SQL Server on virtual machines (VMs) in Azure just like you would on your own hardware, with the added benefits of Azure infrastructure.
Now, let’s look at the main benefits of Azure SQL that can help you improve data management processes.
Advantages of Azure SQL
- Scale your database up or down as your needs change and handle large datasets without any performance issues.
- Enjoy a pay-as-you-go pricing model that allows you to pay only for the resources you use.
- Minimize the risk of downtime and make your applications accessible with the built-in high availability and redundancy.
- Deploy and manage with no infrastructure to install or maintain.
- Use security features that help keep your data safe and secure.
- Simplify the migration of databases to the cloud due to the compatibility with on-premises SQL Server.
- Adhere easily to industry standards and compliance regulations, making it suitable for organizations across a range of industries.
Prerequisites
Now that we have covered some basics, let’s get down to the practical steps.
To get started, ensure that dbForge Studio for MySQL and ODBC Driver for SQL Azure are downloaded and installed on the machine that will be used for data export/import.
- dbForge Studio for MySQL is a versatile IDE from a wide range of the dbForge products designed to develop, manage, administer, test, or deploy databases.
- ODBC Driver for SQL Azure is a high-performance connectivity tool to establish a direct connection to SQL Azure databases without requiring a SQL Azure client.
After the ODBC Driver installation, you must configure the ODBC Driver for SQL Azure.
Configure the ODBC Driver for SQL Azure
Navigate to the folder where the DevartODBCSQLAzure.exe installation file is stored and double-click it to start the installation. In the Setup wizard that opens, follow the installation steps, review the settings, and click Install. When the installation is complete, close the wizard.
Now, you need to set up a data source name (DSN) for the ODBC driver in the Data Source Administrator utility. To open it, locate and select ODBC Data Sources on your machine.
In the ODBC Data Source Administrator window, selecting User DSN restricts the configuration access to the user who created it on the system. On the other hand, selecting System DSN grants access to the configuration for any user who logs into the system.
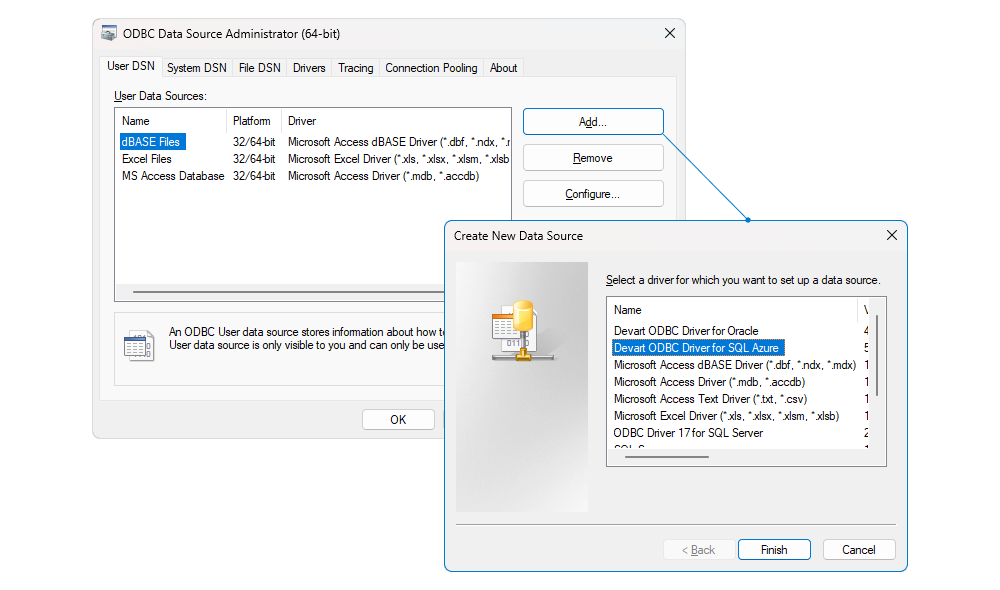
So, on the User or System DSN tab, click Add to create a new data source, and then select Devart ODBC Driver for SQL Azure. Click Finish to close the window.
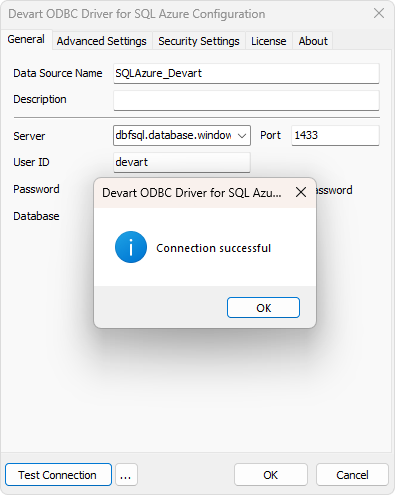
In the configuration window that opens, enter Devart ODBC Driver for SQL Azure as the data source name and specify the server, username (User ID), password, and port number. If you want to display a specific database in the Studio, specify the database name in the Database field. To ensure a successful connection configuration, click Test Connection. After that, save the DSN configuration by clicking OK.
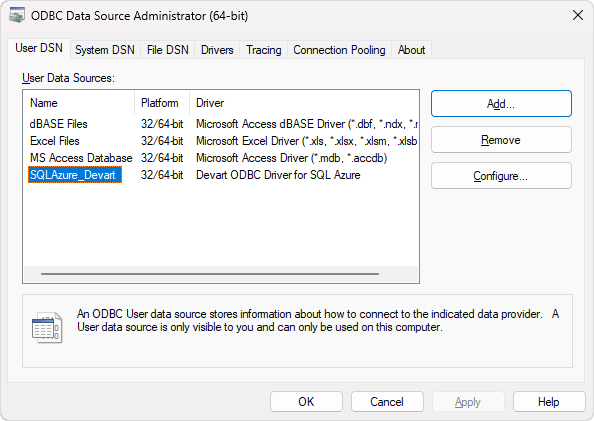
Once done, the DSN will appear on the corresponding tab of the ODBC Data Source Administrator utility. Click OK to close the window.
Export MySQL tables and data to CSV
When all the preparations are done, let’s see how easy it is to export data to a .csv file using dbForge Studio for MySQL.
Open the Studio. In Database Explorer, right-click the required database and select Tasks > Export Data. Alternatively, navigate to the Database menu on top and select Tasks > Export Data.
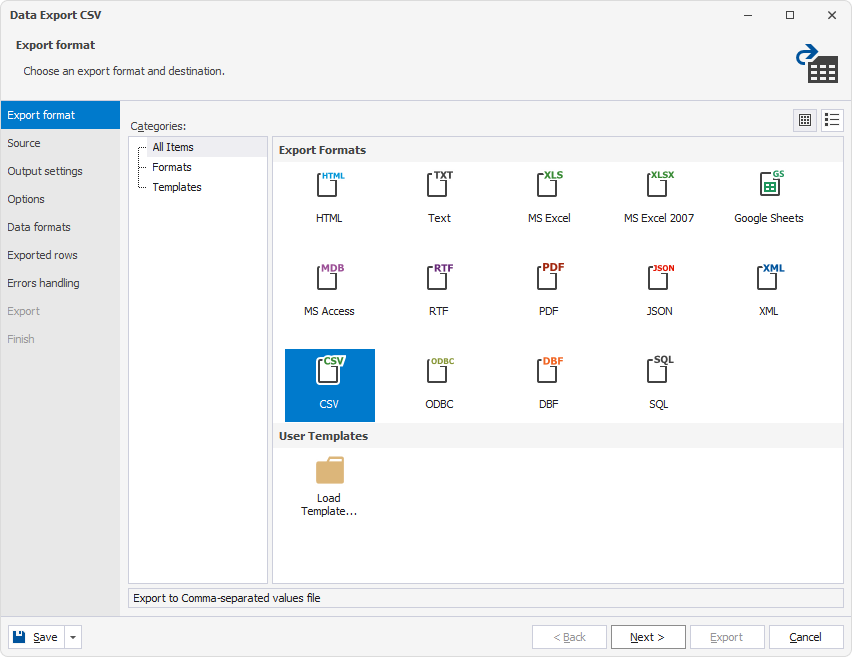
On the Export format page of the Data Export wizard, select the CSV file format and click Next.
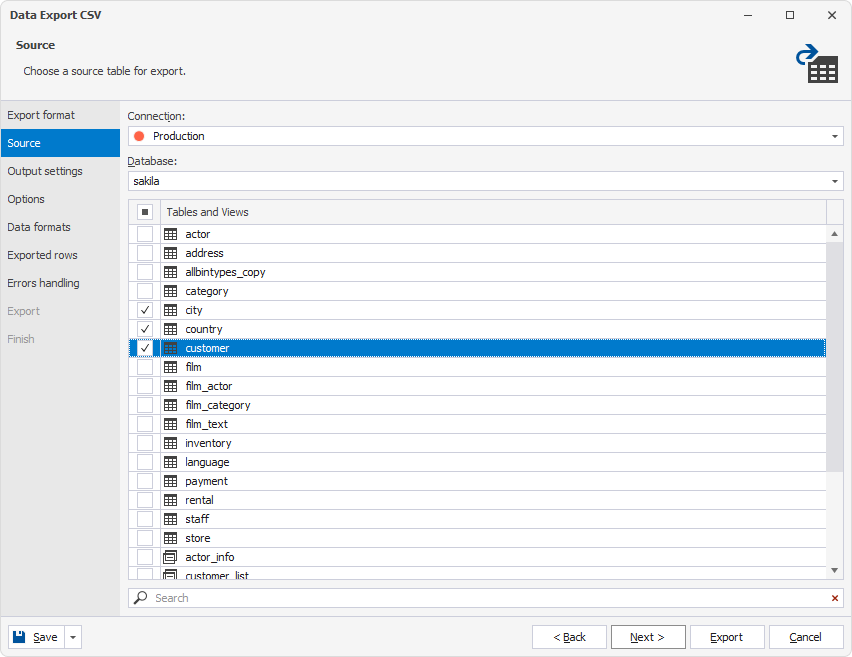
On the Source page, the connection and databases are automatically preselected. You need to select the table from which you want to export data. To proceed, click Next.
Note that if you invoke the wizard from the Database menu, the server connection and the database won’t be set automatically. So, in this step, you need to select the required MySQL server connection, database, tables, or views you want to export.
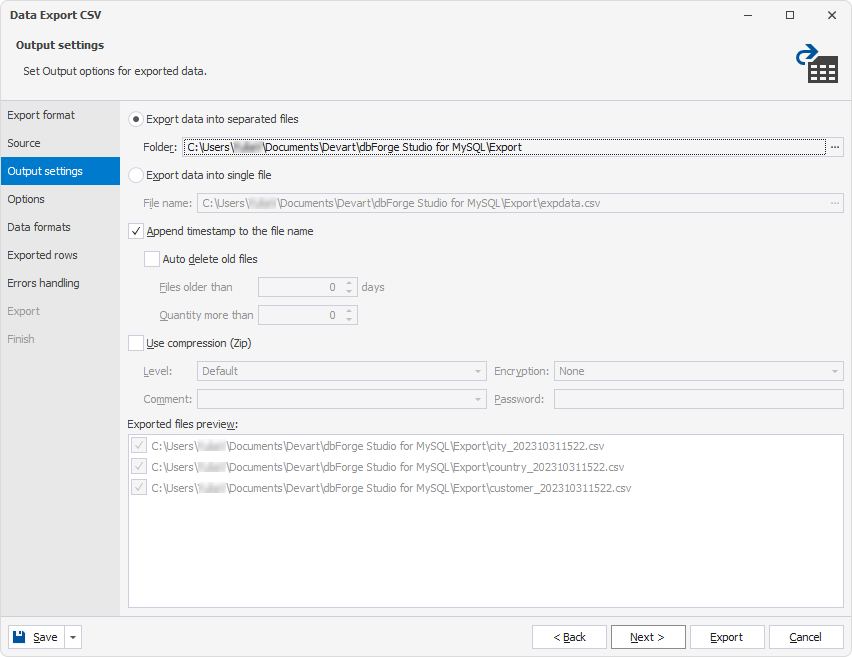
On the Output settings page, select whether you want to export data into a single file or individual files for each table that will be organized in the folder. Depending on your choice, specify the path to store the exported data. The default path is C:\Users\Username\Documents\Devart\dbForge Studio for MySQL\Export, but you can change the location.
Also, you can add date-time parameters to the file name or preview the exported files before finishing the export process.
Moving on, the Options page allows you to customize the default CSV format options for exported data, such as encoding, field delimiter, or quote.
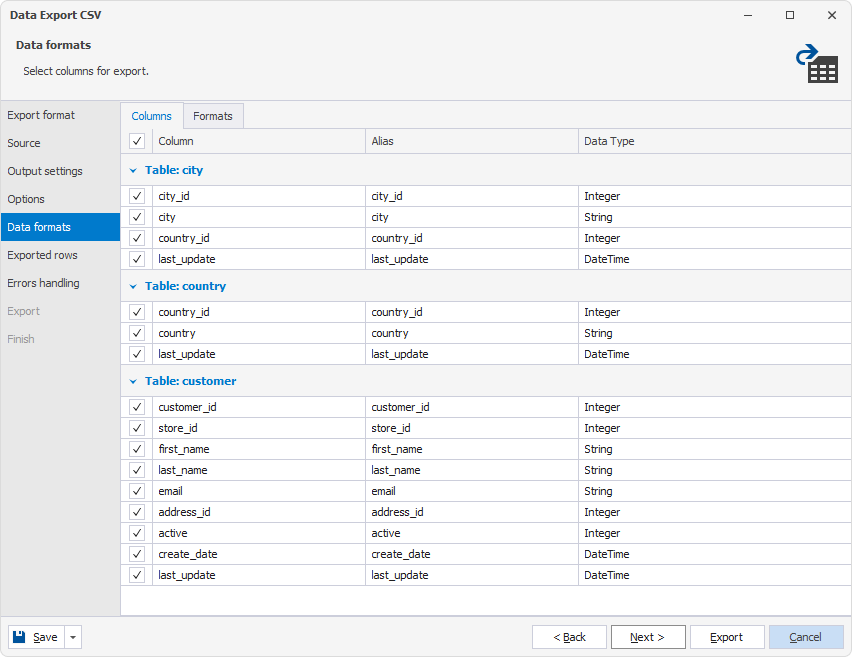
The Data formats page contains two tabs:
- Columns where you can select all columns (default option) or specific ones for export.
- Formats where you can select formats of data representation.
To proceed, click Next.
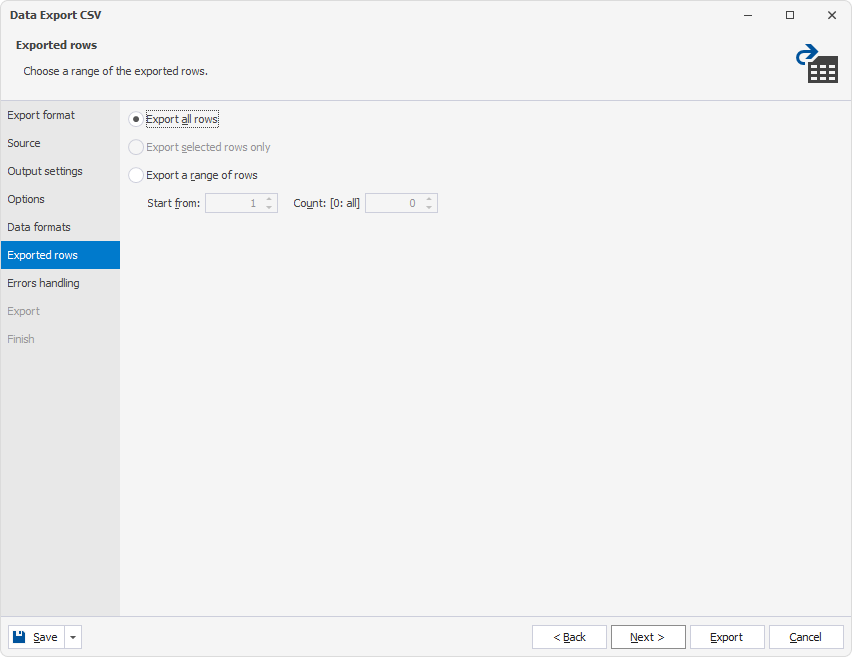
On the Exported rows page, select whether you want to export all rows (default option) or specific ones (the Export a range of rows option). If you opt for the latter, specify the range.
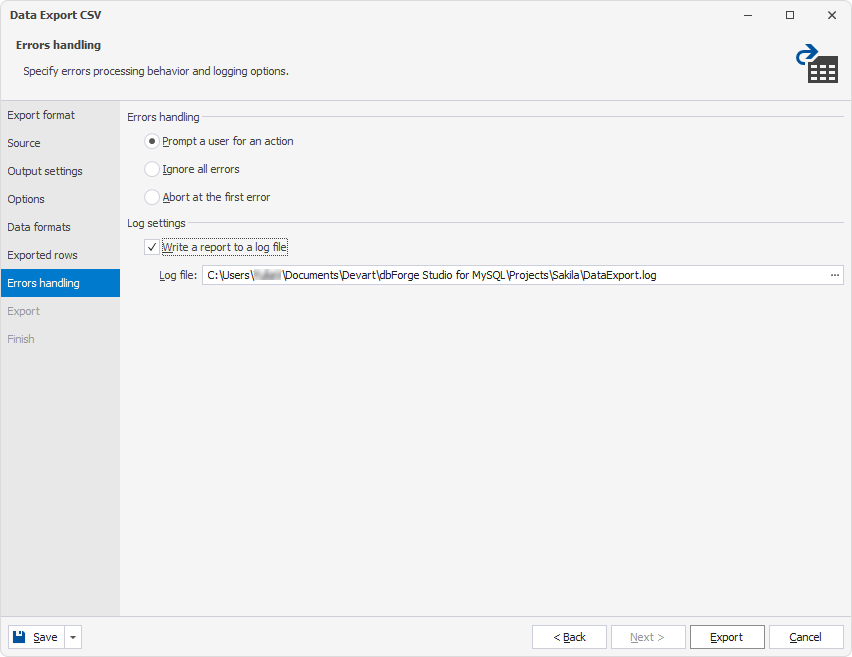
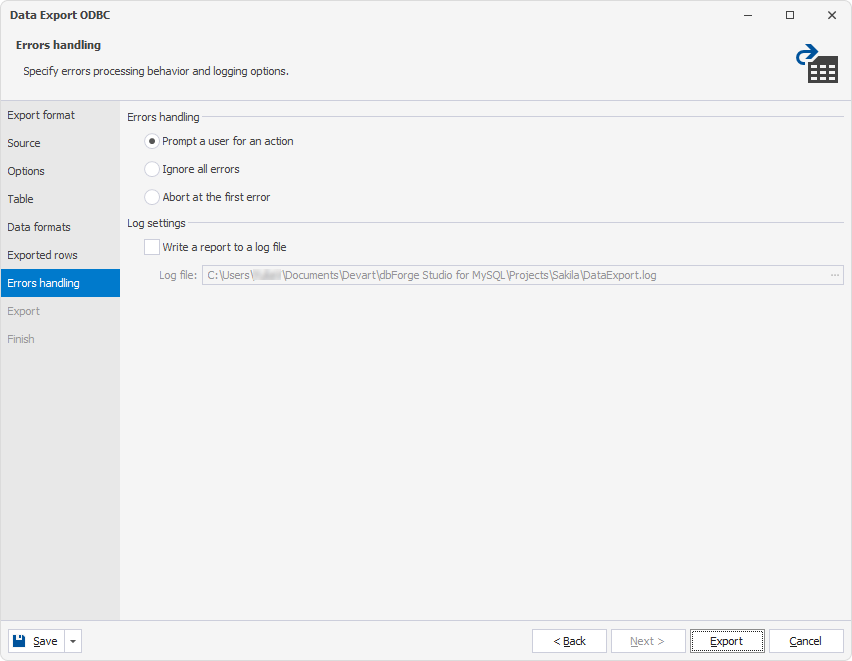
Finally, on the Errors handling page, you can configure how the application responds when an error occurs by selecting the corresponding option. In addition, you can select the Write a report to a log file option to record error reports and then specify the path to the log file.
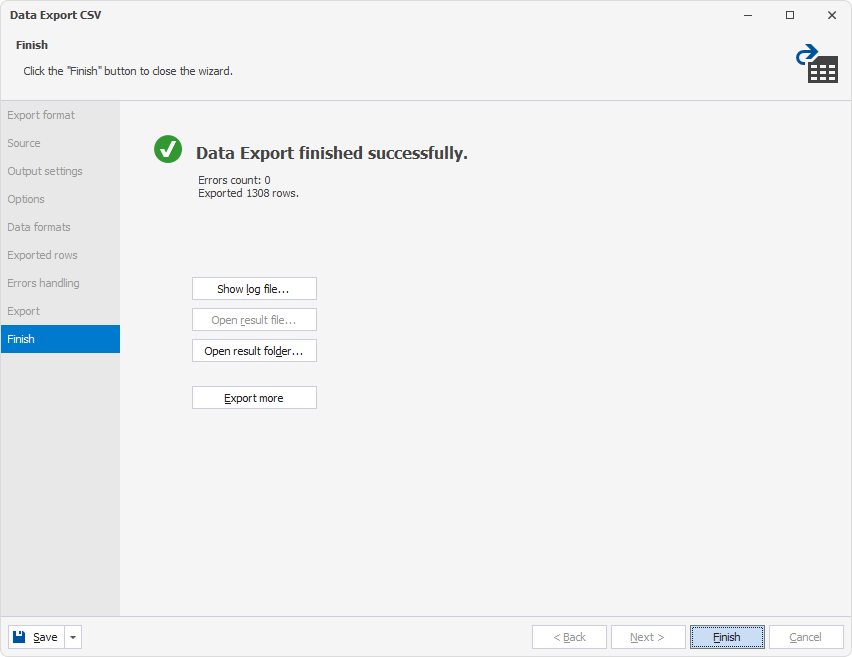
When everything is set up, click Export to execute the data export process. After it is complete, you can view a log file, open a result folder, or run another data export process.
To close the wizard, click Finish.
Universal data export to Azure SQL using ODBC Driver
It is time to explain how to migrate MySQL data to Azure SQL using ODBC Driver for SQL Azure and dbForge Studio for MySQL. We would like to mention that the ODBC drivers by Devart support a lot of databases, including Oracle, MySQL, PostgreSQL, SQL Server, SQLite, and more.
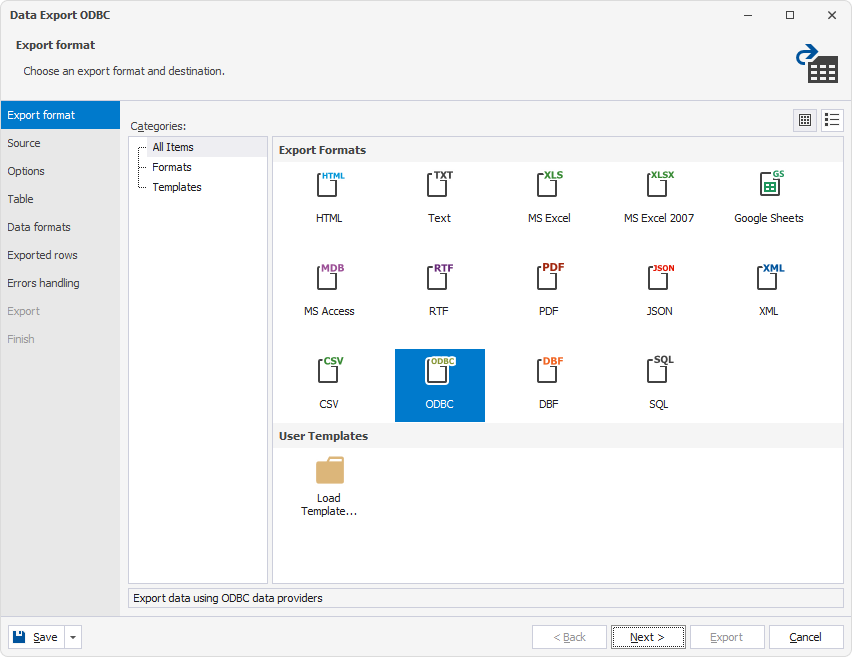
Without further ado, in dbForge Studio from MySQL, go to the Database menu and select Tasks > Export Data. In the wizard, select ODBC as a file format and click Next.
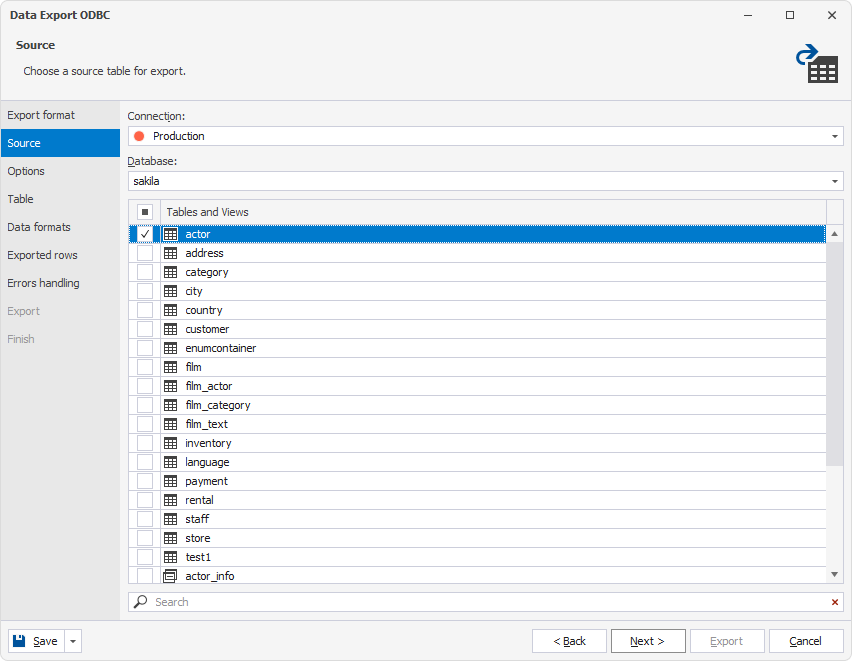
On the Source page, select the MySQL source data you want to transfer: a server, a database, and a table. Click Next to switch to the next page.
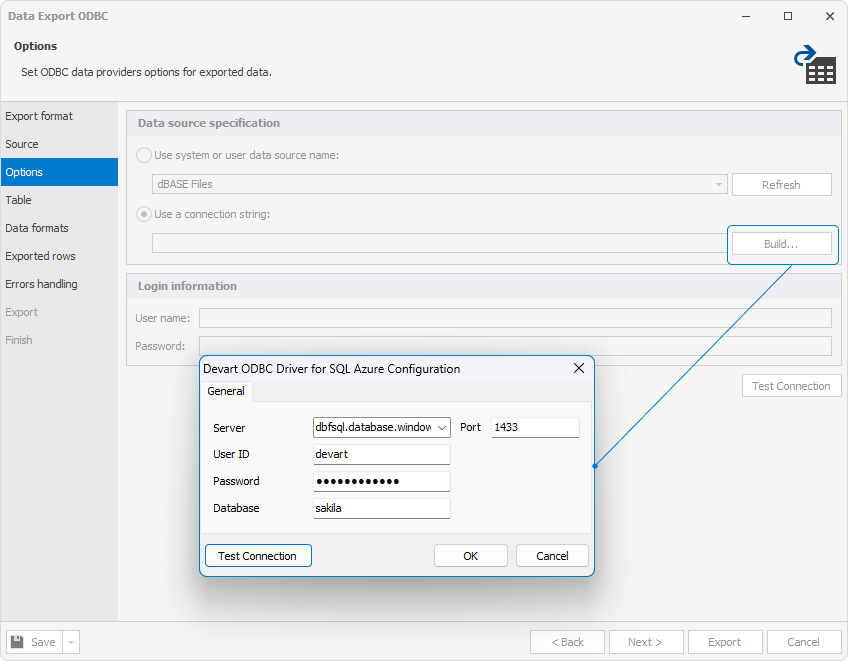
On the Options page, select Use a connection string and click Build to select the configured ODBC driver for SQL Azure which will be used to transfer data to Azure SQL.
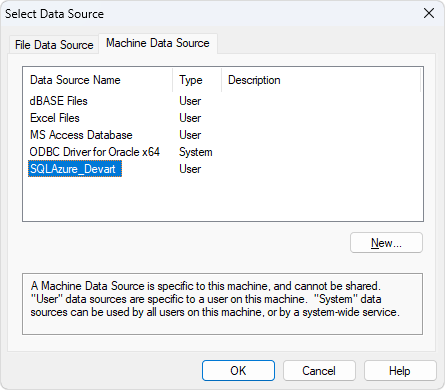
In the Select Data Source window that opens, switch to the Machine Data Source tab, select the configured ODBC driver for SQL Azure, and click OK.
In the Devart ODBC Driver for SQL Azure Configuration dialog, enter the User ID, password, and database, and click OK. Alternatively, you can click Test Connection to check that the connection has been established. Then, click OK to close the dialog.
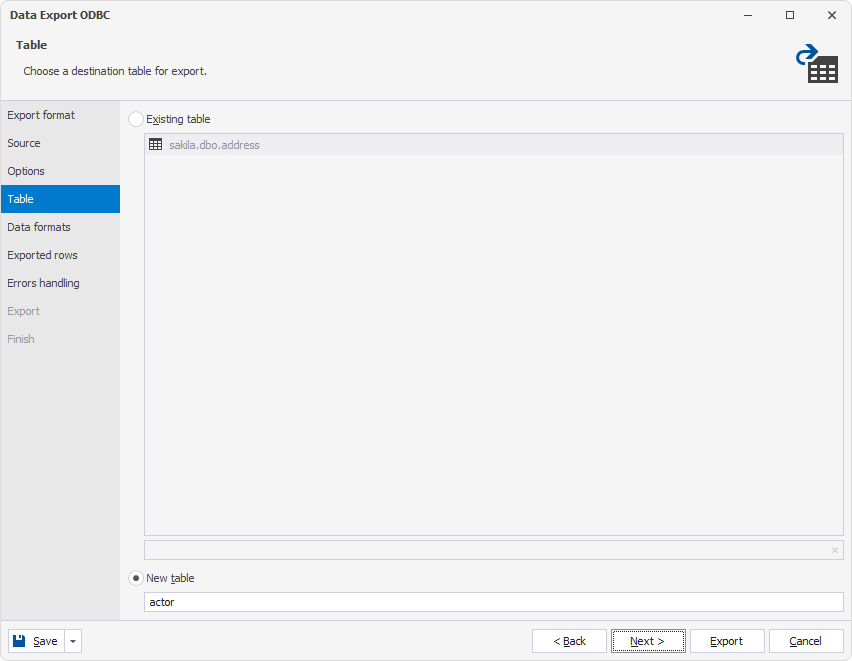
On the Table page, select whether you want to export data to a new table (default option) or an existing one. In our example, we select a new table and click Next.
On the Data formats page, all the columns to be transferred are selected. If you want to exclude specific columns from data export, clear the checkboxes next to the corresponding columns. In addition, you can view aliases and data types assigned to the columns.
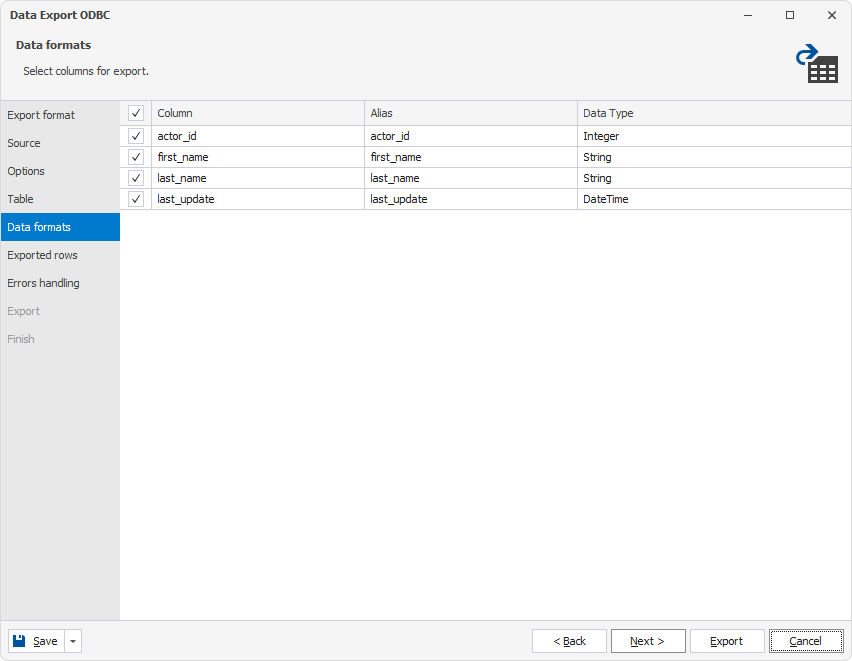
Then, specify the rows you want to export: all rows or a range of rows, and click Next.

On the Errors handling page, configure error processing behavior and select the option to write a report to a log file. Once done, click Export.
The data migration process has been successfully finished. You can close the wizard by clicking Finish.
In the next part of the article, we’ll provide a step-by-step guide to moving data from Azure SQL to a MySQL table with the help of ODBC Driver for SQL Azure and dbForge Studio for MySQL.
How to migrate data from Azure SQL to MySQL
In the Studio, select Tasks > Import Data from the main Database menu. In the Data Import wizard, select the ODBC file format.

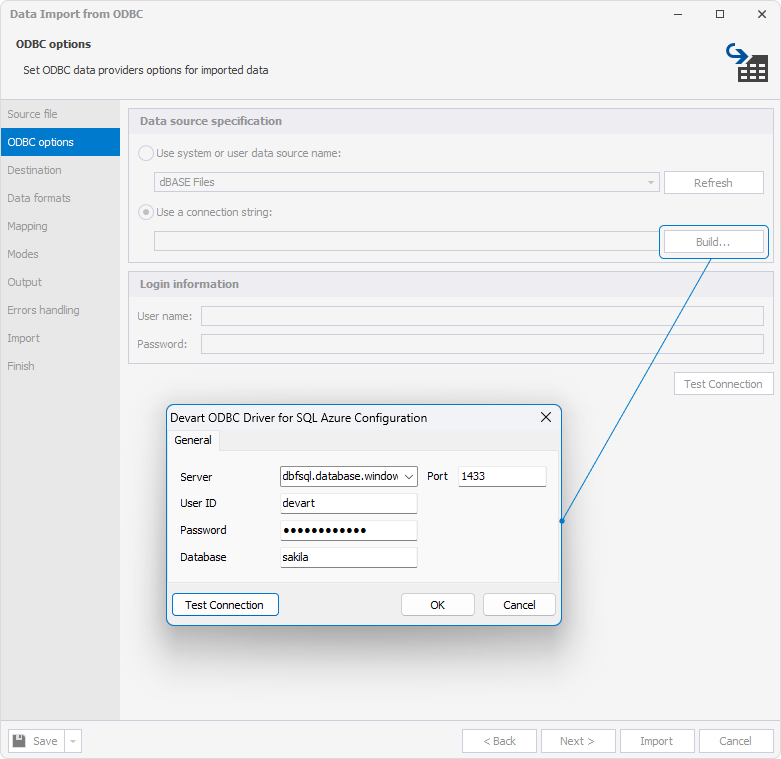
On the ODBC options page, select Use a connection string and click Build. This will open the Select Data Source window – switch to the Machine Data Source tab, select the configured ODBC driver for SQL Azure you want to use for data import, and click OK.
In the Devart ODBC Driver for SQL Azure Configuration dialog, enter the User ID, password, and database of the ODBC driver for SQL Azure, and click OK to save the changes. If you want to ensure the connection has been established, click Test Connection.
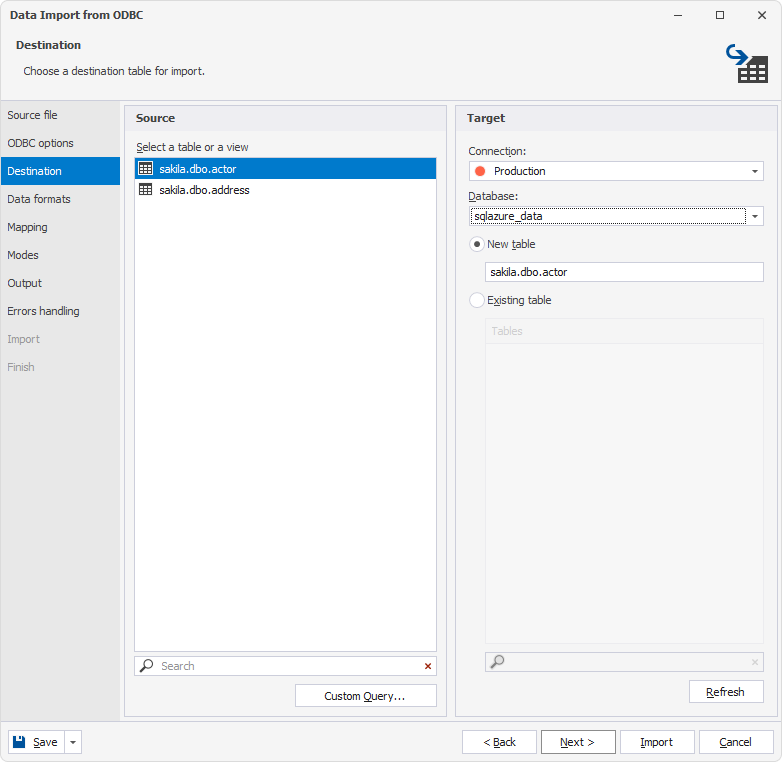
On the Destination page, there are two panes:
- Source that displays the SQL Azure database tables to which the connected SQL Azure username has access permissions.
- Target that displays the MySQL server connection, a database, and a table into which the data will be imported.
Under Source, select the SQL Azure source table, and under Target, select the destination MySQL server connection and a database. By default, the target table will have the same name and be selected as a new one. If you want to import data into an existing table, select the corresponding option.
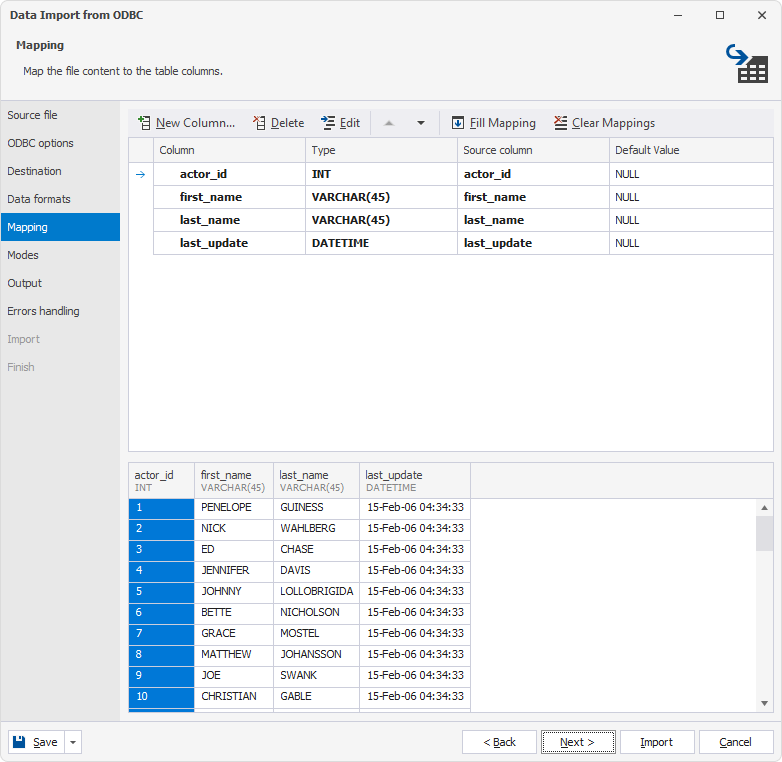
Next, go to the Mapping page to map the data types of the columns. The page displays the columns with the assigned data types. Also, you can preview the table with the imported data. It is important to note that when importing data into a new table, the Studio automatically creates and maps all the columns. However, if you import the data to an existing table, only columns with identical names will be automatically mapped, while the rest will require manual mapping.
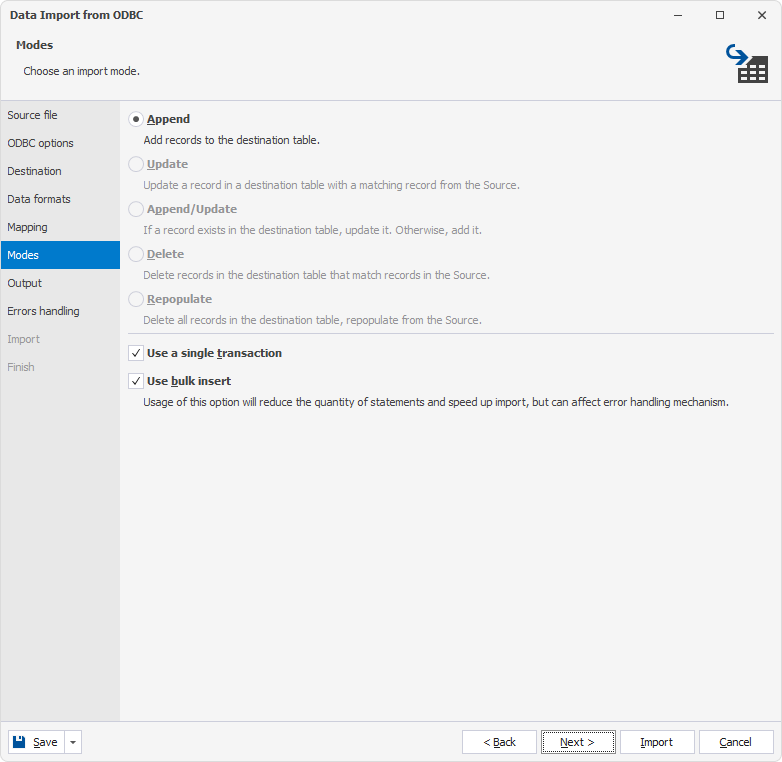
We import data to a new table, that’s why only the Append mode can be used on the Modes page. If you migrate data to an existing table, you can select one of the following modes:
- Append: Adds records to the target table.
- Update: Updates a record in the target table with a matching record from the source table.
- Append/Update: Updates a record if it exists in the target table; otherwise, adds a record.
- Delete: Deletes records in the target table that match records in the source table.
- Repopulate: Deletes all records in the target table and repopulate them from the source.
Finally, select Import data directly to the database to populate the database with data after clicking Import.
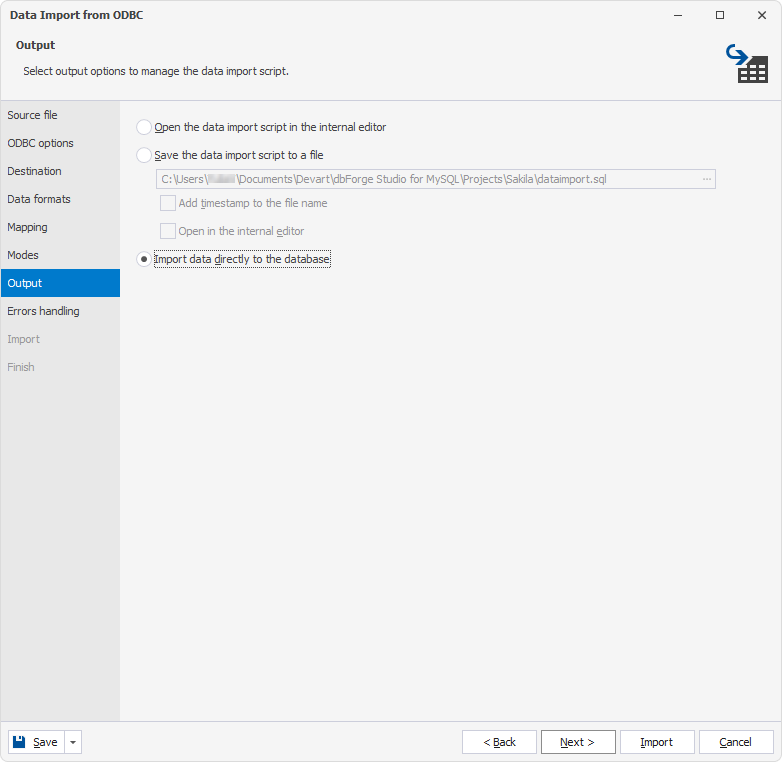
When the data import is complete, click Finish to close the wizard.
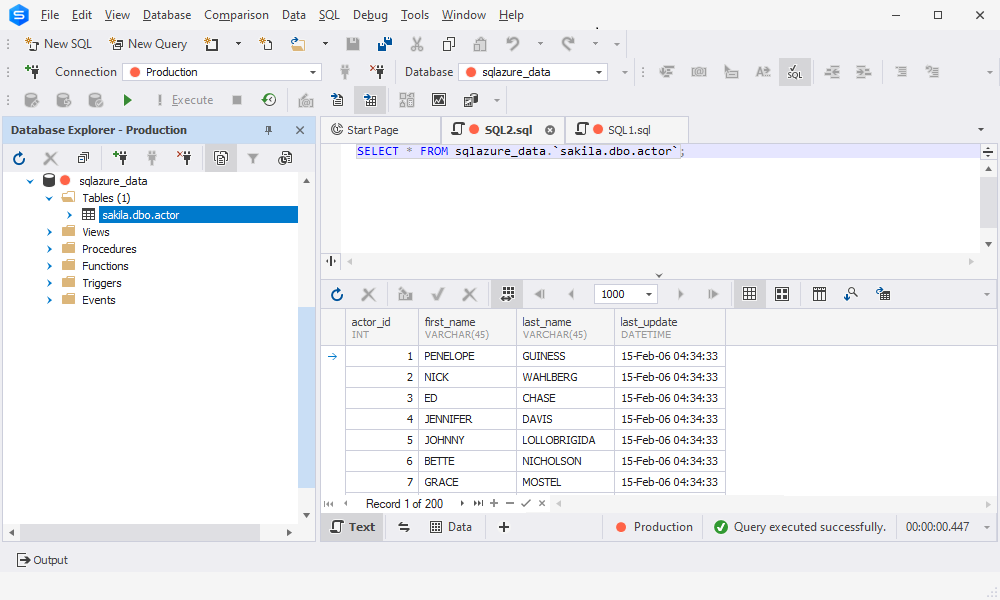
Now, let’s check whether the data has been migrated to the MySQL database. To do this, refresh Database Explorer, expand the required database, right-click the table that is supposed to contain the imported data, and select Select All Rows. The result will be output in a new SQL document.
Conclusion
To sum it up, multiple ways exist to migrate data between servers. In this article, we offered one of the easiest methods to import/export data between Azure SQL and MySQL servers using ODBC Driver for SQL Azure and dbForge Studio for MySQL.
Unlock the full potential by downloading dbForge Studio for MySQL for a free 30-day trial period, including the Import and Export tools, and try a rich set of other useful features.