
This article explains how to install, configure, and test Devart ODBC drivers on Debian-based or RPM-based Linux distributions.
Table of contents
- What is an ODBC Driver?
- General Prerequisites
- How to Install an ODBC Driver on Ubuntu
- How to Install an ODBC Driver on CentOS
- How to Install an ODBC Driver on Debian
- How to Test ODBC Connection in Linux
- How to Uninstall or Remove ODBC Driver from Linux
- Step-By-Step ODBC Data Source Setup on Linux
- Conclusion
What is an ODBC Driver?
Open Database Connectivity (ODBC) is an industry-standard application programming interface for database access. It is based on call-level specifications for database APIs and uses SQL as its database access language.
An ODBC driver uses the ODBC interface to access data in database management systems. It allows an ODBC-compliant application to gain access to one or more data sources.
ODBC drivers work under the control of an ODBC driver manager, which is a library that manages communication between the ODBC-aware application and ODBC drivers. The driver manager carries out a number of tasks, such as resolving data source names, loading and unloading of the driver, processing and passing ODBC function calls to the driver, mapping function calls and data types between different versions of the ODBC standard, e.g. between version 3.x and 2.x.
On Linux systems, you can choose between the unixODBC and iODBC driver manager. We recommend using the unixODBC driver manager as it is more popular among Linux users and our drivers are fully compatible with it. If you would like to use iODBC with our drivers on Linux, you would have to manually modify the configuration files of the driver manager; note though that full compatibility with iODBC and stable operation of the drivers is not guaranteed in this event.
Need to install and configure not only the Linux ODBC driver manager but also one for MacOS? Get the full instructions here!
You can choose to install the ODBC driver using the DEB or RPM package, depending on your Linux distribution. Both DEB and RPM packages of Devart ODBC drivers require unixODBC as the driver manager.
Prerequisites
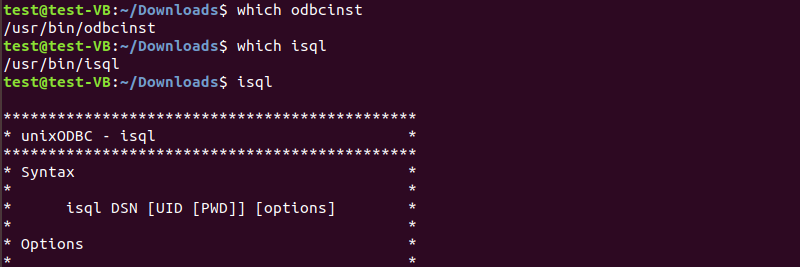
1. Prior to installing an ODBC driver on Linux, you need to install the unixODBC driver manager and its dependencies. To verify whether unixODBC is installed in the system, you can run the commands which odbcinst and which isql, which should return the path to the corresponding tools, or just run isql, which should print the syntax and available options for the isql utility.
2. Verify that the bitness of the driver that you are going to install matches the bitness of your Linux system and the unixODBC driver manager. The bitness of the driver is indicated on the download page of our website; also can you find out the bitness of the driver by looking at the .deb filename — a 32-bit driver contains i386 in its filename, whereas a 64-bit driver contains amd64.

To learn about the bitness of your Linux system, run the command uname -m, which should print x86_64 on a 64-bit system and anything else like i386 / i486 / i586 / i686 on a 32-bit system.

Which ODBC Driver Manager to Choose on Linux?
Sometimes, our users ask, which ODBC driver manager they should choose on a Linux system, unixODBC or iODBC. Both of them are open-source implementations of the ODBC standard, which enable non-Windows systems to communicate with databases via ODBC. We recommend using the unixODBC driver manager with our ODBC drivers on Linux, mainly because it is more stable than iODBC.
Advantages of unixODBC include support by many ODBC applications by default, availability of a cursor library, thread safety (including flags to protect handles at different levels), support for the latest ODBC 3.8 standard, and others. Historically, iODBC has been used mostly on macOS.
Debian-Specific Prerequisites
For a Debian derivative, such as Ubuntu, the following packages are required:
- odbcinst1debian2 – this package contains the libodbcinst library from unixODBC, a library used by ODBC drivers for reading their configuration settings from /etc/odbc.ini and ~/.odbc.ini;
- odbcinst – a unixODBC tool for manipulating configuration files: odbc.ini and odbcinst.ini;
- libodbc1 – this package provides the unixODBC shared library, libodbc;
- unixodbc – this package is an open source implementation of the Open Database Connectivity standard, a database abstraction layer that allows ODBC-compliant applications to access various databases; the package also contains isql, a command-line interactive SQL tool that allows you to test the configured DSN for connectivity to the database server and execute SQL statements interactively.
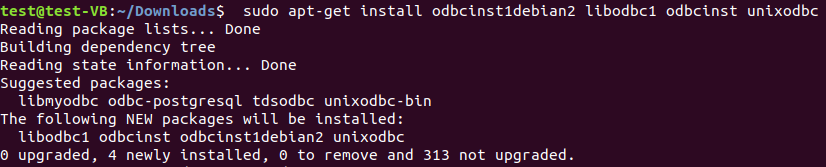
These packages depend on each other, so if you try to install them separately, you will most likely get an error saying that one package depends on another package from the list, and you will keep going round in circles. The solution is to install the packages with a single command: sudo apt-get install odbcinst1debian2 libodbc1 odbcinst unixodbc
RPM-Specific Prerequisites
To retrieve a list of available RPM packages of the unixODBC driver manager, run sudo yum search unixODBC.
To install the 64-bit version of the unixODBC driver manager and all of its dependencies on a RHEL-derivative such as CentOS, run the command: sudo yum install -y unixODBC.x86_64 in the terminal.
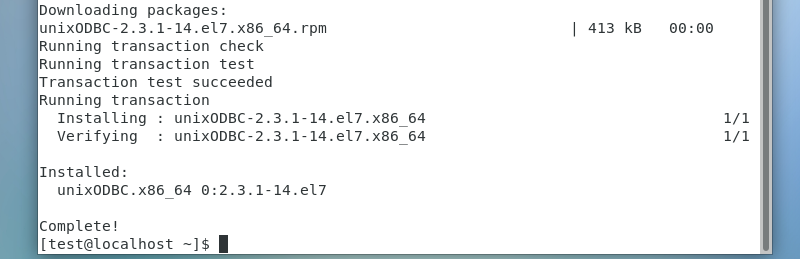
The above command installs all programs and libraries in the unixODBC package, such as isql, odbcinst, libodbcinst, libodbc.
How to Install an ODBC Driver on Ubuntu
Let’s see how to install an ODBC driver on Ubuntu, which is a popular open-source Linux distribution based on Debian. For the sake of this tutorial, we will install Devart ODBC Driver for PostgreSQL, but the following steps are true for other Devart ODBC drivers as well.
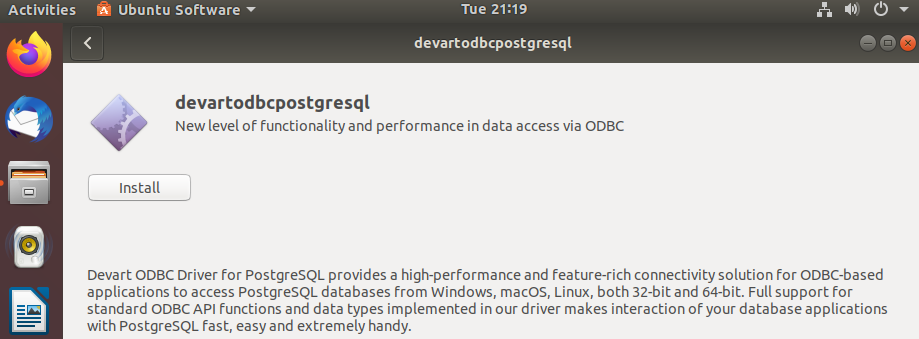
There are two ways to install the driver on Ubuntu: using the Ubuntu Software Center (a discontinued high-level graphical front end for the APT/dpkg package management system) or using the dpkg manager for Debian packages.
1. To install the driver with Software Center, navigate to the directory with the .deb package of the ODBC driver and double click on the file. This will launch Software Center, where you only need to click on the Install button.
2. To install the driver using the command line, open a terminal window and navigate to the directory with the .deb package using the cd command, e.g. cd ~/Downloads. Run the command sudo dpkg -i devartodbcpostgresql_amd64.deb in the terminal.

Note that the devartodbcpostgresql part of the filename is driver-specific, it will be different for other drivers. Once the installation has been successfully completed, we can configure a DSN to test connection to our database server.
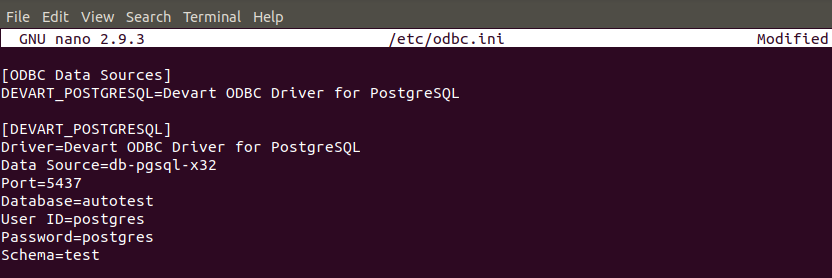
During installation, a sample system DSN is created by the driver in odbc.ini, which is a registry and configuration file for ODBC Data Source Names. To configure the connection parameters, open the file in any text editor – for example, nano, and specify connection information.
You can either navigate to the folder /etc and double click on the odbc.ini file or run the command sudo nano /etc/odbc.ini in the terminal to open the file and start editing it. After entering the connection information, save the changes.
If you prefer to configure a user DSN, run sudo nano ~/.odbc.ini in the terminal.
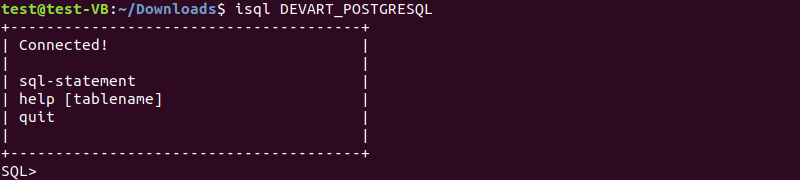
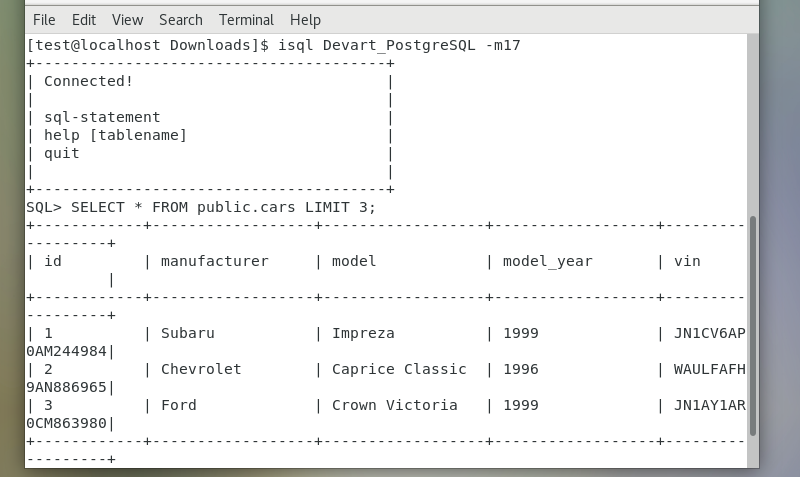
Now it is time to test our DSN for its connectivity to the database server and execute a few SQL statements using the interactive command-line tool isql. In the terminal, run the isql command followed by the name of the data source, e.g. isql Devart_PostgreSQL. If an ODBC connection has been successfully established, you should see the appropriate message printed.
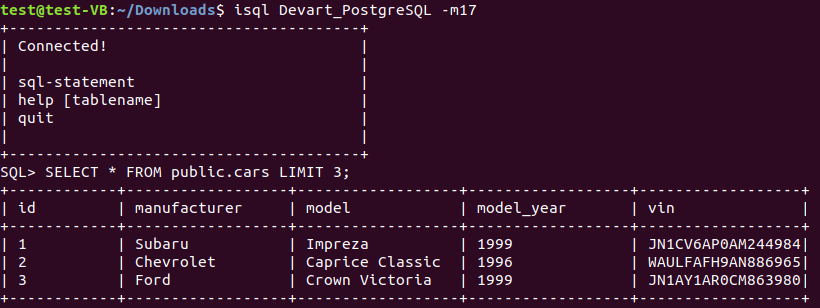
Let’s try and execute an SQL statement to retrieve all fields from the table ‘cars’. Note that in order to remove extra white space from the isql output, we had to reconnect to the database system to add the -mNUM option, which limits the column display width to NUM characters.
How to Install an ODBC Driver on CentOS
Among the RPM-based distributions, we have chosen CentOS to install the RPM file of the ODBC driver.
Navigate to the directory with the RPM file and run the command sudo rpm -ivh devart-odbc-postgresql.x86_64.rpm to install the ODBC driver for Linux (64-bit version). Once the installation has been successfully completed, you can configure the DSN that is created during installation, or you can create a new one.
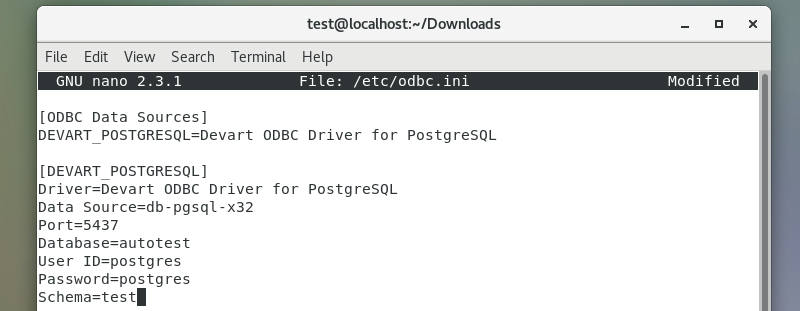
Navigate to the folder /etc and double click on the odbc.ini file or simply run the command sudo nano /etc/odbc.ini in the terminal to open the file for editing. After configuring the DSN parameters, save the changes to the odbc.ini file.
Now you can connect to the data source by issuing the command isql Devart_PostgreSQL, and then execute a query against the database to fetch data.
How to Install an ODBC Driver on Debian
Написати інструкцію як встановити драйвер на Debian
To install an ODBC driver on Debian, follow these step-by-step instructions:
- Update Package Lists: Open a terminal window and update the package lists to ensure you have the latest information about available packages.
sudo apt update - Install the ODBC Driver Package: Use the package manager to install the ODBC driver package for Debian.
sudo apt install <your-odbc-driver-package-name> - Configure the ODBC Driver: After installation, configure the ODBC driver by editing the configuration files. These files are typically located in
/etc/odbcinst.iniand/etc/odbc.ini. Adjust the settings according to your specific driver and database requirements. - Verify the Installation: Ensure the ODBC driver is installed correctly by checking for any error messages during the installation process. Additionally, you can verify the installation by running:
odbcinst -q -d -n <your-odbc-driver-name>
How to Test ODBC Connection in Linux
To test your ODBC connection in Linux and ensure that the driver is functioning correctly, follow these steps:
- Open a Terminal: Launch a terminal window on your Linux system.
- Run the Connection Test Command: Use the following command to test the ODBC connection.
isql -v <your-odbc-datasource-name> <username> <password>
Replace<your-odbc-datasource-name>,<username>, and<password>with your specific connection details. - Review the Test Results: Examine the output of the command for any error messages or successful connection confirmation. A successful connection indicates that your ODBC driver is properly configured and operational.
Screenshot: ODBC connection test
How to Uninstall or Remove ODBC Driver from Linux
To uninstall or remove an ODBC driver from Linux, follow these steps:
- Open a Terminal: Launch a terminal window on your Linux system.
- Identify Installed Driver: Use the following command to list the installed ODBC drivers and identify the one you want to remove.
odbcinst -q -d - Uninstall the ODBC Driver: Depending on your package manager, use the appropriate command to uninstall the ODBC driver package.
sudo apt remove <your-odbc-driver-package-name> - Remove Configuration Files: Delete the ODBC driver configuration files to ensure a clean removal.
sudo rm /etc/odbcinst.ini /etc/odbc.ini Uninstall ODBC Driver
Ensure the removal process is successful by checking for any confirmation messages or using theodbcinst -q -dcommand to verify that the driver is no longer listed.
 Uninstall ODBC Driver
Step-by-Step ODBC Data Source Setup on Linux
- Run isql to verify whether unixODBC is installed.
- If not, install unixODBC: run sudo apt-get install odbcinst1debian2 libodbc1 odbcinst unixodbc for DEB or sudo yum install -y unixODBC.x86_64 for RPM.
- Run uname -m to verify that the installer matches the bitness of your system and unixODBC.
- To install the driver, run sudo dpkg -i drivername_amd64.deb for the .deb package or sudo rpm -ivh drivername.x86_64.rpm for the .rpm package.
- Run sudo nano /etc/odbc.ini to add entries to the odbc.ini file. Configure a DSN and save the changes.
- Run isql dsn_name to connect to the data source.
By following the instructions in this article, you can easily install and configure an ODBC driver on Linux and execute SQL statements to access or modify data in the database.
Conclusion
This guide has provided a comprehensive overview of installing, configuring, and managing ODBC drivers on Debian Linux. By following the detailed steps outlined in this article, you can seamlessly integrate ODBC drivers into your system, facilitating efficient connectivity with various databases.
From the initial installation process to checking the driver version, testing the ODBC connection, and finally, uninstalling or removing the driver when necessary, each section has been crafted to empower users with the knowledge needed for successful ODBC driver management.
Whether you are a seasoned Linux user or just getting started, the presented instructions, accompanied by screenshots, aim to simplify the often intricate tasks associated with ODBC drivers. By ensuring the correct installation and configuration of these drivers, you pave the way for robust and reliable data access across diverse applications.
Having a solid understanding of ODBC drivers becomes increasingly crucial for developers, system administrators, and database professionals alike. By mastering the steps outlined in this guide, you not only enhance your ability to work with databases seamlessly but also contribute to the overall efficiency and performance of your Linux-based systems.
Stay connected, stay informed, and make the most out of your ODBC-driven interactions on Debian Linux. Cheers to a successful integration and effortless data connectivity!