
Systems often work with distributed databases that contain distributed tables. Distribution is supported by various mechanisms, including replication. In this case, it is necessary to constantly maintain the synchronization of a particular data segment. It is also necessary to check the synchronization itself. This is when the need to compare data in two tables appears.
Table of contents:
- Comparing database schemas using SQL Server Data Tools
- Comparing database schemas with the help of dbForge Schema Compare
- Comparing database data using SSIS
- Comparing databases data with the help of dbForge Data Compare
- Conclusion
Before comparing data in two tables, you need to make sure that the schemas of the compared tables are either the same or acceptably different. By acceptably different we mean a difference in the definition of two tables, whereby data can be compared correctly. For example, types of corresponding columns of compared tables should be mapped without data loss in these columns.
Let us compare the SQL Server schemas of the two Employee tables from two different databases JobEmpl and JobEmplDB.
For further work, it is necessary to recall the definitions of the Employee table of JobEmpl and JobEmplDB databases:
USE [JobEmpl]
GO

SET ANSI_NULLS ON
GO

SET QUOTED_IDENTIFIER ON
GO

CREATE TABLE [dbo].[Employee](
	[EmployeeID] [int] IDENTITY(1,1) NOT NULL,
	[FirstName] [nvarchar](255) NOT NULL,
	[LastName] [nvarchar](255) NOT NULL,
	[Address] [nvarchar](max) NULL,
	[CheckSumVal]  AS (checksum((coalesce(CONVERT([nvarchar](max),[FirstName]),N'')+coalesce(CONVERT([nvarchar](max),[LastName]),N''))+coalesce(CONVERT([nvarchar](max),[Address]),N''))),
	[REPL_GUID] [uniqueidentifier] ROWGUIDCOL  NOT NULL,
 CONSTRAINT [PK_Employee_EmployeeID] PRIMARY KEY CLUSTERED
(
	[EmployeeID] ASC
)WITH (PAD_INDEX = OFF, STATISTICS_NORECOMPUTE = OFF, IGNORE_DUP_KEY = OFF, ALLOW_ROW_LOCKS = ON, ALLOW_PAGE_LOCKS = ON, FILLFACTOR = 80) ON [PRIMARY]
) ON [PRIMARY] TEXTIMAGE_ON [PRIMARY]
GO

ALTER TABLE [dbo].[Employee] ADD  CONSTRAINT [Employee_DEF_REPL_GUID]  DEFAULT (newsequentialid()) FOR [REPL_GUID]
GO


and


USE [JobEmplDB]
GO

SET ANSI_NULLS ON
GO

SET QUOTED_IDENTIFIER ON
GO

CREATE TABLE [dbo].[Employee](
	[EmployeeID] [int] IDENTITY(1,1) NOT NULL,
	[FirstName] [nvarchar](255) NOT NULL,
	[LastName] [nvarchar](255) NOT NULL,
	[Address] [nvarchar](max) NULL,
 CONSTRAINT [PK_Employee_EmployeeID] PRIMARY KEY CLUSTERED
(
	[EmployeeID] ASC
)WITH (PAD_INDEX = OFF, STATISTICS_NORECOMPUTE = OFF, IGNORE_DUP_KEY = OFF, ALLOW_ROW_LOCKS = ON, ALLOW_PAGE_LOCKS = ON) ON [PRIMARY]
) ON [PRIMARY] TEXTIMAGE_ON [PRIMARY]
GO
Comparing database schemas using SQL Server Data Tools
With the help of Visual Studio and SSDT, you can compare database schemas. To do this, you need to create a new project “JobEmployee” by doing the following:
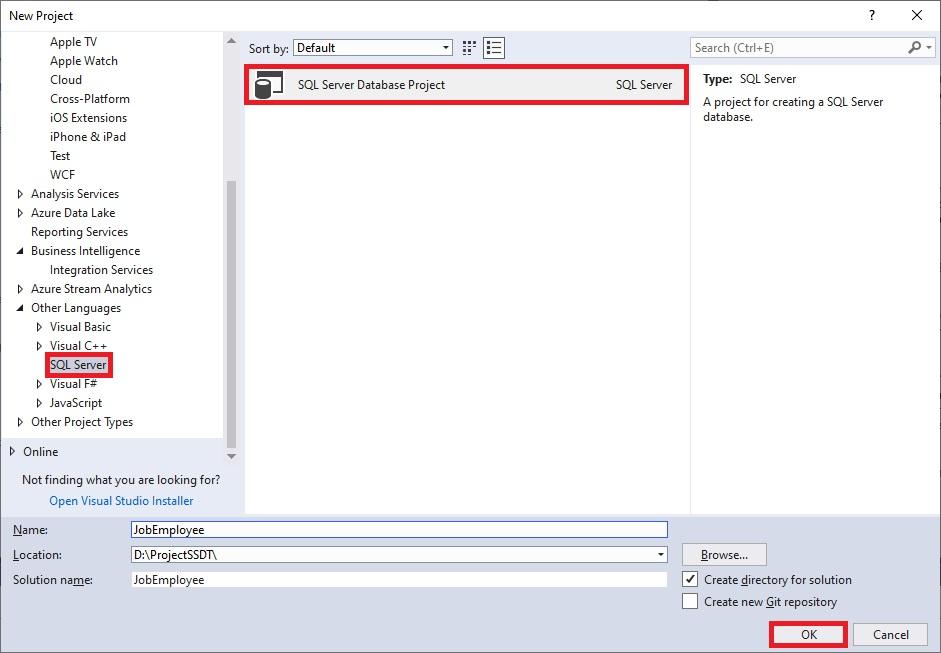
Img.1. Creating a project JobEmployeeDB
Then, you need to import the database.
To do this, right-click the project and on the shortcut menu, select Import > Database:

Img.2. Select database import
Next, click Select connection and on the Browse, tab set up the connection to the JobEmpl database as follows:
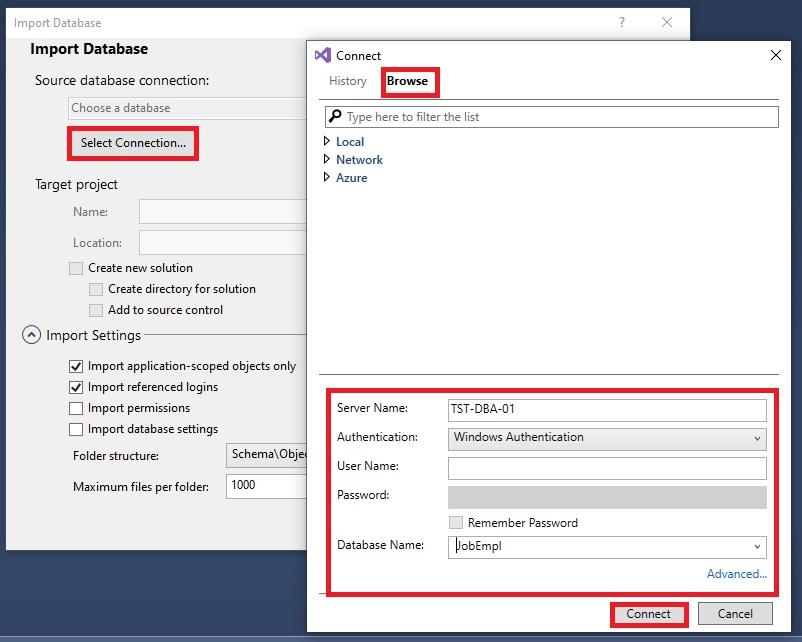
Img.3. Configuring JobEmpl Database Import
Next, click Start to start the import of the JobEmpl database:
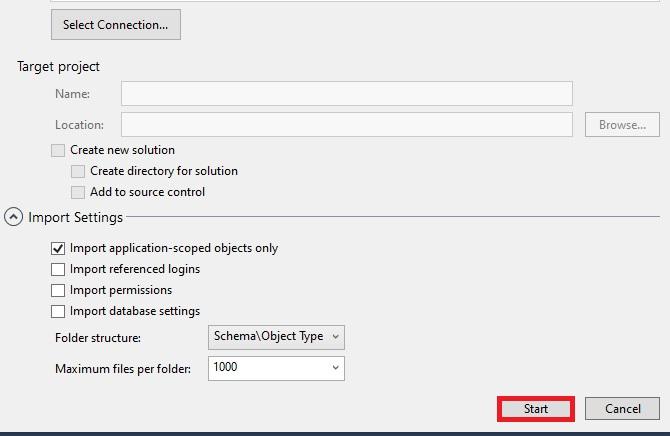
Img.4. Starting the database import process
You will then see a window showing the progress of the database import:
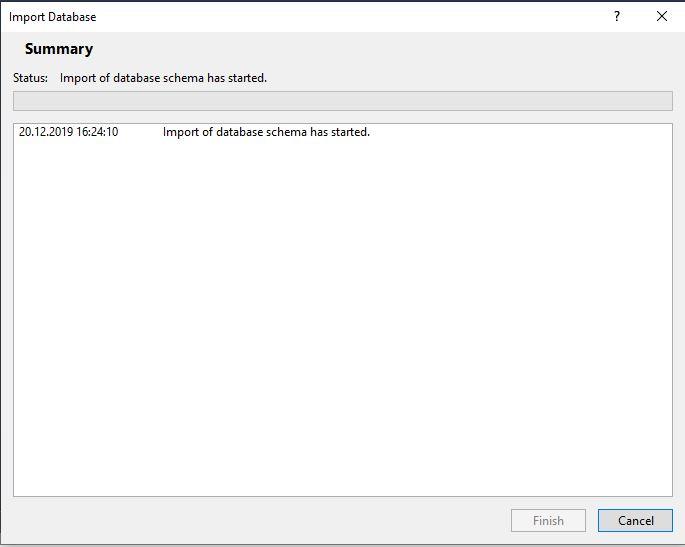
Img.5. The window of the database import progress
When the database import process is completed, click Finish:
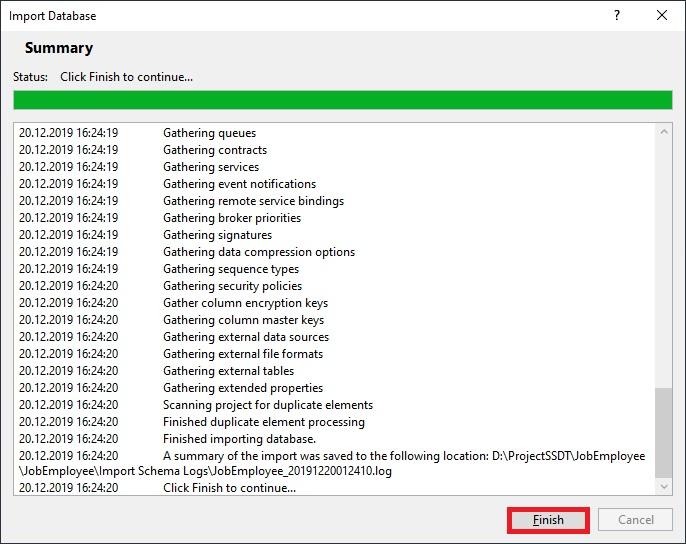
Img.6. Finishing database import
Once it is finished, the JobEmployee project will contain directories, subdirectories, and database objects definitions in the following form:
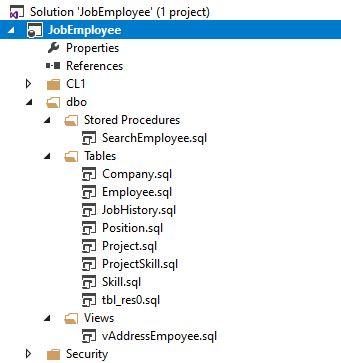
Img.7. JobEmployee project after importing the JobEmplDB database
In the same way, we create a similar JobEmployeeDB project and import the JobEmplDB database into it:

Img.8. JobEmployeeDB project after JobEmplDB database import
Now, right-click the JobEmployee project and on the shortcut menu, select Schema Compare:
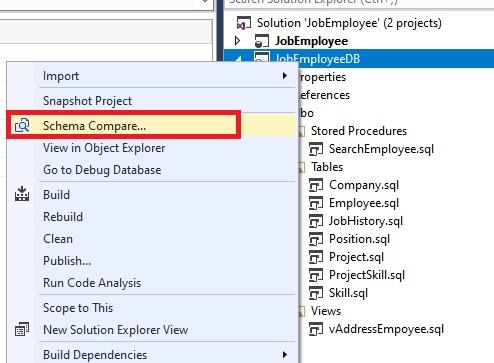
Img.9. Calling the database schema compare window
This will bring up the database schema compare window.
In the window, you need to select the projects as source and target, and then click Compare to start the comparison process:
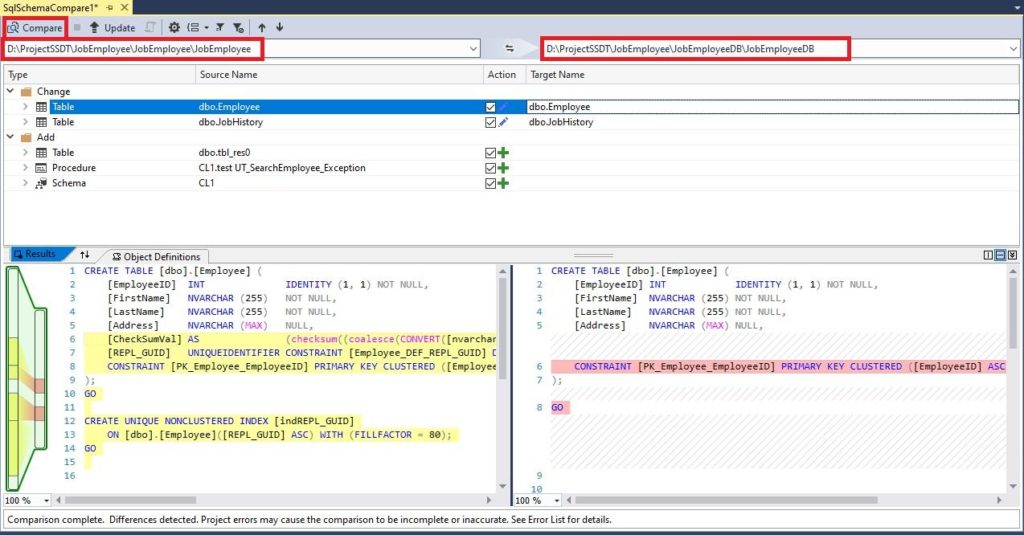
Img.10. Database schema comparison window
We can see here that despite the differences between the definitions of the Employee tables in two databases, the table columns that we need for comparison are identical in data type. This means that the difference in the schemas of the Employee tables is acceptable. That is, we can compare the data in these two tables.
We can also use other tools to compare database schemas such as dbForge Schema Compare for SQL Server.
Comparing database schemas with the help of dbForge Schema Compare
Now, to compare database table schemas, we use a SQL diff tool, dbForge Schema Compare for SQL Server, which is also included in SQL Tools.
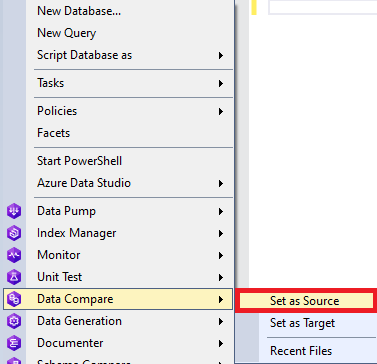
For this, in SSMS, right-click the first database and on the shortcut menu, select Schema Compare > Set as Source:
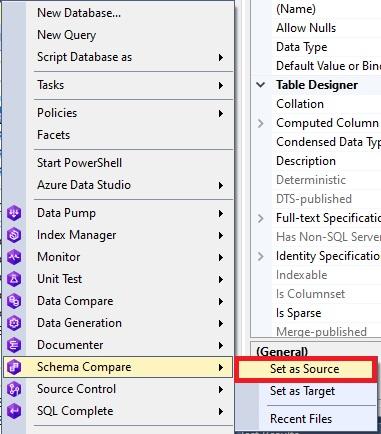
Img.11. Selecting the source-base for schema comparison
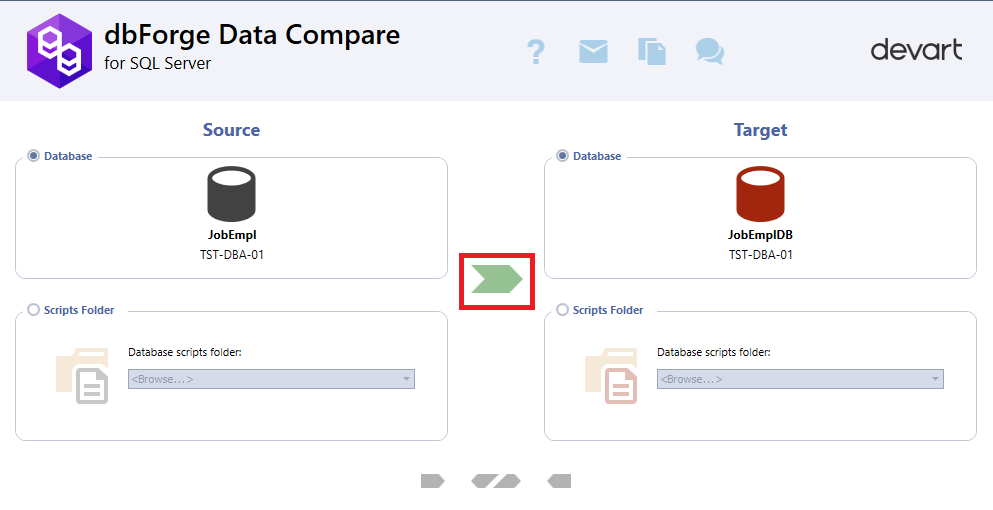
We simply transfer JobEmplDB, the second database, to the Target area and click the green arrow between source and target:
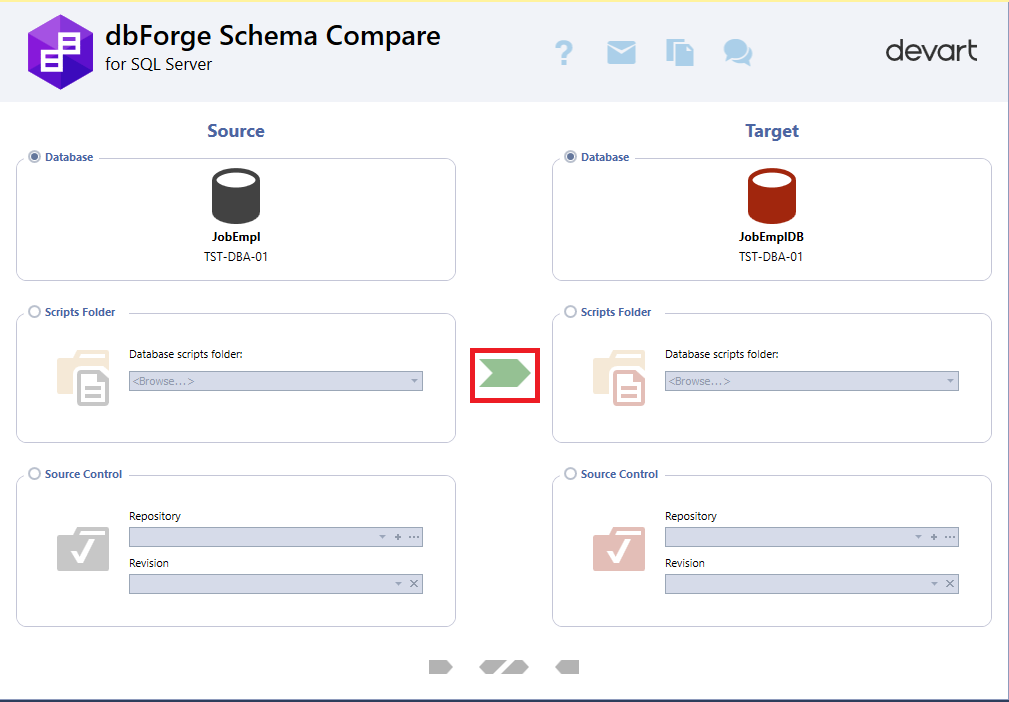
Img.12. Setting up database schema comparison
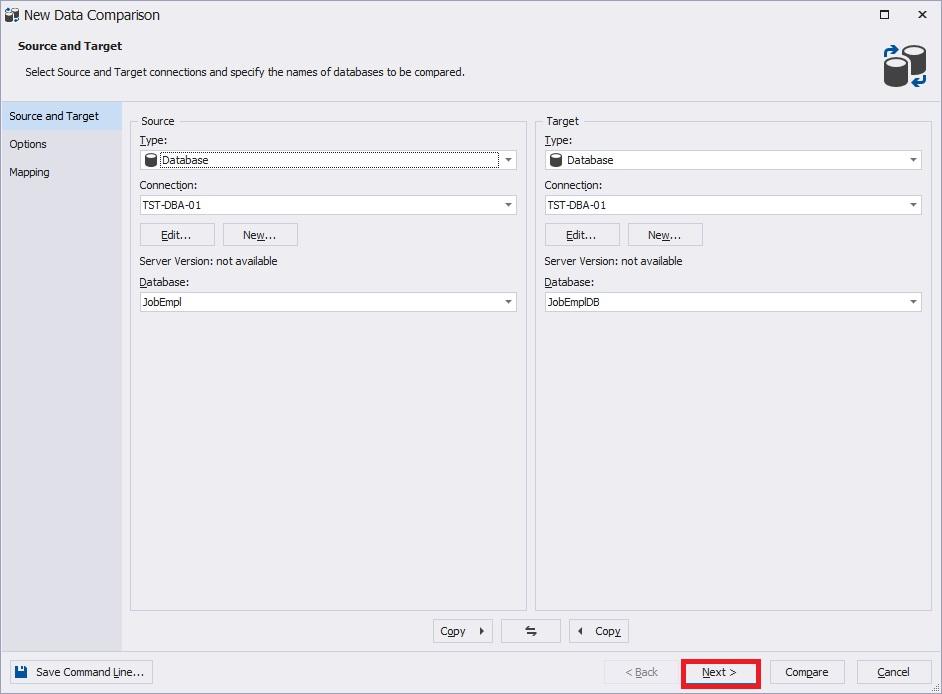
You simply need to click Next in the opened database schema comparison project:
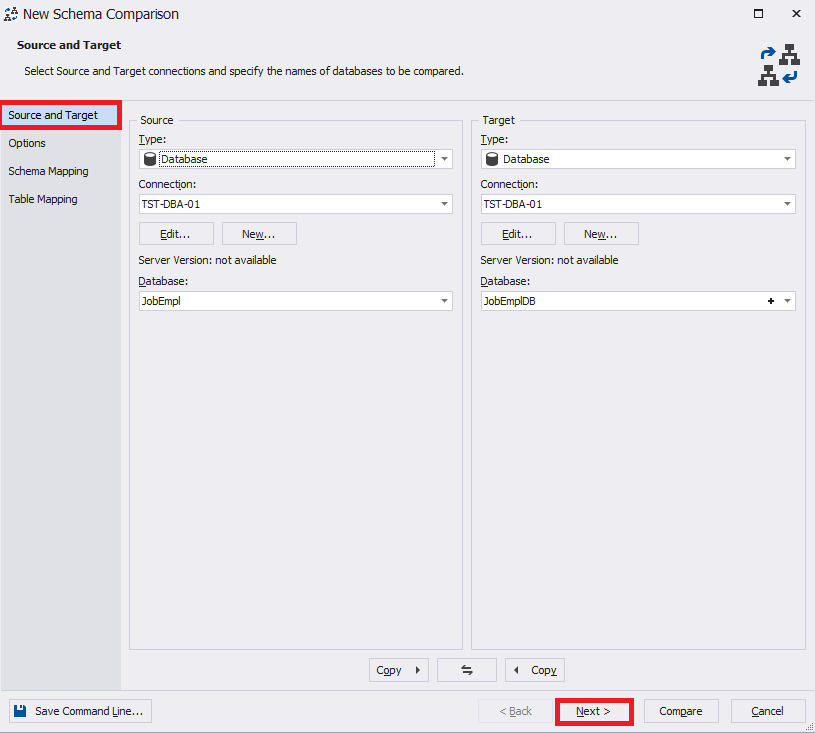
Img.13. Choosing the source and target for schema comparison
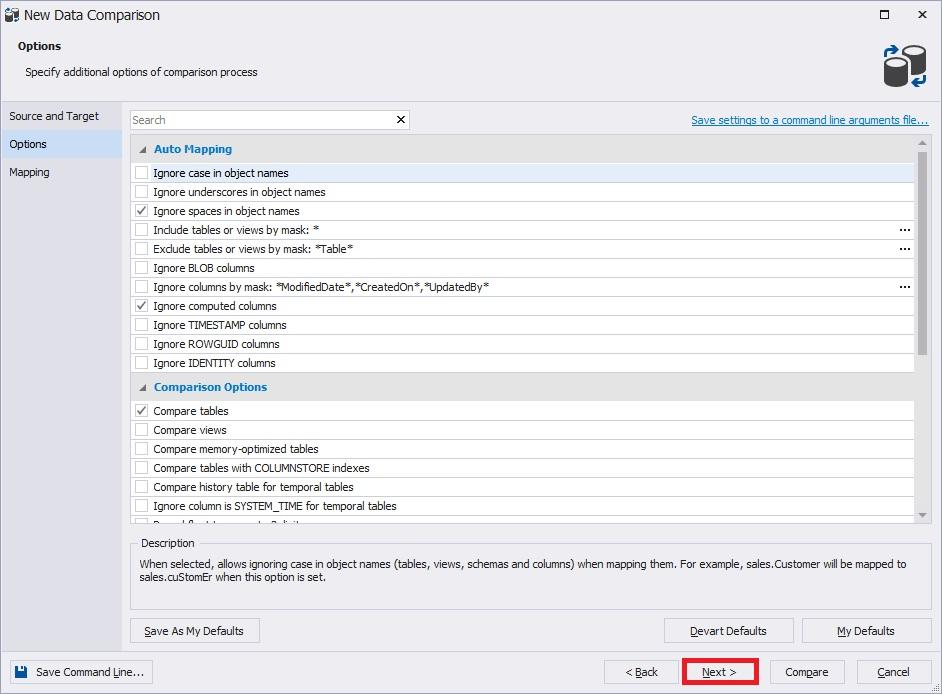
Leave the following settings at their defaults and click Next:
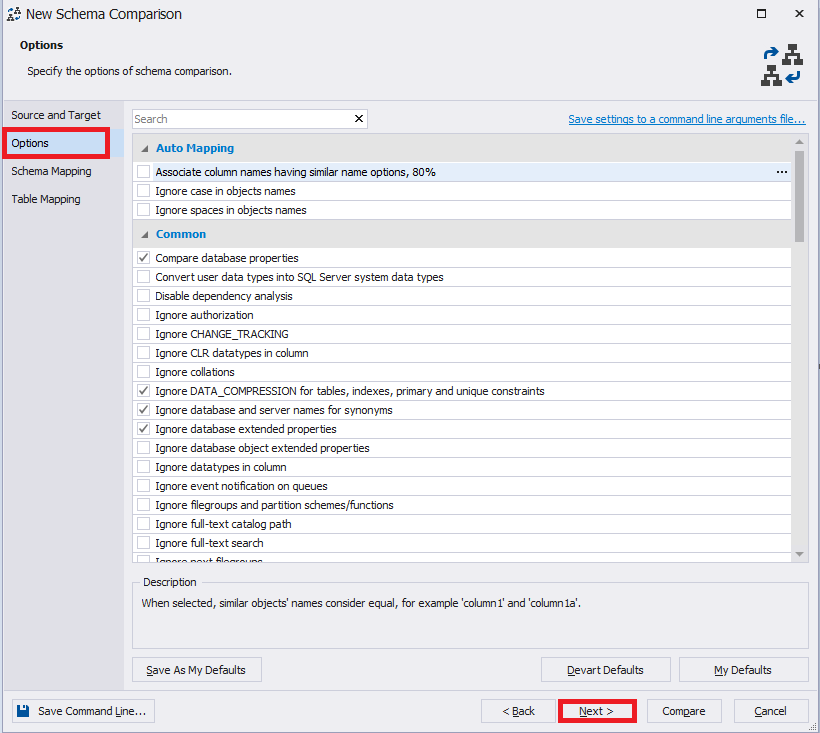
Img.14. Schema comparison options
On the Schema Mapping tab, we also leave everything by default and click Next:
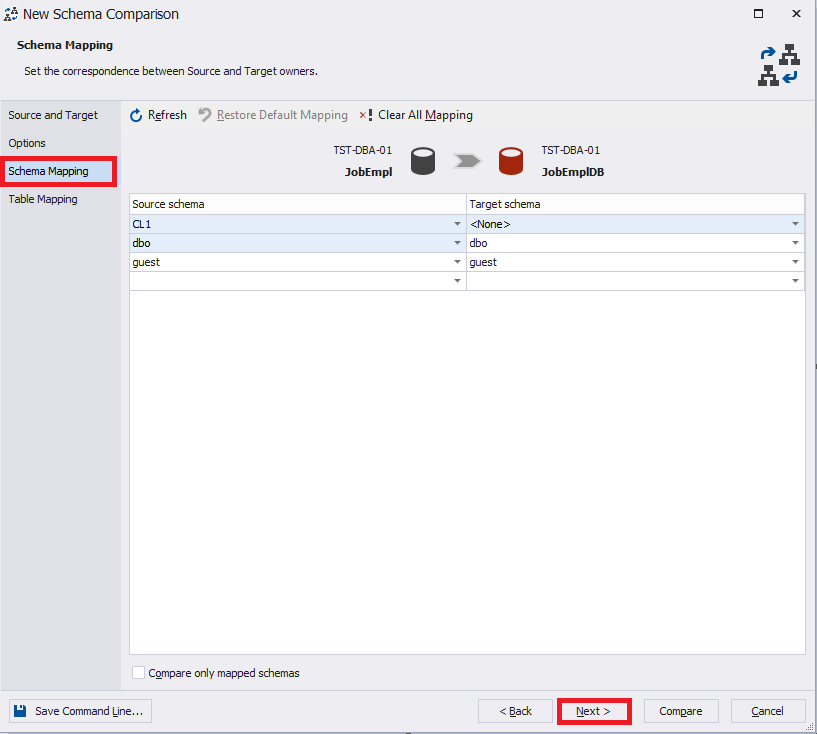
Img.15. “Schema Mapping” Tab
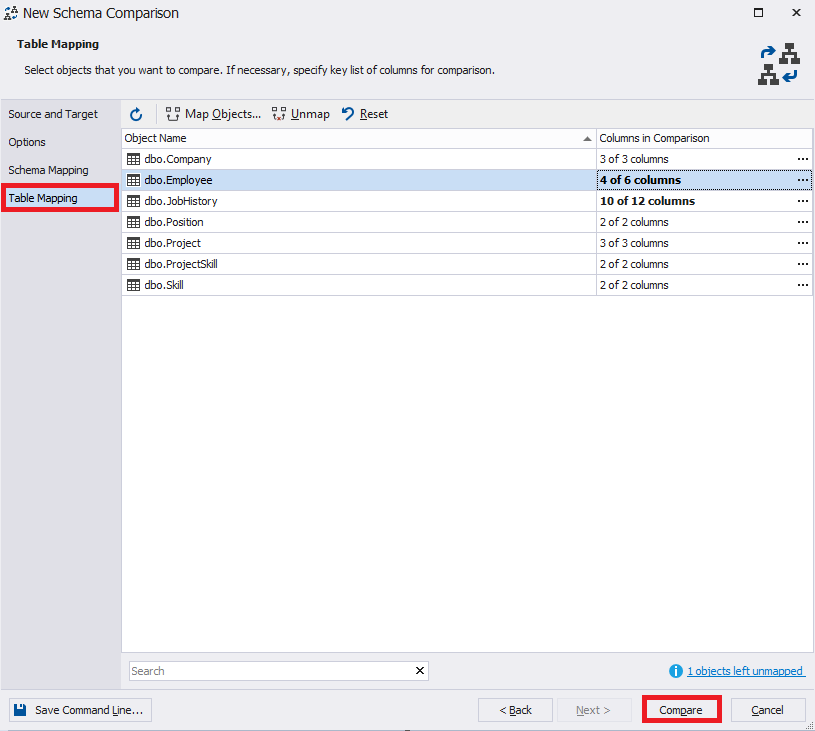
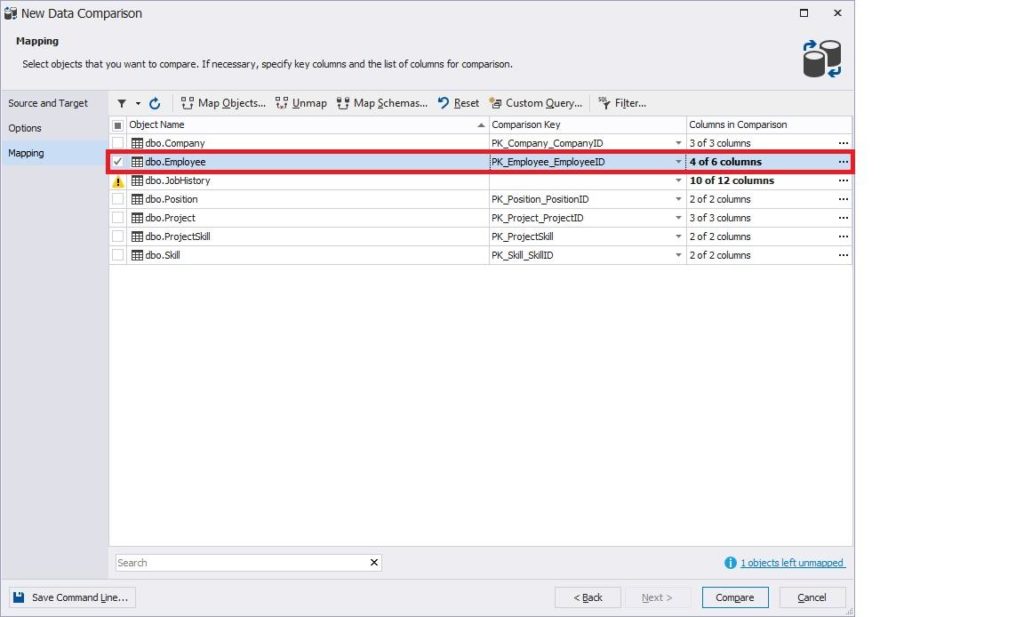
On the Table Mapping tab, select the required Employee table and on the right of the table name, click the ellipsis:
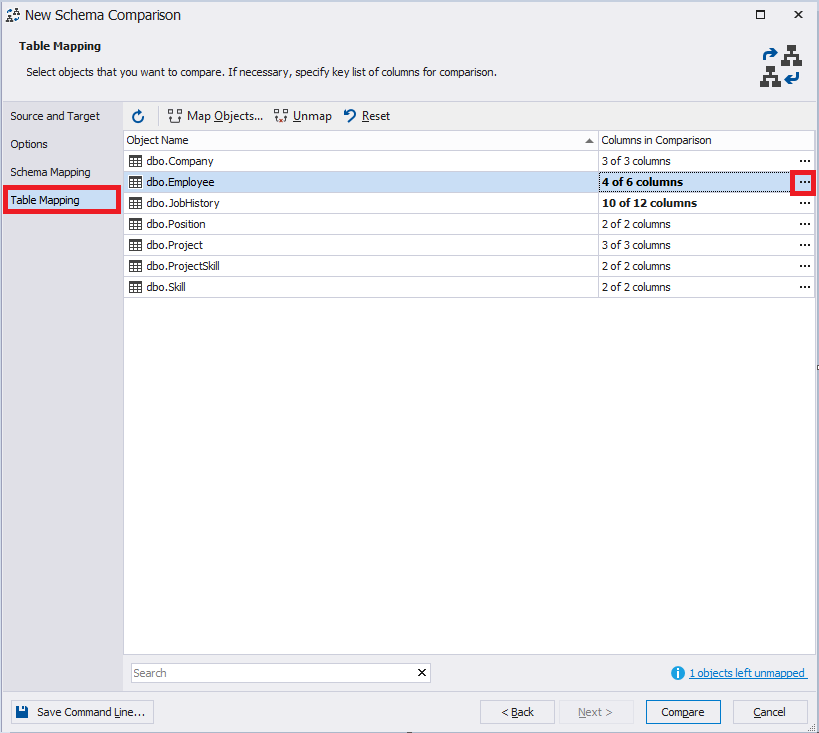
Img.16. Selecting the Employee table
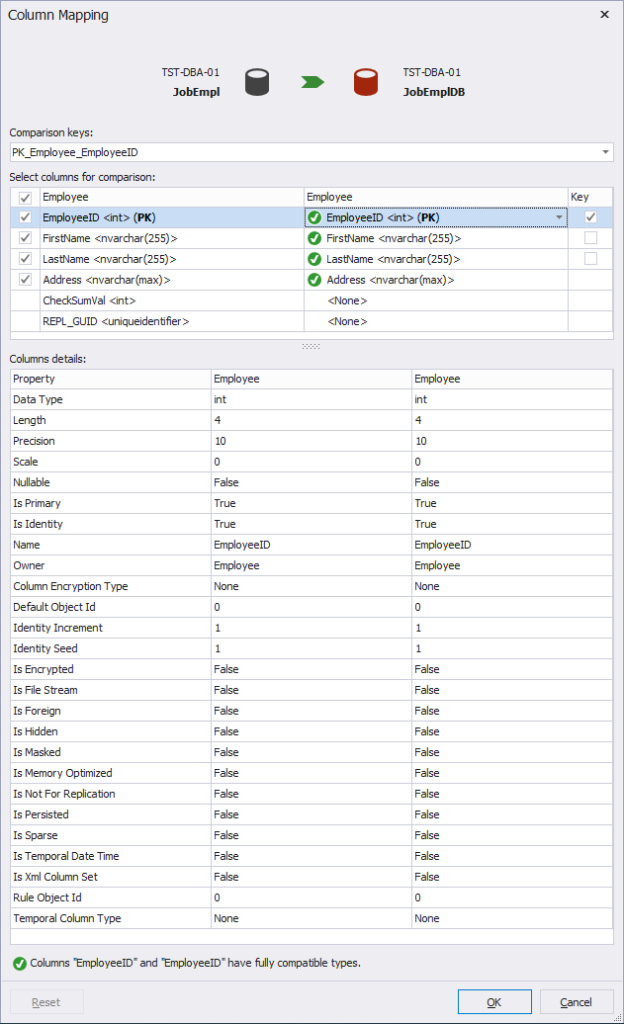
The table mapping window opens up:
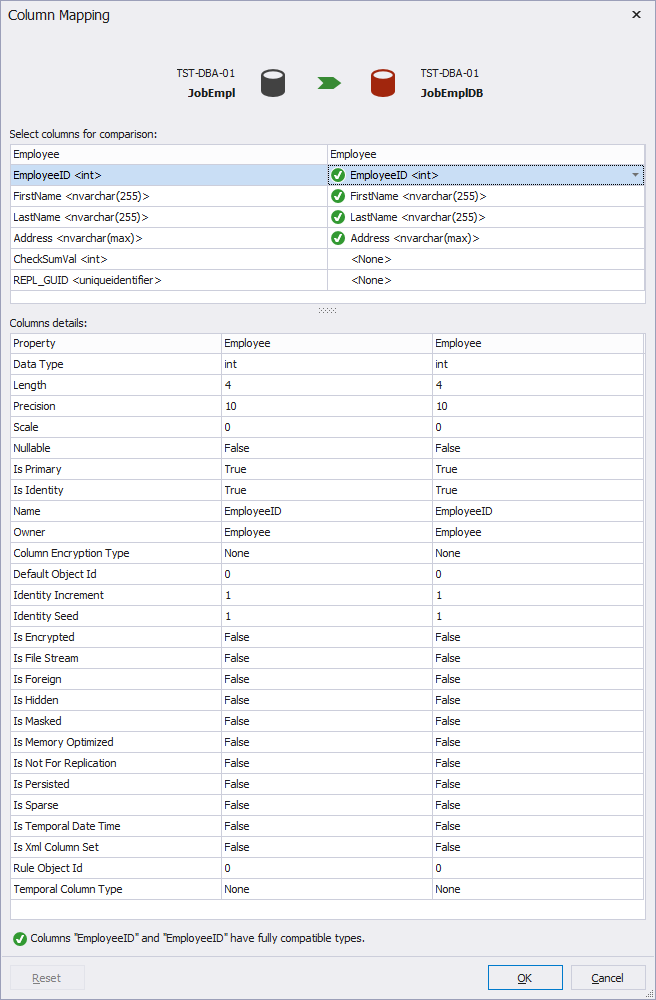
Img.17. Column mapping of two tables
In our case, only 4 fields are mapped, because two last fields are contained only in the JobEmpl database and are absent in the JobEmplDB database.
This setting is useful when column names in the source table and target table do not match.
The Column details table displays the column definition details in two tables: on the left – from the source database and on the right – from the target database.
Now, click OK:
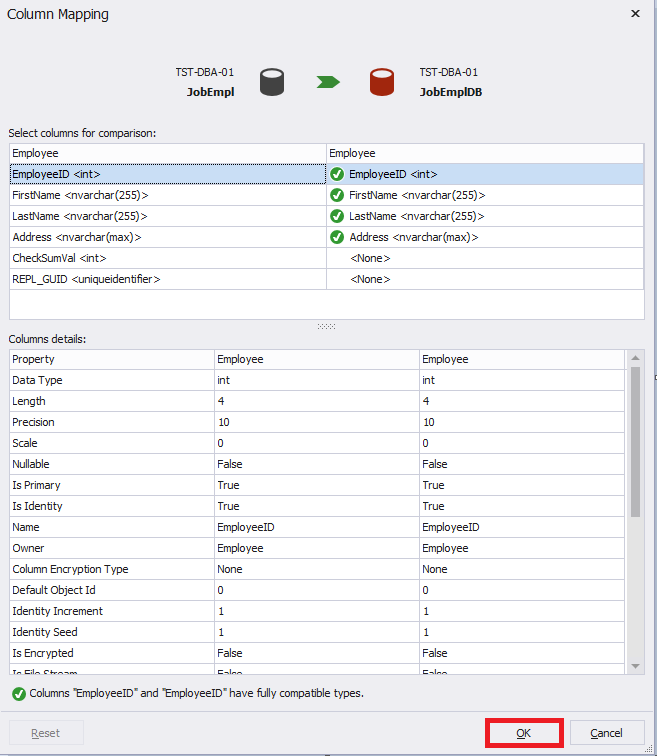
Img.18. Column mapping of two tables-2
Now, to start the database schema comparison process, click Compare:
Img.19. Starting schema comparison
A progress bar will appear:
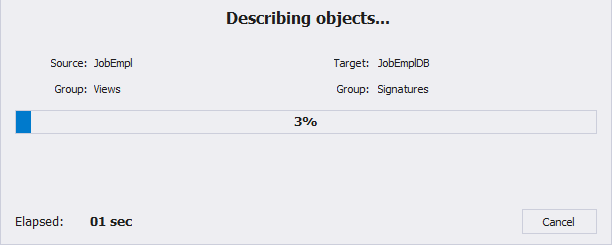
Img.20. Schema comparison progress
We then select the required Employee table:
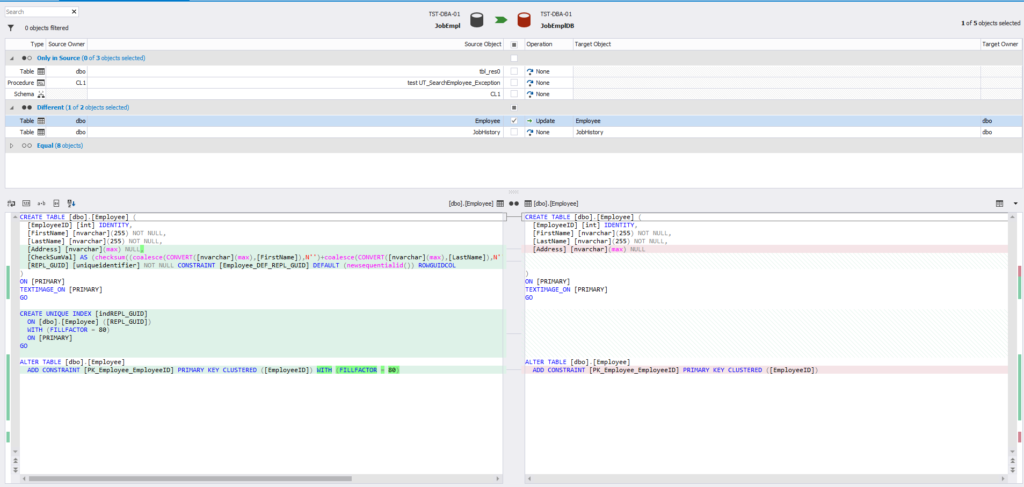
Img.21. The comparison of Employee table schema
At the bottom left, you can see the code for defining the source database table and on the right – the target database table.
We can see here, as before, that the definitions of the Employee table in two databases JobEmpl and JobEmplDB show admissible distinction, that is why we can compare data in these two tables.
Let us now move on to the comparison of the data in two tables itself.
By the way, to learn how to involve dbForge Schema Compare in the CI process, feel free to watch this video.
Comparing database data using SSIS
We create a project called Integration Service Project in Visual Studio and name it IntegrationServicesProject:
Let’s first make a comparison using SSIS. For this, you need to have SSDT installed.
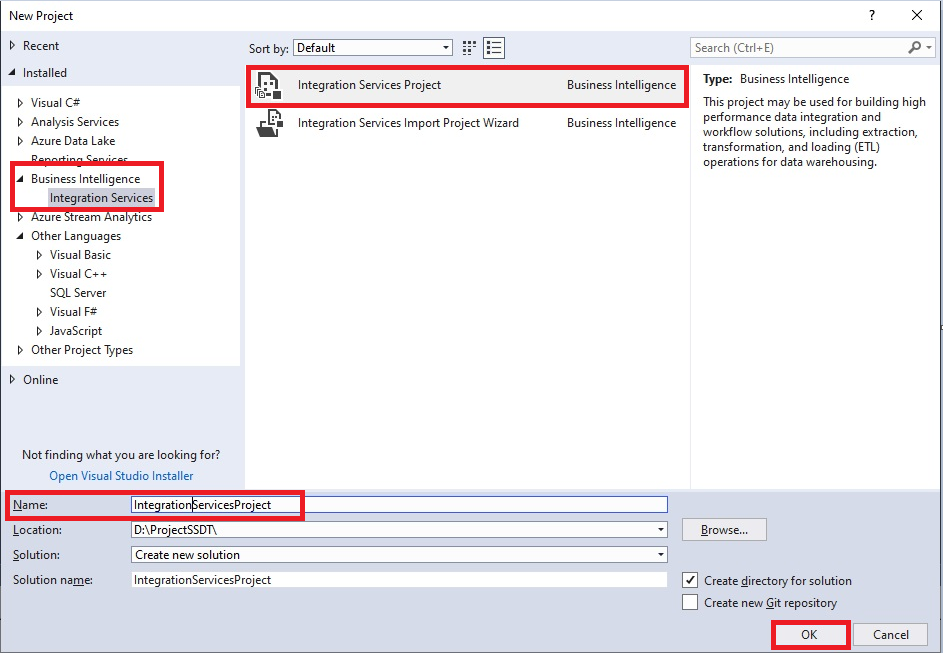
Img.22. Creating a project called Integration Services Project
We then create three connections:
- to the source JobEmpl database
- to the target JobEmplDB database
- to the JobEmplDiff database, where the table of differences will be displayed the following way below:
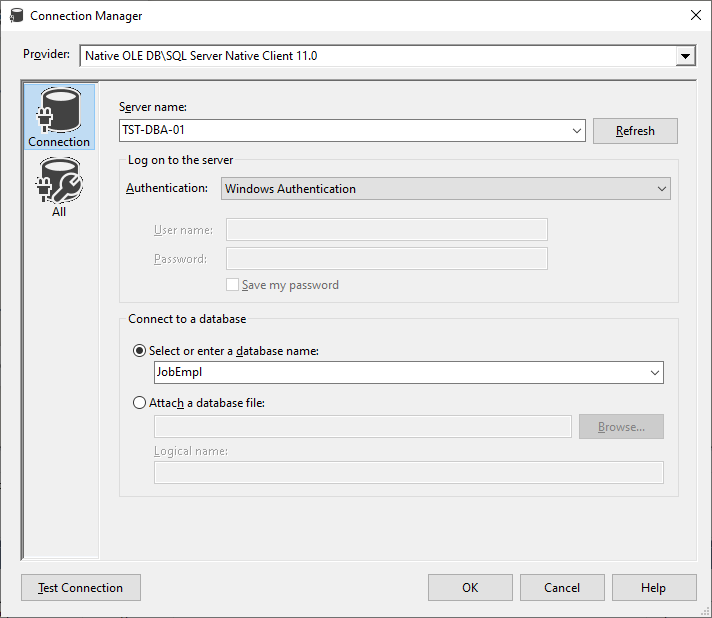
Img.23. Making a database connection
That way, new connections will be displayed in the project as follows:
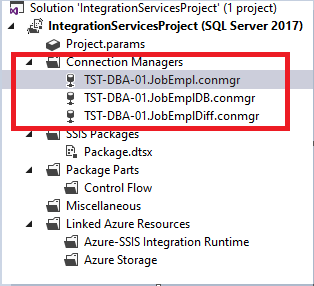
Img.24. Displaying the created connections
Then, in the project, on the Control Flow tab, we create a data flow task and name it “data flow task”:
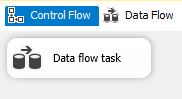
Img.25. Creating a data flow task
Let us now switch to the data flow and create an element “Source OLE DB” by doing the following:
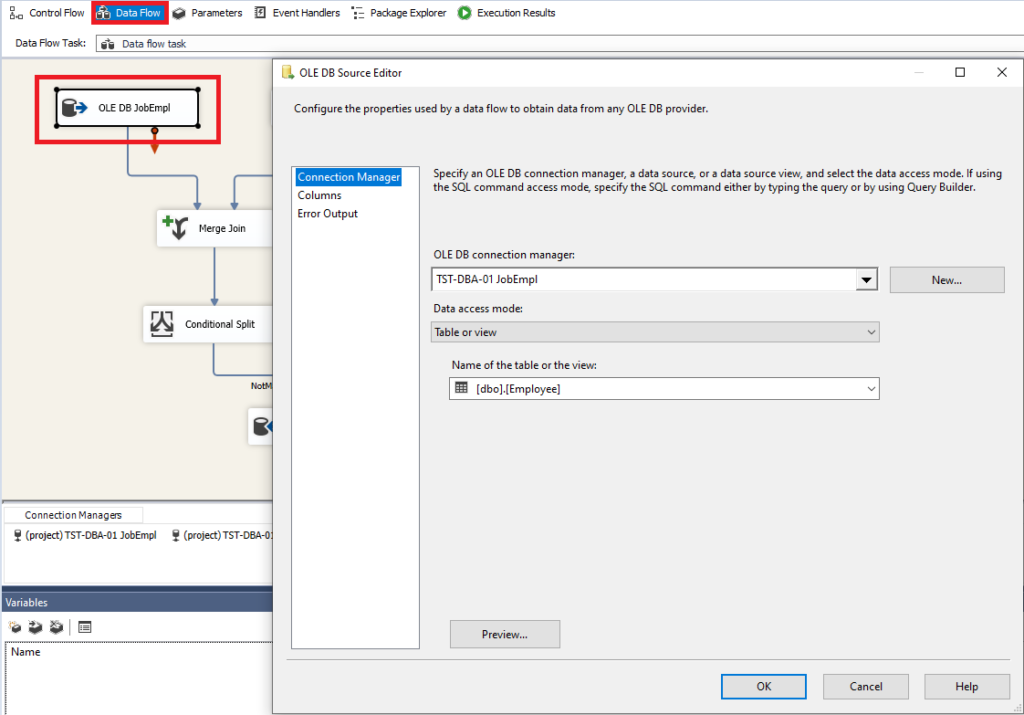
Img.26. Creating a data source
On the Columns tab, we then select the fields required for comparison:
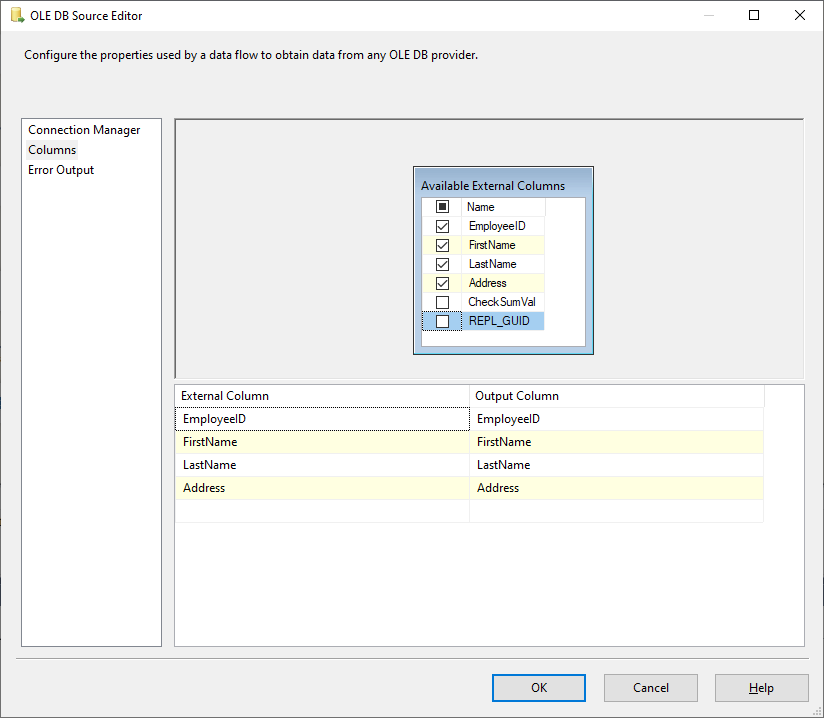
Img.27. Selecting the required fields
Next, we leave by default and click OK:
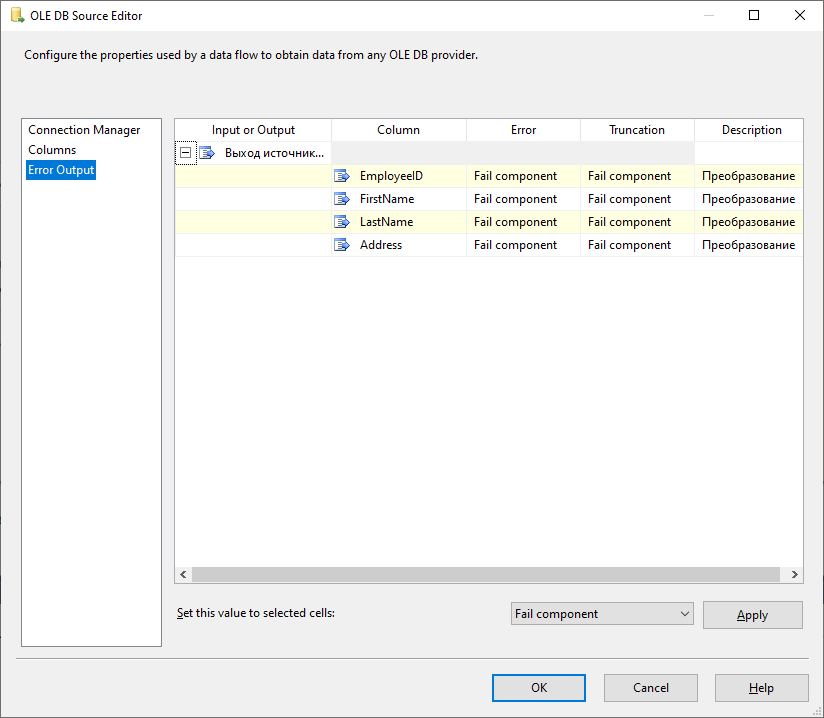
Img.28.“Error Output” Tab
And now, right-click the created data source and on the shortcut menu, select Show Advanced Editor:
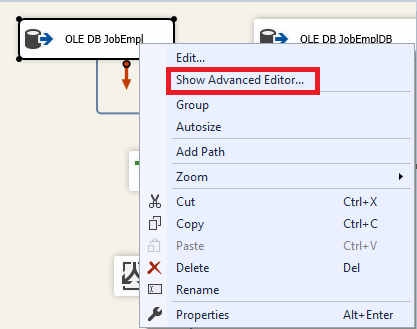
Img.29. Selecting “Show Advanced Editor…”
On the Input and Output Properties tab, set IsSorted to True in the properties for OLE DB source output and OLE DB source errors output:
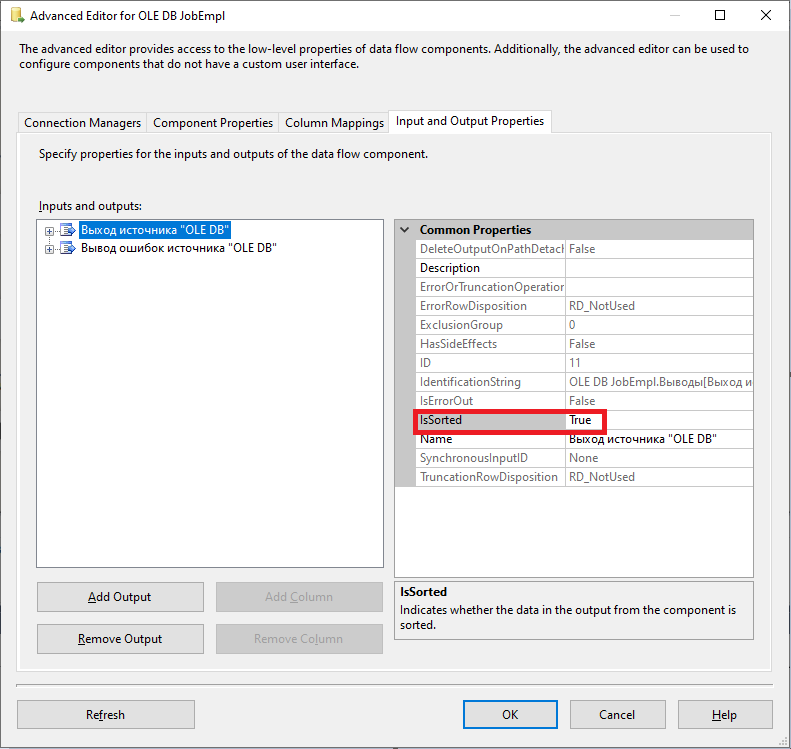
Img.30. Setting IsSorted property to True
Next, for each of the Output Columns groups for the EpmloyeeID column, set SortKeyPosition property to 1. That is, we sort by the EmployeeID field value in ascending order:
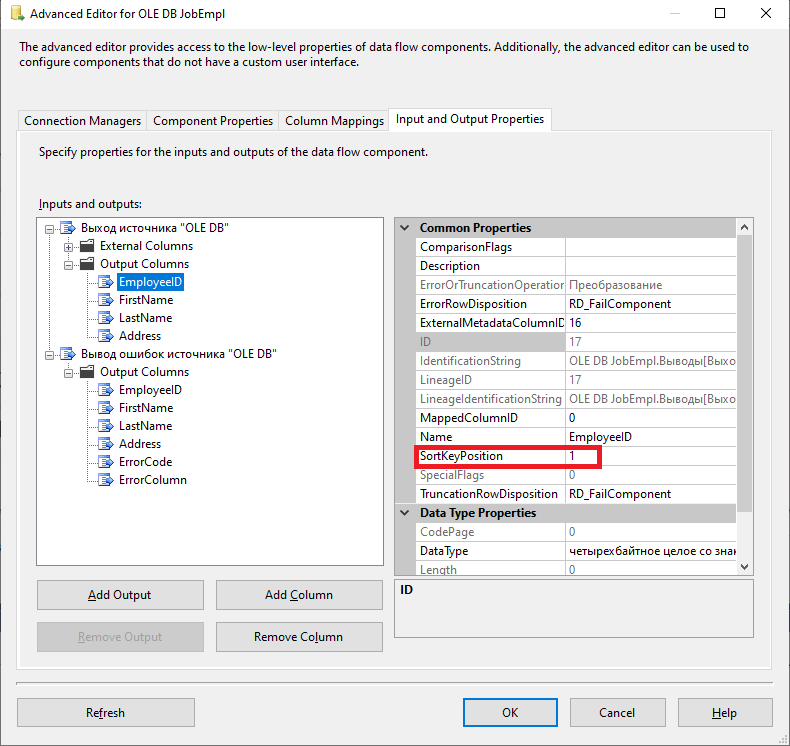
Img.31. Choosing sort by the EmployeeID field value in ascending order
Similarly, let us create and set the data source to the JobEmplDB database.
That way, we obtain two created sources in the data flow task:
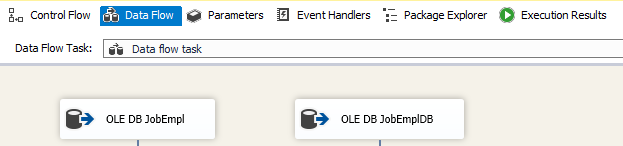
Img.32. Created data sources
Now, we create a merge join element in the following way:

Img.33. Creating “Merge Join”
Please note that we merge tables using a full outer join.
We then connect our sources to the created join element by merging “Merge Join” as follows:
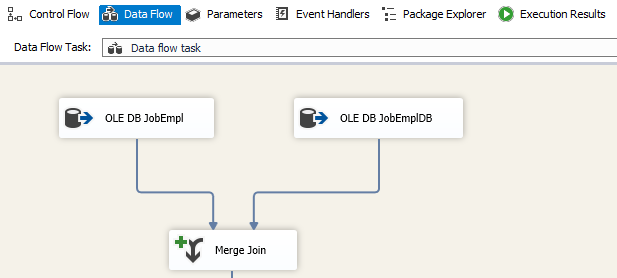
Img.34. Connecting sources to “Merge Join”
We make the connection from JobEmpl left and the connection from JobEmplDB – right.
In fact, it is not that important, it is possible to do this the other way around.
In the JobEmplDiff database, we create a different table called EmployeeDiff, where we are going to put data differences in the following way:
USE [JobEmplDiff]
GO

SET ANSI_NULLS ON
GO

SET QUOTED_IDENTIFIER ON
GO

CREATE TABLE [dbo].[EmployeeDiff](
	[ID] [int] IDENTITY(1,1) NOT NULL,
	[EmployeeID] [int] NULL,
	[EmployeeID_2] [int] NULL,
	[FirstName] [nvarchar](255) NULL,
	[FirstName_2] [nvarchar](255) NULL,
	[LastName] [nvarchar](255) NULL,
	[LastName_2] [nvarchar](255) NULL,
	[Address] [nvarchar](max) NULL,
	[Address_2] [nvarchar](max) NULL,
 CONSTRAINT [PK_EmployeeDiff_1] PRIMARY KEY CLUSTERED
(
	[ID] ASC
)WITH (PAD_INDEX = OFF, STATISTICS_NORECOMPUTE = OFF, IGNORE_DUP_KEY = OFF, ALLOW_ROW_LOCKS = ON, ALLOW_PAGE_LOCKS = ON, FILLFACTOR = 80) ON [PRIMARY]
) ON [PRIMARY] TEXTIMAGE_ON [PRIMARY]
GO
Now, let us get back to our project and in the data flow task, we create a conditional split element as follows:
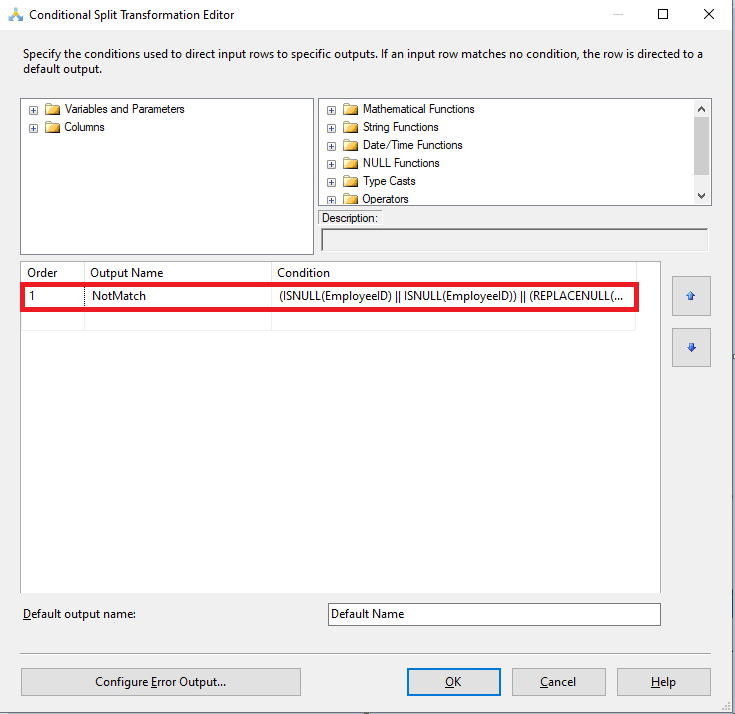
Img.35. Creating a conditional split
In the Conditional field for NotMatch, you need to type the following expression:
(ISNULL(EmployeeID) || ISNULL(EmployeeID)) || (REPLACENULL(FirstName,"") != REPLACENULL(FirstName_2,"")) || (REPLACENULL(LastName,"") != REPLACENULL(LastName_2,"")) || (((Address != Address_2) && (!ISNULL(Address)) && (!ISNULL(Address_2))) || (ISNULL(Address) != ISNULL(Address_2)))This expression is true if the fields do not match with account for NULL values for the same EmployeeID value. And it is true if there is no match for the EmployeeID value from one table for the EmployeeID value in the other table, that is, if there are no rows in both tables that have the EmployeeID value.
You can obtain a similar result in the form of selection, using the following T-SQL query:
SELECT e1.[EmployeeID] AS [EmployeeID],
	e2.[EmployeeID] AS [EmployeeID_2],
	e1.[FirstName] AS [FirstName],
	e2.[FirstName] AS [FirstName_2],
	e1.[LastName] AS [LastName],
	e2.[LastName] AS [LastName_2],
	e1.[Address] AS [Address],
	e2.[Address] AS [Address_2]
FROM [JobEmpl].[dbo].[Employee] AS e1
FULL OUTER JOIN [JobEmplDB].[dbo].[Employee] AS e2
	ON e1.[EmployeeID] = e2.[EmployeeID]
WHERE (e1.[EmployeeID] IS NULL)
OR (e2.[EmployeeID] IS NULL)
OR (COALESCE(e1.[FirstName], N'') <> COALESCE(e2.[FirstName], N''))
OR COALESCE(e1.[LastName], N'') <> COALESCE(e2.[LastName], N'')
OR COALESCE(e1.[Address], N'') <> COALESCE(e2.[Address], N'');
Now, let us connect the elements “Merge Join” and “Conditional Split” as follows:
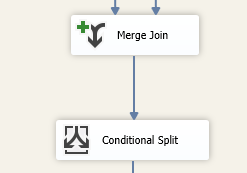
Img.36. Connecting “Merge Join” and “Conditional Split” elements
Next, we create an OLE DB destination element in the following way:
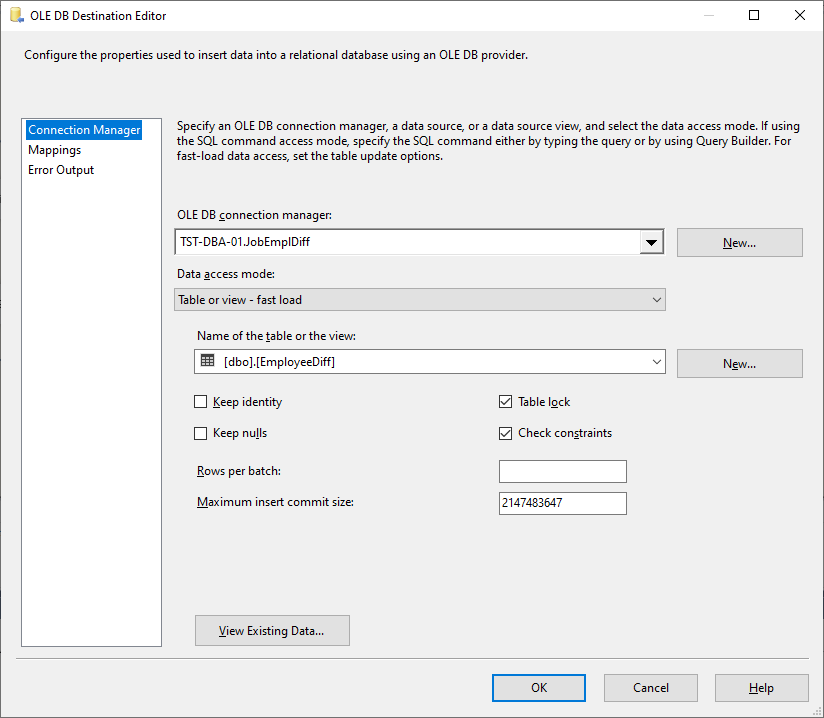
Img.37. Creating a destination element
Now, we map the columns:
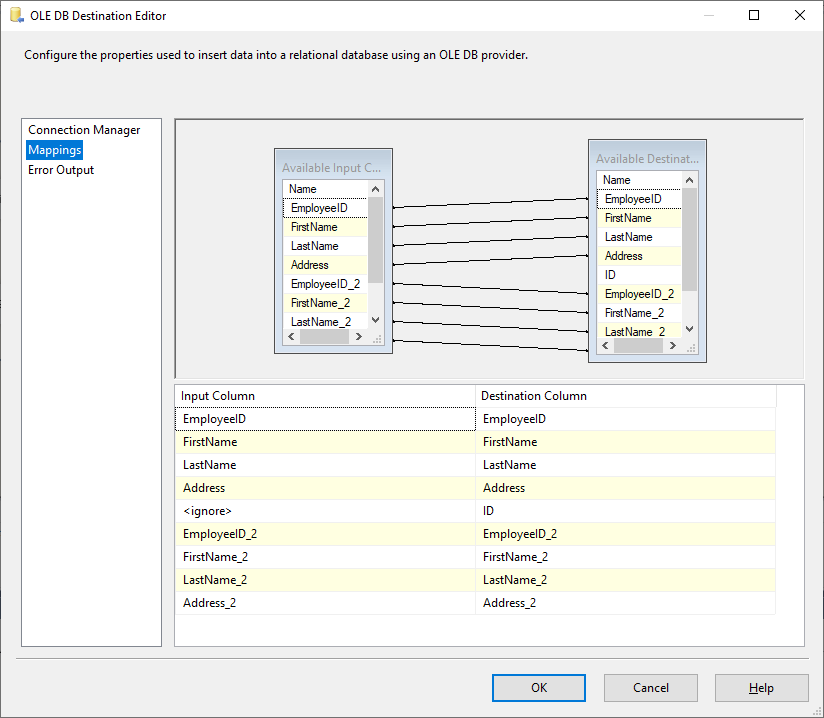
Img.38. Columns mapping
We set the Error Output tab by default:
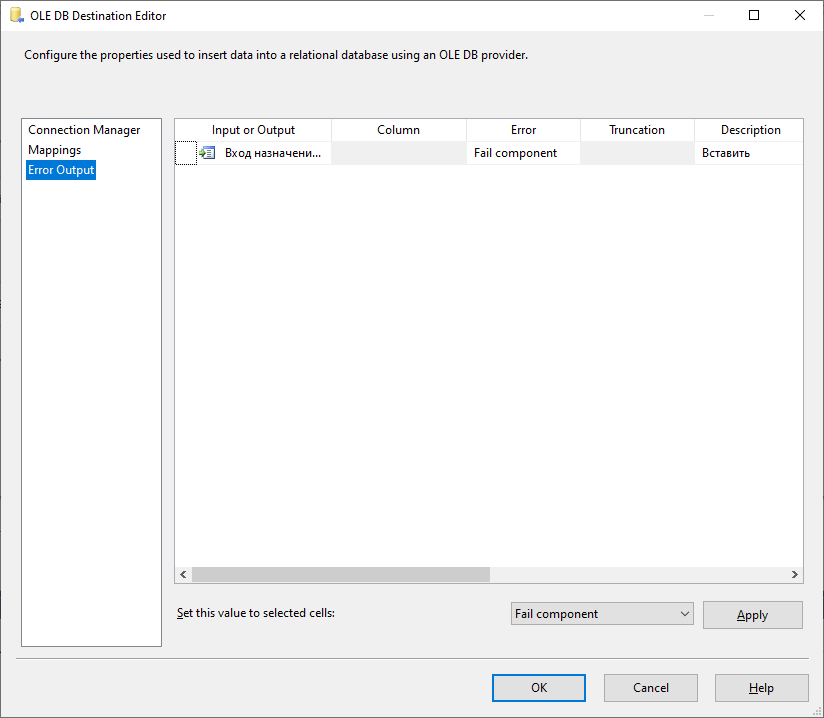
Img.39. “Error Output” Tab-2
We can now join “Conditional Split” and “OLE DB JobEmplDiff” elements. As a result, we get a complete data flow:
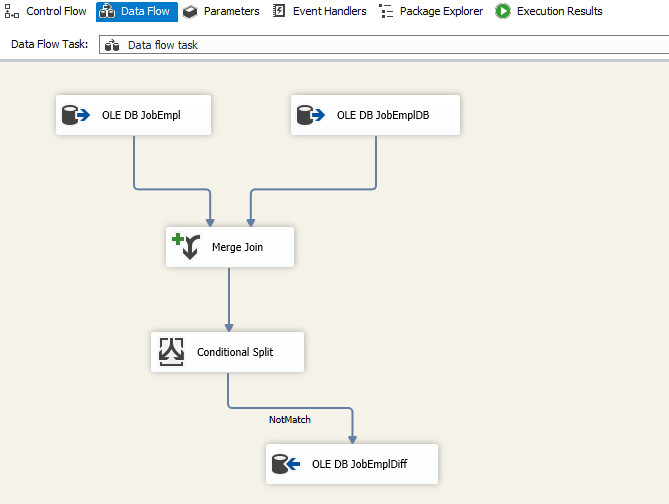
Img.40. A complete data flow
Let us run the package that we have obtained:
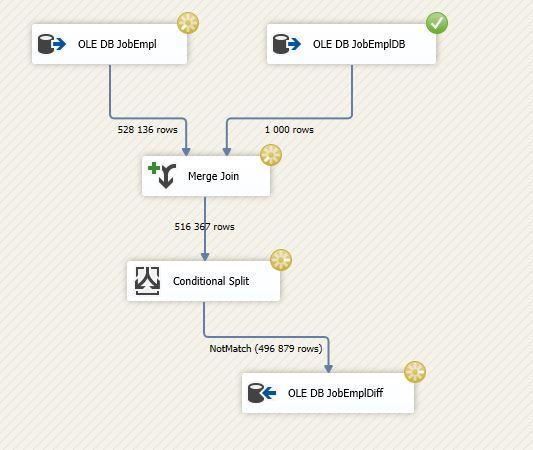
Img.41. Work of data flow
Upon the successful completion of the package work, all its elements turn into green circles:
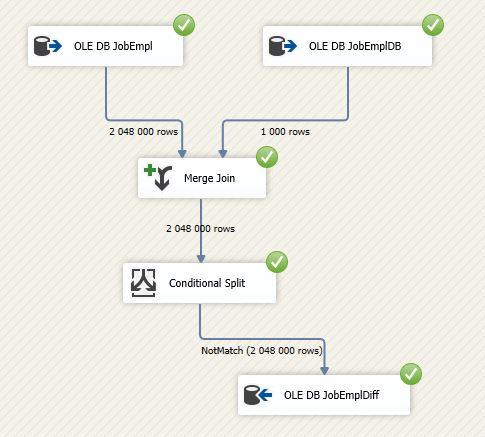
Img.42. A processed package without errors
If errors occur, they are displayed in the form of red circles instead of green ones. To resolve the issues, you need to read log files.
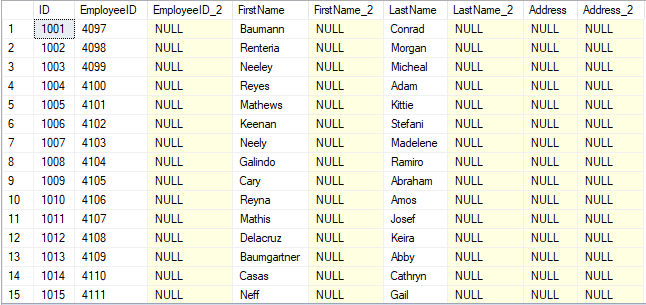
To analyze the data difference, we need to derive the necessary data from the EmployeeDiff table of the JobEmplDiff database:
SELECT [ID]
      ,[EmployeeID]
      ,[EmployeeID_2]
      ,[FirstName]
      ,[FirstName_2]
      ,[LastName]
      ,[LastName_2]
      ,[Address]
      ,[Address_2]
  FROM [JobEmplDiff].[dbo].[EmployeeDiff]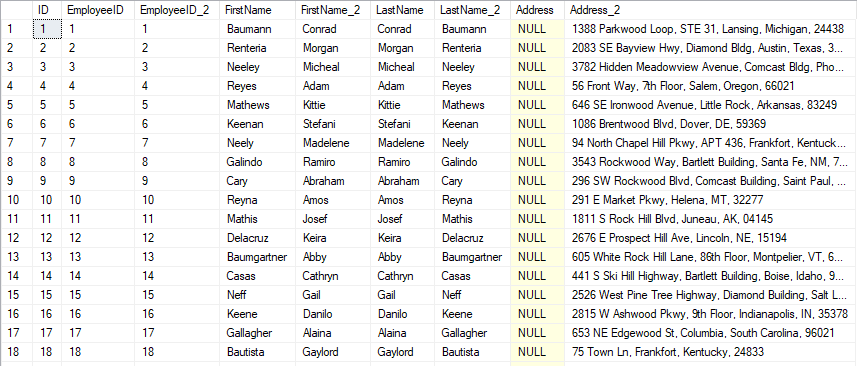
Img.43. Data difference-1
Here you can see the Employee table from JobEmpl database, where Address isn’t set, and FirstName and LastName are mixed up in some columns. However, there is a bunch of missing rows in JobEmplDB, which exist in JobEmpl:
Img.44. Data difference-2
Comparing databases data with the help of dbForge Data Compare
Let’s make data comparison with the help of dbForge Data Compare for SQL Server, which is also included in SQL Tools.
For this, in SSMS, right-click the JobEmpl database and on the shortcut menu, choose Data Compare > Set as Source:
Img.45. Choosing a data source for data comparison
Choose the second database JobEmplDB as Target and click the green arrow between source and target:
Img.46. Starting the database data comparison setup
In the opened project of database comparison, click Next:
Img.47. Defining source and target for data comparison
We leave the following settings by default and click Next:
Img.48. Data comparison options
On the Mapping tab, we choose the desired Employee table and click the ellipsis:
Img.49. Choosing the Employee table
The field mapping window opens:
Img.50. Field mapping
In our case, only four fields are mapped, because two last fields are contained only in the JobEmpl database and are absent in the JobEmplDB database.
This setting is quite convenient when the names of columns in the source table and target table do not match.
“Column details” displays the details of the definitions of the columns from 2 tables: on the left – from the source database, on the right – from the target database.
Let’s click OK. Note that you can set another key in “Comparison Key” including a customizable one. Now, click Compare to start comparing data in the databases:
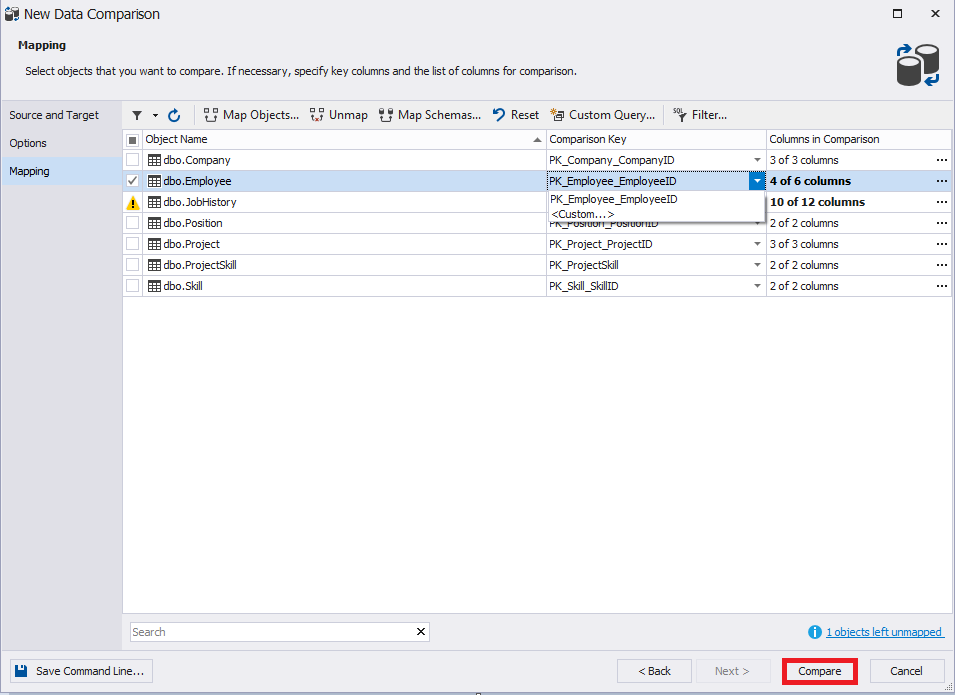
Img.51. Starting data comparison
After that, the progress window will appear:

Img.52. Data comparison progress
Here we can see that 2 047 000 records are missing in the Employee table of the JobEmplDB database, which are present in the Employee table of the JobEmpl database, and the remaining 1000 records differ because they have no Address value in the source and because the FirstName and LastName field values are swapped in the table source. It is also possible to set visibility and sorting of fields:
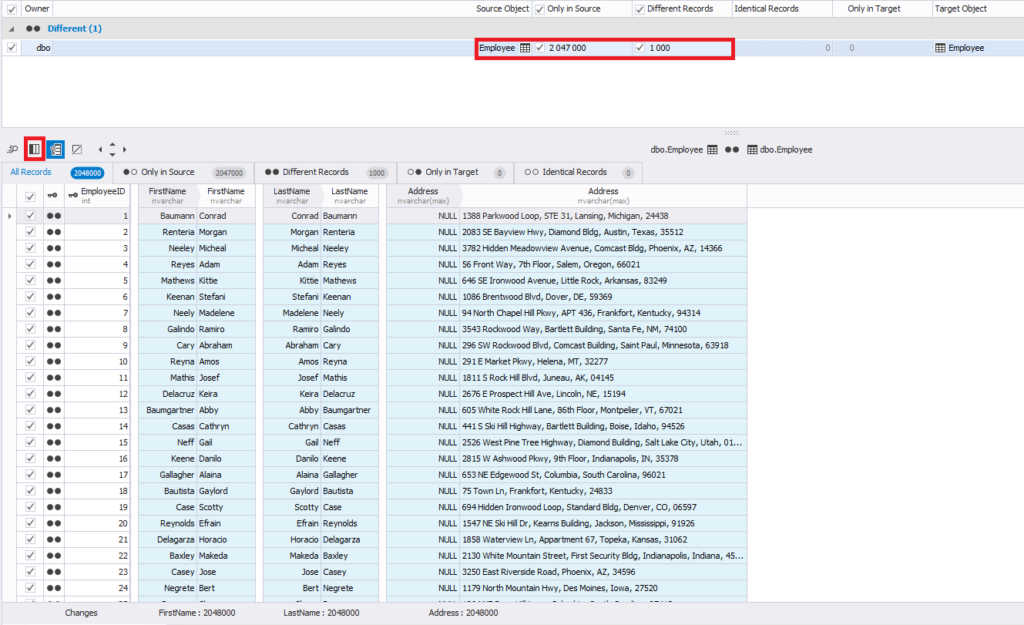
Img.53. Data difference-3
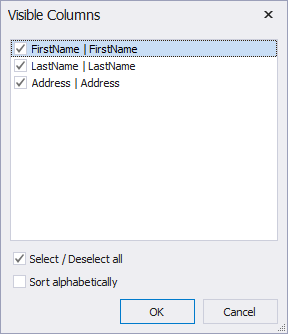
Img.54. Setting visibility and sorting of columns
There is also a Find and Replace option:
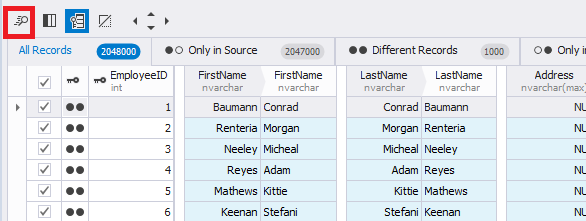
Img.55. Selecting the Find and Replace option
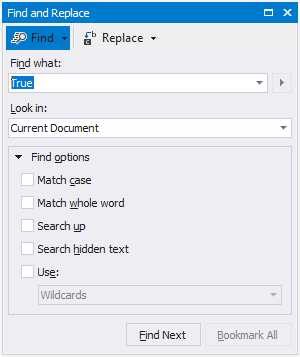
Img.56. Find and Replace
You can use dbForge Search to search by selected data.
You can also use dbForge Data Compare for SQL Server if you need to find out how to compare rows in SQL and perform other precise comparison tasks.
See also: How to compare two MySQL tables
Conclusion
To sum up, we have studied the possible ways of comparing schemas and data of two databases. To illustrate this, we compared schemas and data of the Employee table in the JobEmpl and JobEmplDB databases.
dbForge Schema Compare and Data Compare are Devart tools, included in SQL Tools, that enable us to perform database schema comparison without creating 2 projects for compared databases beforehand. They also enable users to compare database data without creating any extra tables.