
In this article, we are going to export a table from SQL Server to a .csv file using four different tools. Besides, you will learn how to export SQL query results with and without headers to a .csv file.
Contents
- Method 1: Using SQL Server Management Studio
- Method 2: Exporting SQL results to a CSV file with and without headers
- Method 3: Exporting SQL data with PowerShell
- Method 4: Using the BCP tool
- Method 5: Using the GUI tool – dbForge Studio for SQL Server
- Conclusion
Method 1: Using SQL Server Management Studio
One of the most popular tools for exporting tables to a .csv file is, of course, SQL Server Management Studio.
1. In SQL Server Management Studio, connect to a database you want to export a table from.
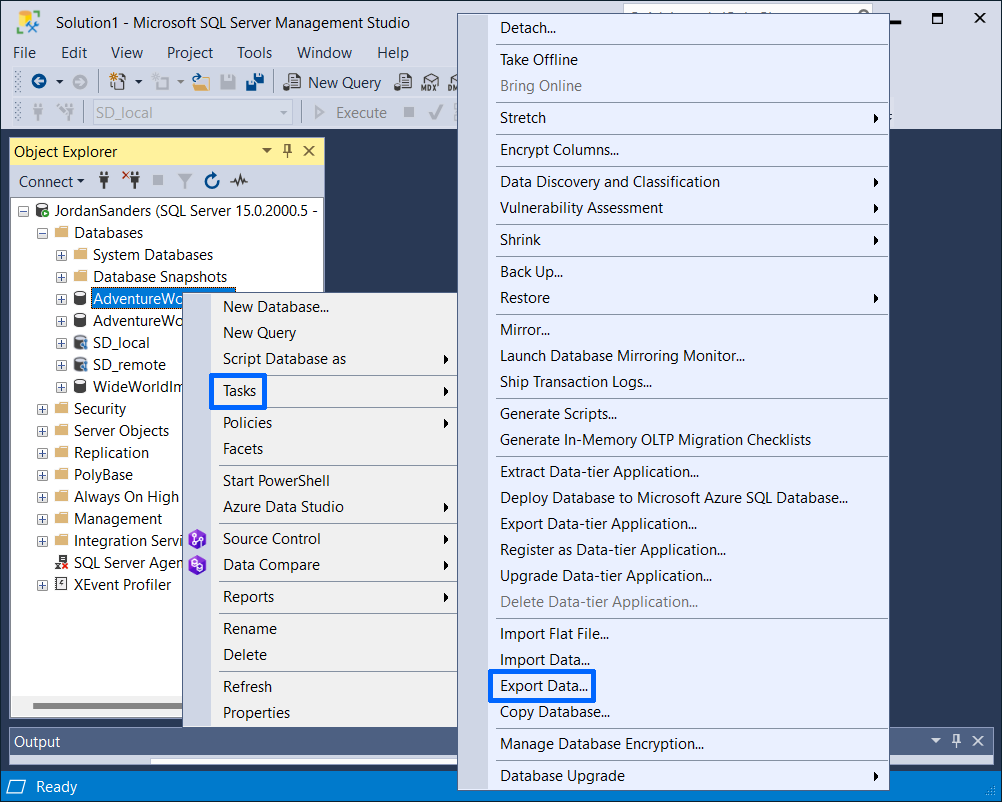
2. Right-click the database and navigate to Tasks > Export Data:
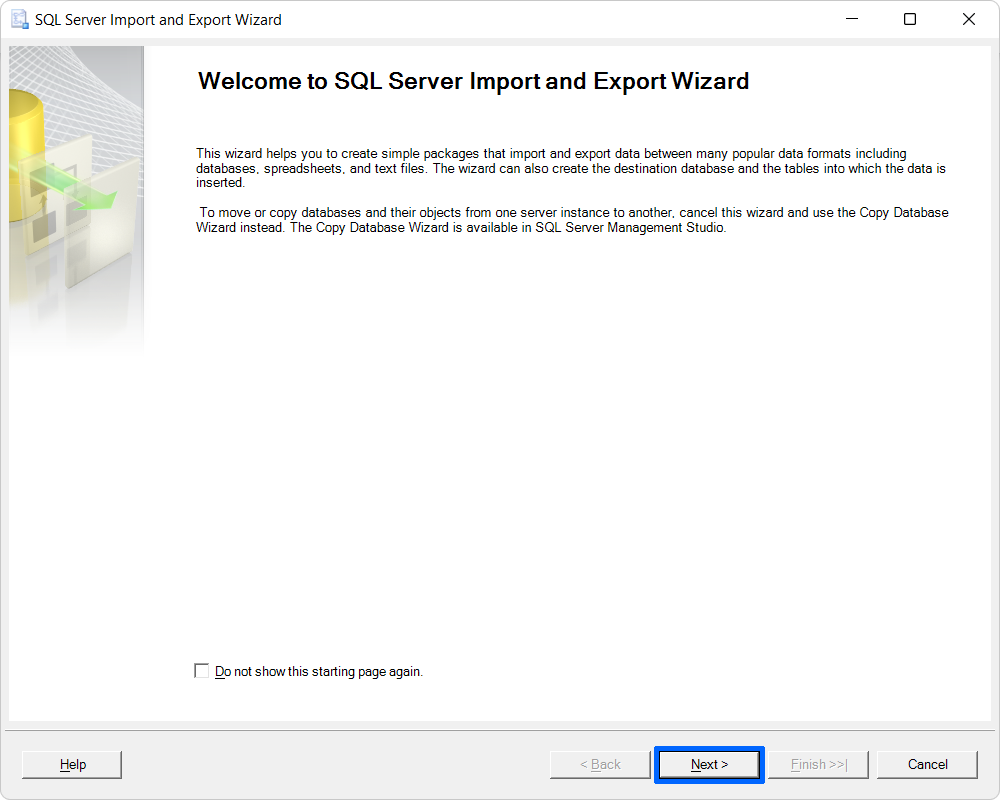
3. In the SQL Server Import and Export Wizard window, click Next:
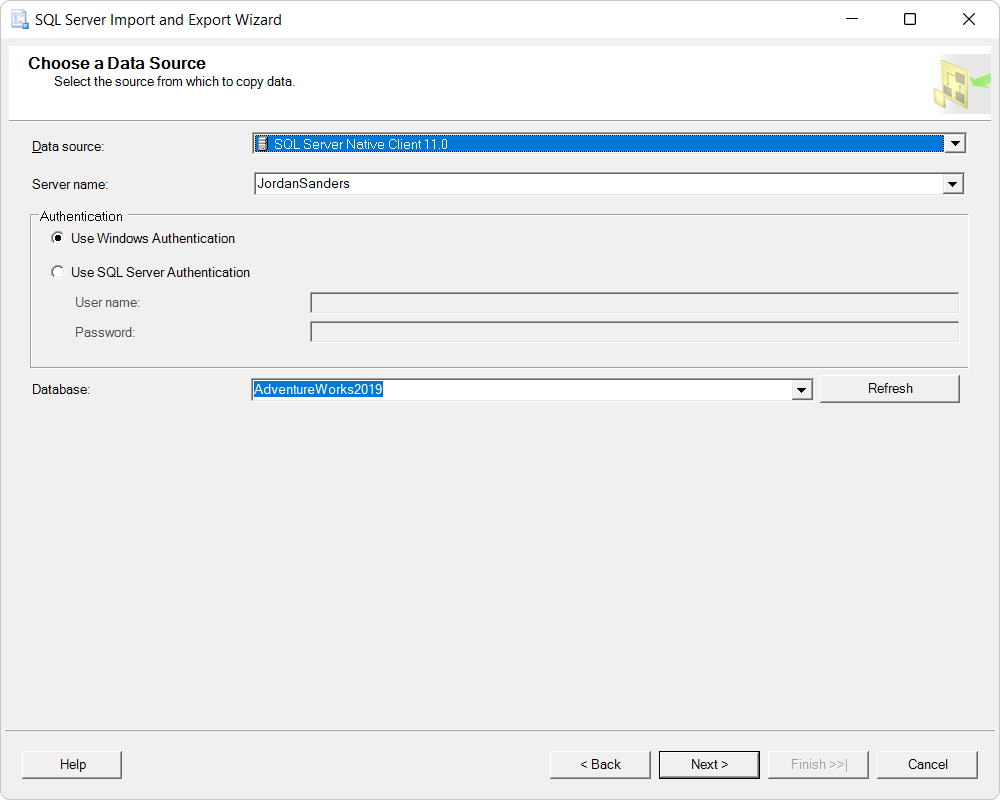
4. Customize the data in the Choose a Data Source window:
- Select SQL Server Native Client 11.0 from the Data source drop-down menu.
- By default, the Server name and Database fields already contain appropriate data.
- Select a required mode in the Authentication block.
After you have adjusted the data, the window will look as follows:
5. Then click Next.
6. Customize the data in the Choose a Destination window:
- Select Flat File Destination from the Destination drop-down menu.
- Enter the file name in the File Name field. To select the file destination path, click Browse, select the path, and create the .csv file.
7. Click Next.
8. Select a required option in the Specify Table Copy or Query window and click Next.
9. Select the table you want to export from the Source table or view drop-down menu and click Next.
10. In the Save and Run Package window, click Next.
11. Read the information in the Complete the Wizard window and click Finish. After the export process has finished, there will be the report:
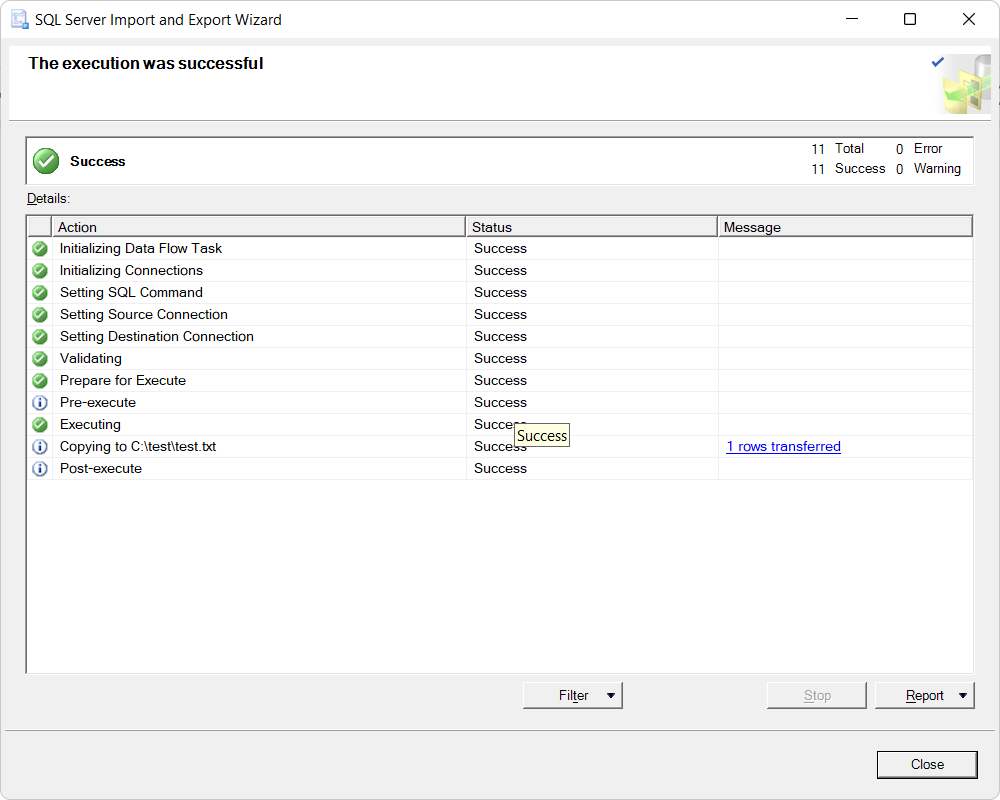
If you want to save the report, you can click Report and select the desired option.
12. Finally, click Close.
Method 2: Exporting SQL results to a CSV file with and without headers
To export SQL queries results to .csv file, at first, you have to run a query in SQL Server Management Studio. Depending on your requirements, the results can be exported without or with headers.
To export without headers:
1. In SQL Server Management Studio, after you have run a query, go to the Results tab.
2. Right-click the result set and click Save Results As:
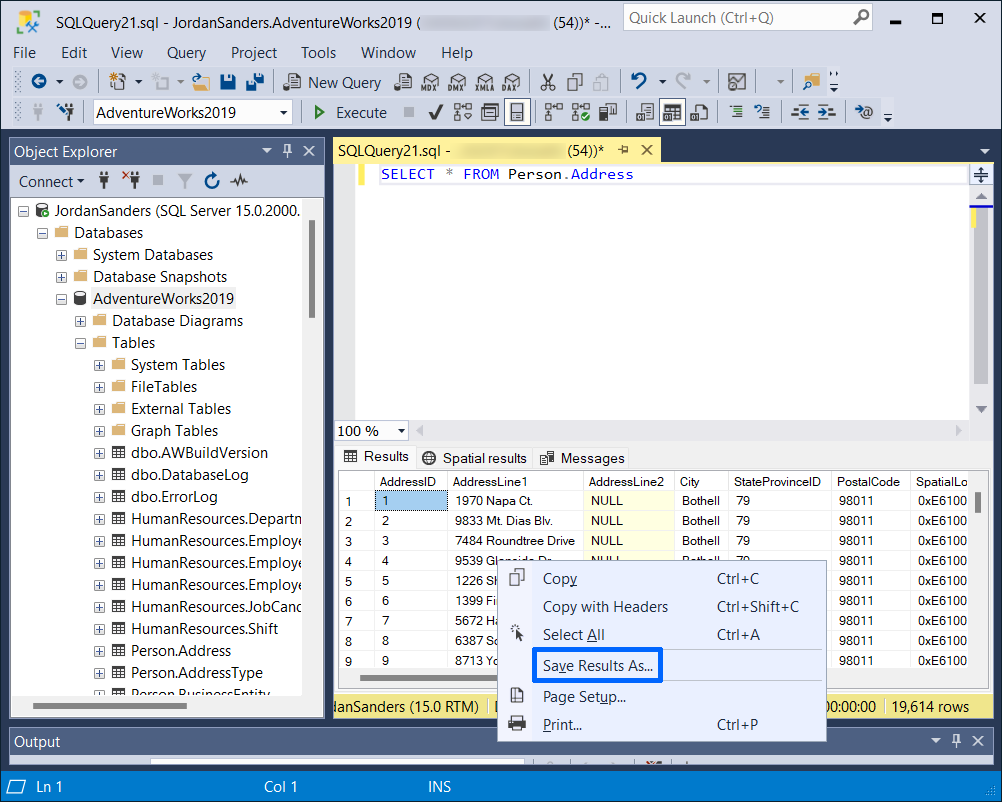
3. Name the file and save it.
To export with headers:
1. Create an empty .csv file on your pc.
2. In SQL Server Management Studio, after you have run a query, go to the Results tab.
3. Right-click the result set and click Select All:
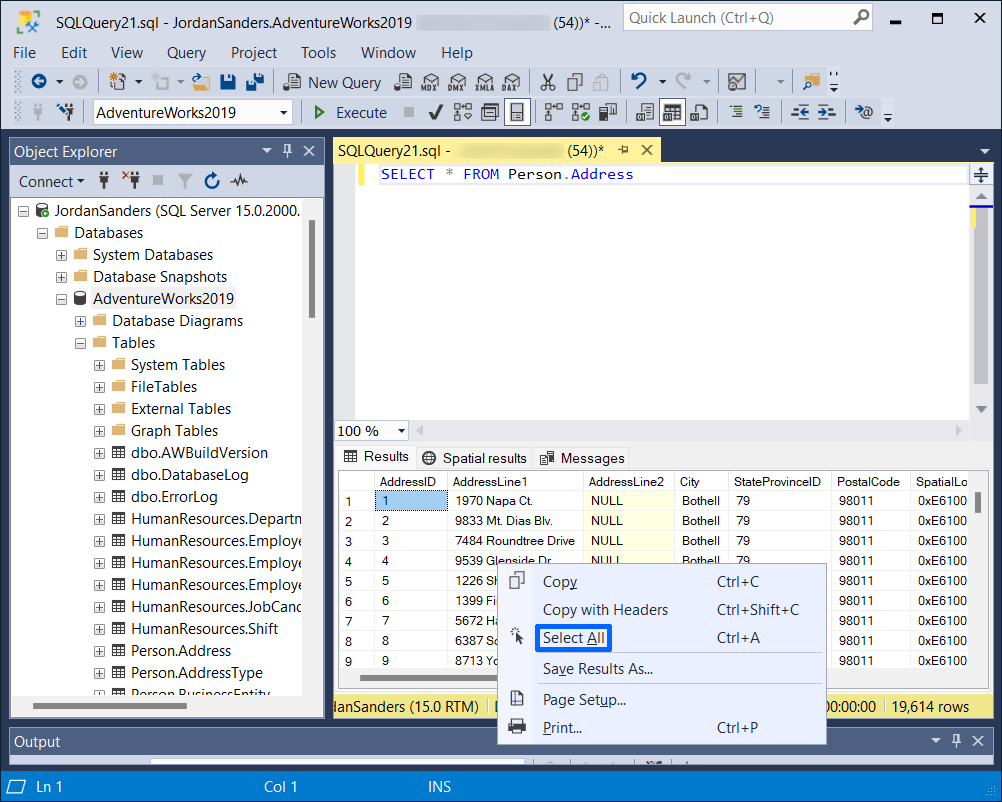
All rows must be highlighted.
4. Right-click the result set again and click Copy with Headers:
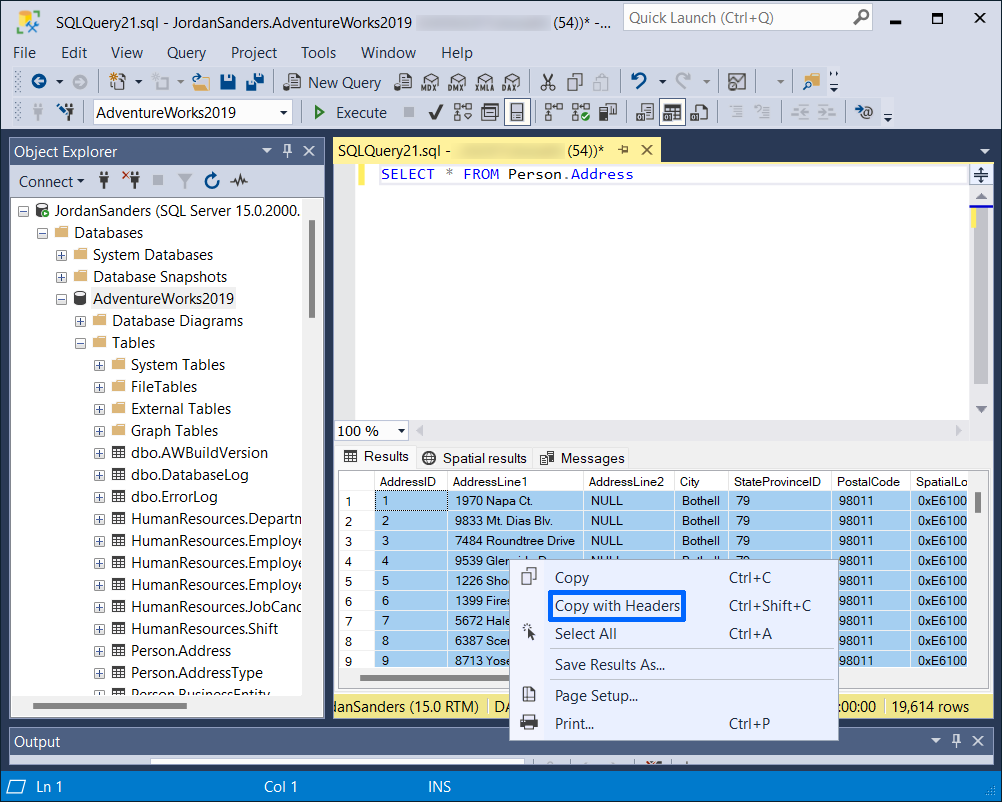
5. Paste the copied content into the .csv file that you have created before.
Interested in export and import formats you can choose while using dbForge Studio for SQL Server? Learn more about database export and import features.
Method 3: Exporting SQL data with PowerShell
To use PowerShell for exporting SQL table to a .csv file, it is required to install an additional module for SQL Server, SqlServer module.
1. In SQL Server Management Studio, connect to a database you want to export a table from.
2. Open PowerShell ISE as Administrator and export data by running the following command:
Invoke-Sqlcmd -Query "SELECT * from <database_name>.<schema_name>.<table_name>;" -ServerInstance "<server_instance>" | Export-Csv -Path "file_ destination_path" -NoTypeInformationWhere:
<database_name>: a database name that contains a table you want to export data from. Value example to enter is AdventureWorks2019.<schema_name>: a schema name of a table you want to export data from. Value example to enter is Sales.<table_name>: a table name you want to export data from. Value example to enter is Store.<server_instance>: a name of SQL Server instance to which to connect.<file_destination_path>: a location where a specified .csv file will be stored. Value example to enter is D:\store.csv.
3. Check the exported .csv by the location that you have specified in <file_destination_path>.
Method 4: Using the BCP tool
BCP (Bulk Copy Program) utility is another one tool that can be used for exporting SQL table data to a .csv file. The utility copes with the task if you need to export to .csv, .xml, .txt files. But if you need a table to be exported, for instance, to .xls file, you will have to search for another tool.
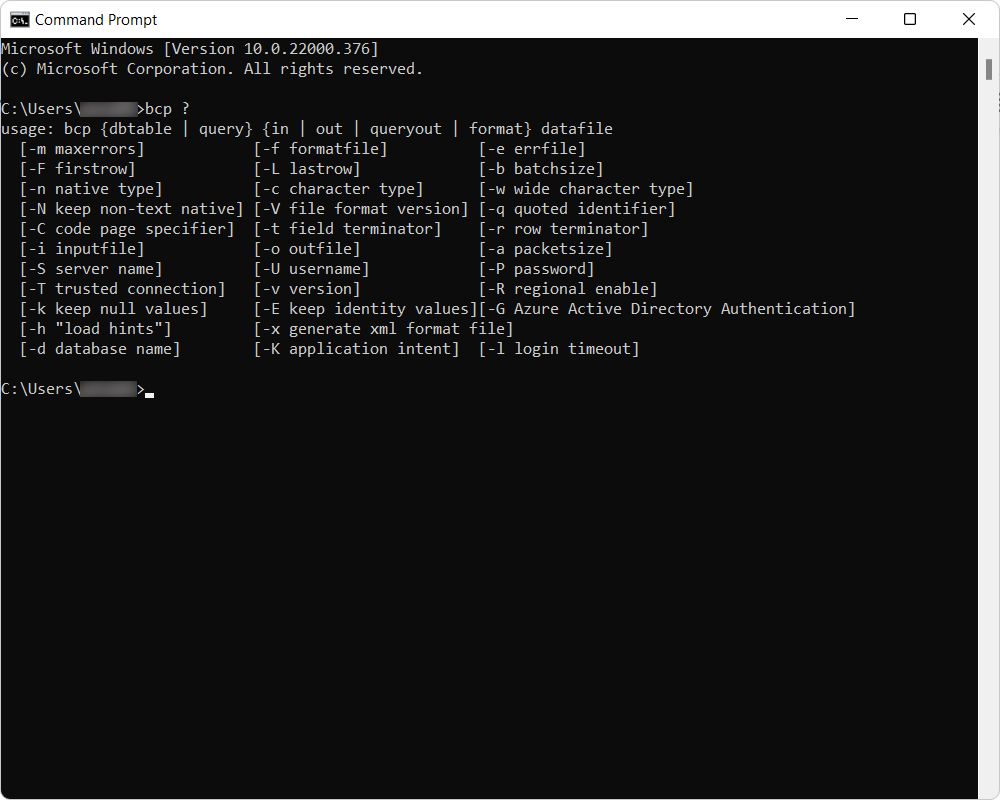
1. First of all, check whether everything works as expected. For this, open Command Prompt and type bcp ?. The output must be the following:
2. To export a table data to a .csv file, run the command below, but adjust the values:
bcp <database_name>.<schema_name>.<table_name> out <file_destination_path> -S<server_instance> -c -t"," -THere is the explanation for each value/argument in bcp command:
| Value/Argument | Explanation |
| database_ name | A database name that contains a table you want to export data from. Value example to enter is AdventureWorks2019. |
| schema_ name | A schema name of a table you want to export data from. Value example to enter is Person. |
| table_ name | A table name you want to export data from. Value example to enter is Address. |
| out | Used for copying data from a database table to a specified .csv file. |
| file_ destination_path | A location where a specified .csv file will be stored. Value example to enter is C:\test\address.csv. |
| -S | Used for specifying SQL Server instance to which to connect. |
| server_ instance | A name of SQL Server instance to which to connect. |
| -c | Used for performing the operation using a character data type. |
| -t | Used for setting the field terminator which will separate each column in a specified .csv file. |
| -T | Used for specifying that the bcp utility connects to
SQL Server instance with a trusted connection (Windows Authentication). Other possible switches are:
-U to connect using SQL Authentication. -P to connect using SQL Server user password. |
3. Check the exported .csv by the location that you have specified in <file_.
destination_path>
Interested in importing and exporting data in SQL Server? Here are the must-read resources to facilitate your workflows:
Method 5: Using the GUI tool – dbForge Studio for SQL Server
dbForge Studio for SQL Server ends a list of tools for exporting SQL data to a .csv file. It has the Export wizard that guides you through all the stages of the export process. The Export wizard contains many different export options to be customized. This makes the export process more optimized.
1. In dbForge Studio for SQL Server, right-click a table you want to export and click Export Data:
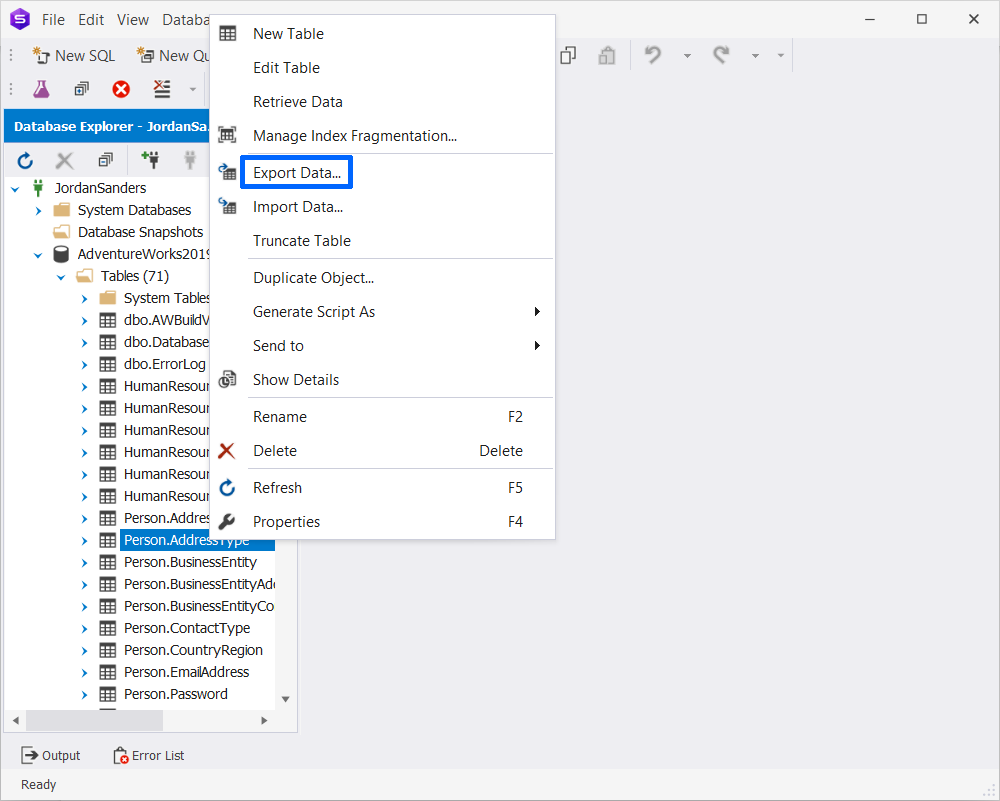
There will open a separate window, Data Export CSV.
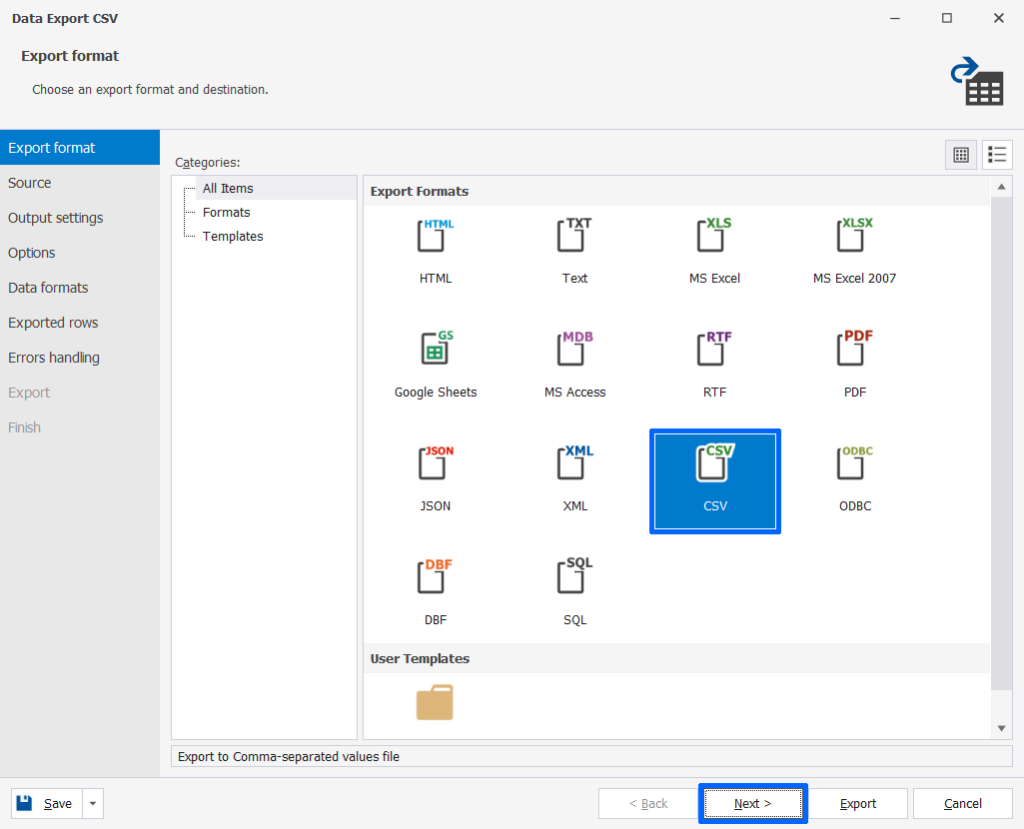
2. In the Export format page, select CSV and click Next:
3. In the Source page, ensure that all data is correct and click Next.
4. In the Output settings page, check a suggested destination path for the .csv file in File name field. If you want to set another location, click three dots next to the field:

Here you can also select the options:
- Append timestamp to the file name: for adding a timestamp to the exported .csv file. If you select the option, the file will have the following name, for example, C:\test\data_<year><month><date><time>.csv.
- Auto delete old files: for deleting old exported files and replacing them with new ones.
- Use compression (Zip): for archiving the file.
5. After you have adjusted all required options in the Output settings page, click Next.
6. In the Options page, customize desired options.
Use Unicode and Show a table header options are selected by default. It means that the file will be exported with UTF-8 encoding and with a displayed table header. If you disable Use Unicode, the file will be exported with Windows encoding.
Quote string field contains a symbol that will be used to frame lines at the beginning and end. You change it if necessary.
Force quote isn’t applied by default, therefore, column values will be quoted if a value contains separators (listed in Field Delimiter), quotas, or line breaks. If you disable the option, all column values will be quoted.
Field separator suggests different variants for dividing fields.
7. When you have finished with the Options page, click Next.
8. Review data in the Data formats page and click Next.
9. In the Exported rows page, Export all rows is enabled by default. If you apply Export a range of rows, you will be able to limit the number of exported rows.
Select an appropriate option and click Next.
10. In the Errors handling page, you are proposed several ways for the export process execution in case there is an error:
- Prompt a use for an action: applied by default. It means that if there is any error, you will be asked to perform some operation for solving it.
- Ignore all errors: allows proceeding with the export process even if there is any error.
- Abort at the first error: implies finishing the export process if there is any error.
In addition to this, you are able to select Write a report to a log file and specify a file for logging.
11. Finally, click Export. After this, you will see several options:
- Open result file: for opening the exported .csv file.
- Open result folder: for opening the folder where the exported .csv file is located.
- Export more: for starting the export process again.
12. Click Finish and check the exported .csv file by the location that you have specified in File name field.
Explore other database design features provided within dbForge in more detail and compare our tool with similar solutions to make the right decision.
Conclusion
In the article, we have provided step by step instructions on how to export SQL table to a .csv file using different tools. It’s up to you which tool to use. But as you can see, dbForge Studio for SQL Server has no limitations and doesn’t need some extra modules in comparison with other mentioned tools. Feel free to download its 30-day trial version and ensure that the tool satisfies all your needs.