The Sakila project was designed to demonstrate all cutting-edge capabilities of dbForge Studio for MySQL such as Database Projects, Database Diagram, Data Reports, Pivot Grid, Visual Query Builder, Code Refactoring, Database Comparison and Synchronization, and also to let a user get acquainted with the mentioned functionality quickly and easily with the help of the prepared examples.
First of all, you should have MySQL server version 5.1 installed locally (localhost).
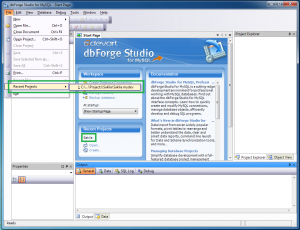
Then launch dbForge Studio for MySQL, open Start Page and click Sakila in the Recent Projects section (or open the Sakila project from the File -> Recent Projects -> Sakila.mydev menu).
After this dbForge Studio will ask you to create two new connections.
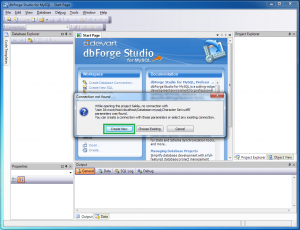
You should create both of them.
In the Project Explorer window the Sakila project with the sakila_sample_local connection will be opened. Delete both newly created connections from the Database Explorer window.
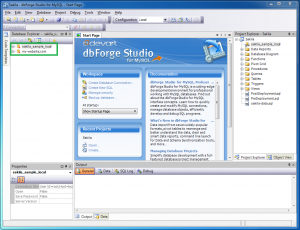
After you delete these two connections, the sakila_sample_local connection will be deleted from the project automatically.
Then you should open dbForge Studio for MySQL and open the Database Explorer window. Create a connection to the available MySQL server in this window. You can specify any of the available databases (for example, test) in the Database field of the Database Connection Properties window. Connect to the server (i. e. open a connection).
Now drag’n’drop the opened connection from the Database Explorer window to the project (i. e. to the Project Explorer window itself, to any branch of the project tree).
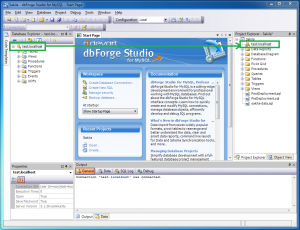
Now we can open the project on the server that is connected with it.
To do this, choose the Deploy Sakila option in the popup menu of the Sakila project or press the Deploy Project Sakila button on the Project toolbar.
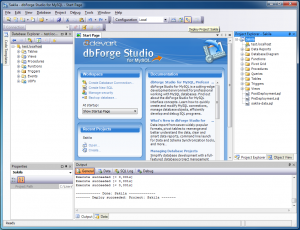
In the Output window of the General tab should be the following log:
—— Deploy started: Project: Sakila, Configuration: Local ——
Validating project syntax…
Validating objects…
Validating references…
Generating project output…
—— Execution started: Sakila ——
Execute succeeded [0,001s]
Execute succeeded [< 0,001s]
…
Execute succeeded [< 0,001s]
4581 rows inserted [0,212s]
Execute succeeded [0,036s]
Execute succeeded [< 0,001s]
6 rows inserted [0,001s]
Execute succeeded [0,020s]
…
Execute succeeded [< 0,001s]
Execute succeeded [< 0,001s]
———— Done: Sakila ————-
——- Deploy succeeded: Project: Sakila ——-
This log indicates that the project was successfully built and deployed to the selected server.
Now you can open the Database Diagram folder of the Sakila project and double click the SakilaDiagram.dbd file. The Connect to MySQL Database window will appear. You should enter a password there. After successfully connecting to the server, the SakilaDiagram.dbd document with the diagram of the Sakila database will open.
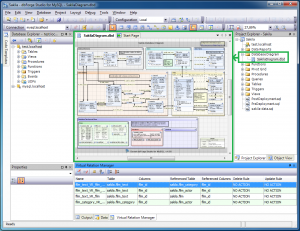
We tried to present all available diagram elements on this diagram to cover all functionality of this visual instrument. Now you can try to change something in this diagram yourself. In addition you can open Virtual Relation Manager that allows to view virtual connections between non-InnoDb tables.
Let’s open the Data Reports folder in the Sakila project and double click on SakilaFilmsCatalogReport.rdb. A ready for viewing and printing data report document will be opened in the Preview tab.
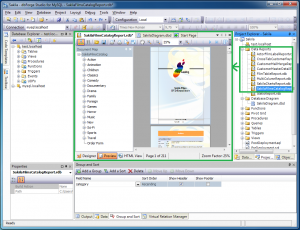
If you switch to the Designer tab of this document, you will be able to edit the contents of this dynamic data report. At the same time the document is opened, the Data Source window that contains controls to manage the data source of the active document.
Now open the Pivot Grid folder in the Sakila project and double click Select_data_for_PivotGrid.sql. After this the Select_data_for_PivotGrid.sql document should be opened and activated.
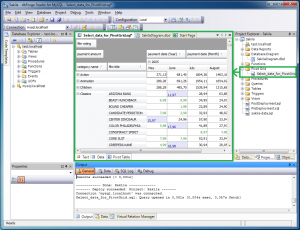
At the same time the document is opened, the Data Source window that contains controls to manage the data source of the active document.
If you switch from the Pivot Table tab to the Text tab, you can view the query itself, and if you switch to the Data tab you will be able to view the result of this query execution as an ordinary, not a pivot, table.
Now let’s open the Queries folder of the Sakila project and double click Actor_Info.sql. A visual diagram of the query will be opened. Click the button with an exclamation mark on the Query toolbar (the Execute button) to execute this query. The result of this query execution will be displayed in the Data window.
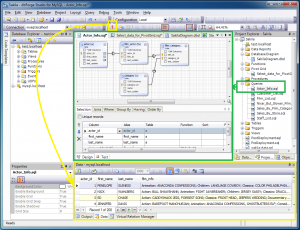
Let’s view the query as a hierarchical tree. To do this, call the popup menu on the diagram of the query and choose the Synchronize Document Outline option. In the opened Document Outline window open all levels to view the query hierarchy. To view the text of the query switch to the Text tab from the Design tab.
Now let’s perform quick renaming of one of the procedure variables, for example. To do this open the Procedures folder in the Sakila project tree and double click rewards_report.sql. In the opened document find the DECLARE last_month_start DATE line and in the popup menu on last_month_start – Rename… change last_month_start to start. After this the renaming preview window will open.
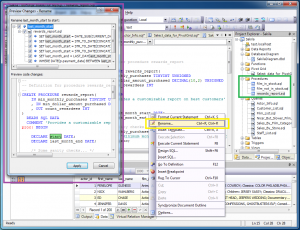
As we can see in this window, the application has found all links to the variable in the procedure body and offers to rename them all. Let’s apply the changes by pressing the Apply button.
Now let’s compare live database that was opened after deploying the project with the project we’ve performed changes in. To do this, press Synchronize Project Sakila With Server on the Project toolbar or choose the corresponding option from the popup menu of the Sakila project in the Project Explorer window tree. The Synchronize Sakila.scomp document will be opened. This document is a visual instrument for comparison and synchronization of objects from the MySQL server database with the Sakila project.
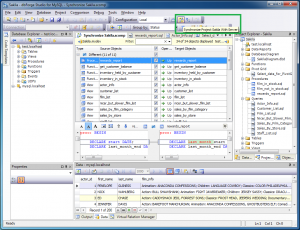
Now let’s apply the changes performed in the project to the database without recreating the latter. To do this, press the Synchronize button or F8 in the .scomp document. After this Synchronization Wizard will open. In this wizard we should press the Synchronize button once more. After this a sql document with the differences (delta translation) between the real state of the live database and the modified project will open. To apply the changes you can simply execute a script. If you refresh the contents of the comparison file by pressing F5, the application will show that the procedures are identical now.
We think that after this explanation you will find many ways to use dbForge Studio for MySQL. As you can see, the application has powerful instruments for database architects, developers, analysts and others.
Check the benefits yourself, download dbForge Studio for MySQL now for free.
