
Data migration plays a vital role in various business scenarios. When your company moves its services from on-premises to the cloud, data migration steps in to transfer data from the old place to a new one. Another common practice may be to replace or upgrade servers or storage equipment. In such cases, data migration ensures a smooth and efficient transfer of data, minimizing downtime and disruptions. In addition, data migration can help maintain database integrity and consistency by ensuring that important information remains accurate and accessible in the new environment.
In the article, we’ll explore how to migrate data from Oracle to a MySQL table using dbForge Studio for MySQL and Devart ODBC driver for Oracle.
In addition, you can refer to our articles to learn more about data migration between different servers:
Contents
- Why migrate from Oracle to a MySQL database?
- Prerequisites
- Advantages of using ODBC
- How to convert Oracle data to MySQL using ODBC
- Install and configure ODBC driver for Oracle
- Connect to the Oracle database using ODBC
- Migrate the Oracle schema to MySQL
- Migrate data from Oracle to MySQL
- Benefits of using dbForge Edge instead of individual Studios
Why migrate from Oracle to a MySQL database?
You may need to migrate data from Oracle to a MySQL database for any reasons, such as:
- MySQL is more cost-effective compared to Oracle. Since MySQL is an open-source database, it does not require associated licensing costs.
- MySQL is simple and flexible due to its straightforward setup process and user-friendly interface. The syntax and commands in MySQL are generally easier to learn and understand compared to Oracle’s more complex and feature-rich PL/SQL language.
- Due to its high-performance capabilities and scalability, MySQL can handle large amounts of data efficiently and maintain optimal database performance simultaneously.
- MySQL benefits from the open-source community that provides a lot of troubleshooting and development support, resources, and documentation. The community often releases updates and improvements to the MySQL database, ensuring it remains reliable and up-to-date.
- MySQL is compatible with multiple platforms and operating systems and can be easily integrated with various programming languages, frameworks, and tools, thus, allowing for easier data migration.
Prerequisites
Migration on a database includes transferring a schema, a table, and data. To accomplish this, we are going to download and use the following tools:
- dbForge Edge
It is a universal suite containing four database IDEs, each of which allows performing database development, management, and administration tasks on different database systems, including Microsoft SQL Server, MySQL, MariaDB, Oracle, PostgreSQL, and Amazon Redshift. The Data Import feature available in all Studios allows users to import data from multiple sources, including the ODBC driver, quickly and easily. - Devart ODBC Driver for Oracle
It is a reliable and simple tool to access Oracle databases from ODBC-compatible tools on 32-bit and 64-bit Windows, macOS, and Linux.
Advantages of using ODBC
Before delving into data migration, let’s take a look at the benefits that developers and organizations can have by using the Devart ODBC drivers:
- Support a wide range of databases, including popular ones like Oracle, MySQL, PostgreSQL, SQL Server, SQLite, and more.
- Use fewer system resources while processing the same level of data within a given timeframe due to minimizing CPU cycles and RAM usage.
- Support various authentication mechanisms and encryption protocols, such as SSL and SSH data encryption, as well as HTTPS tunneling.
- Ensure comprehensive Unicode compliance, enabling effective retrieval and modification of data in multilingual databases, as well as maintaining language integrity.
- Enjoy the cost-effective solution that provides a reliable and feature-rich driver installation package without the need to deploy and configure any additional software. This, in turn, reduces deployment costs drastically.
- Run ODBC drivers on popular operating systems such as Windows, macOS, and Linux.
- Support all the data types, which may be mapped to ODBC data types.
How to convert Oracle data to MySQL using ODBC
To move data from Oracle to a MySQL database using ODBC, you need to follow the steps shown in the Data Migration Plan image.
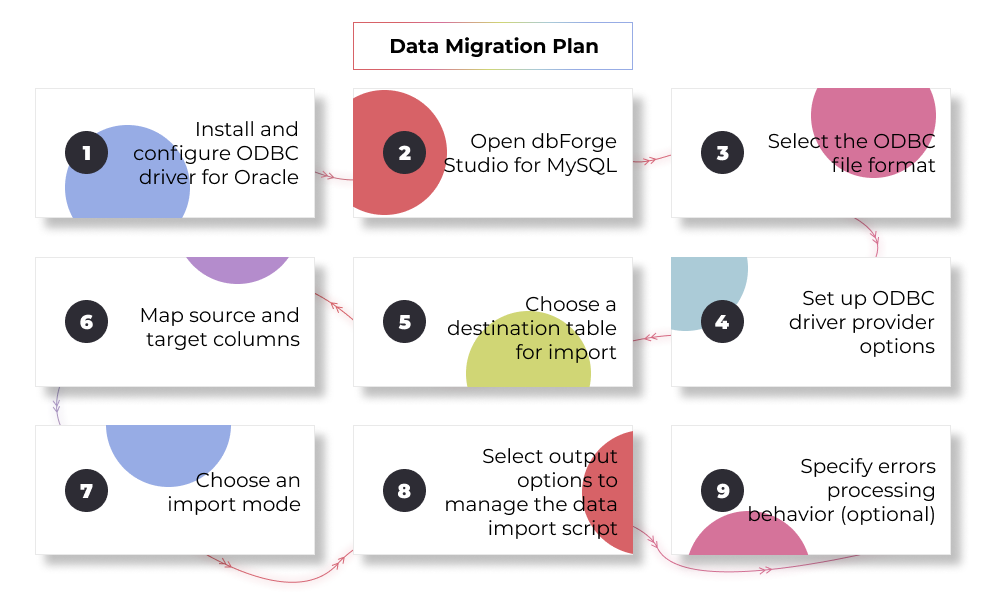
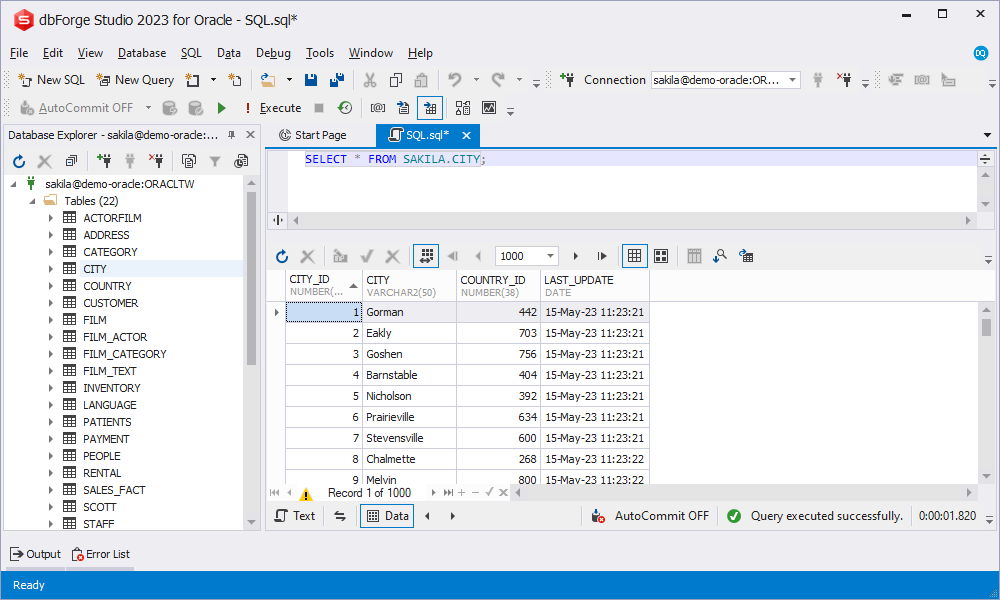
Let us examine each step in detail. Before we start, open dbForge Studio for Oracle and retrieve the data from the Oracle sakila.city table, which will be imported to the MySQL table.
Install and configure ODBC driver for Oracle
To convert Oracle data to MySQL, you need Devart ODBC Driver for Oracle to be downloaded on the machine where the data migration will take place.
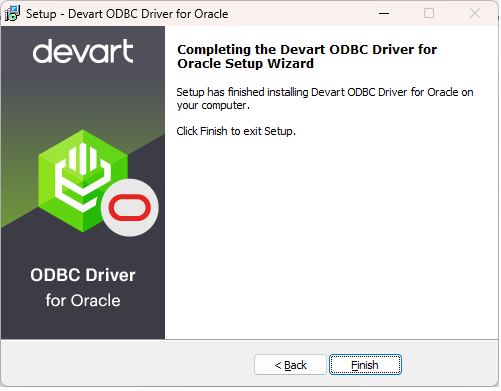
To install the driver, go to the downloads folder and double-click the DevartODBCOracle.exe installation file. In the Setup wizard that opens, follow the steps:
- Click Next to launch the installation.
- Read and accept the License Agreement terms.
- Specify the path to the destination folder where Devart ODBC Driver for Oracle will be installed.
- Select the components to be installed. By default, all options are selected. If you want to exclude some components from the installation, clear the corresponding checkboxes.
- Verify the settings and click Install.
Once done, click Finish to close the Setup wizard.
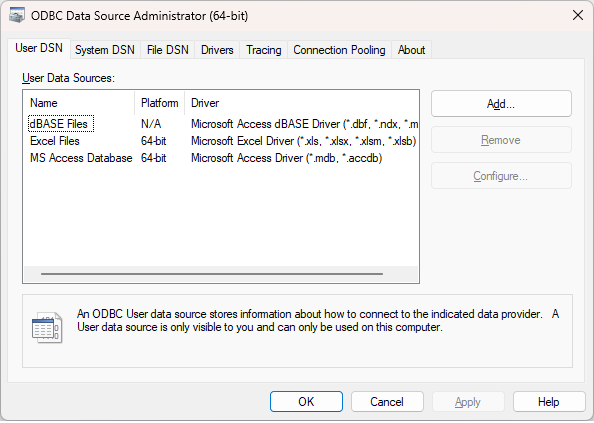
Before proceeding with the data import using the ODBC driver, you need to set up a data source name (DSN) for the ODBC driver in the Data Source Administrator utility. To open it, in the search bar of your machine, type ODBC Data Sources and select it. In our example, we use the 64-bit version of the ODBC Data Source Administrator to create a DSN for our ODBC driver.
As you can see, there are two tabs for the data source names:
- User DSN is accessible to the user who created it in the system.
- System DSN is accessible to any user logged in to the system. If you want to have unique access, go to User DSN.
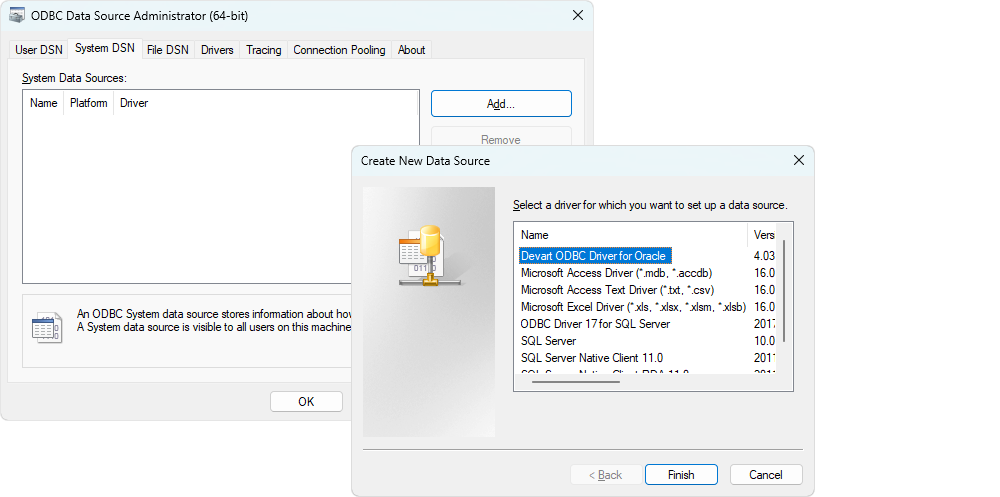
In the example, we go to the System DSN tab and click Add to create a new data source. In the dialog that opens, select Devart ODBC Driver for Oracle and click Finish.
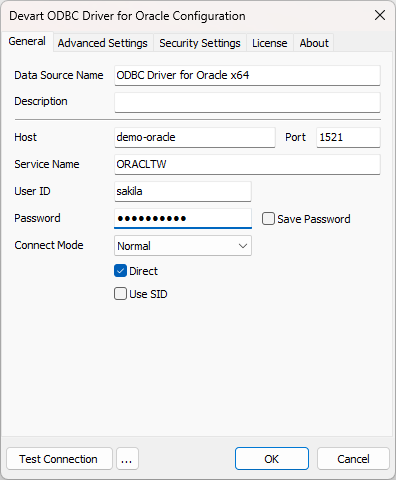
In the Devart ODBC Driver for Oracle Configuration dialog, enter a name for the data source and specify the Oracle host name or IP address, port number, database name, username, and password. Click Test Connection to verify that the connection has been properly installed and configured, and then click OK in the pop-up window. To save the DSN, click OK.
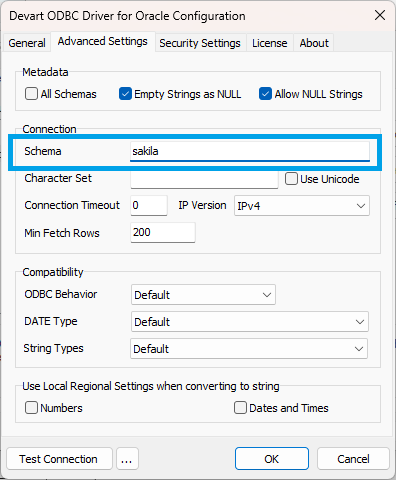
Note: If the connected user has access rights to multiple schemas, all of them will be visible in the Data Import wizard of dbForge Studio for MySQL. However, if you want to display a specific Oracle database in the Studio, navigate to the Advanced Settings tab and specify the database name in the Schema field. Do not forget to click OK to save the changes.
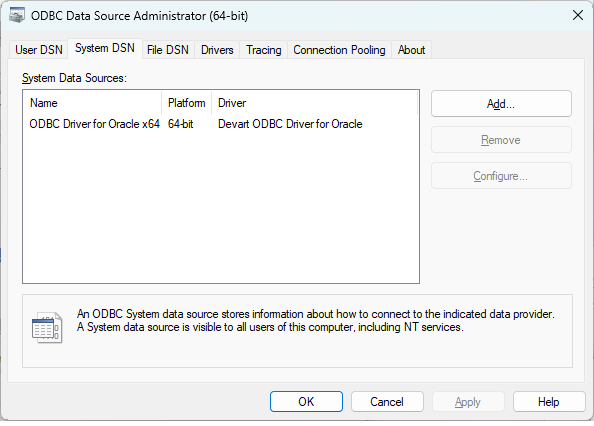
After that, the created DSN will appear on the System DSN tab of the ODBC Data Source Administrator utility.
Connect to the Oracle database using ODBC
Now, we can connect to the Oracle database to migrate data to the MySQL table. Keep in mind that data can be copied either to a new database or the existing one.
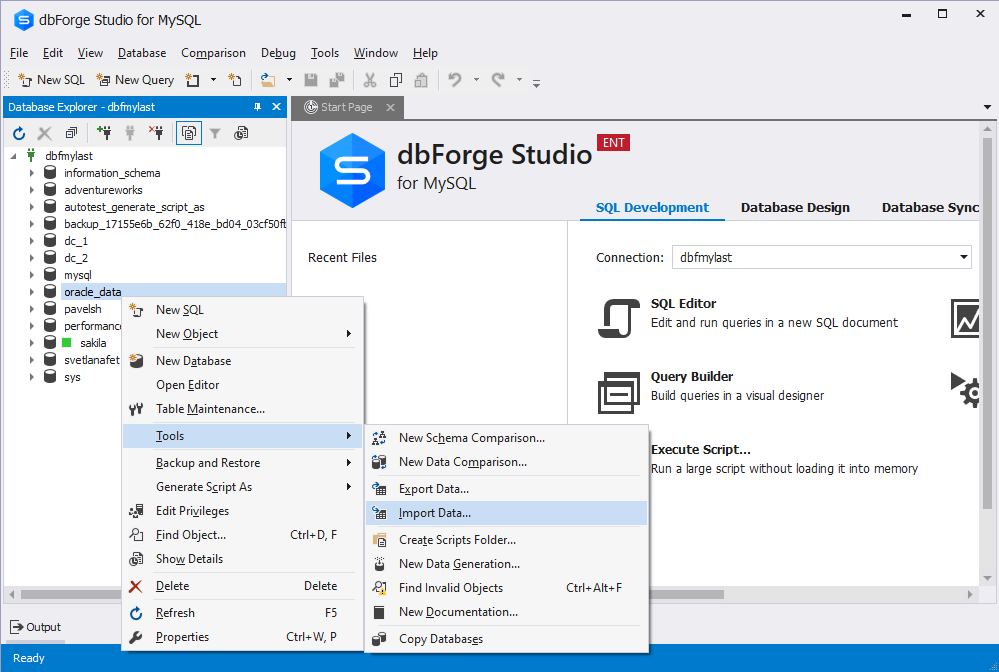
To proceed, open dbForge Studio for MySQL. In Database Explorer, right-click the database to import and select Tools > Import Data.
In the Data Import wizard, select the ODBC source file and click Next.

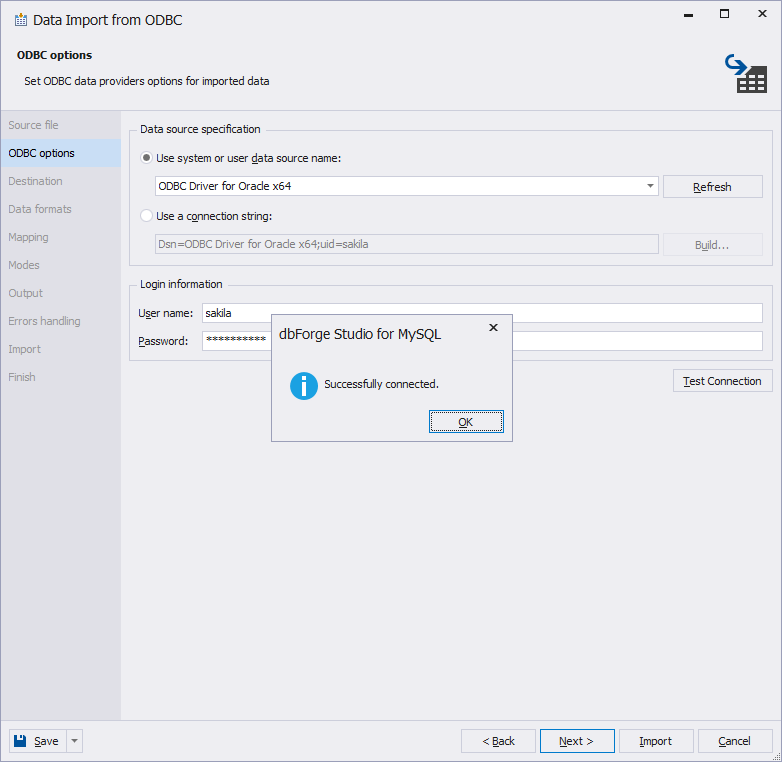
On the ODBC options page, do the following:
- Under Data source specification, select Use system or user data source name and then select the created ODBC driver from the dropdown list.
- Under Login information, enter the username and password to the Oracle server that the ODBC driver is connected to.
- Click Test Connection to verify that the connection has been successfully established. Then, click OK to close the pop-up window.
- Click Next to go to the next page.
Migrate the Oracle schema to MySQL
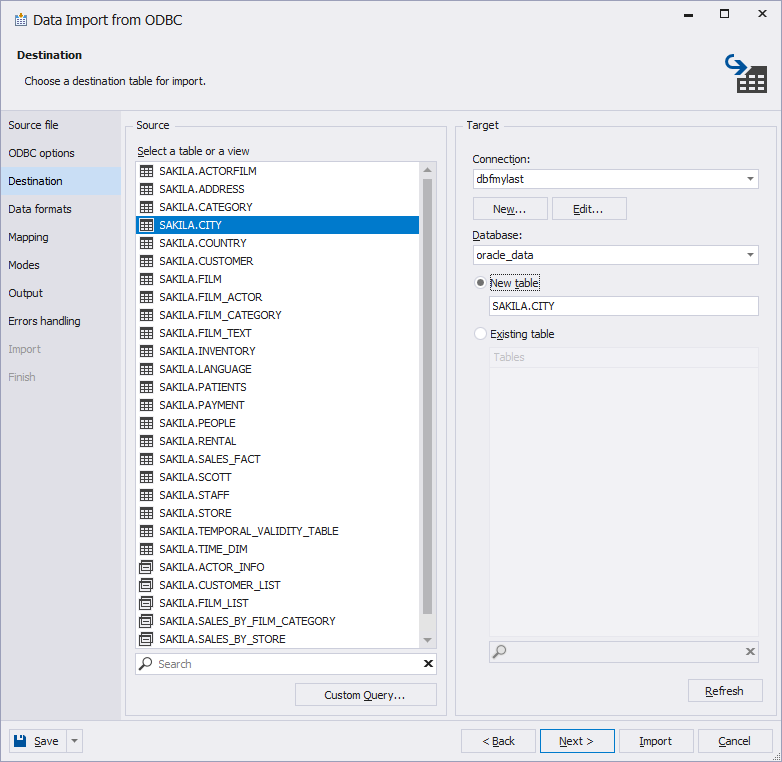
On the Destination page, the Source pane displays the Oracle schema tables to which the connected Oracle username has access rights. The Target pane shows the MySQL server connection, a database, and a table to which the data can be imported.
To import data from Oracle to MySQL, select the source table – sakila.city in our example. The target table will be selected as a new table with the same name by default. You can also copy data to the existing table in the MySQL database by selecting Existing table and then choosing the table from the list.
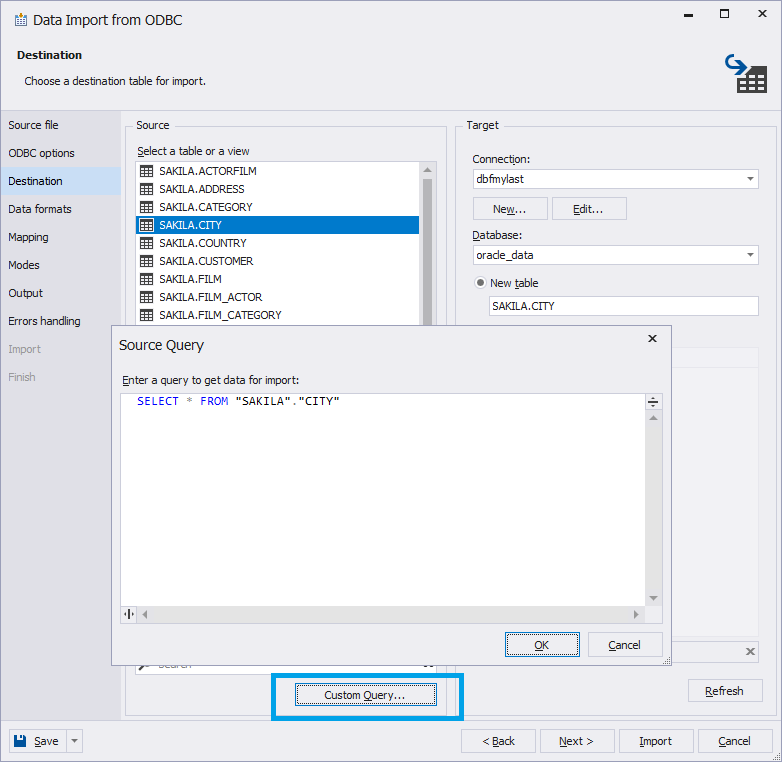
Note: To import specific columns, click Custom Query at the bottom of the Destination page of the Data Import wizard. In the Source Query dialog, enter the query in the text field and click OK to retrieve data for import.
The next step is to switch to the Mapping page where you can configure the data types of the columns. Here you can see the columns with the assigned data types. In addition, you can preview the table with the imported data. Since we are importing the data into a new table, the Studio will automatically create and map all the columns.
However, we can change the data types for the columns in the MySQL table. For example, let’s set an integer type for the City column. To do this, double-click the data type for the required column in the Type column. In the Column Properties dialog, select the INT data type from the Data type dropdown list and click OK to save the changes. Also, you can assign a primary key or unique values.
It is important to note that if you are importing the data to an existing table, only columns with the same names will be mapped; the rest should be mapped manually.

Migrate data from Oracle to MySQL
When we’re done setting up the schema and table, it is time to migrate data to the table. In the Data Import wizard, navigate to the Modes page that displays the following import modes:
- Append: Adds records to the target table.
- Update: Updates a record in the target table with a matching record from the source table.
- Append/Update: Updates a record if it exists in the target table; otherwise, adds a record.
- Delete: Deletes records in the target table that match records in the source table.
- Repopulate: Deletes all records in the target table and repopulate them from the source.
Depending on whether you import data to a new table (as in our example) or to an existing page, the import modes to populate the table will differ. For the data import to a new target table, only the Append mode is available. For the data import to the existing table, all the import modes can be used.
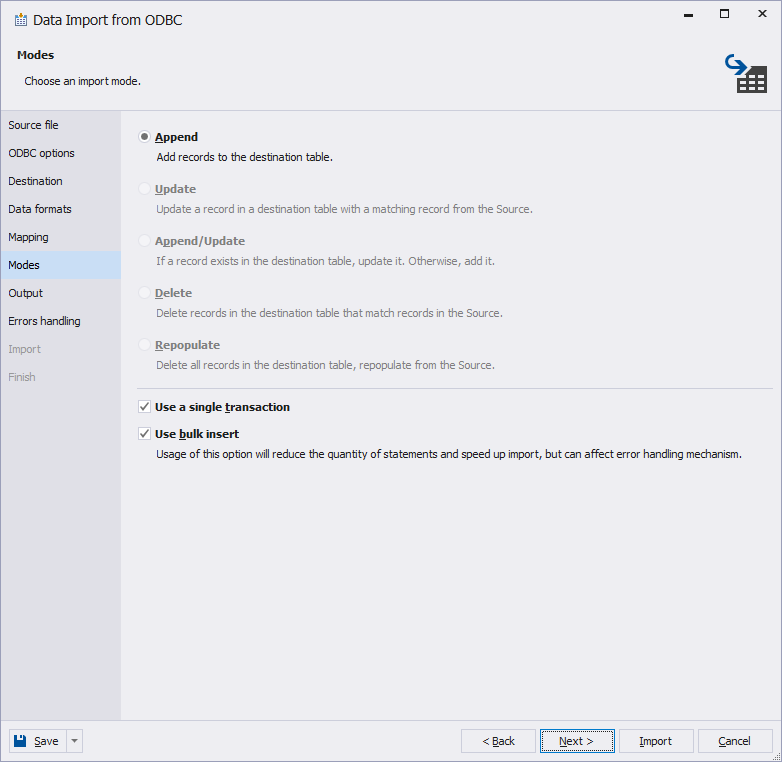
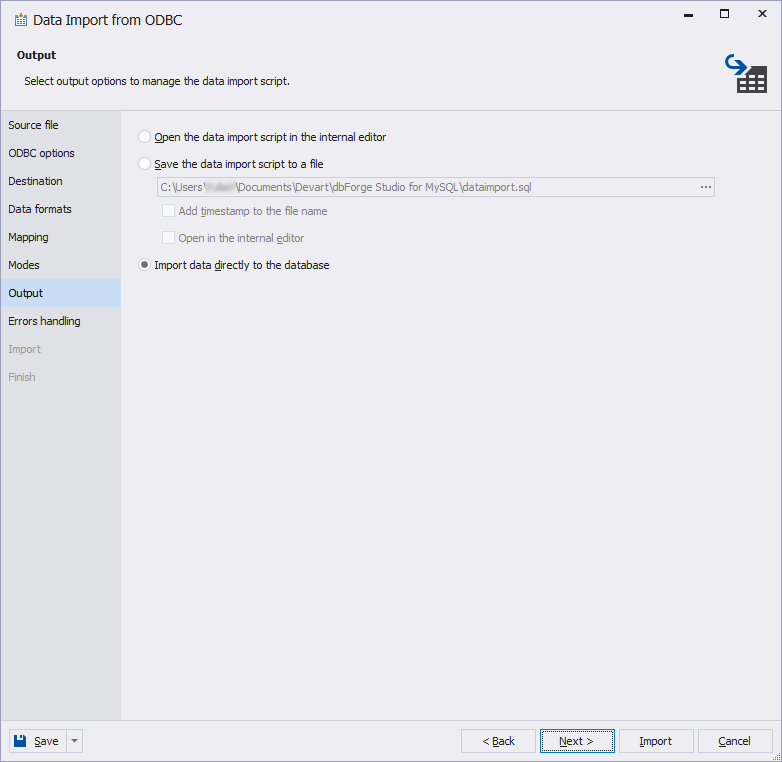
The final step involves selecting the data output method. By default, the Import data directly to the database option is selected, and we recommend keeping it as is. In addition, you can open the data import script in the internal editor for further modifications or review or save the script to a file for later use.
Now, click Import and see the result. When the data import process is completed, you will see the following:
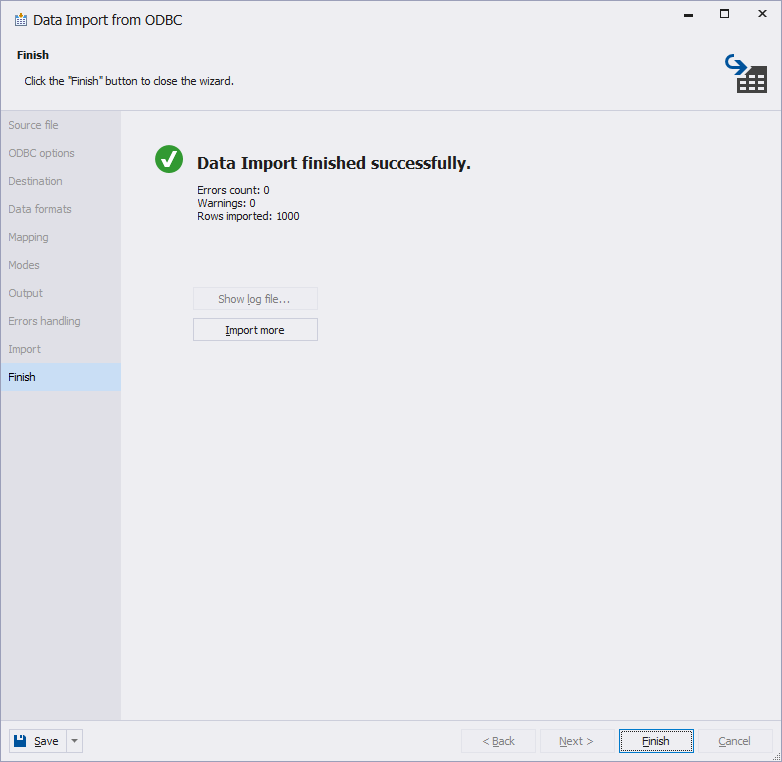
Click Finish to close the wizard.
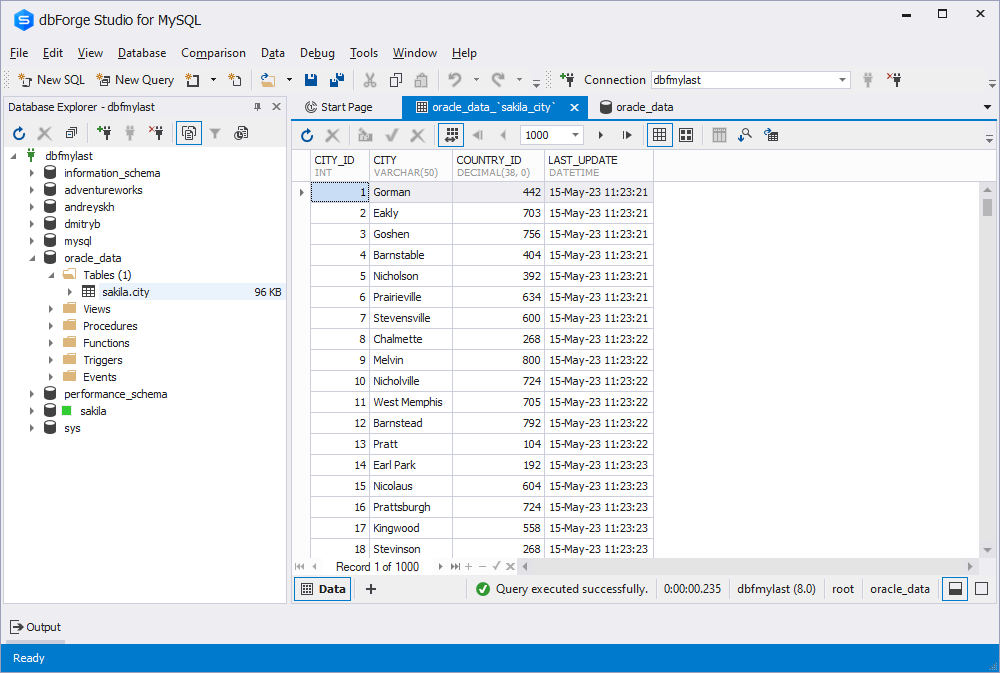
To confirm the successful migration of data from the Oracle table to the MySQL table, let’s navigate back to the Database Explorer. Then, refresh it to ensure that the latest changes are reflected. Expand the oracle_data database, right-click the imported table, and then select Retrieve Data. This action will fetch the data from the MySQL table and verify that the data from the corresponding Oracle table has been imported accurately.
Great! The results grid displays the data imported from the Oracle table.
We have successfully completed the data migration process from Oracle to a MySQL table. However, let’s take a moment to discuss the tools used in this article: dbForge Studio for MySQL and dbForge Studio for Oracle. Both of these tools were installed using the dbForge Edge installation file.
Benefits of using dbForge Edge instead of individual Studios
The common practice for database developers is to work with different database management systems simultaneously. In addition, it would be better if the tools covered a wide scope of features and functionalities and align with your requirements. It is important because your daily routines may include database development, management, deployment, testing, performance optimization, data analysis, reporting, etc.
That’s why dbForge Edge is a perfect choice to have at hand compared to individual dbForge Studios, especially if you frequently work with Oracle DB tools and need a reliable, all-in-one environment.
- dbForge Edge contains four ultimate database IDEs with similarly intuitive user interfaces. This reduces the learning curve and increases productivity as developers can work with familiar tools and workflows, regardless of the underlying database system.
- Each of these IDEs has a comprehensive and versatile range of powerful features including code editing, debugging, schema comparison, data synchronization, data import/export, etc. These tools help developers cope with any database-related tasks, as well as improve the development process and increase code quality.
- The bundle allows working with Microsoft SQL Server, MySQL, MariaDB, Oracle, PostgreSQL, and Amazon Redshift. This integration eliminates the need to switch between different tools and allows for seamless cross-database management.
- The integrated tools encourage collaboration and knowledge sharing among team members working with multiple databases. This allows for easy sharing of database connections, queries, scripts, and other artifacts across the team and streamlines teamwork in a multi-database environment.
- Finally, you will be able to save your costs due to the attractive price of dbForge Edge. The 1-year subscription to the fully-featured Enterprise edition of dbForge Edge costs less than the total price of all four IDEs.
To sum it up, dbForge Edge offers a universal solution for multi-database management, fostering productivity, collaboration, and efficient database development in different database environments.
Conclusion
In the article, we have examined how to migrate data from Oracle to a MySQL table using the ODBC driver. We demonstrated that the combo of dbForge Studio for MySQL, a robust MySQL management tool, and the ODBC driver offers a flexible and simple way to transfer data between different servers. Moreover, the powerful Data Import functionality available in the Studios allows you not only to import data but also to prepare a script for future use or perform testing or debugging operations if needed.
Download a fully-functional 30-day trial version of dbForge Edge to explore the capabilities of every Studio included in the suite.