
By using an ODBC driver to connect to a PostgreSQL database, developers can use a variety of programming languages and tools that support ODBC to interact with the database rather than being limited to just those with native support for PostgreSQL.
So here is the guide on how to use PostgreSQL ODBC Driver easily.
Contents
Download the Devart ODBC driver for PostgreSQL
How to Install PostgreSQL ODBC driver
How to Connect to PostgreSQL using ODBC Driver
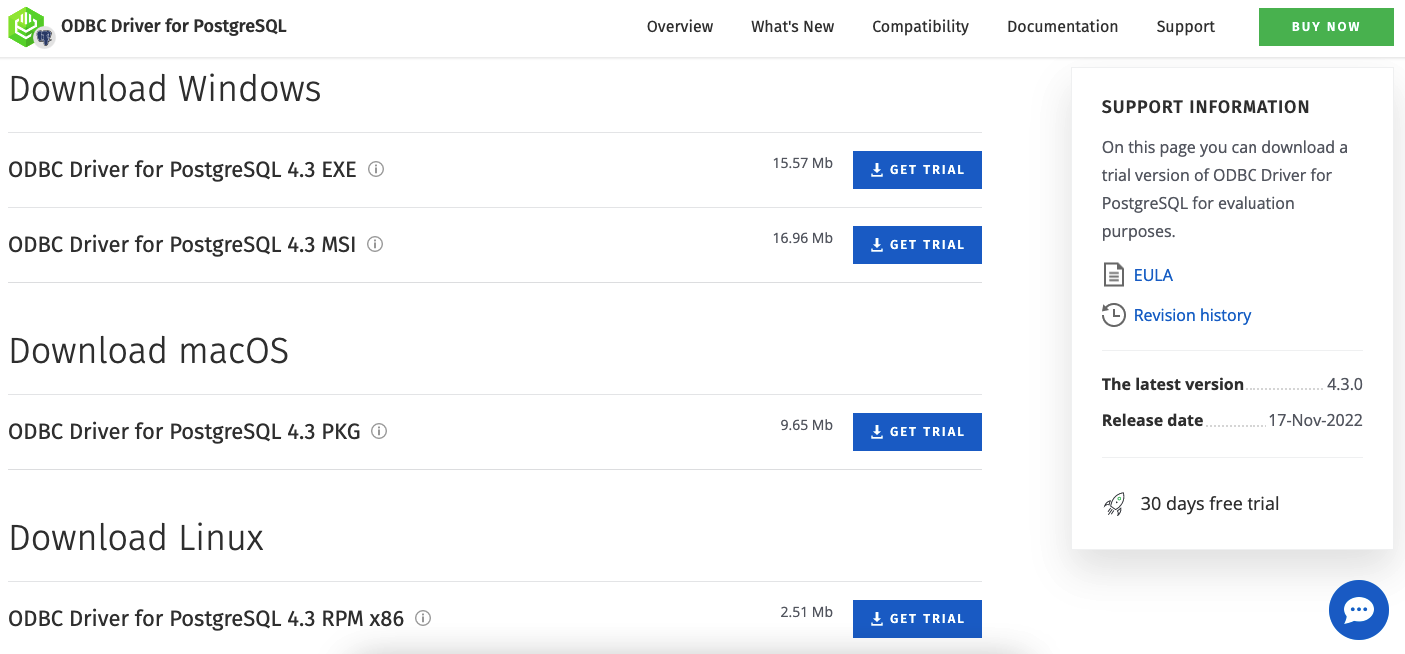
Download the Devart ODBC driver for PostgreSQL
For teams looking to test what could be the best PostgreSQL ODBC connector for production use, Devart provides a fully featured ODBC driver with broad platform and tool support. Devart is a third-party company that provides ODBC drivers for various databases, including PostgreSQL. To download the Devart ODBC driver for PostgreSQL, you can follow these steps:
- Go to the Devart website.
- On the page for the Devart ODBC driver for PostgreSQL, click Download.
- Select the version of the driver that is compatible with your operating system and architecture (32-bit or 64-bit).
- Click Download to start the download process.
- Once the download is complete, run the installer and follow the prompts to install the driver.
- After the installation is complete, you should be able to configure a connection to your PostgreSQL database using the Devart ODBC driver.
Note: The steps and UI may change based on the Devart website updates. It’s better to check the website for the latest steps.
You might also learn about 10 ODBC drivers for marketing, planning and collaboration services.
How to Install PostgreSQL ODBC driver
The PostgreSQL ODBC driver is available for operating systems, including Windows, macOS, and Linux. The Devart ODBC driver manager for PostgreSQL also supports all the major operating systems, and also the driver can be used with various applications and development environments.
The PostgreSQL website also provides its official ODBC driver, which can be downloaded from the site and compiled for use on various operating systems. The official PostgreSQL ODBC driver supports Windows, macOS, and Linux, and it also provides support for many other operating systems, such as various versions of UNIX and BSD.
It is important to note that the steps to install and configure the ODBC driver may vary depending on the operating system and the specific version of the driver that you are using. It’s always better to check the documentation provided by the driver developer or the database vendor to ensure that you are using the correct version of the driver and that you are following the correct installation and configuration steps for your specific operating system.
If you are considering OLEDB or ODBC, we suggest this article.
Installation on Windows
To install the Devart PostgreSQL ODBC driver on a Windows operating system, you can follow these steps:
- Download the Devart ODBC driver for PostgreSQL from the Devart website. Make sure to select the version that is compatible with your operating system (32-bit or 64-bit) and architecture.
- Once the download is complete, double-click on the installer file to start the installation process.
- Follow the prompts to install the driver. You may be asked to agree to the terms and conditions of the license agreement and to specify the location where you want to install the driver.

- Once the installation is complete, you should be able to configure a connection to your PostgreSQL database using the Devart ODBC driver.
- To configure a connection, you can use the ODBC Data Source Administrator tool with Windows. Read more about configuration here. This tool can be accessed by going to Start > Control Panel > Administrative Tools > Data Sources (ODBC).
- In the ODBC Data Source Administrator, you can add a new data source by clicking on the “Add” button. From the list of available drivers, select the Devart PostgreSQL ODBC driver and then follow the prompts to enter the necessary connection details, such as the server name, port number, and database name.
- Once you have configured the connection, you can test it by clicking on the “Test” button. If the test is successful, you should be able to connect to your PostgreSQL database using the Devart ODBC driver. Here is a piece on 4 ways how you can test the connection.

Installation on macOS
- Download the ODBC driver for PostgreSQL from the Devart website. Make sure to select the version that is compatible with your operating system (macOS).
- Once the download is complete, double-click on the disk image file (.dmg) to mount it.
- Double-click on the installer package (.pkg) to start the installation process.
- Follow the prompts to install the driver. You may be asked to agree to the terms and conditions of the license agreement and to specify the location where you want to install the driver.

- Once the installation is complete, you should be able to configure a connection to your PostgreSQL database using the Devart ODBC driver.
- To configure a connection, you can use the ODBC Administrator tool that comes with macOS. This tool can be accessed by going to Applications > Utilities > ODBC Administrator.
- In the ODBC Administrator, you can add a new data source by clicking on the “Add” button. From the list of available drivers, select the Devart PostgreSQL ODBC driver and then follow the prompts to enter the necessary connection details, such as the server name, port number, and database name.
- Once you have configured the connection, you can test it by clicking on the “Test” button. If the test is successful, you should be able to connect to your PostgreSQL database using the Devart ODBC driver.
We also recommend to read about Salesforce ODBC connectors advantages over cloud tools.
Installation on Linux
- Download the ODBC driver for PostgreSQL from the Devart website. Make sure to select the version that is compatible with your operating system (Linux).
- Once the download is complete, extract the archive file to a directory of your choice.
- Navigate to the directory where you have extracted the archive file.
- Run the installer script, typically named “install.sh”. You may need to make the script executable first by running the following command:
chmod +x install.sh- Run the installer script with administrative privileges. On most Linux systems, you can do this by running the following command:
sudo ./install.sh- Follow the prompts to install the driver. You may be asked to agree to the terms and conditions of the license agreement and to specify the location where you want to install the driver.
- Once the installation is complete, you should be able to configure a connection to your PostgreSQL database using the Devart ODBC driver.
- To configure a connection, you can use the unixODBC tools with most Linux distributions. This can include the odbcinst and isql commands.
- In the unixODBC tools, you can add a new data source by editing the appropriate configuration files. The exact steps for doing this will depend on your Linux distribution and the version of unixODBC that you are using.
- Once you have configured the connection, you can test it using the isql command. If the test is successful, you should be able to connect to your PostgreSQL database using the Devart ODBC driver.
How to Connect to PostgreSQL using ODBC Driver
There are several ways of connecting to PostgreSQL databases, using the standard psql utility and GUI tools. One more connecting option is via the Devart ODBC driver on different operating systems, including Windows, macOS, and Linux. The Devart ODBC driver for PostgreSQL provides support for different platforms, so you can use the same driver to connect to PostgreSQL database management systems on different operating systems.
To connect to PostgreSQL using the Devart ODBC driver, you need to follow the installation instructions for your specific operating system, configure a connection to your PostgreSQL database, and then use the connection in your application to connect to the database management systems and perform various database operations.
Note: The exact steps for installation and connection configuration may vary depending on the version of the Devart ODBC driver and the operating system you are using. It’s better to check the Devart website for the latest instructions.
Windows Configuration
To configure a connection to a PostgreSQL database using the Devart ODBC driver on Windows, you can follow these steps:
- Open the ODBC Data Source Administrator tool. You can do this by going to Start > Control Panel > Administrative Tools > Data Sources (ODBC).
- In the ODBC Data Source Administrator tool, click on the “System DSN” tab and then click on the “Add” button to add a new data source.
- From the list of available drivers, select the Devart PostgreSQL ODBC driver and then click on the “Finish” button.
- In the “Create a New Data Source” wizard, enter a name for the data source and then enter the connection details, such as the server name, port number, database management systems name, username, and password.
- Once you have entered the connection details, click on the “Test” button to test the connection. If the test is successful, you should see a message indicating that the connection was successful.
- If the test is successful, click the “OK” button to save the connection and close the wizard.
- You can now use the data source you created in your application to connect to the PostgreSQL database.
You can read even more about configurations here.
Linux Configuration
1. Install the unixODBC tools. On most Linux distributions, you can do this using the package manager for your distribution.
2. Create an ODBC data source configuration file. This file is usually located in the /etc/odbc.ini directory. You can create the file using a text editor.
3. In the ODBC data source configuration file, add the following information:
[DataSourceName]
Driver = Devart PostgreSQL ODBC Driver
Server = server_name
Port = port_number
Database = database_name
Username = username
Password = password
4. Replace “DataSourceName” with a name for your data source, and replace the other values with the connection details for your PostgreSQL database.
5. Save the ODBC data source configuration file.
6. Use the odbcinst command to install the Devart ODBC driver for PostgreSQL. You can do this by running the following command:
odbcinst -i -d -f /path/to/odbcinst.iniReplace “/path/to/odbcinst.ini” with the path to the odbcinst.ini file that comes with the Devart ODBC driver for PostgreSQL.
7. Use the isql command to test the connection to your PostgreSQL database. You can do this by running the following command:
isql DataSourceName username password Replace “DataSourceName” with the name of the data source you created, and replace “username” and “password” with the appropriate values.
8. If the test is successful, you should be able to connect to your PostgreSQL database using the Devart ODBC driver.
Note: The steps and the commands may change based on the Devart website updates. It’s better to check the website for the latest steps.
MacOS Configuration
1. Install the unixODBC tools. On macOS, you can do this using the Homebrew package manager by running the following command:
brew install unixodbc2. Create an ODBC data source configuration file. This file is usually located in the /usr/local/etc/odbc.ini directory. You can create the file using a text editor.
3. In the ODBC data source configuration file, add the following information:
[DataSourceName]
Driver = Devart PostgreSQL ODBC Driver
Server = server_name
Port = port_number
Database = database_name
Username = username
Password = password
Replace “DataSourceName” with a name for your data source, and replace the other values with the connection details for your PostgreSQL database management systems.
- Save the ODBC data source configuration file.
- Use the odbcinst command to install the Devart ODBC driver for PostgreSQL. You can do this by running the following command:
odbcinst -i -d -f /path/to/odbcinst.iniReplace “/path/to/odbcinst.ini” with the path to the odbcinst.ini file that comes with the Devart ODBC driver for PostgreSQL.
- Use the isql command to test the connection to your PostgreSQL database. You can do this by running the following command:
isql DataSourceName username password Replace “DataSourceName” with the name of the data source you created, and replace “username” and “password” with the appropriate values.
- If the test is successful, you should be able to connect to your PostgreSQL database using the Devart ODBC driver.
List of Compatibility
The Devart ODBC driver for PostgreSQL provides compatibility with third-party tools and platforms. Here is the full list of some of the used tools:
| Application Development Tools | Database Management Systems | BI & Analytics Software | Office Software Suites |
| Adobe ColdFusion Embarcadero Delphi & C++ Builder FileMaker Lazarus Microsoft Visual FoxPro Microsoft Visual Studio Omnis Stud PHP PowerBASI Python | Aqua Data Studio dbForge StudiodBeaver EMS SQL Management Studio Informatica Cloud RazorSQL SQL Server Data Tools SQL Server Management Studio SQL Server Reporting Services | Alteryx DBxtra Dundas B IBM SPSS Statistics MicroStrat Power BI Qlik Sense QlikView RStudio SAP Crystal Reports SAS JMP Tableau TARGIT TIBCO Spotfire | LibreOffice Microsoft Access Microsoft Excel OpenOffice StarOffice |
Conclusion
Connecting to a PostgreSQL database using an ODBC driver is a relatively straightforward process, but the specific steps you need to follow will depend on your operating system and the ODBC driver you are using.
With the Devart ODBC driver for PostgreSQL, you can connect to your PostgreSQL database management systems from a wide range of third-party tools and platforms, including Microsoft Excel, Microsoft Access, Microsoft Power BI, Tableau, QlikView, Oracle Data Integrator (ODI), Informatica PowerCenter, and Talend.
Overall, connecting to PostgreSQL via an ODBC driver is a convenient and flexible way to access your data, as long as you have the necessary technical knowledge and follow the correct steps.