
You can connect to MySQL Server using the MySQL Command-Line Client or tools with graphical user interfaces. In this article, we consider each method in detail.
How to connect to MySQL using the MySQL Command-Line Client
How to connect to MySQL using dbForge Studio for MySQL
How to connect to MySQL using MySQL Workbench
How to connect to MySQL using Sequel Ace
How to connect to MySQL using the Command-Line Client
In the first article of our series, we provided a detailed walkthrough outlining how to install MySQL Server on Windows. This guide builds on your MySQL server being up and running.
MySQL Command-Line Client is the default CLI utility included with every MySQL installation. This solution allows you to perform standard operations such as connecting to the database, creating, editing, and deleting databases and tables, retrieving and filtering data, etc.
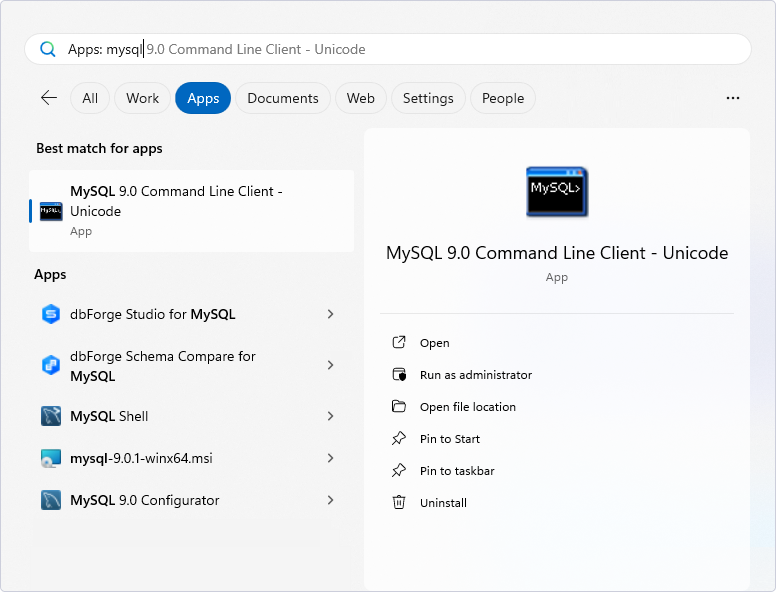
By default, MySQL Command-Line Client is installed together with the MySQL Server. To check if you have it on the machine, search for it in the Apps section (we are using Windows 11, if you have a different Windows version, search for this utility using the standard methods):
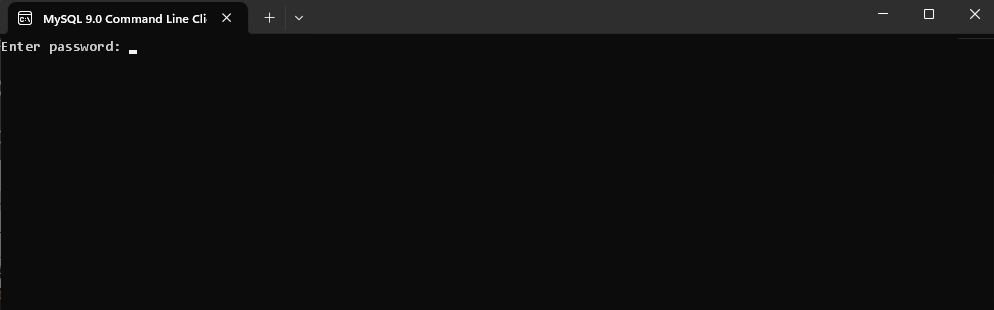
Launch the MySQL Command-Line Client. You will be asked to enter the root user password you set during the MySQL installation. It is necessary to connect to your MySQL server.
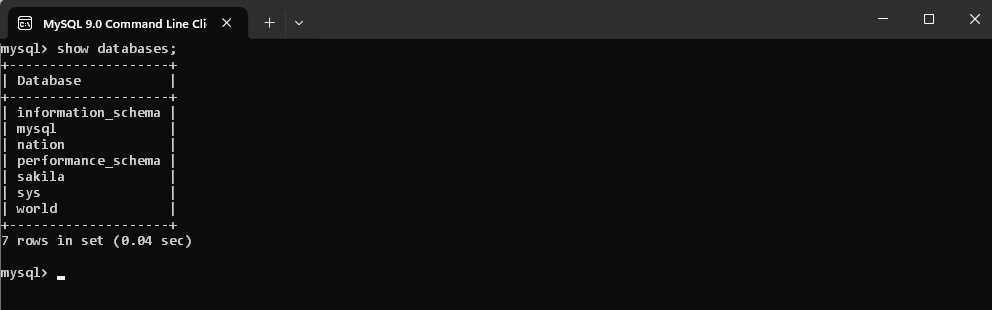
After successfully connecting to the MySQL server, you can execute commands.
Assume that you want to check the list of databases on the server. Execute the SHOW DATABASES command:
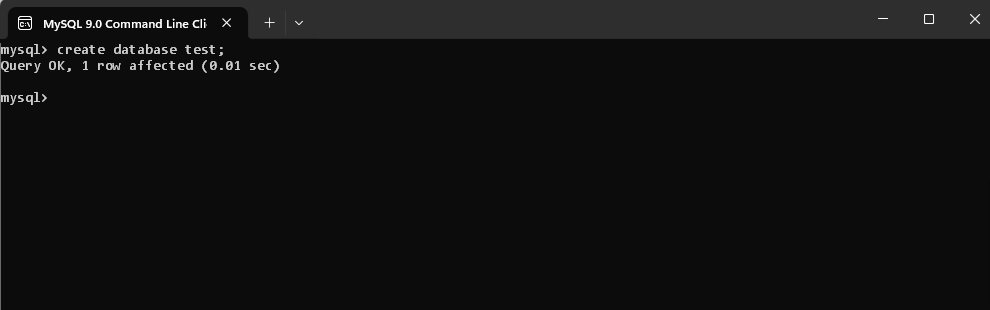
You can create a new database with the help of the CREATE DATABASE command:
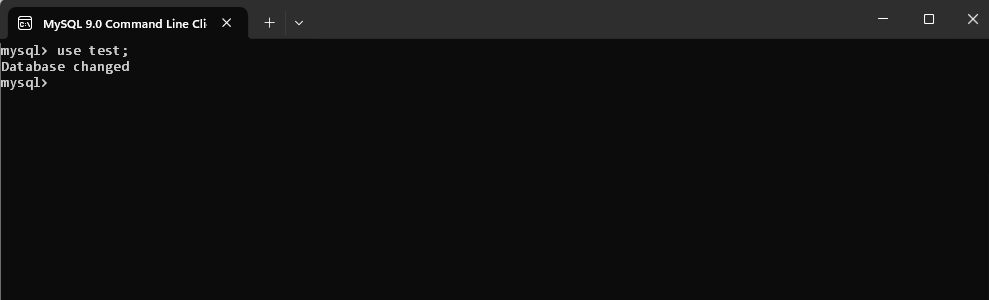
To connect to a specific MySQL database and work with it, execute the USE database command and specify the name of the database you want to access:
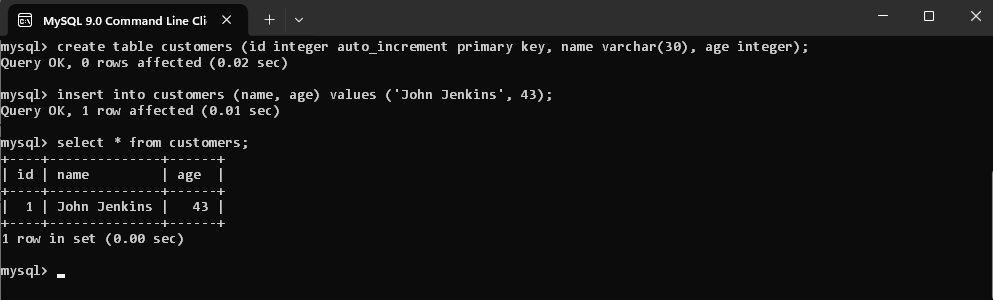
You can create a new table and then populate it with data using the CREATE TABLE and INSERT INTO commands:
Finally, when all tasks you wanted to perform during this session are complete, type QUIT and click Enter to leave the MySQL client.
How to connect to a MySQL database with a GUI
Graphical user interface (GUI) tools are increasingly replacing command-line tools due to their ease of use. These tools simplify database operations by offering a visual mode, significantly reducing the learning curve. As a result, users can perform essential database tasks without needing to write code, relying on buttons, controls, and drag-and-drop functionality.
Even experienced database professionals with strong SQL skills are turning to GUI tools more often. Such tools help them speed up workflows and reduce manual routine tasks. Advanced solutions like dbForge Studio for MySQL, for instance, offer robust scheduling and automation capacities, saving the users’ time and letting them focus on more challenging and essential tasks instead.
Can GUI tools connect to MySQL databases? Absolutely. Since GUI tools are designed to handle various database-related tasks, connecting to databases is a fundamental feature. Let’s explore how to connect to databases using popular tools like dbForge Studio for MySQL and MySQL Workbench.
How to connect using dbForge Studio for MySQL
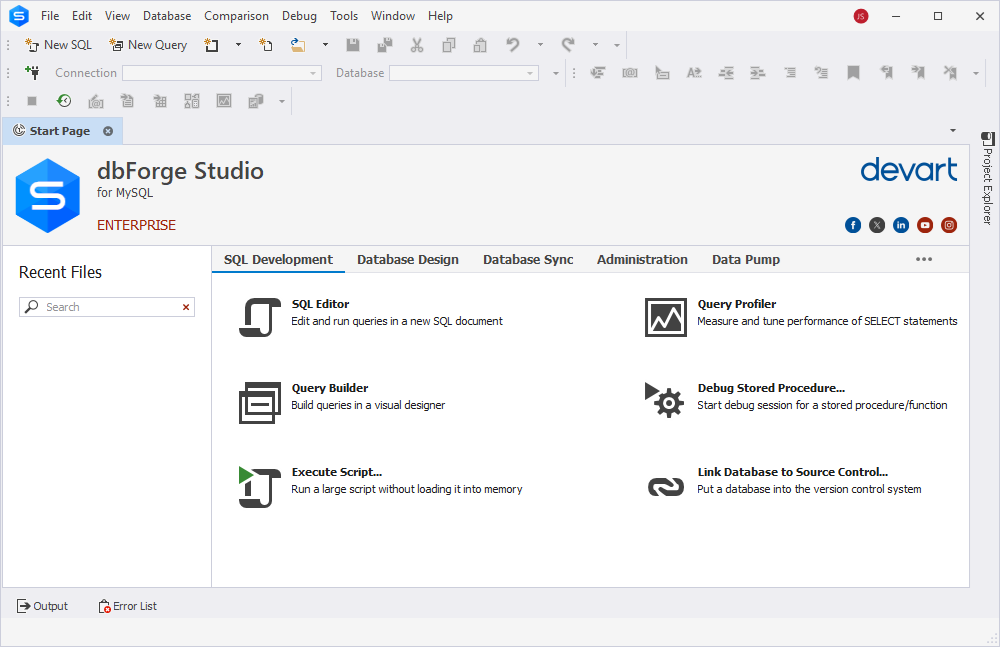
dbForge Studio for MySQL is a comprehensive integrated development environment (IDE) designed for MySQL and MariaDB databases. It offers a powerful set of tools that enable users to perform a wide range of tasks, from writing SQL code to managing source control, all within a single solution.
The user-friendly, customizable graphical interface allows for quick mastery of the tools and configuring tasks in just a few clicks. Additionally, the ability to automate tasks with precision makes dbForge Studio a preferred choice among MySQL professionals of all skill levels, helping them save both time and resources.
To connect to MySQL Server using Studio for MySQL:
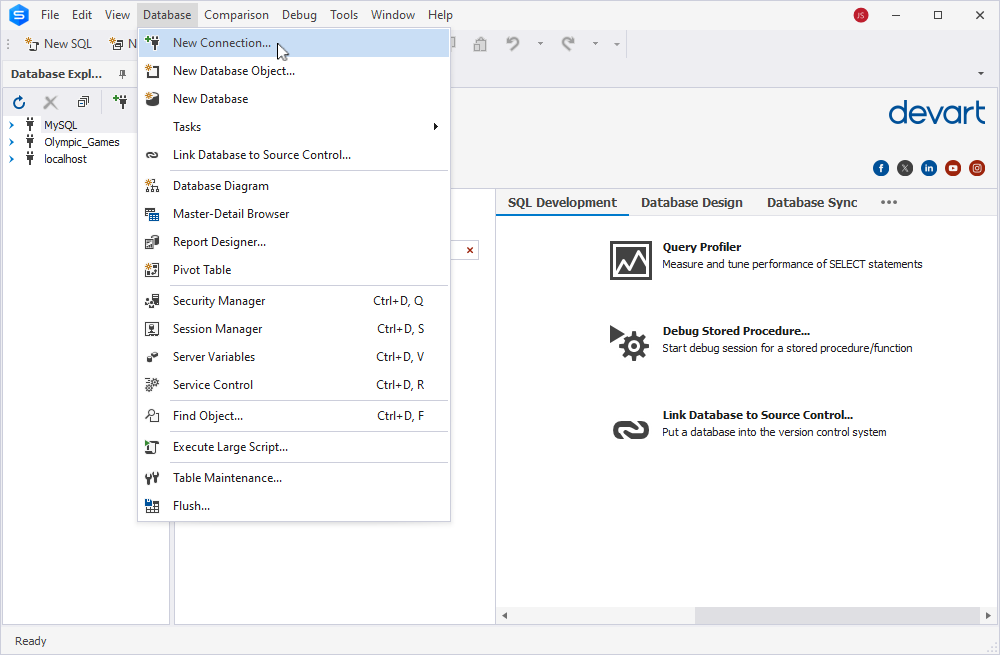
1. Open the Database Connection Properties dialog box in one of the following ways:
click New Connection on the Database menu
or
click the New Connection button on the Connection toolbar
2. Fill the connection details: specify the connection type, enter the host, the port, the user, and the password. Optionally, you can also specify the default database to connect to.
The Connection Name will be generated automatically from the Host name. However, you can set a distinctive name for your new connection, if required.
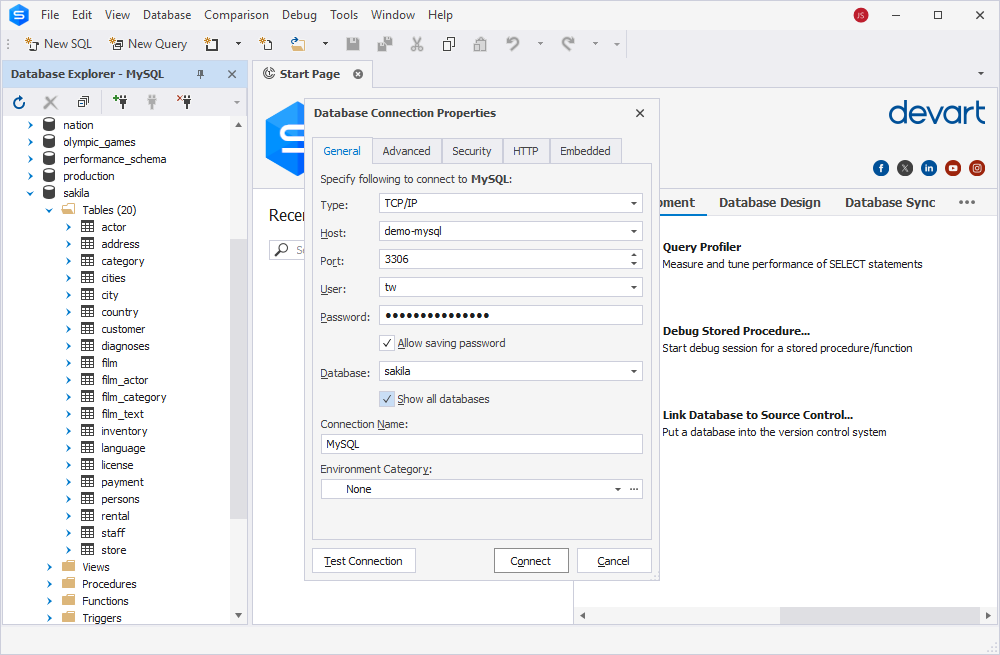
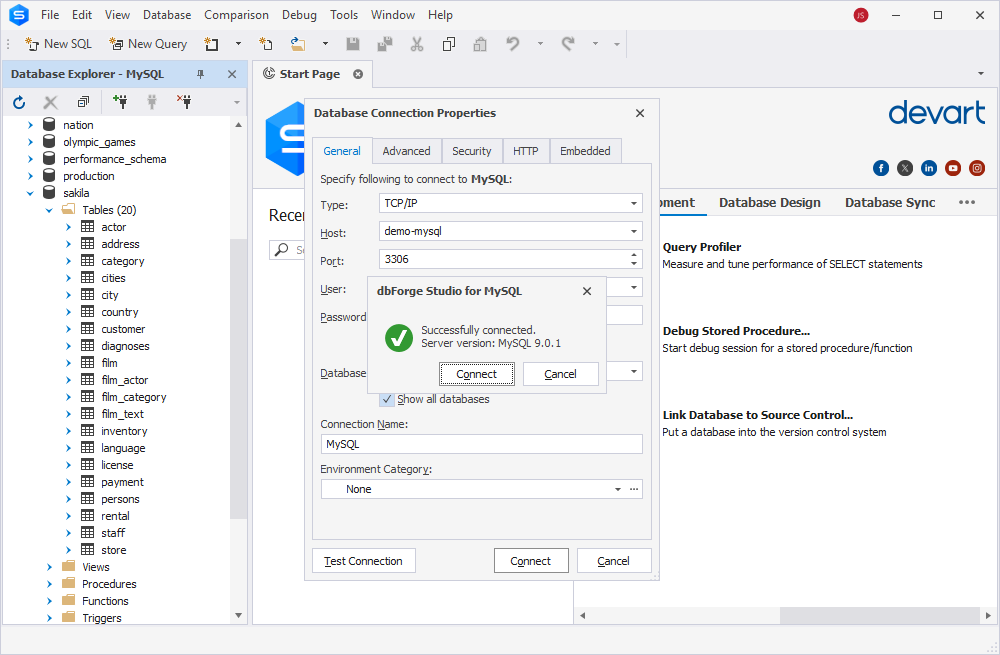
3. In most cases, it is enough to enter the connection details on the General tab to successfully connect to the MySQL server and access the databases. Click Test Connection to verify the details, and dbForge Studio for MySQL will connect to the server.
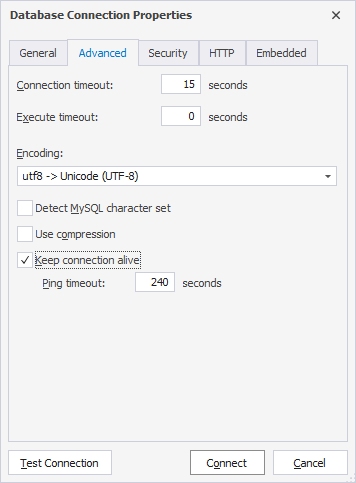
Optionally, you can adjust connection settings more precisely in the Database Connection Properties window.
On the Advanced tab, you can specify Connection timeout and Execute timeout values in seconds. Here, you can also select the Encoding type from a drop-down list and enable the Detect MySQL character set, Use compression, and Keep connection alive options.
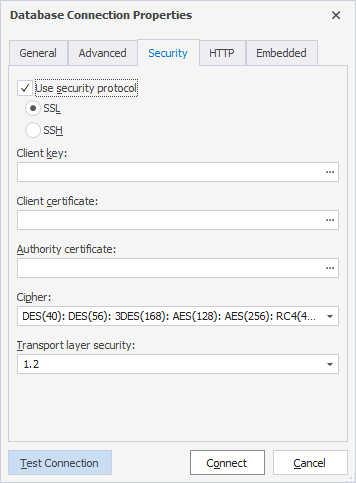
On the Security tab, you can configure security properties, such as SSL or SSH security properties. This tab also allows you to enter the client key, the client certificate, and the authority certificate to increase the security level.
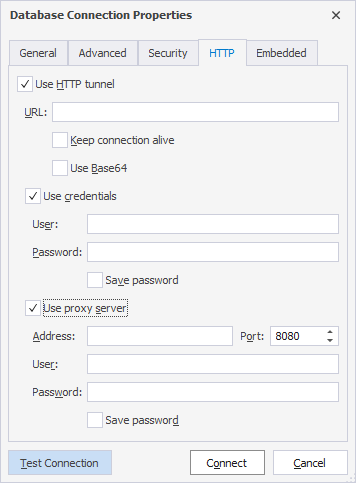
On the HTTP tab, you can configure HTTP tunnel properties. and provide the additional details to establish the connection securely.
When all settings are configured, click Test Connection or Connect.
As you can see, dbForge Studio for MySQL offers a visual and straightforward method to connect to MySQL Server. It also gives you more control over connection configurations.
How to connect using MySQL Workbench
MySQL Workbench is a popular visual tool for database architects, developers, and DBAs. It is the default IDE for MySQL, a free and highly functional tool, though its functionality is not as robust as in dbForge Studio.
To access MySQL Server using Workbench:
1. Run MySQL Workbench. On the Database menu, click Connect to Database.
Alternatively, click the plus icon next to MySQL Connections label.
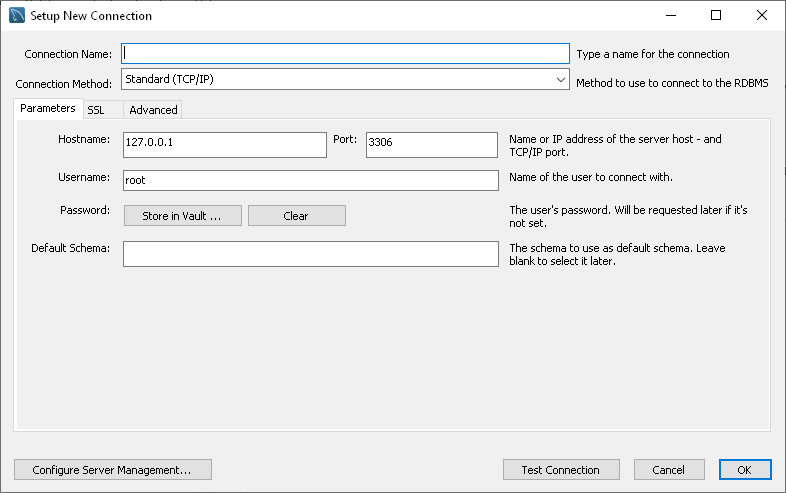
2. In the Setup New Connection window, specify the Connection Name and provide the hostname, port, and username.
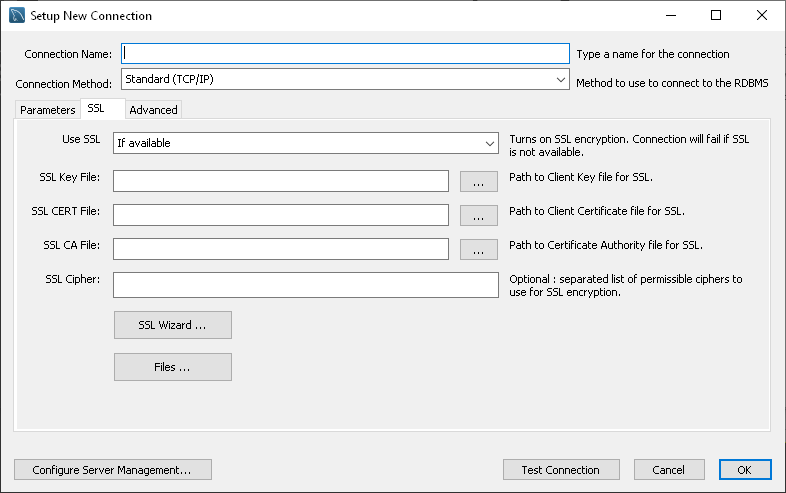
3. (Optional) Go to the SSL tab to configure SSL connection settings.
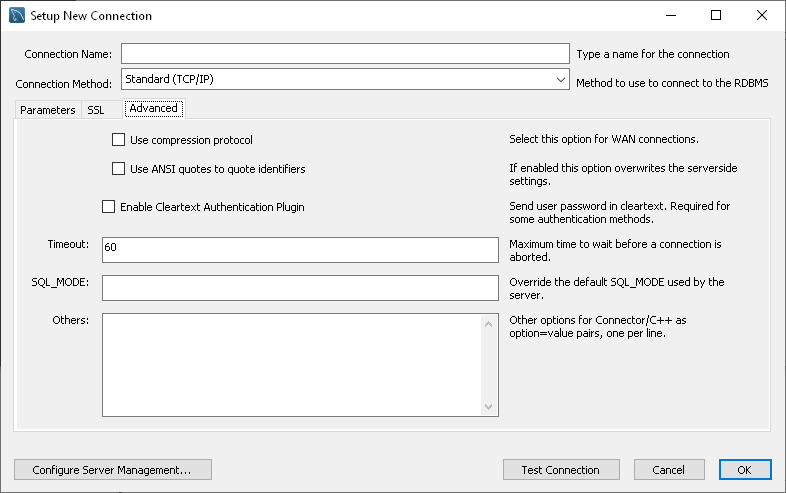
4. (Optional) Go to the Advanced tab to configure advanced connection settings.
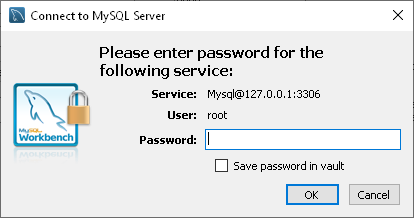
5. You can click Test Connection to check the parameters that you’ve entered. In case you are sure that all the credentials are correct, click OK. Enter the password.
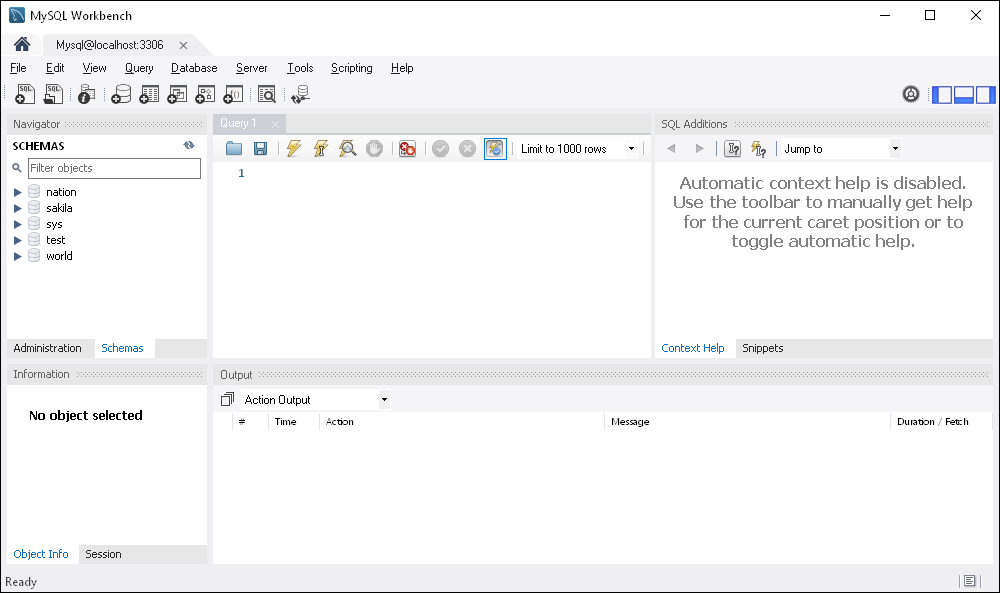
After connecting, you will see the list of databases on the left.
How to connect using Sequel Ace
Sequel Ace is a widely used open-source GUI tool designed for managing MySQL and MariaDB databases on macOS, appreciated by MySQL specialists for its functionality and ease of use.
To connect to MySQL using Sequel Ace, follow these steps:
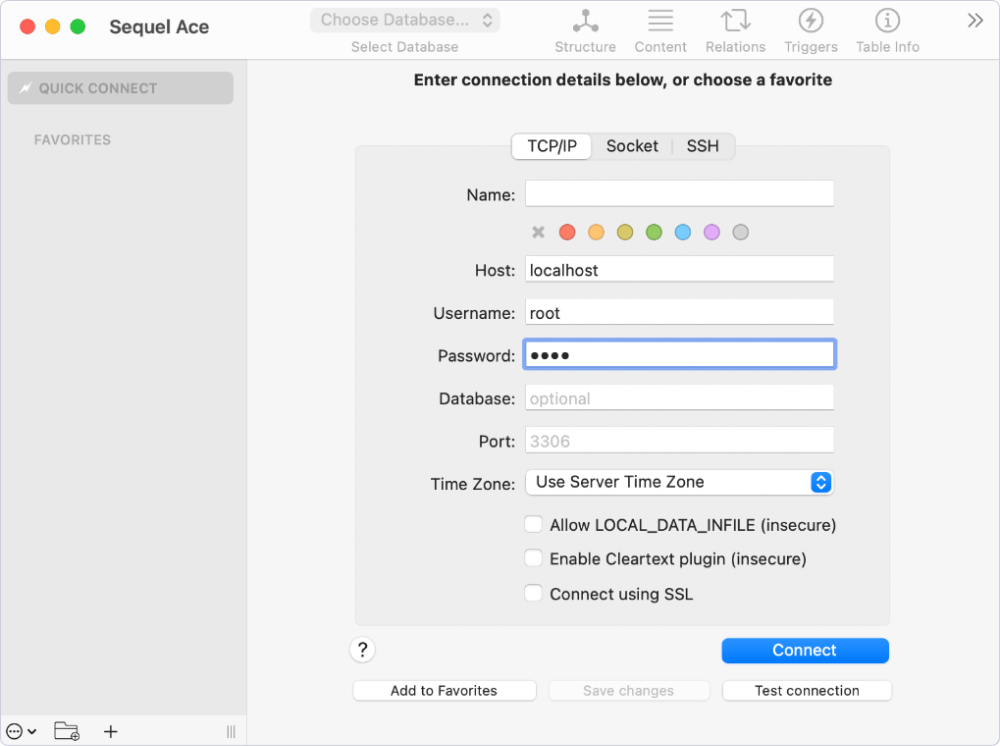
1. Launch Sequel Ace and click Quick Connect.
2. In the connection dialog window, select TCP/IP to establish a standard connection.
3. Provide a name for the connection and enter the following credentials: Host, Username, Password (if applicable), Database (optional), Port.
4. Click Test Connection to verify the details or click Connect to proceed directly.
Note: If your environment requires an SSH connection, choose the SSH option in the connection dialog window and provide the following additional details: SSH Host, SSH User, SSH Password, SSH Port.
Conclusion
In this article, we have presented three ways to connect to MySQL Server, including the MySQL Command-Line Client and the visual tools, dbForge Studio for MySQL, MySQL Workbench, and Sequel Ace. The choice of the solution depends on your personal preferences and work requirements, though, modern GUI tools offer significant benefits far exceeding the task of connecting to the databases. In particular, dbForge Studio for MySQL offers an all-embracing toolset to perform all tasks on database development, management, and administration with one software.
You can try dbForge Studio for MySQL in your workflow and evaluate its powers under full workload. The fully functional trial of the Studio is available for 30 days.