Navigating the process of SQL Server version upgrades and downgrades can be a daunting task, often accompanied by various challenges and complexities. However, with the assistance of dbForge Compare Bundle, businesses can overcome these hurdles and streamline the upgrade process.
In this article, we will explore how you can overcome the problem of migrating databases between different SQL Server versions using dbForge Compare Bundle. Whether you are a database administrator or developer, this guide will provide valuable insights to enhance your upgrade experience and maximize the potential of your SQL Server environment.

Contents
- Identifying the problem
- Restoring a database from earlier versions of SQL Server to later versions
- Migrating a SQL Server database to a lower version
- Solution 1: Using dbForge Schema Compare and Data Compare
- Solution 2: Using the Generate Script and Execute Large Scripts functionality
- Conclusion
Identifying the problem
Migrating databases between different versions of SQL Server is a routine task undertaken by organizations seeking to stay up-to-date with the latest technology and leverage the benefits offered by newer versions. There is a bunch of good reasons why one might need to migrate databases from older versions of SQL Server to newer ones. Newer versions, for example, often introduce performance improvements and scalability enhancements, enabling databases to handle increasing workloads more efficiently. Feature enhancements in newer versions provide advanced capabilities for data management, analytics, and reporting.
Downgrading the version of SQL Server is not a rare thing too and may be necessary for various reasons. It could be caused by application compatibility issues, where an application or software solution requires a specific SQL Server version. Cost considerations may also play a role, as organizations may need to downgrade to a lower edition with reduced licensing costs. Feature requirements, stability concerns, testing and development needs, and migration rollbacks are additional factors that might prompt the need for a downgrade.
However, being a common task, database migration between different versions of SQL Server still can present several challenges, particularly regarding compatibility levels. Each database in SQL Server has an associated compatibility level, which can cause issues if the target SQL Server instance has another compatibility level than the database being migrated. In such cases, certain features and functionality may not be fully supported or may exhibit different behavior.
Restoring a database from earlier versions of SQL Server to later versions
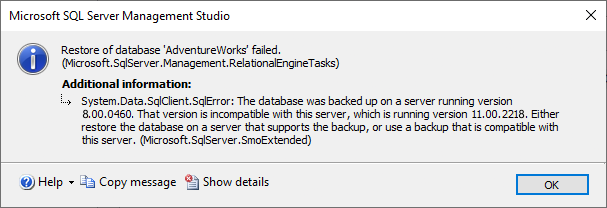
We tried a bunch of different scenarios: tried to back up a database on SQL Server 2008 and then restored it on SQL Server 2022, backed up a database on SQL Server 2012 and tried to restore it on SQL Server 2019. As a result, all operations went smoothly except for the SQL Server 2000 backup attempted to be restored on SQL Server 2012. In this case, the following error was shown.
Migrating a SQL Server database to a lower version
Encountering errors while attempting to downgrade a SQL Server database is a common issue. In our specific scenario, we backed up a database on SQL Server 2022 and tried to restore it on SQL Server 2019, which resulted in the following error message.
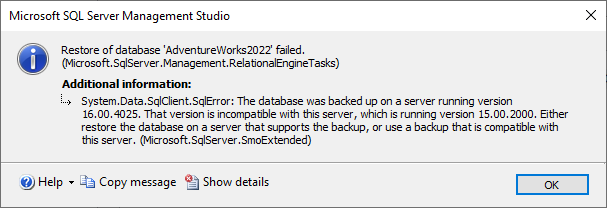
The error message is generated because SQL Server performs a version check during the restoration process, preventing the restoration of a database from a newer version of SQL Server to an older version. This limitation also applies when attempting to attach a database from a higher version of SQL Server to a lower version.
Solution 1: Using dbForge Schema Compare and Data Compare
Let’s explore a workaround for this problem using two lightweight yet powerful tools from Devart: Schema Compare and Data Compare. These tools can be obtained either together as dbForge Compare Bundle for SQL Server or as standalone products.
Step 1: Create an empty database on the target server
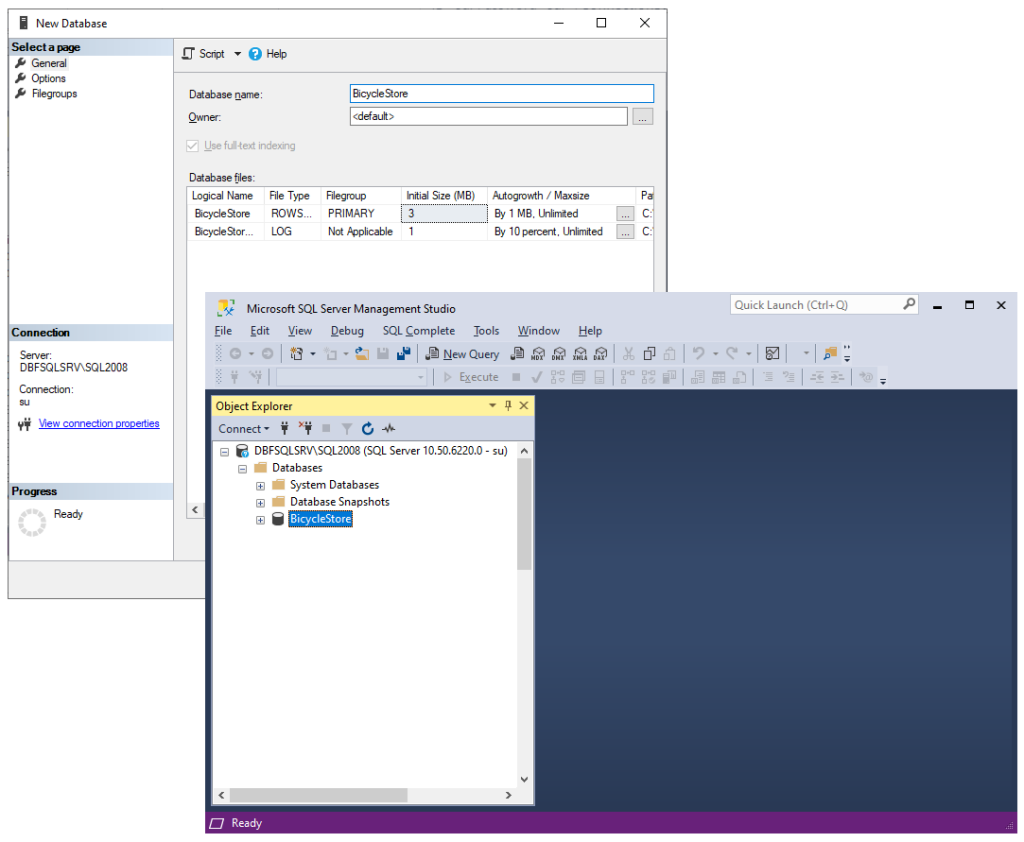
Suppose we want to migrate a BicycleStore sample database that represents a simplified e-commerce system for managing bicycle products, customers, orders, and inventory to another SQL Server version. The first step is to create an empty database with the same name on the target server. In our example, we create a BicycleStore database on SQL Server 2008 to test the downgrade.
Step 2: Run schema synchronization
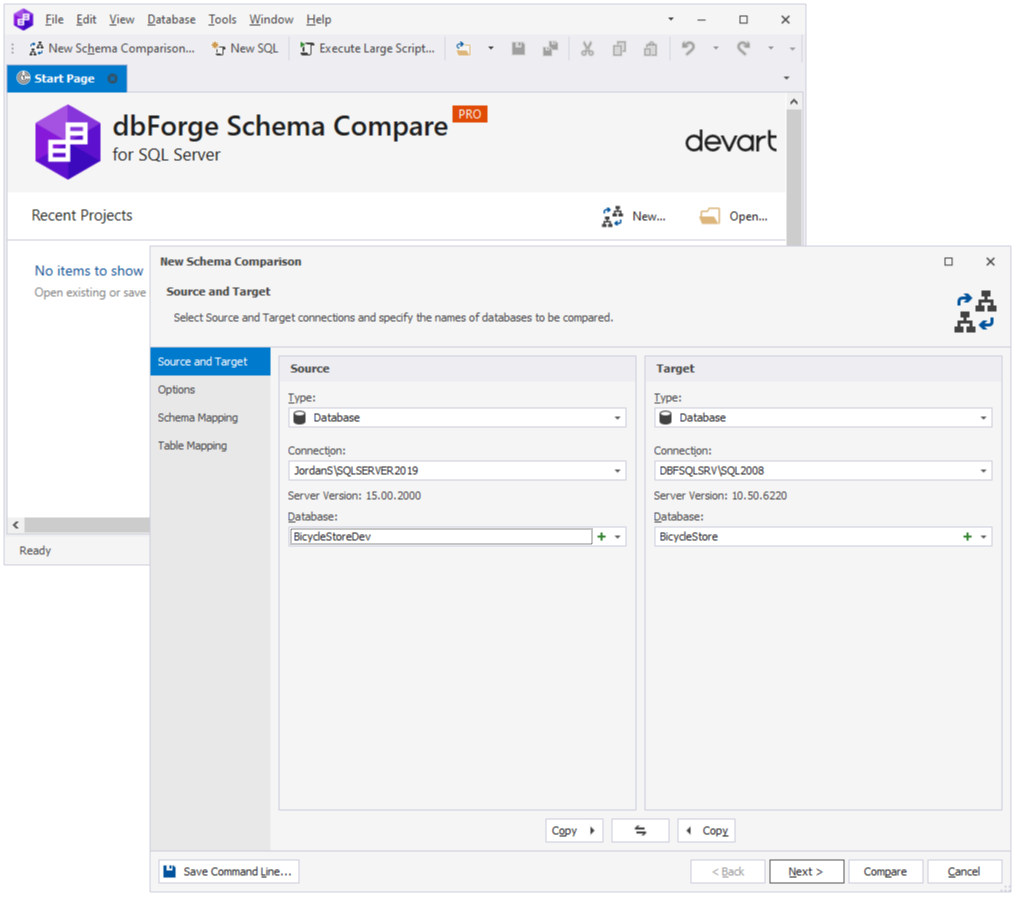
The main idea behind this step is to migrate the structure of the source database by utilizing dbForge Schema Compare, which involves running a database comparison and then performing synchronization to replicate the schemas to the target database.
So, to begin with, on the File menu, click New > New Schema Comparison. Next, in the New Schema Comparison wizard that opens, configure all the necessary settings and run schema comparison by hitting the Compare button.
Note
You can skip Step 1 and create an empty database right from Schema Compare. For this, under Target, near the Database drop-down, click the plus icon. This will open a database creation dialog where you can configure the necessary settings for the new database.
After you click Compare, the Schema Comparison document will open, displaying all the schema differences between the two databases. Here you can select database objects you want to migrate to the target database. In your specific case where the target database is empty, Schema Compare offers to create the schema objects that exist in the source database.
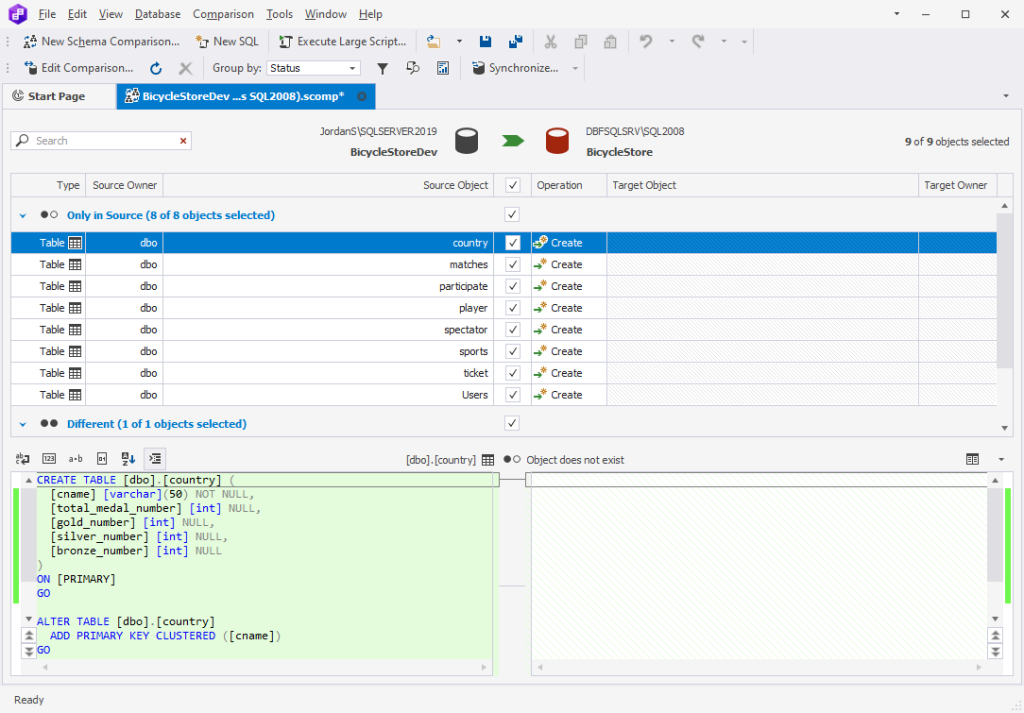
Once done, click Synchronize. After that, the structure of the source database will be transferred to the target one. Let us check the database in the SSMS’s Object Explorer.
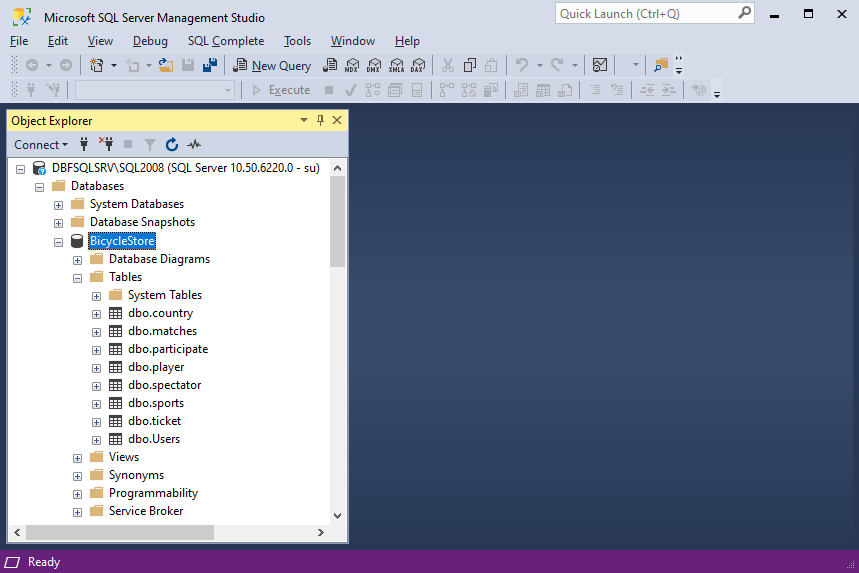
Fantastic! Thanks to dbForge Schema Compare, now our source and target databases have identical structures.
Step 3: Run data comparison and synchronization
Now that the source schemas have been successfully migrated, we can proceed to the next step, which involves transferring the data from the source to the target. We will use dbForge Data Compare for that.
On the File menu, click New > New Data Comparison. Next, in the New Data Comparison wizard that opens, configure all the necessary settings and run data comparison by clicking Compare.
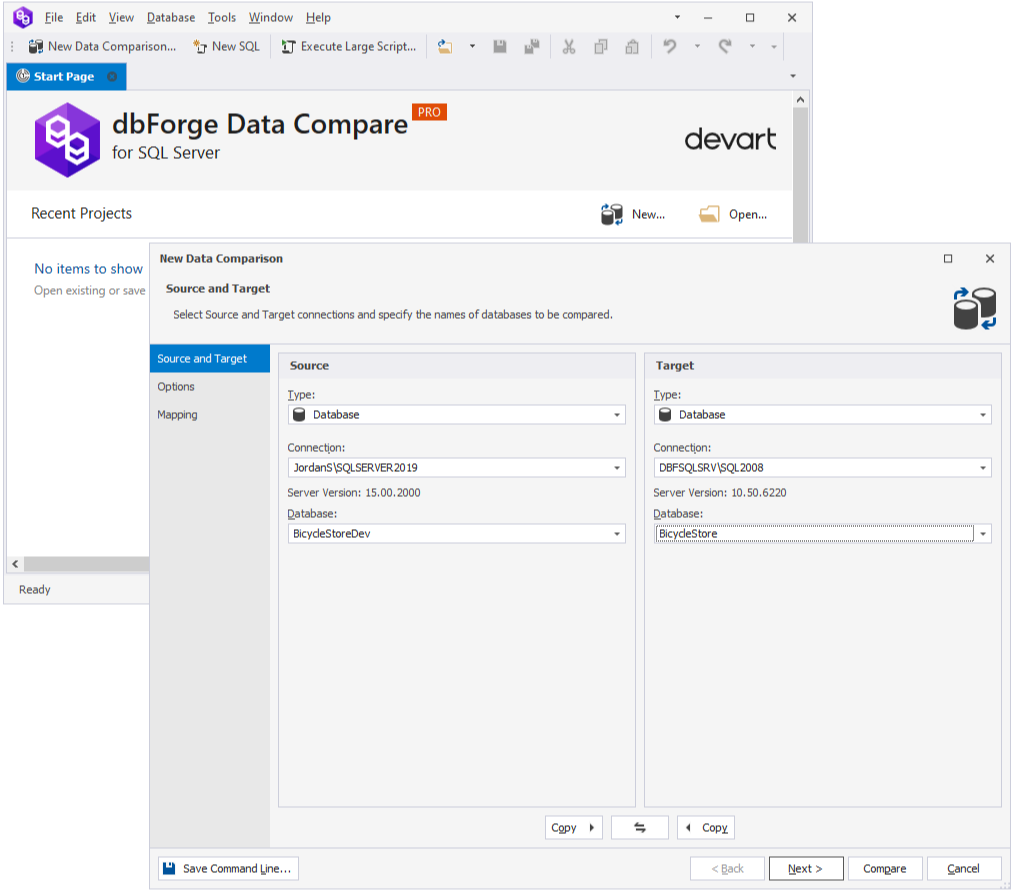
After you click Compare, the Data Comparison document will open, displaying all the data differences between the two databases. Here you can select the data you want to migrate to the target database. In our working example, the target database is empty.
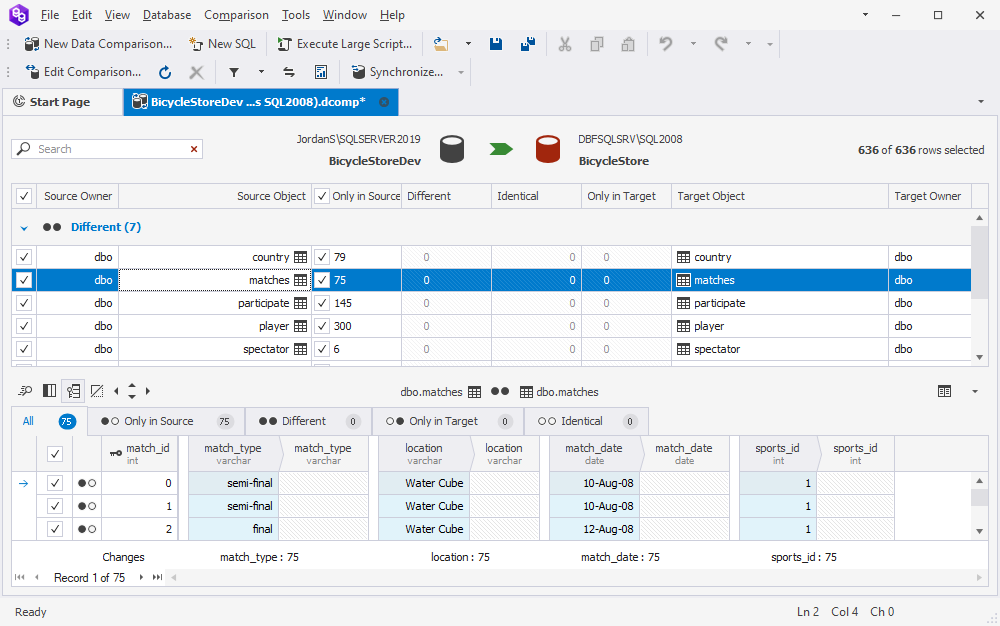
Click Synchronize to migrate data between the two databases. This will synchronize data between the source to the target. Let us run a simple SELECT query to verify that the data has migrated successfully and is accurately reflected in the target database.

Indeed, it’s quite impressive! The process of downgrading the database from SQL Server 2019 to 2008 has been made simple and efficient with just a few clicks using the dbForge tools. Whether it’s upgrading or downgrading the database, this method ensures a smooth and successful migration, making it a reliable solution for any database migration scenario.
Solution 2: Using the Generate Script and Execute Large Scripts functionality
The previous approach demonstrated the downgrade. Let us now try an upgrade. In this example, we will migrate the BicycleStoreDev database from SQL Server 2019 to the latest version, SQL Server 2022. So, fasten your seat belts and let the show begin.
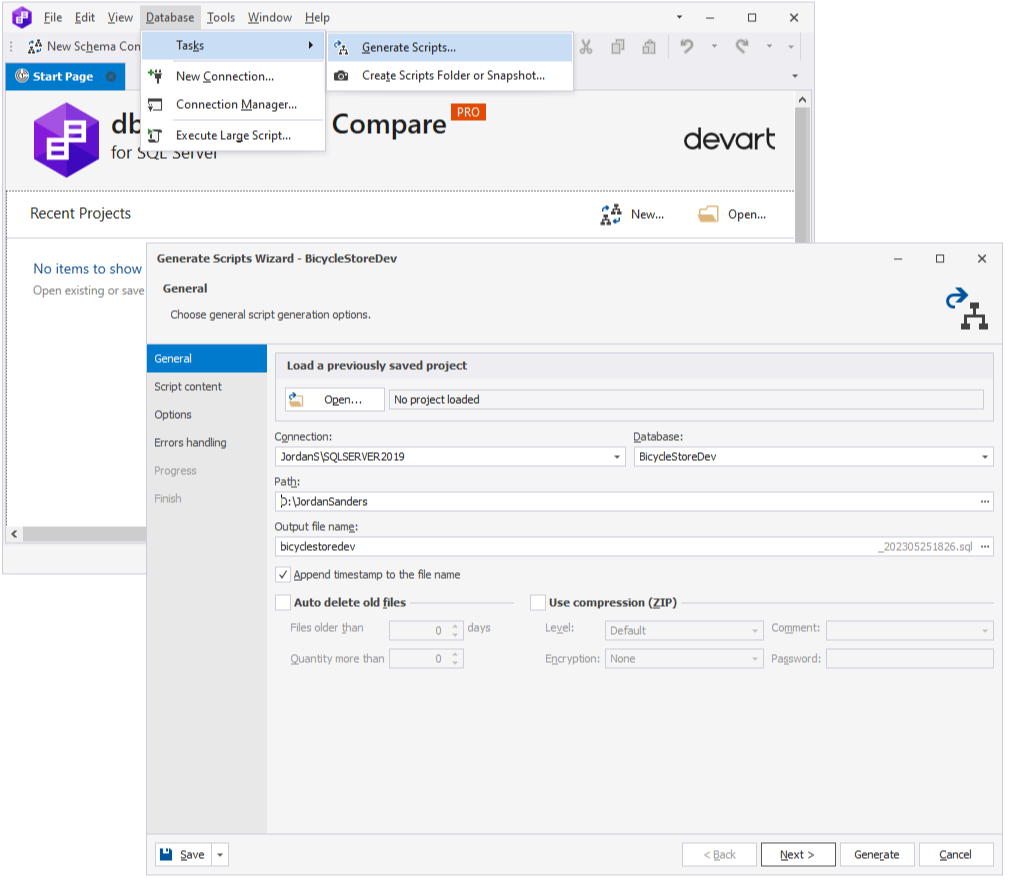
To access the Generate Scripts functionality in dbForge Schema Compare, go to Database > Tasks > Generate Scripts. In the Generate Scripts Wizard that opens, you can configure all the necessary settings. On the General page, select a connection and database you want to create a script for. To proceed to the next page of the wizard, click Next.
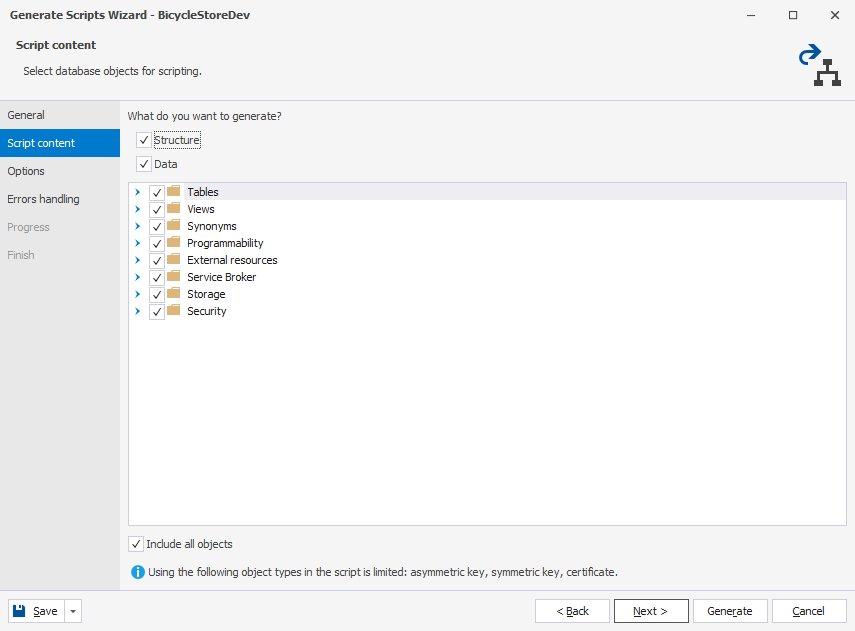
On the Script Content page, you have the option to select what you would like to generate a script for. You can choose to generate a script for the database structure, data, or both, depending on your specific requirements. This time you won’t need Data Compare to migrate data. Cool, right?
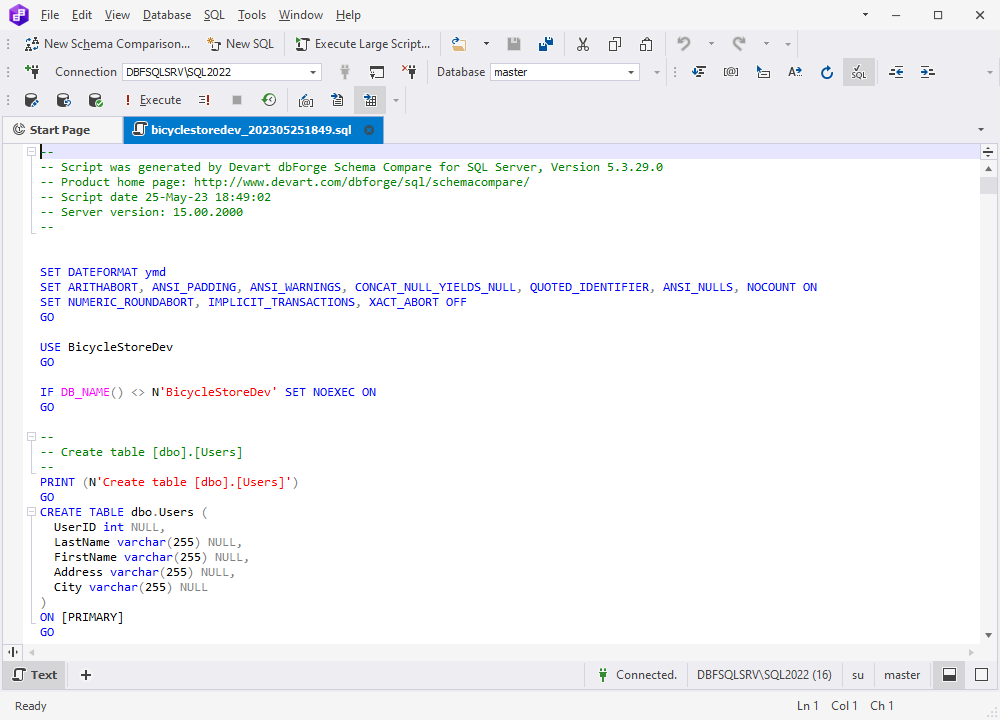
The wizard will smartly guide you through the process of configuring script generation. Once done with the settings, hit Generate.
All you need next is to open the script and execute it on the required connection. You can do this right from Schema Compare.
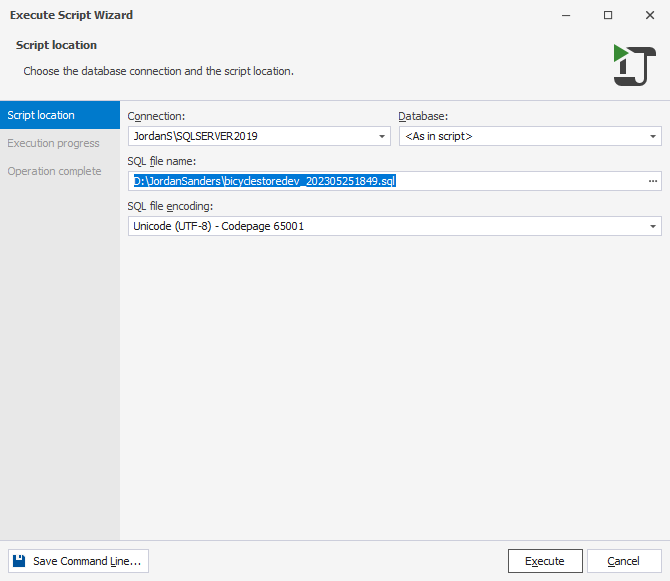
Alternatively, you can click Execute Large Script on the ribbon menu, specify a path to the script file, and then click Execute.
Our script has been executed successfully. However, let us also run a SELECT query to ensure that the migration process has been properly completed, and that the data is intact and available for retrieval.
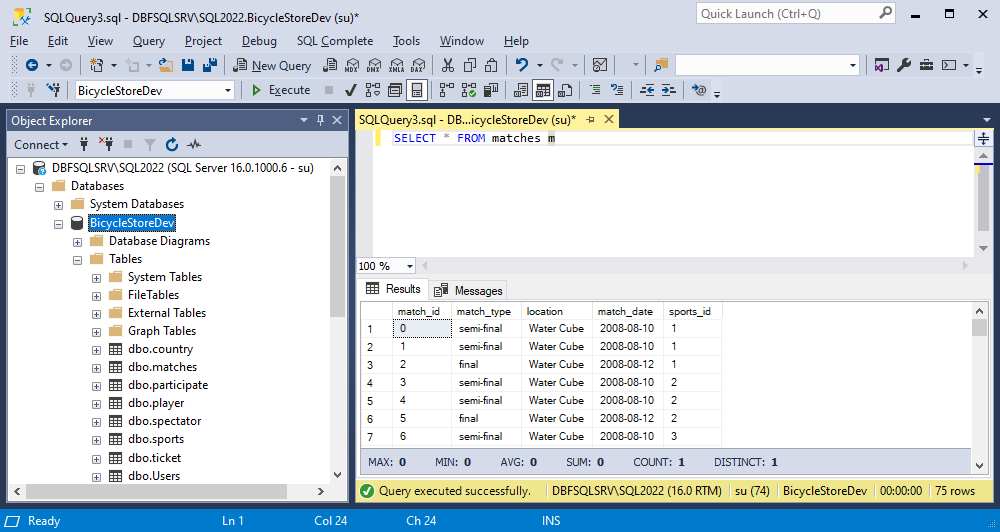
Perfect! The scenario we’ve demonstrated provides a straightforward and uncomplicated way to upgrade a database. It’s worth noting that this approach can also be utilized for downgrading a database. By following a similar process, you can adapt the steps to meet the specific requirements of a downgrade scenario.
LEARN MORE
- Different Methods to Copy Data with dbForge SQL Tools
- How to Export and Import SQL Server Database Data to a SQL Script
- Implement Automatic Migration of SQL Server Databases for DevOps
Conclusion
Migrating SQL Server databases between different server versions is a common and essential task that demands a seamless execution. In this article, we have introduced two straightforward workarounds to address potential challenges encountered during the migration process. Leveraging the power of tools such as dbForge Schema Compare and Data Compare significantly enhances the efficiency and smoothness of the migration. Whether you are upgrading or downgrading, these approaches provide dependable solutions for achieving successful and trouble-free database migrations. Armed with these workarounds, you can confidently navigate database migrations, facilitating smooth transitions across various database versions with ease and confidence. However, we recommend that you back up your database using reliable software, such as SQL Server backup and restore tool available in dbForge Studio for SQL Server, before starting an upgrade or downgrade.
Ready to simplify your database migration process? Download dbForge Compare Bundle for a 30-day free trial and experience the power of streamlined database schema and data comparison.


