
Database conversion from MySQL to SQL Server implies migrating data and schema from a MySQL database to a SQL Server database. This process typically includes transferring tables, views, stored procedures, and other database objects while ensuring data integrity and compatibility with the target SQL Server environment.
This article explains the fundamental differences between MySQL and SQL Server and outlines potential issues that might occur during the migration process. The article also provides a step-by-step guide to migrate data from a MySQL table to SQL Server using ODBC driver for MySQL and Data Pump for SQL Server.
Contents
- MySQL vs. SQL Server: understanding the key distinctions
- Key issues in the MySQL-to-MS SQL migration process
- Prerequisites
- Introduction to ODBC drivers
- Install and configure ODBC driver for MySQL
- Overview of Data Pump for SQL Server
- Convert your data from MySQL to SQL Server effortlessly
MySQL vs. SQL Server: Understanding the key distinctions
MySQL and SQL Server are popular relational database management systems, and it’s important to understand their differences because knowing the distinctions helps anticipate and address compatibility issues during the migration process.
MySQL is an open-source, simple, and scalable database for managing and organizing data. Though it is free, users can get premium support services through a commercial license. MySQL runs on most operating systems, including Linux, Windows, and macOS.
On the other hand, SQL Server is a commercial product with multiple editions having advanced features for efficient storage, management, and data retrieval. Designed primarily for Windows, the product is well-known for its scalability, security, and integration with other Microsoft products.
Key issues in the MySQL-to-MS SQL migration process
Migrating data MySQL-to-MS SQL may be a complex process, so you should keep in mind some challenges that might appear when you convert MySQL to SQL Server, including compatibility issues, data integrity concerns, and performance implications.
- Compatibility: Remember about syntax variations, data type differences, and supported features between MySQL and SQL Server. Many of these compatibility issues can be easily resolved with a MySQL migration tool.
- Data Integrity: Review and adjust foreign key constraints, data types, and sequence of data migration. Ensure dependencies are appropriately maintained.
- Performance Optimization: Evaluate and optimize indexes and queries for the target database. Examine the current MySQL database to identify what should be improved and then implement suitable strategies within the SQL Server environment.
Prerequisites
For data conversion, we’ll download and install the following tools, which will help in how to migrate a MySQL database to SQL Server efficiently:
- Data Pump for SQL Server, a robust tool for easy and quick data export and import between different servers and instances.
- Devart ODBC Driver for MySQL, a reliable and easy-to-use tool to access MySQL databases from ODBC-compatible tools on 32-bit and 64-bit Windows, macOS, and Linux. In addition, the ODBC driver for MySQL allows you to access live MySQL data directly from SQL Server Management Studio.
Introduction to ODBC drivers
Before we start, let’s find out what ODBC drivers are what their role in data conversion is.
ODBC (Open Database Connectivity) drivers serve as a bridge between a source and a target database, establishing a connection to transfer data between them. The Devart ODBC drivers support a wide range of databases, including Oracle, MySQL, PostgreSQL, SQL Server, and SQLite.
ODBC drivers help migration tools access data, send SQL queries to the source database, retrieve the results, and then insert or update the data with the mapped data types in the target database, allowing users to efficiently migrate MySQL to SQL Server.
Install and configure ODBC driver for MySQL
For data conversion from a MySQL database to a SQL Server database, first, download the ODBC Driver for MySQL on the computer where you want to perform data migration.
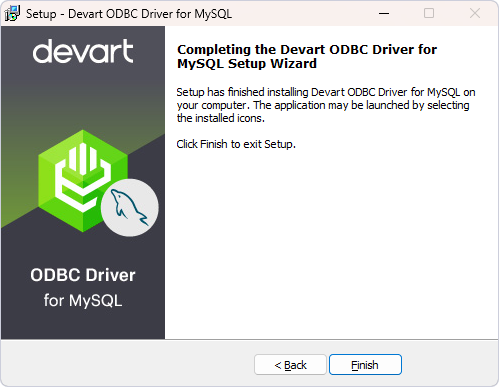
Once done, go to the Downloads folder and double-click the DevartODBCMySQL.exe setup file to install the driver on your computer. In the Setup wizard, go through all the installation steps and click Finish to close the wizard.
Next, you must set up a data source name (DSN) for the ODBC driver. To do this, open the ODBC Data Source Administrator utility by typing ODBC Data Sources in the search bar. Select the 32-bit or 64-bit version of the ODBC Data Source Administrator utility, depending on your machine.
In the ODBC Data Source Administrator window, you can create a User DSN, which means the DSN will be accessible to the user who created it in the system, or a System DSN, meaning the DSN will be accessible to anyone logged in.
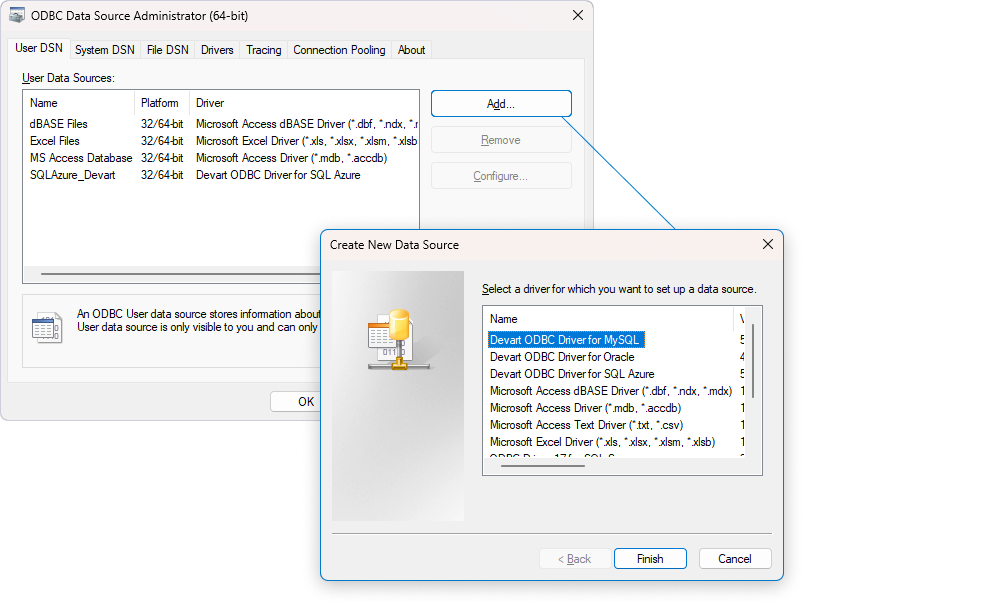
To proceed, on the User DSN or System DSN tab, click Add to create a new data source. In the dialog that opens, select Devart ODBC Driver for MySQL and click Finish.
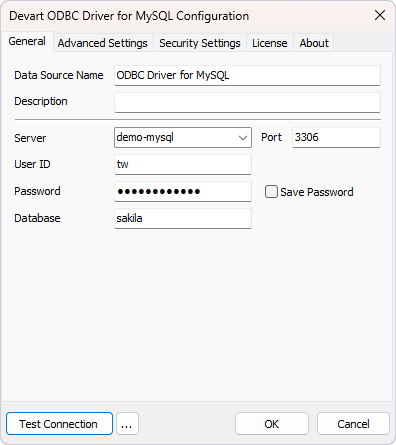
This will open the Devart ODBC Driver for MySQL Configuration dialog, where you need to specify the required details, including the data source name, MySQL server, username, password, and target database. The default port number is 3306. You can change it in the corresponding field. Note that the data source name you specify will subsequently appear in the list of data source names in dbForge Data Pump for SQL Server.
If you click Test Connection, you can verify that the connection has been properly configured. If the configuration is correct, the notification window will appear. Click OK to close it. To save the DSN settings, click OK.
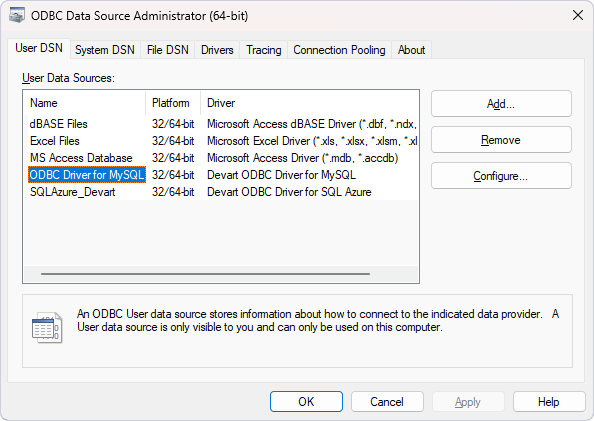
The driver you’ve installed will appear on the corresponding DSN tab. Click OK to save the changes and close the dialog.
Overview of Data Pump for SQL Server
For data migration from MySQL to SQL Server, we’ll use dbForge Data Pump for SQL Server, which is a part of the SQL Tools pack. Data Pump is a SQL Server Management Studio (SSMS) add-in aimed to facilitate data migration from third-party databases to SQL Server. While it’s focused on SQL Server, many concepts apply to similar cross-platform scenarios like moving from MySQL to Postgres, especially when handling data types, constraints, and schema mapping. The tool also supports data import/export in popular data formats, including Excel, CSV, XML, JSON, Text, MS Access, etc. Data Pump allows saving templates for repetitive export scenarios or automating and scheduling export tasks using the command line.
Convert your data from MySQL to SQL Server effortlessly
Everything has been prepared, so that we can start with data conversion from MySQL to SQL Server.
First, let’s see the data we want to transfer from a MySQL table to a SQL server table.
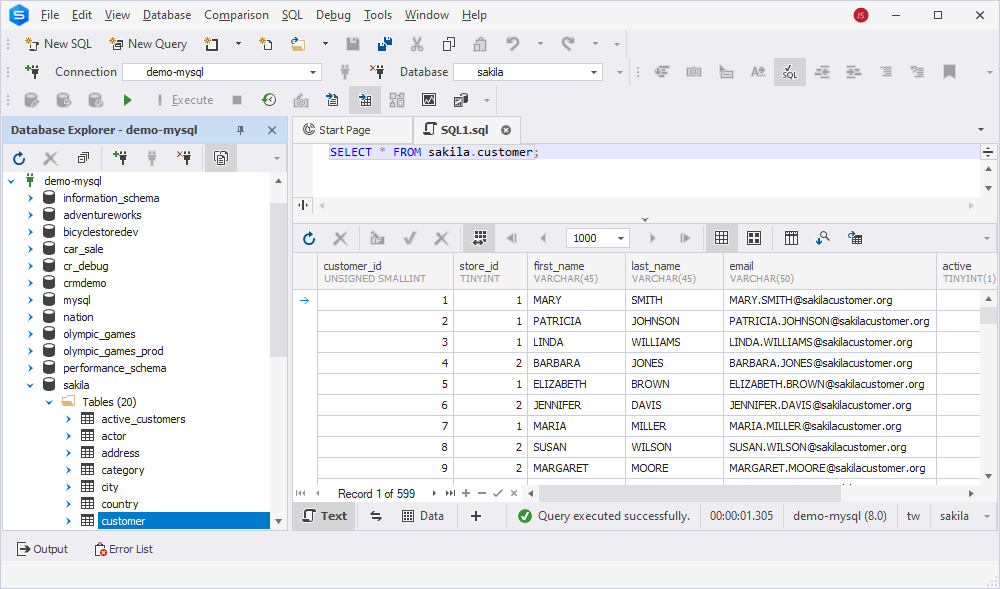
To migrate the data, you will need to export it from MySQL, which can be done using solutions like dbForge Studio for MySQL. This tool simplifies data extraction, allowing you to generate a structured export file that can be seamlessly imported into SQL Server.
Now, open SSMS, and in Object Explorer, right-click the required database and select Data Pump > Import Data to open the Data Import wizard. This tool acts as a MySQL to SQL Server converter.
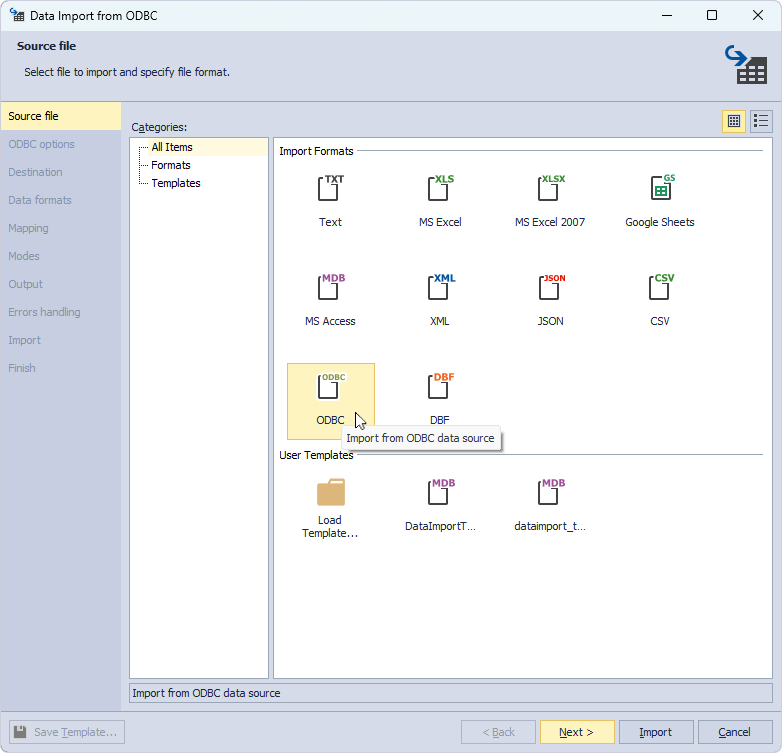
On the Source file page of the wizard, select the ODBC source file format and click Next.
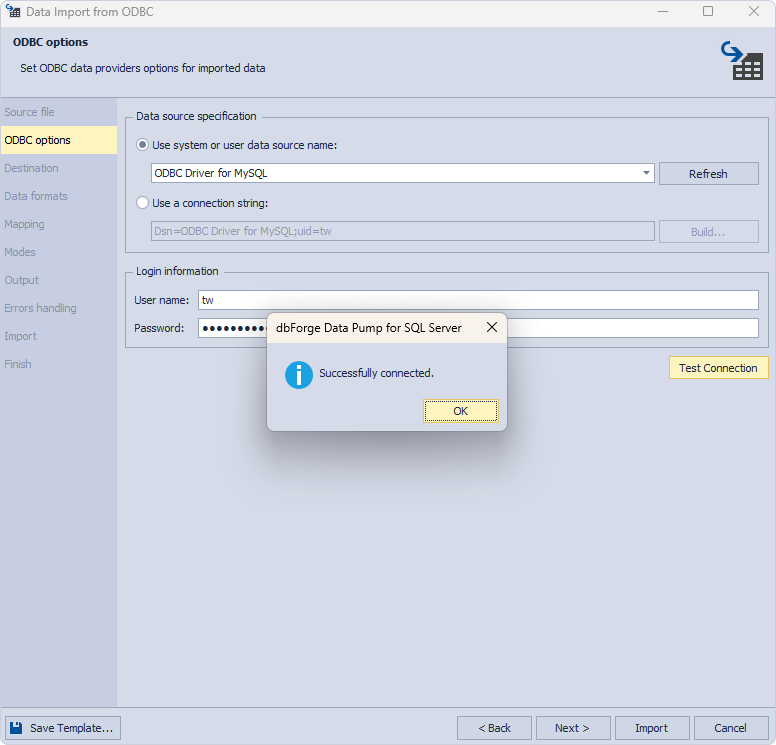
On the ODBC options page, specify the configured ODBC data provider options for imported data:
- Under Data source specification, select ODBC Driver for MySQL from the Use system or user data source name dropdown list.
- Under Login information, enter the username and password to the MySQL server to which the ODBC driver is connected.
- Click Test Connection to verify that the connection has been successfully established. Then, click OK to close the pop-up window.
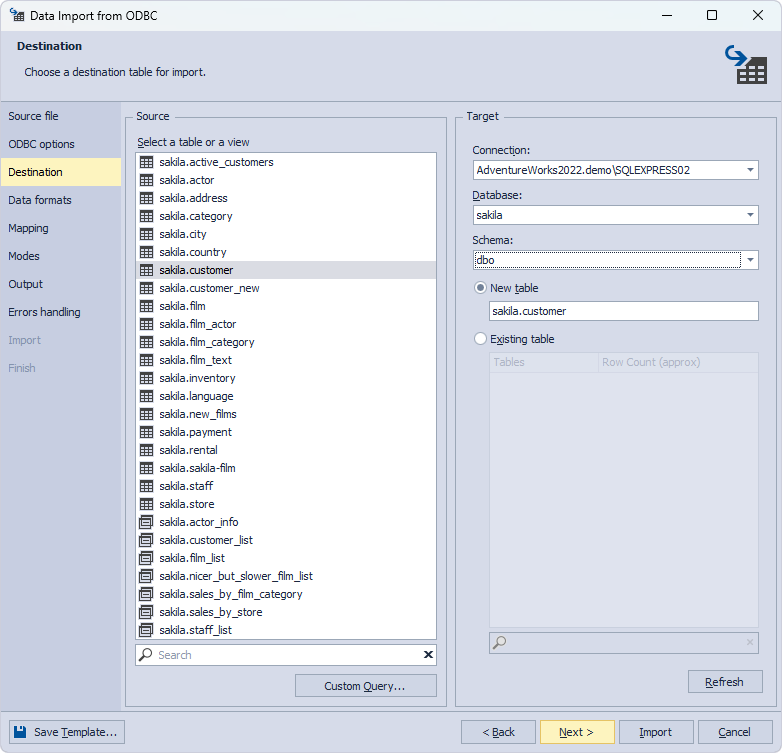
On the Destination page, select a target table for data import:
- Under Source, you can view all the tables located on the sakila database of the connected MySQL server.
- Under Target, you can view the preselected SQL Server connection, a database, a schema, and a table to which the data can be imported.
In our example, we select sakila.customer as a source table and import its data into a new table with the same name on the target server. You could also import data into an existing table.
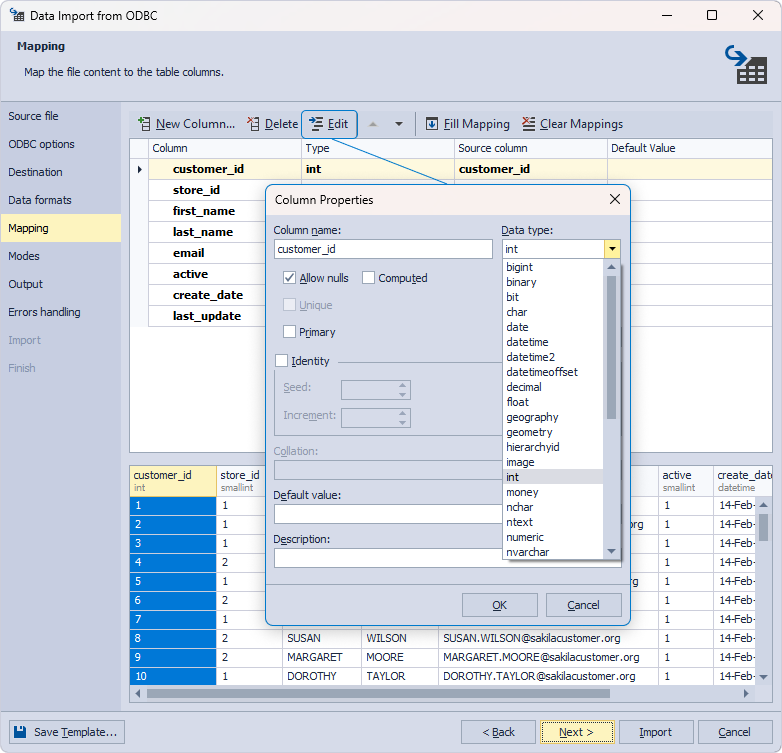
Switch to the Mapping page, where you can see the columns with the assigned data types in the upper grid and the preview mode in the lower grid. You can also change the data type for the selected column by clicking Edit on the toolbar.
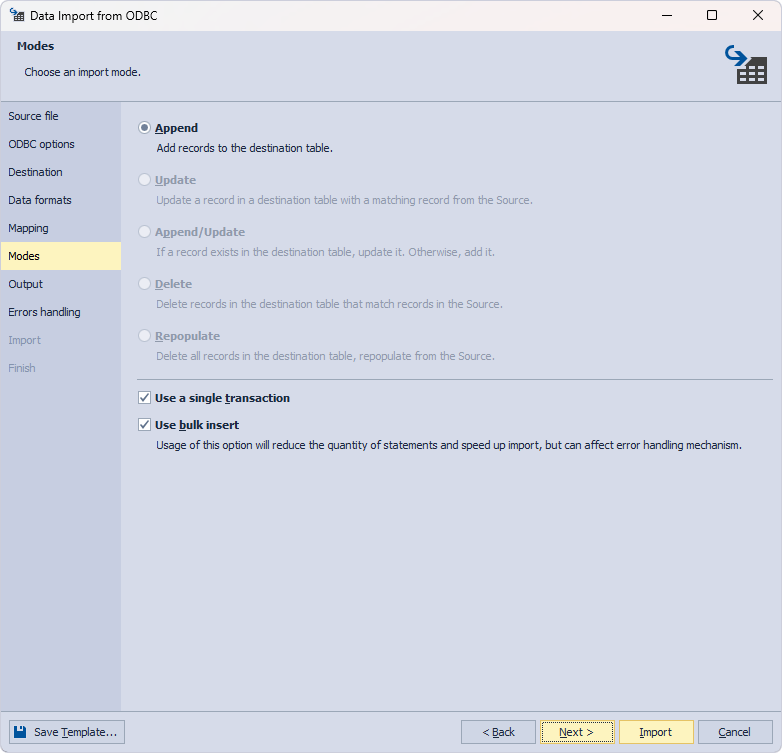
To proceed, click Next. The Modes page displays the import modes. Only Append mode becomes available if you migrate data to a new table. However, if you transfer data into an existing table – all modes will be available, allowing you to choose the most suitable option based on your specific requirements.
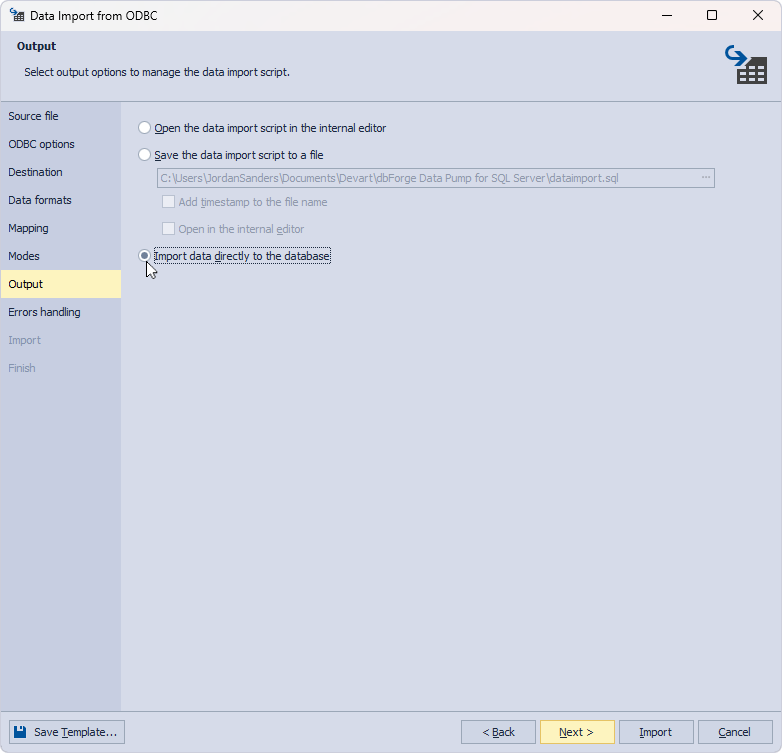
On the Output page, the Import data directly to the database option is selected by default, and we leave it as is. You can also save the file for further use or open it in the internal editor to make changes.
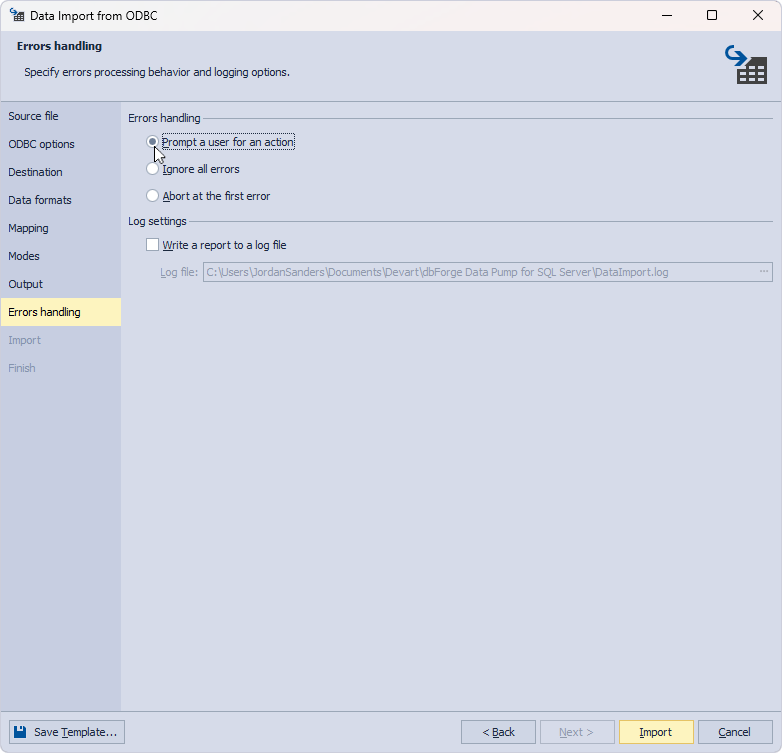
Finally, specify the error processing behavior and logging options and click Import.
When the data import process has been finished, you will see the following result:
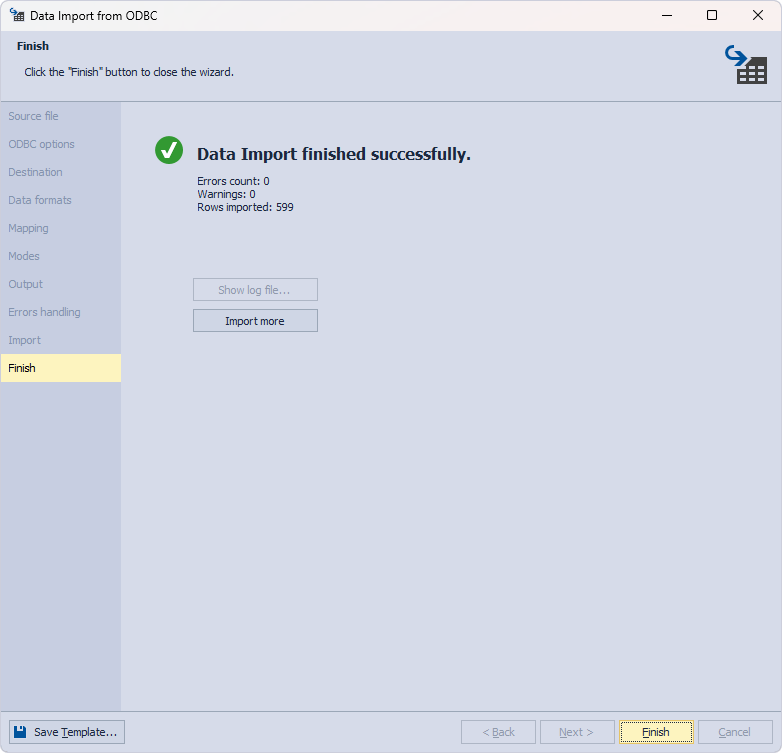
Click Finish to close the wizard.
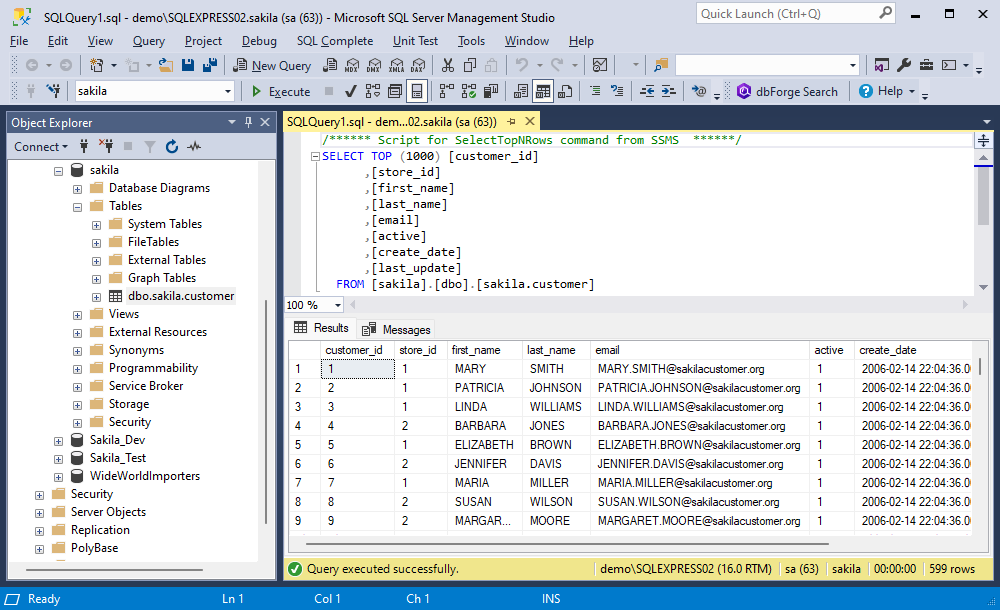
Let’s now refresh Object Explorer to check that the data from the MySQL table has been imported to the SQL table. Then, in Object Explorer, expand the sakila database and retrieve data from the imported dbo.sakila.customer table.
Great! The MySQL table data has been successfully transferred to the SQL Server table.
bForge Edge brings together the power of four database management Studios — dbForge Studio for SQL Server, MySQL, Oracle, and PostgreSQL—into a single, integrated environment. With built-in support for ODBC drivers, users can easily establish connections and convert a MySQL database to SQL Server, streamlining cross-platform migration along with all associated data.
Key benefits of using dbForge Edge for data migration
dbForge Edge supports MySQL, SQL Server, PostgreSQL, and Oracle, making cross-platform migrations seamless.
- Multi-platform support through four powerful dbForge Studios in one environment
- ODBC connectivity for seamless database conversion and integration
- Data Export for exporting data between databases
- Data Import for importing data between databases
- Streamlined data integration between systems with minimal manual effort
This unified toolset helps ensure accurate, efficient, and scalable migrations across diverse database systems.
Conclusion
In the article, we have covered the fundamentals of the data conversion process between MySQL and SQL Server. We have also delved into the main differences between these databases, explored potential issues that might happen during data migration, and provided a detailed, step-by-step guide for efficiently transferring data from a MySQL table to a SQL Server table. The Devart ODBC Driver for MySQL and Data Pump for SQL Server for data migration ensure a quick, easy, and efficient data migration experience.
Gain access to a 30-day free trial of the SQL Tools pack to experience the full range of powerful tools, including dbForge Data Pump for SQL Server.
You may also find the following articles useful to explore how to transfer data between different servers.
- How to convert a Microsoft Access database to a SQL Server database
- How to migrate data from Oracle to MySQL: step-by-step guide
- How to convert MySQL data to PostgreSQL
- How to easily convert your MS Access data to MySQL
- How to migrate from MySQL to Oracle: a comprehensive guide
- Migrating data from Oracle to PostgreSQL
- Automating bulk data import from MS Access to SQL Server
FAQ
Why migrate from MySQL to SQL Server?
SQL Server offers advanced security, better performance optimization, and seamless integration with Microsoft technologies like Azure and Power BI. It also provides superior scalability and comprehensive transaction management for enterprise-level applications.
How does MySQL differ from SQL Server in terms of database structure and management?
MySQL employs a storage model that is file-based, whereas SQL Server uses a unified storage engine complete with transaction logging. SQL Server also supports T-SQL for the purpose of procedural programming, while MySQL depends on structured queries with limited procedural features.
MySQL is available as a free Community Edition under the GPL license or as a subscription-based Commercial Edition (Oracle MySQL), which includes support, advanced features, and additional tools.
SQL Server is a proprietary licensed RDBMS, with pricing based on server cores or per-user/per-device, while its free Express Edition is suitable for small-scale applications and development.
Tools for MySQL include: command-line client for administration, MySQL Workbench for database design and development, and phpMyAdmin for web-based management. Additionally, there are third-party tools like DBeaver, Navicat, or dbForge.
Tools for SQL Server include: SQL Server Management Studio (SSMS) for comprehensive administration and development, and Azure Data Studio for cross-platform use with growing capabilities. Command-line tools like sqlcmd and PowerShell cmdlets support scripting and automation. Additional third-party tools such as DBeaver, Navicat, and dbForge extend functionality.
How can one assess the compatibility of MySQL data types with SQL Server?
A compatibility check would involve analyzing MySQL data types and converting them to SQL Server equivalents. Devart ODBC Driver for MySQL simplifies this process by automatically mapping MySQL data types to SQL Server-compatible formats, ensuring smooth data migration.
You can assess compatibility by mapping MySQL data types to their closest SQL Server equivalents, while accounting for differences in precision, length limits, and behavior. For example, TINYINT(1) in MySQL is often used as a boolean and maps to BIT in SQL Server. VARCHAR types are generally compatible but may differ in maximum length handling. MySQL’s DECIMAL supports higher precision than SQL Server’s limit of 38 digits, so adjustments may be needed. For date and time values, DATETIME and TIMESTAMP in MySQL are better mapped to DATETIME2 or DATETIMEOFFSET in SQL Server. Larger data types like TEXT, BLOB, or LONGTEXT should be converted to VARCHAR(MAX), VARBINARY(MAX), or NVARCHAR(MAX) to maintain proper storage and compatibility.
What tools are available for migrating MySQL databases to SQL Server?
Key tools include Data Pump for SQL Server, which enables bulk data import/export, and Devart ODBC Driver for MySQL, which allows configuring data formats and mapping data types to ensure compatibility between MySQL and SQL Server.
Several solutions are available for migrating MySQL to SQL Server, including Data Pump for SQL Server by Devart. This tool helps transfer data and table structures while automatically converting MySQL data types to their SQL Server equivalents. It works with the Devart ODBC Driver for MySQL and requires manual conversion of objects like triggers, procedures, and events, as well as adding foreign keys.
What are the common schema conversion issues when migrating from MySQL to SQL Server?
The challenges with migration typically include: mismatched data types; varying index structures; and foreign key constraints in need of direct alterations. It is quite common that SQL Server’s identity columns, event-driven actions, and stored procedures demand rewriting due to code structure and functional inconsistencies.
Common schema conversion issues when migrating from MySQL to SQL Server include differences in data types, requiring careful mapping to compatible SQL Server equivalents. Database objects like views, stored procedures, and triggers often need to be rewritten to match SQL Server syntax. Additionally, MySQL events must be converted to SQL Server Agent jobs, which serve a similar role in task automation.
What are the key performance differences between MySQL and SQL Server?
SQL Server differs from MySQL in the way that it achieves boosted performance with In-Memory OLTP and concurrent query processing. In addition to that, it improves data retrieval by utilizing upscale indexing methods. MySQL, while lightweight and fast for read-heavy workloads, lacks SQL Server’s sophisticated query optimization and resource governance.
SQL Server generally delivers faster response times than MySQL, especially in most query operations except for INSERT queries. As data volume increases, SQL Server scales more efficiently, showing a smaller performance drop compared to MySQL, which often experiences a doubling of response time in similar scenarios.